Authorize.Net lets you accept credit and debit card payments on your site, including one-time charges and recurring memberships. Customers enter card details at checkout; card data is tokenized with Accept.js and stored at Authorize.Net for renewals and card updates. You can use free trials, sign-up fees, and billing cycles, and issue refunds from WordPress or sync refunds from the Authorize.Net dashboard.
The Authorize.Net add-on is available starting with an Agency or Pro license.
After purchasing a paid version of Paid Member Subscriptions, you can check the following guide on how to install Paid Member Subscriptions.
Go to Paid Member Subscriptions → Add-ons, activate Authorize.Net, then Settings → Payments → Gateways and enable the Authorize.Net gateway.
When enabled, the Authorize.Net settings section appears.
Enter credentials for the mode PMS is using (Test or Live). Test and Live are stored separately.
To obtain the API Credentials, you will need to log in to your Authorize.Net account, after which go to Merchant Interface → Account → Settings → Security Settings → API Credentials & Keys. From there, you will need to:
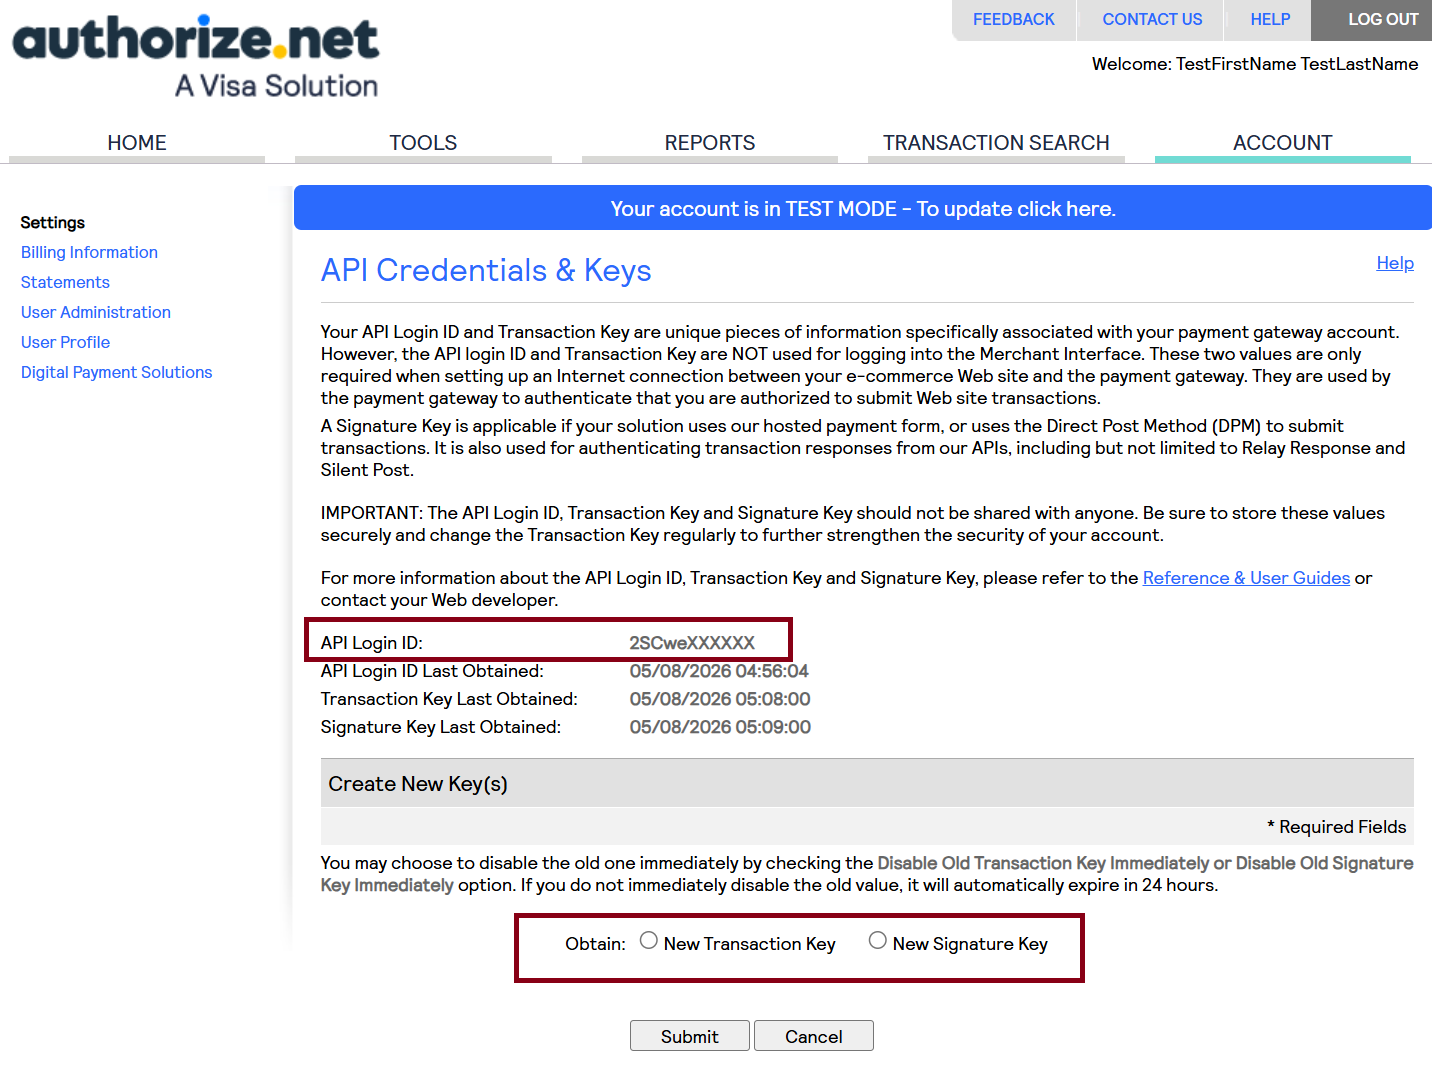
After obtaining all the credentials, you will need to go to your site → Paid Member Subscriptions → Settings → Payments → Gateways and add the API Keys to their respective fields.
Save payment settings after entering credentials. Transaction Key and Signature Key stay masked once saved—leave the placeholder unless you’re replacing them. Saving also fetches your Public Client Key for checkout.
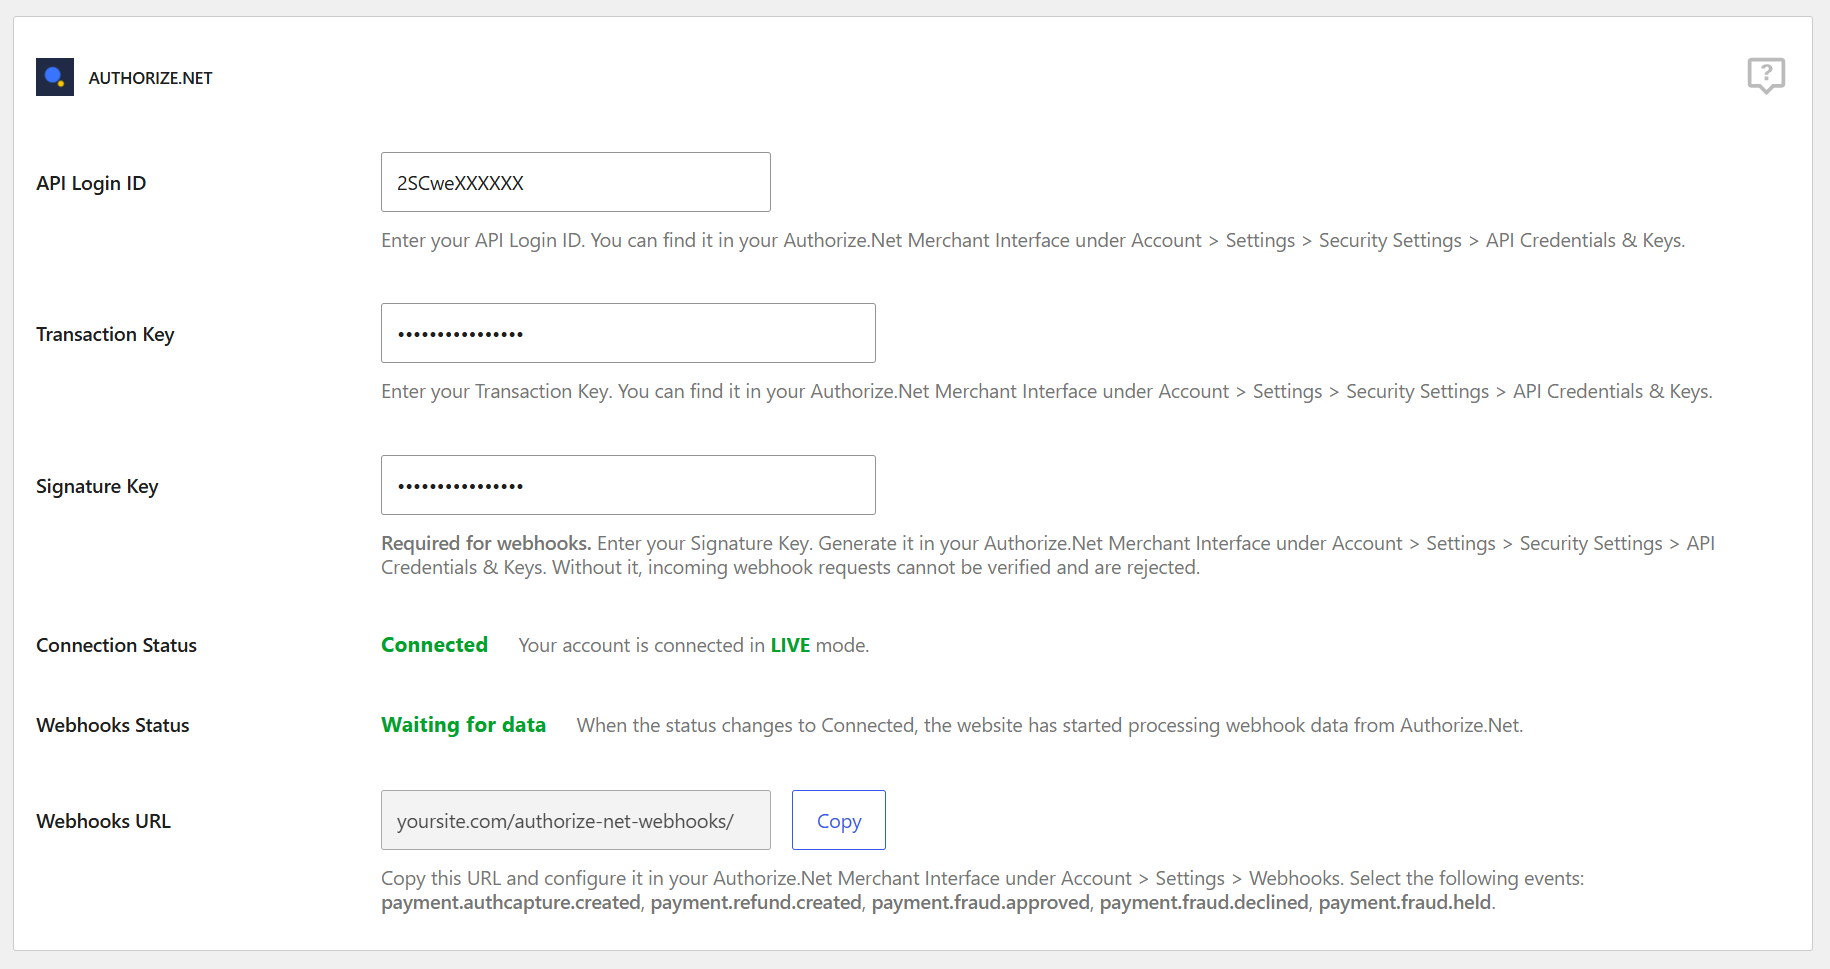
Status reflects TEST or LIVE per Settings → Payments → Test Mode.
Configure webhooks in your Authorize.Net account → Account → Settings → Webhooks:
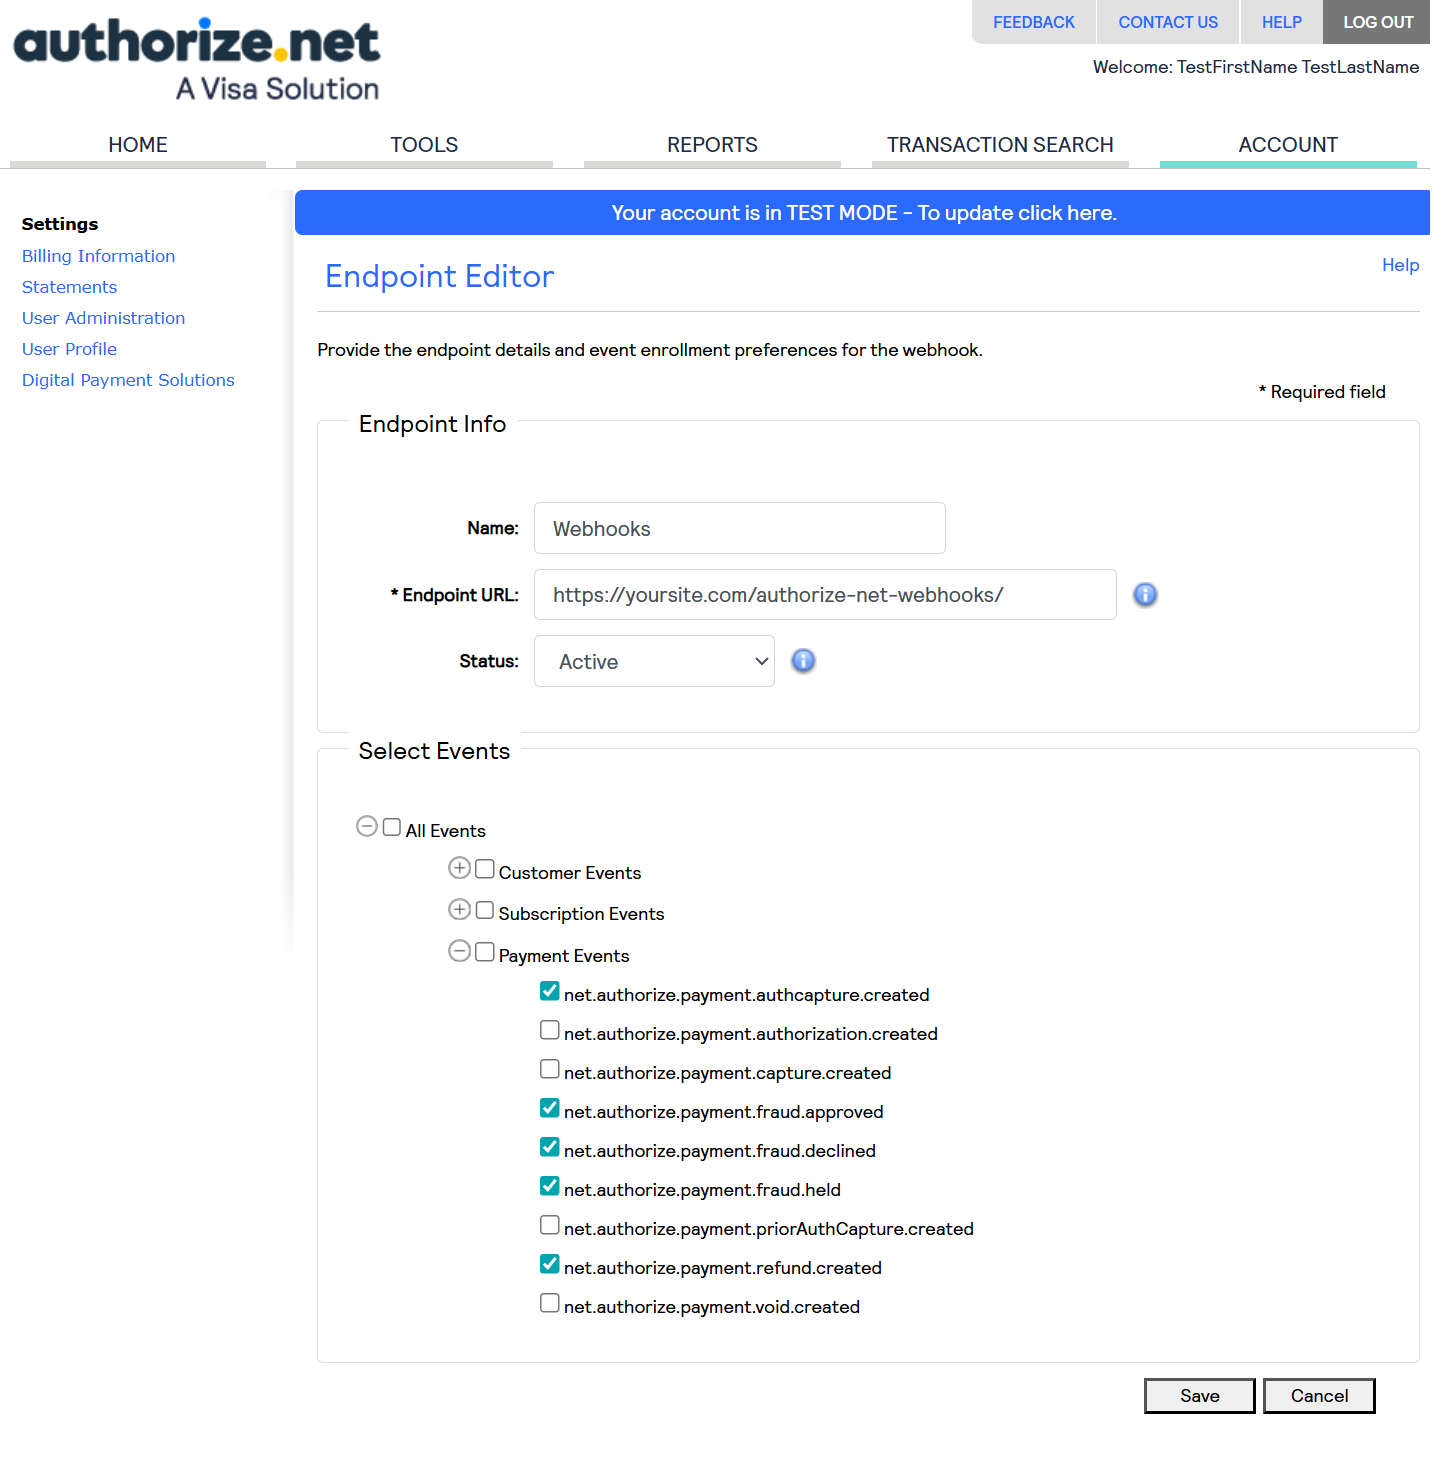
Webhooks complete held transactions, sync dashboard refunds, and handle fraud events. If webhooks stop arriving, confirm the endpoint still exists in Authorize.Net and save Settings → Permalinks once.
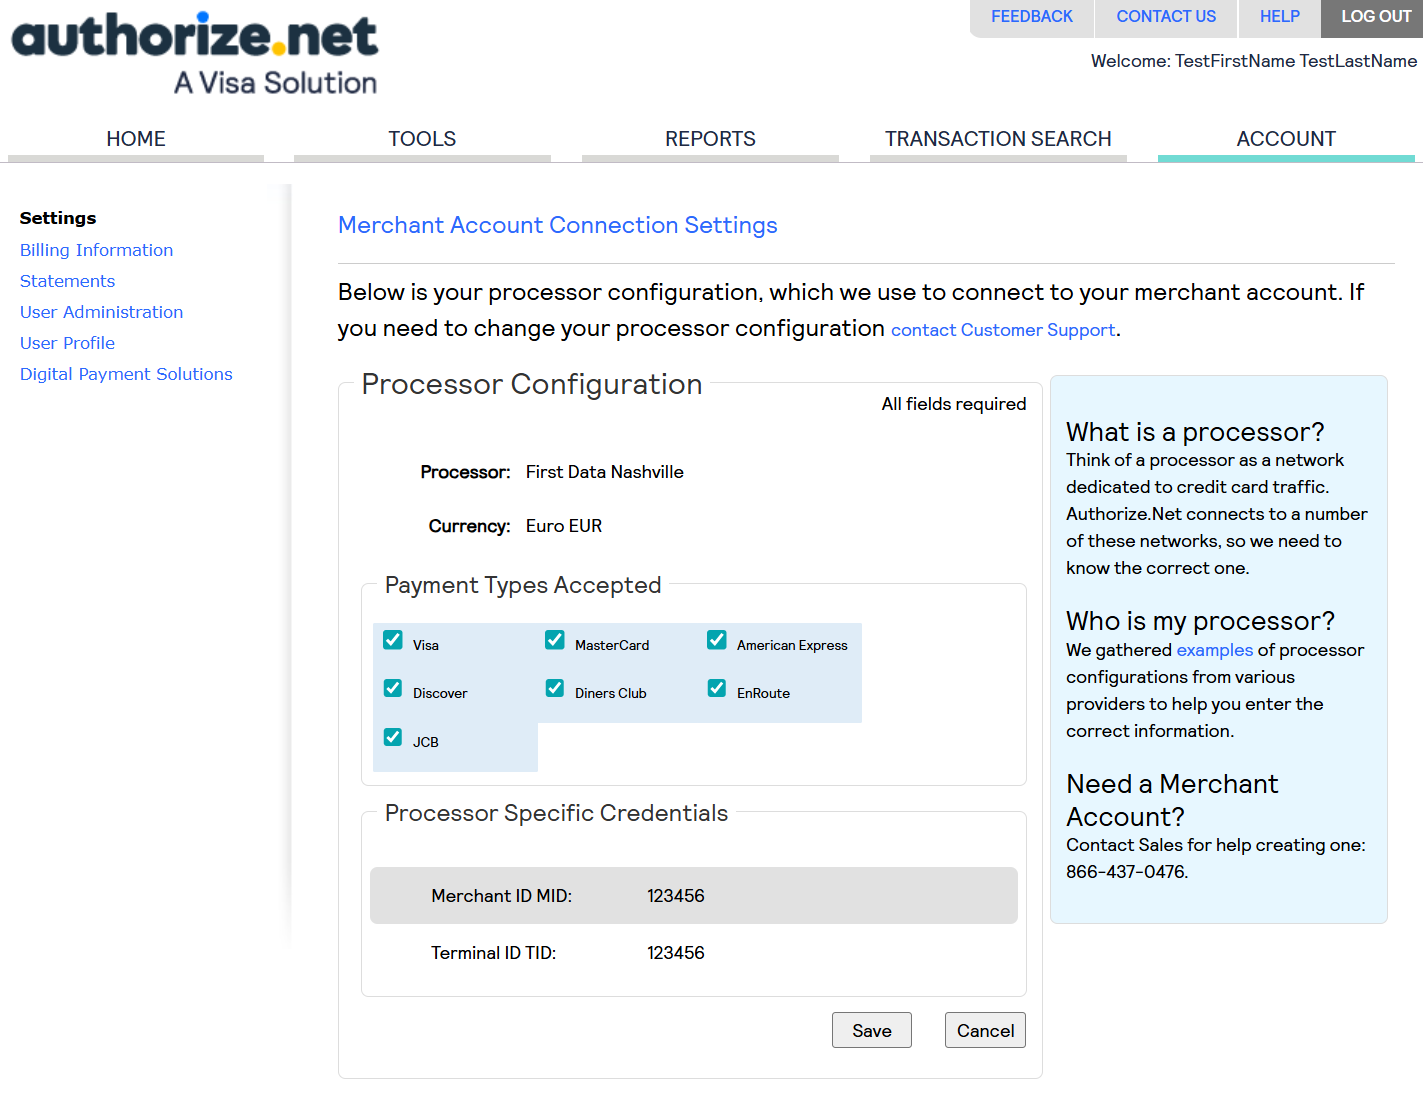
To select which payment types can be processed through Authorize.Net, log in to your Authorize.Net account and navigate to Account → Settings → Processor. From there, you can choose the payment types you would like to accept.
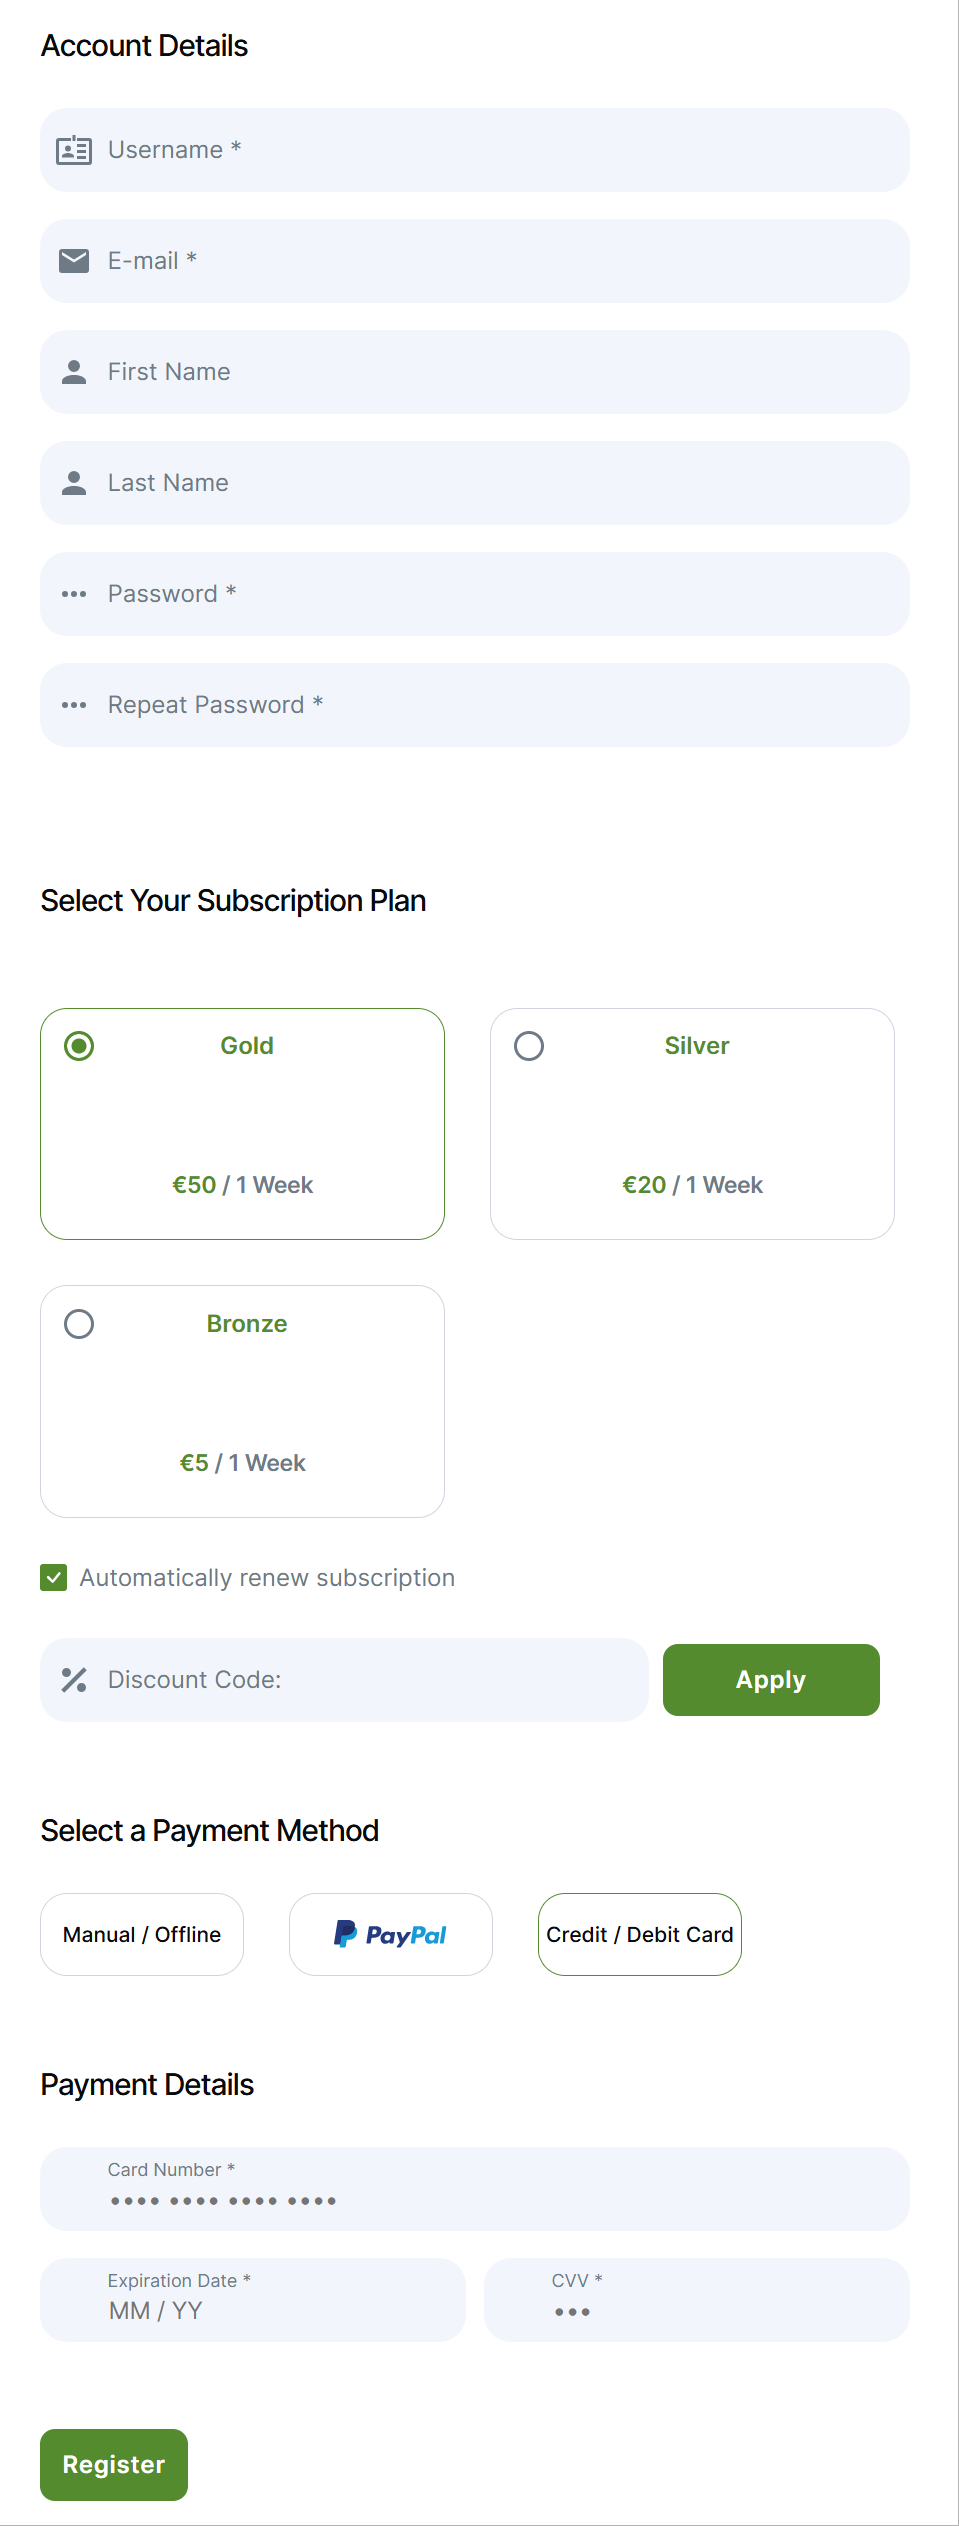
With the gateway enabled and connected, members see Credit / Debit Card at checkout and a Payment Details block: card number, expiration (MM / YY), and CVV. Submit tokenizes the card via Accept.js; the plugin creates or updates a Customer Profile and charges when due. Zero-amount checkouts (e.g. free trial) still create a profile for later renewals.
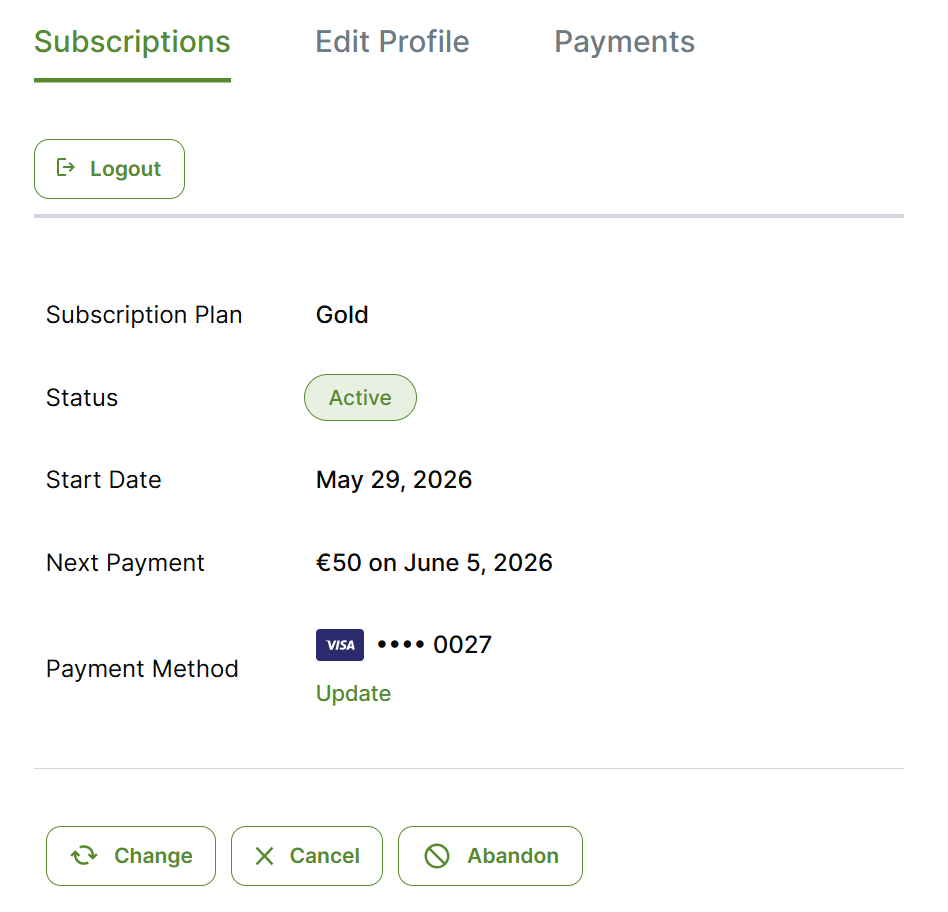
Your customers can update the payment details for a recurring subscription at any time using the account page. They can see which credit card they are using for a specific subscription and are able to update it in case it expires, or they just want to change it.
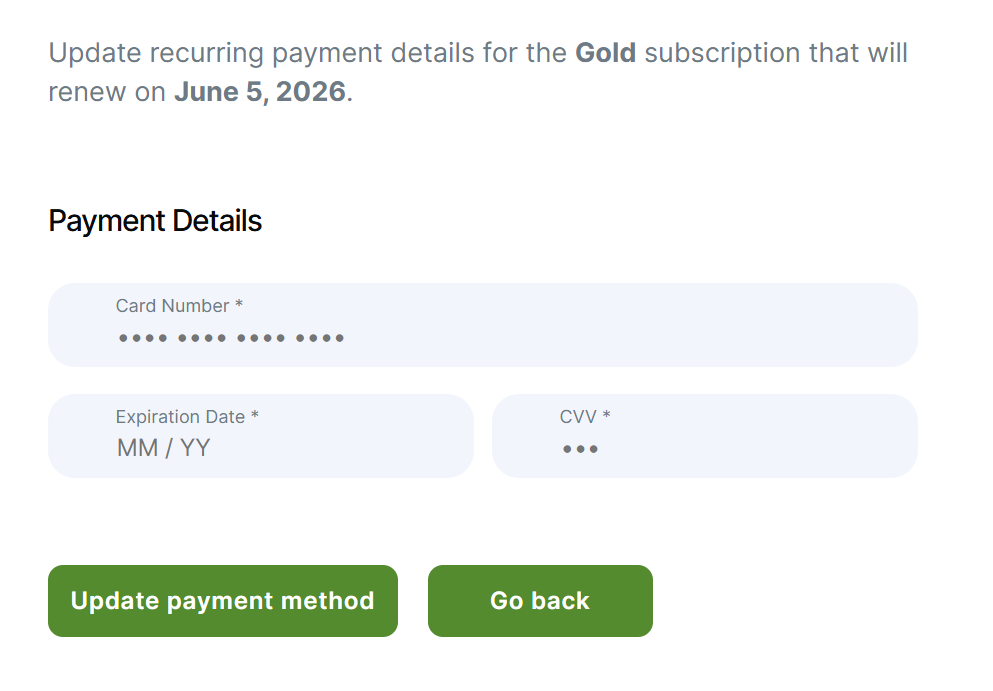
When the next recurring payment for the customer is triggered, the new card will automatically be charged.
The credit card update is done very easily by the customer; he is only asked to provide the details for his new card. New details are tokenized, and the Authorize.Net payment profile is updated; the next renewal uses the new card.
When processing refunds, you can choose between two options:
To issue a refund, navigate to the Payments page, hover over the desired payment, and select Refund. For detailed instructions, please refer to the full documentation here.
Refunds need the original transaction ID and the last four digits of the card stored on the subscription. If that’s missing, refund from the Authorize.Net dashboard.
Refunds in the Authorize.Net dashboard sync via payment.refund.created. The payment is marked refunded; subscription handling follows your gateway refund behavior setting.
Authorize.Net may hold a charge for review. The payment stays pending until a webhook approves or captures it; declined fraud events can fail or expire the subscription per your settings.
Since the Sandbox environment is completely separate from the live production environment, it requires its own set of credentials. For testing purposes, you will need to create a Sandbox account here:https://developer.authorize.net/hello_world/sandbox/
If you are connected in Test mode, you can test the integration using test credit cards that Authoirze.Net provides:
| Card Brand | Test Card Number |
|---|---|
| American Express | 370000000000002 |
| China UnionPay | 6221499053360818 |
| Discover | 6011000000000012 |
| JCB | 3088000000000017 |
| Diners Club / Carte Blanche | 38000000000006 |
| Visa | 44012888818888 |
| Mastercard | 5424000000000015 |
The following test credit card numbers can only be used in the Sandbox environment. When testing, use any expiration date in the future.
If a card security code (CVV/CVC) is required, you may use any 3-digit number for Visa, Mastercard, China UnionPay, Discover, Diners Club, and JCB cards. For American Express cards, please use any 4-digit number.
You can learn more about doing Test payments with Stripe on their website.
Accept (recurring) payments, create subscription plans and restrict content on your website. Easily setup a WordPress membership site using Paid Member Subscriptions.
Get Paid Member SubscriptionsCombine the power of Profile Builder with Paid Member Subscriptions to set up user registration, memberships, and recurring revenue.
Get 25% off with the bundle
