Paid Member Subscriptions comes with a list of shortcodes that you can use right away:
In order to generate the registration form follow the steps below:
[pms-register] shortcode to your newly created pageAll the subscription plans created in Paid Member Subscriptions → Subscription Plans will be displayed inside the registration form.
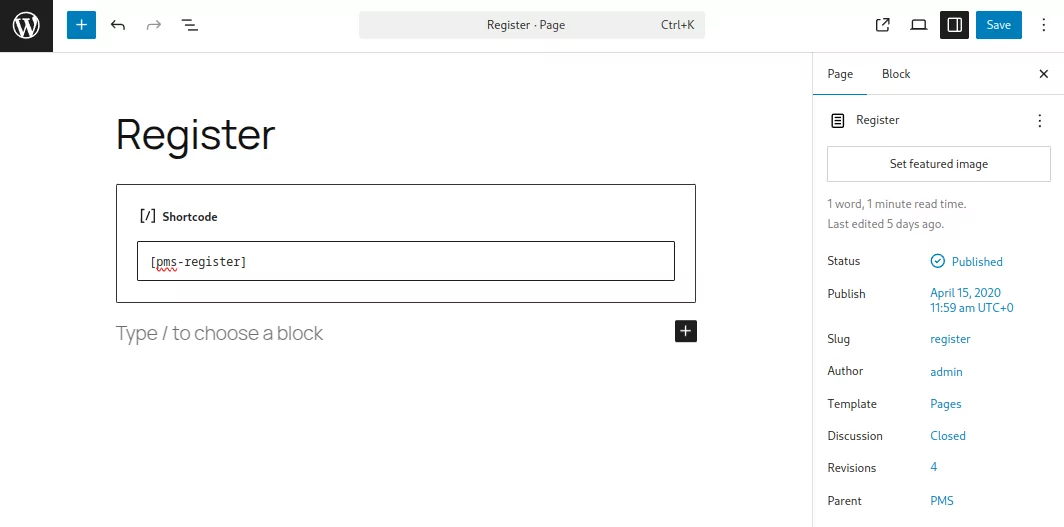
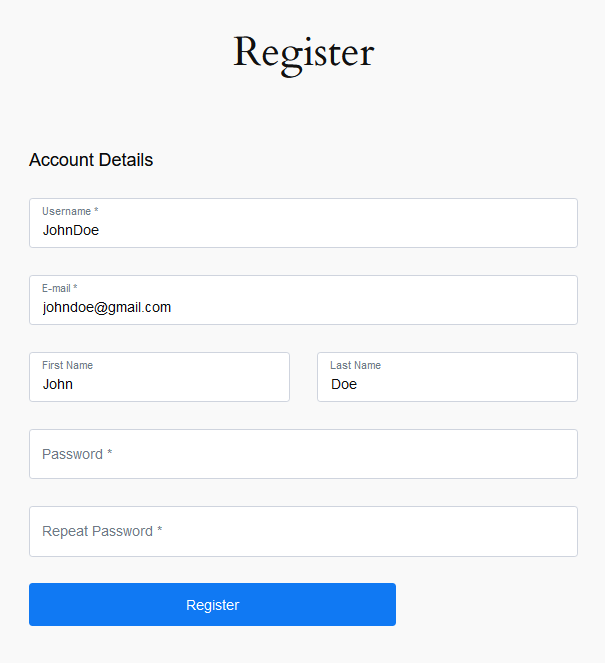
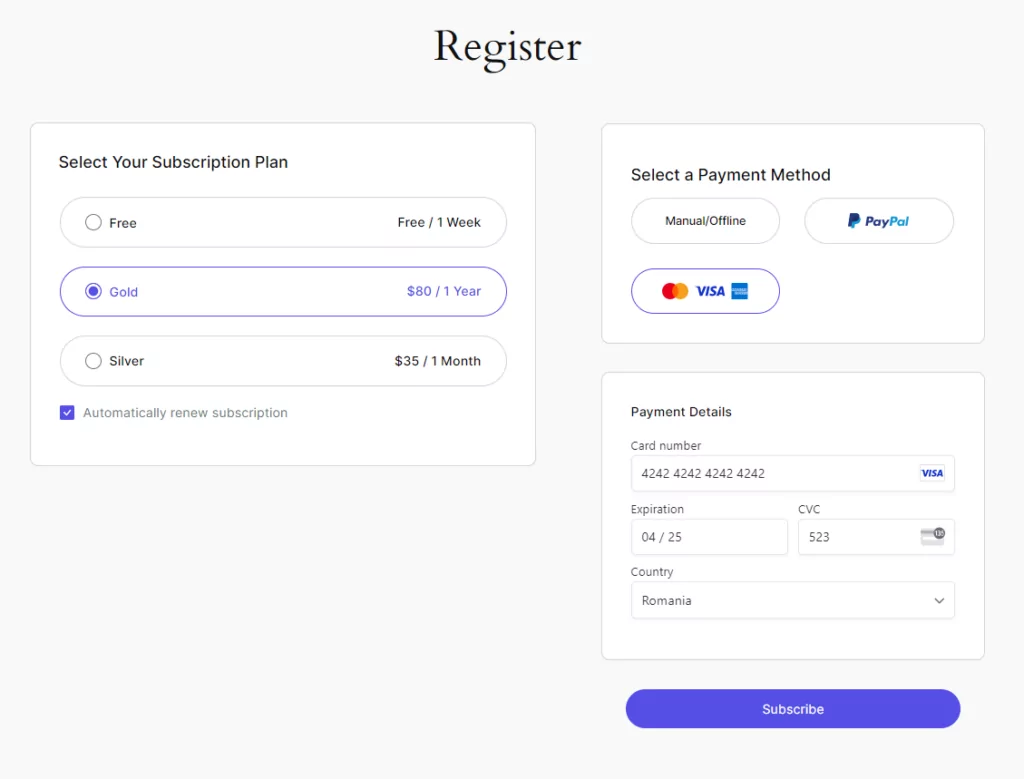
Front End Registration Form
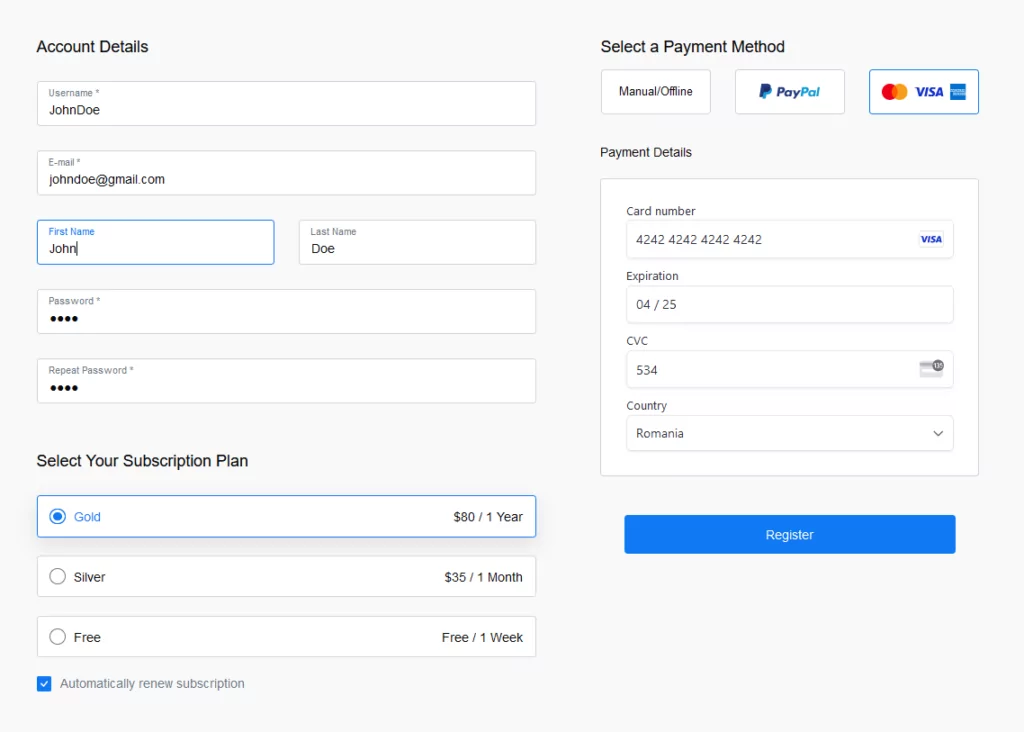
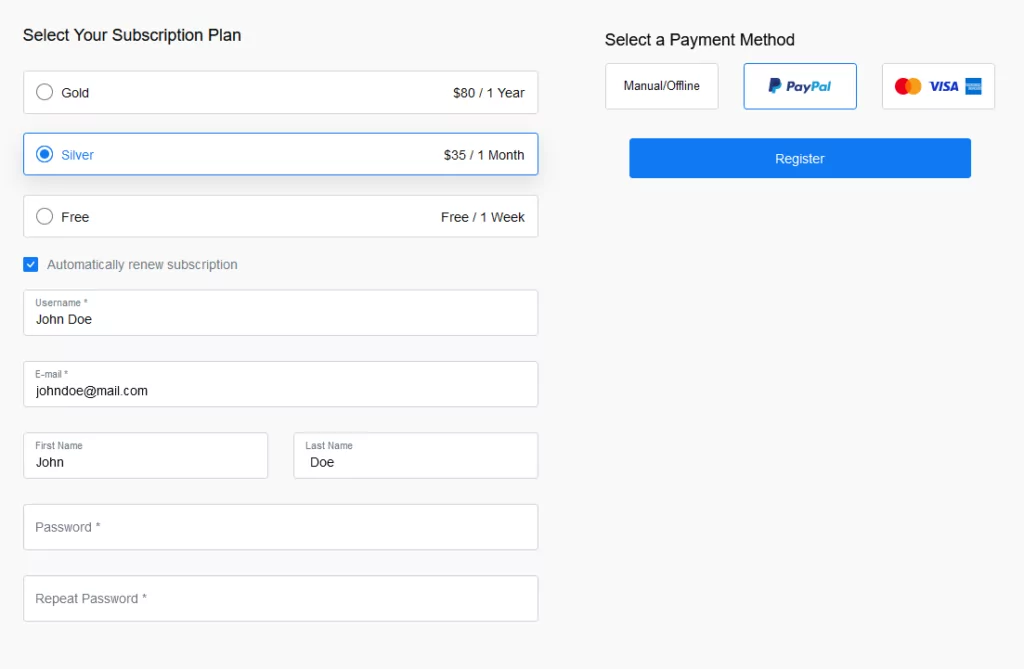
[pms-register subscription_plans="" plans_position="" selected=""]
Example of parameters used inside the [pms-register] shortcode
[pms-register subscription_plans="17,18,19" plans_position="top" selected="18"]
The above shortcode, will create a Registration Form that will list the Gold, Silver, and Free Subscription Plans and position them above the rest of the fields. By default the Silver Subscription Plan (with the ID 18) is selected.
You can allow users to register on your domain without subscribing to a Subscription Plan by using the “none” value inside the subscription_plans parameter like so: [pms-register subscription_plans="none"].
All users that will use this Registration Form will register as a normal user.
If you already have users on your website and you want them to purchase a subscription plan, all they have to do is login to their account and then visit the page with the [pms-register] shortcode.
The page acts as the main way for users to purchase Subscriptions, while also allowing them to register for an account on your website if they don’t already have one.
This can be done through the `subscription_plans` parameter. This parameter takes a comma separated list of Subscription Plan IDs to list only certain plans.
Example:
[pms-register subscription_plans="1,2"]
Will show only plans with ID 1 and 2, the others will be hidden from the form.
You can also use a parameter to exclude subscription plans from showing, so the plugin will display every available plan except the one(s) you’ve added in this parameter.
Example:
[pms-register exclude="3,4"]
This will show all plans in the form except the ones with ID 3 and 4.
You might want to create a better presentation for your subscription plans and what they offer through a Membership Pricing Table and when the user selects a plan, he should be sent to the subscription form with the plan pre-selected.
This can be achieved by adding the subscription_plan parameter to the URL of your subscription page.
In case you’re looking to link to a subscribe form containing just this specific plan (and excluding the others) you can use a second URL parameter: single_plan=yes.
Example:
The URL of your page is: https://website.com/subscribe and the id of the plan you wish to be pre-selected is 15.
The link to pre-select this plan would be: https://website.com/subscribe?subscription_plan=15
The link to pre-select this plan and exclude others would be: https://website.com/subscribe?subscription_plan=15&single_plan=yes
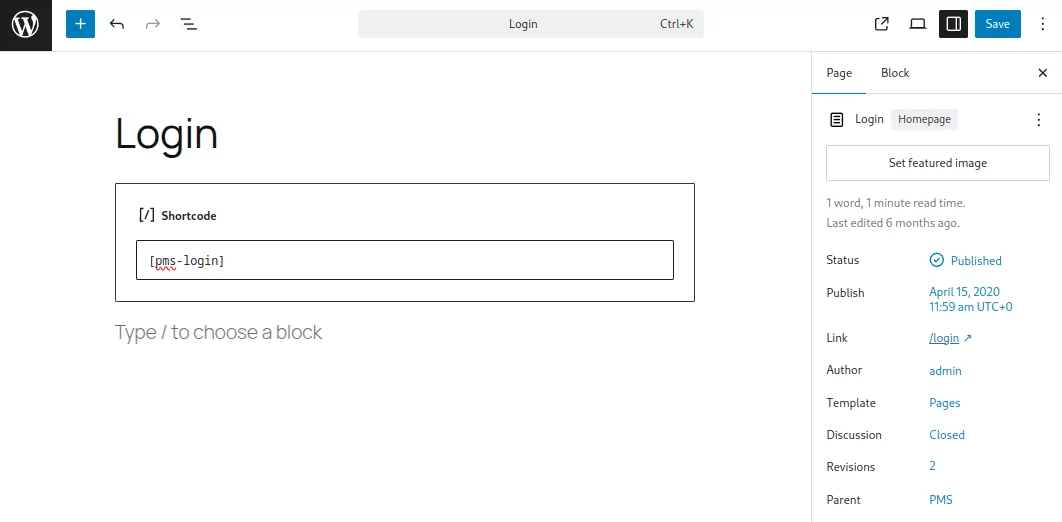
In order to generate the Login Form follow the steps below:
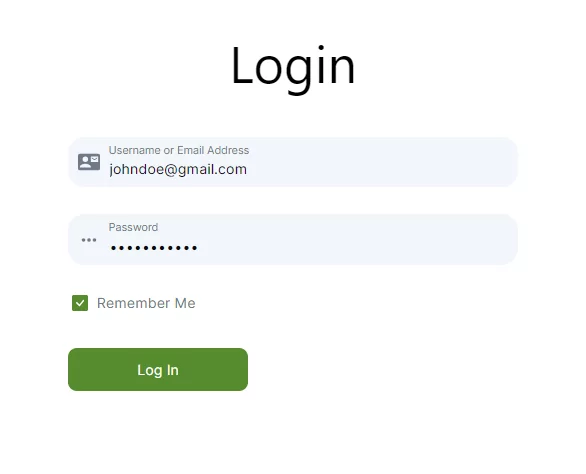
The Login Form allows your users to login from the Front End of WordPress, instead of the default WordPress Login Form.
Front End Login Form
[pms-login redirect_url="" logout_redirect_url="" register_url="" lostpassword_url=""]
Paid Member Subscriptions makes it really easy to redirect users after login to any URL by using the redirect_url parameter.
Example:
[pms-login redirect_url="https://www.yourdomain.com/account"]
You can add a “Register” and a “Lost your password?” link below the Login form using the register_url and lostpassword_url parameters.
Example:
[pms-login register_url="https://www.yourdomain.com/register/" lostpassword_url="https://www.yourdomain.com/recover-password"]
Front End Login Form

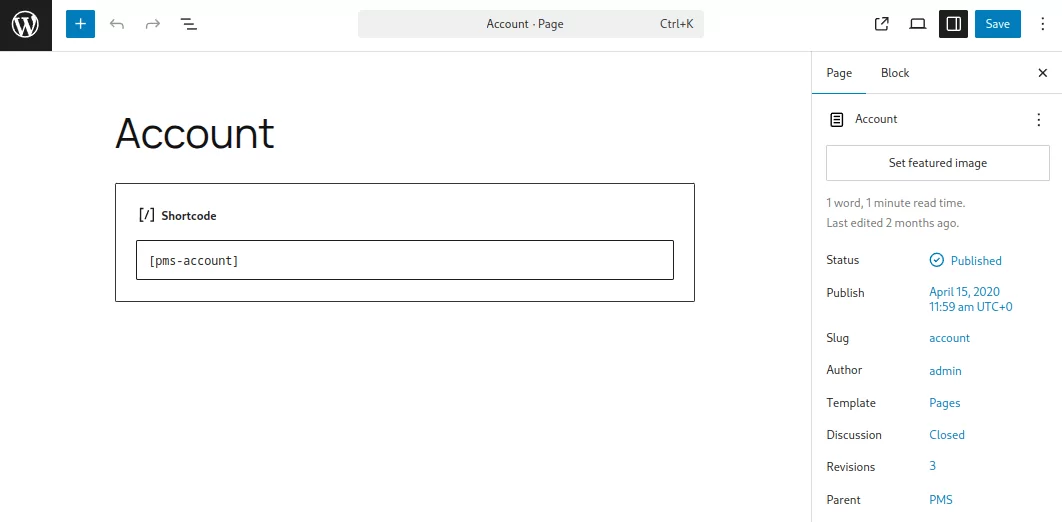
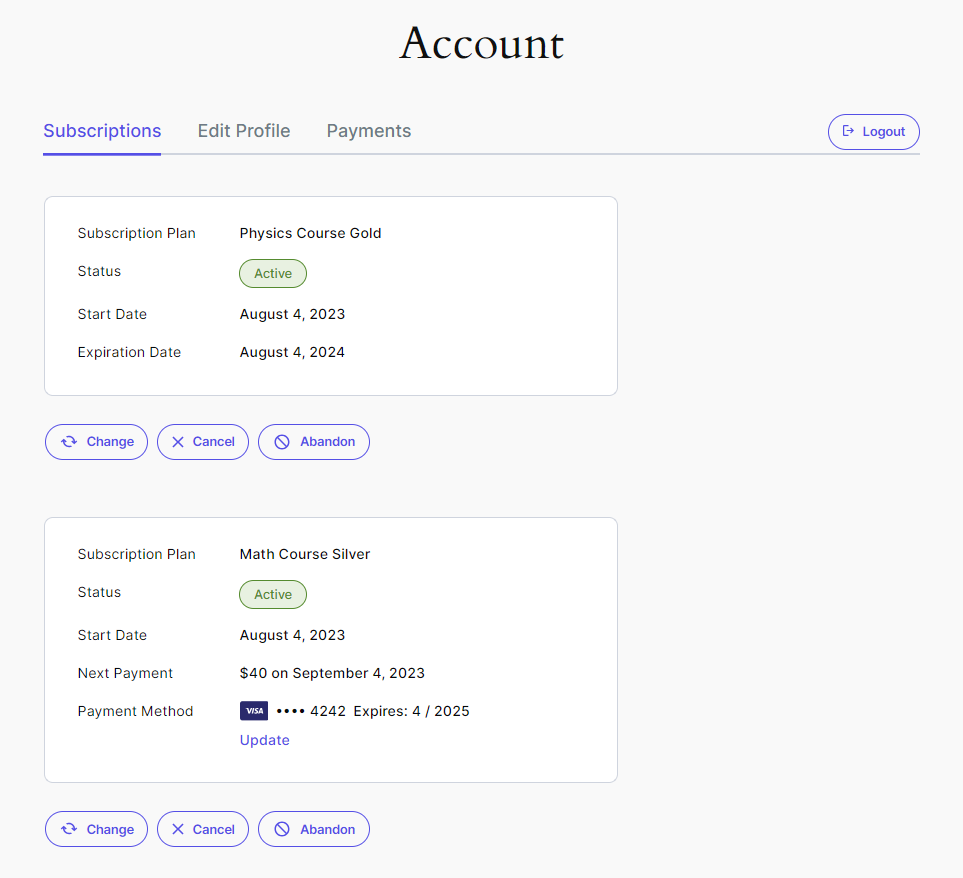
In order to generate the Account Form follow the steps below:
The Account Form will allow your members to View, Upgrade, Renew, Cancel or Abandon their Subscription Plan, and also to modify their information like Email, First Name, Last Name and Password on the site.
In case their initial payment when creating an account failed, they will also be able to Retry the payment.
Front End Account Form Logged In Member
[pms-account show_tabs="no" logout_redirect_url=""]
Front End Account Form for Logged Out Member
If a logged out user is visiting your page with this shortcode, he will be shown a login form so he can login and view his account information.
You can display only the Subscription Plans inside the Account Form using the show_tabs parameter.
Example:
[pms-account show_tabs="no"]
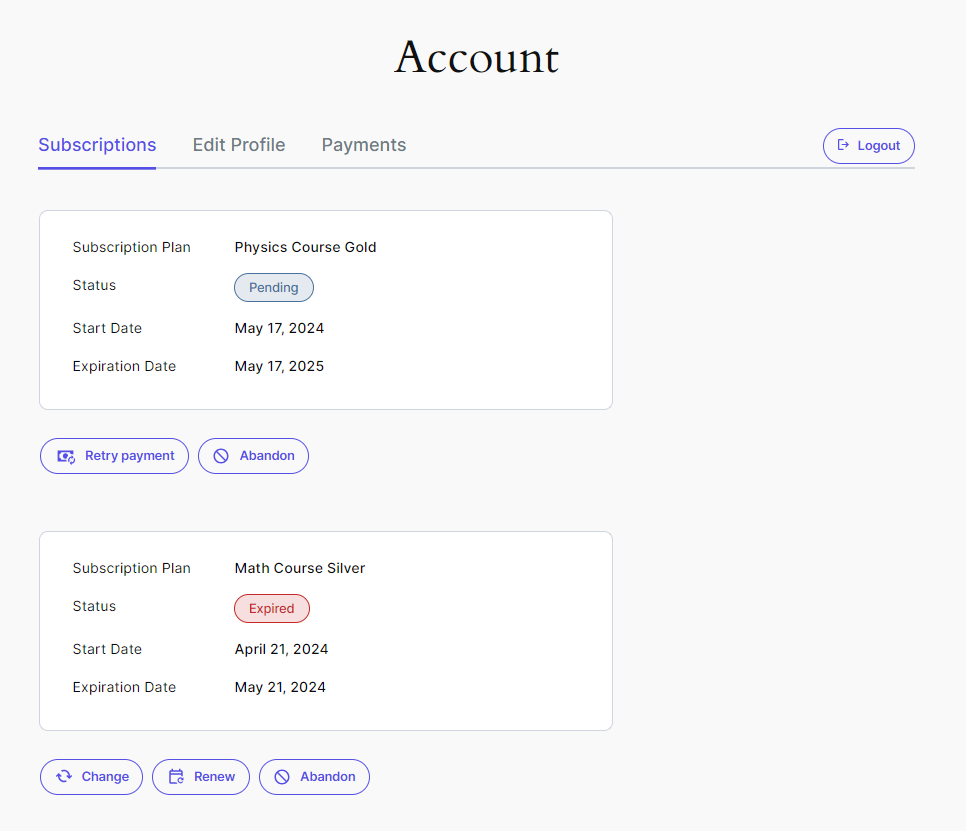
The Retry Payment option appears if the user didn’t successfully pay for the subscription and the status is pending.
This option can be used by the user to reinitiate the payment either by sending the user to the payment gateway or showing the credit card details form.
The Change option lets users to purchase another subscription plan.
Upgrade/Downgrade
The Upgrade/Downgrade options lets user purchase a higher or a lower ordered subscriptions from the same tier.
This option will only appear if there is an upgrade/downgrade available.
The Renew option gives your users the possibility to manually renew a subscription plan.
This option appears for users that have Canceled or Expired subscriptions and also for users of Active subscriptions, which have 15 days or less remaining on their subscription.
The Cancel option gives your users the option to stop recurring subscriptions. The status of the subscription will be set to Canceled and it will expire after the Expiration Date.
These users will still have access to your restricted content until the expiration date has passed.
The Abandon option will completely remove a subscription from a users account. Recurring payments will be canceled and any access to restricted content will be revoked.
The user will need to purchase a subscription plan again from a page with the [pms-register] shortcode.
These actions are disabled by default. In order to enable them, go to the Paid Member Subscriptions -> Settings -> Payments page.

After enabling one of them, the Upgrade action will be named `Change` and through it, your users will be able to Upgrade, Downgrade or Change their subscription plans.
Downgrading a subscription means that the user will be able to go down a subscription level (or more) and through the Change action, users can go to a subscription from a different tier.
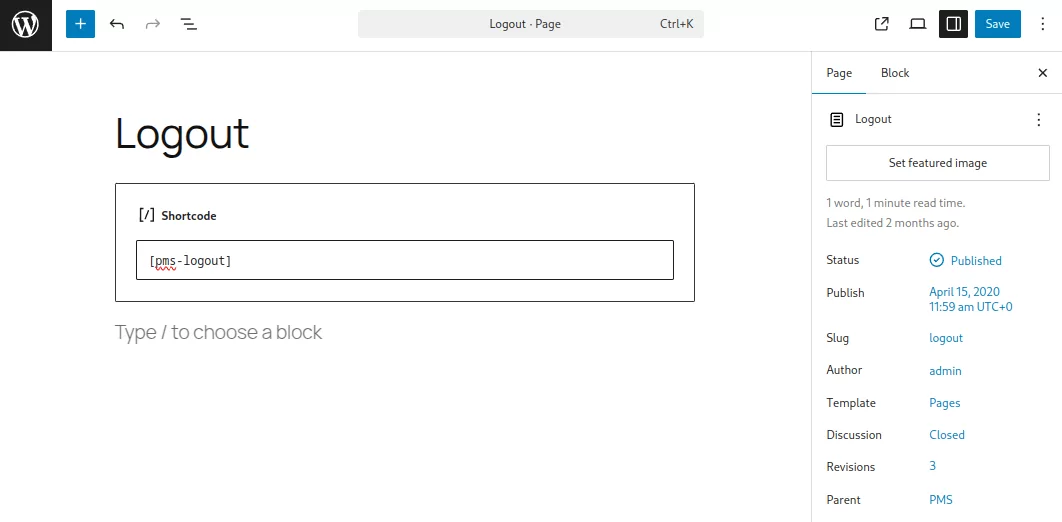
In order to generate the Logout Link follow the steps below:
The Logout Link allows your users to logout from the Front End of WordPress.
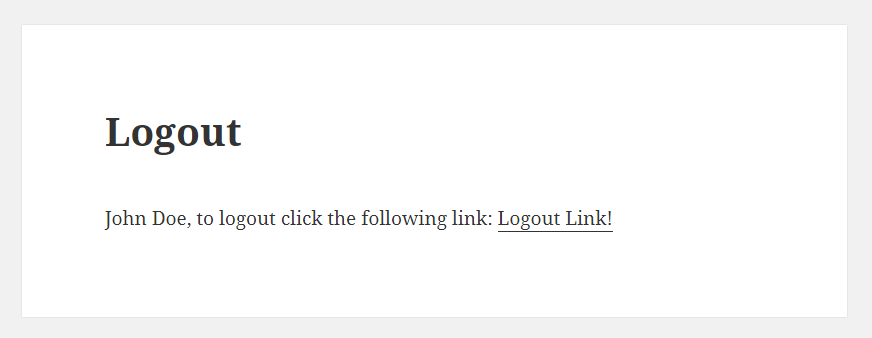
Front End Logout Link
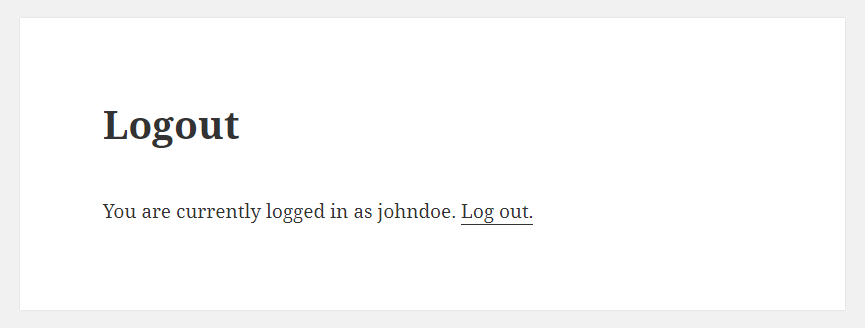
[pms-logout text="" link_text="" redirect_url=""]
To redirect the user after logout you will need to use the redirect_url parameter.
Example:
[pms-logout redirect_url="https://www.yourdomain.com/page"]
To modify the text and the link text displayed to the logged in user you will need to use the text and the link_text parameters.
Example:
[pms-logout text="{{meta_display_name}}, to logout click the following link:" link_text="Logout Link!"]
Front End Logout Link
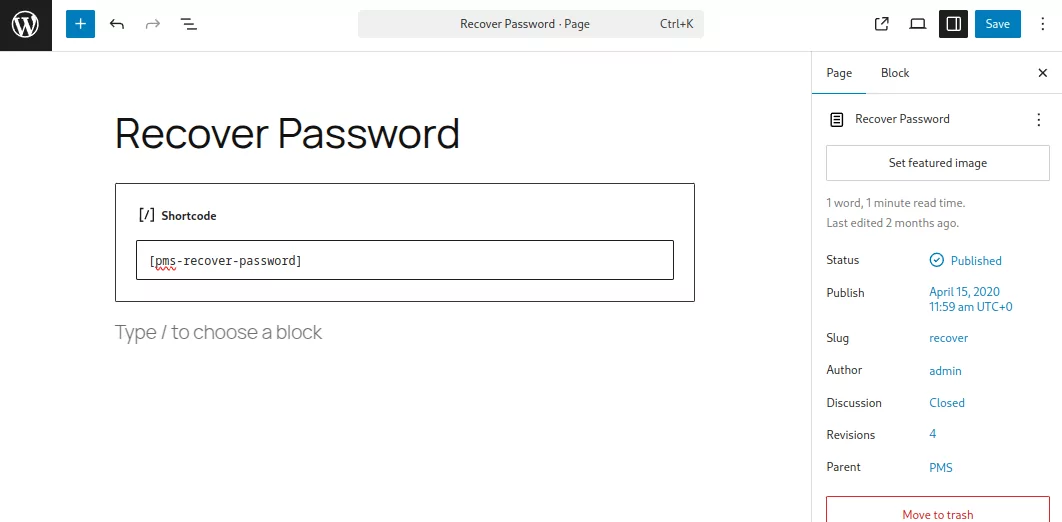
In order to generate the Recover Password Form follow the steps below:
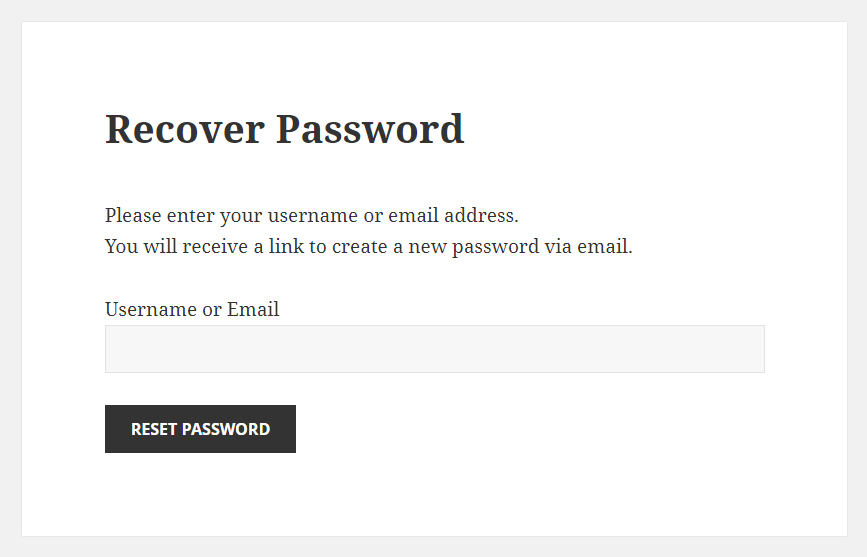
The [pms-recover-password] shortcode will create a simple Recover Password Form for your users that can be used in the Front End, so you don’t have to use the default WordPress Recover Password Form.
Front End Recover Password Form
[pms-recover-password redirect_url=""]
You can redirect the user to an url (ex: Login page) after a successful password recovery by using the redirect_url parameter.
Example:
[pms-recover-password redirect_url="https://www.yourdomain.com/login"]
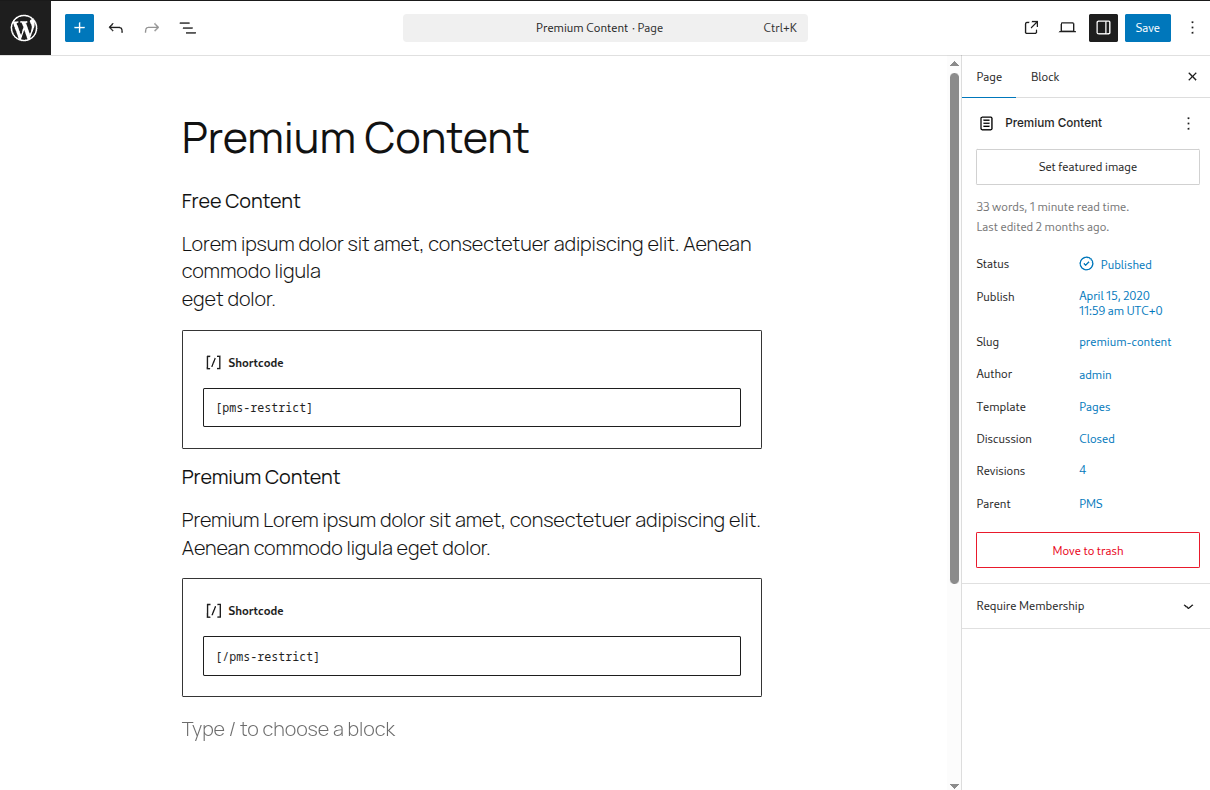
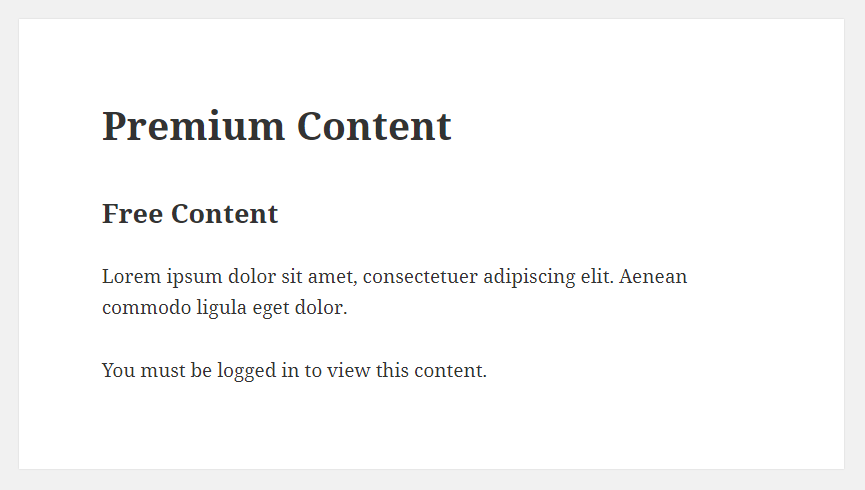
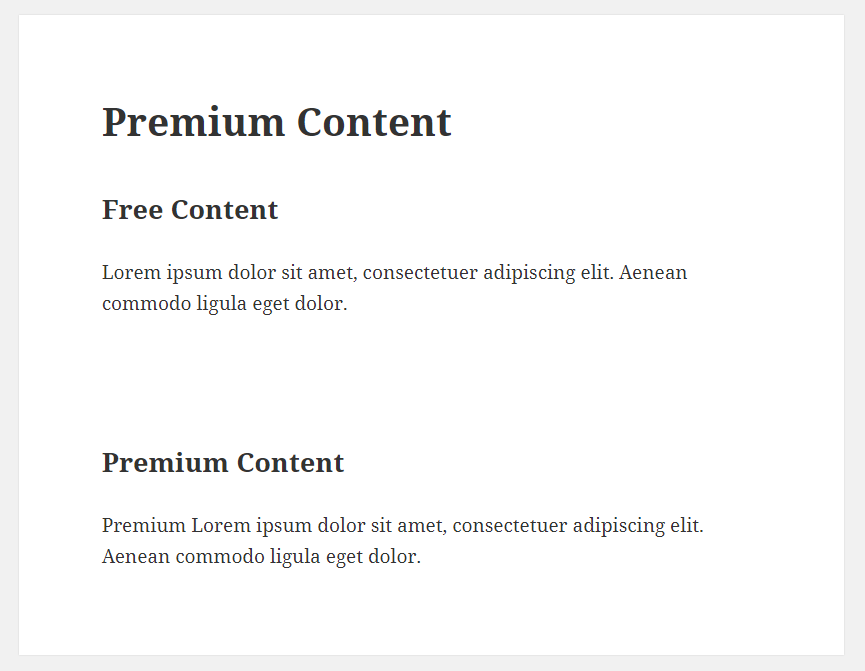
In order to use the Restrict Content shortcode follow the steps below:
shortcode will be restricted for the logged out user. Logged in users will be able to view the restricted content. To restrict the content based on Subscription Plan you will need to use the subscription_plans parameter inside the shortcode.
Front End Premium Content Logged Out User
Front End Premium Content Logged In User
[pms-restrict subscription_plans="" display_to="" message=""] Protect this Premium Content [/pms-restrict]
In order to restrict the content based on Subscription Plan we will need to use the subscription_plans parameter inside the [pms-restrict] shortcode. If we don’t use the subscription_plans parameter all the restricted content will be displayed to all logged in users.
Example:
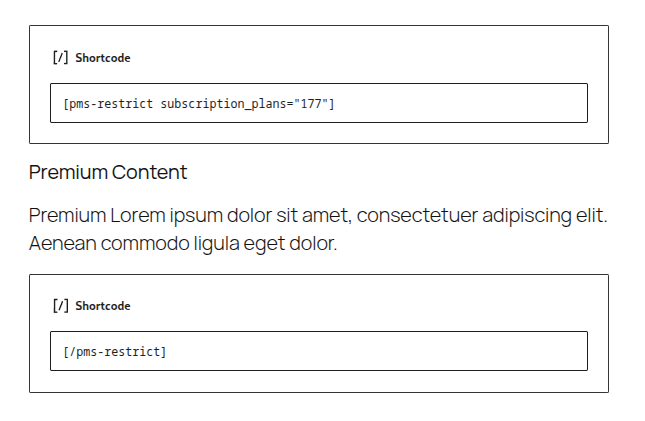
Based on the example above, the content will be restricted for all the members that didn’t subscribe to the Subscription Plan with the ID 177, and in our case it is the Gold Subscription Plan.
Similarly to restricting the content based on specific Subscription Plans, content can be restricted for All Subscription Plans by using the parameter subscription_plans with the value all.
Example:
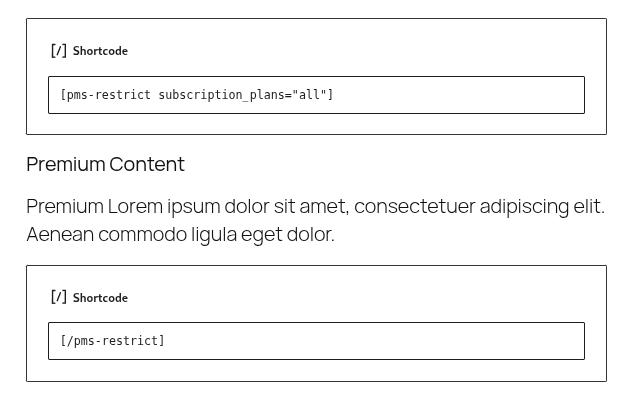
Based on the example above, the content will only be displayed to users with an active subscription.
In order to display content only to Logged Out Users we will need to add the “not_logged_in” value inside the display_to parameter.
Example:
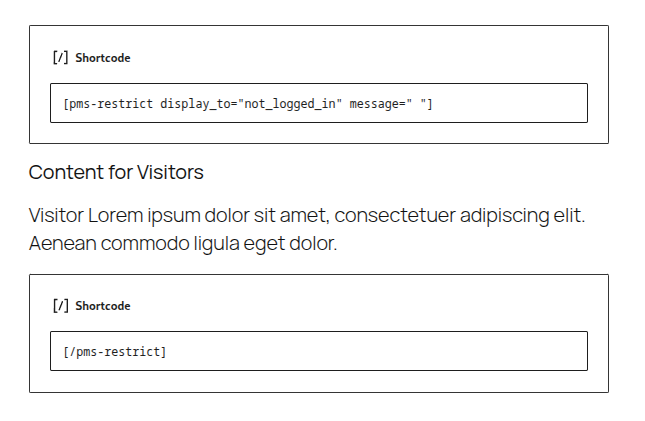
We use the message parameter to not display the message to the Logged In User.
In order to modify the message displayed to the user that doesn’t have the appropriate Subscription Plan to view the restricted content, we will need to use the message parameter.
Example:
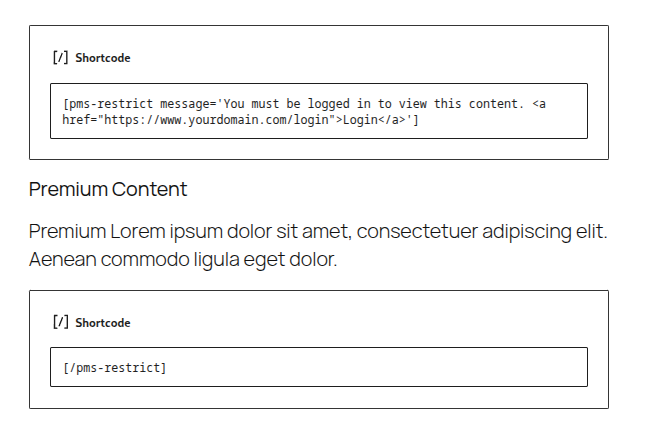
The message parameter will overwrite the default message setup in Paid Member Subscriptions -> Settings -> Content Restriction -> Messages for logged-in non-member users.
You can also use the shortcode to show content to users that are not subscribed to a plan or any plan.
Example:
[pms-restrict display_to="not_subscribed" message=" "]
    This content will be shown to any user that is not subscribed to a plan.
[/pms-restrict]
[pms-restrict subscription_plans=”123,251″ display_to=”not_subscribed” message=” “]
This content will be shown to any user that is not subscribed to plan with id 123 or 251
[/pms-restrict]
The first example will display to any non-subscriber from your website and the second one will be shown only to users that do not have plans 123 or 251.
The `message=” “` parameter was also added so the shortcode doesn’t display anything when the user has the right plan.
Custom content can also be added for Group Subscriptions owners:
Example:
[pms-restrict display_to="group_owner" message=" "]
    This content will be shown only to Group Owners.
[/pms-restrict]
You can also add a second parameter `group_owner_user_id` in order to use the functionality in emails where the current user is not the one the email is being sent to.
Example:
[pms-restrict display_to="group_owner" message=" " group_owner_user_id="{{user_id}}]
    This content will be shown only to Group Owners.
[/pms-restrict]
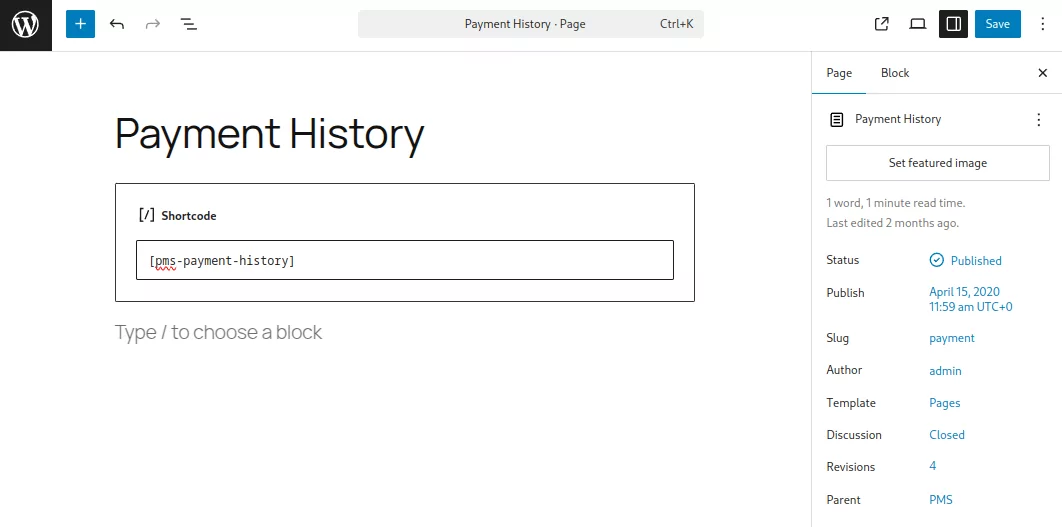
In order to use the Payment History shortcode follow the steps below:
The [pms-payment-history] shortcode, will create a Payment History Table that will list all the Payments done by the user including the ID, Amount, Date/Time and Status. If no payments were made by the user then the “No payments found” notification will be displayed.
Front End Payment History Table
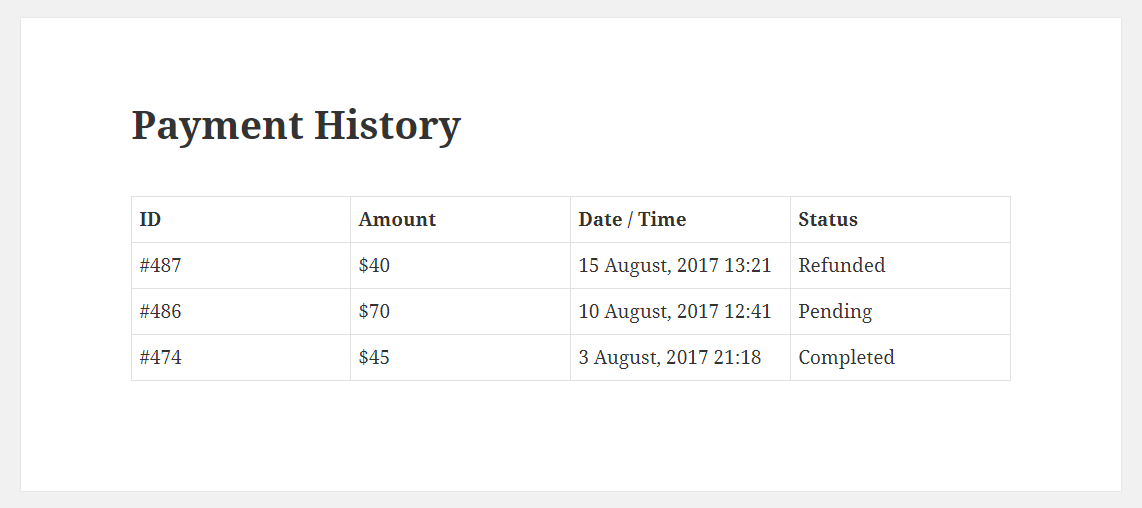
[pms-payment-history number_per_page=""]
Subscription actions are part of the [pms-account] shortcode. They are shown on the Subscriptions tab and let the user manage his subscription. For more information click here.
Using a shortcode, it is possible to display these actions on other pages, prompting the user to renew, retry the payment and more.
[pms-action]
  Your last payment has failed, {{retry}}click here{{/retry}} to try again.
[/pms-action]
The action is chosen based on the tags you are using to wrap your link text. In the example above, we use the {{retry}}…{{/retry}} tags in order to generate a Retry Payment link. You need to replace this with the action that you need to generate the link for. Available actions are:
If no tags are added inside the shortcode or if the closing tag is missing, the shortcode will not return anything.
If the user has more than 1 subscription, when generating the URL, you can add a shortcode parameter to specify to which subscription plan the action you are defining refers to:
[pms-action plan_id="123"]
  To renew your subscription, {{renew}}click here{{/renew}}.
[/pms-action]
So we added the plan_id parameter to the shortcode, alongside the id of the plan we’re looking to target (123 in the example).
The shortcode can be used to return only the URL for the Action instead of the HTML markup. This is useful in a scenario where the markup is generated by something else (a button generated by your page builder for example) and you only need the correct URL appended.
Usage:
[pms-action]{{upgrade}}{{/upgrade}}[/pms-action]
In order to use the Count Members shortcode follow the steps below:
The [pms-count-members] shortcode will display the number of active members regardless of the subscription plan. If there is no active members, the shortcode will display 0.
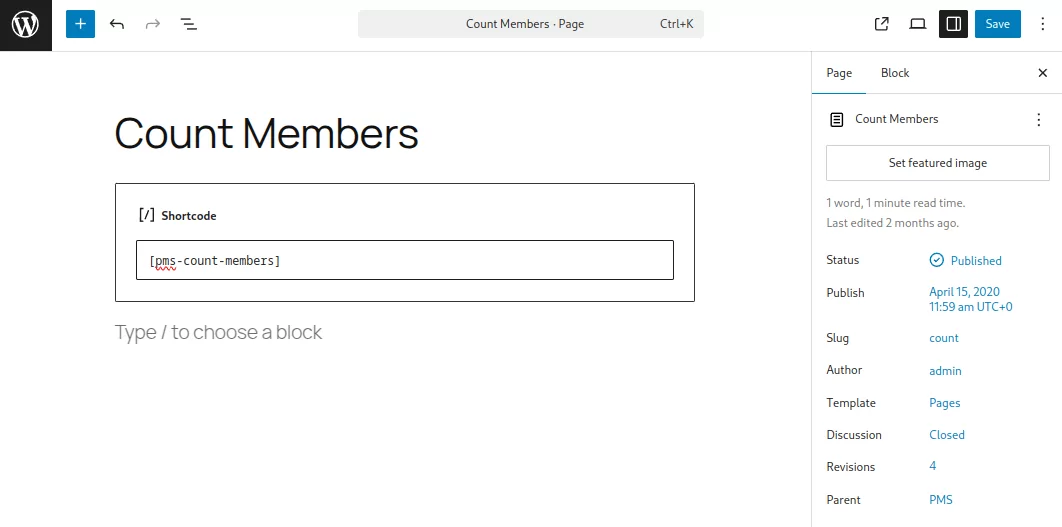
[pms-count-members plan_id="" status=""]
Usage:
[pms-count-members plan_id="46" status="active, cancel"]
Accept (recurring) payments, create subscription plans and restrict content on your website. Easily setup a WordPress membership site using Paid Member Subscriptions.
Get Paid Member SubscriptionsCombine the power of Profile Builder with Paid Member Subscriptions to set up user registration, memberships, and recurring revenue.
Get 25% off with the bundle
