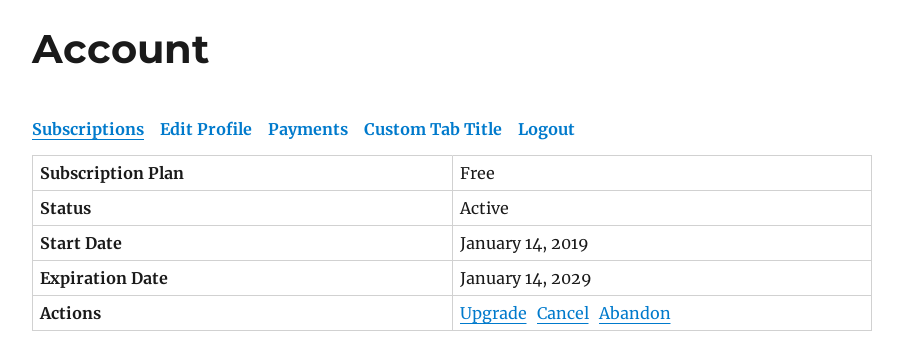
The [pms-account] shortcode features a tabbed interface which gives users a few options (manage subscription, edit profile, see payments etc).
This interface can be extended with custom code, adding a tab which links to another page or content directly in our interface.
The following custom code is necessary to achieve this:
add_filter( 'pms_member_account_tabs', 'pmsc_change_member_account_tabs', 50, 2 );
function pmsc_change_member_account_tabs( $tabs, $args ) {
    $tabs['custom-tab'] = __( 'Custom Tab Title', 'paid-member-subscriptions' );

    return $tabs;
}

add_filter( 'pms_account_get_tab_url', 'pmsc_get_tab_url', 20, 2 );
function pmsc_get_tab_url( $url, $tab ) {
    if ( $tab == 'custom-tab' )
        return home_url( 'my-page' );

    return $url;
}
In the first function, `custom-tab` will be the slug of your tab and `Custom Tab Title` will be its title. The slug is used to return the right URL and the title will be displayed to the user, so modify these accordingly.
In the second function, `my-page` is the slug of the page where you want to send users which will click your custom tab.
When this tab is selected, the user will be sent to the page you added in the second function.
The tab will always be added before the Logout link.
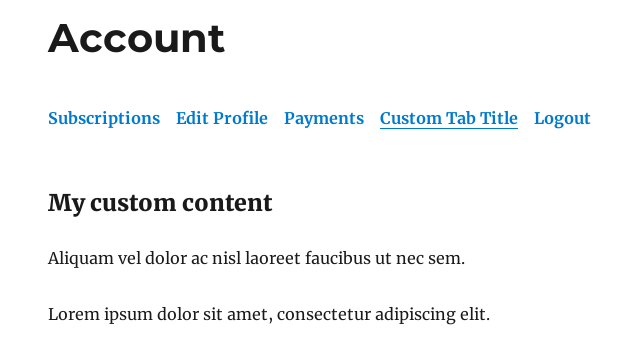
To create a custom tab which shows the content directly in our shortcode, you need to use some different code:
add_filter( 'pms_member_account_tabs', 'pmsc_change_member_account_tabs', 50, 2 );
function pmsc_change_member_account_tabs( $tabs, $args ) {
	$tabs['custom-tab'] = __( 'Custom Tab Title', 'paid-member-subscriptions' );

	return $tabs;
}

add_filter( 'pms_account_shortcode_content', 'pmsc_custom_tab_content', 20, 2 );
function pmsc_custom_tab_content( $output, $active_tab ) {
	if ( $active_tab == 'custom-tab' ) {
		$output .= '<h3>My custom content</h3>';
		$output .= '<p>Aliquam vel dolor ac nisl laoreet faucibus ut nec sem.<p>';
		$output .= '<p>Lorem ipsum dolor sit amet, consectetur adipiscing elit.</p>';
	}

	return $output;
}
In the first function, `custom-tab` will be the slug of your tab and `Custom Tab Title` will be its title. The slug is used to return the right URL afterwards and the title will be displayed to the user, so modify these accordingly.
In the second function, we append our custom content to the output if our custom tab is the currently active one.
You can add any type of content in this manner, an interesting use case would be to add shortcodes. Perhaps you have a shortcode which displays some information that is relevant to the user and you want to show it in the same interface, all you have to do is change a bit the second function from above:
add_filter( 'pms_account_shortcode_content', 'pmsc_custom_tab_content', 20, 2 );
function pmsc_custom_tab_content( $output, $active_tab ) {
	if ( $active_tab == 'custom-tab' ) {
		$output .= do_shortcode( '[your-custom-shortcode]' );
	}

	return $output;
}
This will render the `[your-custom-shortcode]` and show the content to the user.
To change the tab titles, use the following code:
add_filter( 'pms_member_account_tabs', 'pmsc_change_member_account_tabs_title', 50, 2 );
function pmsc_change_member_account_tabs_title( $tabs, $args ) {
	$tabs['payments'] = __( 'Your Payments', 'paid-member-subscriptions' );

	return $tabs;
}
The example above will change the title of the Payments tab to `Your Payments`.
The slugs of our default tabs are the following:
You need to use them to target the correct tab when changing the title.
If you want to remove a particular tab, you can do so using the following code:
add_filter( 'pms_member_account_tabs', 'pmsc_remove_particular_tabs', 50, 2 );
function pmsc_remove_particular_tabs( $tabs, $args ) {
    unset( $tabs['payments'] );

    return $tabs;
}
The example above will remove the Payments tab.
The Logout URL is always added as the last tab from your interface. If you want to remove it, you can use this snippet of code:
add_filter( 'pms_member_account_logout_tab', '__return_false' );
Custom content can also be added before or after a tab using these 2 actions:
do_action( 'pms_member_account_before_' . $active_tab . '_tab', $active_tab, $member );
and
do_action( 'pms_member_account_after_' . $active_tab . '_tab', $active_tab, $member );
The hook is dynamic so by changing the $active_tab variable, you can choose before/after which tab your custom content will be shown.
Usage example:
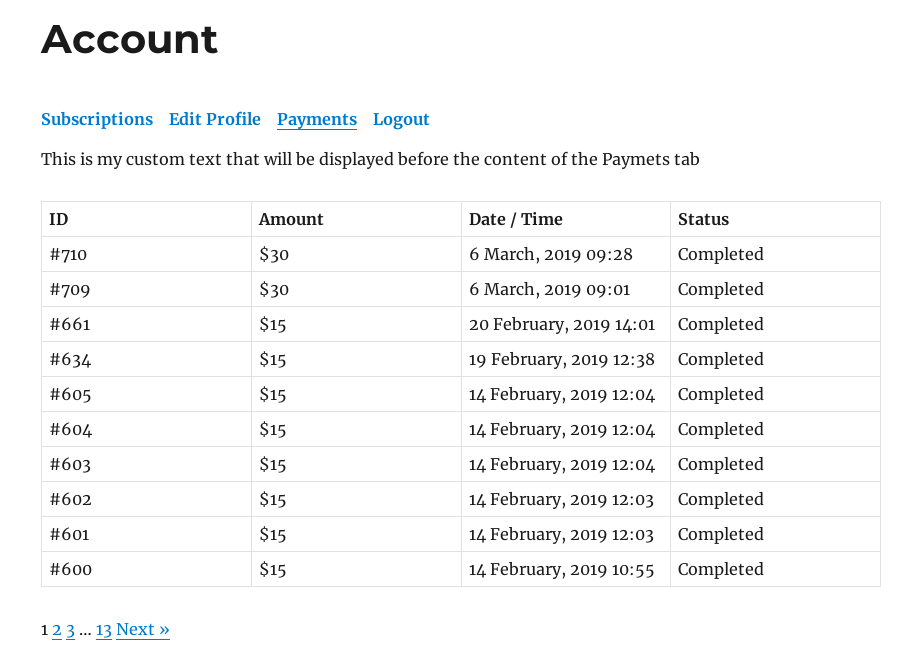
add_action( 'pms_member_account_before_payments_tab', 'pmsc_custom_content_before_payments_tab', 20, 2 );
function pmsc_custom_content_before_payments_tab( $active_tab, $member ) {
    echo '<p>This is my custom text that will be displayed before the content of the Paymets tab</p>';
}
This will add the text before the Payments tab. To add content after, just replace `before` with `after` and change the tab accordingly (see the default tab slugs above)
Accept (recurring) payments, create subscription plans and restrict content on your website. Easily setup a WordPress membership site using Paid Member Subscriptions.
Get Paid Member SubscriptionsCombine the power of Profile Builder with Paid Member Subscriptions to set up user registration, memberships, and recurring revenue.
Get 25% off with the bundle
