Stripe lets you accept payments directly on your website using a wide range of payment methods, allowing for a faster checkout directly on your website.
Enable users to pay using debit or credit cards, Bancontact, Giropay, iDEAL, Sofort, and many more. Accept one-time or recurring payments, offer your users Free Trials for subscriptions, or charge an initial Sign-up fee.
Everything is done in a secure manner, and your website benefits automatically from SAQ A PCI Compliance.
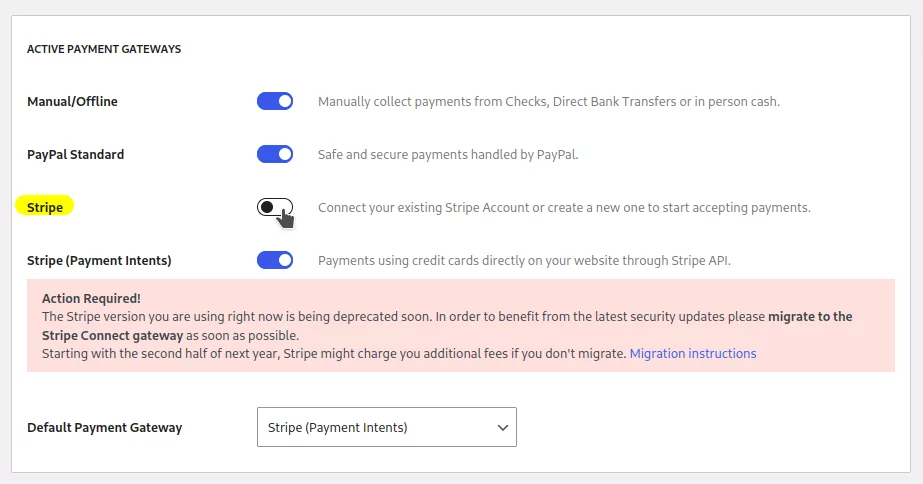
To start using this gateway, go to Paid Member Subscriptions → Settings → Payments → Gateways and enable the Stripe payment gateway.
Once the toggle is clicked, the Connect with Stripe button will appear, which you need to click in order to set up the payment gateway connection.

Press the button to start the onboarding process. You will be redirected to the Stripe website in order to complete the initial setup.
After completing the onboarding process, you will be redirected back to your website and, if the connection is successful, you should be able to process payments.
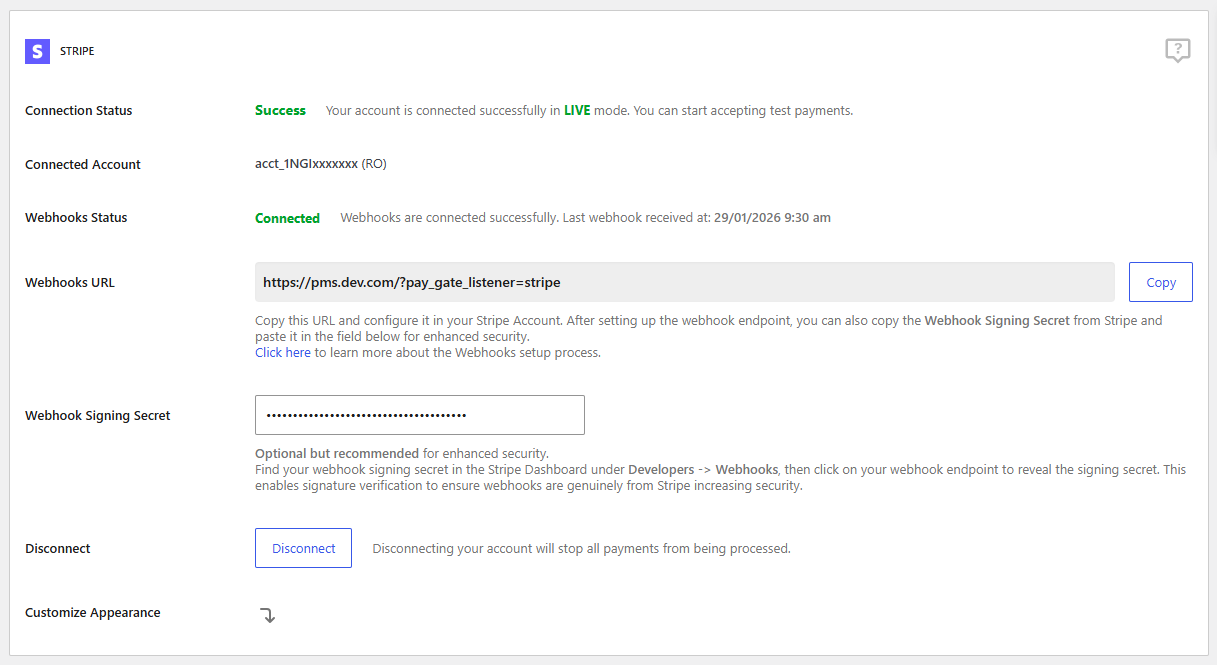
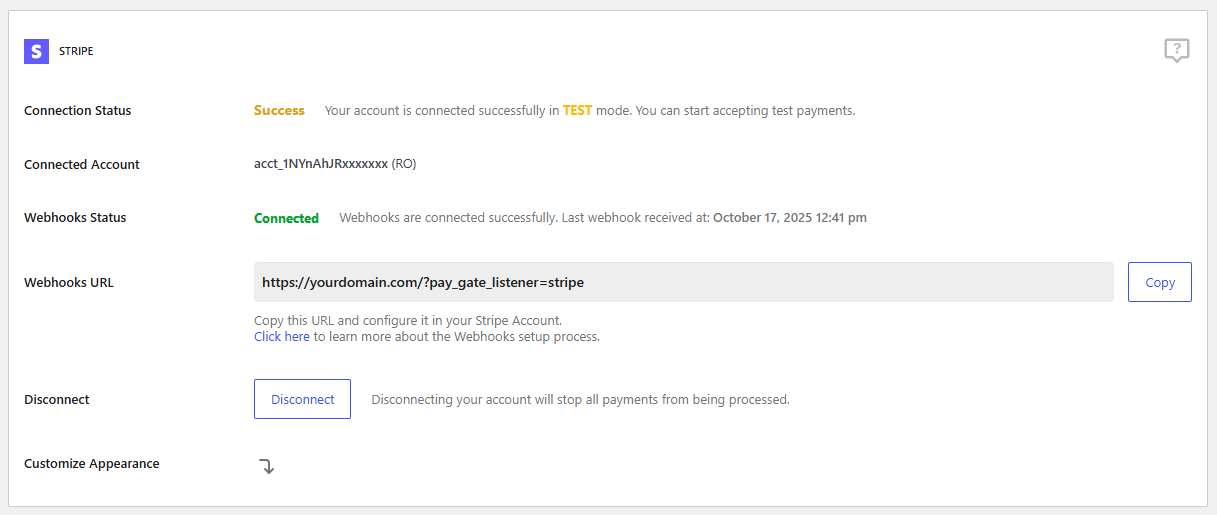
The plugin will tell you the status of the connection:
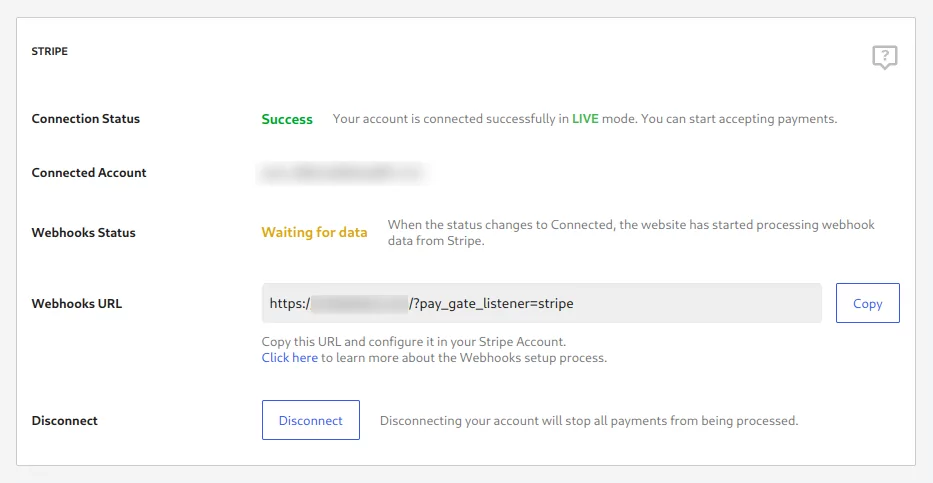
Setting up webhooks is not mandatory in order for payments to work, but for safety, we recommend that you configure them as well. They also help by automating refund processing between Stripe and your website.
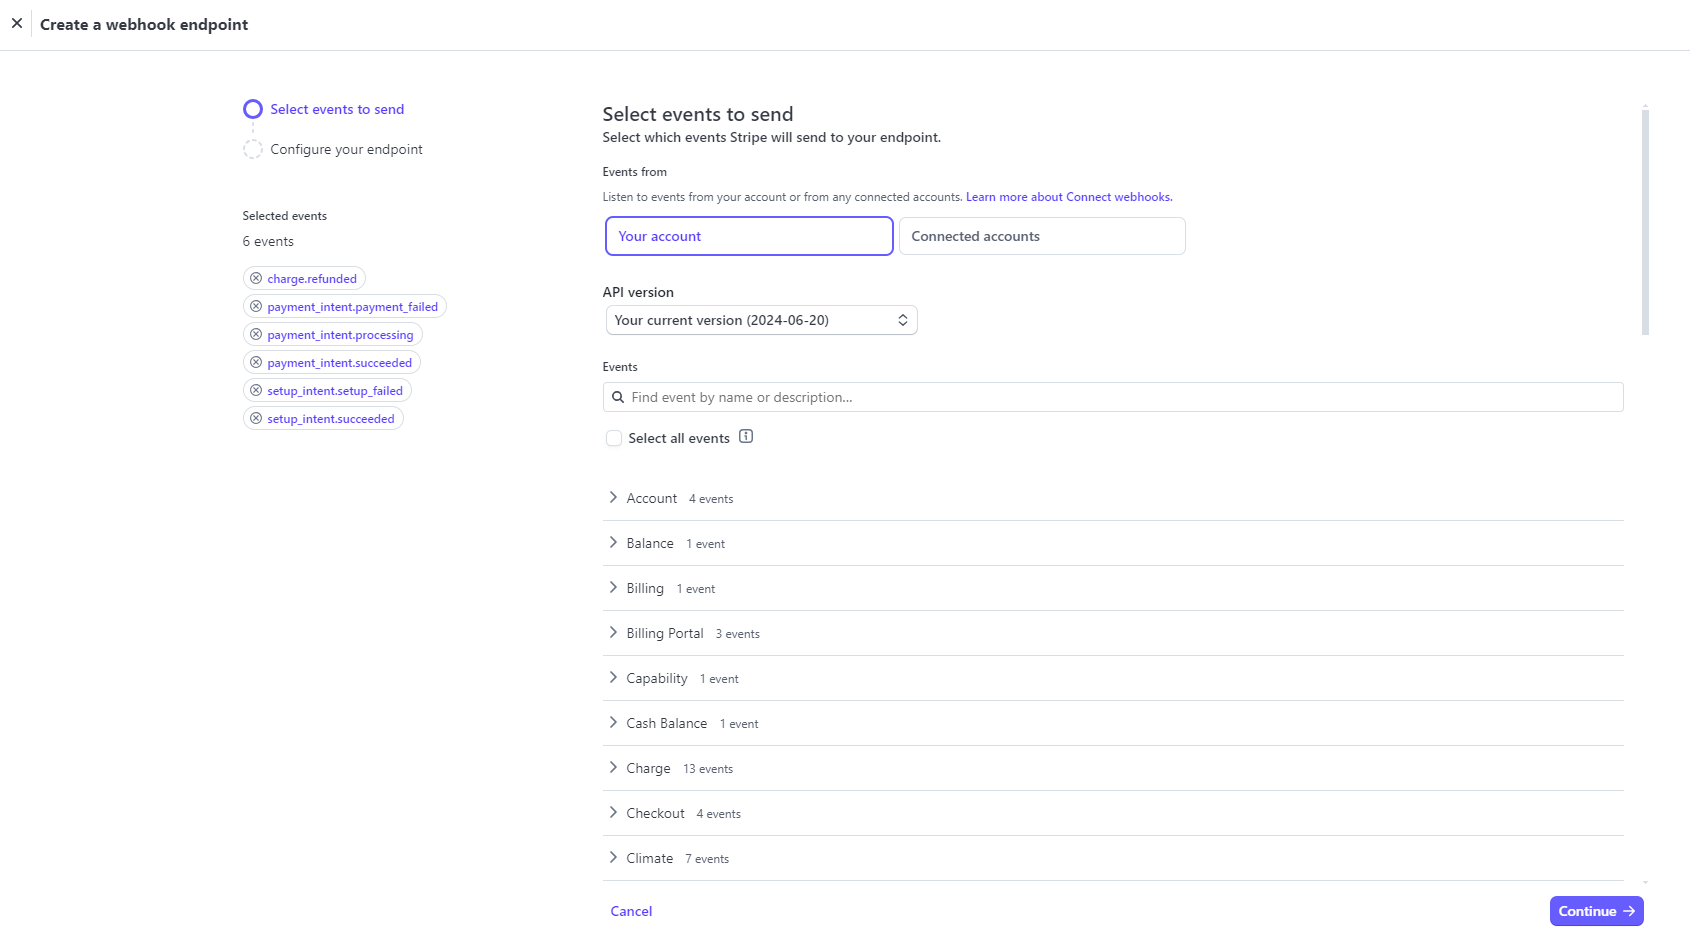
To configure them, press the `Copy` button near the Webhook URL field from settings, and then simply click here. This will redirect you to your Stripe Dashboard account → Developers → Workbench → Webhooks page, where you should have the following 6 events already preselected:
The page should look like this. After making sure the above events are selected, you can click on “Continue”.
On the next page, you will need to add the Webhook URL that you’ve copied from the plugin settings.
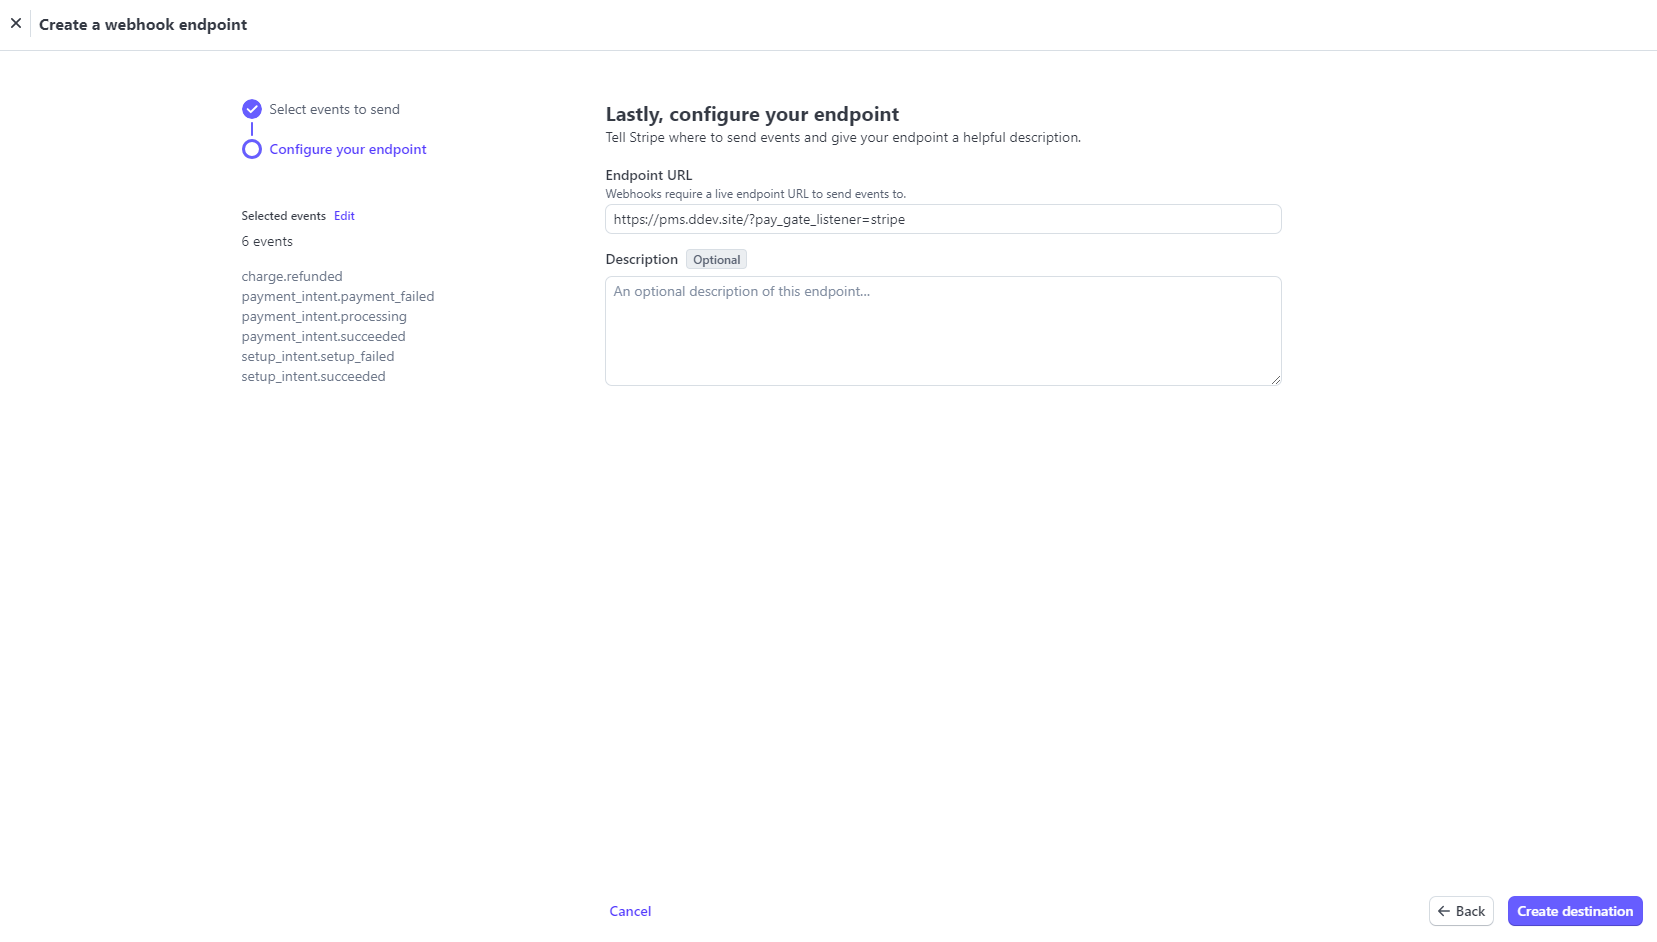
After you click on “Create destination”, your webhook URL should be registered:
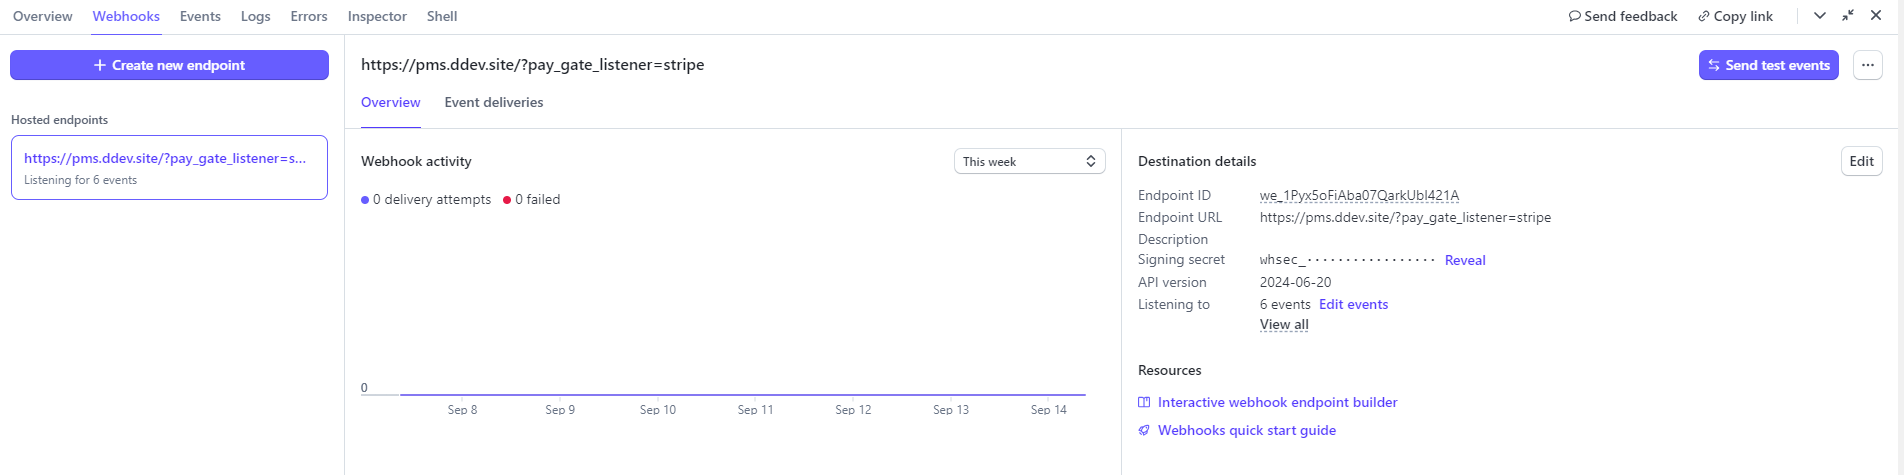
This step is optional, but strongly recommended for improved security. The signing secret enables webhook signature verification, ensuring that incoming requests are genuinely sent by Stripe and helping protect your integration from unauthorized or spoofed requests.
You can find your webhook signing secret in the Stripe Dashboard by navigating to Developers → Webhooks, then selecting your webhook endpoint and revealing the signing secret.
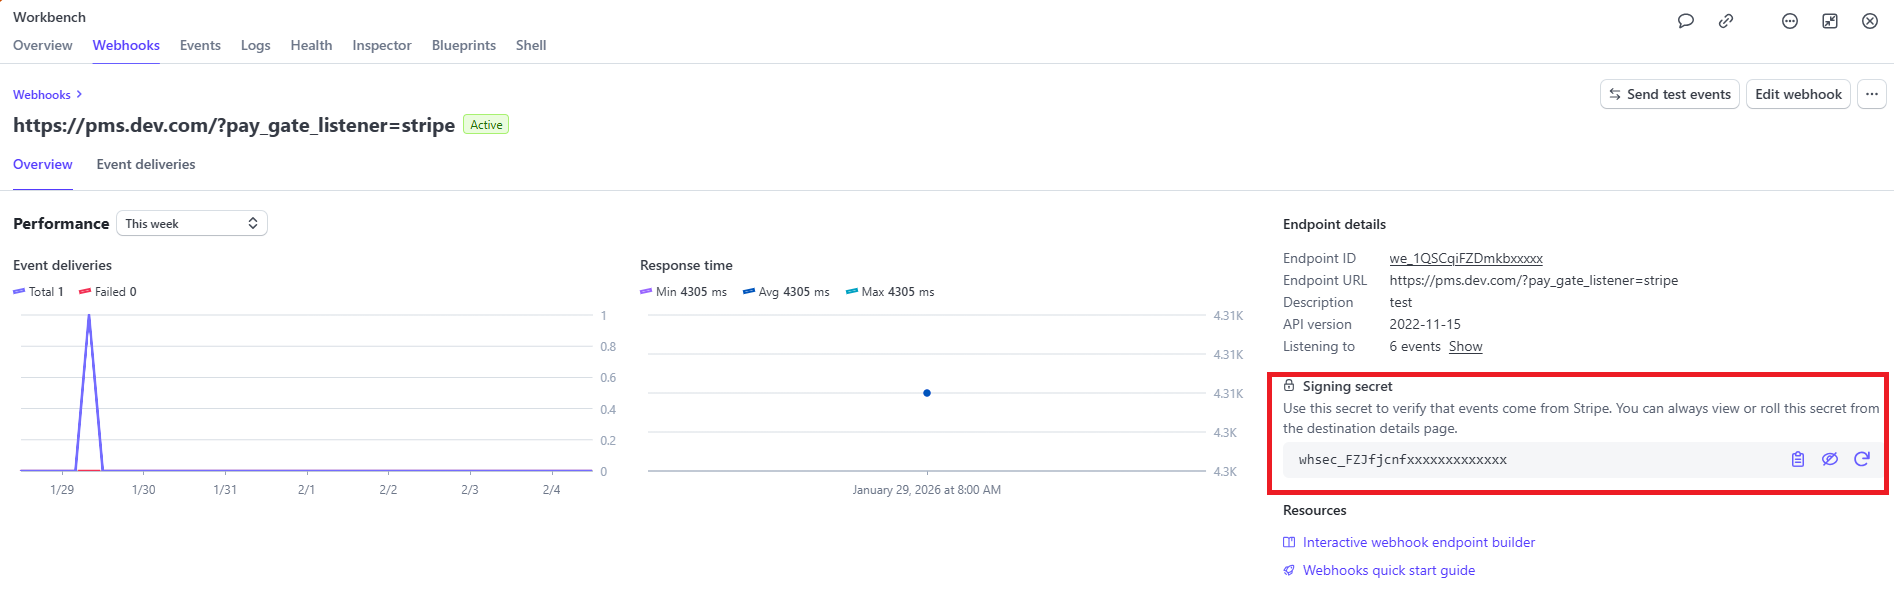
The webhooks status section will change to `Connected` once a webhook from Stripe is received. The plugin will also log and tell you the last date on which a webhook was received from Stripe.
If you are already using one of our other Stripe payment gateways, you can migrate to Stripe Connect and benefit from the extra features.
Simply enable the Stripe payment gateway and then start the onboarding process. Once you reach the Stripe website and you are asked to log in, you need to log in and select the same Stripe account that you previously used for this website.
If you link a new account, older subscriptions that are already set up on your website will not work anymore.
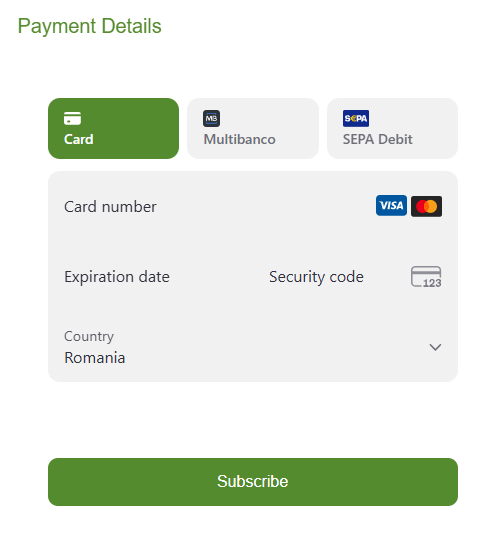
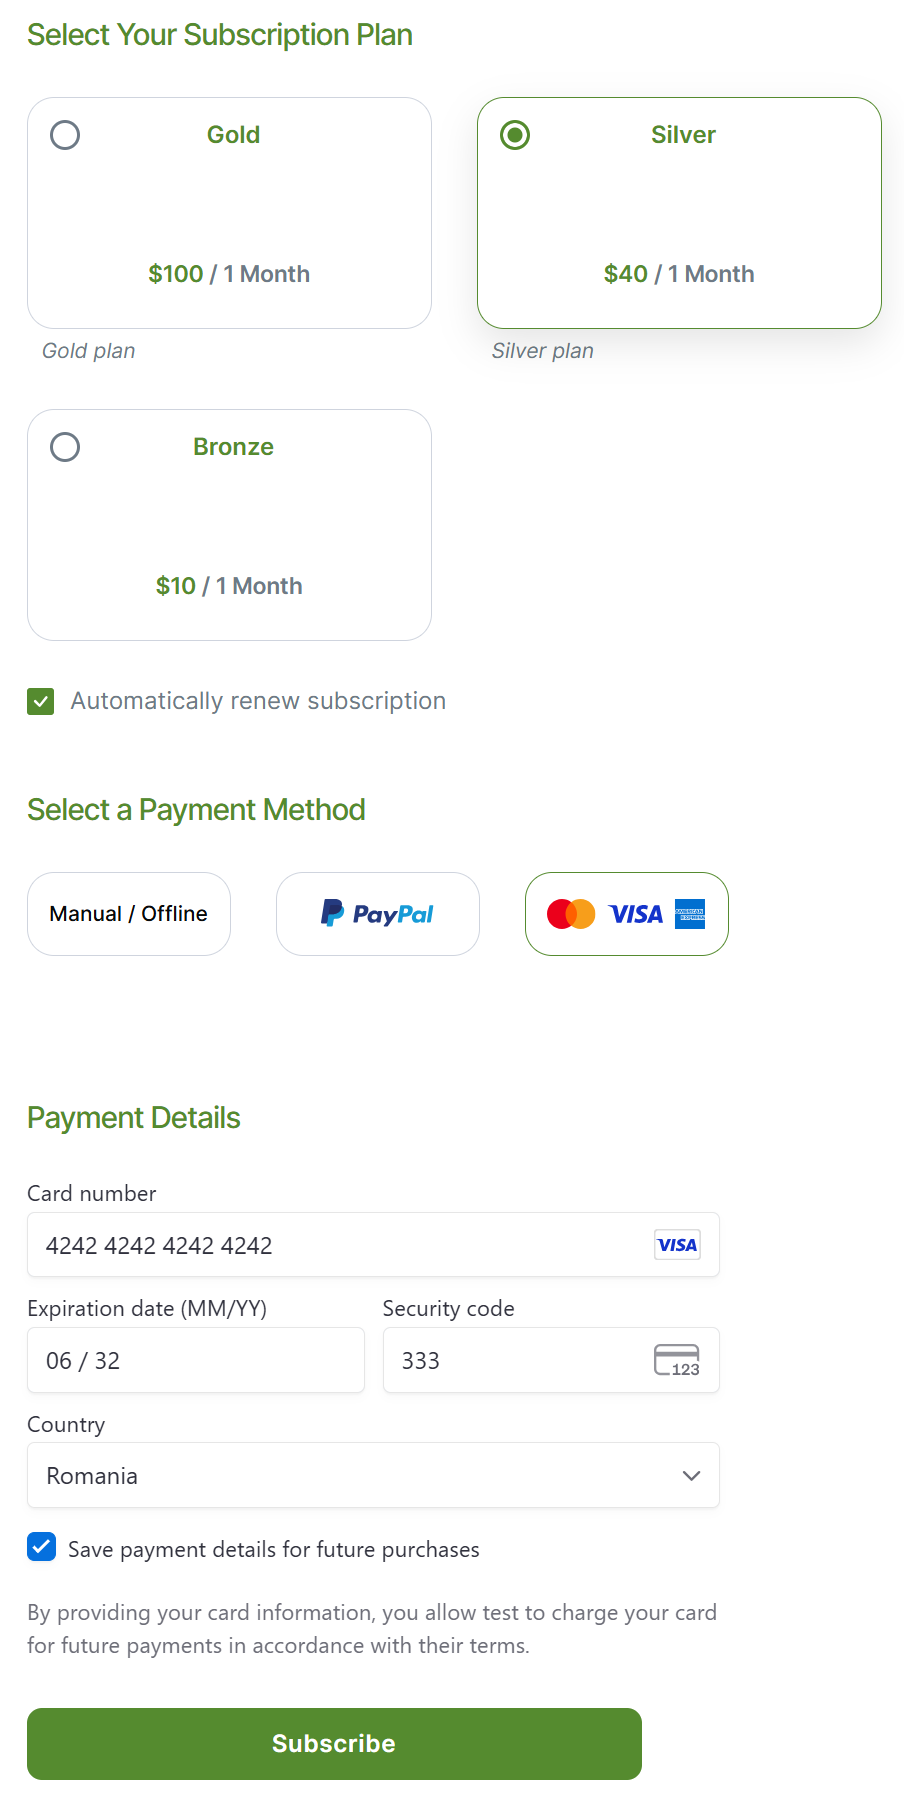
After you have enabled the gateway and successfully connected your website, when you go to a front-end form, you should see Stripe as an available payment method.
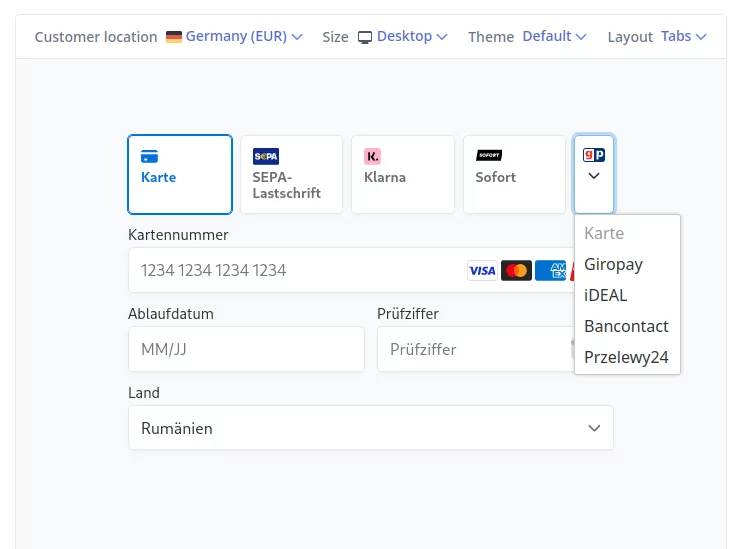
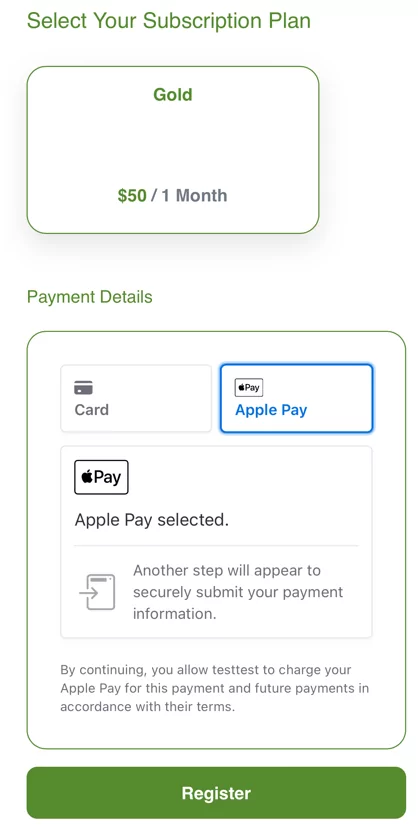
When selecting this method, you will be presented with the payment form:

In order to make a payment, the user simply has to fill out the form with their payment details and press the register button.
The form is presented as a form to enter credit card details, but through Stripe Connect, you are able to accept more than just credit cards. With it, your website can accept payments in more localized payment methods that might be familiar to users in a certain region.
Some examples include Affirm, Bancontact, Giropay, iDEAL, SEPA, and many more. You can check out this article from Stripe, which goes more in-depth about all the available payment methods: https://stripe.com/en-ro/guides/payment-methods-guide
Payment methods are localized, so users from different parts of the world will have different payment methods showing. You can better test how the payment form will look in different countries by going to the Stripe website: https://stripe.com/docs/payments/payment-element
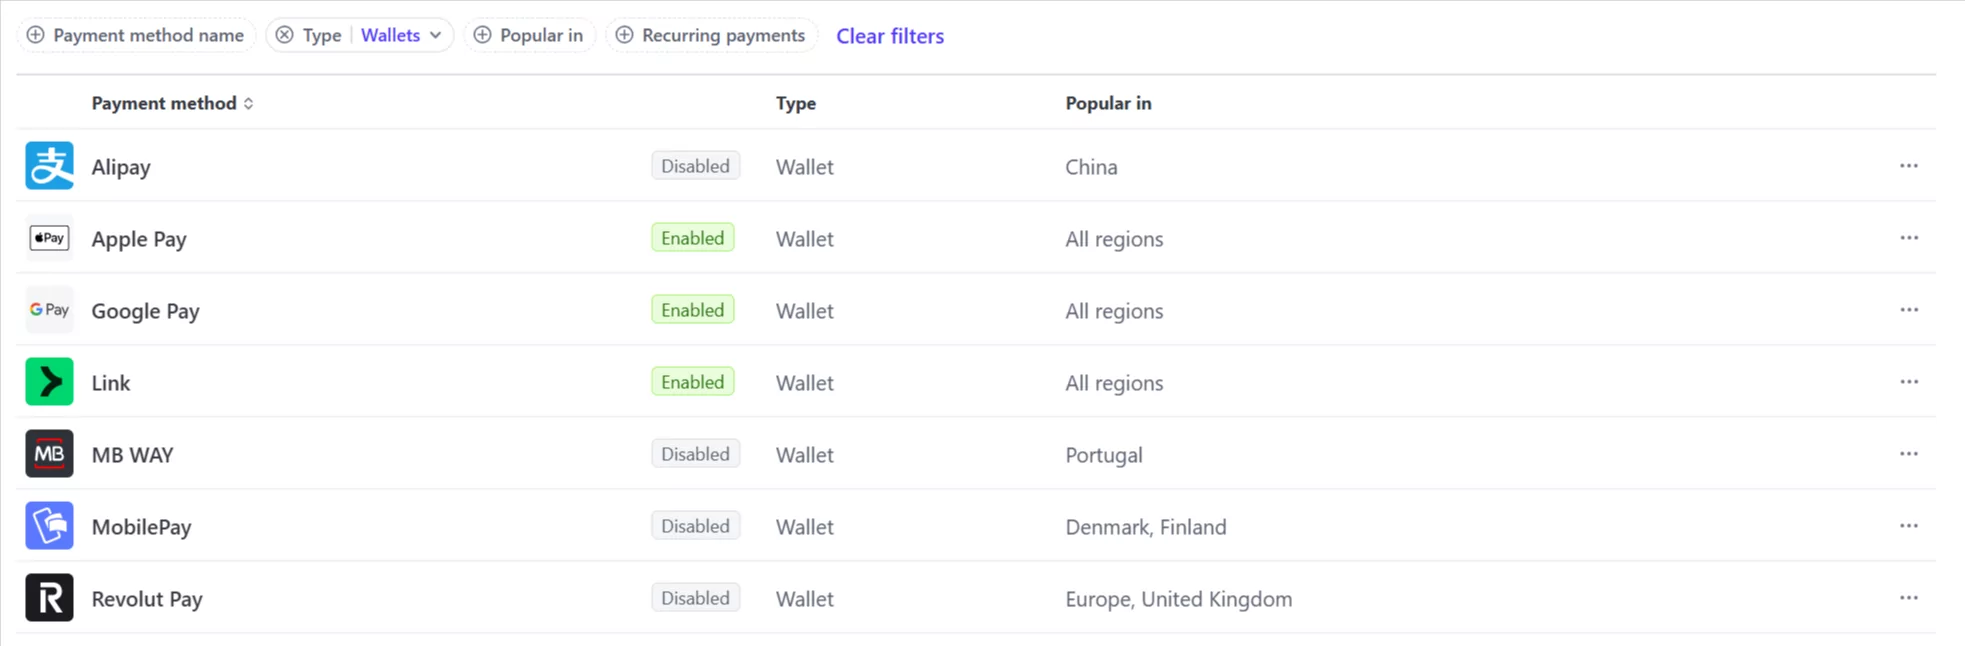
The plugin supports all the additional payment methods that Stripe offers. In order to manage these gateways and choose which ones are enabled, you need to use the Stripe Dashboard.
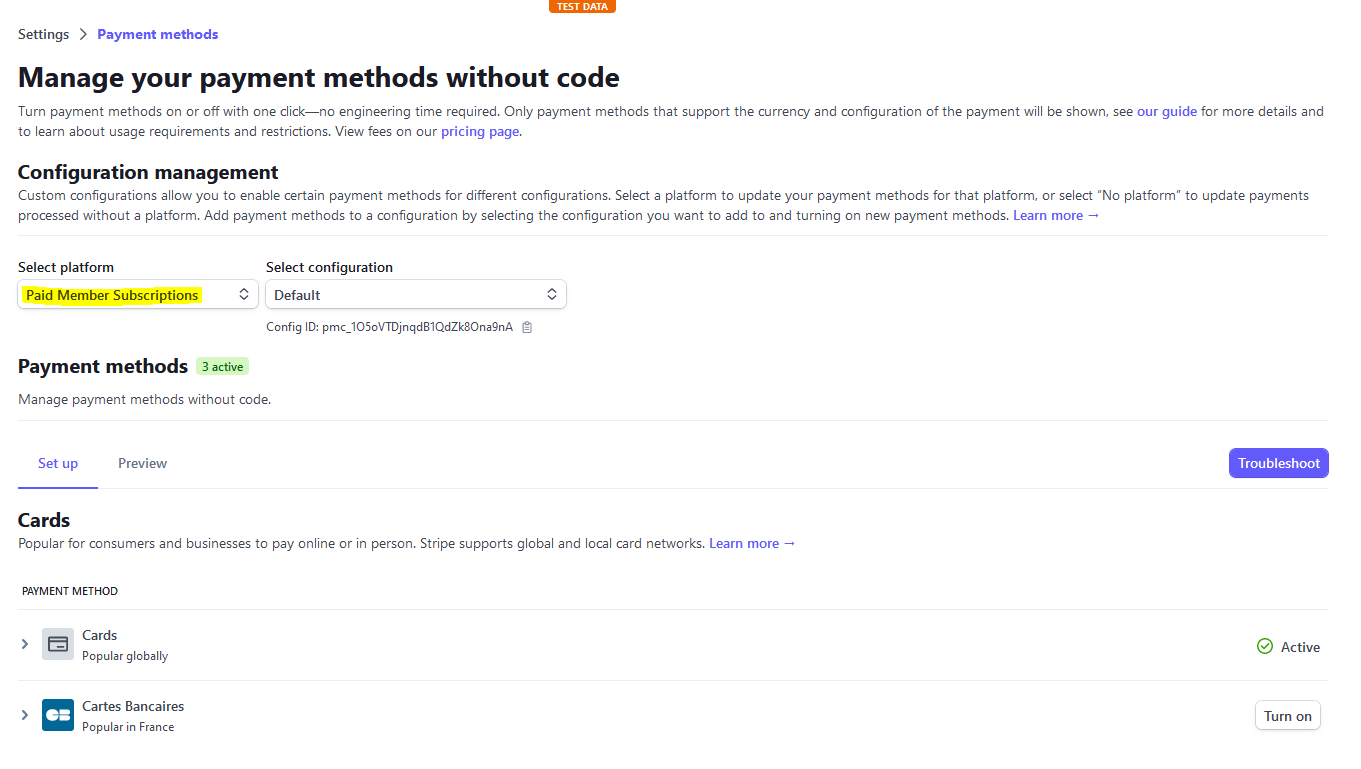
In order to do this, go to the Stripe Dashboard → Settings → Payments → Payment Methods page → select the Paid Member Subscriptions configuration → and enable the gateways that you’d like to use.
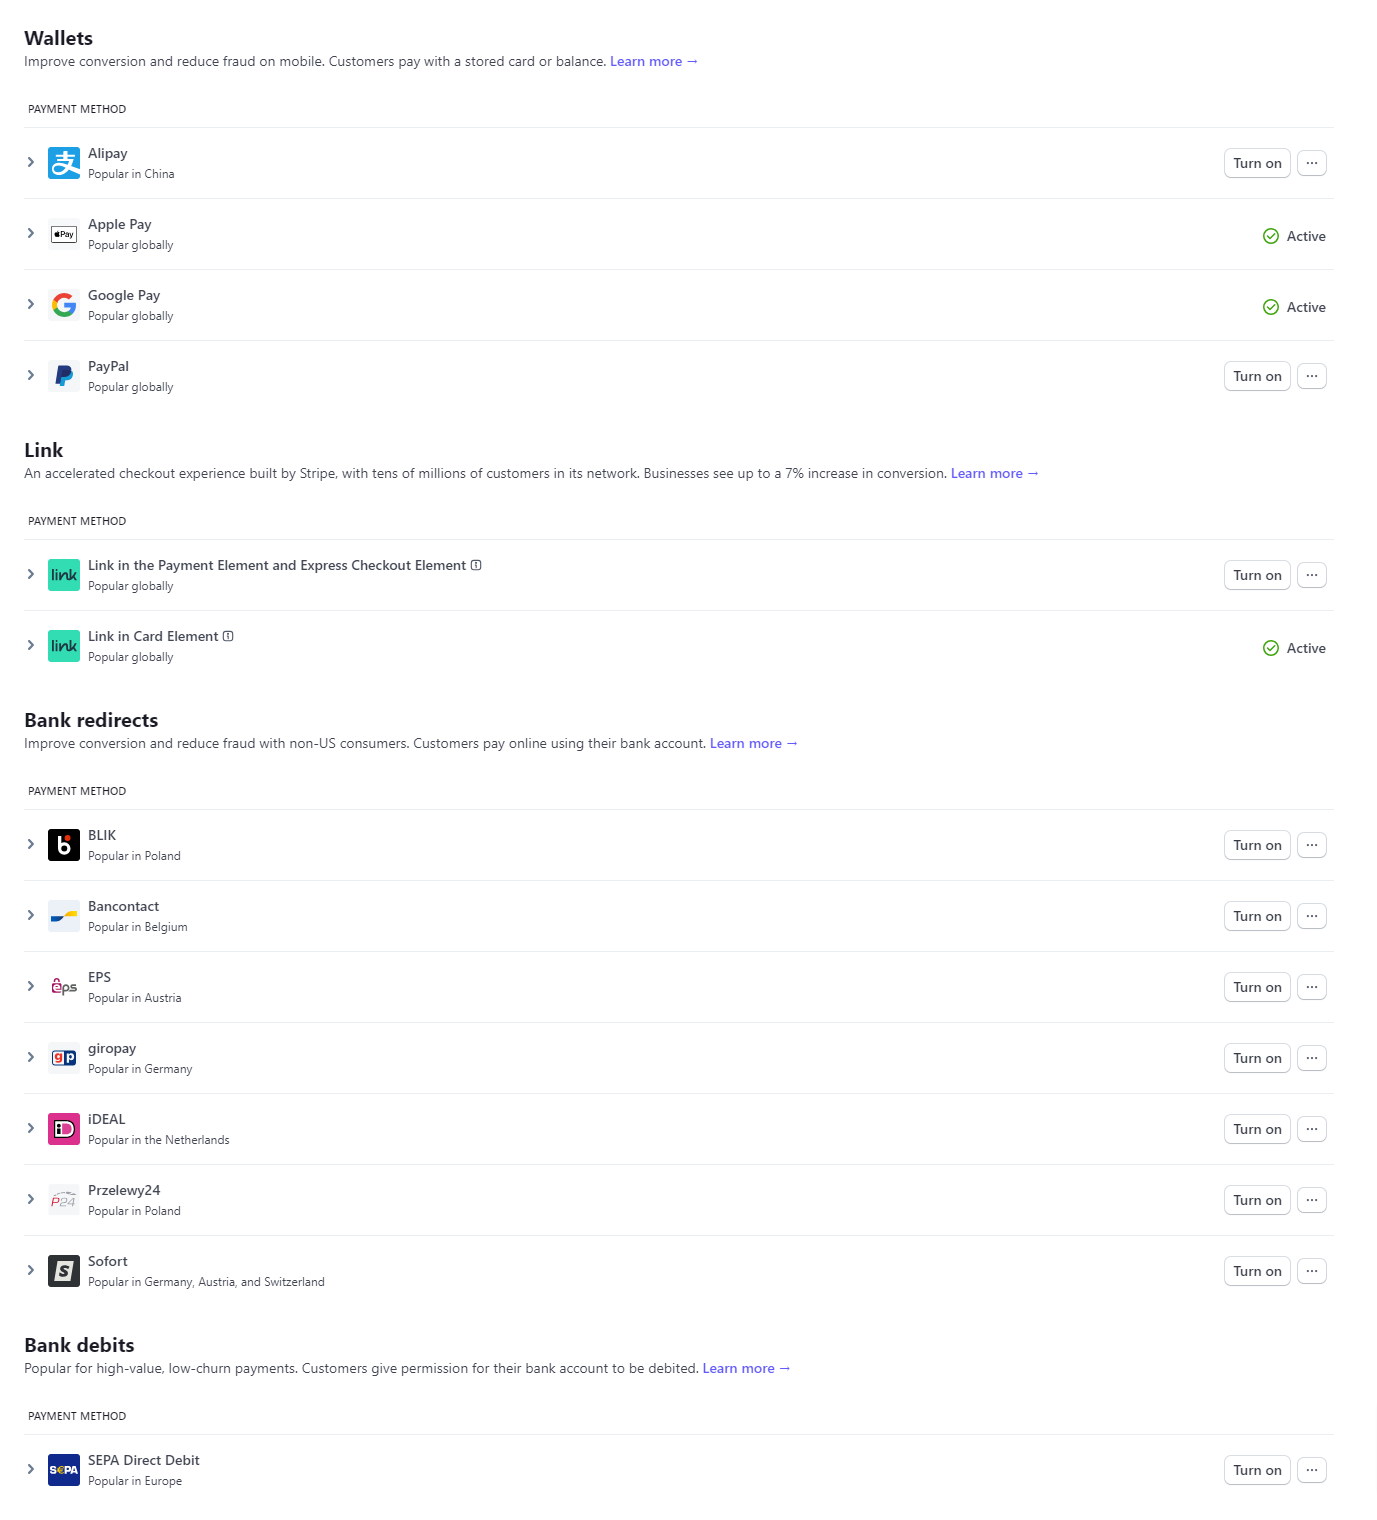
Make sure you have selected Paid Member Subscriptions in the Configuration Management-> Select a Platform.
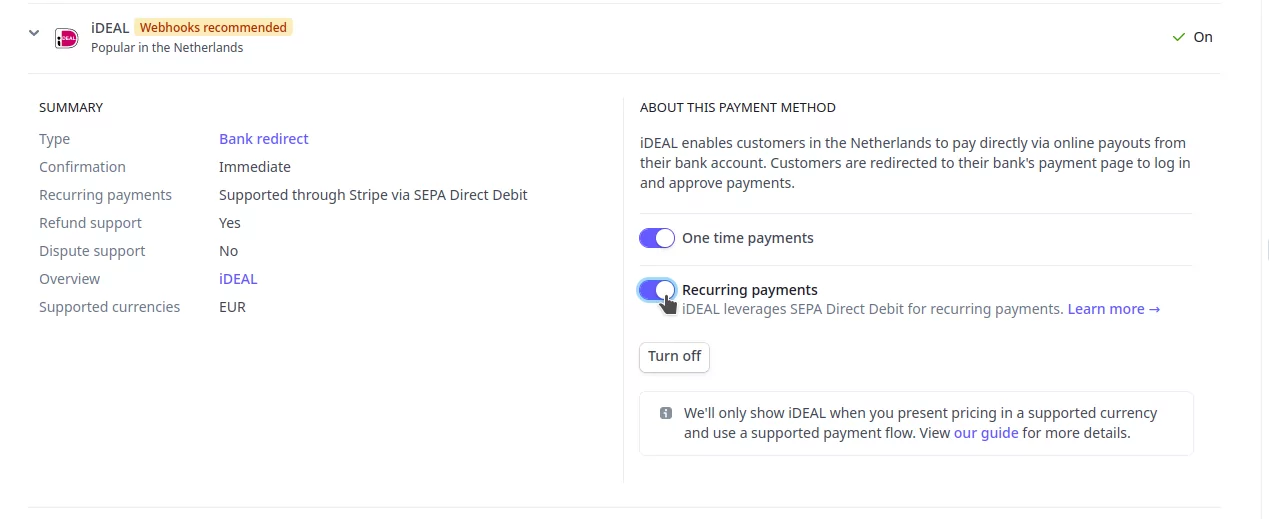
Gateways might have additional settings, so for example, in order to enable recurring payments for Bancontact or iDeal, there is another setting you need to enable.
You can activate Apple Pay and Google Pay from the Payment Methods page.
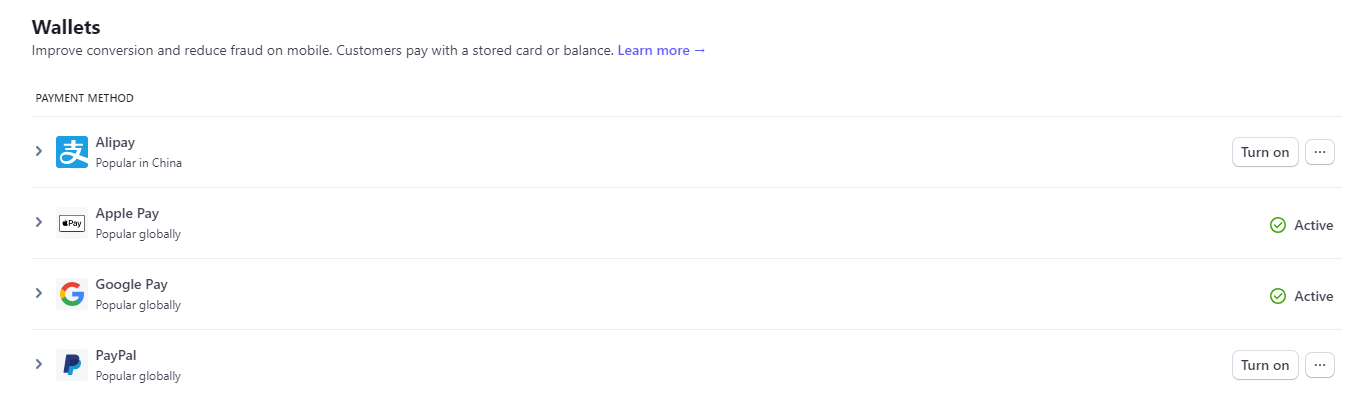
After enabling them in your Stripe account, just use a mobile phone to see Apple Pay or Google Pay options on your form.
Link is a smart payment option that lets customers save and reuse their payment details (like credit card, debit card, or bank info). That way, on future purchases, they don’t have to re-enter everything; checkout becomes nearly instant.
It can be easily activated from the Payment Methods page:
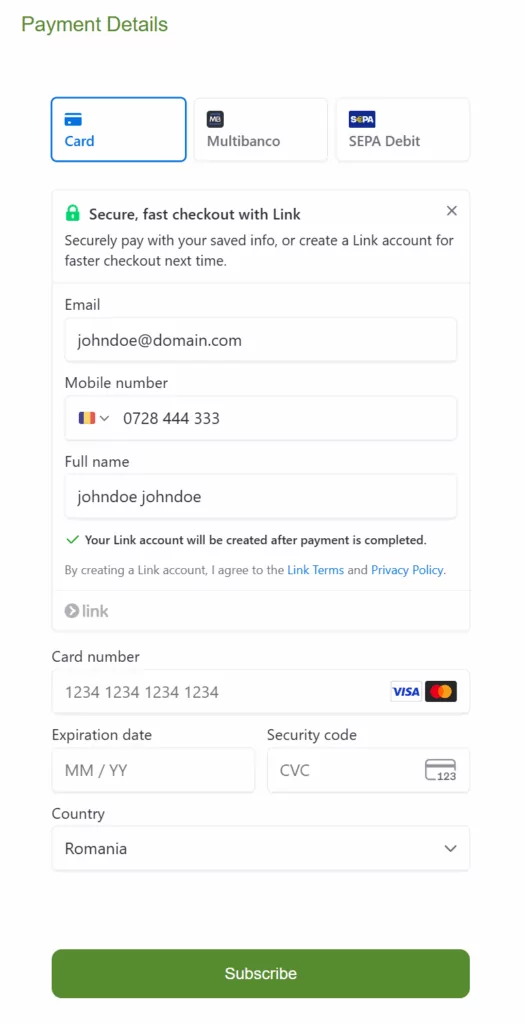
First-time checkout
A customer needs to enter their email, phone, name, and payment. If Link is enabled, Stripe may prompt them to create a Link account automatically (after the payment succeeds).
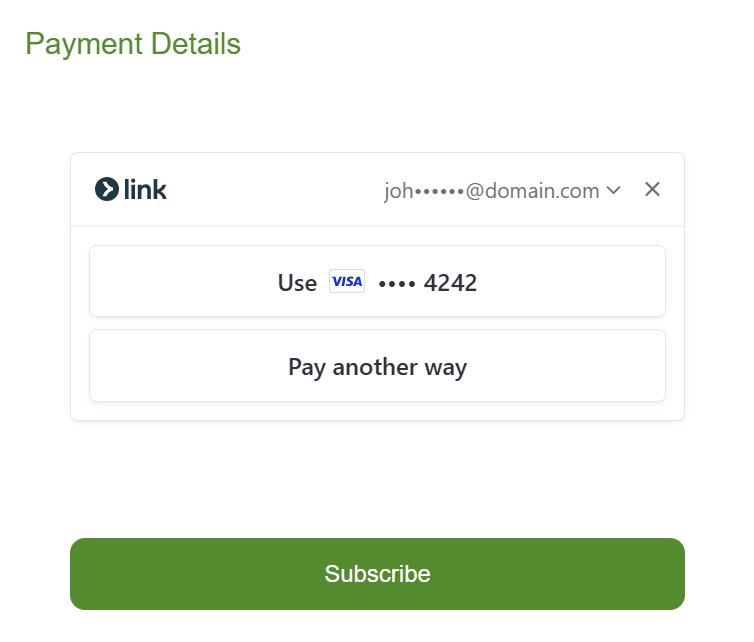
Subsequent visits
On later purchases, if the customer uses the same email/phone or is recognized via browser cookie, Link can autofill payment details and require only a short authentication (e.g., a one-time passcode) to confirm.
You can read more about how Link by Stripe works here.
You can customize the appearance of the Stripe fields to better match your site’s design by clicking the Customized appearance/down arrow in the Stripe section within the settings.
This will reveal the customization settings where you can enable the Customize Appearance toggle, then configure the following design options:
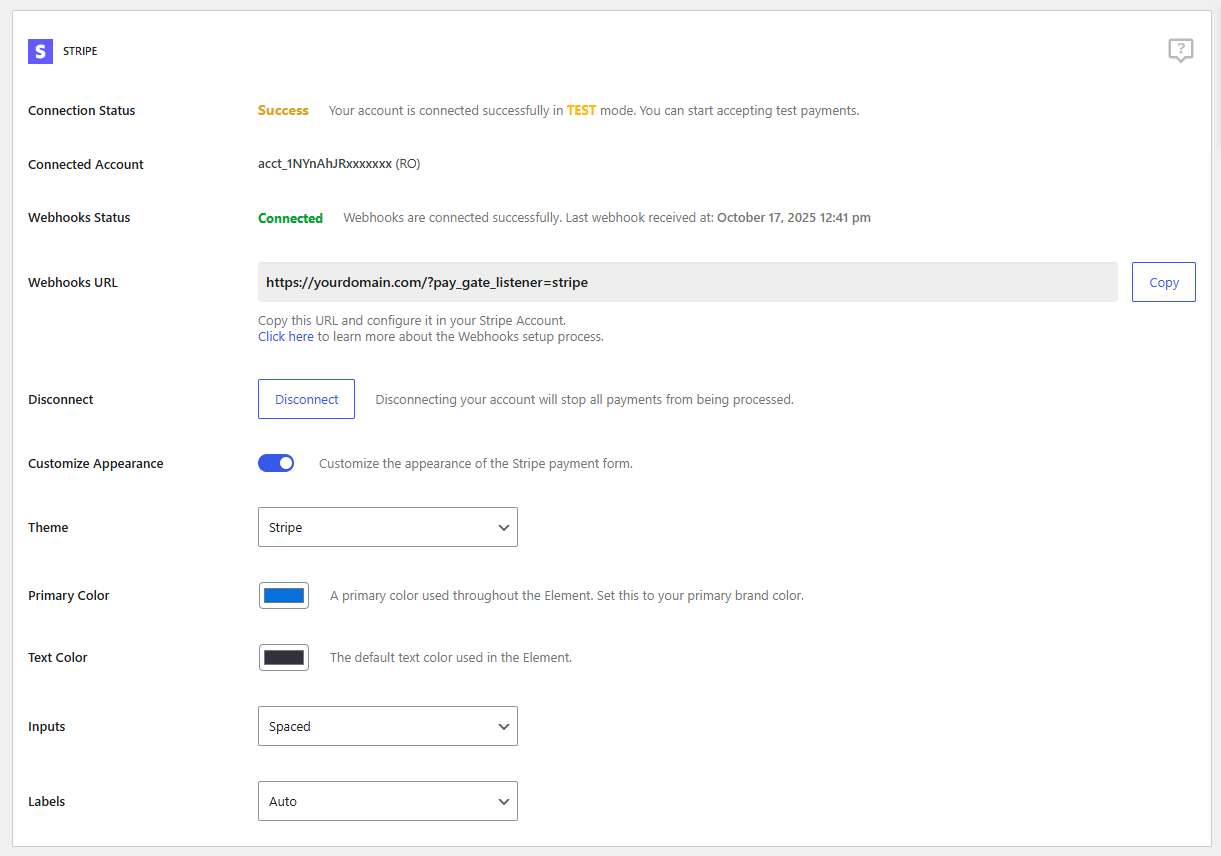
The customization possibilities are virtually limitless. For example, we adjusted the Stripe fields to match the overall design that was used in this documentation and maintain a consistent look and feel.
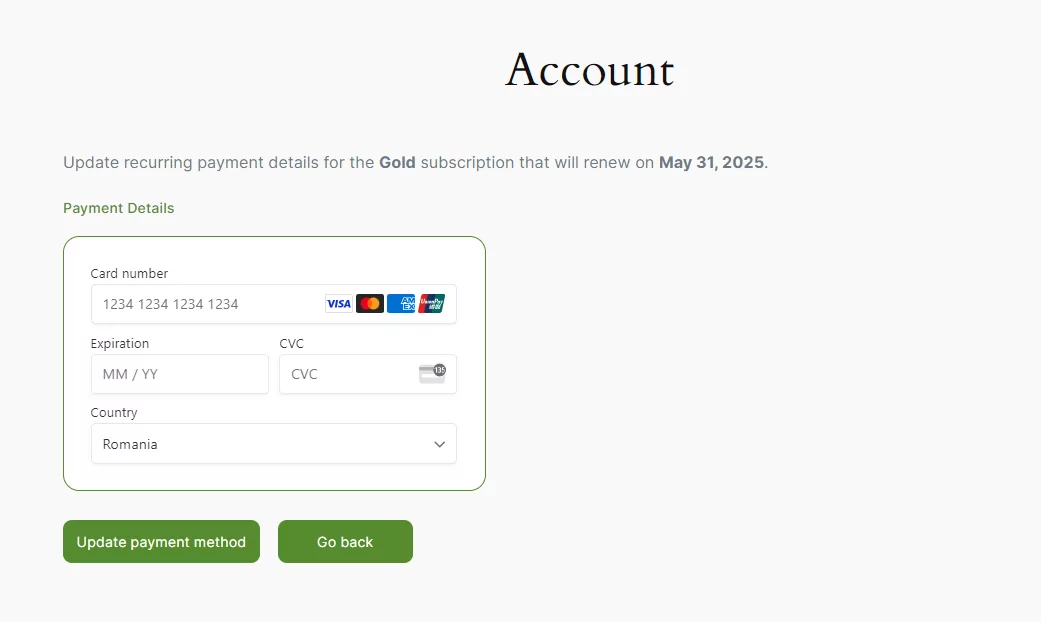
Your customers can update the payment details for a recurring subscription at any time using the account page. They can see which credit card they are using for a specific subscription and are able to update it in case it expires or they just want to change it.
When the next recurring payment for the customer is triggered, the new card will automatically be charged.
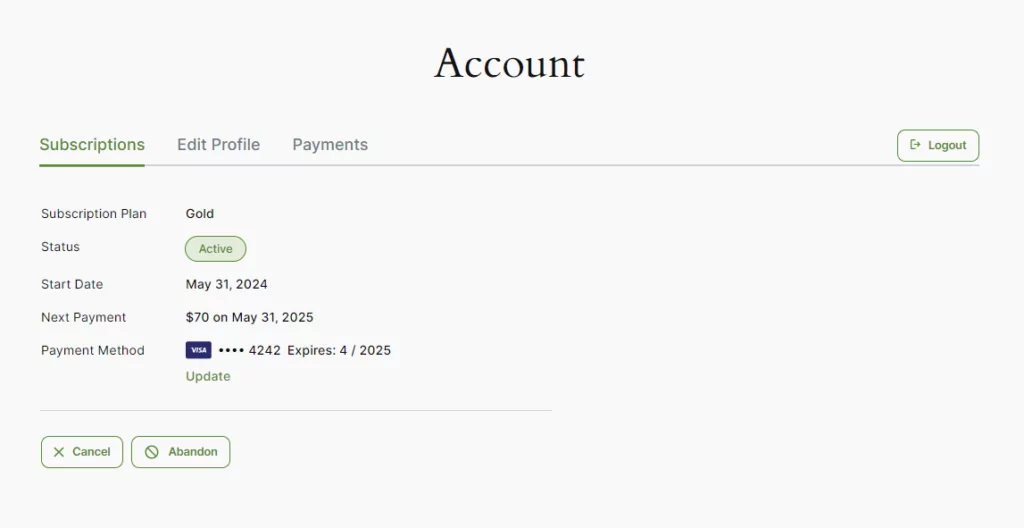
The credit card update is done very easily by the customer; he is only asked to provide the details for his new card. In case the Invoices or Tax add-ons are active, the customer can also update their existing Billing Details.
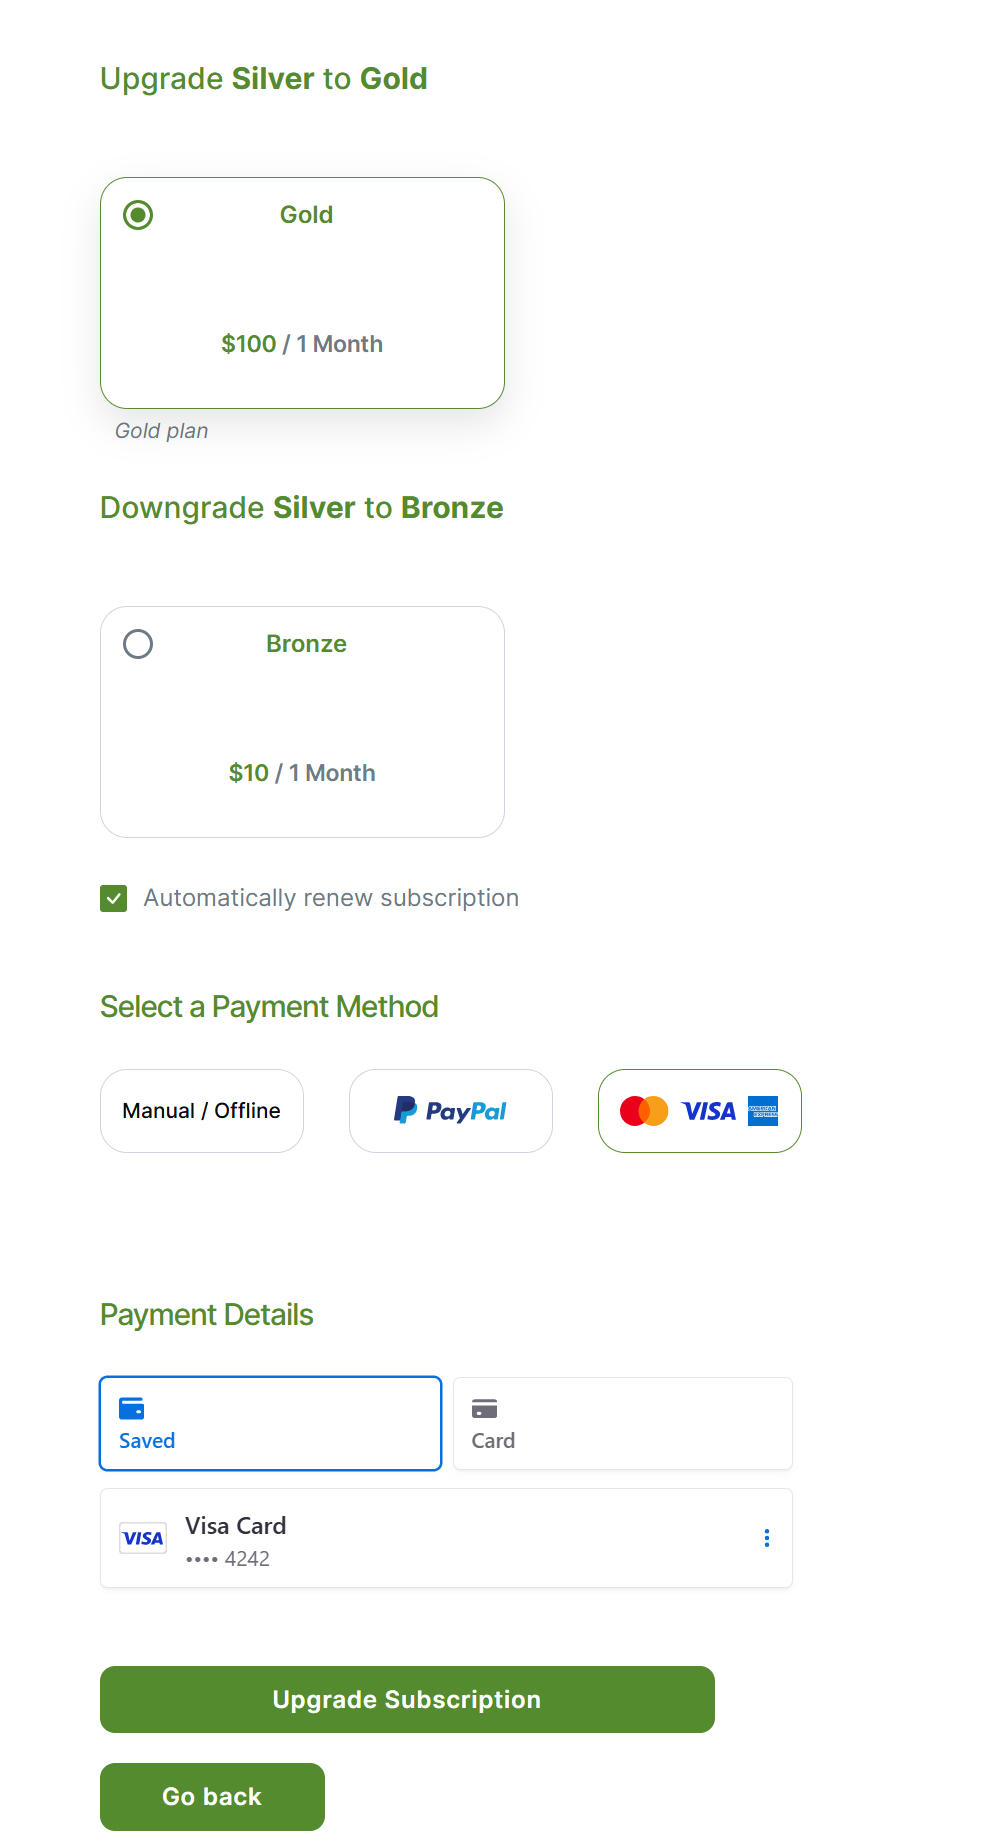
When a logged-in user purchases a membership, they have the option to securely save their payment details for future use.
If they choose to do so, any logged-in actions such as upgrading, downgrading, changing, or renewing their membership can be significantly faster, as they can simply select a previously saved payment method. Of course, the option to add a new credit/debit card is also available.
When processing refunds, you can choose between two options:
To issue a refund, navigate to the Payments page, hover over the desired payment, and select Refund. For detailed instructions, please refer to the full documentation here.
You can also initiate the refund directly from your Stripe Payments dashboard. For more details, read the full guide here.
The Stripe Connection you make is tied to the mode the plugin is running in. So if the plugin is set to Test mode, the connection you make will be in Test mode; if the plugin is in Live mode, the connection you make will be with a Live account.
You can connect the same account both in Test and Live mode, but you can also connect different accounts.
If you are connected in Test mode, you can test the integration using test credit cards that Stripe provides:
| Number – CVV 111 | Brand |
|---|---|
| 4242424242424242 5555555555554444 378282246310005 | Visa Mastercard American Express |
For the CVV, you need to enter any 3 digits, and the expiration date needs to be set in the future. You can learn more about doing Test payments with Stripe on their website.
Accept (recurring) payments, create subscription plans and restrict content on your website. Easily setup a WordPress membership site using Paid Member Subscriptions.
Get Paid Member SubscriptionsCombine the power of Profile Builder with Paid Member Subscriptions to set up user registration, memberships, and recurring revenue.
Get 25% off with the bundle
