Table of Contents
BuddyPress add-on lets you to easily extend the BuddyPress User Profiles with Profile Builder User Fields.
It replaces BuddyPress’s Registration Form, Profile Editing Form, and User Listing with the customized forms created with Profile Builder, using Extra Fields Types.
An import option is available in order to transfer BuddyPress’s Fields and User Entries Information to Profile Builder’s Fields.
The BuddyPress add-on is available only with a Profile Builder Pro, or Agency license.
After purchasing the Pro, or Agency version of Profile Builder, you can check the following guide on how to install Profile Builder.
For the BuddyPress add-on to work as expected, you’ll also need to have the following plugins installed and activated on your site:
After you install and activate the BuddyPress add-on, under the Profile Builder menu item, you’ll notice a submenu item called “BuddyPress”. From here you can manage the BuddyPress Add-on Settings.
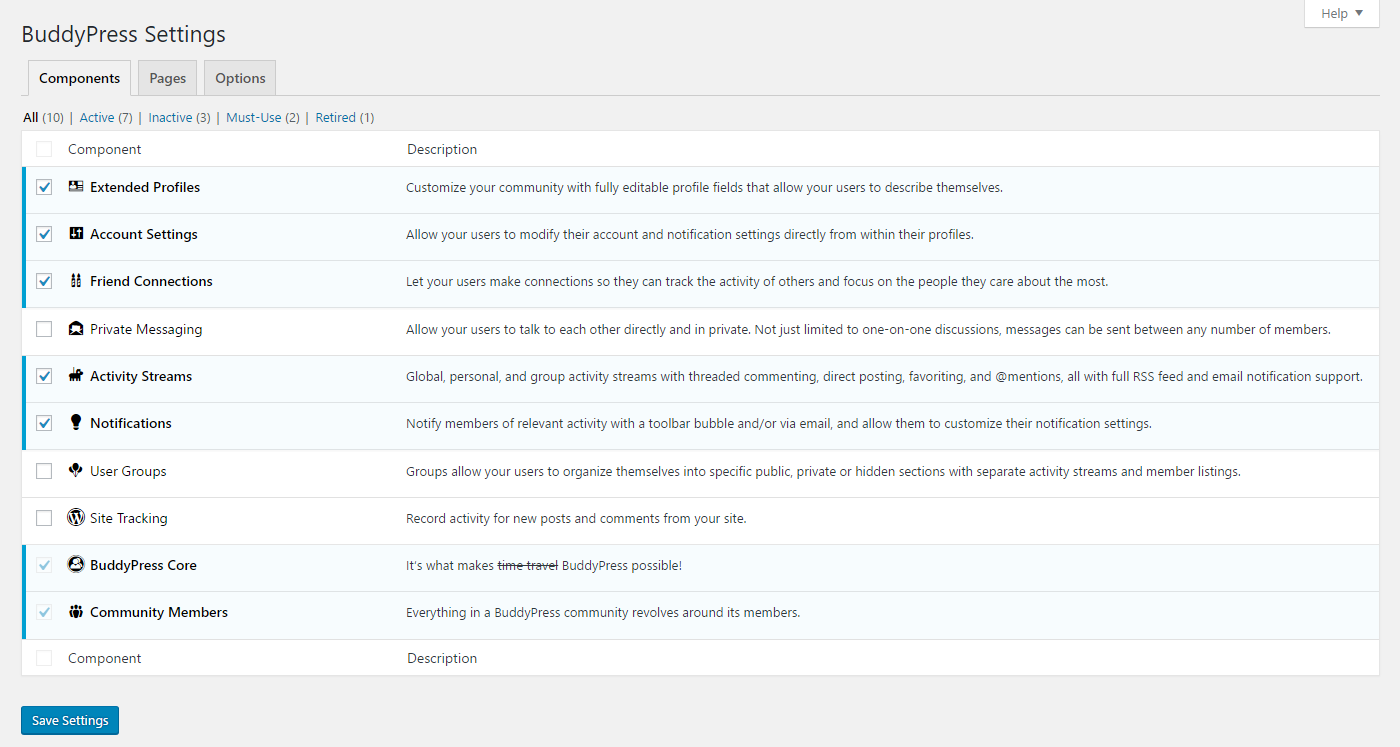
The available settings are:

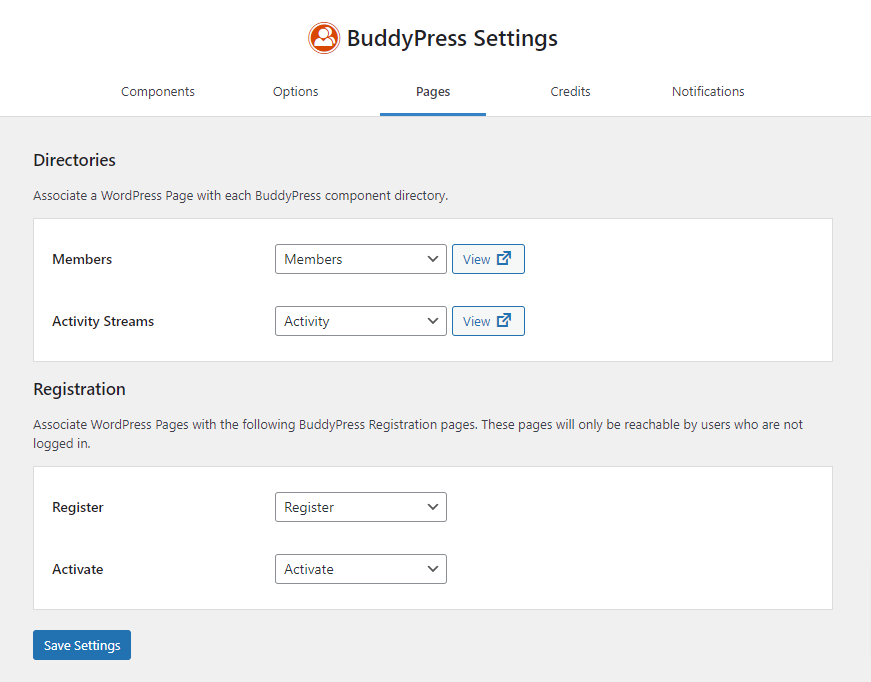
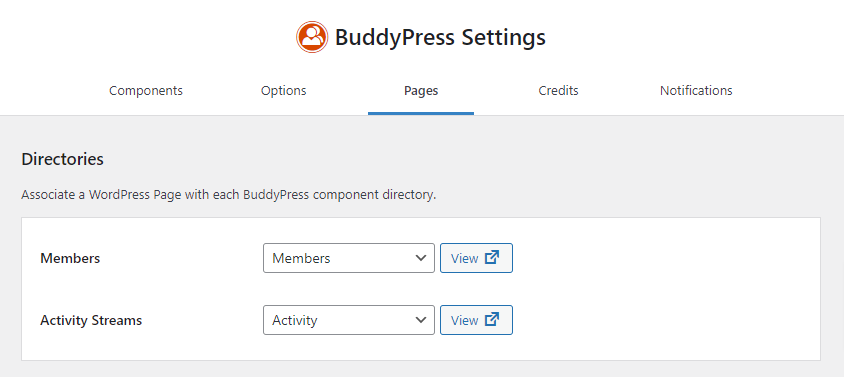
By default, the BuddyPress plugin creates 4 pages and you can associate these pages with the BuddyPress component directory or with BuddyPress Registration pages in Settings -> Buddypress -> Pages:
The BuddyPress Add-on replaces BuddyPress’s Field Management with Profile Builder’s fields. This means that in order to continue using BuddyPress user data you will need to use the import feature from the Profile Builder -> BuddyPress page.
Importing will start by clicking the Import BuddyPress Fields button.
First off, Profile Builder will create corresponding fields that map the existing ones from BuddyPress. Field settings such as required, visibility settings and defaults will also be imported. Below is a list of BuddyPress fields and their equivalent in Profile Builder.
| BuddyPress | Profile Builder |
|---|---|
| Checkboxes | Checkbox |
| Drop Down Select Box | Select |
| Multi Select Box | Select(Multiple) |
| Radio Buttons | Radio |
| Date Selector | Datepicker |
| Multi-line Text Area | WYSIWYG |
| Number | Number |
| Text Box | Input |
| URL | Input |
Notice that for the URL field, the closest equivalent was an Input. You can easily transform an Input into a clickable link in User Listing templates by using the following syntax:
{{{meta_name}}}
Group field titles will be imported as Heading fields.
Then Profile Builder will import user entries for the imported fields. By default, the BuddyPress add-on will import 50 users at a time.
If you encounter timeouts or memory limits errors, you should consider lowering this value by using the wppb_bdp_user_field_import_step_size filter .
/*
 * Filter to lower or increase the  BuddyPress import step size
 * Add the following code in functions.php of your active theme before doing the import
 */

function wppbc_import_users_step_size(){
    return 10;
}

add_filter( 'wppb_bdp_user_field_import_step_size', 'wppbc_import_users_step_size' );
Alternatively, if you have a large user count and fewer user entries, you may try to increase the user step size to speed things up.
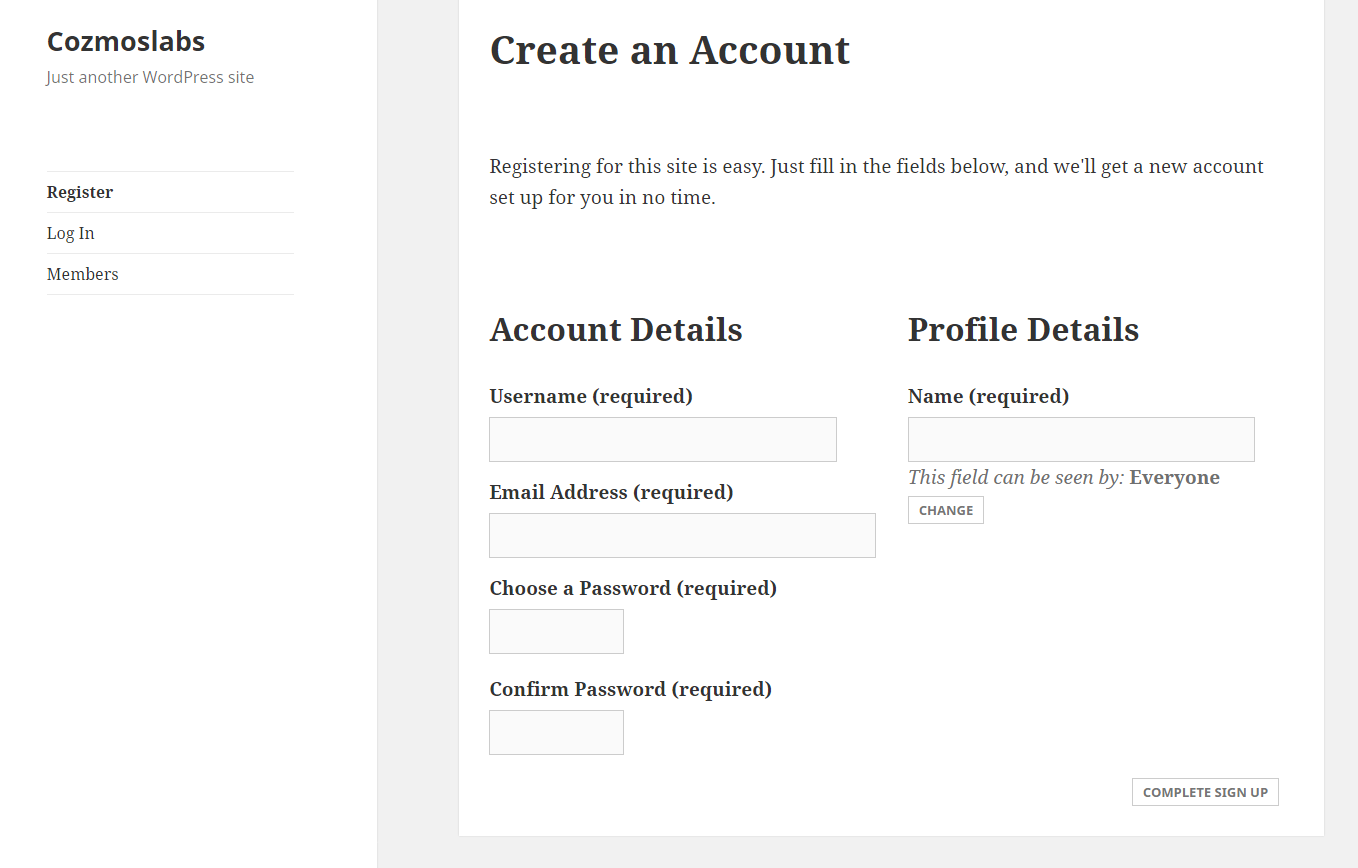
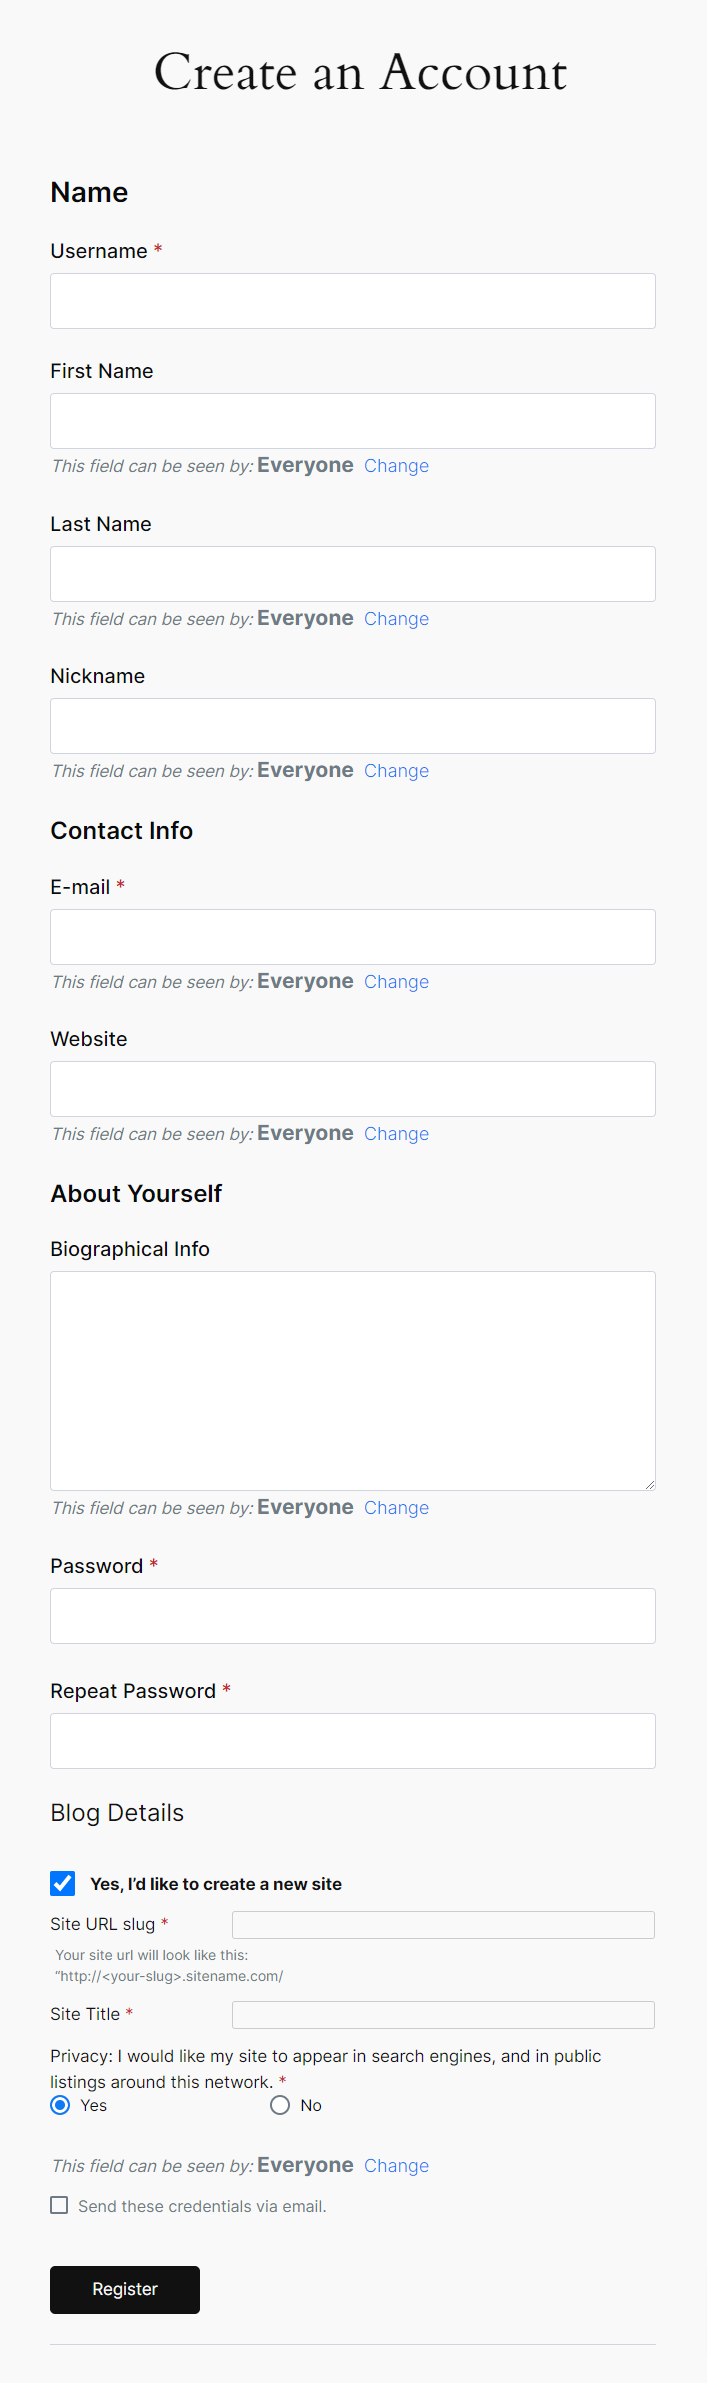
After you activate the BuddyPress Add-on the BuddyPress Registration Form will be replaced by the Profile Builder Registration Form. This is how the Default BuddyPress Registration Form looks like.
Profile Builder’s Default Registration Form is selected by default inside the Registration form option. You can choose from other Custom Registration Forms created by using the Multiple Registration Forms Module.

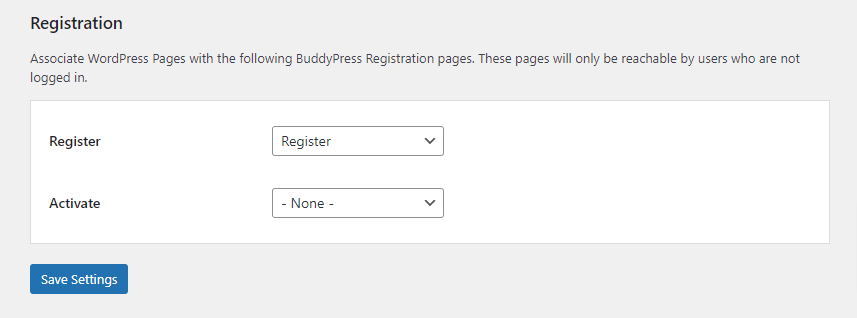
The selected Registration form will replace the Default BuddyPress Registration page. The Default BuddyPress Registration page is set up in Settings -> BuddyPress -> Pages -> Register option.
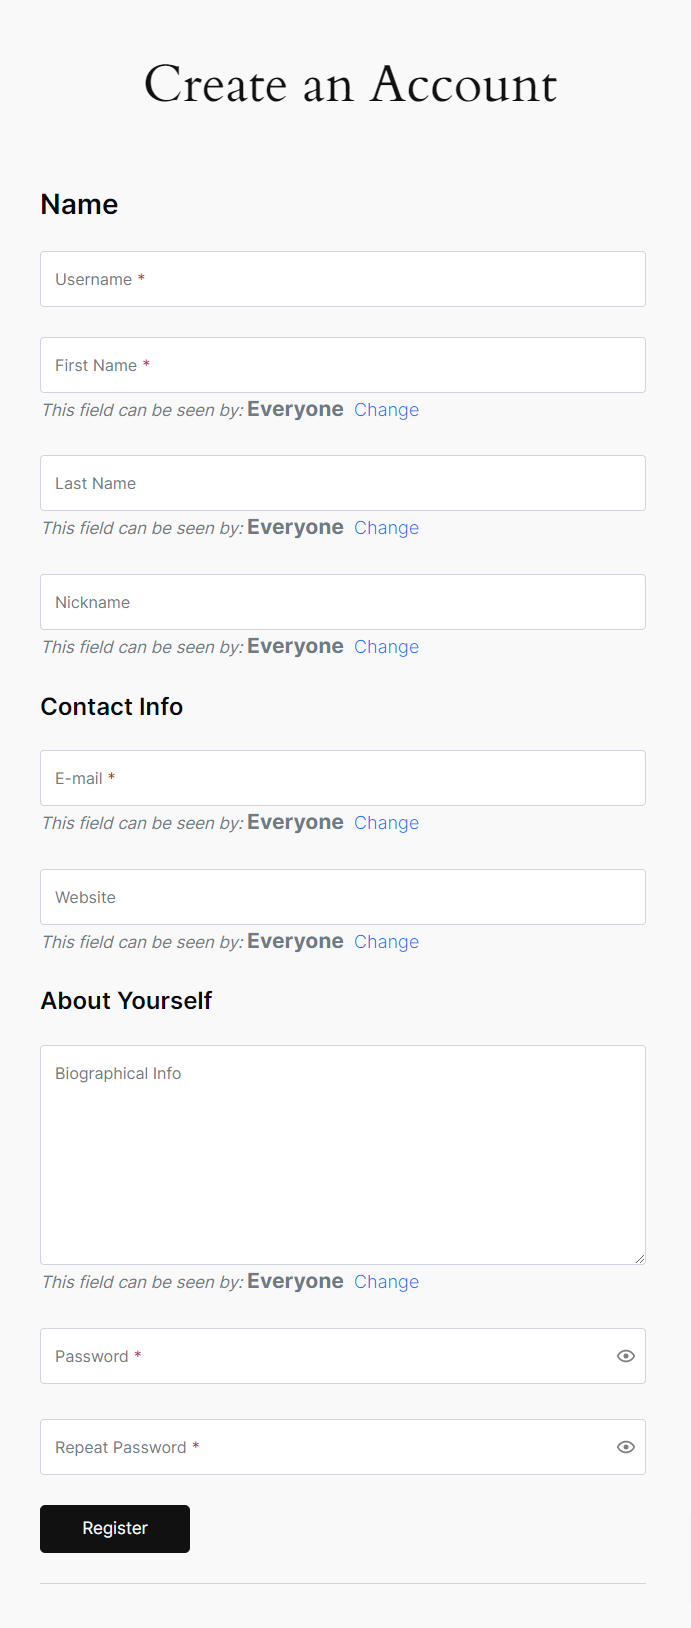
This is how the Default BuddyPress Registration Form looks like after we activate the BuddyPress Add-on. The Default BuddyPress Registration Form is replaced by the form selected inside the Registration Form option.
You can manage Profile Builder Default Fields and Extra Fields Types, displayed inside the Registration Form, if you go to Profile Builder -> Manage Fields.
If you are running a WordPress MultiSite and you want to Enable Blog Creation upon User Registration, you can do so by adding the Default – Blog Details field in Profile Builder -> Manage Fields.
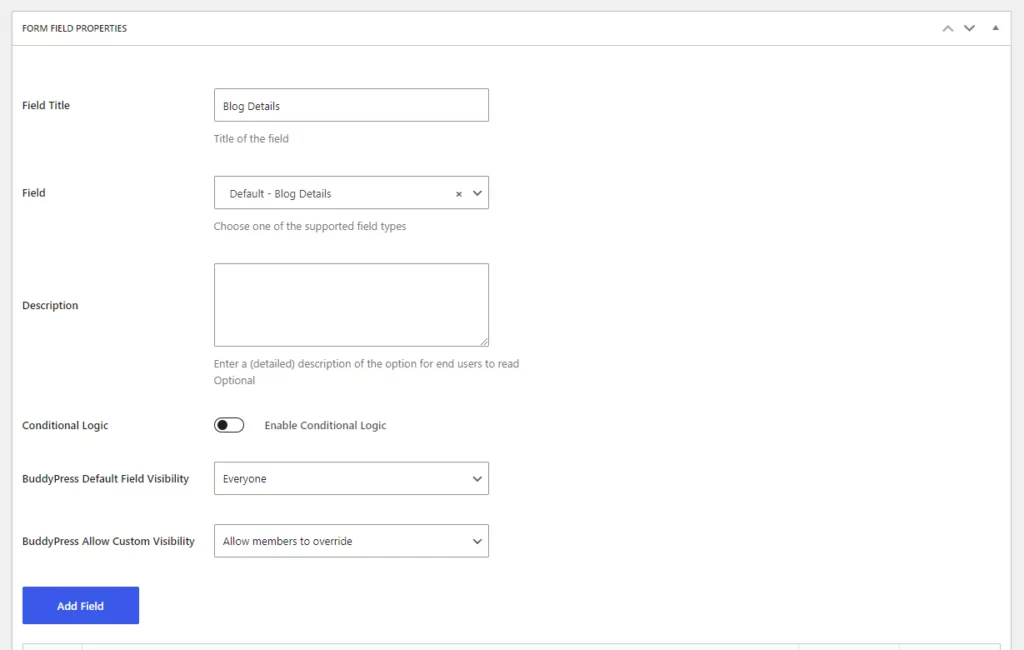
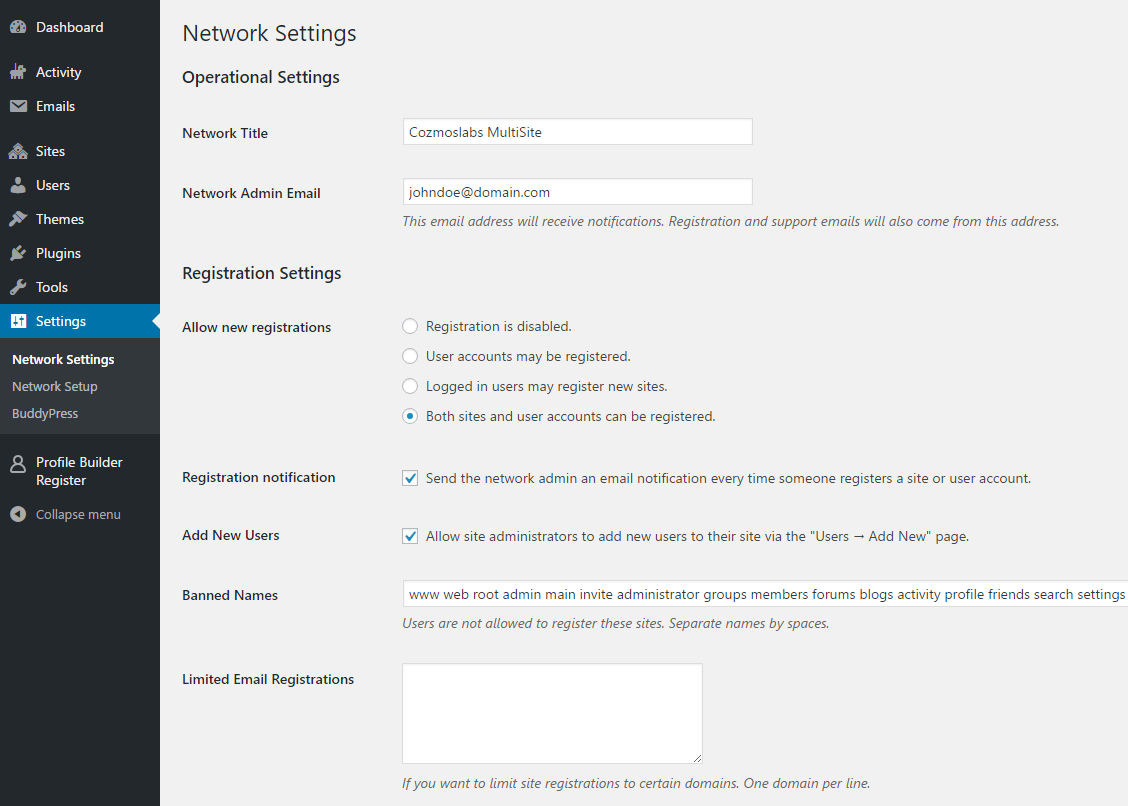
If you don’t see the “Default – Blog Details” field inside Profile Builder -> Manage Fields you will need to select the “Both sites and user accounts can be Registered” option found inside Network Admin -> Settings -> Network Settings -> Registration Settings -> Allow new registrations.
This is how the “Default – Blog Details” Field, created above, looks like in the Registration Form.
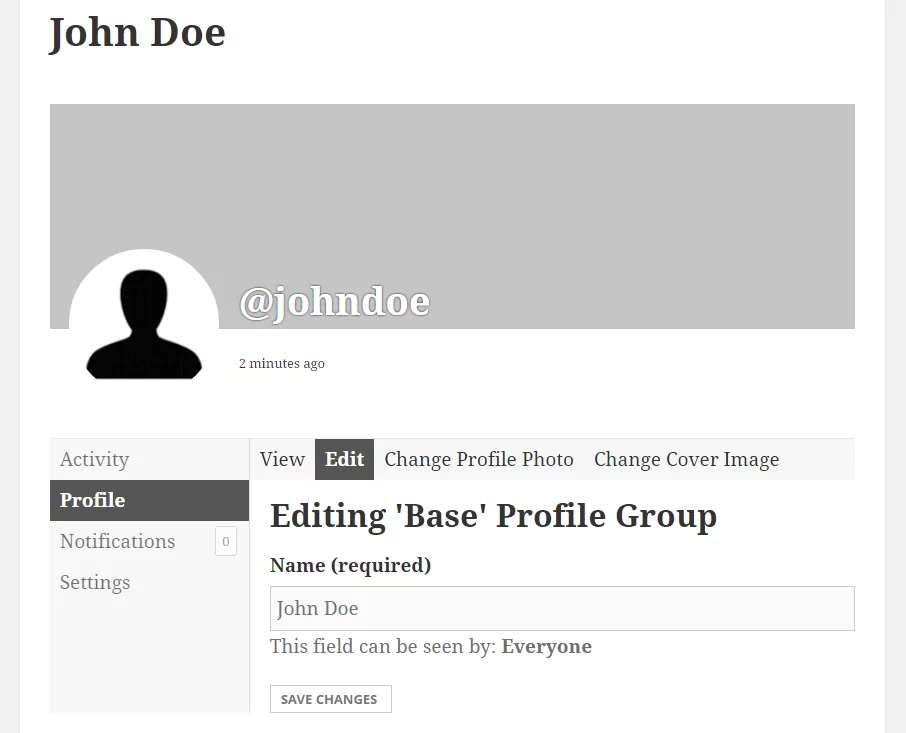
After you activate the BuddyPress Add-on the BuddyPress Edit Profile Form will be replaced by the Profile Builder Edit Profile Form. This is how the Default BuddyPress Edit Profile Form looks like.
Profile Builder’s Default Edit Profile Form is selected by default inside the Edit Profile form option. You can choose from other Custom Edit Profile Forms created by using the Multiple Edit Profile Forms Module.

The selected Edit Profile Form will replace the Default BuddyPress Edit Profile tab found inside the individual member page. Logged in go to the Profile -> Edit.
This is how the Default BuddyPress Edit Tab looks like after we activate the BuddyPress Add-on. The Default BuddyPress Edit tab is replaced by the form selected inside the Edit Profile Form option.
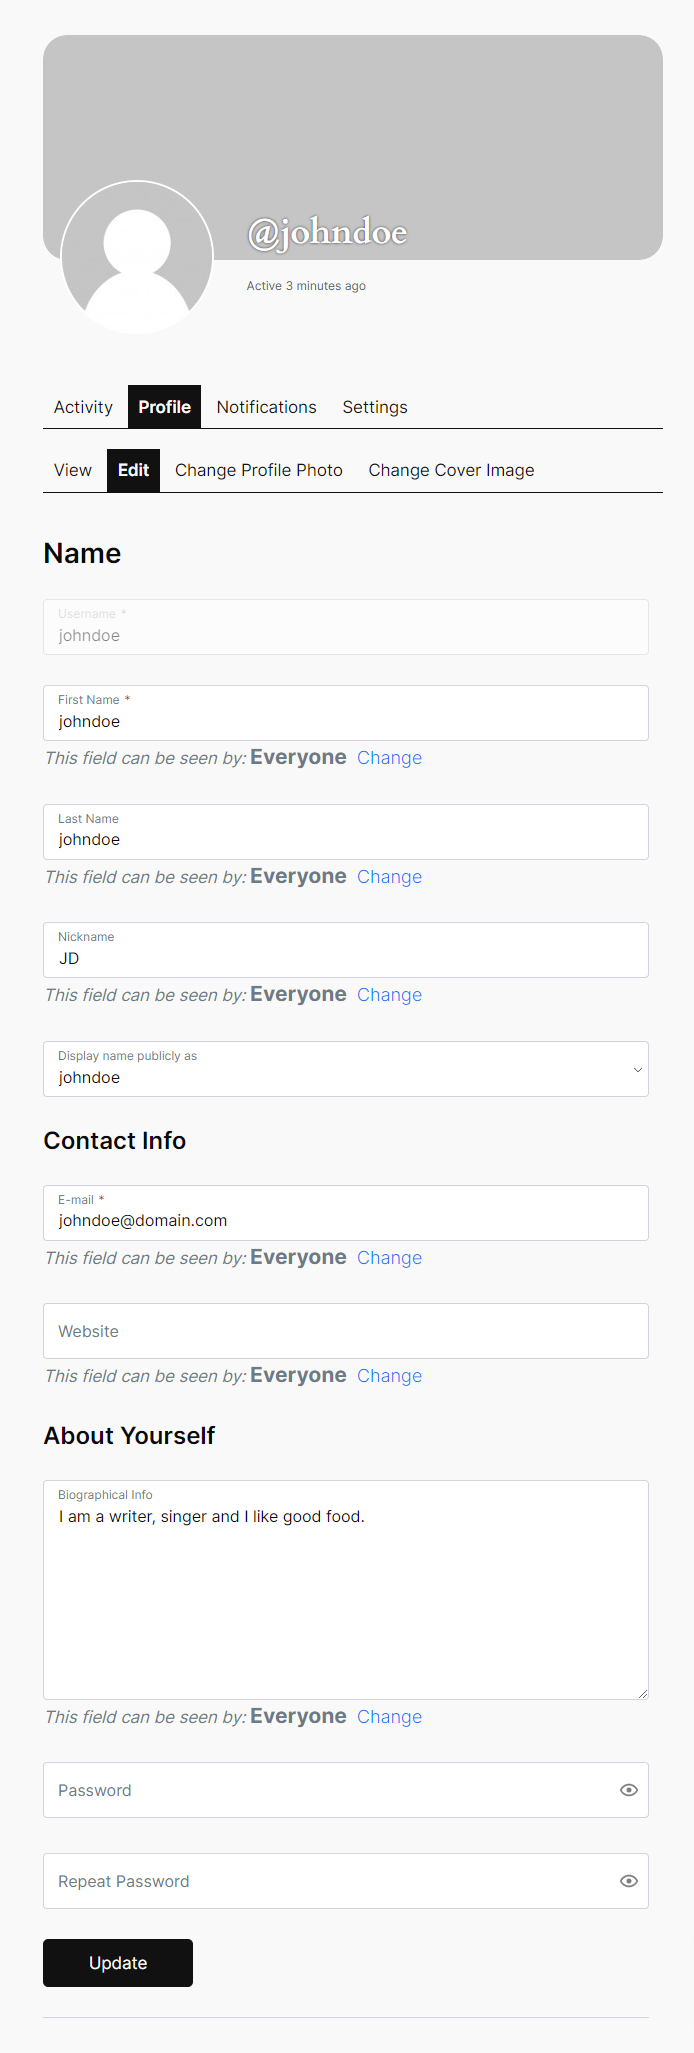
You can manage Profile Builder Default Fields and Extra Fields Types, displayed inside the Edit Profile Form, if you go to Profile Builder -> Manage Fields.
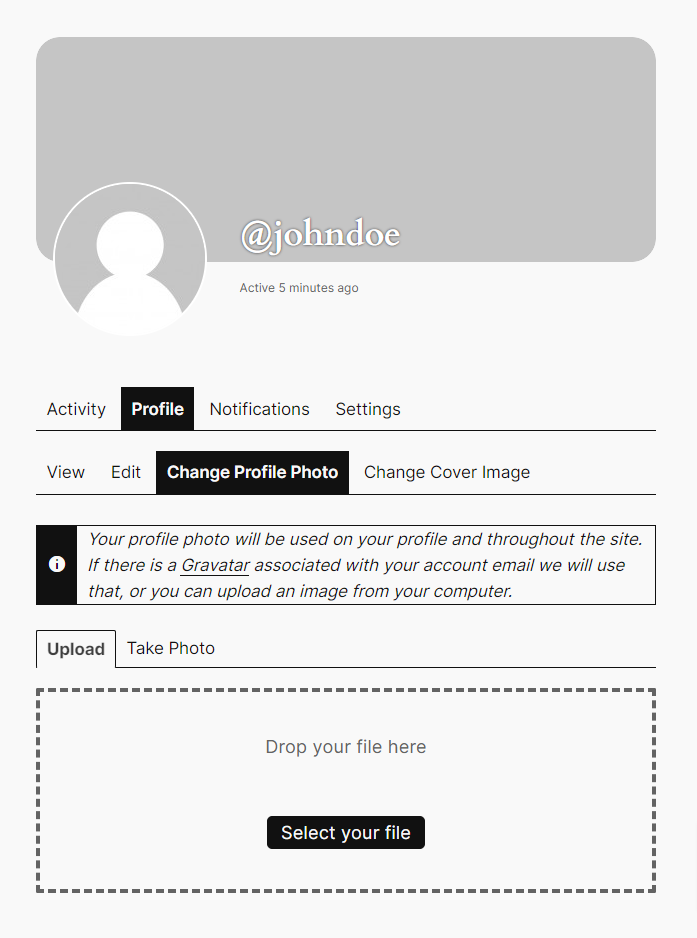
After you activate the BuddyPress Add-on, you will not be able to use the Profile Builder Avatar Upload Field. Profile Builder Avatar Upload field is disabled to allow the use of BuddyPress Avatar.
Users will be able to change their Profile Photo, after logging in, if they go to Profile -> Change Profile Photo -> Select your file.
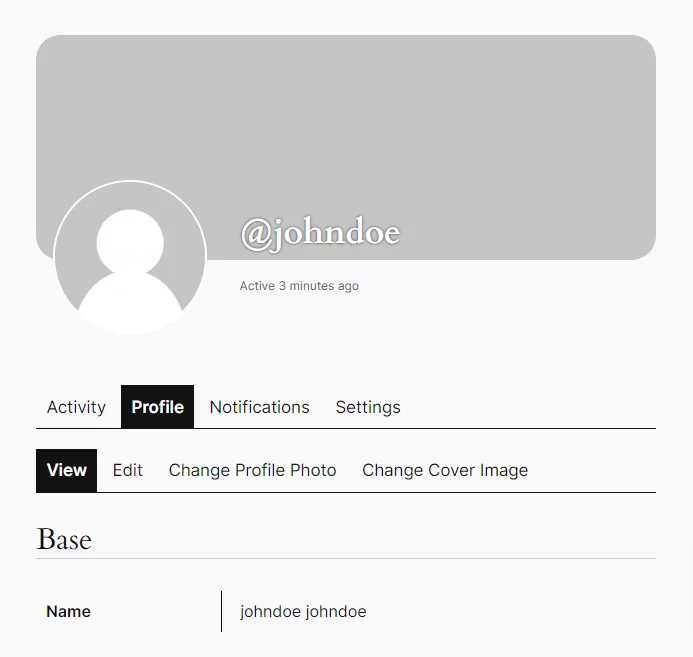
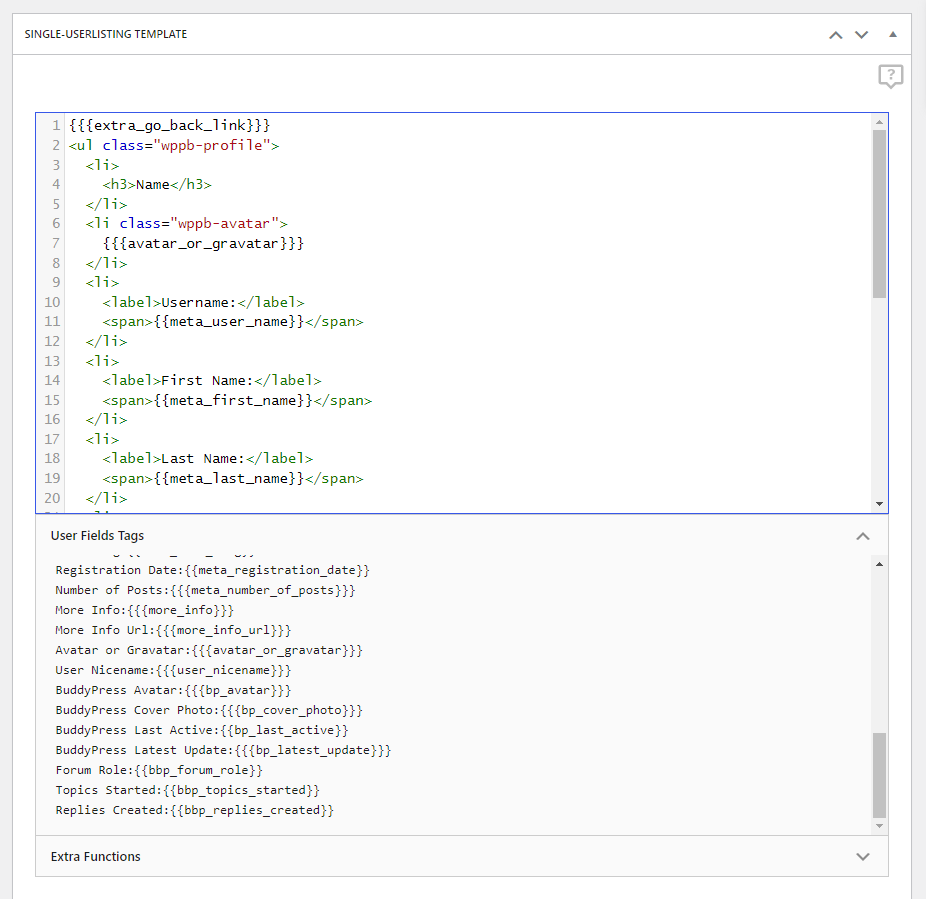
After you activate the BuddyPress Add-on the BuddyPress Profile View section will be replaced by the Profile Builder Single-Userlisting Template. This is how the Default BuddyPress Profile View section looks like.
From the submenu Profile Builder -> BuddyPress, you can choose which Single-Userlisting Template managed by Profile Builder should replace the Default BuddyPress User Profile View.

The selected User Listing Template will be used in the BuddyPress individual member page, in the Profile -> View section.
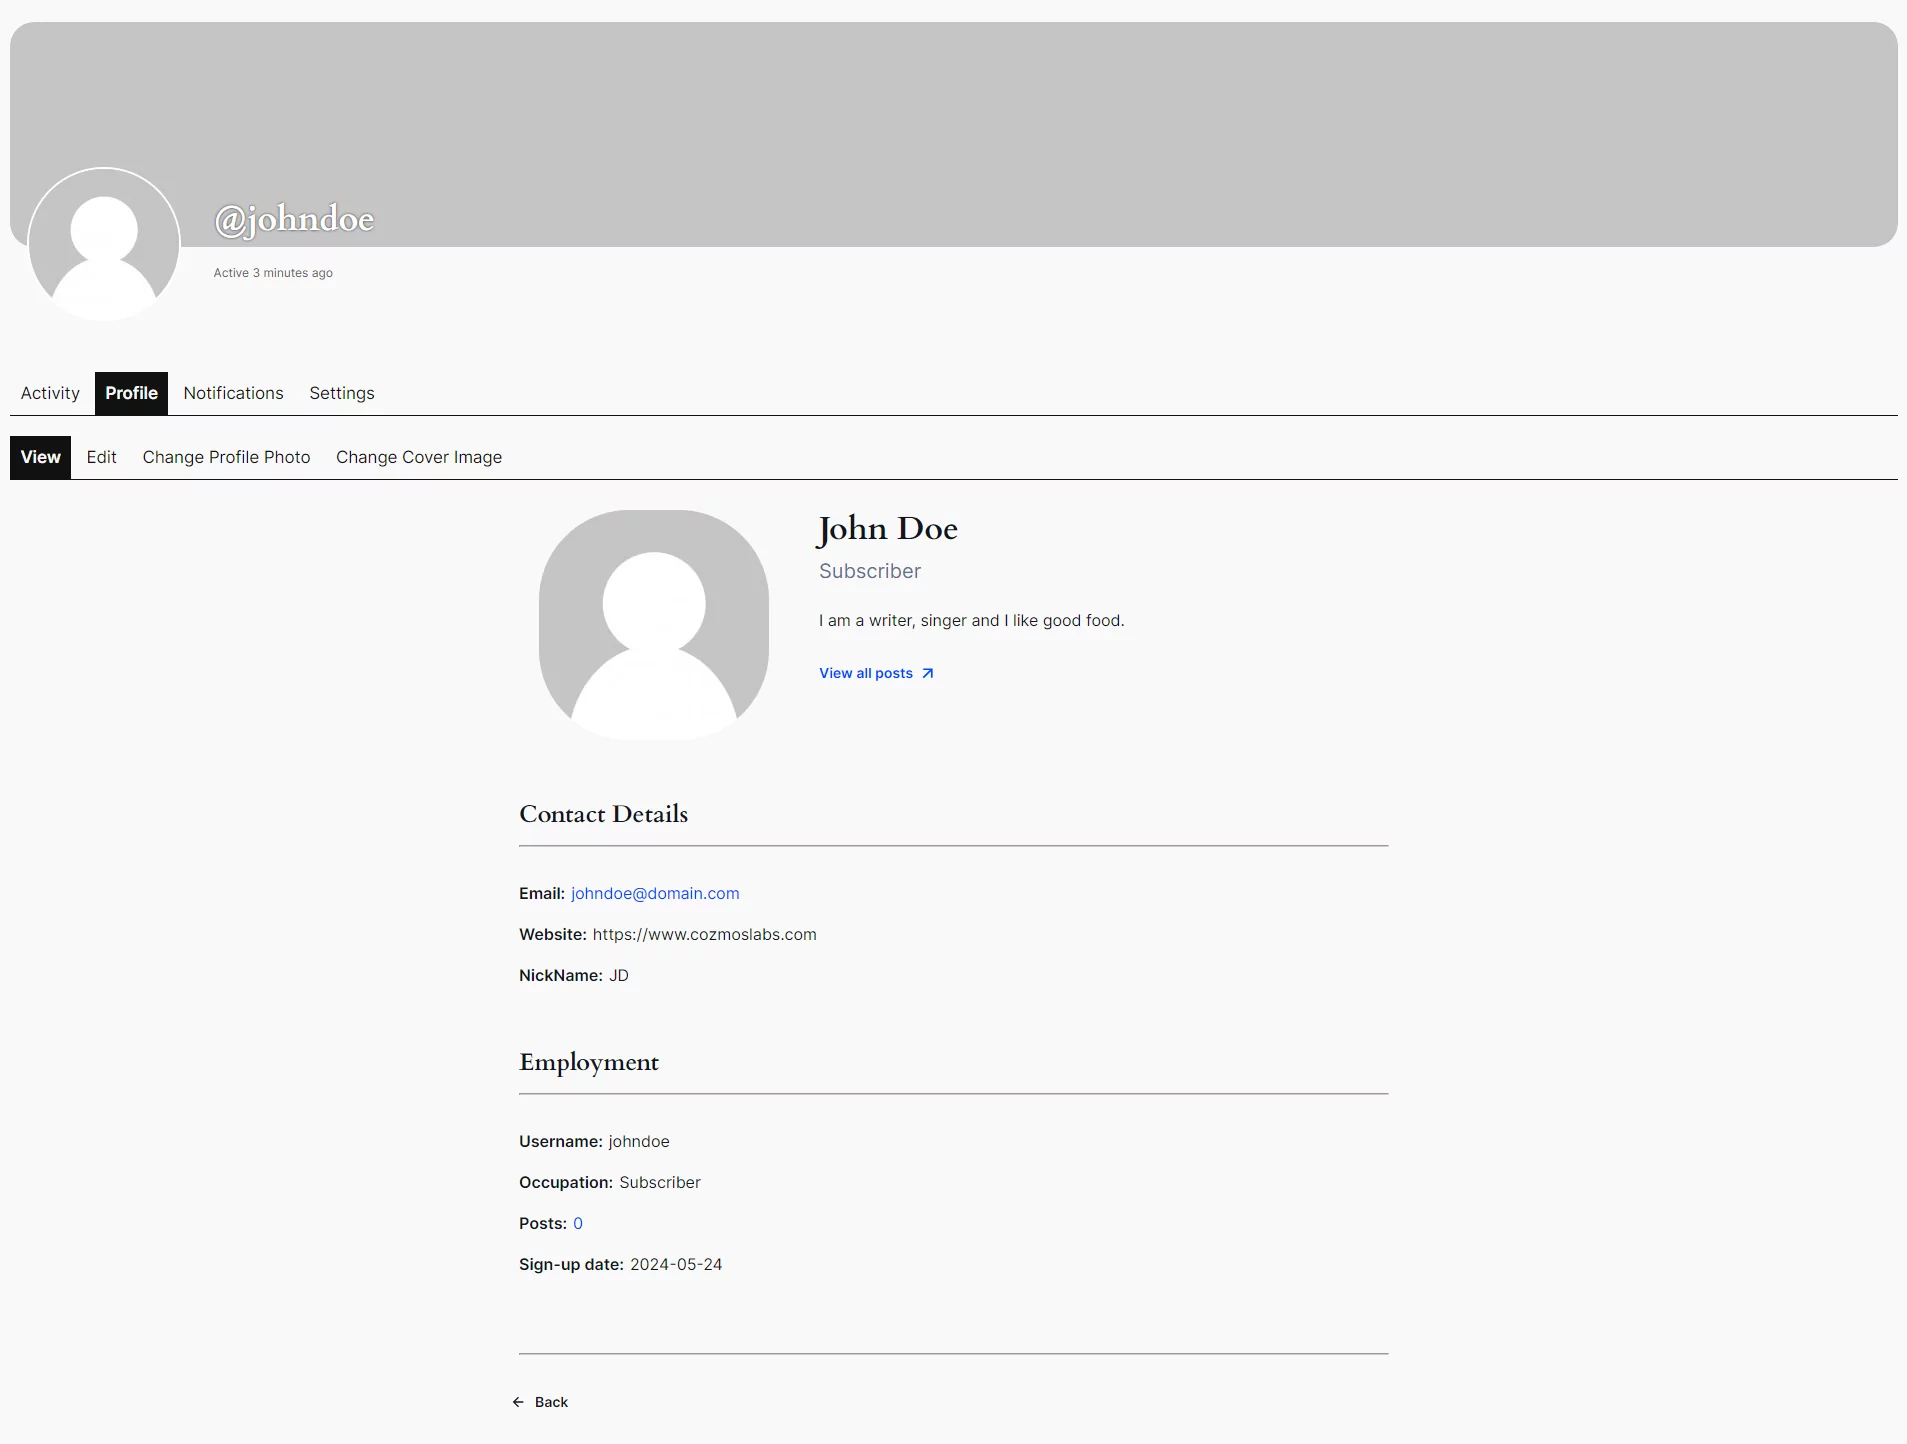
You can customize the selected Single-Userlisting template by going to Profile Builder -> User Listing -> Edit the “Default Userlisting for BuddyPress” User Listing.
After you activate the BuddyPress Add-on the BuddyPress Members listing will be replaced by the Profile Builder All-Userlisting Template. This is how the Default BuddyPress Members listing looks like.
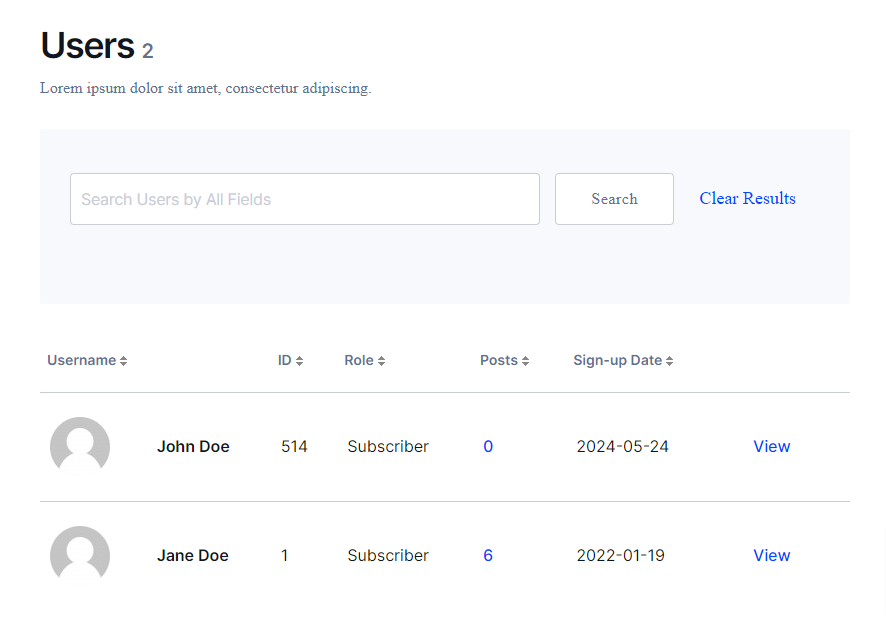
The “Enable PB User Listing on BuddyPress Members page” option is enabled by default. The All-Userlisting Template used will be the one selected above, at the User Listing template option.

The Default BuddyPress Members page is set up in Settings -> BuddyPress -> Pages -> Members option.
This is how the Default BuddyPress Members listing looks like after we activate the BuddyPress Add-on. The Default BuddyPress Members listing is replaced by the All-Userlisting Template.
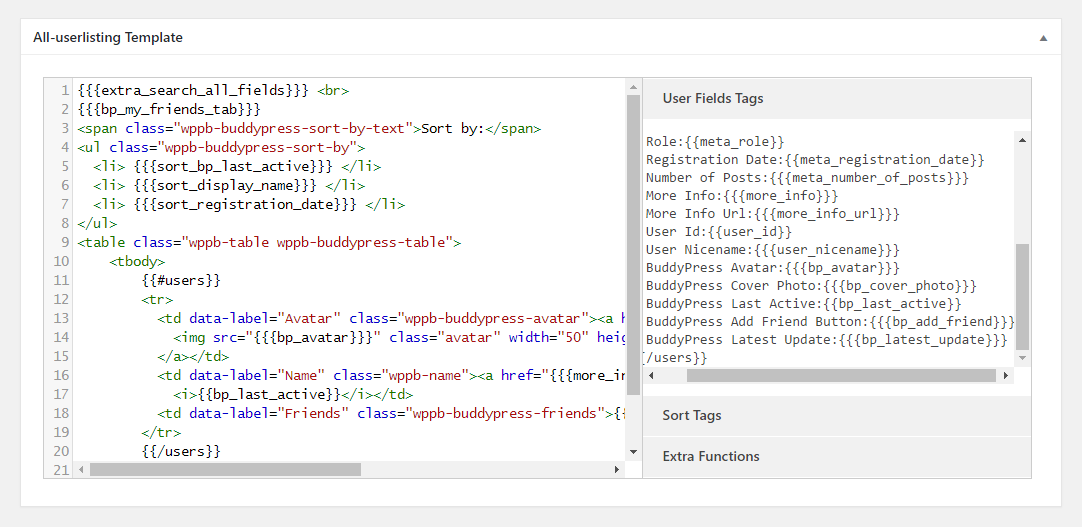
Several tags are available to use in the User Listing templates
| BuddyPress User Tags | Details |
|---|---|
| BuddyPress Avatar – {{{bp_avatar}}} | Returns the URL of the BuddyPress Avatar. Note – Because BuddyPress has an Avatar field, Profile Builder Avatar Upload Field is disabled |
| BuddyPress Cover Photo – {{{bp_cover_photo}}} | Returns the URL of the BuddyPress Avatar. |
| BuddyPress Last Active – {{bp_last_active}} | Returns a relative time since the user has been BuddyPress active. |
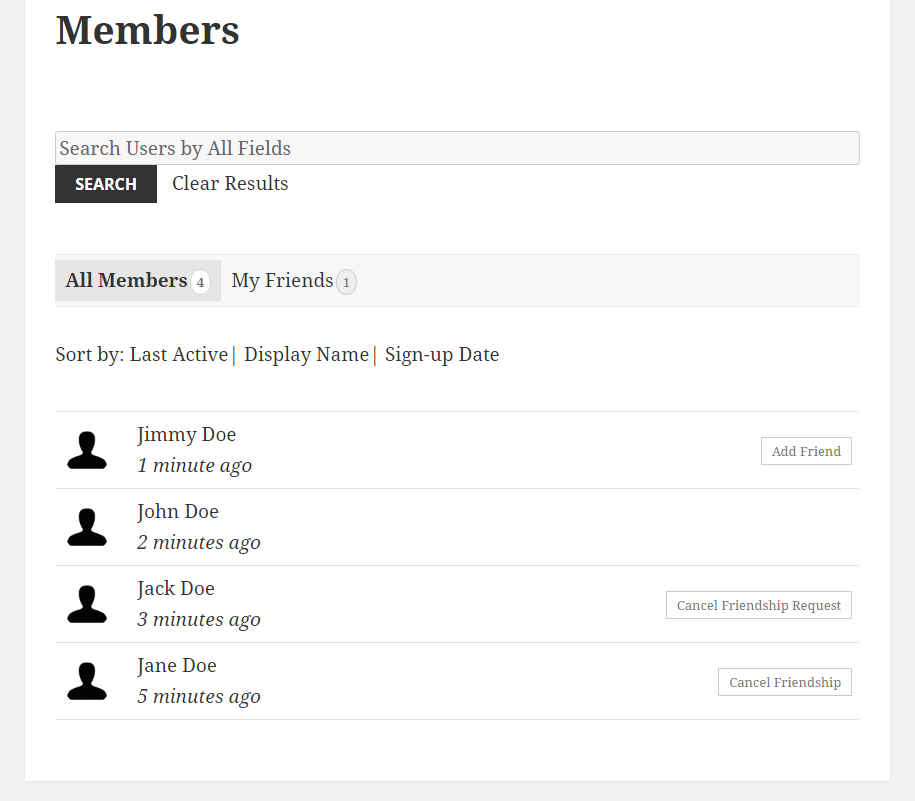
| BuddyPress Add Friend Button – {{{bp_add_friend}}} | Returns an appropriate button that allows a user to Add Friend, Cancel Friendship or Cancel Friendship Request. Note – To make this work enable the “Friend Connections” option |
| BuddyPress Latest Update – {{{bp_latest_update}}} | Returns the latest BuddyPress update, alongside a View link |
| BuddyPress Extra Functions | Details |
| BuddyPress Friends Tab – {{{bp_my_friends_tab}}} | Found in the Extra Functions tab, it can be used only in the All-Userlisting Template. It returns a bar with tabs for All Members and My Friends, that filter users accordingly. |
You can find the User Tags and the Extra Function if you go to Profile Builder -> User Listing -> Edit the “Default Userlisting for BuddyPress” -> All-Userlisting Template.
The BuddyPress plugin, by default, adds a “Log in” link in the Admin Bar and also in the Menu. These shortcuts will take you to the Default WordPress Log In form. Clicking on the Register link will take you to the BuddyPress Registration form.
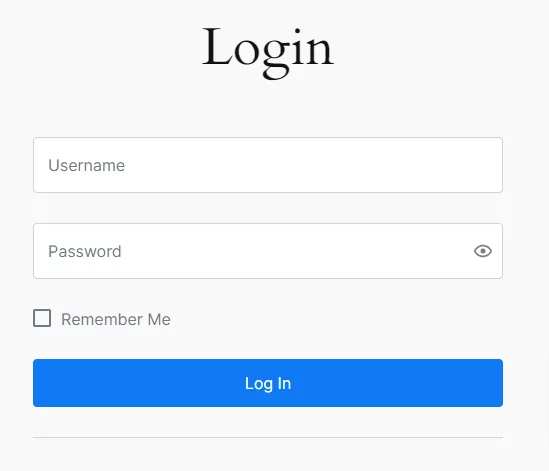
If you want to replace it with the Front End Login Form created via Profile Builder, you need to follow these steps:
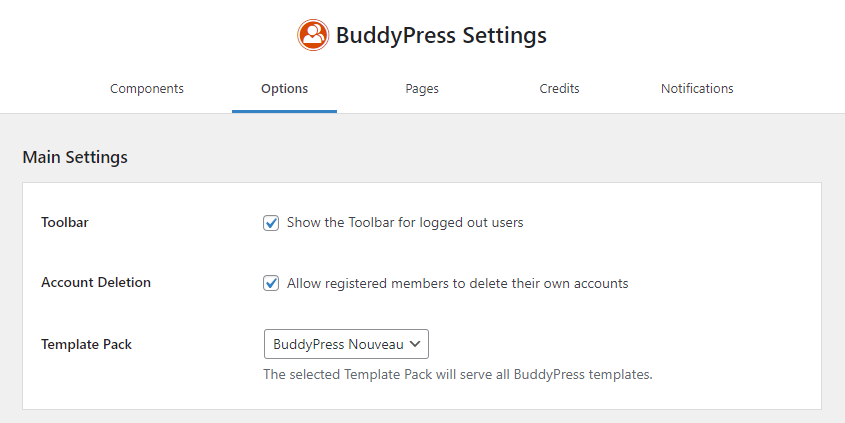
You can disable the Toolbar if you go to Settings -> BuddyPress -> Options -> Main Settings -> Uncheck the “Show the Toolbar for logged out users” option
Fields can be configured to have a certain Visibility Option, in the same way BuddyPress allows it.
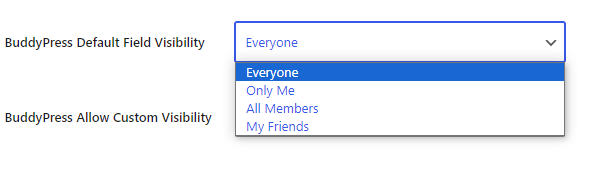
In Profile Builder -> Manage Fields, when editing a field, you can set up the BuddyPress Default Field Visibility and the BuddyPress Allow Custom Visibility options.
BuddyPress Default Field Visibility has the following options:
BuddyPress Allow Custom Visibility has the following options:

The fields that allow field visibility options are:
Extra Field TypesFor the entire set of fields, not individually.
| Default Field Types | |||
|---|---|---|---|
| Default First Name | Default Last Name | Default Nickname | Default E-mail |
| Default Website | Default Biographical Info | ||
| Input | Number | Textarea | WYSIWYG |
| Phone | Select | Select (Multiple) | Select (Country) |
| Select (Timezone) | Select (User Role) | Select (Currency) | Select (CPT) |
| Checkbox | Radio | Upload | Datepicker |
| Timepicker | Colorpicker | Map | Select2 |
| Select2 (Multiple) | |||
| Repeater | |||
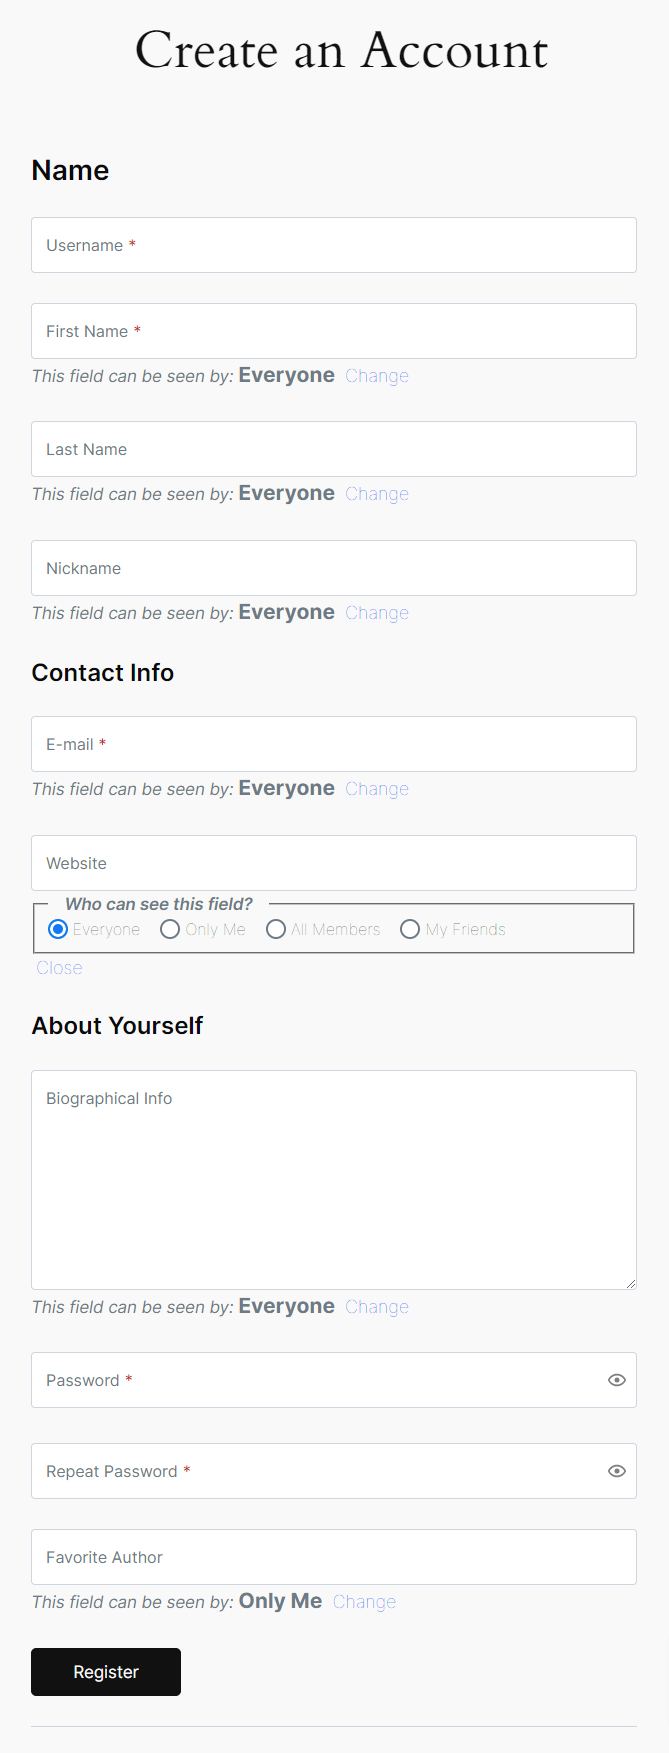
If allowed, the user can decide each field visibility on both Registration and on Edit Profile fields. The field will therefore be visible on Single Profile View and on All-Userlisting, based on each individual field of each user.
In our case, the Favorite Author field is enforced by the “Only Me” option.
This will hide the entire HTML element (<li>, <div>, etc.) and its content, based on the field with the meta name specified in the attribute bp_visibility, for the user specified in the user_id attribute.
Similarly, for Single User Listing templates, you can hide the entire HTML element, based on the visibility of the field with the meta-name specified in the bp_visibility attribute. The user_id attribute is not required here.
You will need to use some custom code in order to hide “This field can be seen by” notification and also to set the “BuddyPress Allow Custom Visibility” option to “Enforce field visibility”:
1. Create an empty plugin like this: https://gist.github.com/sareiodata/76f701e01db6685829db
2. Add the following code to the end of it:
/*
 * Filter to hide "This field can be seen by" notification displayed under the fields
 * Works when BuddyPress Allow Custom Visibility option is set to "Enforce field visibility"
 */

function wppbc_bdp_frontend_field_visibility_settings( $output, $field, $form_id, $form_type, $called_from ) {
    if ( ! wppb_in_bdp_allow_custom_visibility( $field ) ){
        $key_position = strpos ( $output, '<li class="wppb_bdp_visibility_settings">' );
        return substr( $output, 0, $key_position );
    }
    return $output;
}
add_filter( 'wppb_output_after_form_field', 'wppbc_bdp_frontend_field_visibility_settings', 11, 5 );
3. Install this plugin via FTP (copy it inside wp-content/plugins) or create a zip archive with it and install it via the WordPress plugin upload functionality
Create beautiful front-end registration and profile forms with custom fields. Setup member directories, custom redirects, cutomize user emails & more using the all in one user management plugin.
Get Profile BuilderCombine the power of Profile Builder with Paid Member Subscriptions to set up user registration, memberships, and recurring revenue.
Get 25% off with the bundle
