Profile Builder is an all-in-one user registration and management plugin for WordPress.
It gives you the possibility to customize your website by adding front-end Register, Login, and Edit Profile forms.
Profile Builder comes in three premium versions: Basic, Pro, and Agency. All the features can be seen here.
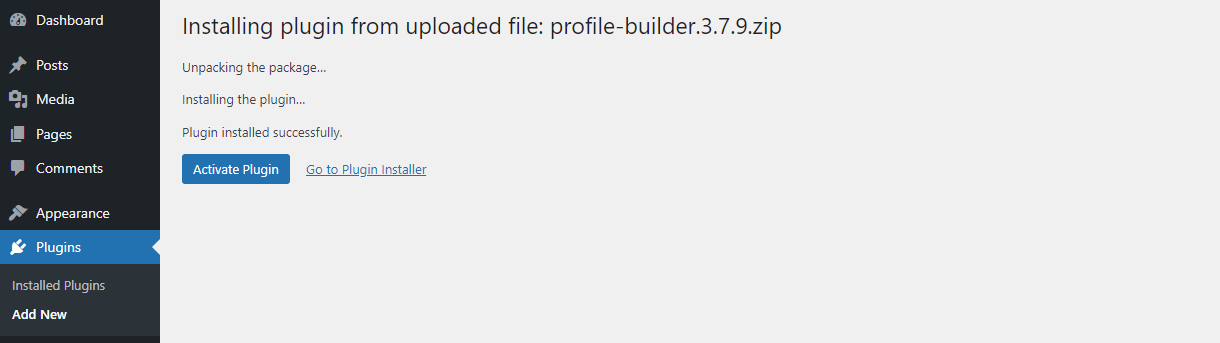
Profile Builder installs and is activated just like any other WordPress plugin.
After you download the plugin, you’ll be able to choose the way you install it:

After the installation completes, just press Activate Plugin and the plugin will be ready for use.
Starting with version 3.7.2 we have changed the way individual Profile Builder add-ons are used by simplifying the process and re-packaging all premium Add-ons into 3 different premium versions: Basic, Pro, and Agency.
When you login into your Cozmoslabs account you will see two buttons:
1. Main Plugin
2. The button associated with the paid version – e.g. if you have the PRO version you will see “Pro Download”.

You need to download the paid version and install it on your site.
In the end, you need to have two plugins installed:
1. Profile Builder – This can be downloaded from the “Main Plugin” button
2. Profile Builder Basic/Pro/Agency – This can be downloaded from the ” Basic/Pro/Agency Download” button

All you need to do when first setting up your plugin is to create your pages with the available shortcodes and configure the settings to your liking. After going through these steps you are ready to allow users to register to your website.
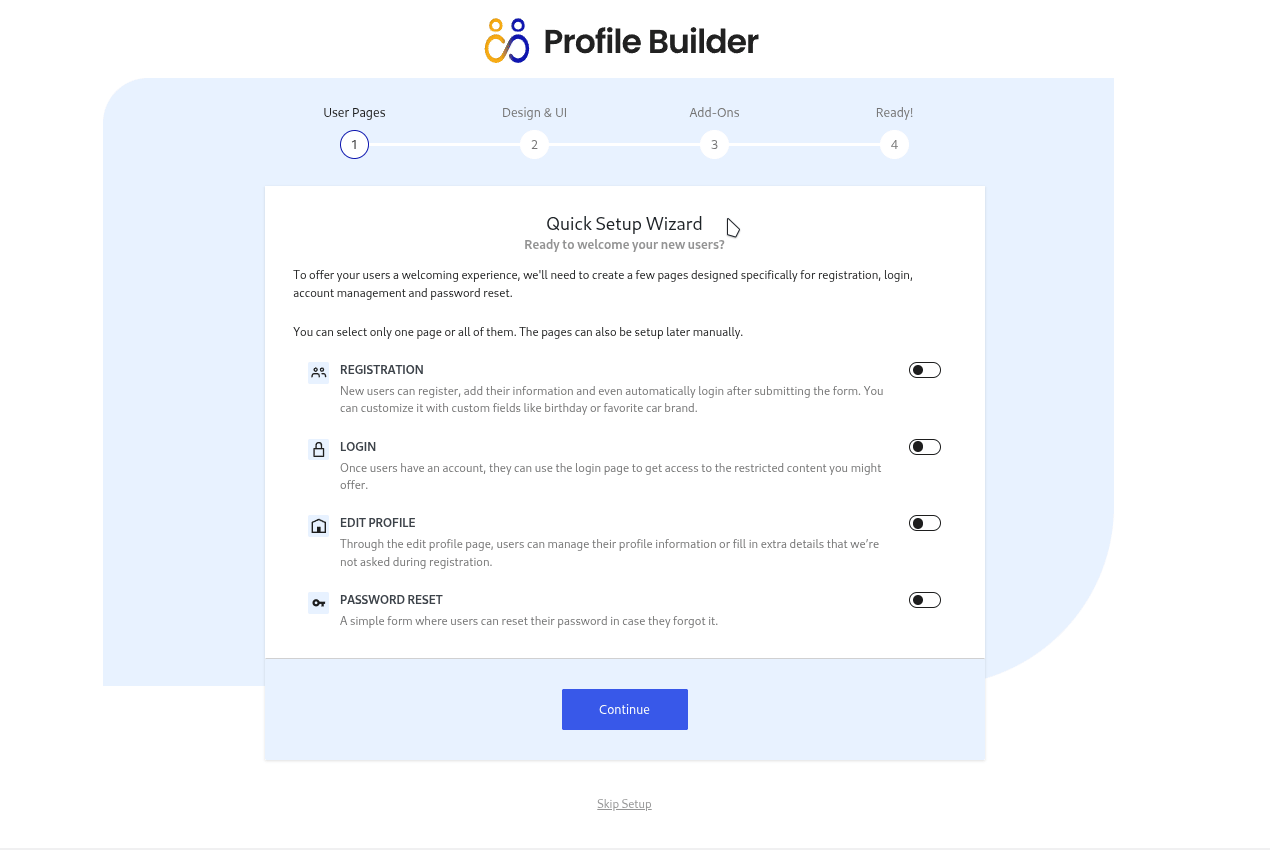
When the plugin is activated for the first time, it will show the Setup Wizard page. The setup page helps you configure the plugin, having the ability to automatically create all the pages and select a design. Alongside this, some other useful settings will be presented.
You still need to create your custom Form Fields but the Setup Wizard will give you a nice head start.
The Basic Information tab gives you an overview of all the Profile Builder features and how to best make use of them.
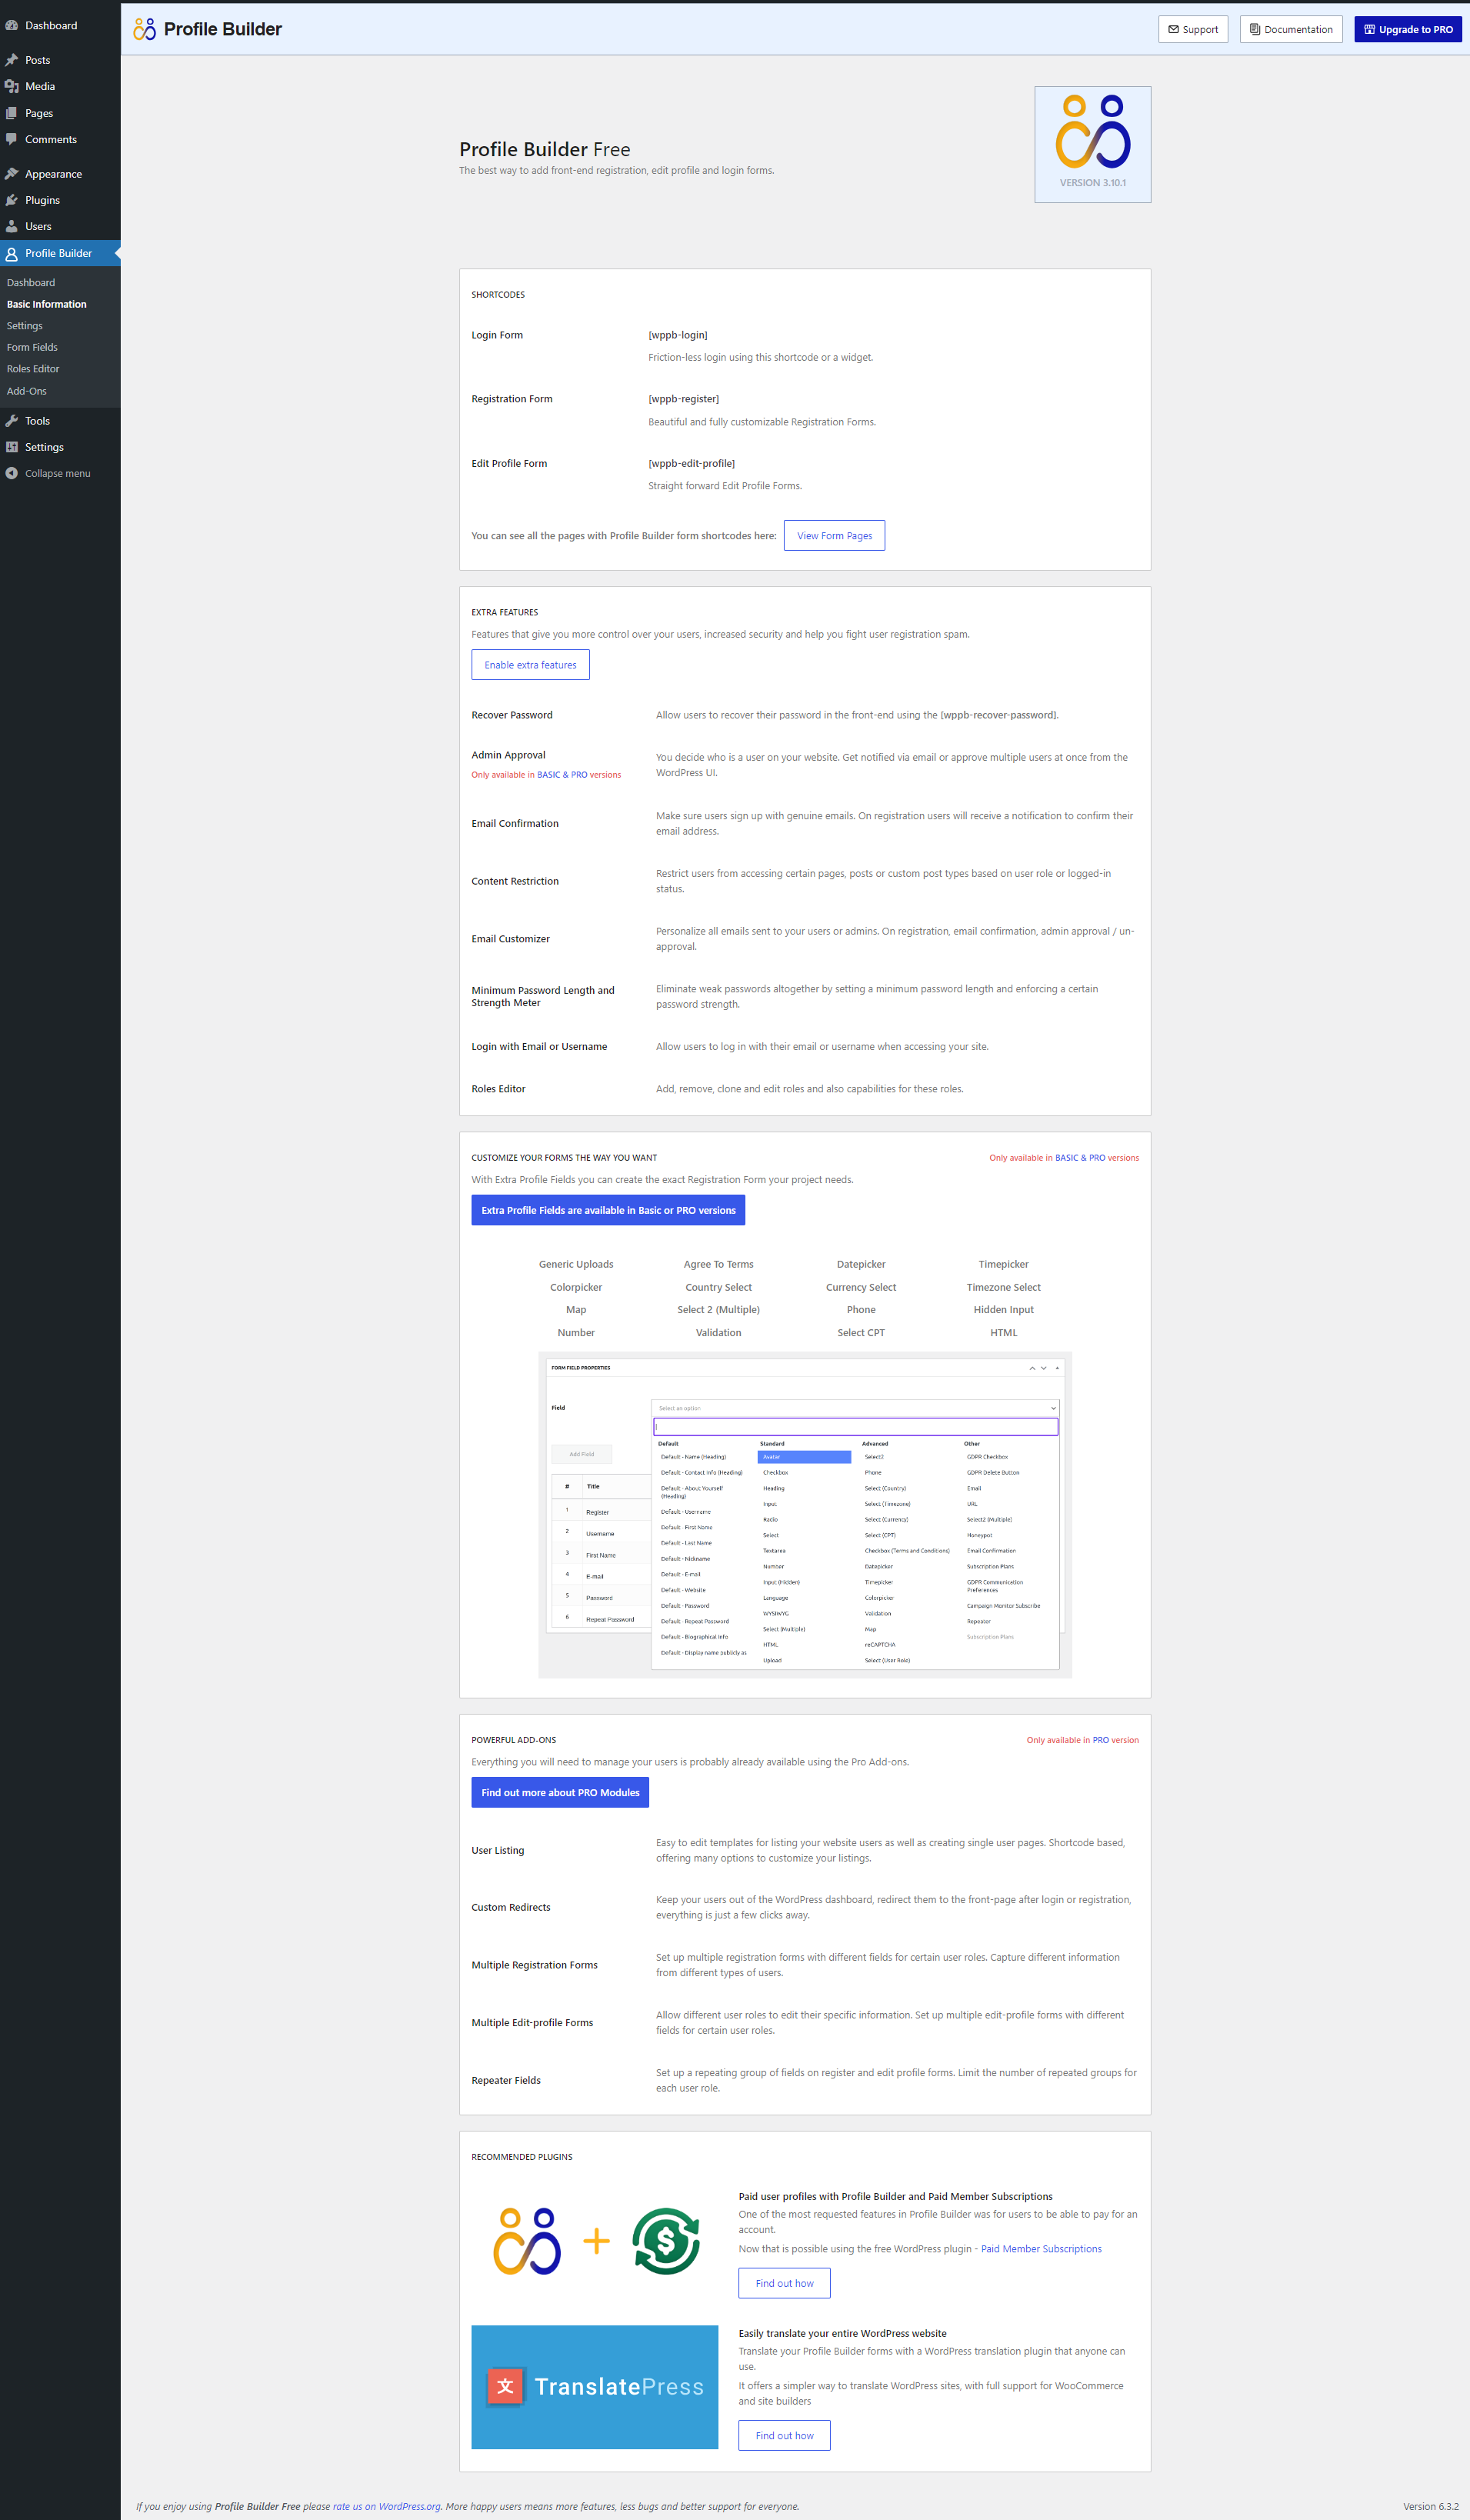
This is a quick start guide on how to create your front-end Login, Register and Edit Profile forms, Manage and Add Extra Fields, activate your Modules, as well as make use of the Extra Features from Profile Builder.
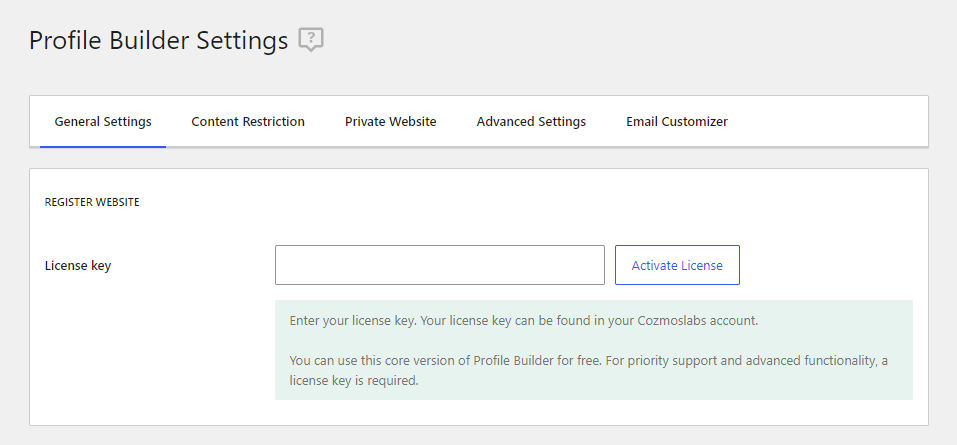
Now that you’ve acquired a copy of Profile Builder Pro or Basic, you should take the time and register it with the serial number you received.
You can find the serial number listed in your account for each of the purchased downloads.
Simply go to the Profile Builder → Settings → General Settings → Register Website section to activate it. The license will let you download updates released for the premium versions, bug fixes and also access premium support.
With Profile Builder you can create the Register, Edit Profile, Log in, and Recover Password forms in four ways:
Create beautiful front-end registration and profile forms with custom fields. Setup member directories, custom redirects, cutomize user emails & more using the all in one user management plugin.
Get Profile BuilderCombine the power of Profile Builder with Paid Member Subscriptions to set up user registration, memberships, and recurring revenue.
Get 25% off with the bundle
