
The Form Builder lets you build your Registration and Edit Profile forms visually. Pick fields from the inserter, arrange them on the canvas, and edit each one in place. The editor shows the same layout your visitors see on the front end.
Existing forms and fields carry over automatically, and live forms keep rendering as before.
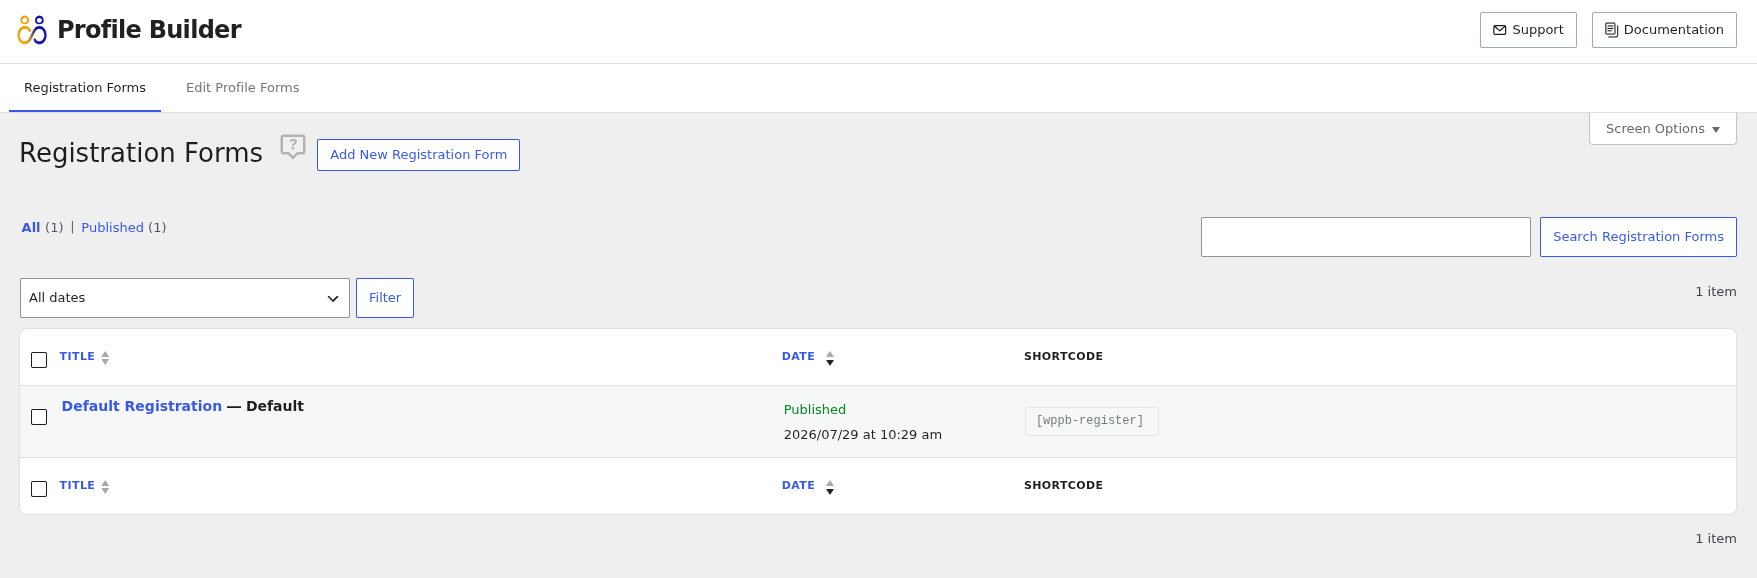
Go to Dashboard → Profile Builder → Forms.
The list screen has two tabs:
Each row shows the form title and a Shortcode column with a click-to-copy field. The shortcode only appears once a form is published.
Field management happens inside the form editor.
Profile Builder creates two forms for you automatically:
Both carry a Default badge in the list, come populated with your existing fields, and cannot be deleted.
The bare shortcodes always render these two. [wppb-register] and [wppb-edit-profile] with no extra parameters point at them no matter what you rename the forms to.
Click Add New Registration Form or Add New Edit Profile Form at the top of the list screen.
New Registration forms start with Username, E-mail and Password already on the canvas. These three are required on every Registration form and can’t be removed.
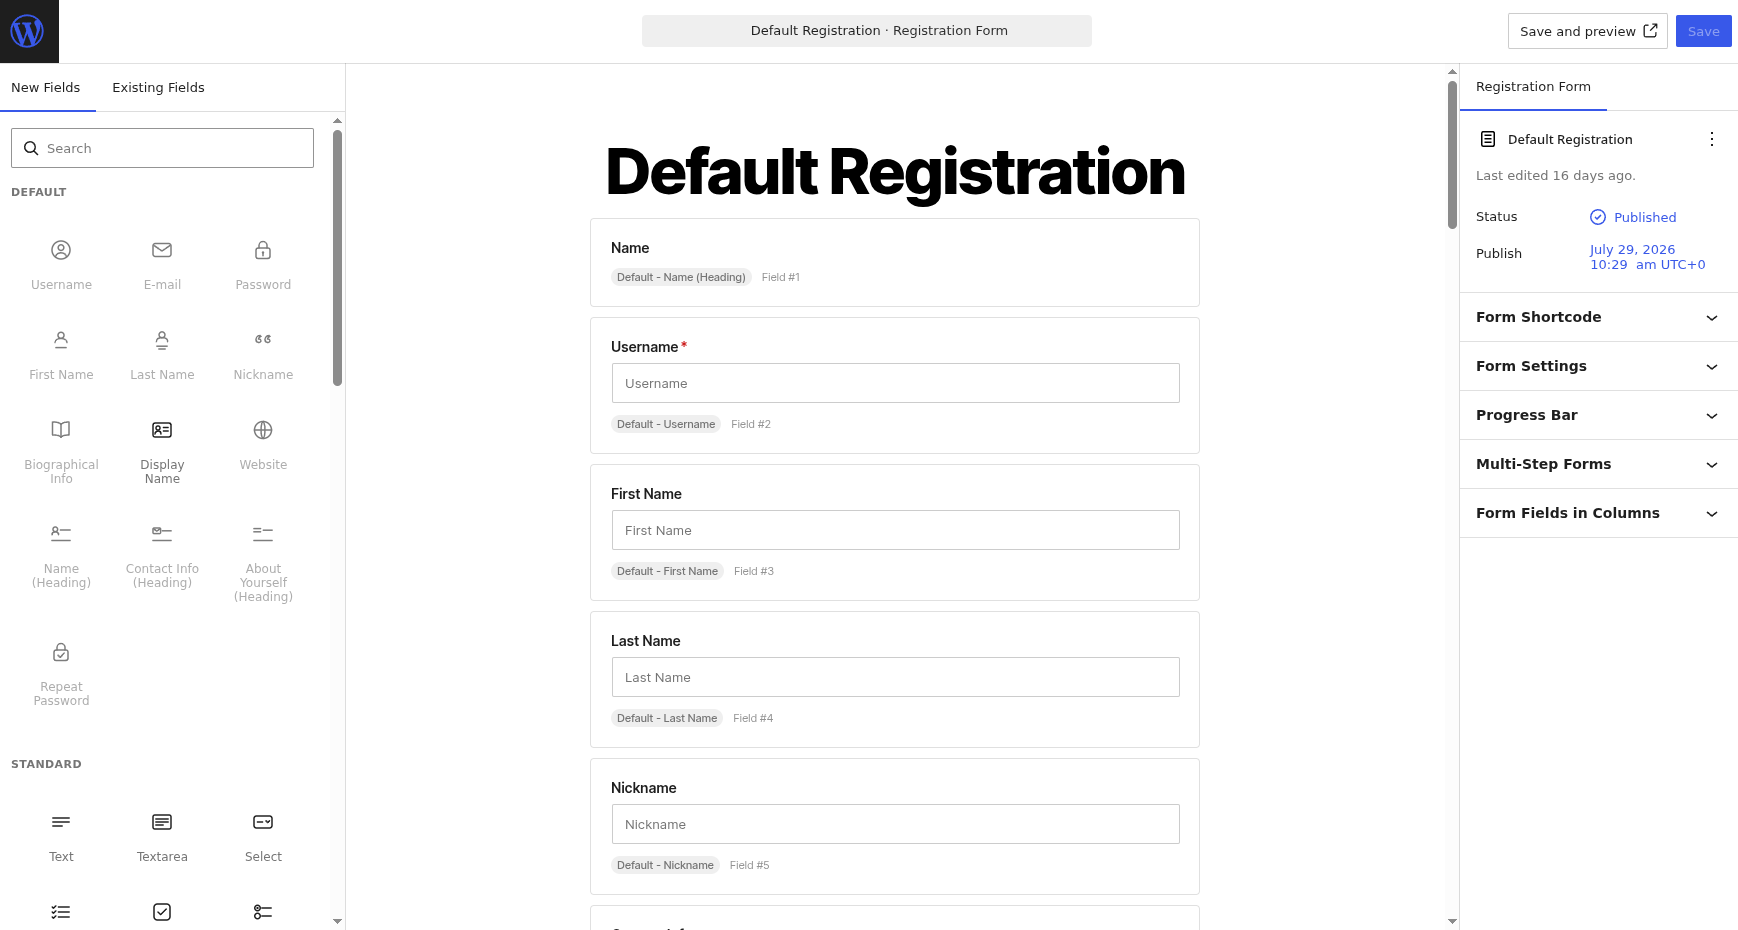
The panel on the left has three tabs:
You can also click the dashed Add field button at the bottom of the canvas, or the + that appears between two fields, to insert at an exact position.
Some fields can only be used once per form, such as Username, E-mail and the section headings. Once they’re in the form they appear greyed out in the inserter.
The Existing Fields tab is a searchable library of every field on your site. Use the Search box and the Filter fields dropdown (All fields / In this form / Not in this form) to find what you need.
Each card shows the field’s type, meta name and ID, and gives you three actions:
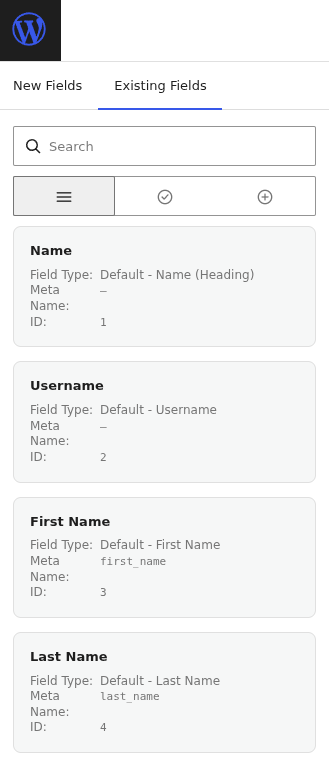
This is how you keep one field, say a “Company” text field, in sync across several forms. Edit it once and the change applies everywhere it’s used.
Drag fields up and down the canvas to reorder them. Each field renders as a card showing its label, a live preview of the control, its description, and its field type.
To remove a field from the form, select it and click Delete in the block toolbar. This only removes it from the current form.
Select any field on the canvas to open the Field Settings sidebar.
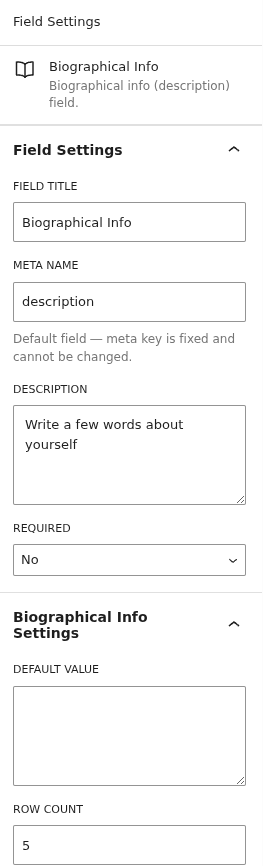
Every field shares these settings:
Below those come the settings specific to the field type, such as Options and Labels for Select, Radio and Checkbox fields, or the date format for the Datepicker. After those sit the Conditional Logic, Field Visibility, Admin Approval and Additional Settings panels.
The standard WordPress user profile fields: Username, E-mail, Password, Repeat Password, First Name, Last Name, Nickname, Display Name, Website and Biographical Info, plus the Name, Contact Info and About Yourself section headings.
Text, Textarea, Number, Select, Select (Multiple), Radio, Checkbox, Heading, HTML, Upload, WYSIWYG, Avatar, International Telephone Input, Input (Hidden) and Language.
Datepicker, Timepicker, Colorpicker, Phone, Map, Additional Map, Select2, Select (Country), Select (Currency), Select (CPT), Select (Taxonomy), Select (Timezone), Select (User Role), Validation, Terms and Conditions, reCAPTCHA, Turnstile and Blog Details.
Email, Email Confirmation, URL, Select2 (Multiple), Repeater, Honeypot, GDPR Checkbox, GDPR Communication Preferences and GDPR Delete Button, plus the Paid Member Subscriptions Subscription Plans and Billing Fields.
Columns, Step Break and Progress Bar. These blocks shape the form rather than collect data, and each has its own section below.
The Form Settings panel in the document sidebar covers what happens after submission:
https://www.example.comRegistration forms also have:
Click Save and preview in the top bar. Profile Builder saves the form and opens it in a new tab, rendered exactly as your visitors will see it.
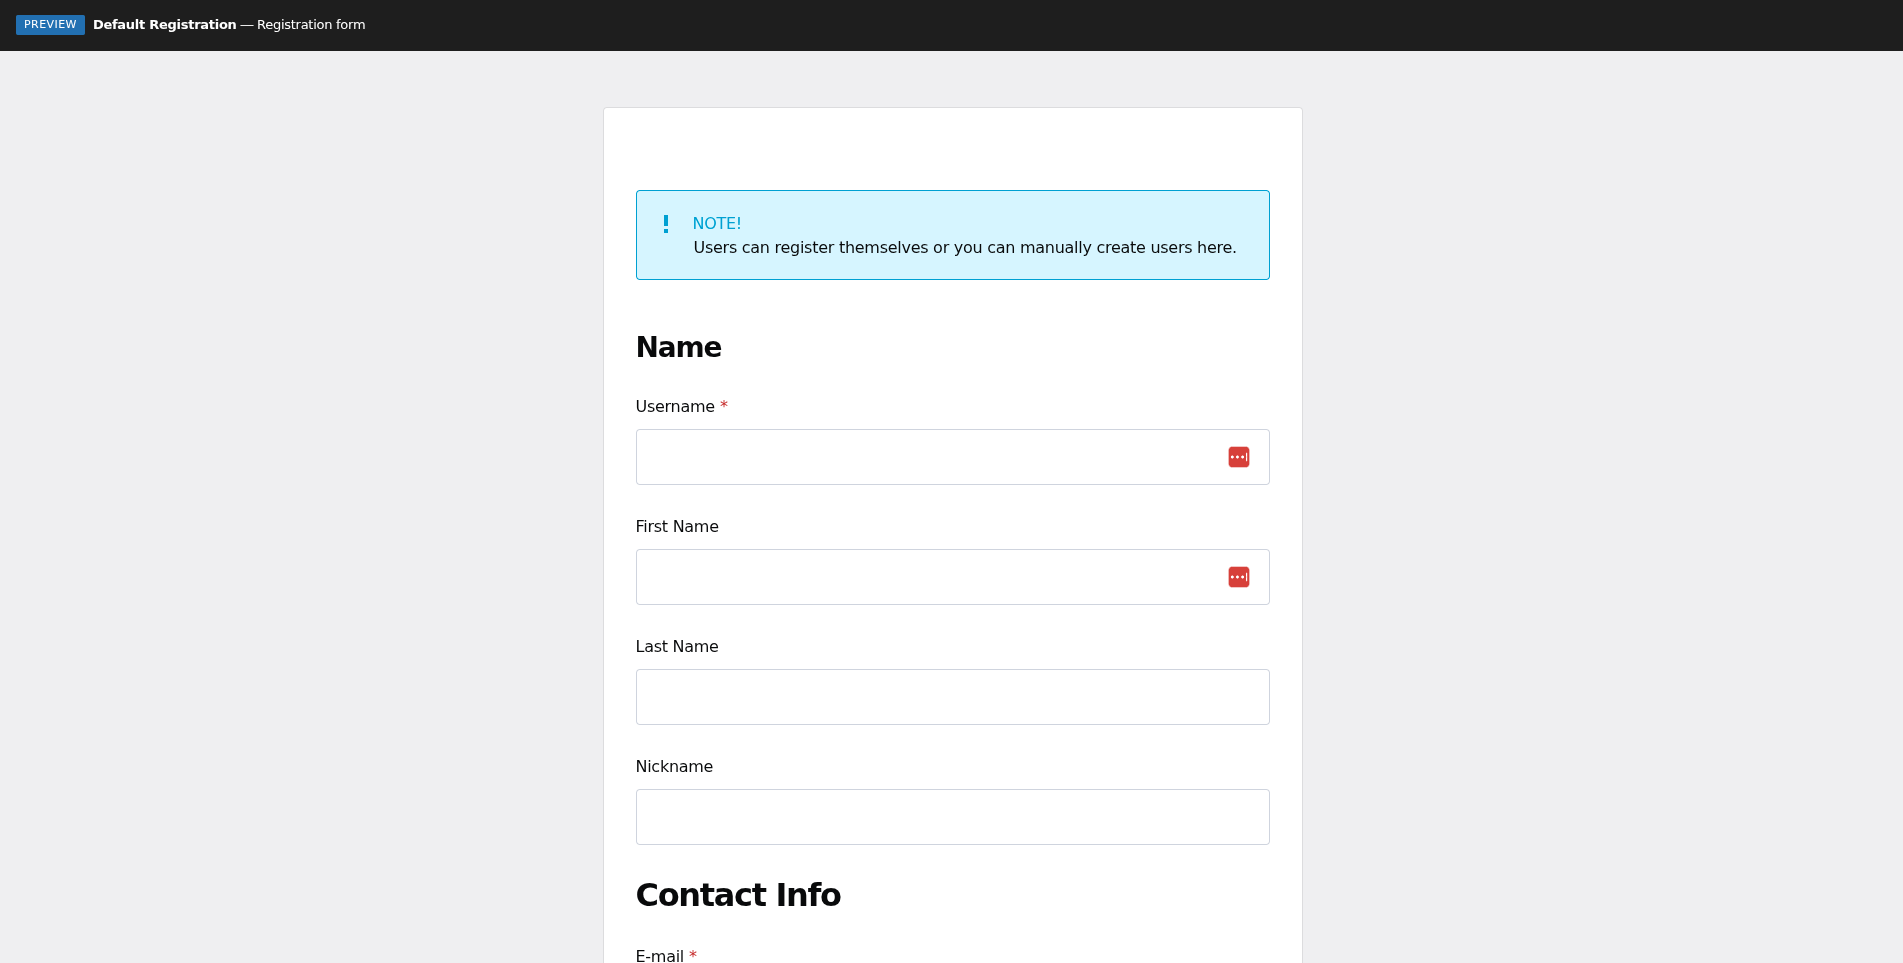
Submitting is disabled in preview mode, so you can safely try out a Registration form without creating a user.
Publish the form first. Unpublished forms are not offered anywhere until they go live.
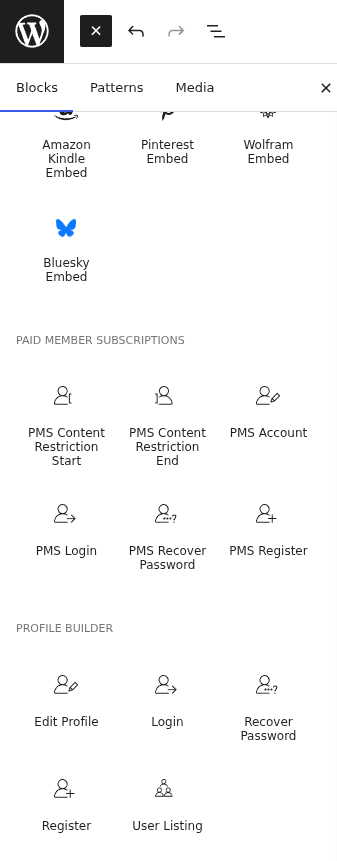
Edit the page where you want the form, click the block inserter, and add the Register or Edit Profile block. Both sit under the Profile Builder category.
Open the block’s Form Settings panel and choose your form from the Form dropdown. Only published forms appear in the list. Once you pick one, an Edit the Settings for this form link appears that takes you back to that form in the Form Builder.
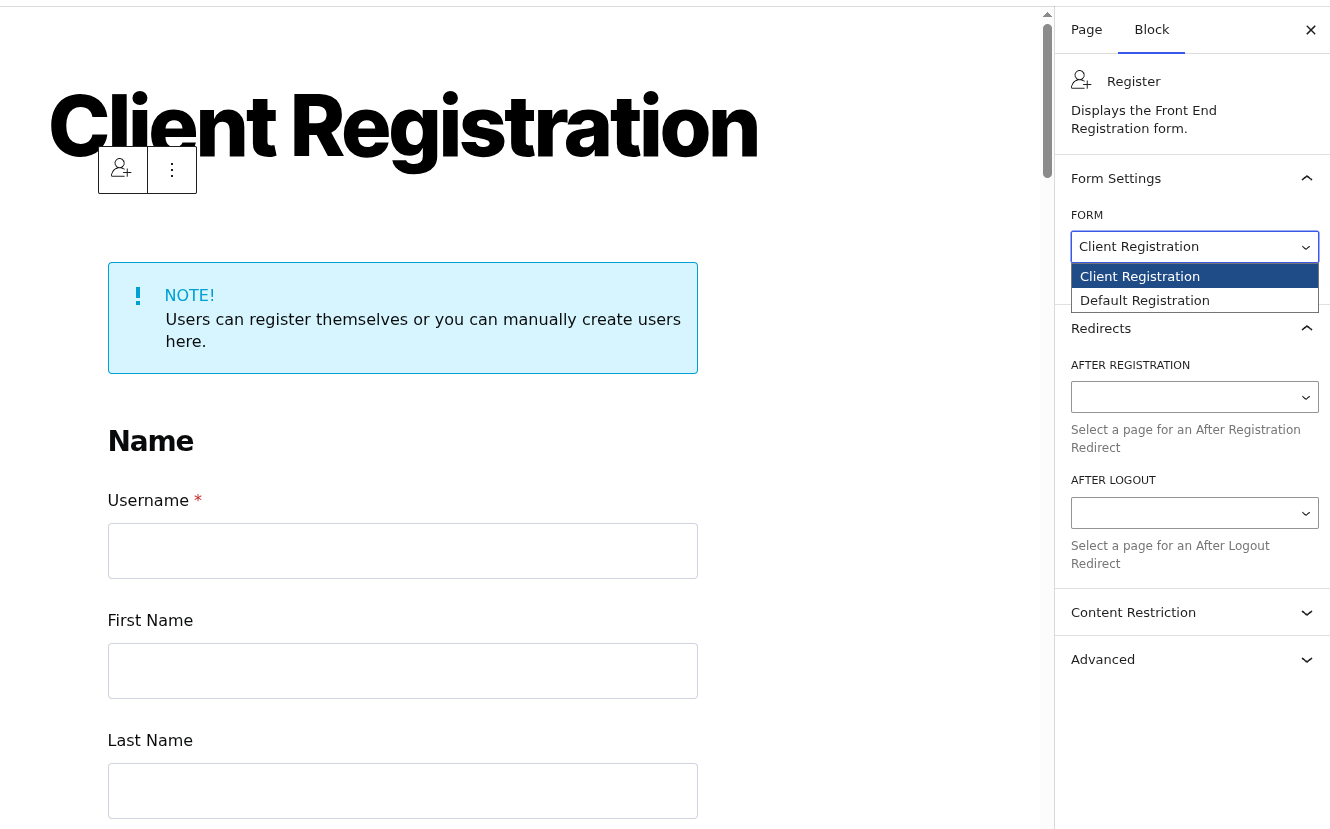
The block renders a live preview of the form, so the page editor shows what visitors will get.
The Register block has a second panel, Redirects:
Both dropdowns list the pages on your site. To send users somewhere the dropdown doesn’t cover, such as an external address, open the block’s Advanced tab and type the full URL into After Registration or After Logout there instead.
Every form has a shortcode you can paste into any page, widget or template. Copy it from the Form Shortcode panel in the form editor sidebar, or from the Shortcode column on the Forms list screen.
| Form | Shortcode |
| Default Registration | [wppb-register] |
| Default Edit Profile | [wppb-edit-profile] |
| Any other Registration form | [wppb-register form_name="your-form-name"] |
| Any other Edit Profile form | [wppb-edit-profile form_name="your-form-name"] |
If you build pages with Elementor, the Register and Edit Profile widgets are under the Profile Builder Forms category. Drag one in, then pick your form from the Form dropdown in the Form Settings section.
Leaving Form set to Default exposes three extra controls on the Register widget: Assigned Role, Automatic Login and AJAX Validation. Pick any other form and those controls disappear, because that form’s own settings apply instead. The Edit the Settings for this form link takes you to them.
The features below need a paid version of Profile Builder. Conditional Logic is built in. The rest come from add-ons you activate under Dashboard → Profile Builder → Add-ons, and each add-on has its own documentation page covering what it does outside the form editor.
Show or hide a field based on what the user picked in another field. Open the Conditional Logic panel in the field’s settings and switch on Enable conditional logic.
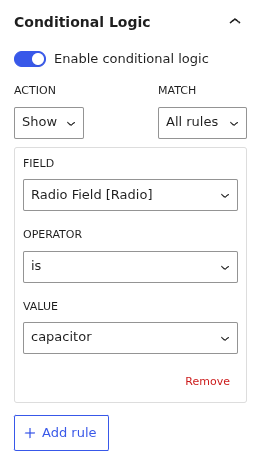
When the field you’re testing against has preset choices, the Value box becomes a dropdown of those choices. Less than and more than are only available on numeric fields.
Rules can point at fields that aren’t in the current form, but those rules never trigger. The editor warns you when that happens.
The Field Visibility panel controls who sees a field and where.
Requires admin approval on Edit Profile holds a field’s new value for review when a non-admin user edits their profile, instead of saving it directly. This applies to every form the field appears in.
A Repeater is a container for a group of fields that users can duplicate on the front end, which suits things like work history or a list of addresses.
Add a Repeater block, then use the Add sub-field button inside it to build the group. Sub-fields are scoped to the Repeater and can’t be dragged in or out.
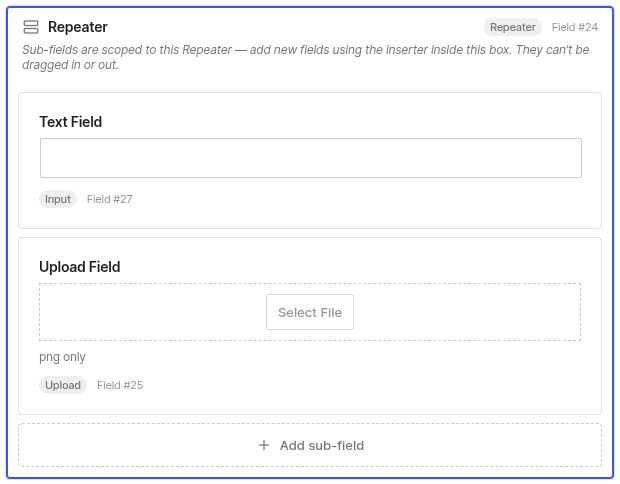
Under Limit, tick Enable limit to cap how many groups a user can add:
Split a long form across several pages by inserting Step Break blocks between fields. Each break ends one step and starts the next.
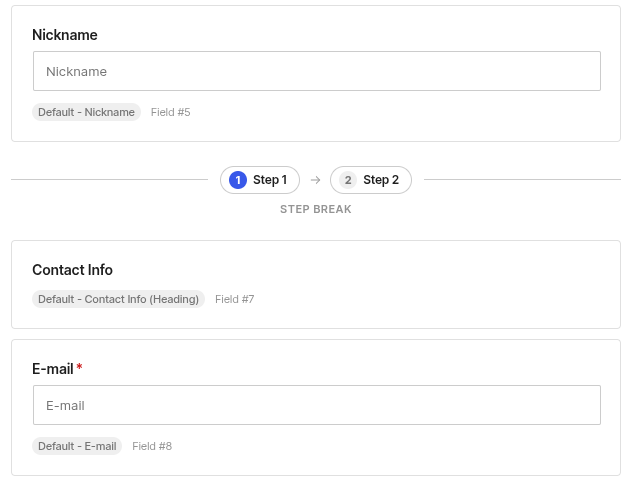
The Multi-Step Forms panel in the document sidebar controls the rest:
Step Breaks have to sit between two fields. One placed before the first field, after the last field, or inside a Repeater does nothing, and the editor flags it.
Show users how far along they are. Open the Progress Bar panel in the document sidebar and switch on Enable Progress Bar.
Profile Builder places the bar on the canvas to match the position you picked. On multi-step forms it appears on every step.
To put fields side by side, insert a Columns block and drag two or more field blocks into it. They render as a horizontal row on the front end, and the editor shows the same layout.
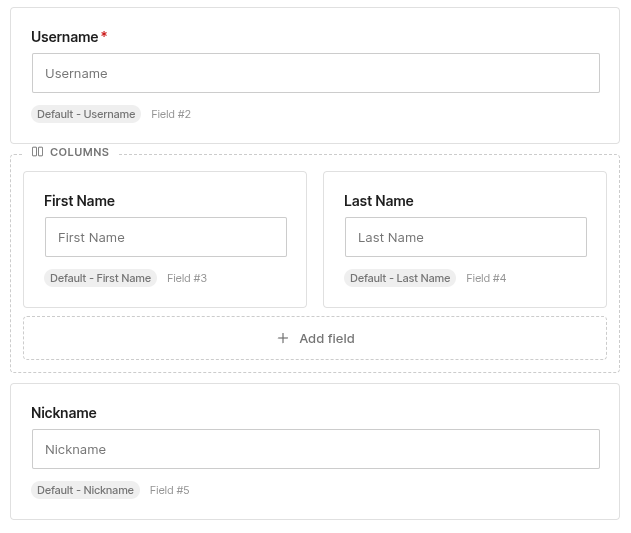
The Form Fields in Columns panel has a single option, Render columns on the front end. Switching it off renders your Columns blocks as a normal vertical stack, which lets you disable the layout temporarily without pulling the blocks apart.
Columns blocks must sit at the top level of the form. They can’t be nested inside a Repeater or another block.
If you’d rather use the previous interface, go to Dashboard → Profile Builder → Advanced Settings → Forms and set Forms Editor to Classic for either form type.
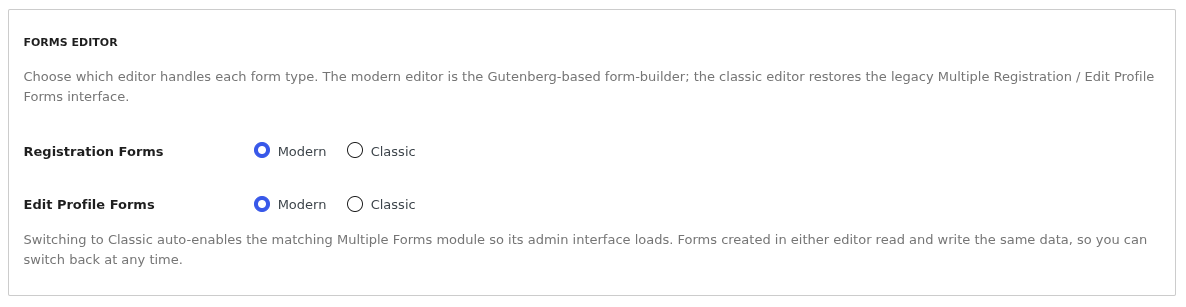
Both editors read and write the same data, so you can switch back and forth at any time without losing anything.

Create beautiful front-end registration and profile forms with custom fields. Setup member directories, custom redirects, cutomize user emails & more using the all in one user management plugin.
Get Profile BuilderCombine the power of Profile Builder with Paid Member Subscriptions to set up user registration, memberships, and recurring revenue.
Get 25% off with the bundle