Profile Builder integrates with WP Webhooks allowing the admin to automate certain events on their website while taking advantage of the available Triggers.
In order to use Profile Builder with WP Webhooks you’ll need to have the following plugins installed and activated on your site:
After installing the two plugins, you will need to activate the Profile Builder integration by navigating to your Dashboard → WP Webhooks Pro → Integrations → look for Profile Builder → click on Install.
The Profile Builder integration includes the following Triggers that can be used within WP Webhooks:
pbp_profile_editedpbp_user_activatedpbp_user_approvedpbp_user_logged_inpbp_user_registeredpbp_user_unapprovedThere are two ways of using these triggers. One is by setting up a Send Data Webhook that will send the data specific to each trigger to the configured destination. The other is setting up an Automation (Flow) that gives you more control over the actions that are triggered by each of these events.
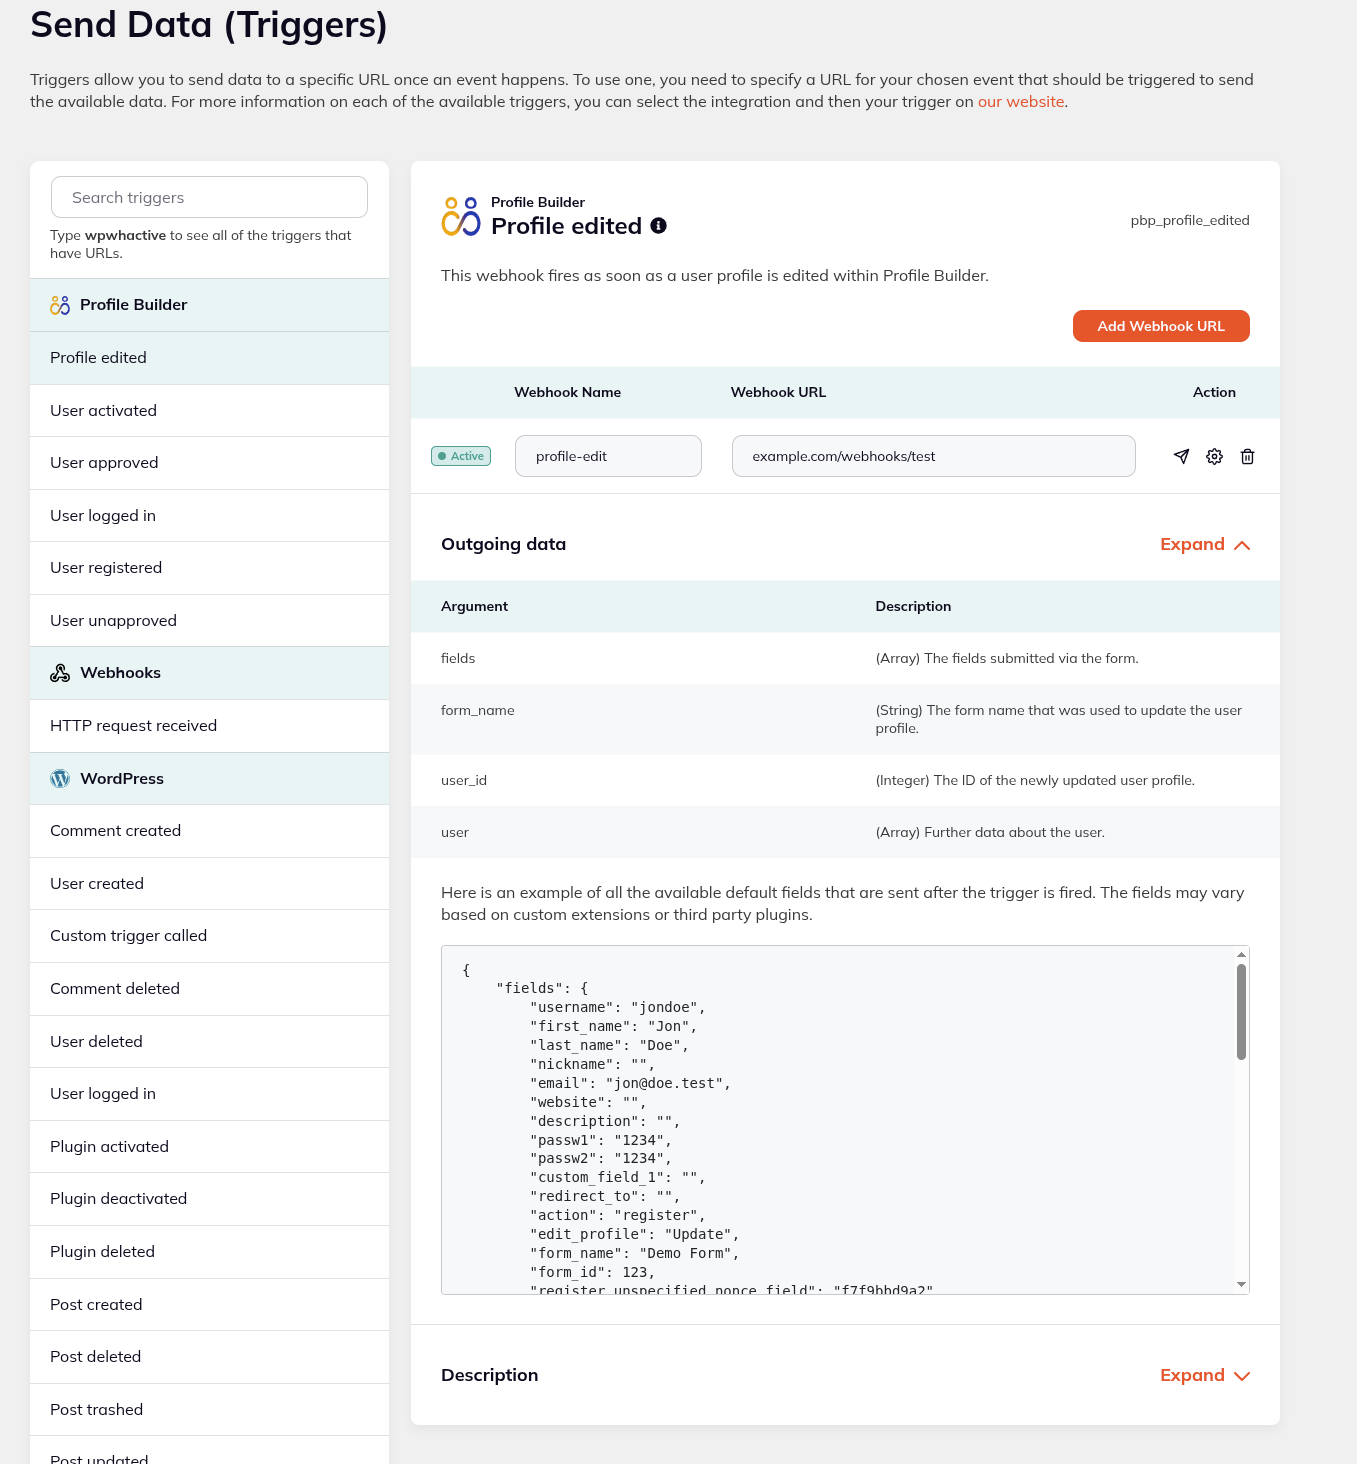
By navigating to Dashboard → WP Webhooks Pro → Webhooks → Send Data (Triggers) you can select your desired event, click on Add Webhook URL and type in your desired Webhook Name and Webhook URL
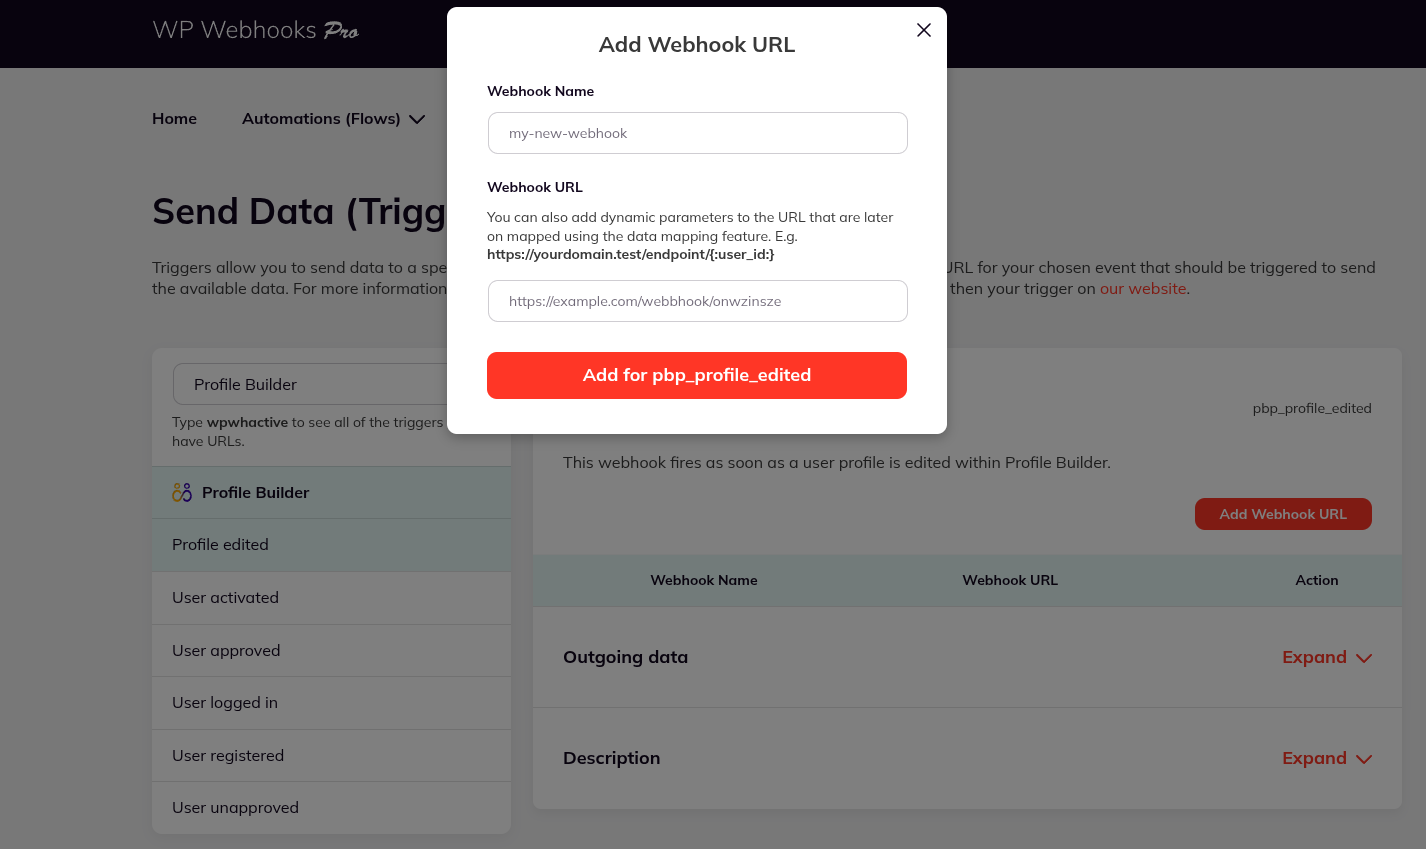
In the example below, after configuring your Send Data trigger, each time a user edits their profile on your website, the user data will be sent to the Webhook URL you have configured. An example of the data sent can be found in the Outgoing data section.
The Profile Builder integration includes the following Actions that can be used within WP Webhooks:
There are two ways of using these actions. One is by setting up a Receive Data Webhook that will run the action once a request is received on the Webhook URL. The other is setting up an Automation (Flow) that gives you more control over what event should trigger this action.
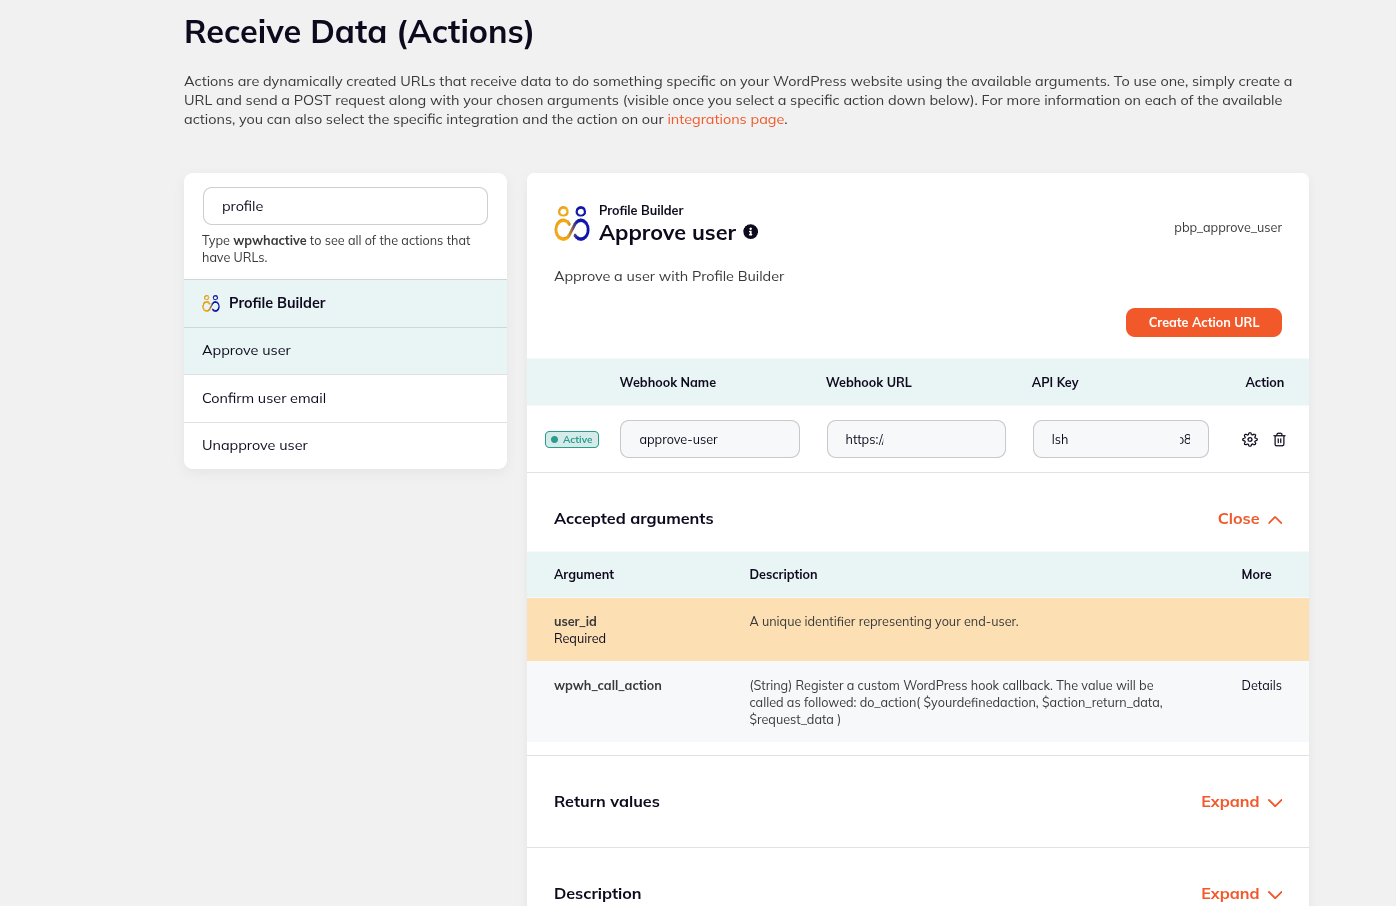
By navigating to Dashboard → WP Webhooks Pro → Webhooks → Receive Data (Actions) you can select your desired event, click on Create Action URL and type in your desired Webhook Name.
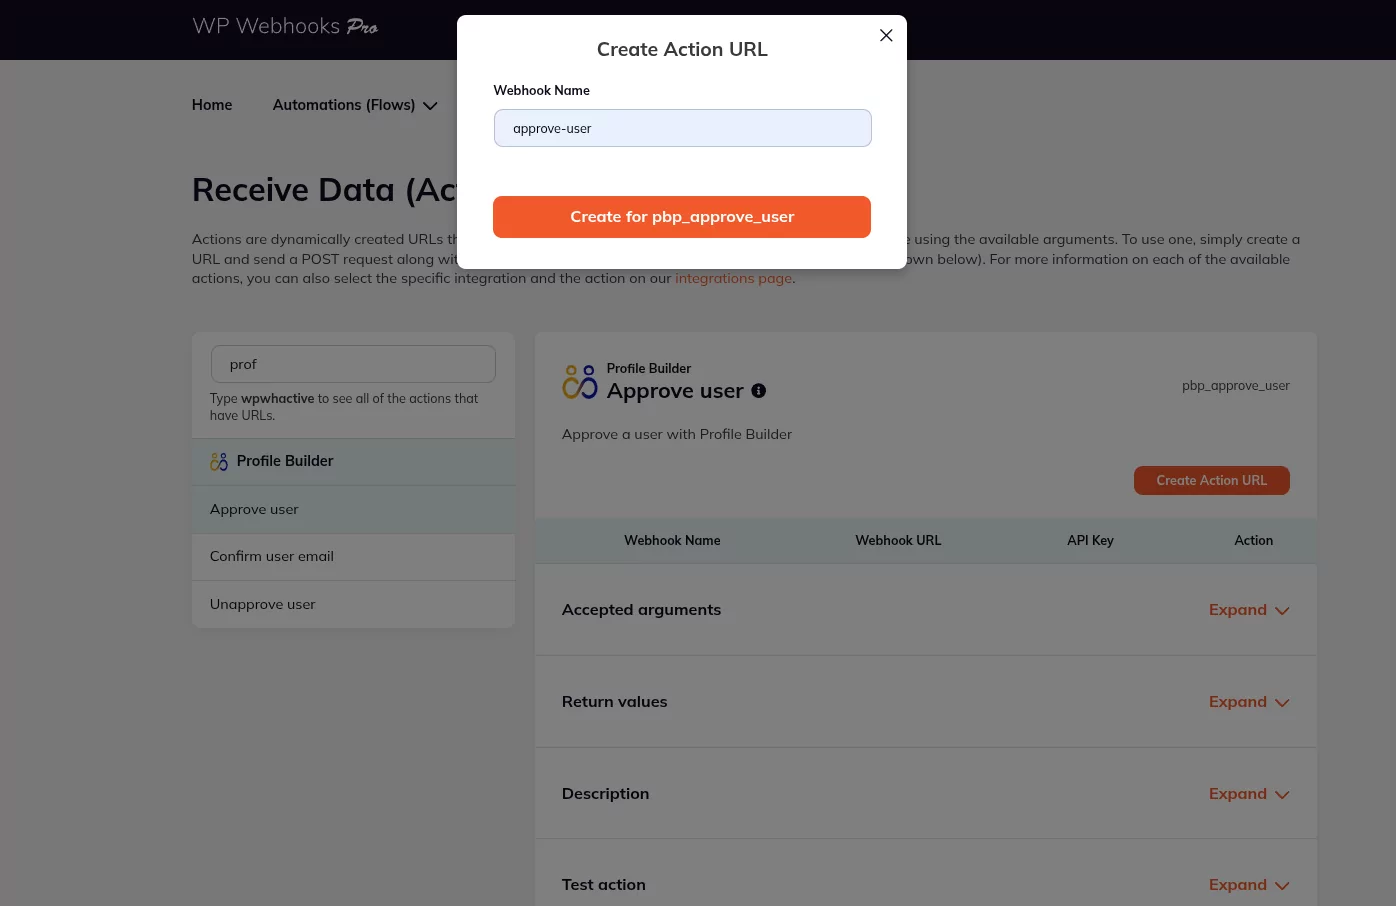
In the example below, after configuring your Receive Data Action, you can send a request with the correct parameters to the action URL generated which will result in the user being approved. You can see the required arguments in the Accepted Arguments section.
You can use the triggers that come with the Profile Builder integration by navigating to your Dashboard → WP Webhooks Pro → Automations (Flows) → click on Create Flow → Give it a name → click on Create.
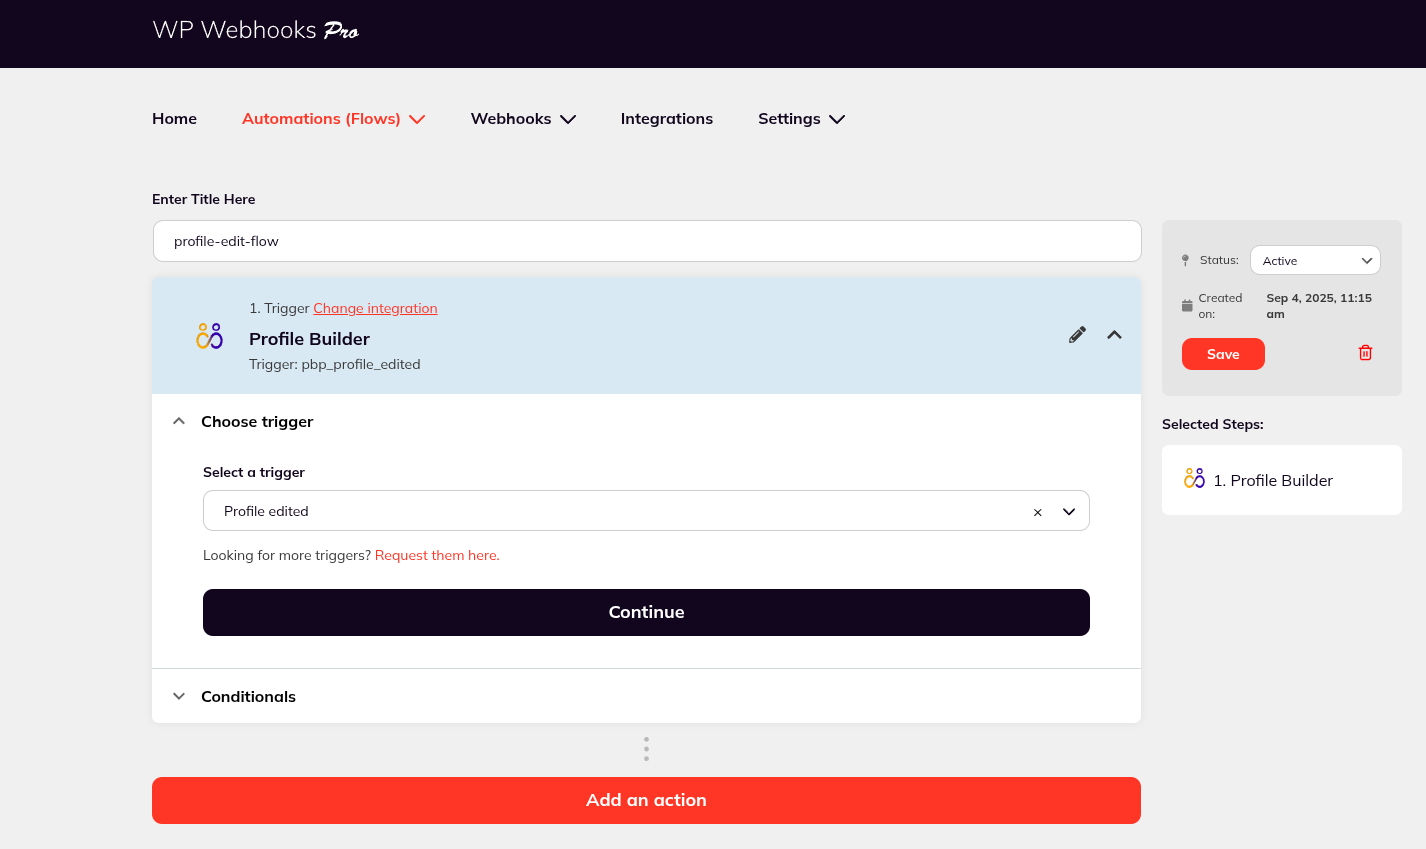
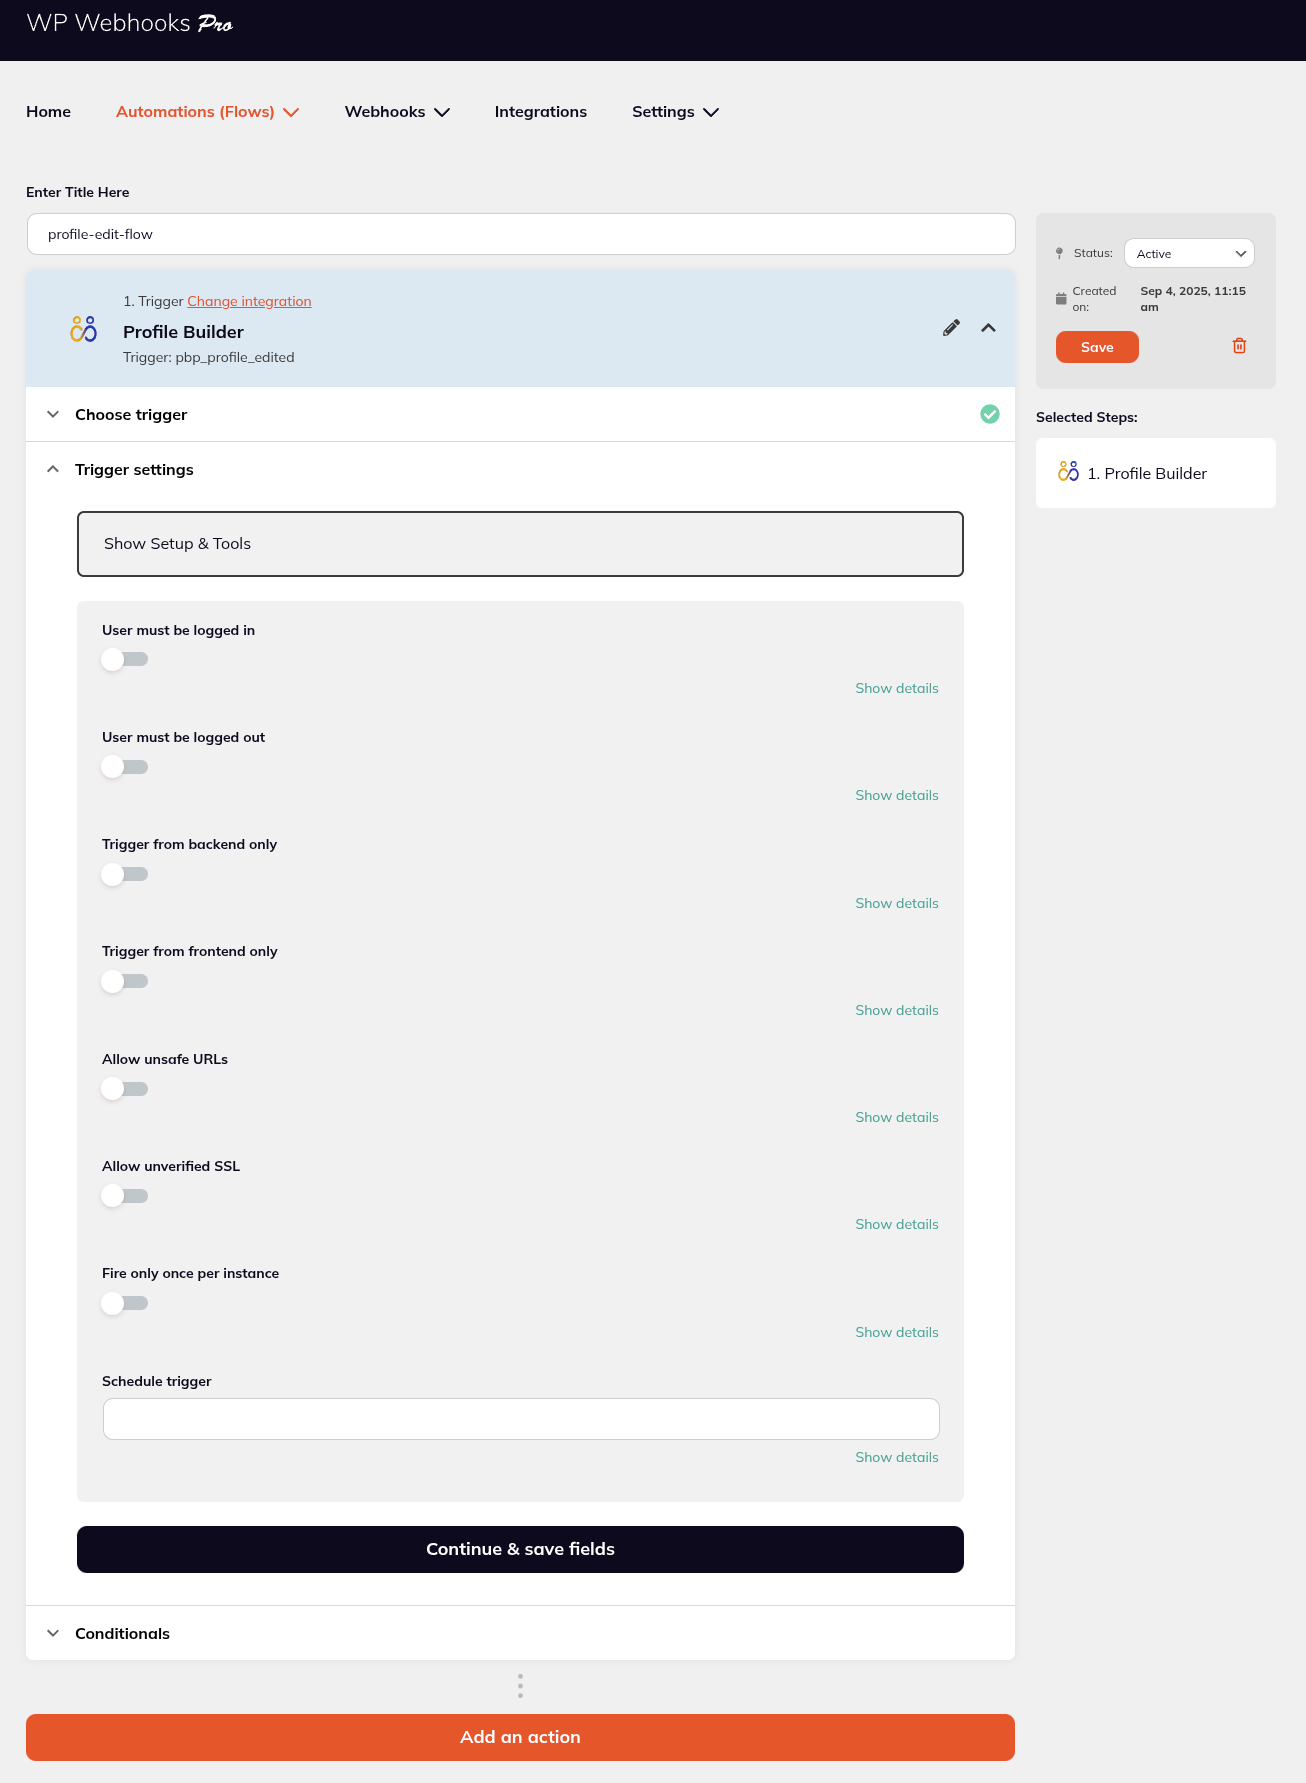
After selecting your desired Profile Builder trigger, you are able to configure the Trigger settings and have more control over the way this event is triggered.
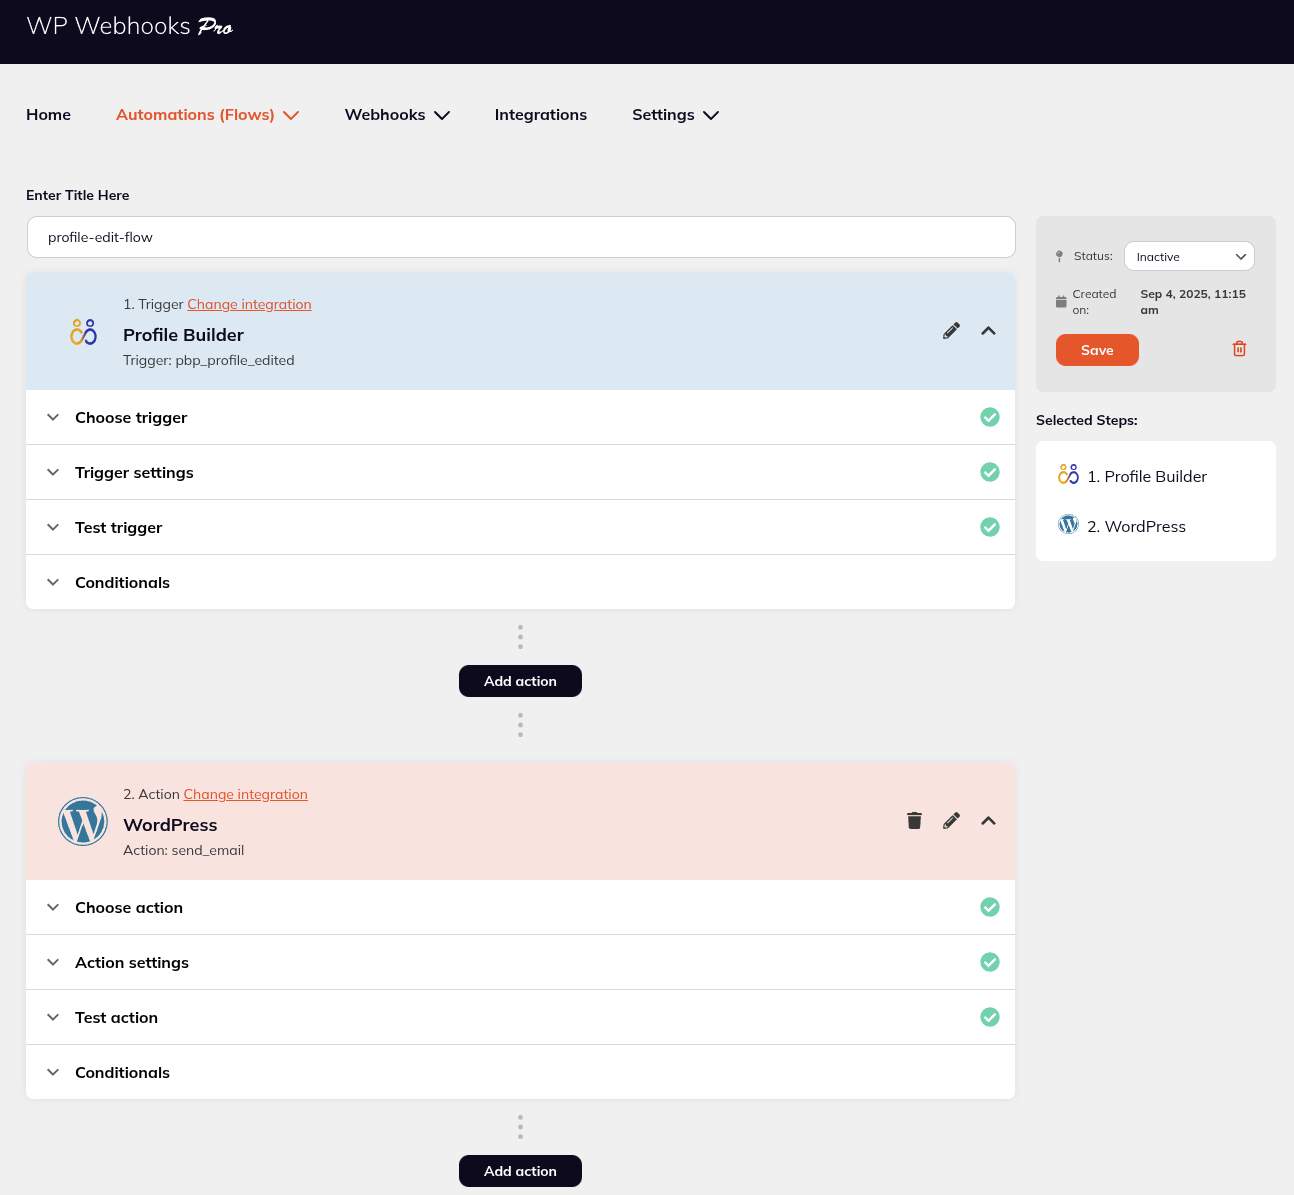
Using Automations (Flows) you have more control over the actions that are triggered by the selected event and even have the ability to add multiple actions to one trigger.
In the example below, we have set up an Automation (Flow) that uses the Profile Builder Profile Edited Trigger and the WordPress Send Email Action to send an email to the administrator with the changes made by the user.
Create beautiful front-end registration and profile forms with custom fields. Setup member directories, custom redirects, cutomize user emails & more using the all in one user management plugin.
Get Profile BuilderCombine the power of Profile Builder with Paid Member Subscriptions to set up user registration, memberships, and recurring revenue.
Get 25% off with the bundle
