Repeater Fields Add-on makes it really easy to add repeater front-end fields or groups of fields to your user profile. This will allow your users to fill out multiple forms of the same type.
The Repeater Fields add-on is available only with a Profile Builder Pro, or Agency license.
After purchasing the Pro, or Agency version of Profile Builder, you can check the following guide on how to install Profile Builder.
The Repeater Fields Addon from Profile Builder makes it really easy to add repeater front-end fields or groups of fields to your user profile.
Under the Form Fields tab, you will find a field type called Repeater field that will give you full control over the repeater fields that appear on the front-end register and edit profile forms.
You can add a repeater field to the front-end forms by choosing “Repeater” from the Field select box.

Once you select the Repeater field you will need to set out the Field properties: Field Title, Limit, Edit field group, Conditional Logic.
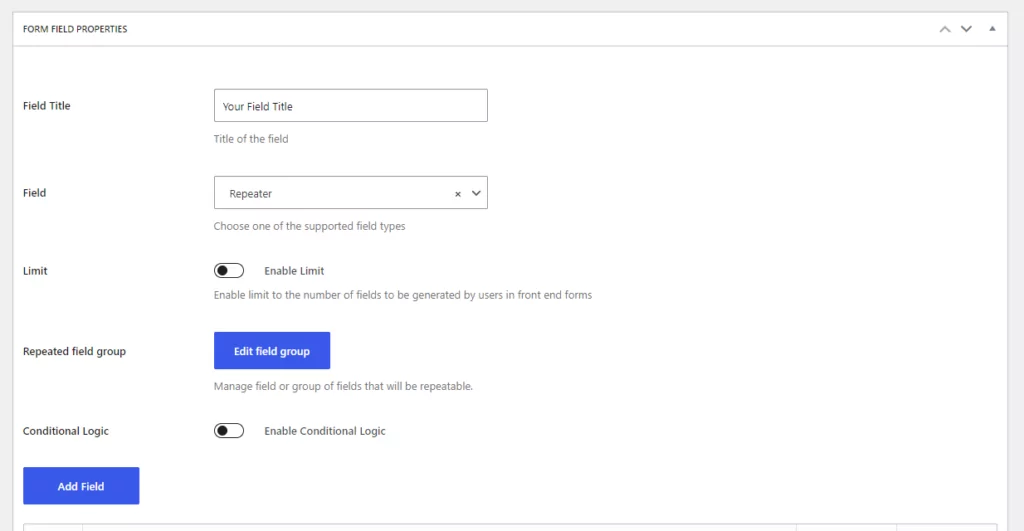

If you want to limit the number of fields generated by users in front-end forms, you have various options.
You can set up a general limit or a limit per User Role. The “0” value means an unlimited number of registration and edit user fields.
Second, you can also set up a custom pop-up message that will be displayed when the limit of repeater groups is reached.
When you click the edit field group, a secondary interface will open and there you will manage the fields or group of fields that will be repeated.
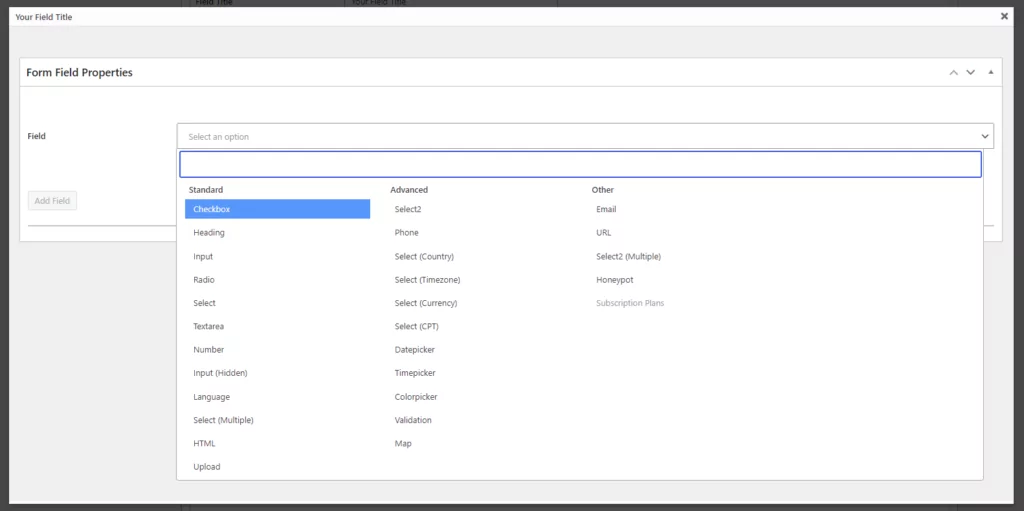
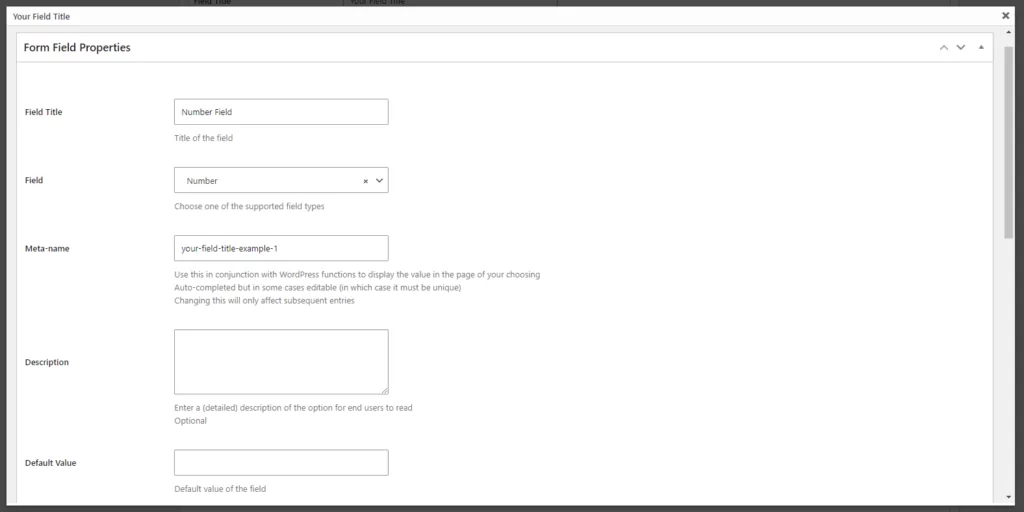
Here you will have to set up Field Properties. You will start by selecting a supported field type, from the list of Extra Fields Types.
Supported Field Types
Heading, Input, Number, Input (Hidden), Textarea, Phone, Select, Select (Multiple), Select (Country), Select (Timezone), Select (Currency), Select (CPT), Checkbox, Checkbox (Terms and Conditions), Radio, Upload, Datepicker, Timepicker, Colorpicker, Validation, Map and HTML.
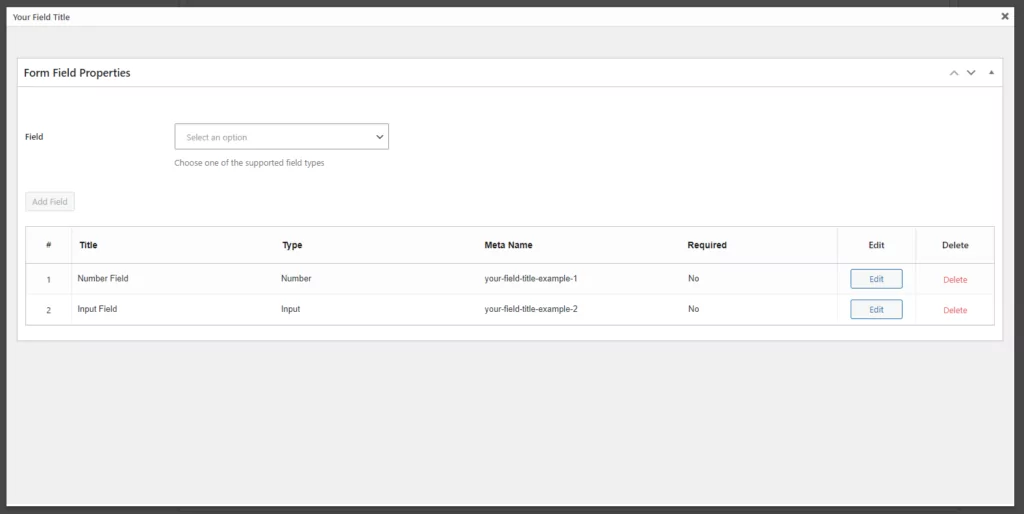
When done editing the repeated fields, close the interface by clicking on the X button, or on the grayed-out zone. The repeatable sub-fields are saved automatically.
Delete Repeater Fields
You can also delete the repeater fields you have created. This option is displayed on the right side of the Repeater Fields Table. When you click the “Delete” button a confirmation message will be displayed asking you to validate it.
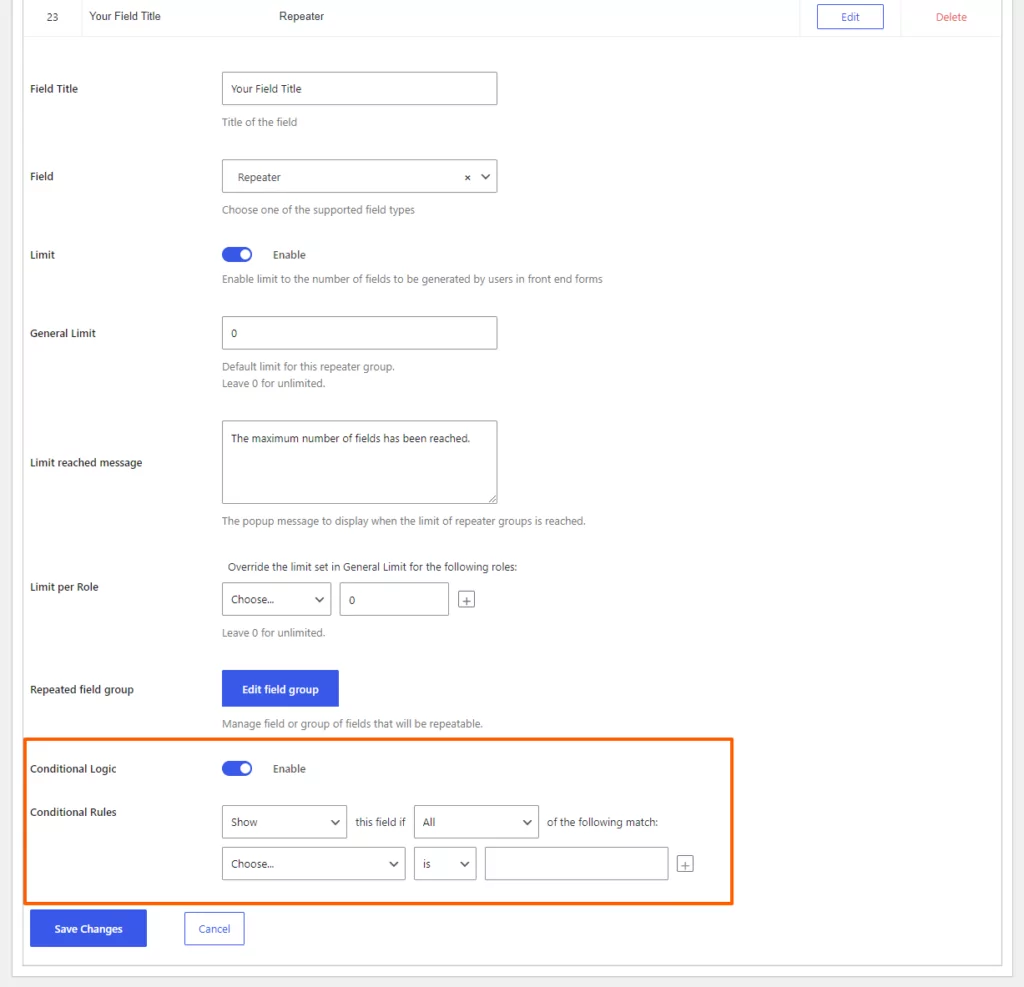
This feature allows you to display or hide entire repeater fields based on other fields. But you cannot show or hide other fields based on repeater fields.
Now let’s have a look at how repeater fields will look in the front-end registration and edit profile forms.
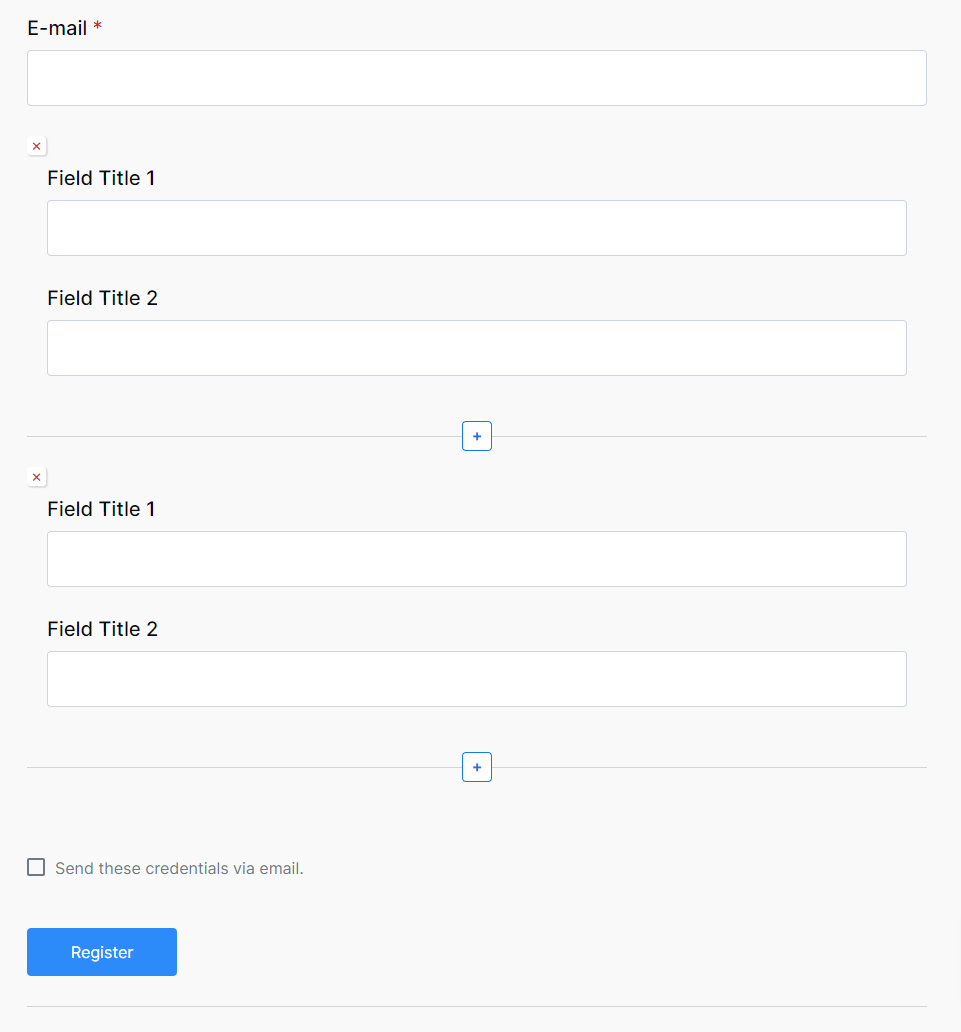
Registration Form
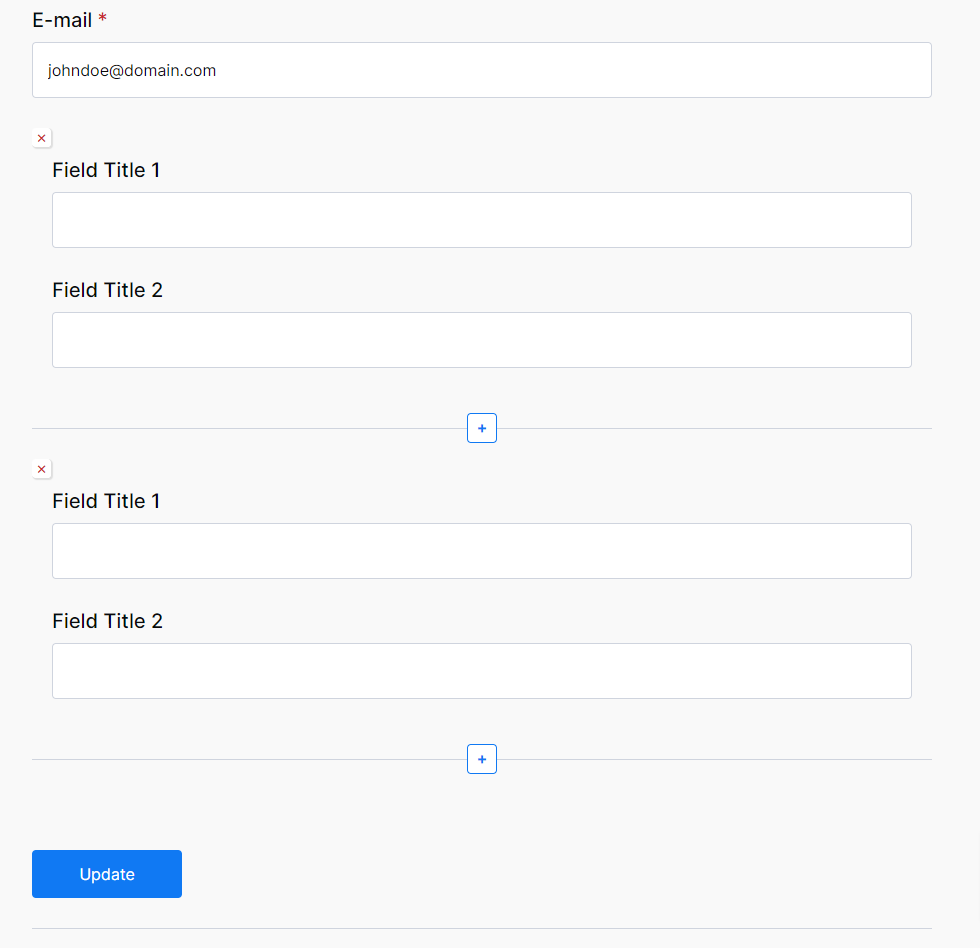
Edit Profile Form
The repeater fields allow you to duplicate the set of fields with “+” or delete one with “x”
The repeater fields interface to add and remove fields only works with front-end forms. In the WordPress default Edit Profile form, you can edit existing fields, but can not add or remove records. As an administrator who wants to edit other user’s profiles, you can use the front-end Edit Profile form.
If the maximum number of field groups is reached, according to your Repeater field configuration in Manage Fields, the “+” button is grayed out. If the user clicks the “+” button, the configured popup message will appear.
Users can delete any set of fields, except if there is only one remaining. On clicking the “X” button, the user is asked to confirm the deletion.
You can display your users in the front end of your website by using the shortcode, which can be found under the User Listing settings.
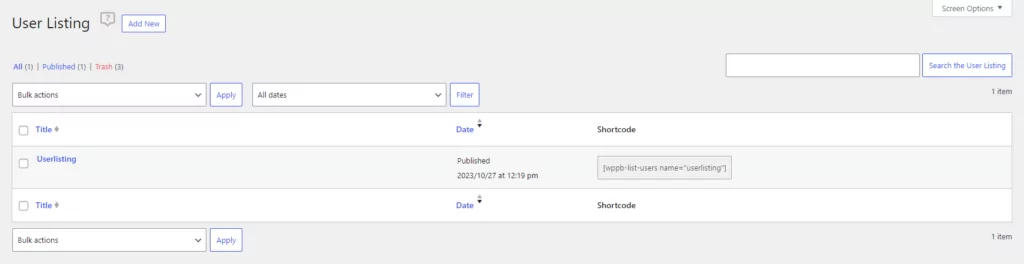
To display a user list on your front-end you have to go to Pages section, create a new page and paste the shortcode there.
You have to go back to the User Listing settings and edit the list. There you will find the All-userlisting and Single-userlisting Template.
At “Meta / Available Variables” you have to search for your Repeater Field Meta Field Title to the Single-userlisting Template
{{#meta_repeater-field-title}}
Field1:{{meta_your-subfield-name1}}
Field2:{{meta_your-subfield-name2}}
{{/meta_repeater-field-title}}
The above syntax will output in a loop all the sets of fields inputted by the user on registration or while editing his profile.
With Admin Email Customizer and User Email Customizer, you can personalize the emails sent to your admins or users.
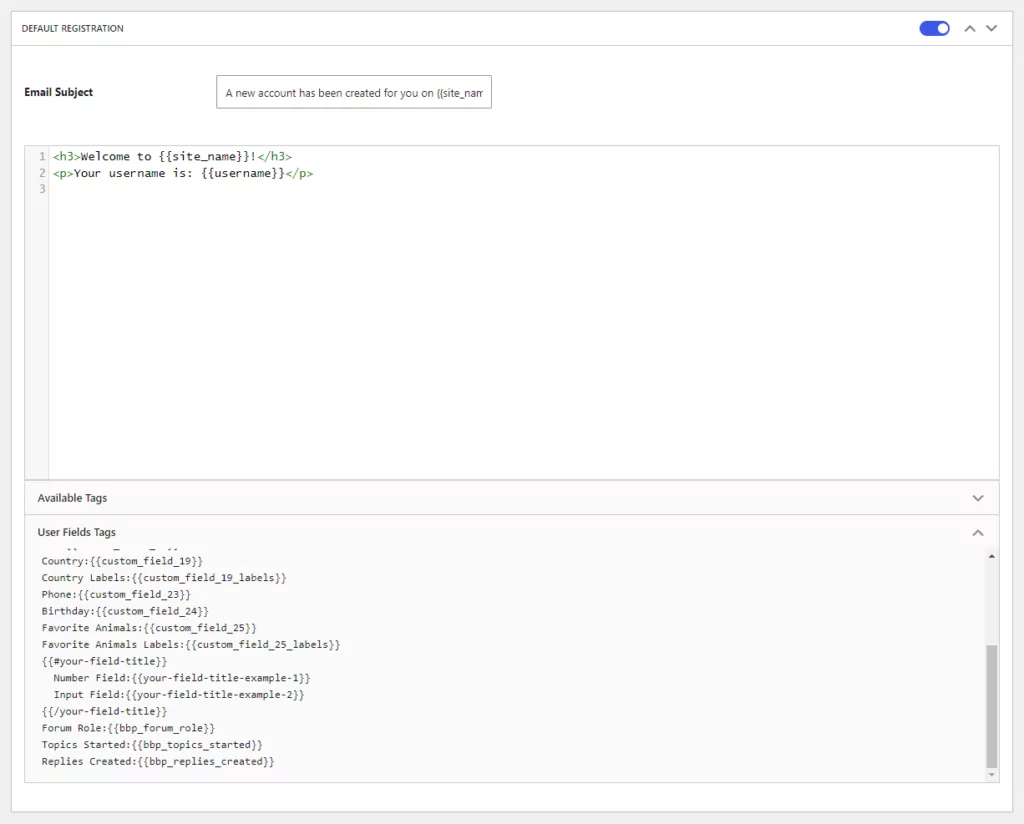
Go to Default Registration & Registration with Email Confirmation or Registration with Admin Approval and copy your Repeater Field – Field Title from the User Meta section into the Email Subject section.
{{#field-title}}
Field1:{{your-subfield-name1}}
Field2:{{your-subfield-name2}}
{{/field-title}}
The above syntax will output in a loop all the sets of fields inputted by the user on registration or while editing his profile.
When finished, click on the Update button.
Create beautiful front-end registration and profile forms with custom fields. Setup member directories, custom redirects, cutomize user emails & more using the all in one user management plugin.
Get Profile BuilderCombine the power of Profile Builder with Paid Member Subscriptions to set up user registration, memberships, and recurring revenue.
Get 25% off with the bundle
