Table of Contents
You might want to add a Contact Form that allows visitors to contact the owner of the profile they are currently browsing.
Initial requirements:
Create the contact form the way you want it, you can check out here how to do this.
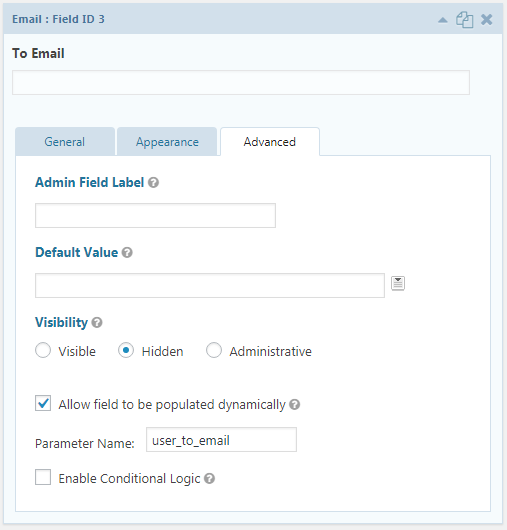
After creating it, add a new Email field to your form. Choose a name for it and then go to the Advanced tab where you need to make the field hidden by checking the option from the Visibility section and also check the Allow field to be populated dynamically checkbox. After checking this a new input with the Parameter Name label will appear, in here enter user_to_email and save the form.
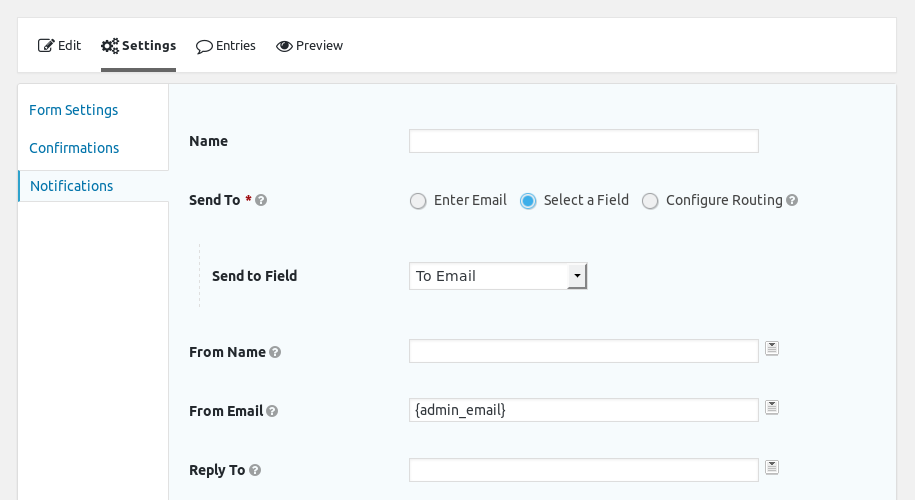
Then go to Settings -> Notifications -> Add New and create a new notification. This will be the message that is sent to the user that is being viewed.
The most important thing here is to choose the Select a Field option in the Send To section and then choose the email field you created earlier. You can read more about GravityForms notifications here.
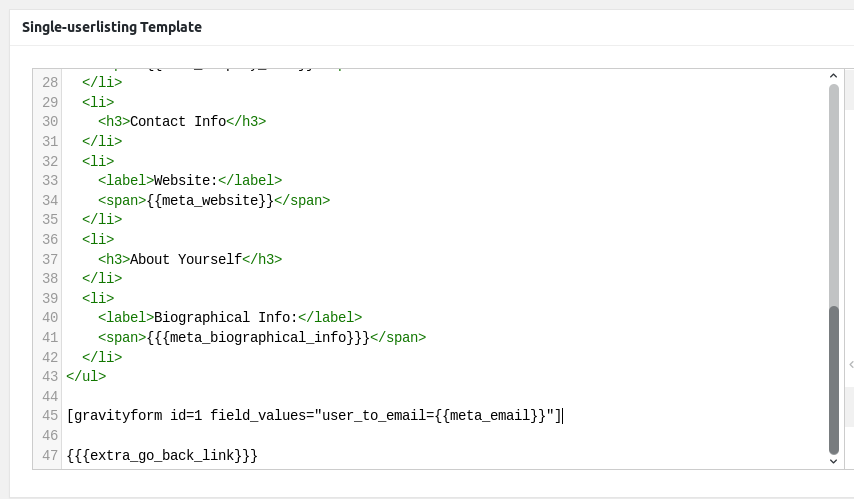
Last step is to go to your desired Single Userlisting and insert the Gravity Forms shortcode:
[gravityform id=1 field_values="user_to_email={{meta_email}}"]
Where id is the ID of your form and field_values contains the parameter that we added to the Email field we created with the correct value given by the {{meta_email}} tag from our Userlisting module.
Initial requirements:
The last plugin is a shortcode that will return the email address of the user that is currently being browsed (when added inside the Single Userlisting). It is packed as a plugin for ease of use, I will post the code at the end if you want to put it directly in the functions.php file from your theme.
Before starting, make sure you have the 4 plugins installed and activated.
Start by creating the contact form the way you want it, you can check out basic information on this page.
Then go to your form and add a Dynamic Hidden field just before the submit button. Name it userlisting-user-email and in the Dynamic Value option enter userlisting-get-user-email (this is the shortcode handler that we defined earlier in the custom code), after this press Insert Tag.
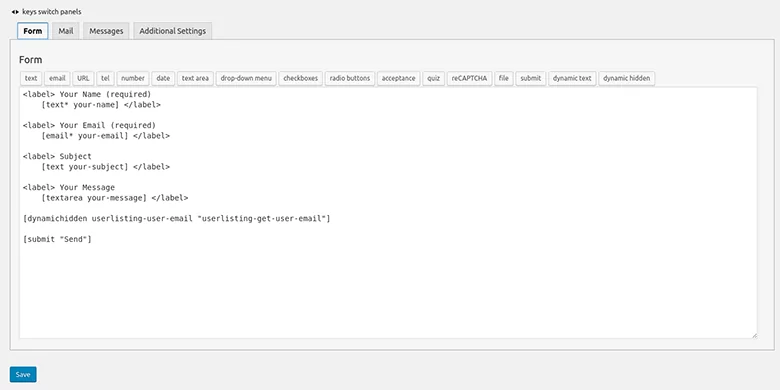
Next, go to the Mail tab of the contact form and in the To field enter: [userlisting-user-email] (this is the name we entered earlier).

On the same Mail tab you can configure other options like From Email, Subject, Additional Headers and also customize the Message Body.
Make sure to save your form, you will see that the contact form plugin reports configuration errors in the Mail tab and specifically in the To field. These errors can be ignored, they are being caused by the shortcode that is entered instead of a valid email (this gets replaced later along the line so it is not an issue).
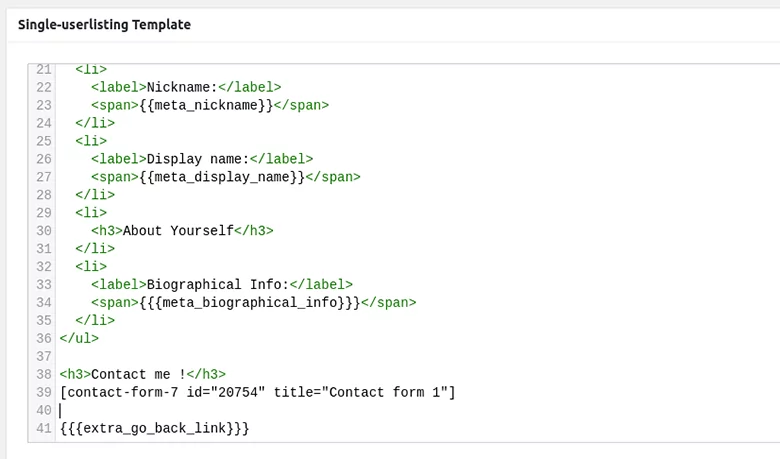
Before leaving the contact form page, copy the shortcode and then go to Profile Builder -> Userlisting -> click on the Userlisting that you wish to edit, scroll down to the Single-userlisting Template and insert the shortcode of your contact form where you want it to show. You should add a heading as well, so the form can be identified better:
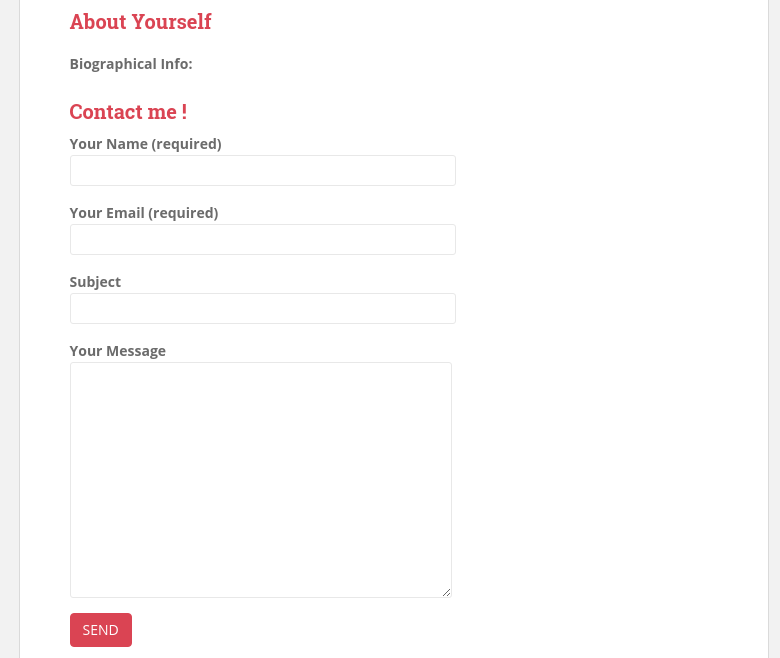
This is how it’s going to look in the front-end:
The code for the shortcode that gets the correct email:
function wppbc_get_user_email_cf7($atts){
	$get_user_by_id = apply_filters('wppb_userlisting_get_user_by_id', true);

	if ($get_user_by_id)
		$user = get_user_by('ID', get_query_var('username'));
	else {
		$user = get_user_by('login', get_query_var('username'));
	}

	if ($user === false)
		return;
	else
		return $user->user_email;
}
add_shortcode('userlisting-get-user-email', 'wppbc_get_user_email_cf7');
Create beautiful front-end registration and profile forms with custom fields. Setup member directories, custom redirects, cutomize user emails & more using the all in one user management plugin.
Get Profile BuilderCombine the power of Profile Builder with Paid Member Subscriptions to set up user registration, memberships, and recurring revenue.
Get 25% off with the bundle
