Table of Contents
Campaign Monitor Add-on allows users to subscribe to your Campaign Monitor lists directly from the Register and Edit Profile forms.
You can associate your Campaign Monitor form fields with Profile Builder fields for each of your lists. You can add unlimited Campaign Monitor Subscribe fields in your Register and Edit Profile forms. Also, you can add the Campaign Monitor Widget in any widget area to allow any visitor of your website to subscribe to your list.
Campaign Monitor is an Advanced add-on, available with a Profile Builder Basic, Pro, or Agency license only.
After purchasing a premium version of Profile Builder, you can check the following guide on how to install Profile Builder.
For the Campaign Monitor add-on to work as expected, you’ll also need to have the following plugin installed and activated on your site:
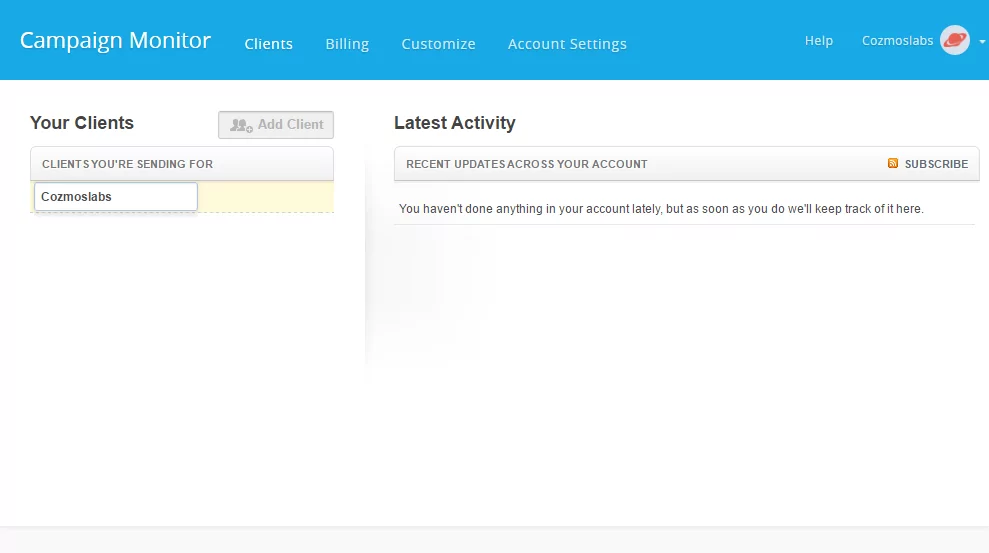
In order to connect Profile Builder with Campaign Monitor you will need a Client API Key. To create a Client you will need to login into your Campaign Monitor Account and then click on the “Add Client” button.
After you set the Name of the Client click on the Name -> Go to Client Settings -> Edit -> Show client’s API Info.
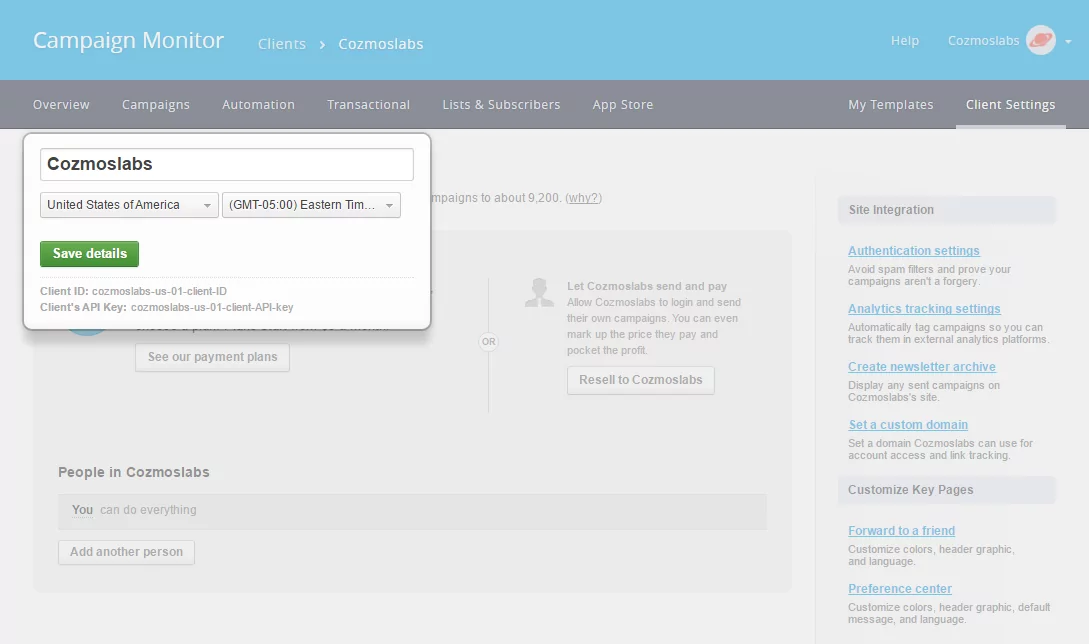
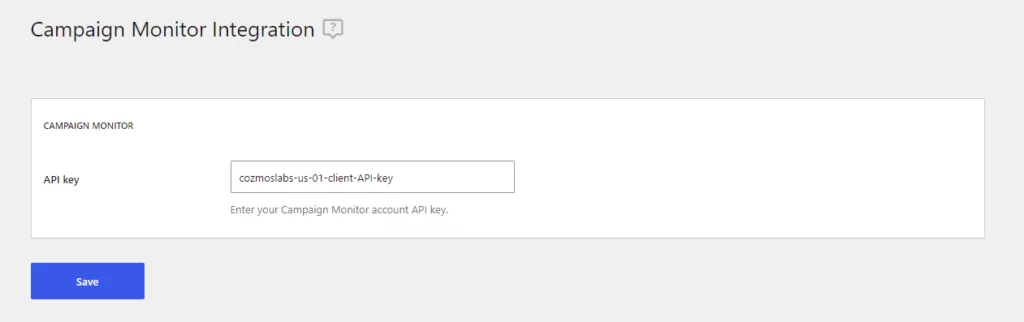
Copy, paste and save the Client API Key in Profile Builder -> Campaign Monitor in order to load your client.
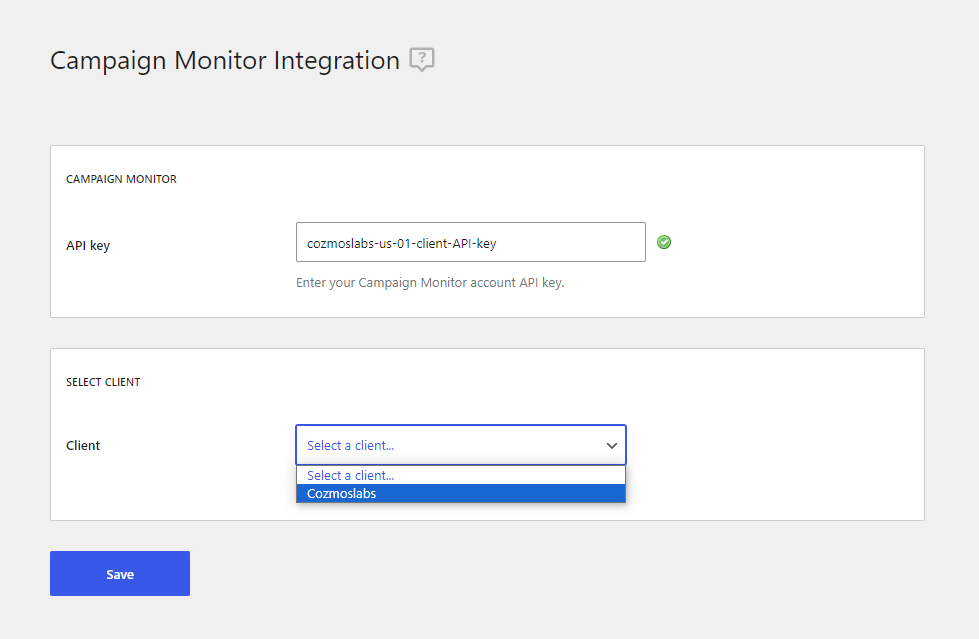
If the Client API Key is valid a drop-down with all the Clients from Campaign Monitor will appear. Select the client you wish to connect with Profile Builder and the Lists associated with that client will load into the page.
To create a list click on the Client Name -> Lists & Subscribers -> Create a list. Setup the List Name and List Type. The List Type can be set to:
Additional settings for the Confirmed opt-in option can be found if you go to Client -> Lists & Subscribers -> Click on List Name -> Customize landing pages.
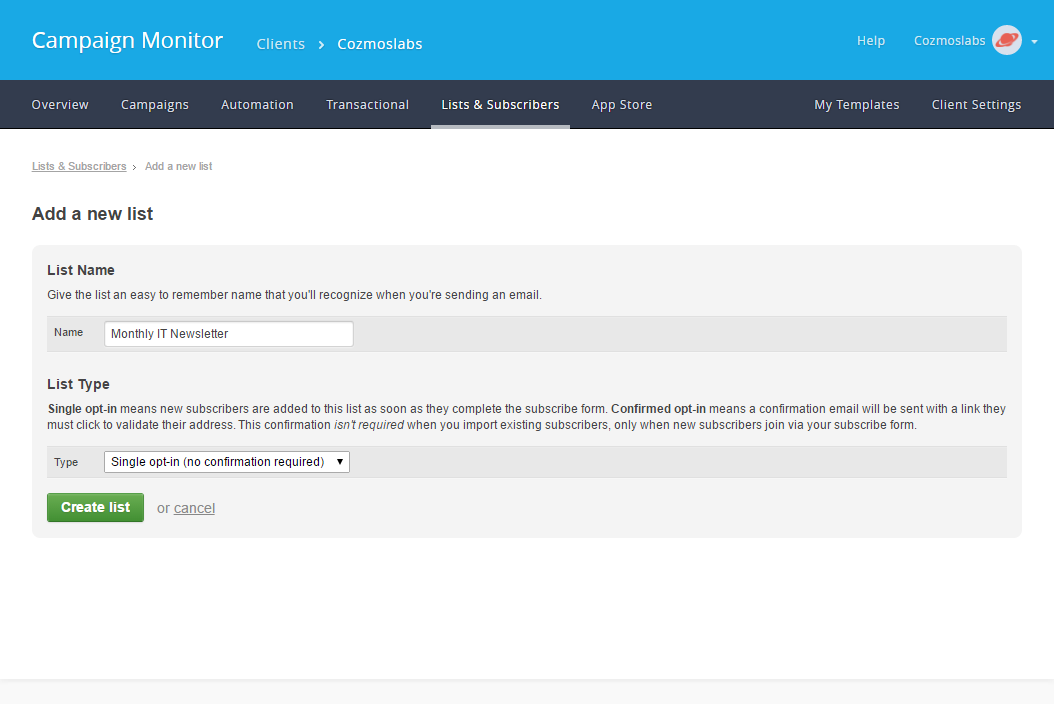
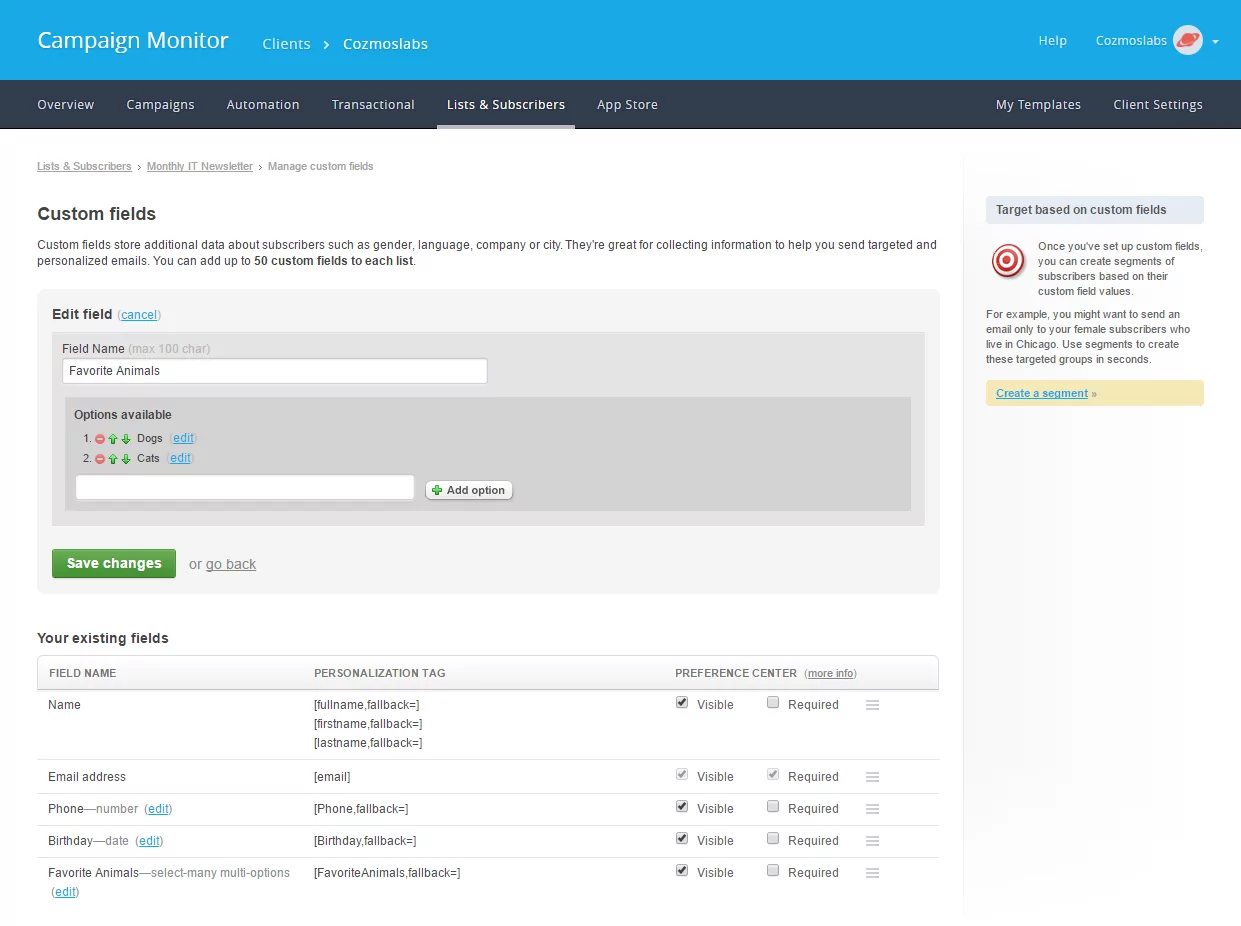
The newly created List has by default 2 fields: Name and Email Address which are mandatory fields. In most cases, this is sufficient when setting up a Newsletter but if you want to collect more user data we can add other extra fields.
To add Extra Fields go to Client -> Lists & Subscribers -> Click on List Name -> Click on Custom fields displayed in the right sidebar.
If the Client API Key is valid you will be able to select a Client. After we select the Client the List will be loaded and you will be able to edit it by clicking on the name of the List. In the Edit Panel of a List you will be able to associate each of the Campaign Monitor Fields with Profile Builder Fields.
By default the Email Address field from Campaign Monitor is associated with the Default E-mail field from Profile Builder and this cannot be edited.
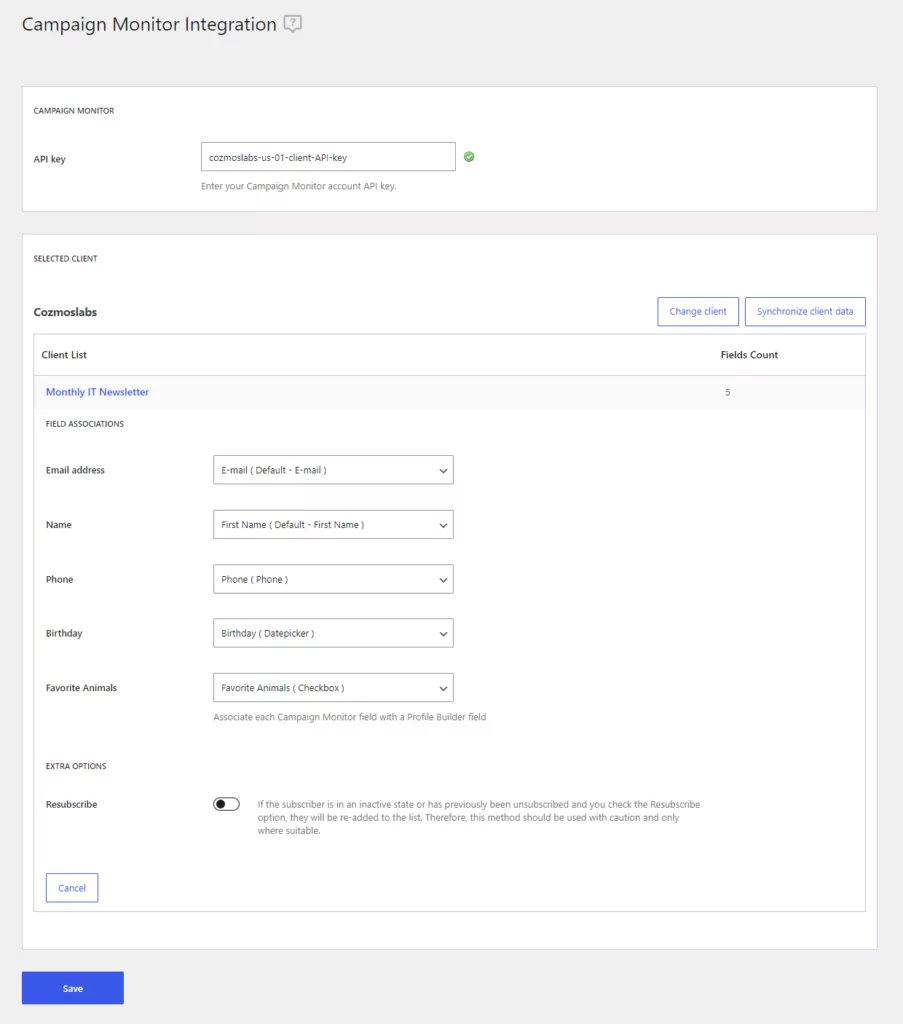
The Profile Builder Phone, Birthday and Favorite Animals fields were created in Profile Builder -> Manage Fields.
In the Edit Panel we can set Extra Options:
In the Edit Panel, we can also Change our Client or we can Synchronize client data in case we made changes inside our Campaign Monitor account.
We use Segments to target sub-groups of subscribers depending on the information they provide through subscriber details or custom fields. Segments make it easy to target certain types of subscribers in your list based on simple rules. For example, everyone that selected “Dogs” as their Favorite Animals.

To do this, you will have to associate Campaign Monitor Fields with Profile Builder Fields.
Campaign Monitor offers support for the following custom fields:
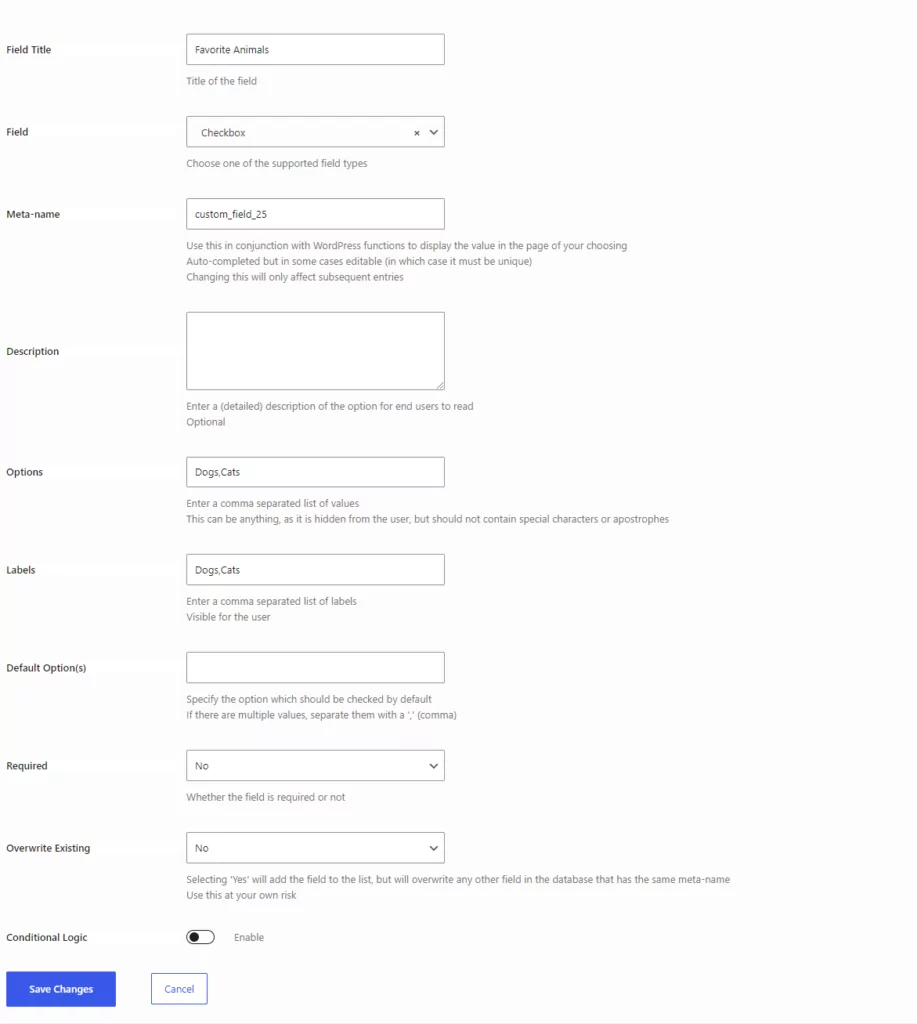
For example let’s say you have a Checkbox Field in your List called Favorite Animals with 2 options: Dogs and Cats. You will need to go to Profile Builder -> Manage Fields and add a checkbox field with the Field Title: Favorite Animals and in Options / Labels add: Dogs, Cats.
Now if you go to Profile Builder -> Campaign Monitor -> Your List -> You will be able to pair Favorite Animals with the Favorite Animals ( Checkbox ) created in Manage Fields.
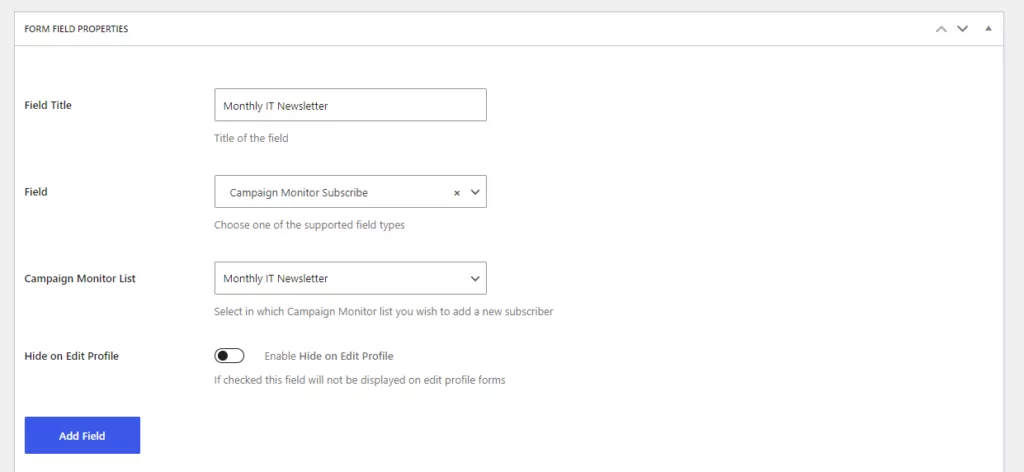
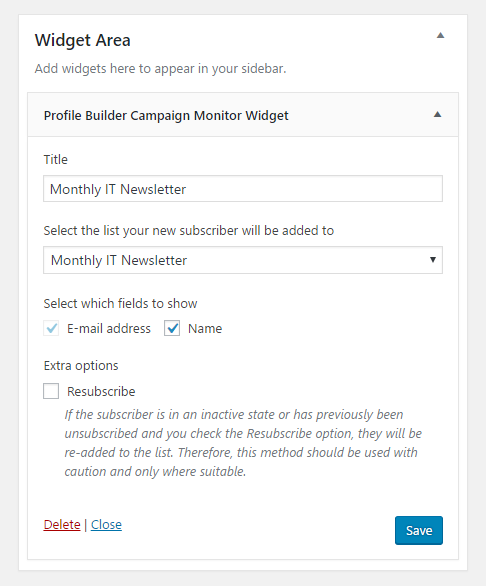
Once the add-on is active the Campaign Monitor Subscribe field will be added to the fields drop-down in Manage Fields. Here you will select the list you wish your new users to be added to.
By default, the field shows both on Register forms and on Edit Profile forms, but you can hide it from the latter if you wish. Also, you can setup a Conditional Logic rule.
User Side
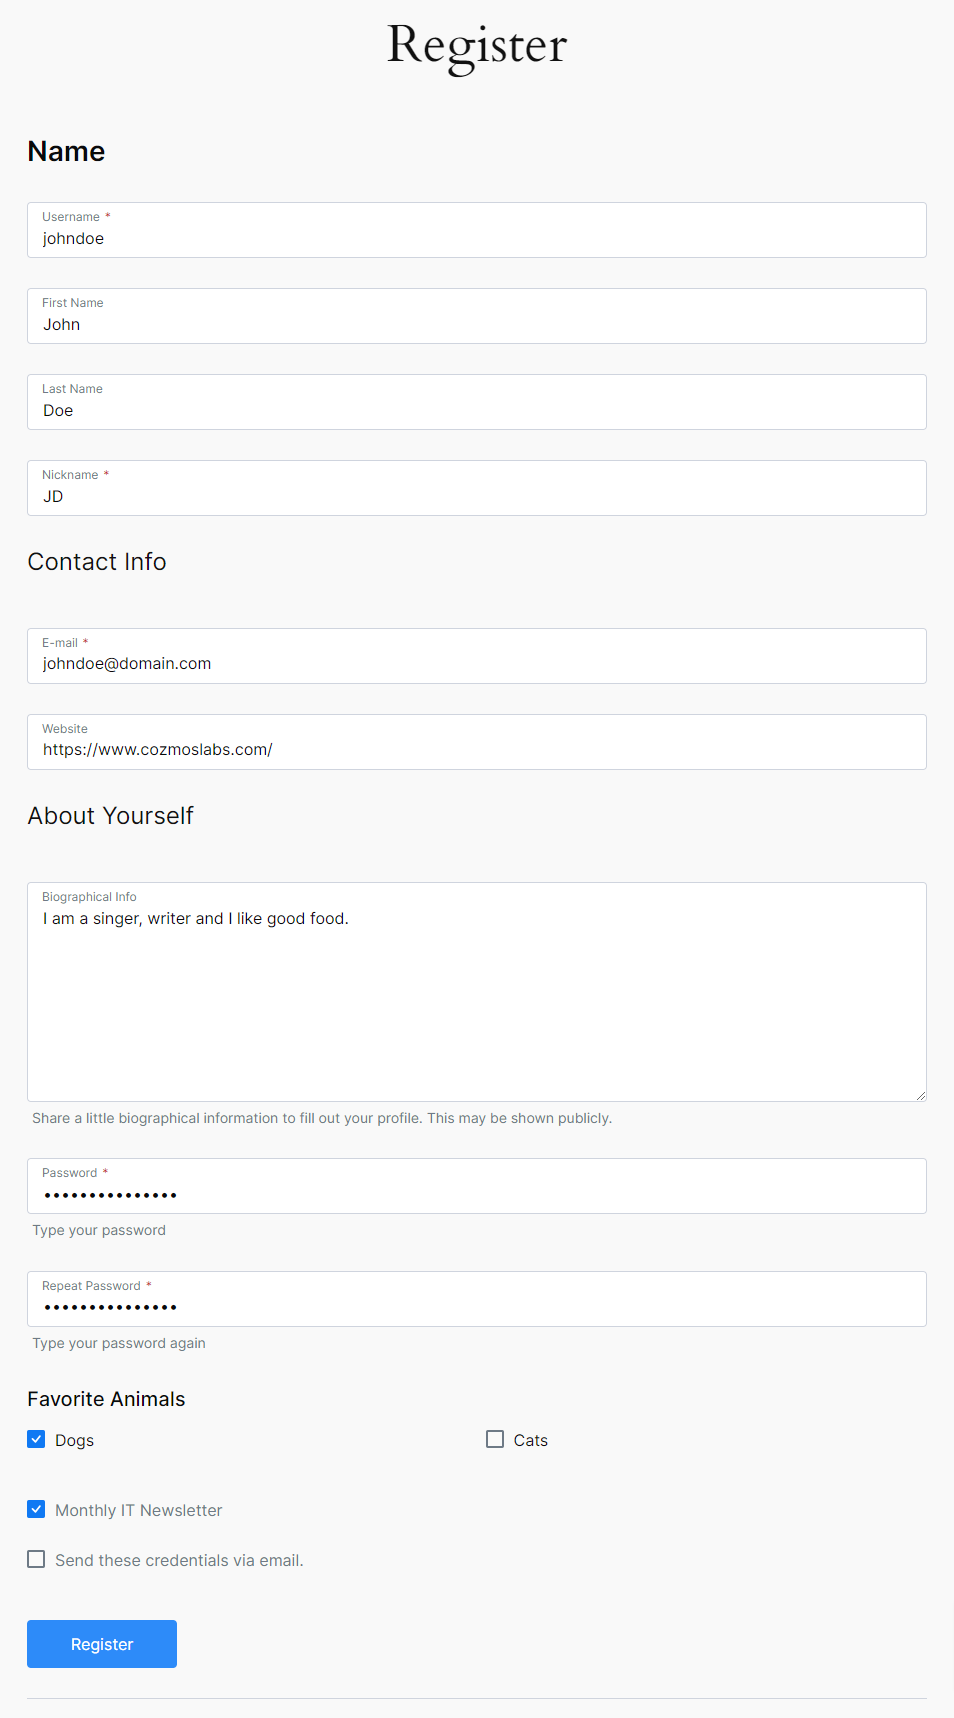
In the front-end part of your website, the field will be displayed as a checkbox. If the user checks this option, when the registration is complete, the data of the fields will be sent to Campaign Monitor and the new user will be subscribed to the list that you have selected.
Admin Side
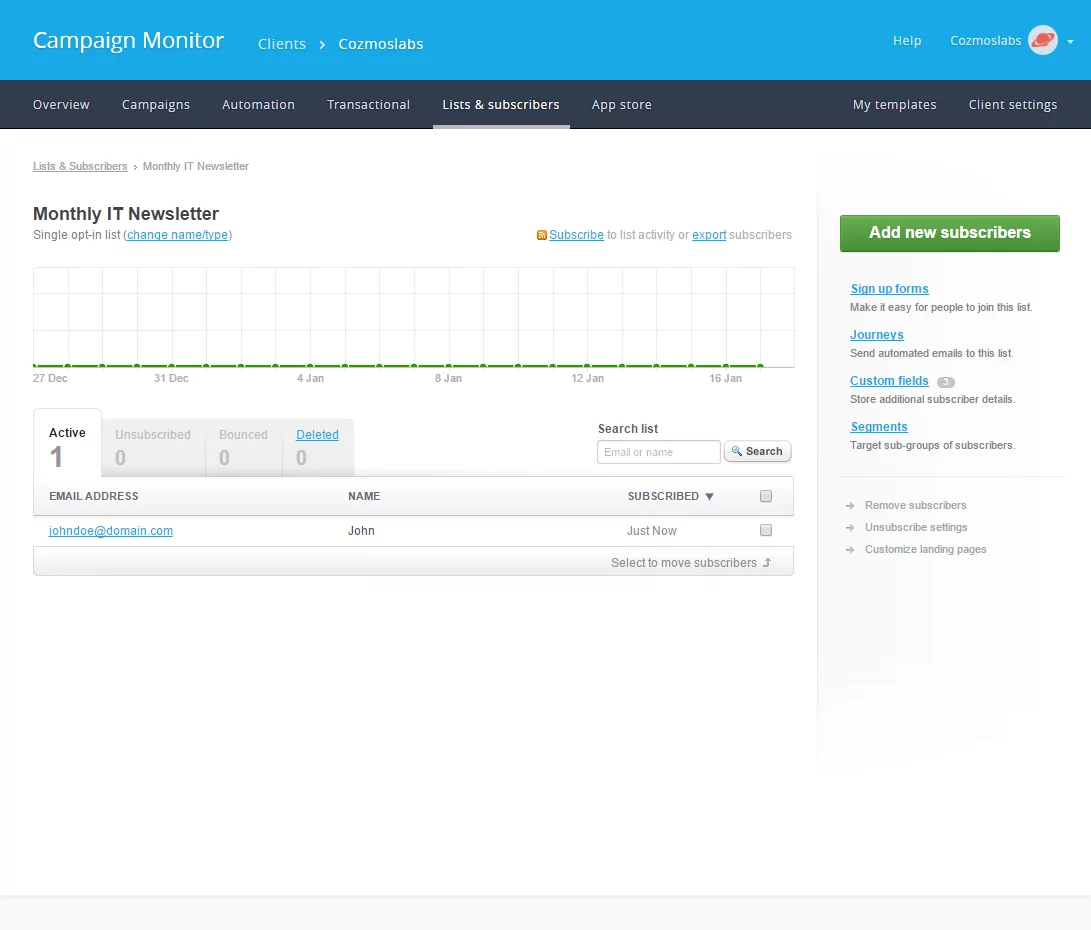
We will be able to view our subscribers if we login into our Campaign Monitor Account and go to Lists & Subscribers -> Click on the List name.
If we click on the email address we will see the profile of the subscriber.
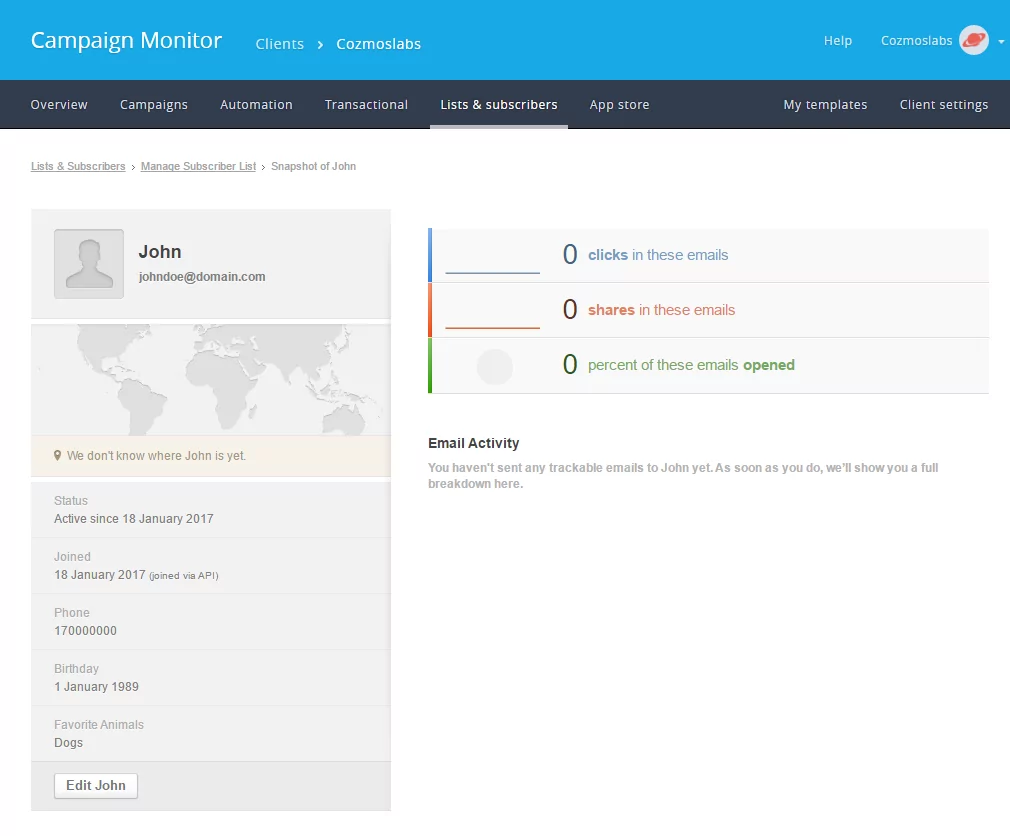
Since the user checked in the Favorite Animals field the “Dogs” value we will see that user in the “Segments” Section.
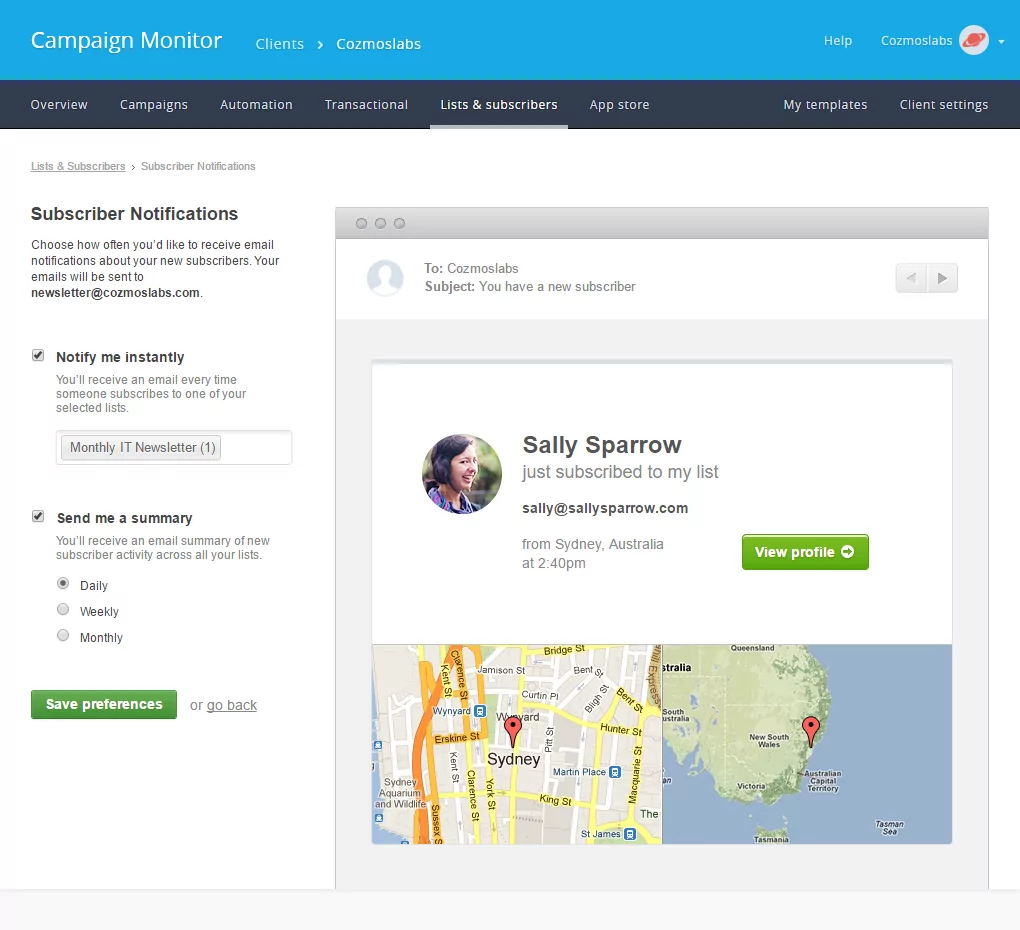
You can manage the Admin Email Notifications if you go to Lists & Subscribers -> Subscriber notifications.
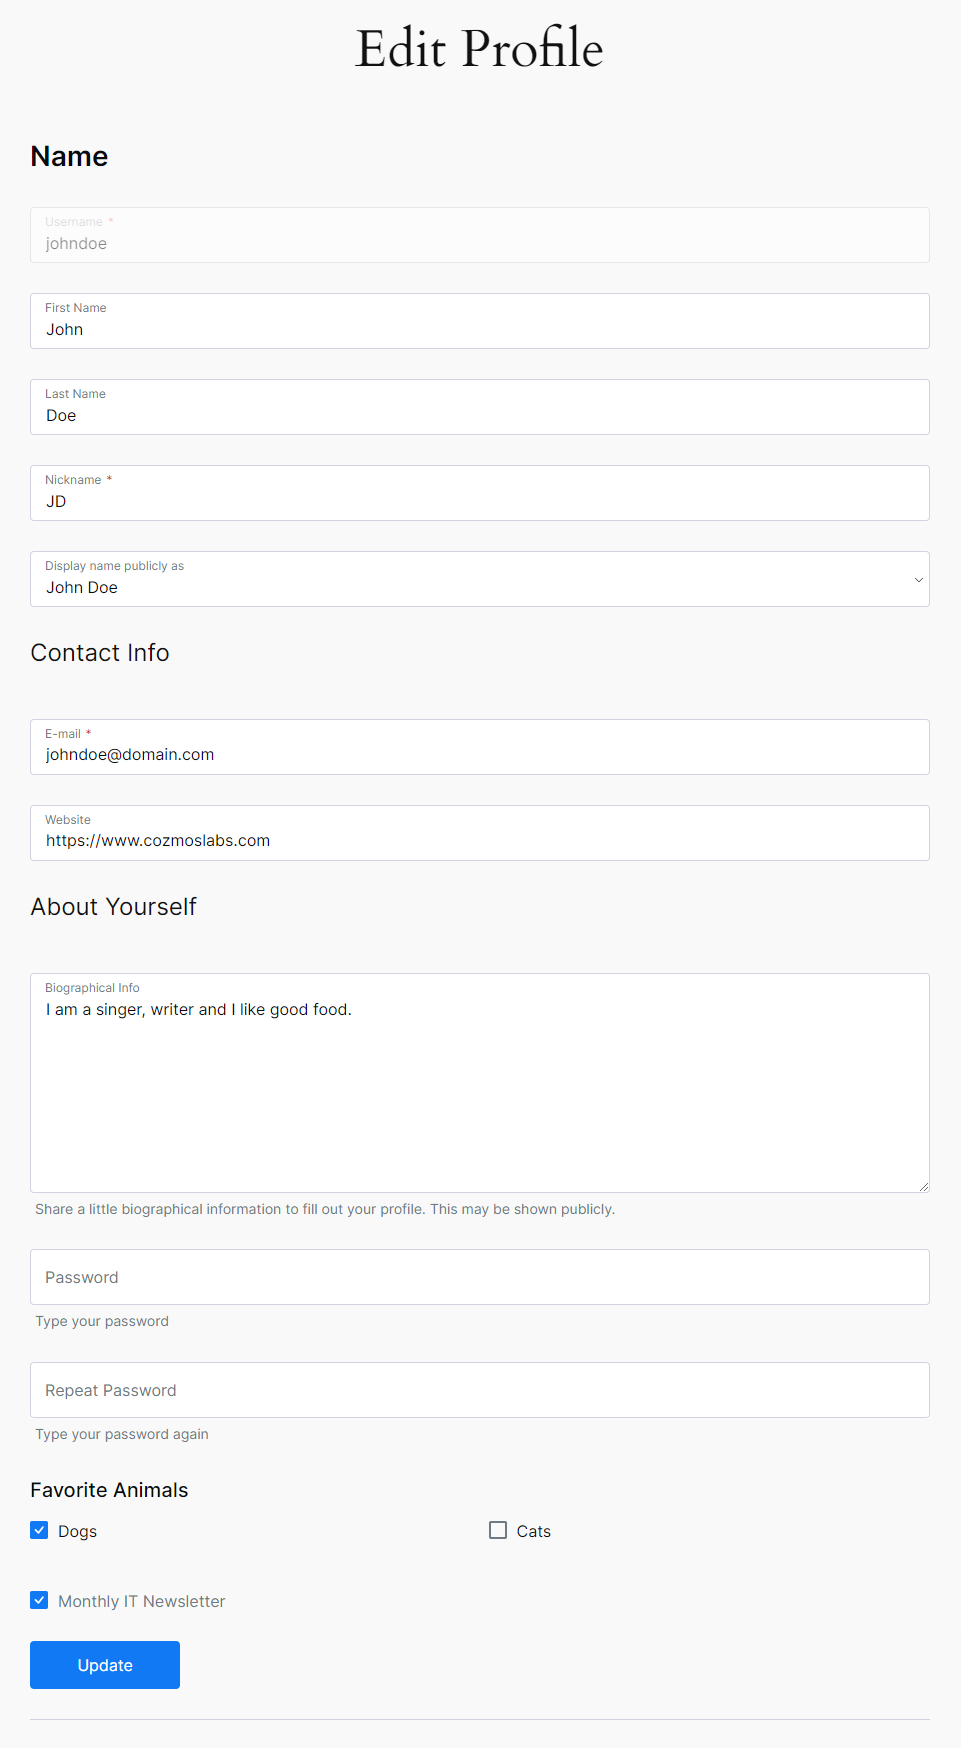
Users can subscribe or unsubscribe from the list if they login and access the Edit Profile Form created by Profile Builder.
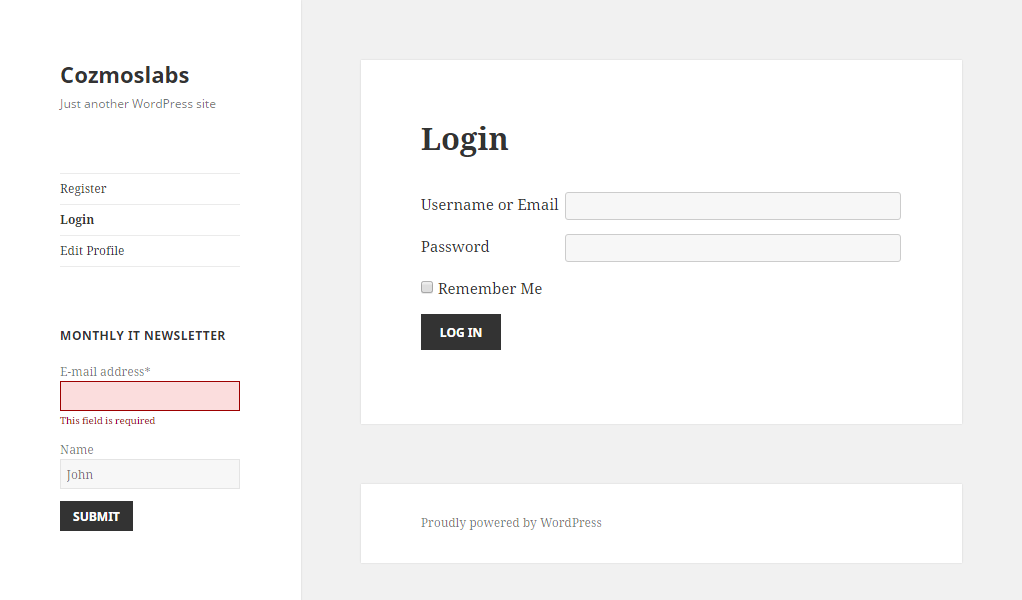
The add-on comes with a built-in widget that you can place in any widget area. By default the widget has only the Email Address and Name fields from each list, and you can select which of these to display.
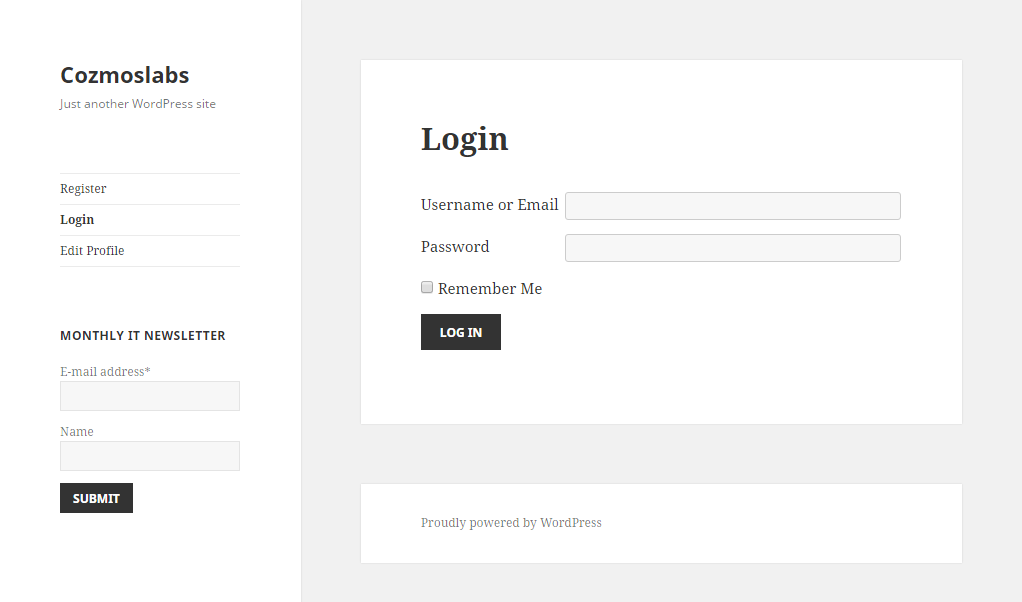
If both fields are selected, in the front-end part of your website, the widget will look something like the one bellow. The email address field is mandatory.
If a field is required, on submission, the user will be prompted with an error.
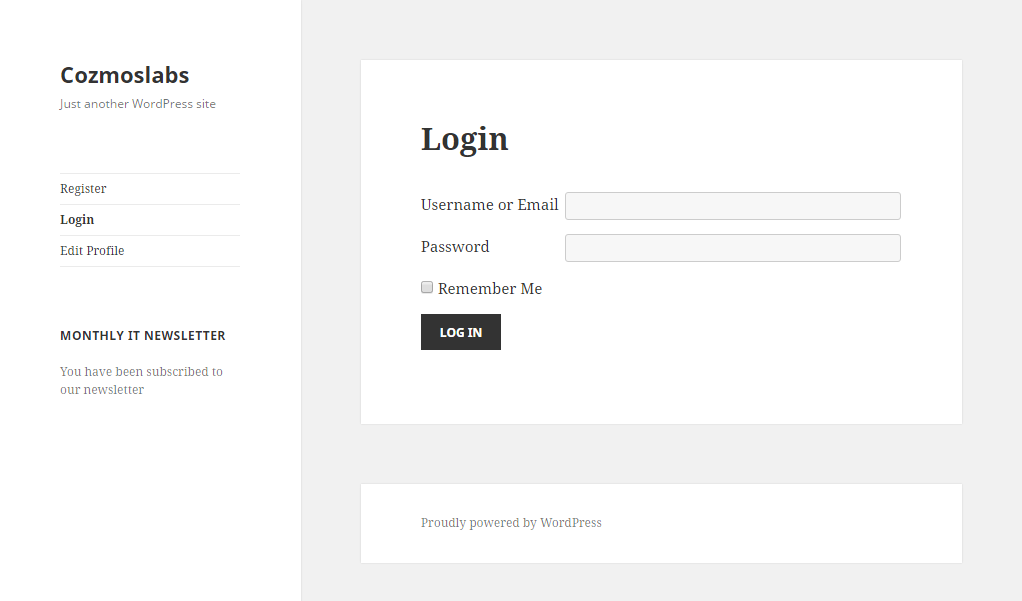
If everything worked fine, the user will receive a thank you message and will be subscribed to the list you have selected.
In order to create a Campaign Monitor Campaign you will need to login into your account and go to Campaigns. The setup will walk you through the entire process.
In order to import users into your Campaign Monitor list you will need to follow this tutorial.
Campaign Monitor is an Advanced add-on, available only with a Profile Builder Basic or Pro license.
Create beautiful front-end registration and profile forms with custom fields. Setup member directories, custom redirects, cutomize user emails & more using the all in one user management plugin.
Get Profile BuilderCombine the power of Profile Builder with Paid Member Subscriptions to set up user registration, memberships, and recurring revenue.
Get 25% off with the bundle
