The developer console is a powerful tool primarily intended for web developers and designers. It enables real-time inspection and modification of HTML and CSS for testing style changes before applying permanent adjustments to WordPress Appearance.
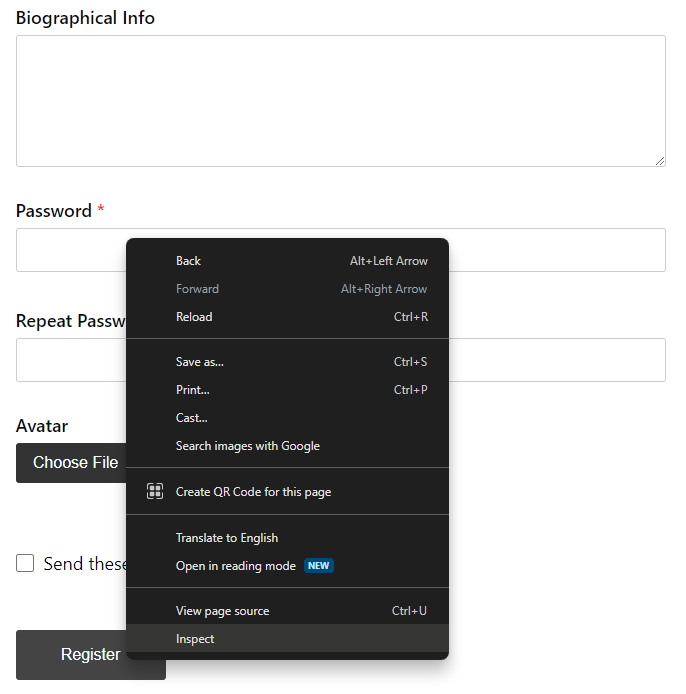
To access the developer console, simply hover your mouse over the element you wish to edit—in this case, the register button. Right-click the mouse and choose “Inspect” from the menu of options that appear.
Once the Developer Console is open, you’ll need to identify and target the specific button you want to customize. Look for a line of code that represents the button. It will typically be surrounded by HTML tags like <button>, <input>, or <a>.
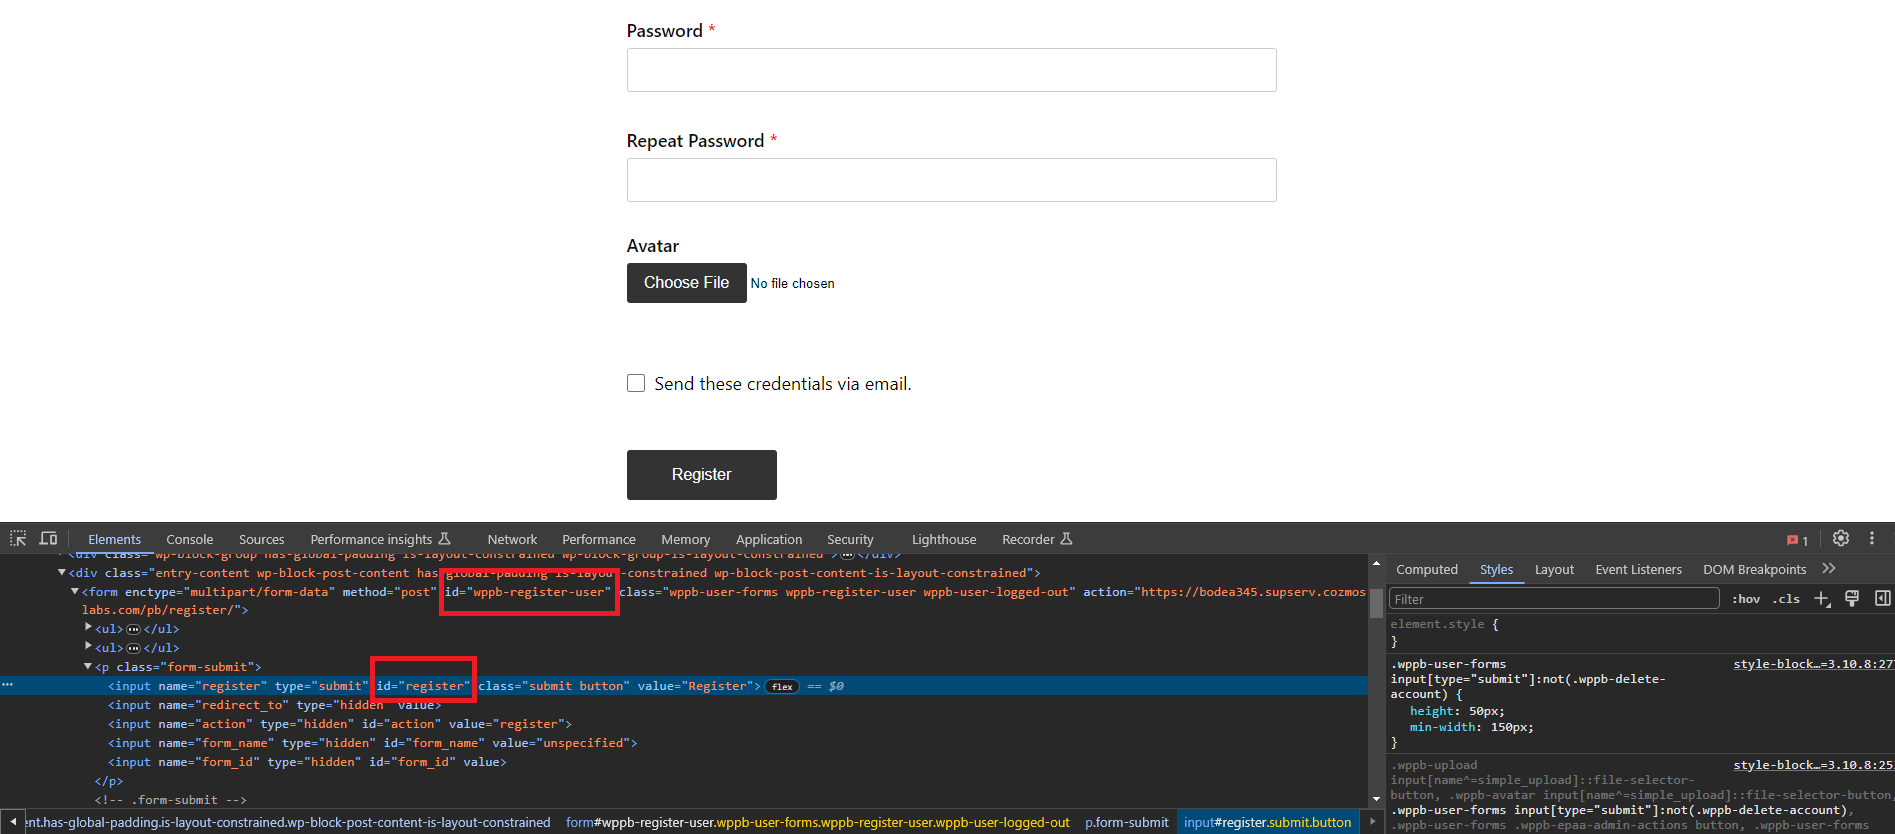
In this case, the button has an ID called “register” that you can use to target it with CSS. To customize the register button within the registration form, you should also target the register form. Therefore, you should use the following CSS code: #wppb-register-user input#register{}
When customizing buttons, it’s crucial to pinpoint the precise IDs and classes associated with each form. Below are the key identifiers for some common forms:
Use these selectors as a starting point to effectively target and customize the buttons within each respective form. Understanding these identifiers is essential for crafting tailored CSS code in the next section.
The typical customization for buttons involves adjusting their background color, hover states, and borders.
Examples of CSS code for Register Button
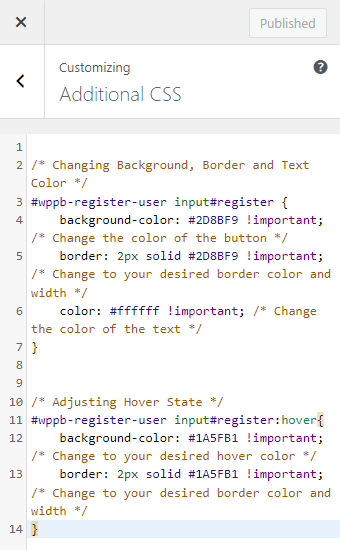
/* Example 1: Changing Background, Border and Text Color */
#wppb-register-user input#register {
    background-color: #2D8BF9 !important; /* Change the color of the button */
    border: 2px solid #2D8BF9 !important; /* Change to your desired border color and width */
    color: #ffffff !important;            /* Change the color of the text */
}
/* Example 2: Adjusting Hover State */
#wppb-register-user input#register:hover{
    background-color: #1A5FB1 !important; /* Change to your desired hover color */
    border: 2px solid #1A5FB1 !important; /* Change to your desired border color and width */
}
The provided code can be used to customize the appearance of the register button. To extend this styling to another button for a Profile Builder form, simply adjust the CSS selector. Replace the current class or ID with the one associated with your target button. (check the “Identifying IDs and Classes for Buttons” section for guidance.) For example, to stylize the login button, replace #wppb-register-user input#register with #wppb-loginform input#wppb-submit in your CSS code.
To add custom CSS code in WordPress, follow these steps:
Example:
Replace “your-button-class” with the actual class of your button and adjust the CSS properties as needed.
Now, your button should reflect the changes you made using the provided CSS code.
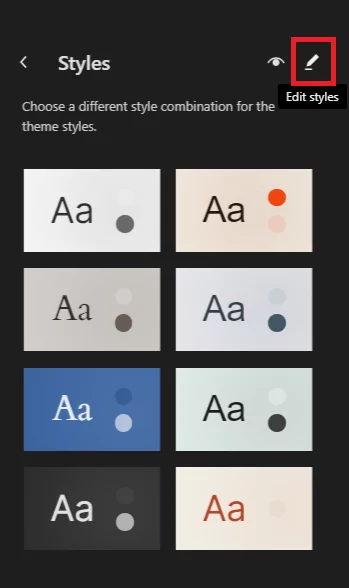
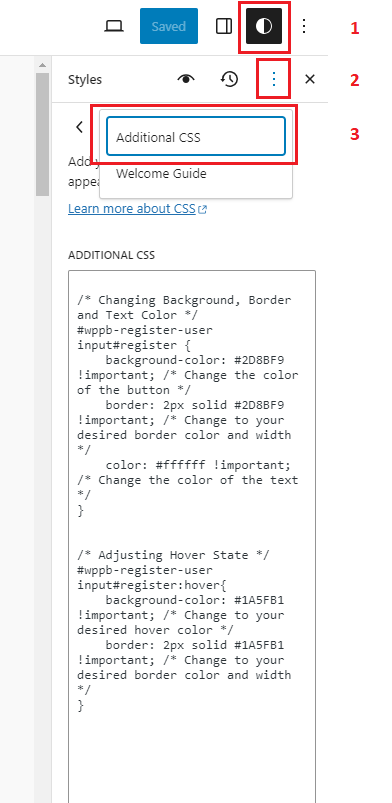
If you use on your site a block theme (for example the Twenty Twenty-Three theme), then you can find the Additional CSS section by:
Now, your button should reflect the changes you made using the provided CSS code.
Create beautiful front-end registration and profile forms with custom fields. Setup member directories, custom redirects, cutomize user emails & more using the all in one user management plugin.
Get Profile BuilderCombine the power of Profile Builder with Paid Member Subscriptions to set up user registration, memberships, and recurring revenue.
Get 25% off with the bundle
