

Table of Contents
- 1 Reasons for Using a WooCommerce Form with Payment Options
- 2 Using Profile Builder Pro for Building Your Form
- 3 Creating a Customized Form for WooCommerce
- 4 Building a WooCommerce Form with Payment
- 5 Creating a Subscription Plan and Adding Products
- 6 Integrating Payment Options Into the WooCommerce Form
- 7 Create a Customized WooCommerce Form with Payment Today!
If you don’t have a large range of products or services to sell, you may not need a fully-fledged WooCommerce store. Creating a WooCommerce form with payment options may turn out to be a simpler and more effective alternative.
All you need is a reliable plugin that can handle payments for you. You also need the plugin to provide you with a strong tech infrastructure.
Below we’ll walk you through the process of creating a WooCommerce form with different payment options. But let’s first take a quick look at some of the reasons site owners may want to use this way of handling payments.
Reasons for Using a WooCommerce Form with Payment Options
- Not everyone wants to build a full-scale WooCommerce store. And building one just for the sake of selling a couple products or services is not an ideal use of resources.
- Instead of building a single-product or single-service store which may not even look professional, you would be much better off creating a WooCommerce custom payment form to sell your product or service.
- Similarly, in some cases, the site owner may only be offering consulting services. A fully-fledged WooCommerce store for that would not only be overkill, but also too much of a burden and distraction to your business.
- The same goes for collecting donations or getting rooms booked. You don’t really need a WooCommerce store to accept payments in these cases. A simple WooCommerce form with payment will do the trick for you.
Using Profile Builder Pro for Building Your Form
The process of building a customized WooCommerce form with payment options can be split into two parts: (1) creating a customized registration form and (2) setting up payment options.
For the first part, you will need Profile Builder Pro. It’s a complete user management plugin with a wide range of user-related features.
It creates customized and flexible user registration, login, edit profile, password reset, and other user-related forms. It also offers many other types of user management features like adding user roles, creating login, registration, and logout redirects in WordPress, creating password protected content and posts, and much more.
If you have WooCommerce installed on your site, you would also be able to create a WooCommerce login shortcode and implement WooCommerce social login using Profile Builder Pro.
Profile Builder Pro
If you want to create a fully customized WooCommerce form, Profile Builder should be your go-to plugin.
Get Profile BuilderCreating a Customized Form for WooCommerce
Creating a customized registration form for WooCommerce is really simple with Profile Builder Pro. Assuming you have the WooCommerce plugin installed and activated on your site, it would only take a few simple steps.
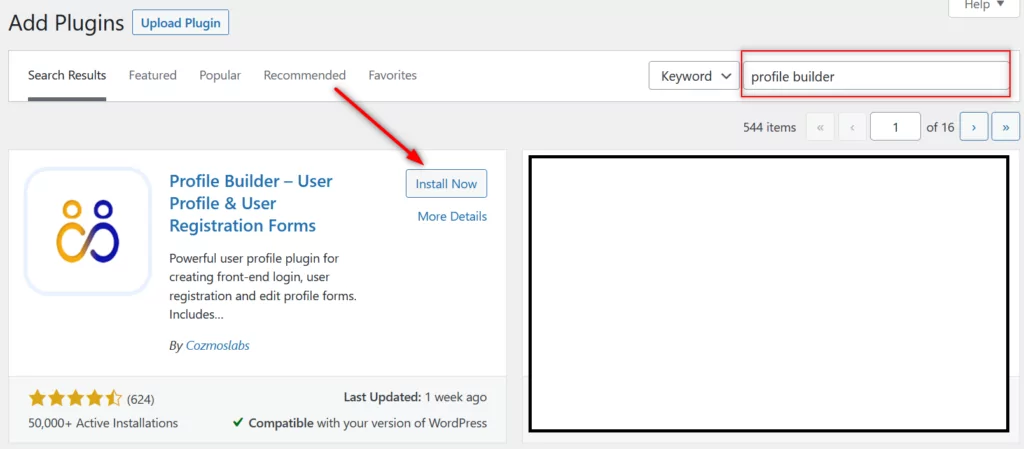
Begin with downloading the free Profile Builder plugin from your WordPress dashboard. Click on the Add New option under Plugins and type “Profile Builder” into the search bar.
Locate the plugin and then click on Install Now and later the Activate button.
However, you’re also going to need the WooCommerce billing and shipping fields added to your form, a feature only available in the pro version of Profile Builder. In addition, you may also want to customize other fields of your form.
But since you get so much more in terms of overall functionality and customizations with Profile Builder Pro, it’s going to be a worthy investment into user management on your site.
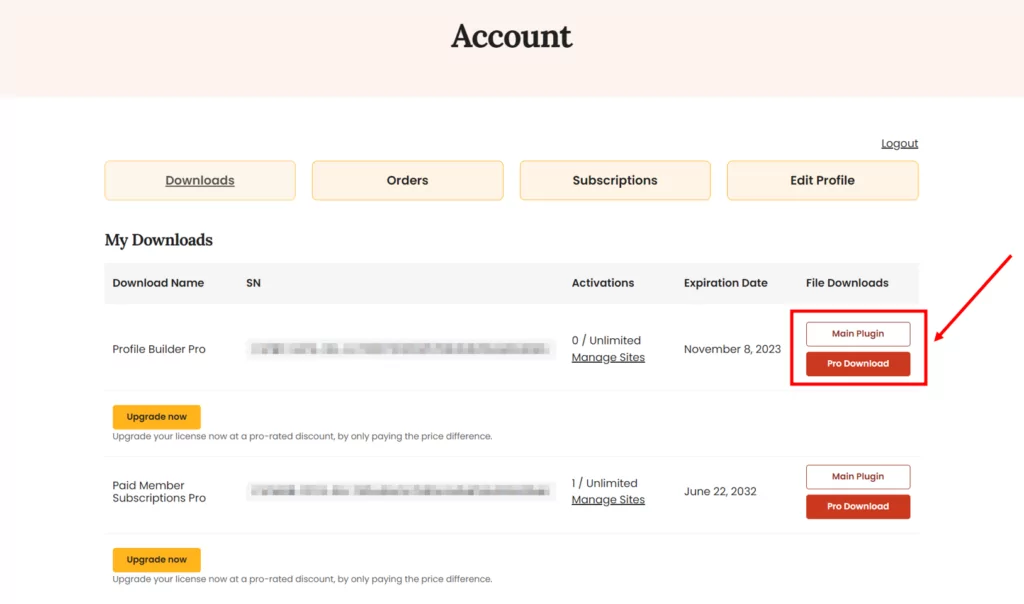
Once you purchase Profile Builder Pro, you can download the pro plugin from your account on Cozmoslabs and then upload it to your site from the Plugins area of your dashboard.
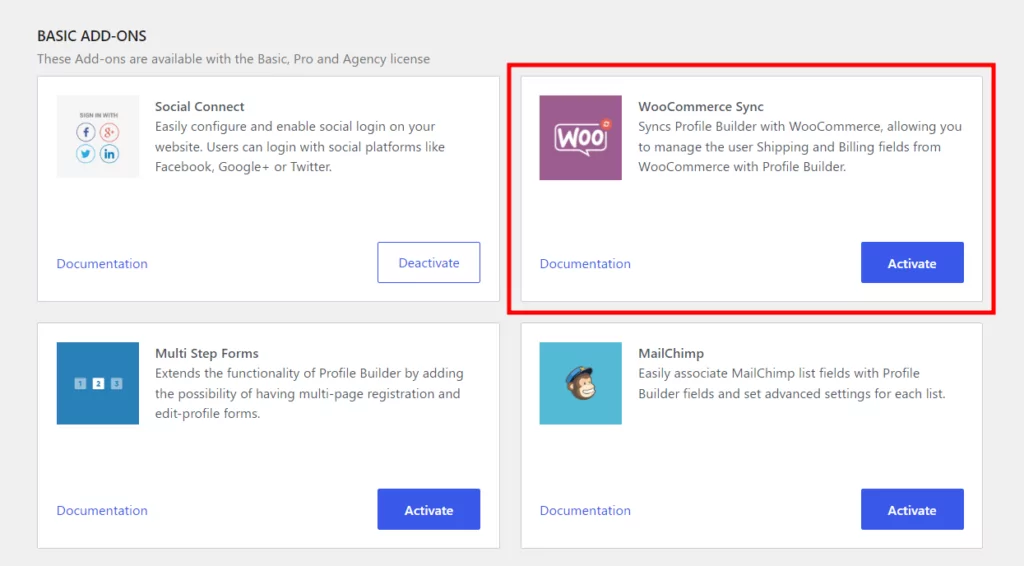
Next, you need to activate the WooCommerce Sync pro add-on from Profile Builder. Go to the Add-Ons menu under Profile Builder in your WordPress dashboard.
Scroll down a bit, find the WooCommerce Sync option, and click on the Activate button.
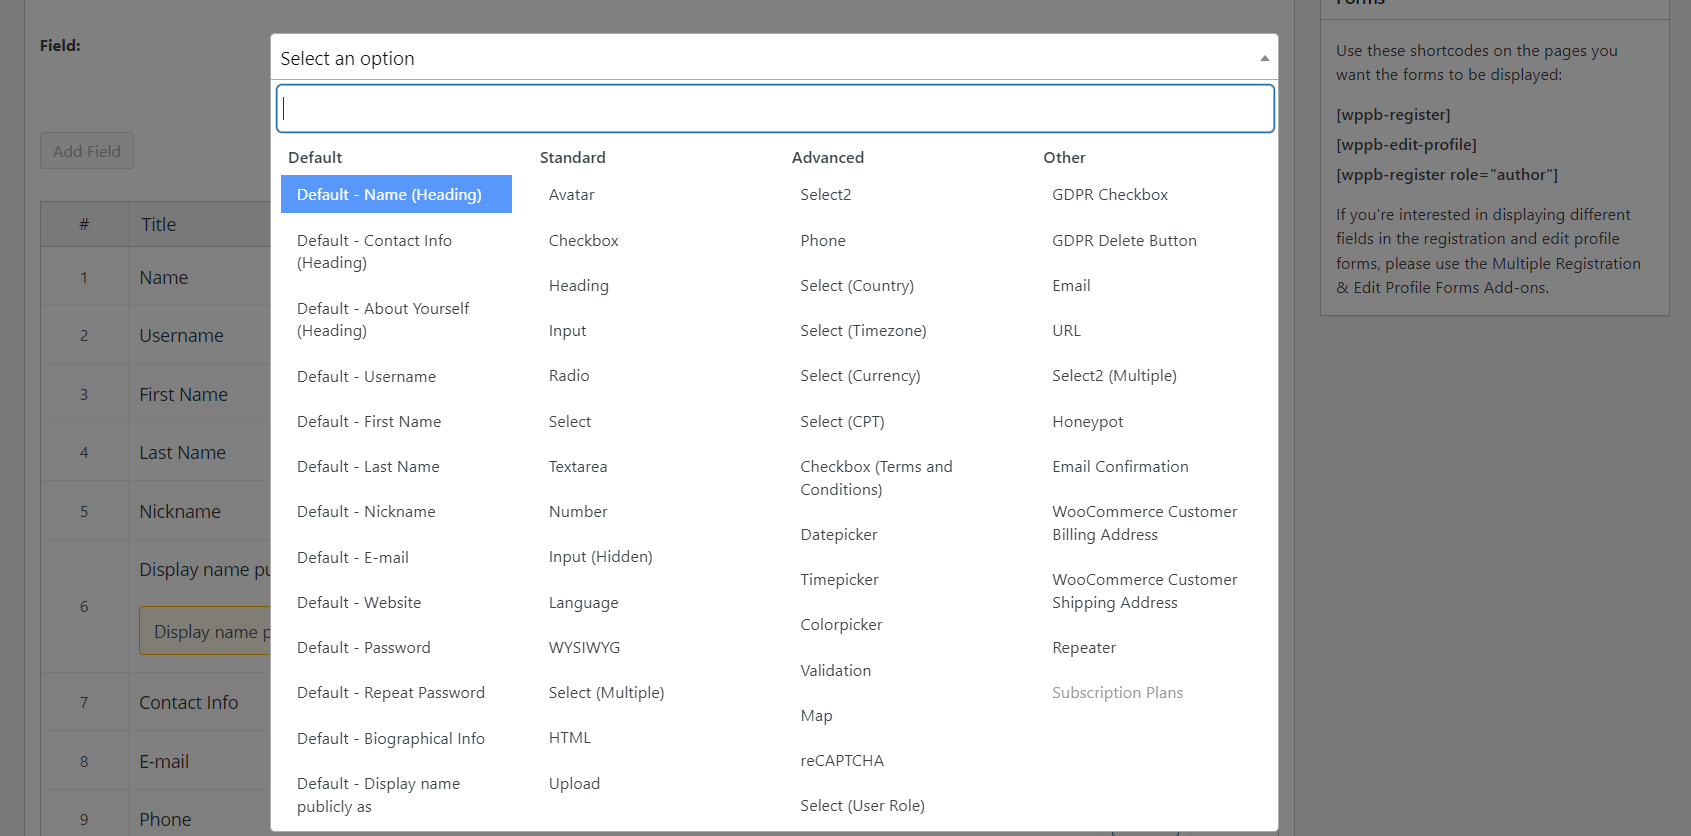
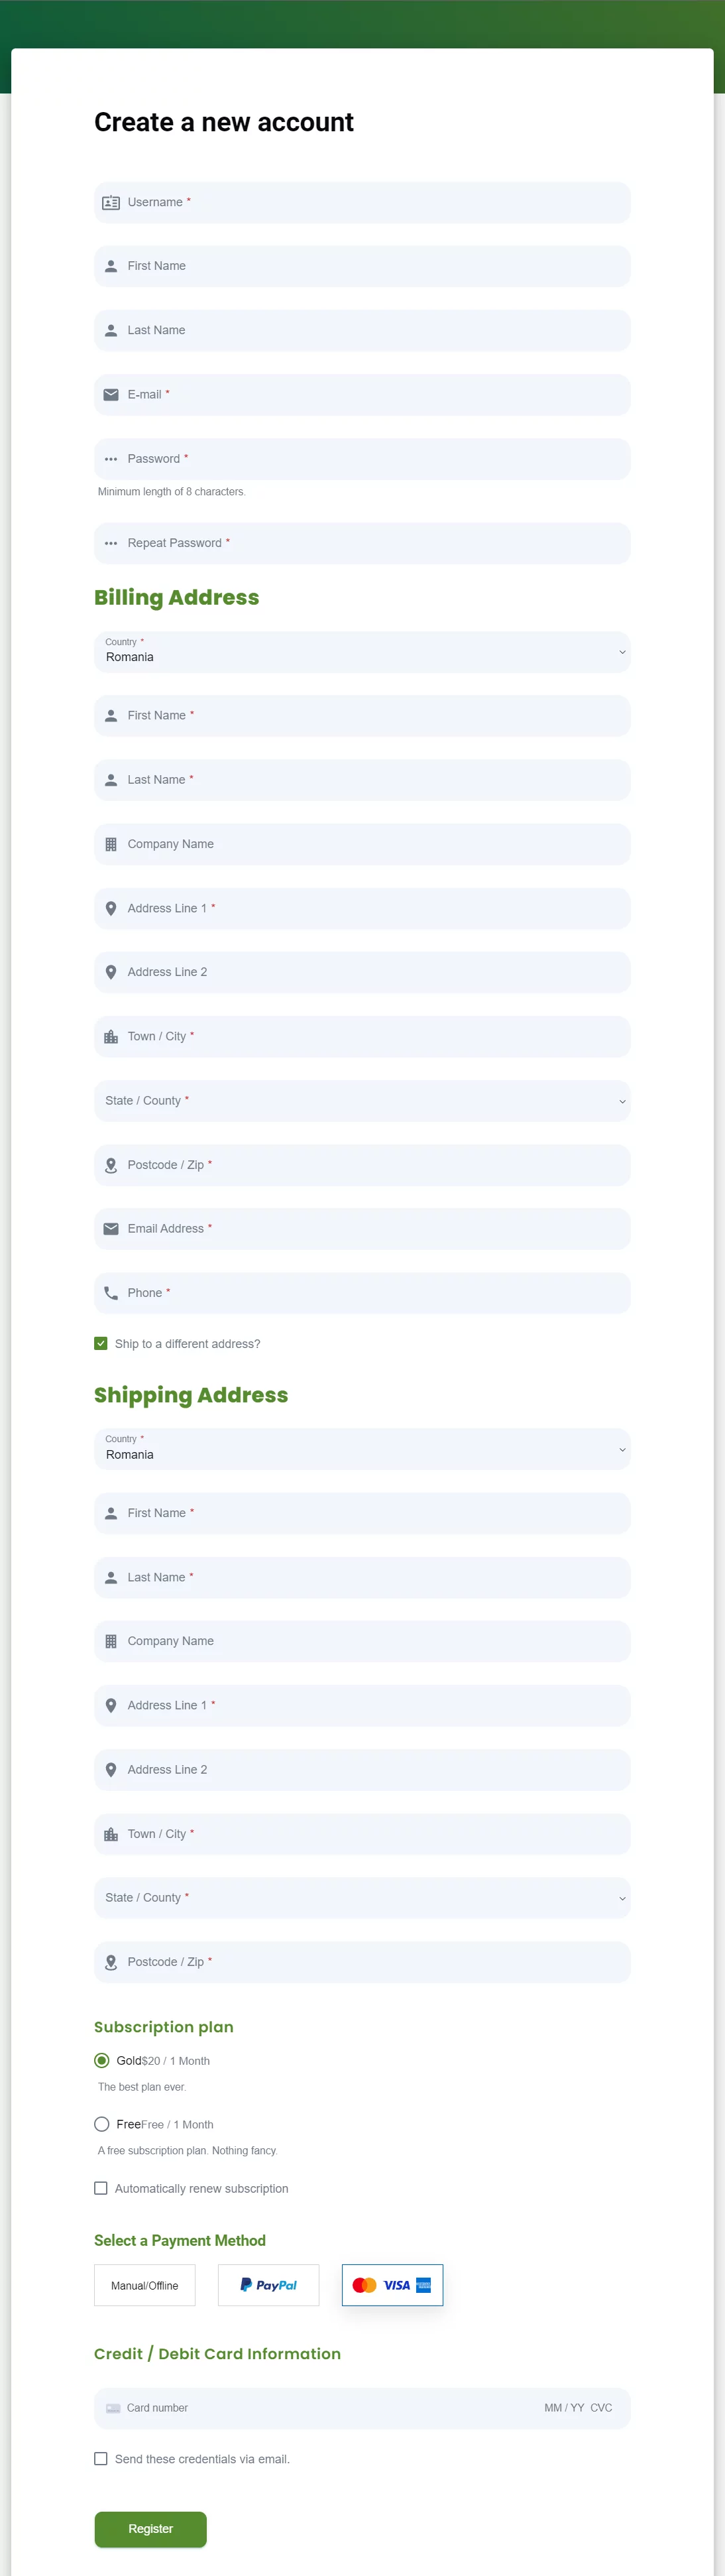
Now click on the Form Fields menu under Profile Builder. You’ll be able to customize your WooCommerce payment form here.
You can edit the existing form fields, as well as add new ones, such as customer billing and shipping address. Just like you see in the image below.
Once you have customized the form to your liking, you can go to the next step of integrating the payment options into your form.
Alternative: Creating a Basic WooCommerce Form
If you don’t need all that extra customization Profile Builder provides for your form, there’s a simpler alternative. You can just create a registration page using Paid Member Subscriptions, the plugin that will allow you to accept payments in the next step.
We’re going to use this plugin to add payment functionality to the form anyway, so if you want to take the easy path, you can simply use Paid Member Subscriptions for everything right from the start.
However, keep in mind that this way your form will only have an option to make a payment, the basic registration fields, and some billing fields. You won’t be able to customize the form.
But if you’re only looking to accept payments using a basic form, then it will get the job done for you. You won’t need Profile Builder in that case.
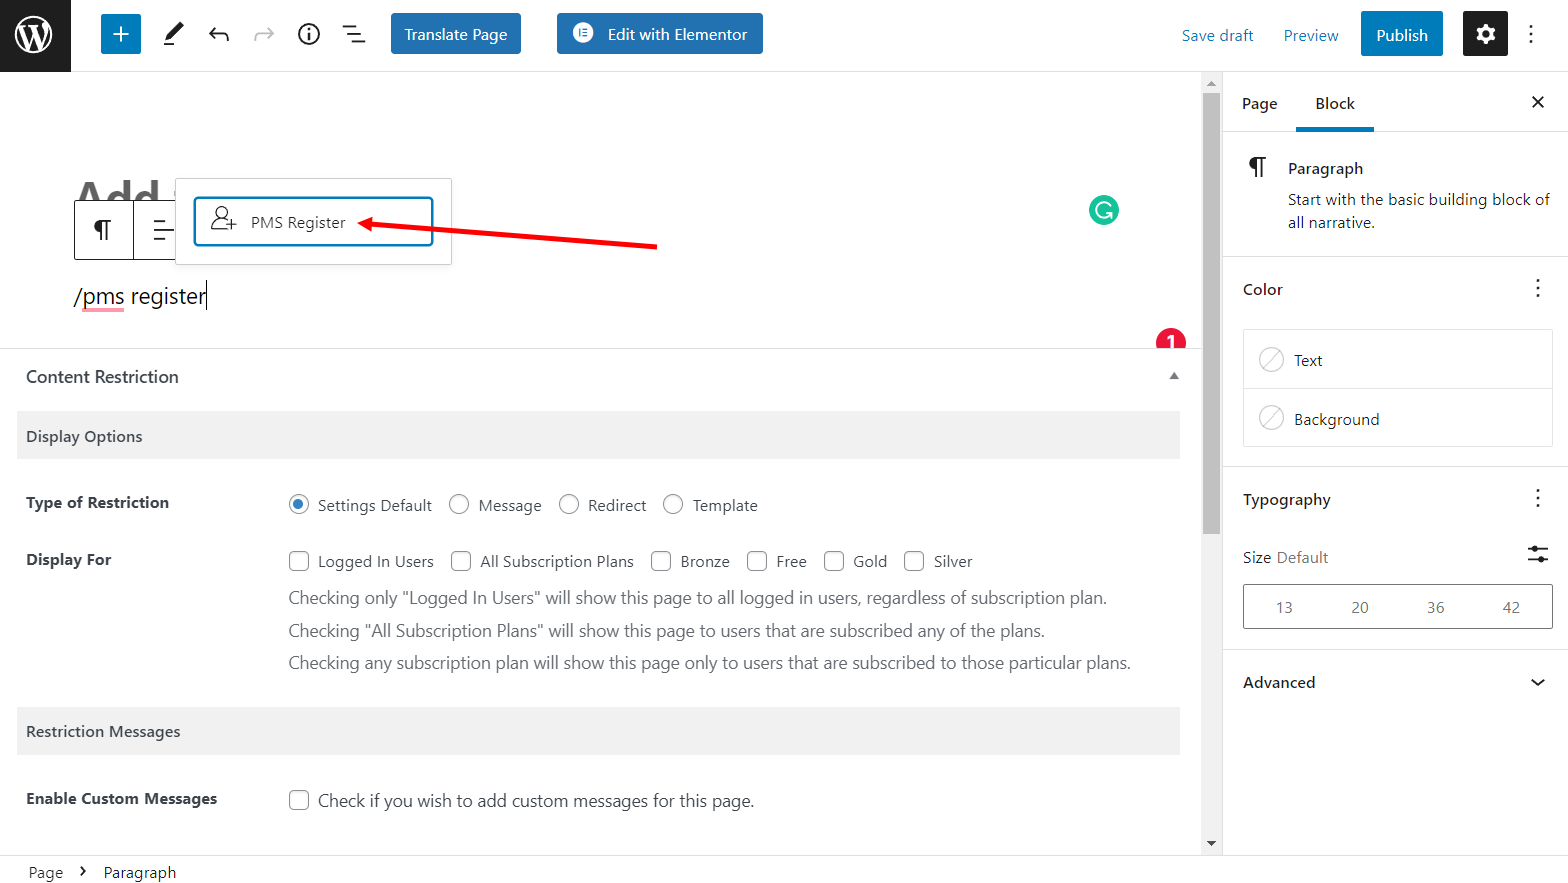
All you have to do to implement this is create a new page and add the PMS Register block in the Gutenberg editor.
Building a WooCommerce Form with Payment
Now that you have a basic or customized WooCommerce registration form, you can move to the second part of the process: Adding payment to your WooCommerce form. For this, you’ll need the Paid Member Subscriptions plugin to help you out.
Paid Member Subscriptions will allow you to receive payments using different methods and payment gateways. It would also allow you to integrate different payment options right into the form you just created.
This way you will be able to easily create a WooCommerce form with all the payment options and customizations you want.
Paid Member Subscriptions Pro
Paid Member Subscriptions makes the otherwise complicated task of accepting payments on your site incredibly easy and efficient.
Get Paid Member SubscriptionsTo install the plugin on your site, you can follow the exact same steps I showed for Profile Builder.
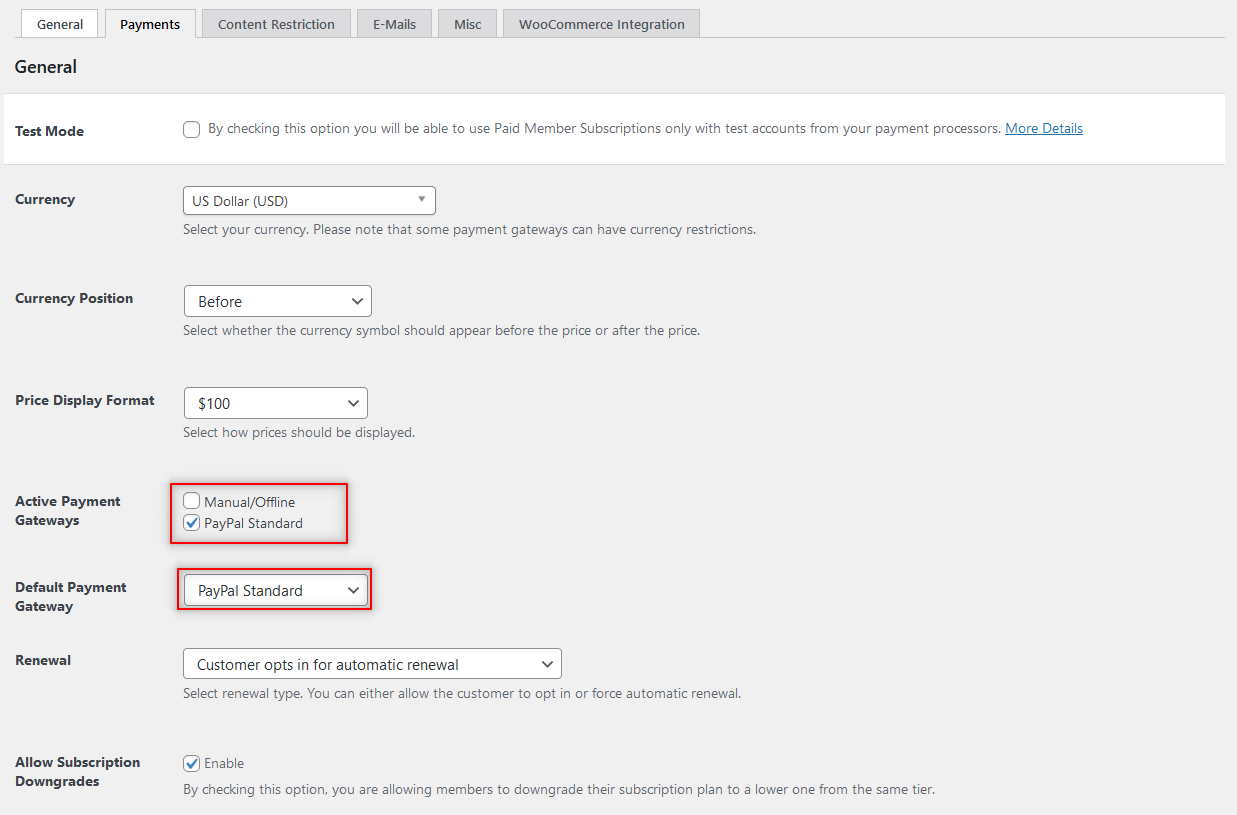
PayPal Standard Recurring Payments
If you’re offering a monthly service or a subscription to a certain set of products you can use PayPal Standard as your default payment gateway and set your plan to automatically renew.
For this, you payment set up should look something like this:
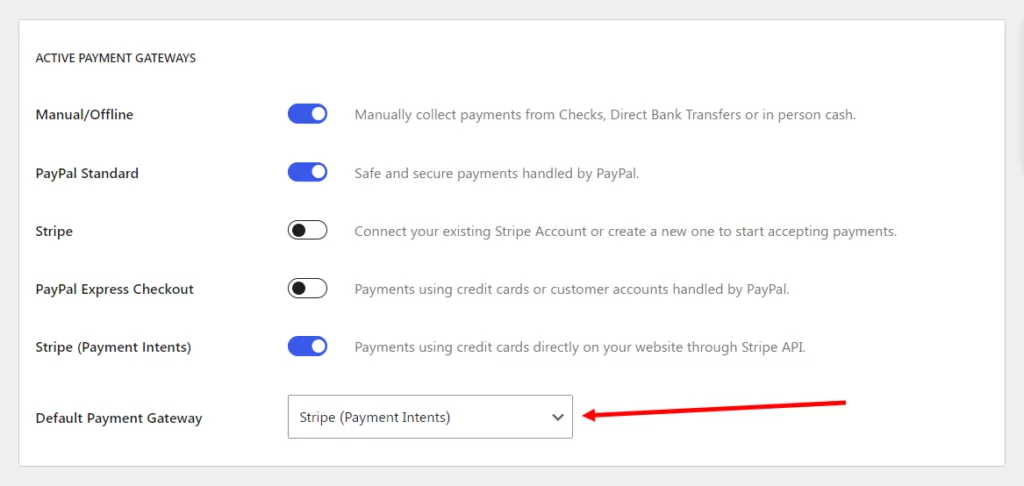
PayPal Express Checkout
Next up, you have the PayPal Express Checkout payment option. Lucky for you, we have an add-on for this payment . Click on the Add-ons option and locate the PayPal Express add-on. Then activate it the same way you activated the other add-on above.
Now you will see two more payment options under the same Payments tab we mentioned above.
However, you can only have either PayPal Standard or PayPal Express Checkout as an active payment gateway. The latter is actually very similar to PayPal Standard, but it offers an additional layer of security. It also allows users to pay without leaving your site.
Detailed instructions to set up PayPal Pro and Express Checkout can be found here.
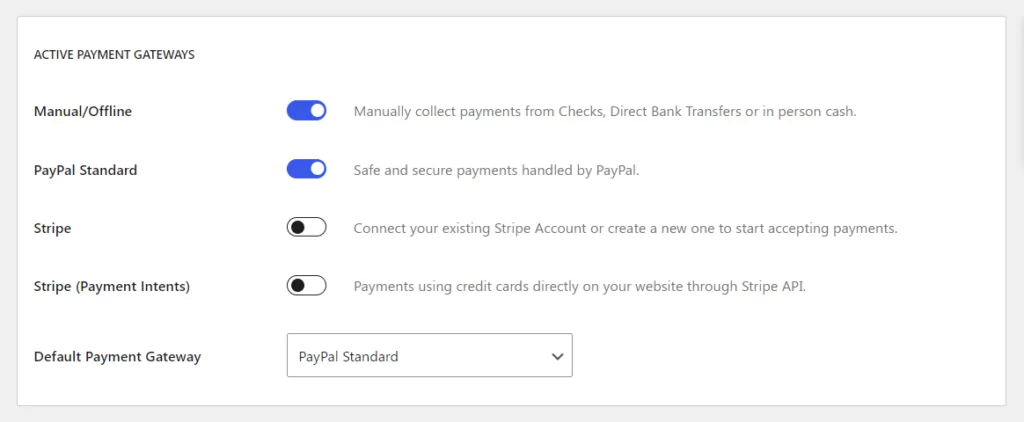
Stripe
Stripe is another popular payment option among users and Paid Member Subscriptions offers this one as well.
Again, activate the Stripe add-on in the same way. You should now see two more payment options listed as options under the Activate Payment Gateways.
Both these Stripe payment options – Stripe and Stripe (Payment Intents) – are similar, but the latter is more secure and the recommended option. You can also set Stripe as the default payment gateway.
You can find all the setup instructions for the Stripe payment gateway here.
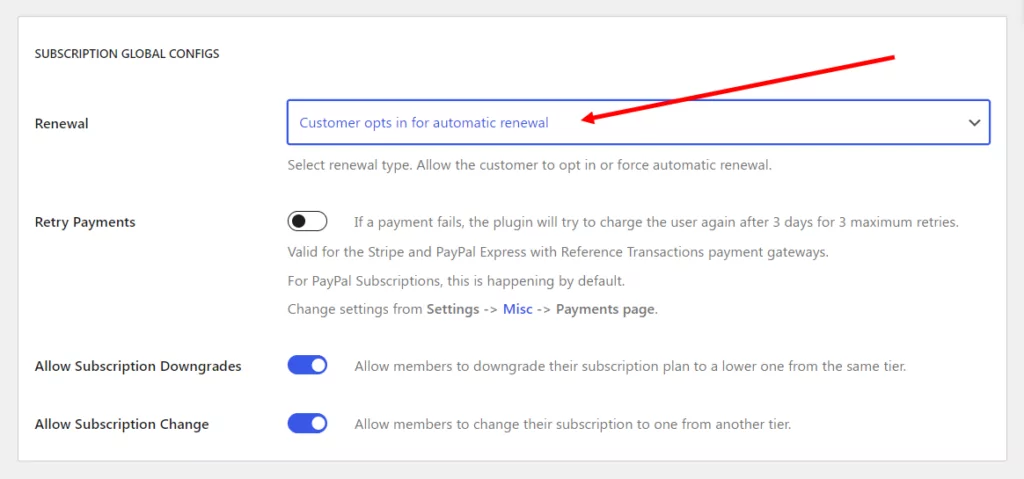
Finally, with all the payment options we discussed above, you would have the option to enable recurring payments or automatic renewals for all of them.
Creating a Subscription Plan and Adding Products
Now that you have your WooCommerce payment form as well as your payment options set up, it’s time to merge the two of them. This will give you a functional WooCommerce form with payment.
You’ll need to have an active subscription plan to add payment options to your WooCommerce form. But don’t worry, you can easily create one with Paid Member Subscriptions.
Click on the Subscription Plans option under the Paid Member Subscriptions menu and then hit Add New.
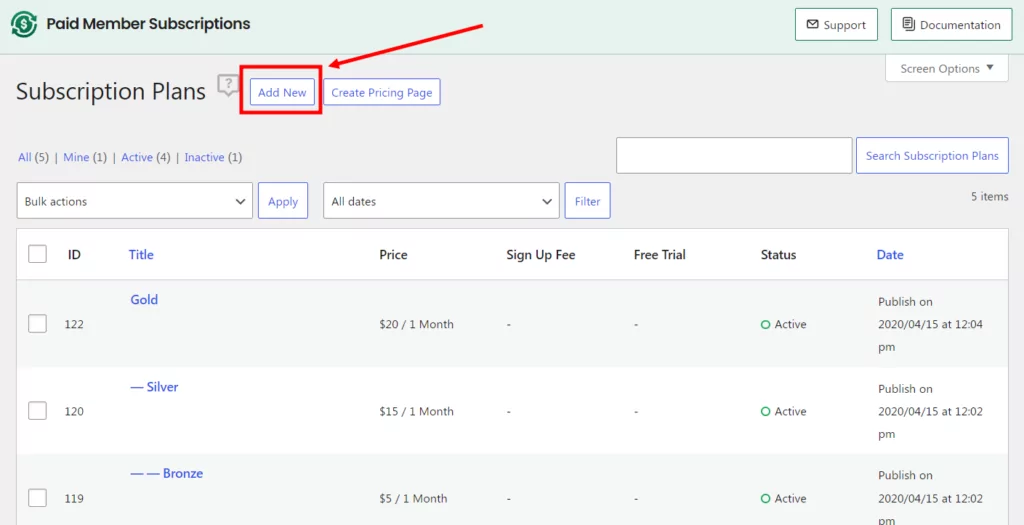
From here you’ll be able to create your brand new subscription plan that you can then connect to your WooCommerce product.
Once that’s done, scroll back to the top and click on the Save Subscription button at the top-right of the screen.
Integrating Payment Options Into the WooCommerce Form
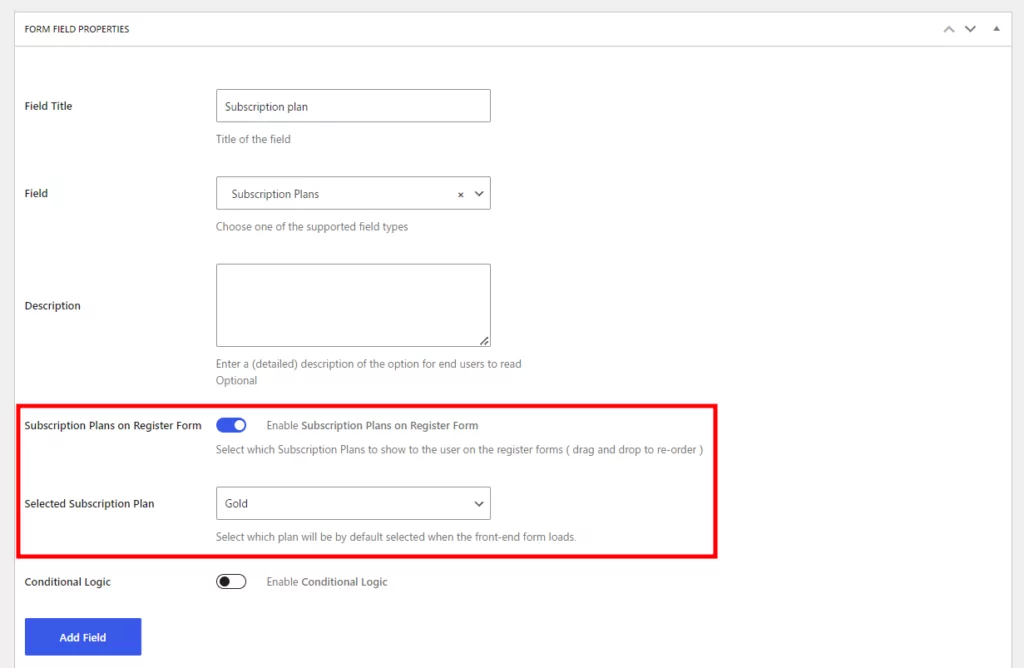
If you decided to use Profile Builder to create a customized WooCommerce payment form, you’ll have another step here.
You will need to go back to the Form Fields option under Profile Builder. Then click on the Select an option dropdown menu at the top. Now click on the Subscription Plans option there.

Fill in the required details. Then choose your subscription plan. Finally, click on the Add Field button at the bottom.
Now wherever you display this form, your users will also see the option to make a payment. If you didn’t let Profile Builder automatically create a registration page for you, you’ll need to add the Register Gutenberg block to a new page and give it a suggestive name (i.e. User Registration).
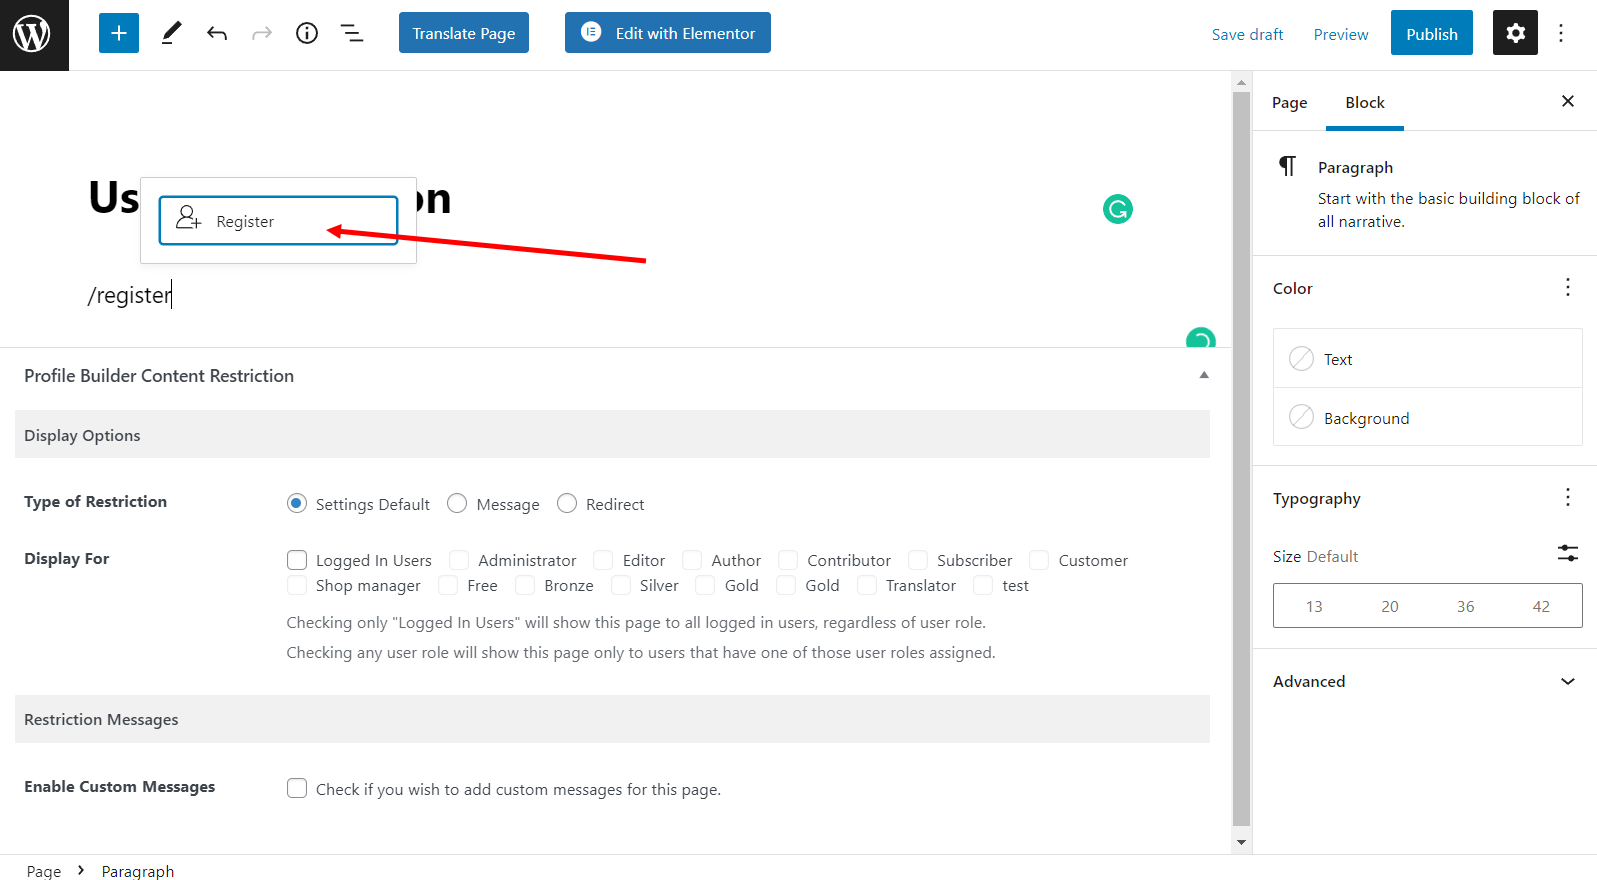
Alternatively, you can also copy the registration shortcode [Only an administrator can create pages with the register shortcode.] and create a page using it.
This is going to be your WooCommerce form with payment. You would also have the billing, shipping, and other relevant fields in it.
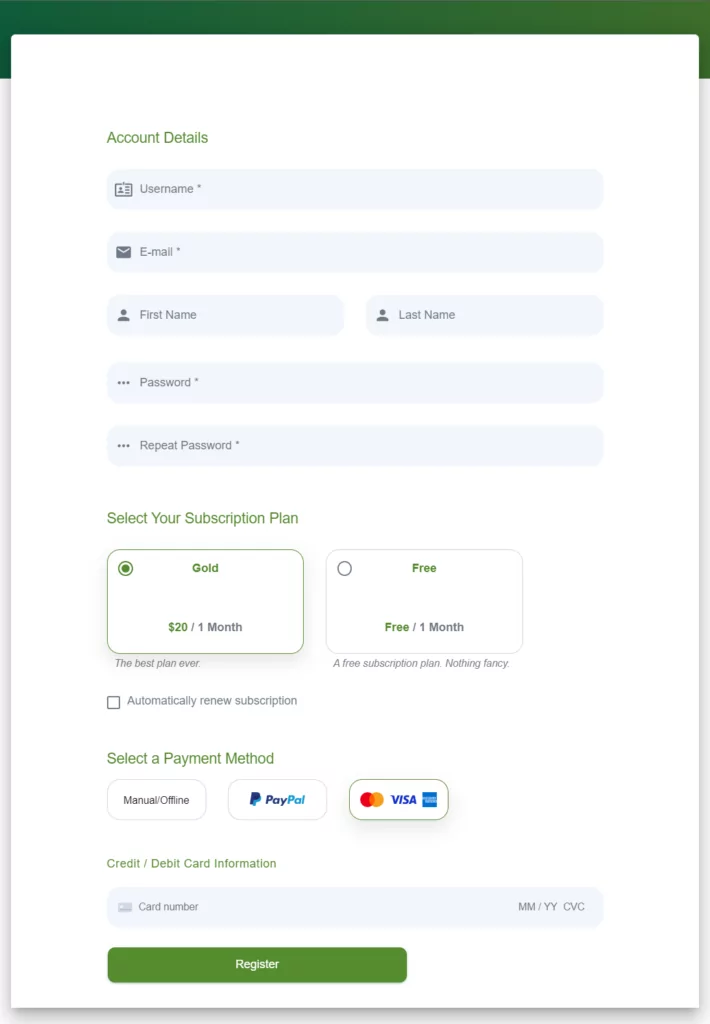
However, if you didn’t use Profile Builder and simply used the basic registration form created using Paid Member Subscriptions, you will only have a limited number of form fields. However, you will easily be able to accept payments through the form all the same.
Here’s an example of the WooCommerce payment form we created just using Paid Member Subscriptions:
Create a Customized WooCommerce Form with Payment Today!
Creating a customized WooCommerce form can be complicated and tricky, but not if you have a powerful and flexible payments plugin.
If you add Profile Builder to the mix you can enjoy a lot of freedom in terms of form customization. However, if you don’t need custom form fields then Paid Member Subscriptions alone will handle everything for you.
It would cover every aspect of creating a functional WooCommerce form that supports multiple payment options. And as we explained above, it also supports recurring payments.
So what are you waiting for? Do away with the hassle of creating a fully-fledged WooCommerce store just for accepting payments and instead create an efficient WooCommerce form with payment using Paid Member Subscriptions.
Paid Member Subscriptions Pro
Ranging from accepting payments using multiple payment methods through a simple WooCommerce form to creating a fully-fledged membership website, Paid Member Subscriptions Pro does it all for you!
Get Paid Member SubscriptionsDo you still have questions about how to create a WooCommerce form with payment options? Let us know in the comments below!
Related Articles

How to Set Up WooCommerce Stripe Subscriptions with Recurring Payments (3 Methods)
Are you searching for a way to set up WooCommerce Stripe subscriptions? Setting up recurring subscriptions is a great way to build regular, dependable revenue for your website. And when it comes to processing payments, Stripe is one of the top options thanks to its competitive fees and flexible feature set. However, WooCommerce doesn't include […]
Continue Reading
How to Set Up WooCommerce Recurring Payments
Can't figure out how to set up WooCommerce recurring payments for your business? You aren't alone. Building a subscription business is daunting, especially if it's your first time. There are many moving parts at any given time. Whether it's laying the foundation, creating content, marketing your membership site, or managing payments, there are plenty of […]
Continue Reading
Best WooCommerce Subscriptions Alternative: Paid Member Subscriptions, a More Affordable and Complete Solution
Are you looking to sell subscription products on your WooCommerce site? One of the most popular ways to sell subscription products in WooCommerce is with the WooCommerce Subscriptions plugin. It lets you create WooCommerce products with recurring payments as a way to offer subscriptions to your customers. While this is an official extension from WooCommerce, […]
Continue Reading