
Table of Contents
- 1 The Need for WordPress Logout Redirect
- 2 Creating WordPress Logout Redirect with Profile Builder Pro
- 3 Set Up Flexible WordPress Logout Redirects and Much More!
Setting up WordPress logout redirects the right way can go a long way in helping you improve your website’s overall user experience. It also helps you stay on top of your user engagement since you would be able to make your users visit the pages you really want them to.
It would be far better than letting them land on the unengaging WordPress default login page. But let me explain this in a bit more detail below before I walk you through the process of setting up WordPress logout redirects.
The Need for WordPress Logout Redirect
By default, WordPress redirects all users to the standard WordPress login page (wp-login) upon logout. However, this is far from ideal, no matter the type of site you’re running.
Let’s talk about some of the reasons you would want to control the WordPress logout redirect rules on your site:
- Regardless of whether you’re running an online store, a membership website, or even just a blog, letting your users land on an unengaging page is not a good idea;
- You may want to redirect the users logging out to some specific page which would help you get better value out of them;
- Redirecting to the default wp-login is not going to be a good user experience either;
- Even if you don’t have any specific page in mind where you can redirect the users logging out, you can simply redirect them to the homepage, which would help the engagement and overall user experience.
Things like bounce rate and the number of pages your users visit are also important in terms of SEO. If you let your users land on the default wp-login page, they will most likely close the page and exit your website.
However, if you redirect them to some other page that may help you convert them or even just engage them, it’s not only going to improve the user experience but may also help with SEO. So even redirecting to the homepage may make sense.
In fact, if you have an online store, letting the users redirect to the default wp-login page upon logout should not even be an option. Just like a WooCommerce login redirect, you can redirect them to the shop page on logout as well, to boost the probability of converting them into sales.
Types of WordPress Logout Redirects
Depending on the plugin you use to implement the WordPress logout functionality on your site, you would be able to set up different types of redirects. You need to have the control and flexibility to create different redirects for different types of users.
You can use Profile Builder as your plugin here which offers many different types of logout redirects, while being a complete user management system in itself.
Profile Builder Pro
Create beautiful front-end registration and profile forms with custom fields. Setup member directories, custom redirects, cutomize user emails & more using the all in one user management plugin.
Get Profile BuilderSo, let’s go through the types of redirects you get with Profile Builder.
Individual User Redirect
The individual user redirect allows you to set up WordPress redirect after logout for specific users. You can use the users’ user ID or username to set up this type of redirect.
User Role Based Redirect
Profile Builder also lets you redirect users on logout based on their user role. This is a very useful type of redirect if you don’t want to redirect all your user roles, or if you want to redirect different user roles to different pages.
So, for instance, you can redirect the “Customer” user role to the shop page, but can choose to redirect the “Subscribers” to the blog page. Similarly, you can also avoid redirecting user roles like “Author”, “SEO Manager”, and “Editor” to any page.
Global Redirect
The Global redirect is basically a general redirect. You can use this redirect type to redirect all users, or the users who are not covered under any other types of redirects, like user role-based redirect or individual redirect.
Redirecting Default WordPress Pages
Profile Builder also offers the option to redirect the default WordPress pages, including the wp-login page. So you also have the option to completely do away with the default wp-login page for your users, making sure no user lands on that page after logging out.
You can instead redirect the wp-login page to any other page you want, such as a customized login page. This way, when the users who do not fall under any other type of redirect setup log out from their account on your site, they would get redirected to the page of your choice.
Redirect Types for Other User Actions
In addition to logout redirects, Profile Builder also allows you to set up redirects for pretty much every other important user action:
- Redirect upon login;
- Redirect upon registration;
- Redirect after the user edits their profile;
- Redirect after a user confirms their email after registration;
- Redirect after a successful password reset;
- Redirect the users when they try to access the WordPress dashboard.
Profile Builder takes the customization and flexibility to the next level with some of its other redirect features like redirect priority and tags for redirecting to dynamic URLs. We will get to them at the end of this post.
You should now have a clear idea of what you get with Profile Builder in terms of setting up redirects.
So let me walk you through the step-by-step process of setting up different types of WordPress logout redirects and customizing them to your needs.
Creating WordPress Logout Redirect with Profile Builder Pro
To follow this tutorial you would need to purchase one of the Pro versions of Profile Builder since the custom redirect is a pro feature. Profile Builder comes with a whole lot of useful features other than flexible user redirects for different user actions, so it’s an all-in-one plugin for user management.
1. Downloading and Uploading Profile Builder Pro
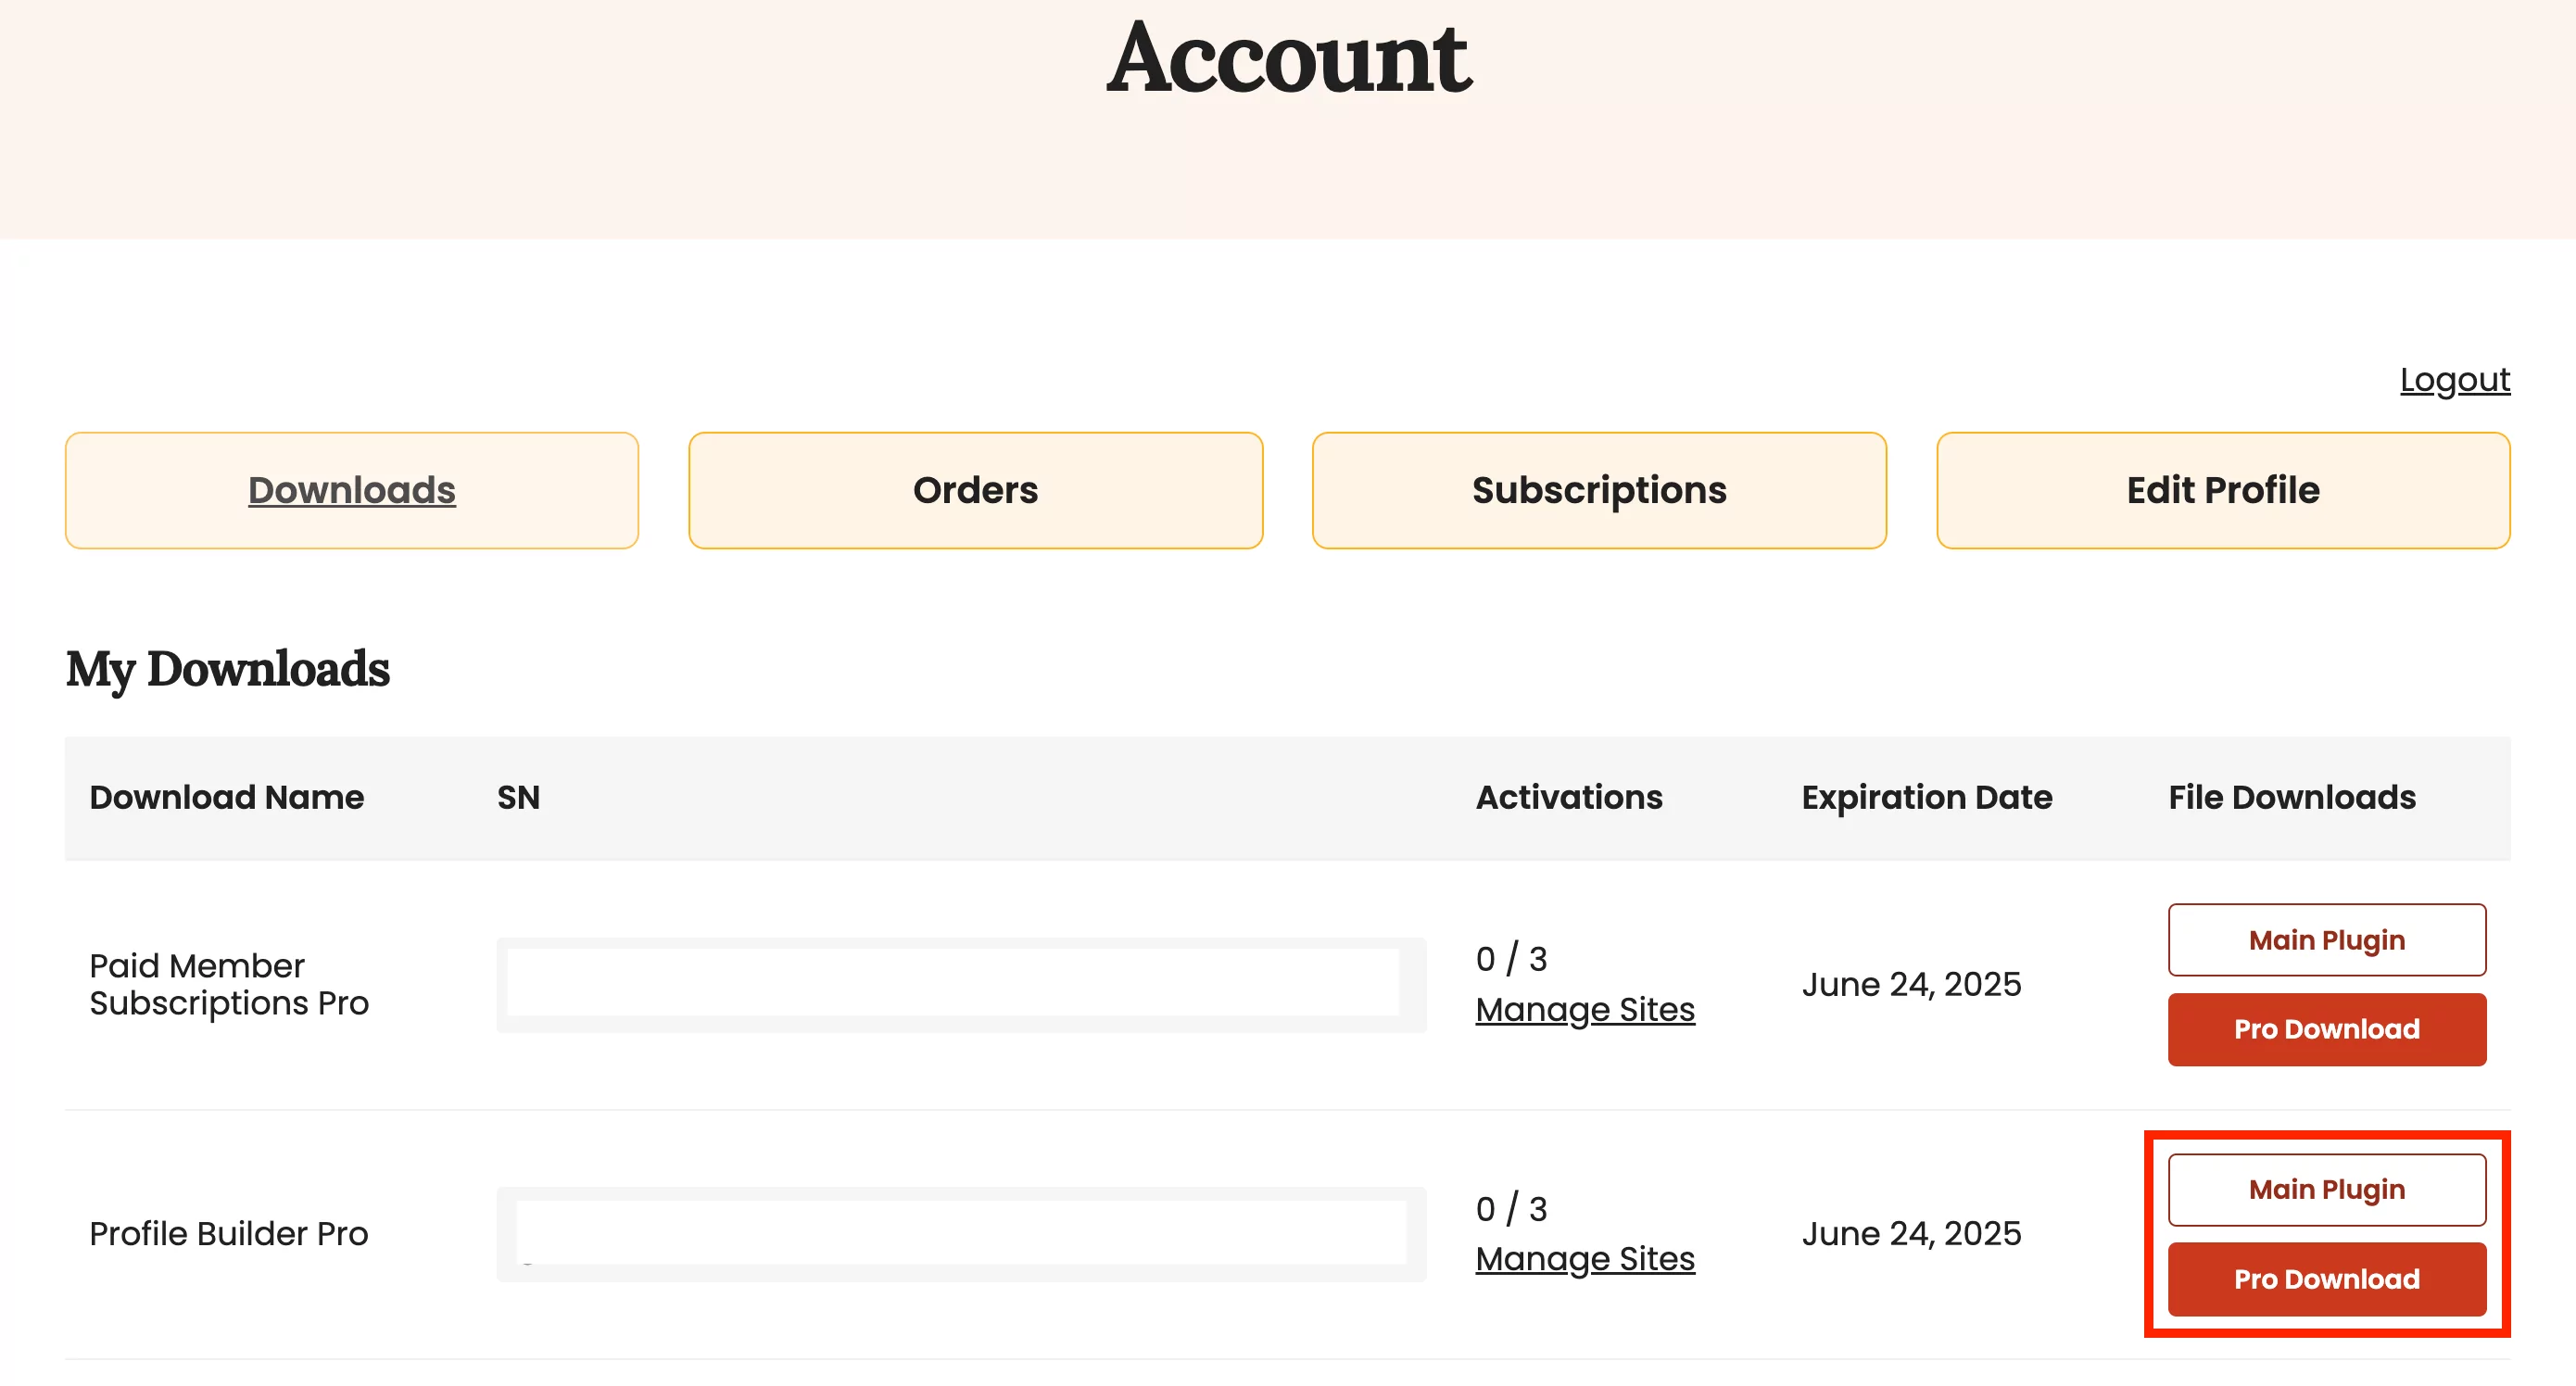
Once you purchase Profile Builder Pro, you will be able to log into your account on Cozmoslabs and download the plugin files.
Once downloaded, you’ll need to upload the plugin to your WordPress website. You just need to click the Add New option under Plugins and then the Upload Plugin button at the top of the page.
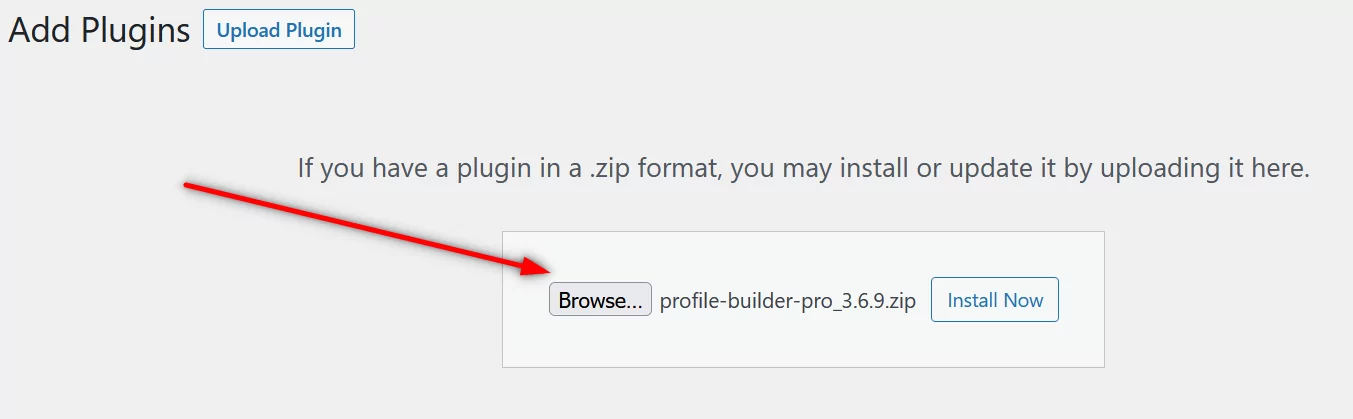
Next, click the Browse button, upload the plugin files, and hit Install Now. Once installed, click on the Activate button.
Profile Builder Pro is now active on your WordPress website.
2. Activating the Custom Redirects Add-On
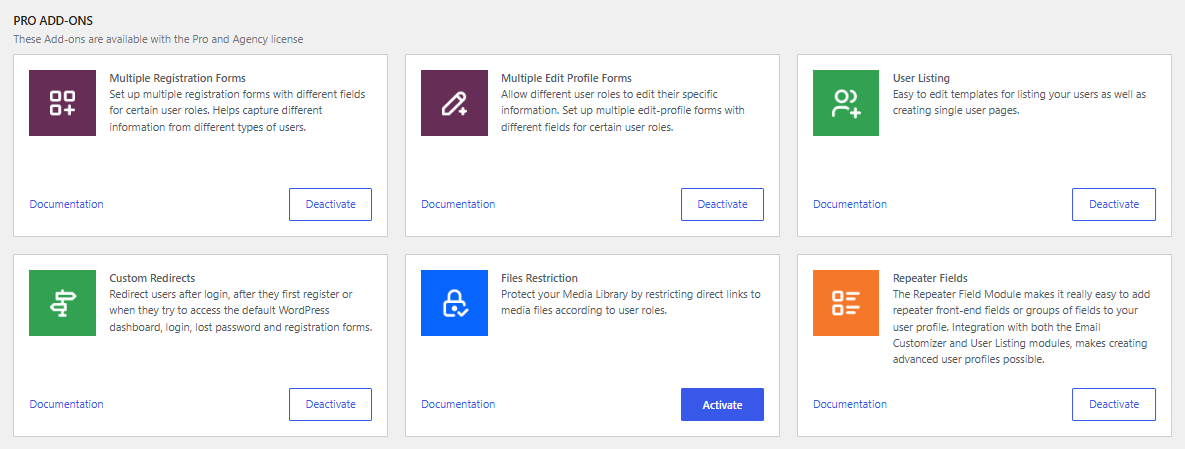
The next step is to activate the Custom Redirects pro add-on. This add-on will install the functionality to create custom WordPress logout redirects on your site.
Go to the Add-Ons option under Profile Builder from the dashboard. Scroll down a bit to find the Custom Redirects add-on, and then click the Activate button.
3. Creating Different Types of Logout Redirects
Now you’re ready to set up WordPress redirect after logout. Let’s go to the specific steps you need to perform to create different types of logout redirects.
Individual Logout Redirect
Click on the Custom Redirects option under Profile Builder in the dashboard menu. The very first section you will see at the top is Individual User Redirects.
Select Username or User ID depending on what you plan to use to redirect the particular user and then fill in the field accordingly. Then choose the After Logout option from the Redirect Type dropdown list. Next, put in the URL you want that particular user to be redirected to.
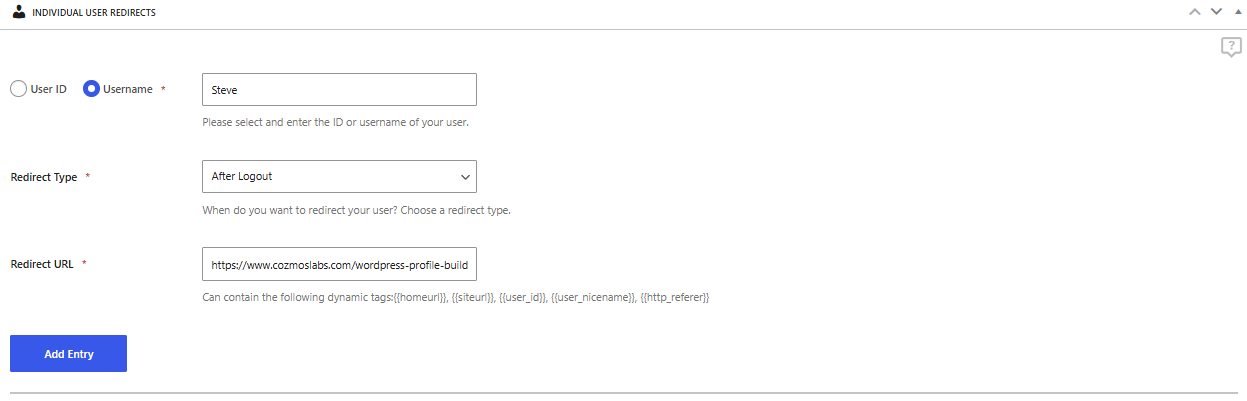
Finally, click on the Add Entry button and this redirect will come into effect. The user with the username “Steve” will be redirected upon logout to the URL we have put into the Redirect URL field as you can see in the above image.
WordPress Logout Redirect Based on User Role
As explained above, you can easily set up a logout redirect based on user roles. The section right below the Individual User Redirects is User Role based Redirects.
Here, you’ll just need to choose the User Role you want to redirect and follow the same steps for the rest of the fields as we did for the previous redirect type.
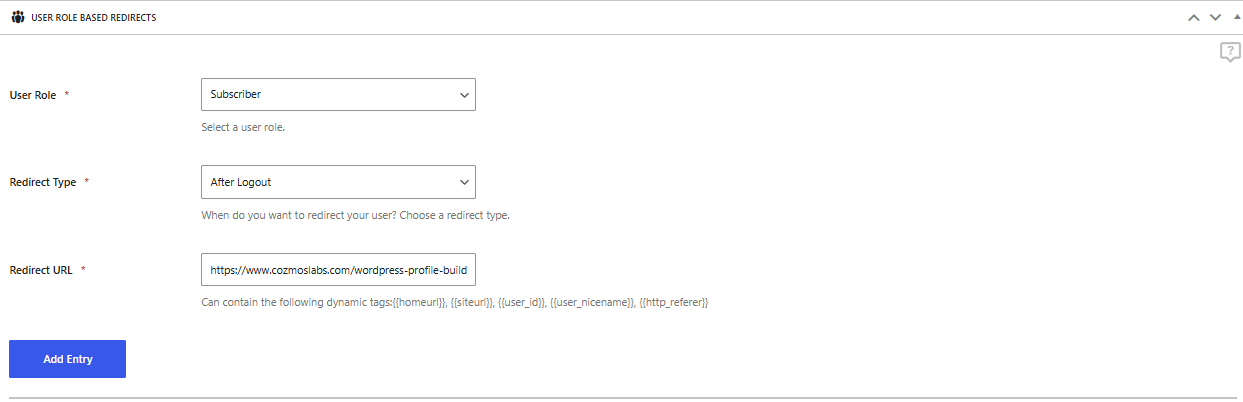
Once we click on the Add Entry button here, all the users under the “Subscriber” user role will get redirected to our blog after logging out.
Global Logout Redirects
As explained above, this is a general redirect and would apply to all users who haven’t been covered under any other type of redirect.
You simply need to choose the After Logout option from the dropdown menu, put in the redirect URL, and click on the Add Entry button.
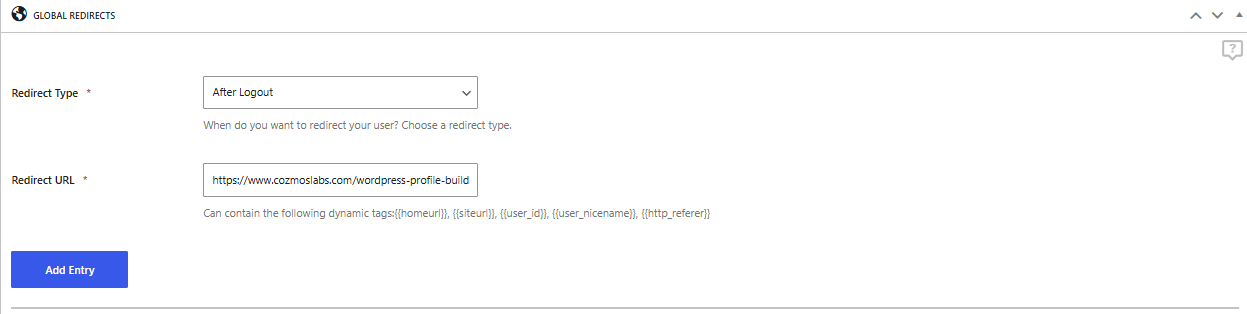
So now in our case, all users except all the “Subscribers” and the user Steve would get redirected to the URL we entered above.
Redirecting the Default WordPress Login Page
As we said above, the default WordPress behavior is to redirect users to the default WordPress login page when they log out. You can choose to redirect the default wp-login page itself so that every user who would have otherwise landed on the default WordPress login page would get redirected to a page of your choice instead.
The last section on the Custom Redirects add-on would allow you to set up this type of redirect. Just choose the Login (wp-login.php) option from the dropdown menu, enter the redirect URL in the next field, and click the Add Entry button.
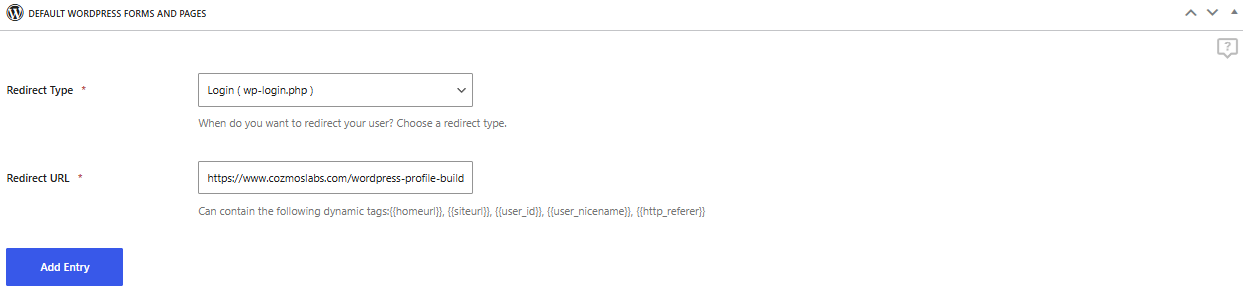
So even if you don’t set up a global redirect or have certain user roles you didn’t cover with other redirect rules, they can still get redirected to the page of your choice.
4. Prioritizing WordPress Logout Redirects
Since you can set up so many different types of logout redirects using Profile Builder Pro, it’s also important to prioritize them. This would help you ensure that no user gets wrongly redirected and that you don’t have conflicting redirect rules on your website.
The image below explains how Profile Builder prioritizes redirects by default. This is also visible on the Custom Redirects add-on page.
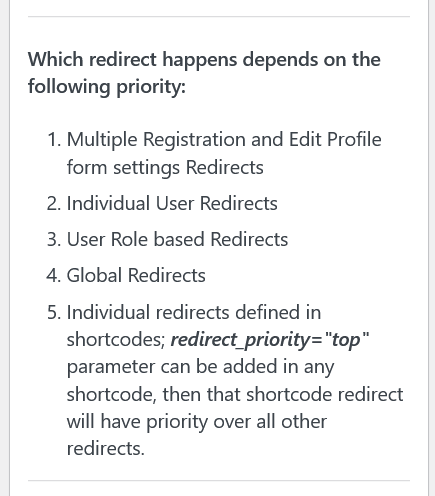
As you can see, the redirects are prioritized in the same order as the redirect types appear on the Custom Redirects add-on page. However, if you’re using the Multiple Registration and Edit Profile form add-on and have set up redirects through it, then they will be prioritized over all the other types of redirects, including the ones you set up using the Custom Redirects add-on.
That said, the following parameter allows you to prioritize a particular redirect over all the other redirects.
redirect_priority="top"
You can add this parameter in any shortcode that contains the logout redirect argument. For example, if you use this parameter in the following shortcode, this particular redirect will take priority over all the other redirect rules.
[wppb-login logout_redirect_url="https://www.cozmoslabs.com/wordpress-profile-builder/" redirect_priority="top"]
5. Using Pre-Made Tags for Redirecting to Dynamic URLs
Profile Builder Pro extends its redirect functionality by allowing you to set up redirects to dynamic URLs instead of static URLs.
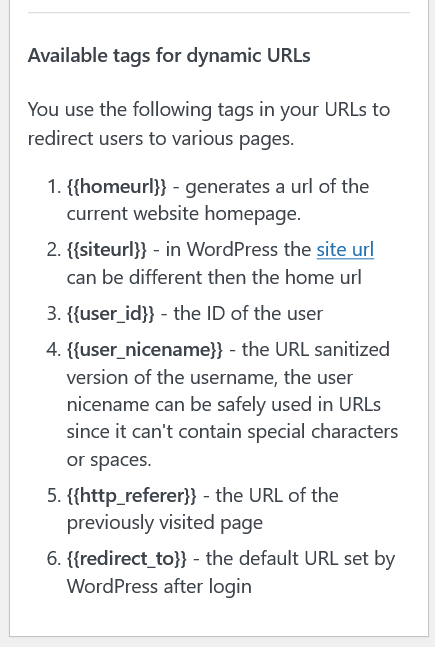
Here’s a quick overview of what each of these tags does.
- {{homeurl}}: It simply takes the users to the current homepage URL of your website;
- {{siteurl}}: This tag would take the users to your site’s URL, which in some cases can be different than the homepage URL;
- {{user_id}}: You can use this tag to redirect users after login, for example, based on their user ID;
- {{user_nicename}}: This tag will take the users to their own private profile page on your website;
- {{http_referer}}: This is a pretty neat tag that makes the otherwise complex task of redirecting the users to their previous page before logging out surprisingly easy;
- {{redirect_to}}: You wouldn’t really want to use this tag unless you’re doing it for a specific purpose, since it redirects the users to the default URL set by WordPress after login, which would be the WordPress dashboard of your website.
WordPress Logout Redirect to Current Page
A simple approach to handling logout redirects is to simply redirect the users to the current page they are viewing after they log out. So for example, if a particular user is viewing the blog page on your website, then they should be redirected to the blog page when they log out. But this could be any other page, of course.
To make this happen, you’ll need to use one of our premade tags as you will need to redirect to a dynamic URL that would be unique for every user.
The tag for setting up a WordPress logout redirect to the current page is {{http_referer}}. When you use this tag in setting up a logout redirect, it will redirect the users to the page they were viewing before they logged out.
Set Up Flexible WordPress Logout Redirects and Much More!
Profile Builder Pro offers the easiest, fastest, and most effective way to set up and manage WordPress logout redirects, or any other type of redirect for that matter. It gives you complete control and flexibility with your redirects so that you can use them exactly the way you want.
However, Profile Builder Pro is designed to do much more. It’s a complete user management system that takes care of every aspect of user management on your WordPress website.
Be it creating customized registration pages or other important pages, password protecting content, editing user roles, or creating a member directory, it has you covered. And it lets you do all of these things and more without any technical knowledge.
Give it a try and see how easier your life gets as a WordPress website owner!
Profile Builder Pro
Profile Builder Pro is a complete user management plugin that lets you create many different types of redirects and implement various other user-related functionalities on your website.
Get Profile BuilderDo you still have questions on how to set up WordPress logout redirects? Let us know in the comments below!
Related Articles

8 Best WordPress User Registration Plugins
Not sure what WordPress user registration plugin to use for your project? Going through all the WordPress user registration plugins can be disorienting. You may have spent hours and hours searching for plugins and tutorials to help you with your project, and you’re still as confused as you were when you started. Imagine finding the […]
Continue Reading
How to Customize WordPress Email Login Behavior (+ Registration)
Searching for a WordPress email login feature so that you can customize your site's login process, such as requiring users to use their email address instead of a username? By default, WordPress lets users log in with either their username and password or their email and password via the default login page. But if you […]
Continue Reading
How to Password Protect Content, Posts, and Categories in WordPress
There are many use cases for password-protected content in WordPress. For example, you might be a content creator who wants to monetize premium content in the form of subscriptions or memberships. As with everything related to WordPress, password-protecting posts doesn’t have to be difficult. If you’re wondering how to password-protect WordPress content, posts, and even […]
Continue Reading