

Table of Contents
The default WordPress user registration form is sufficient, but it doesn’t reflect your branding or let you collect extra details from users. Therefore, you may be wondering how to create a registration form that’s more unique to your business.
This way, you can make sure your form slots in nicely with the look and feel of your site. Plus, you can add extra fields like contact details, preferences, and special requirements. Additionally, you’ll gain more control over fields, so that you can make certain elements mandatory, or show/hide fields based on user input.
In this post, we’ll take a closer look at some key elements to include in your registration form. Then, we’ll show you how to create a registration form in WordPress!
What to Include in a Registration Form
One of the best reasons to create a custom registration form is that you can deliver a consistent User Experience (UX). You can customize your form so that it slots in nicely with the rest of your website. Plus, this provides a great opportunity to reinforce your branding to new users.
Typically, most registration forms will include name fields and email addresses. But, you can also add extra fields that are relevant to your website type.
For instance, if you’re organizing an event, you can ask users to submit dietary requirements, contact details, and other preferences. Meanwhile, it can be a good idea to ask users to supply specific demographic details to aid your market research activities.
What’s more, you’ll gain far more control over your registration form fields. So you might make certain elements mandatory, suggest answers, or add relevant details like dates, locations, or links. However, it’s important to keep your form short and simple so that it’s quick for visitors to complete.
How to Create a Registration Form for Your WordPress Site (In 5 Steps)
Now that you know what to include in your form, here’s how to make an online registration form in WordPress!
Step 1: Install Profile Builder Pro
If you’re an advanced WordPress user, you can build a custom registration form using code. However, for beginners, the easiest way to do this is to use a plugin like Profile Builder Pro.
Create beautiful front-end registration and profile forms with custom fields. Setup member directories, custom redirects, cutomize user emails & more using the all in one user management plugin.![]()
Profile Builder Pro
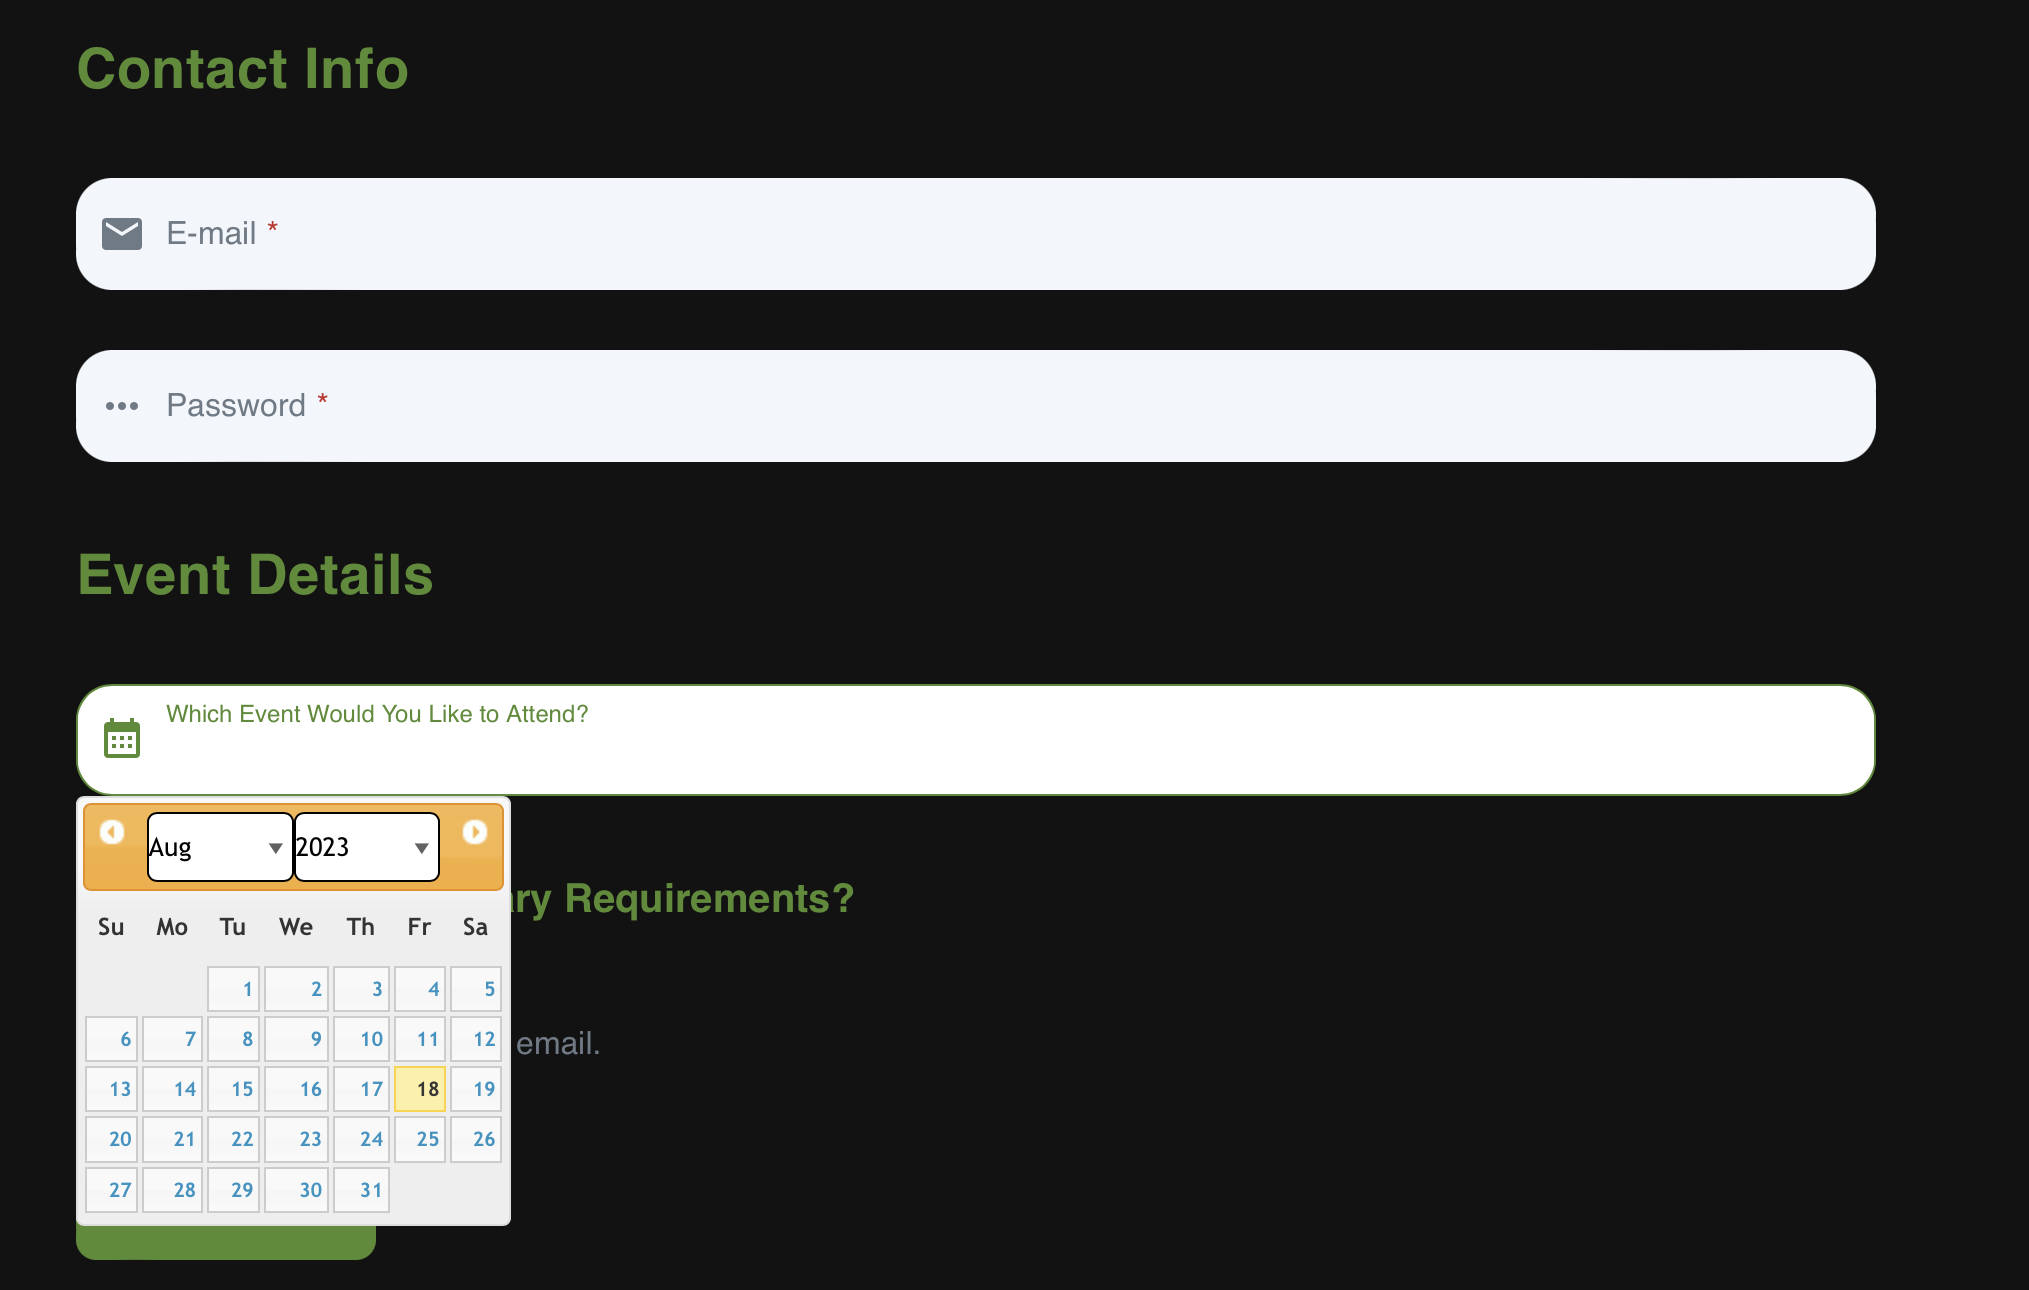
The plugin is intuitive and lets you create beautiful registration forms like this one with no coding skills and minimal time investment:
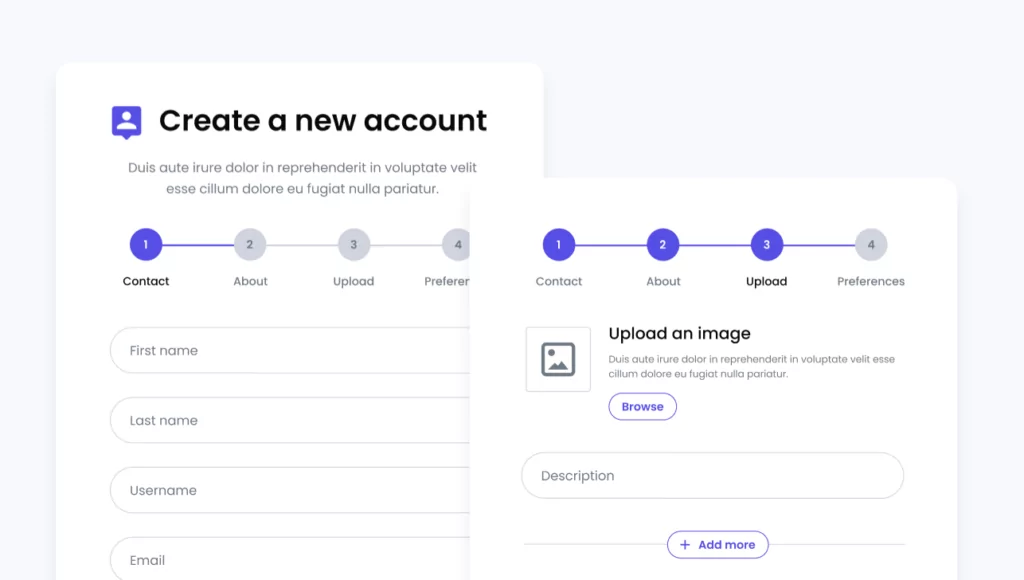
You can use the free Profile Builder plugin or upgrade to the Pro version for extra user fields, avatar uploads, and advanced add-ons. For instance, you can build multi-step forms, control field visibility, and integrate forms with WooCommerce.
If you’re installing the free plugin, you can do this directly through your WordPress dashboard. For Pro customers, you’ll need to download the zip file from your Account page.
Then, head over to the WordPress admin panel and go to Plugins. Click on Add New and select Upload:
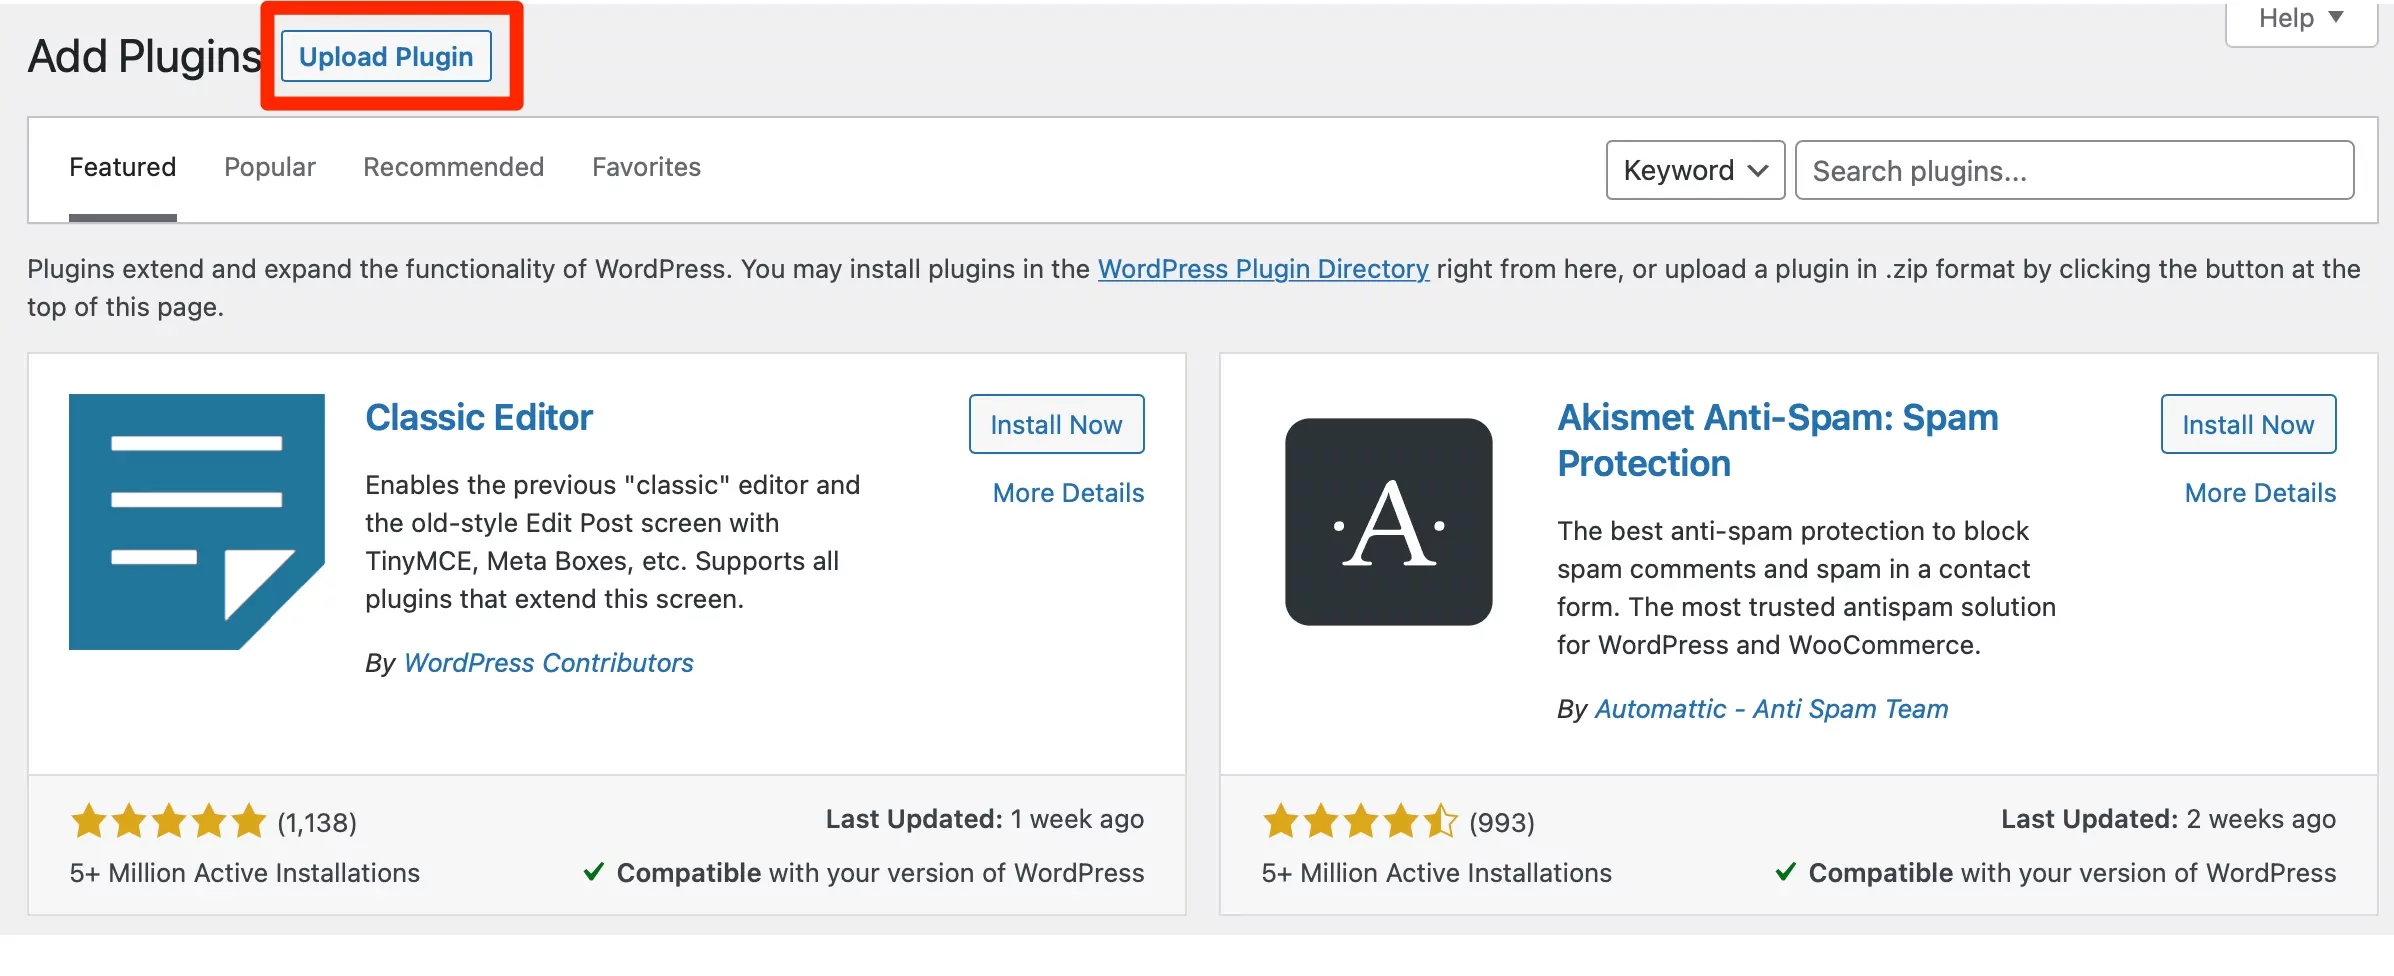
Drop the file onto the page and select Install Now. This may take a few seconds. Then, click on Activate.
At this point, you’ll receive a notification to enter your license key. If not, go to the Profile Builder tab. Then, select Register Version and enter your license key here.
Step 2: Create Your Registration Form
The easiest way to build your registration form is to head to the Settings section of Profile Builder. In the General Settings, you’ll find that the active form design is the default layout. However, there are three additional form styles to choose from:
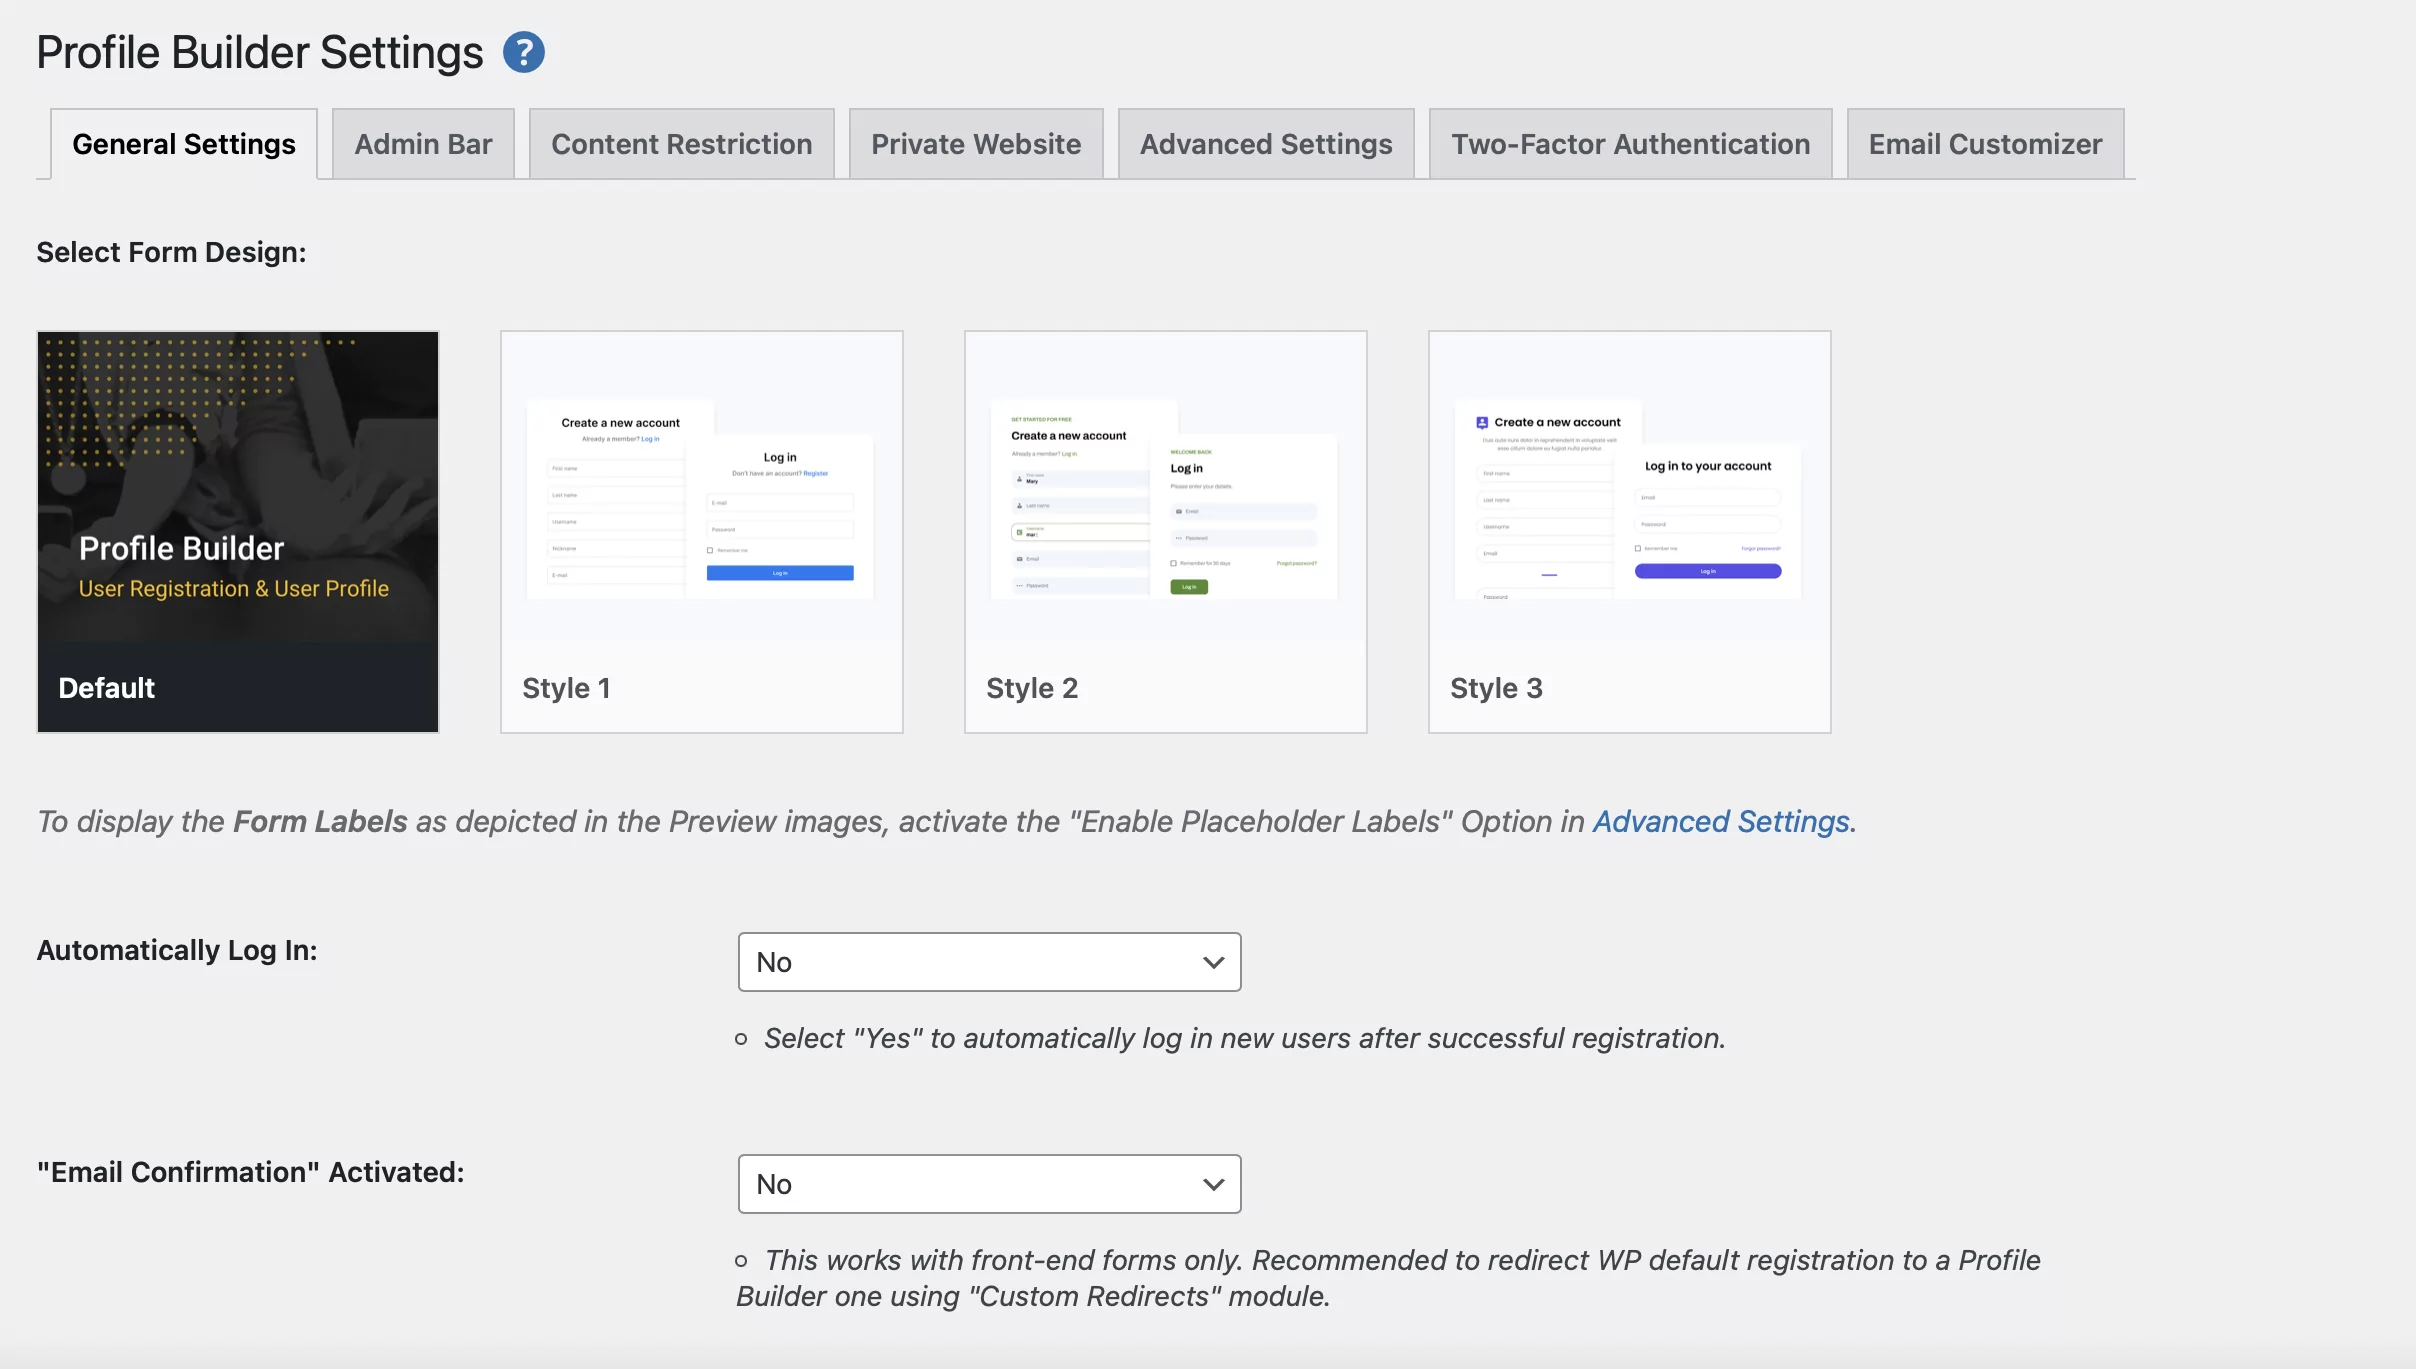
By selecting a pre-designed layout, you can achieve a professional-looking form with minimal effort. Better yet, you can preview the design first. Then, click on Select to apply the design to your registration form and save the changes at the bottom of the page.
You can customize your form using the settings below. For instance, you’re able to enable automatic logins, define a minimum password length, and select a Recover Password page.
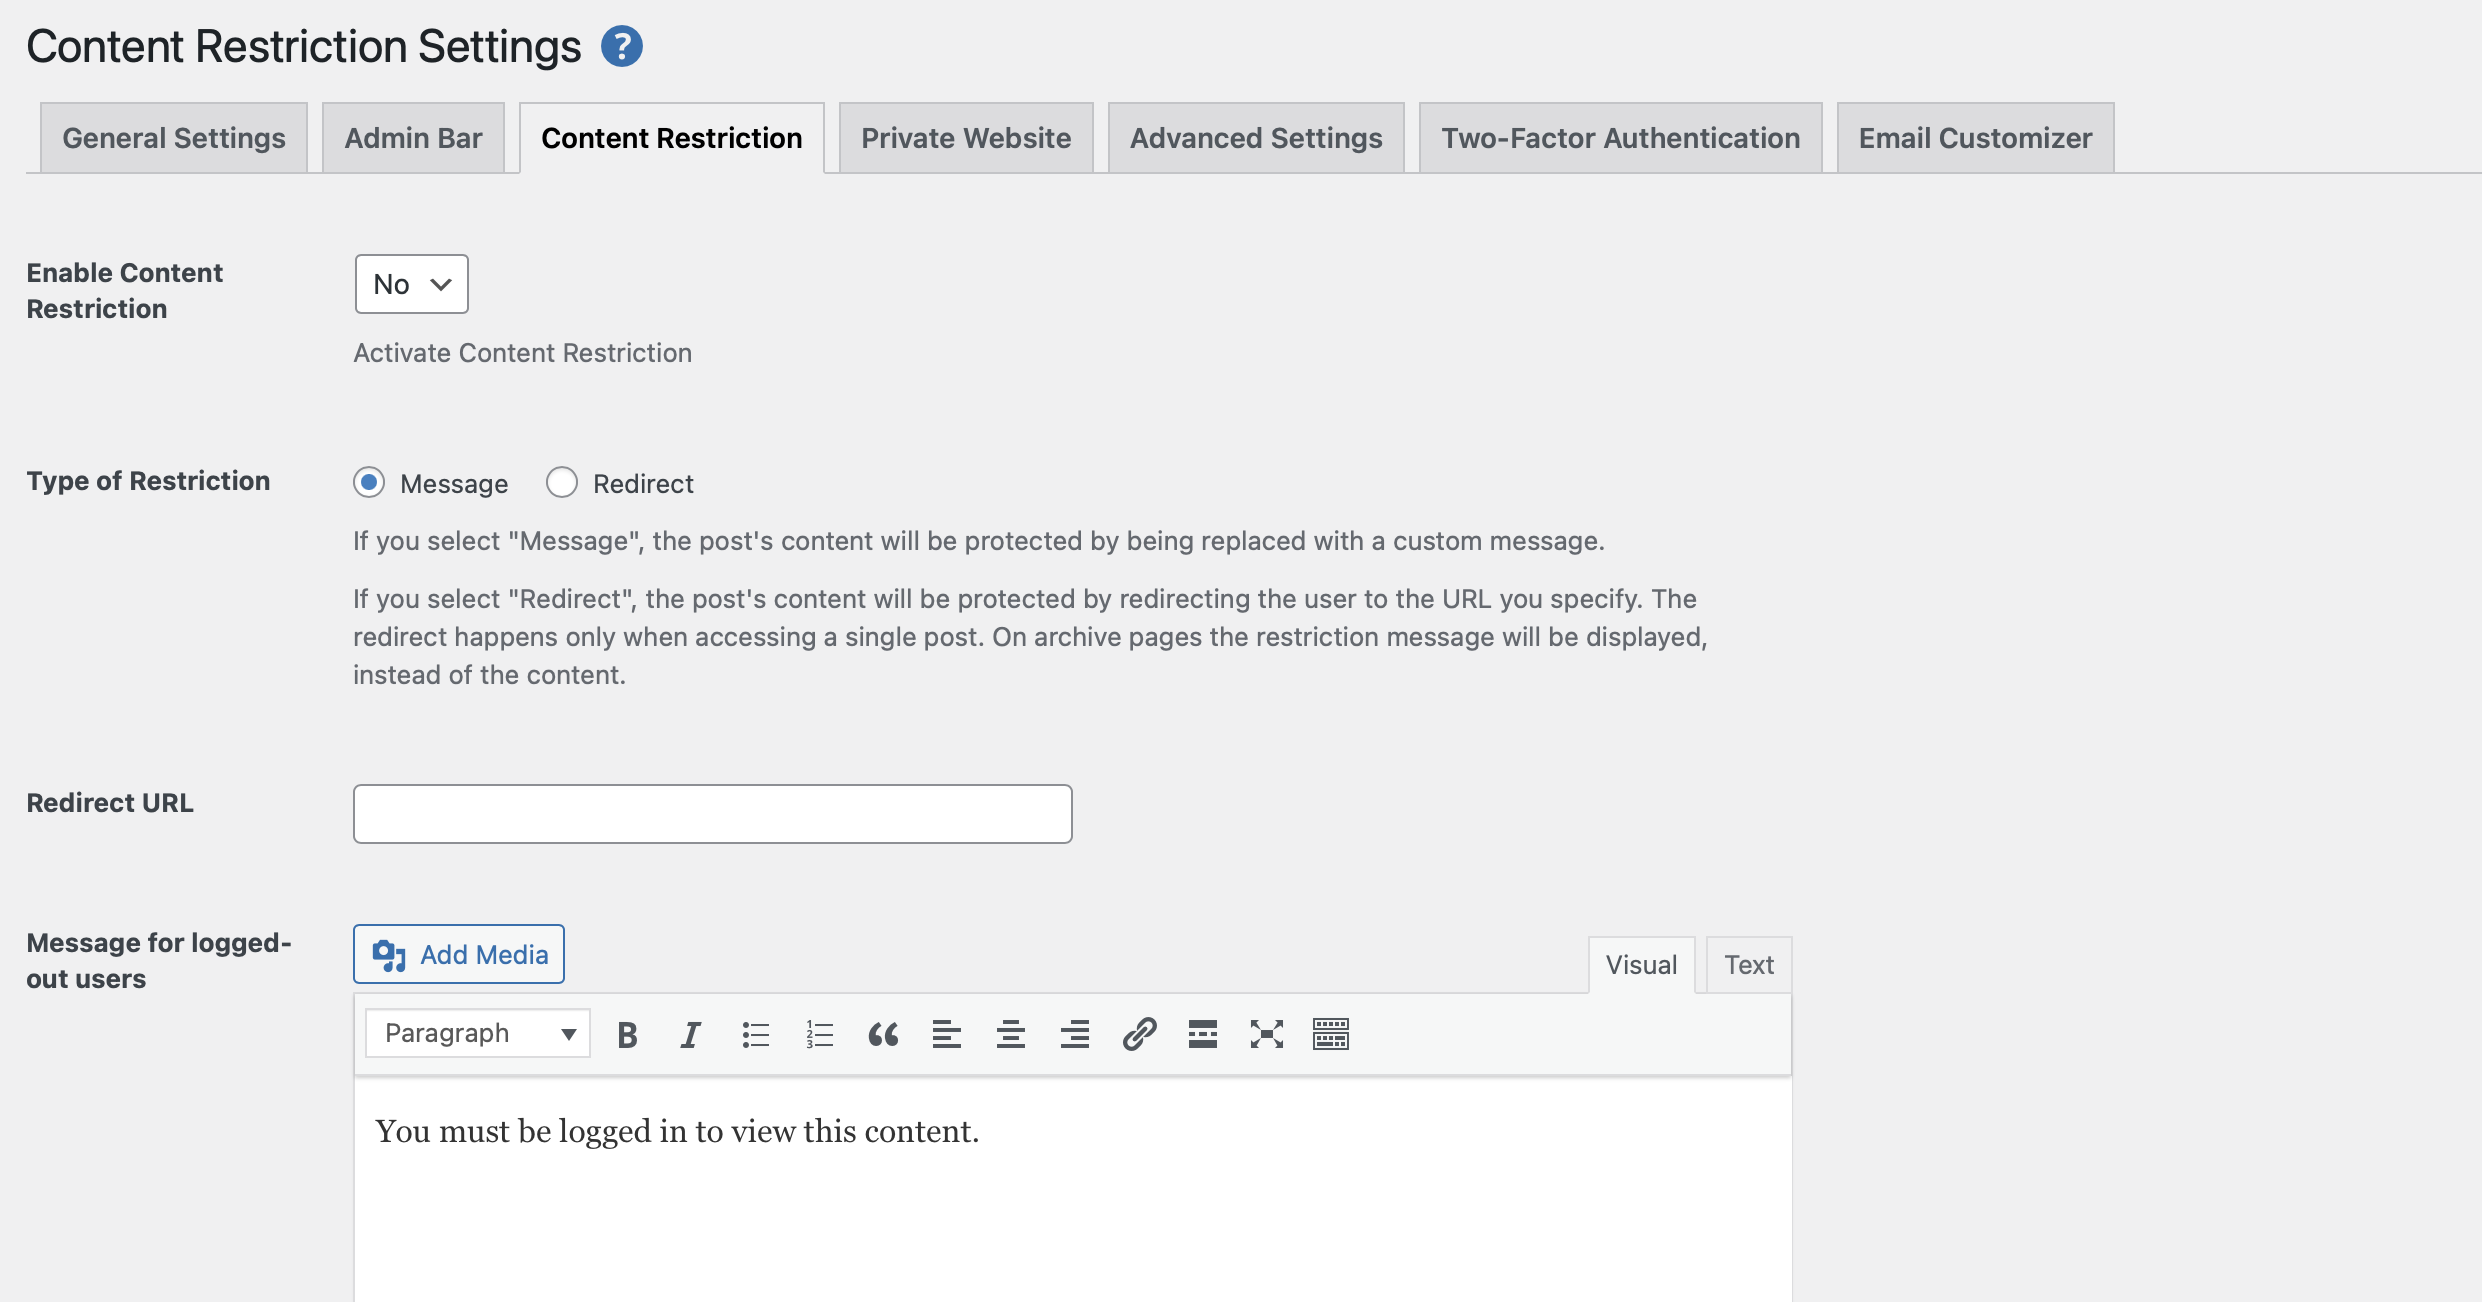
If you switch over to the Content Restriction tab, this provides an easy way to activate content restriction based on logged-in status or user role. Then, you can choose to protect content with a custom message, or redirect to a specified URL:
In the Advanced settings, you’ll find even more ways to customize your form. One of the key changes you can make here is that you can disable email confirmation for Social Connect registrations. This means that visitors who register through social login bypass the confirmation feature.
Additionally, you can enable two-factor authentication to tighten security on your website. And, in the Email Customizer tab, you’re able to replace the From (name) tag, edit the email subject, and enter a custom welcome email.
Step 3: Configure Your Form Settings
Now that you’ve set up your custom registration form, you can go to the Form Fields tab to manage your form fields. If there are fields that you don’t need, you can delete them. Or, click on Edit to make changes:
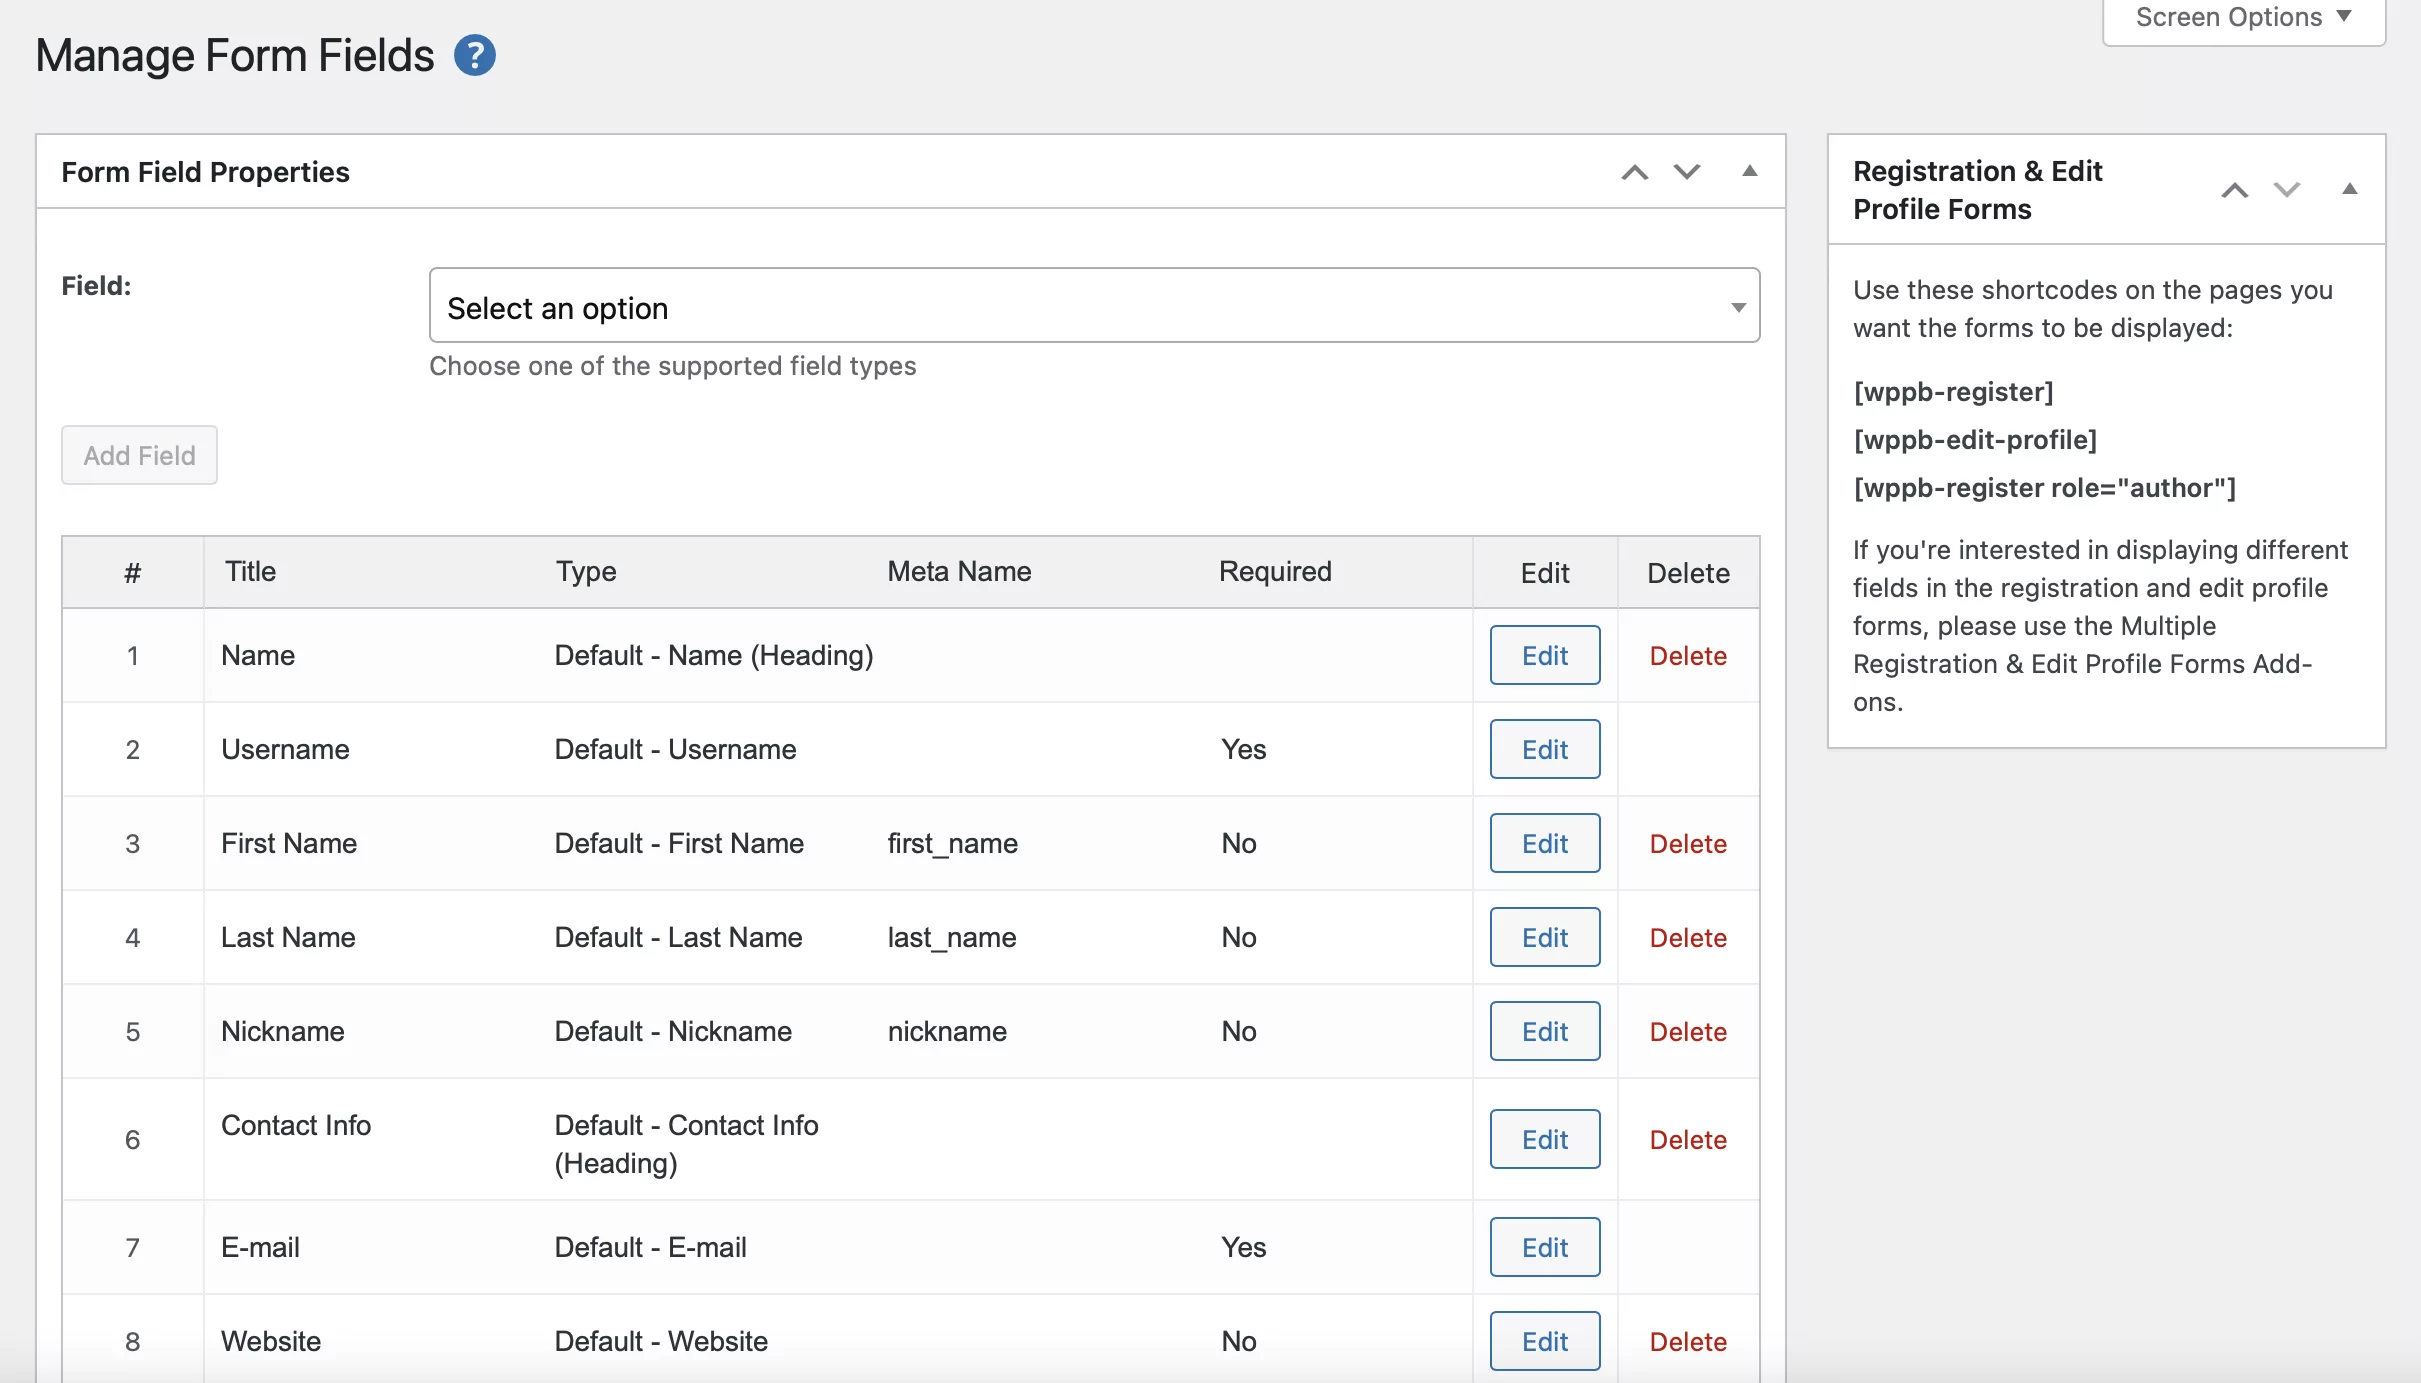
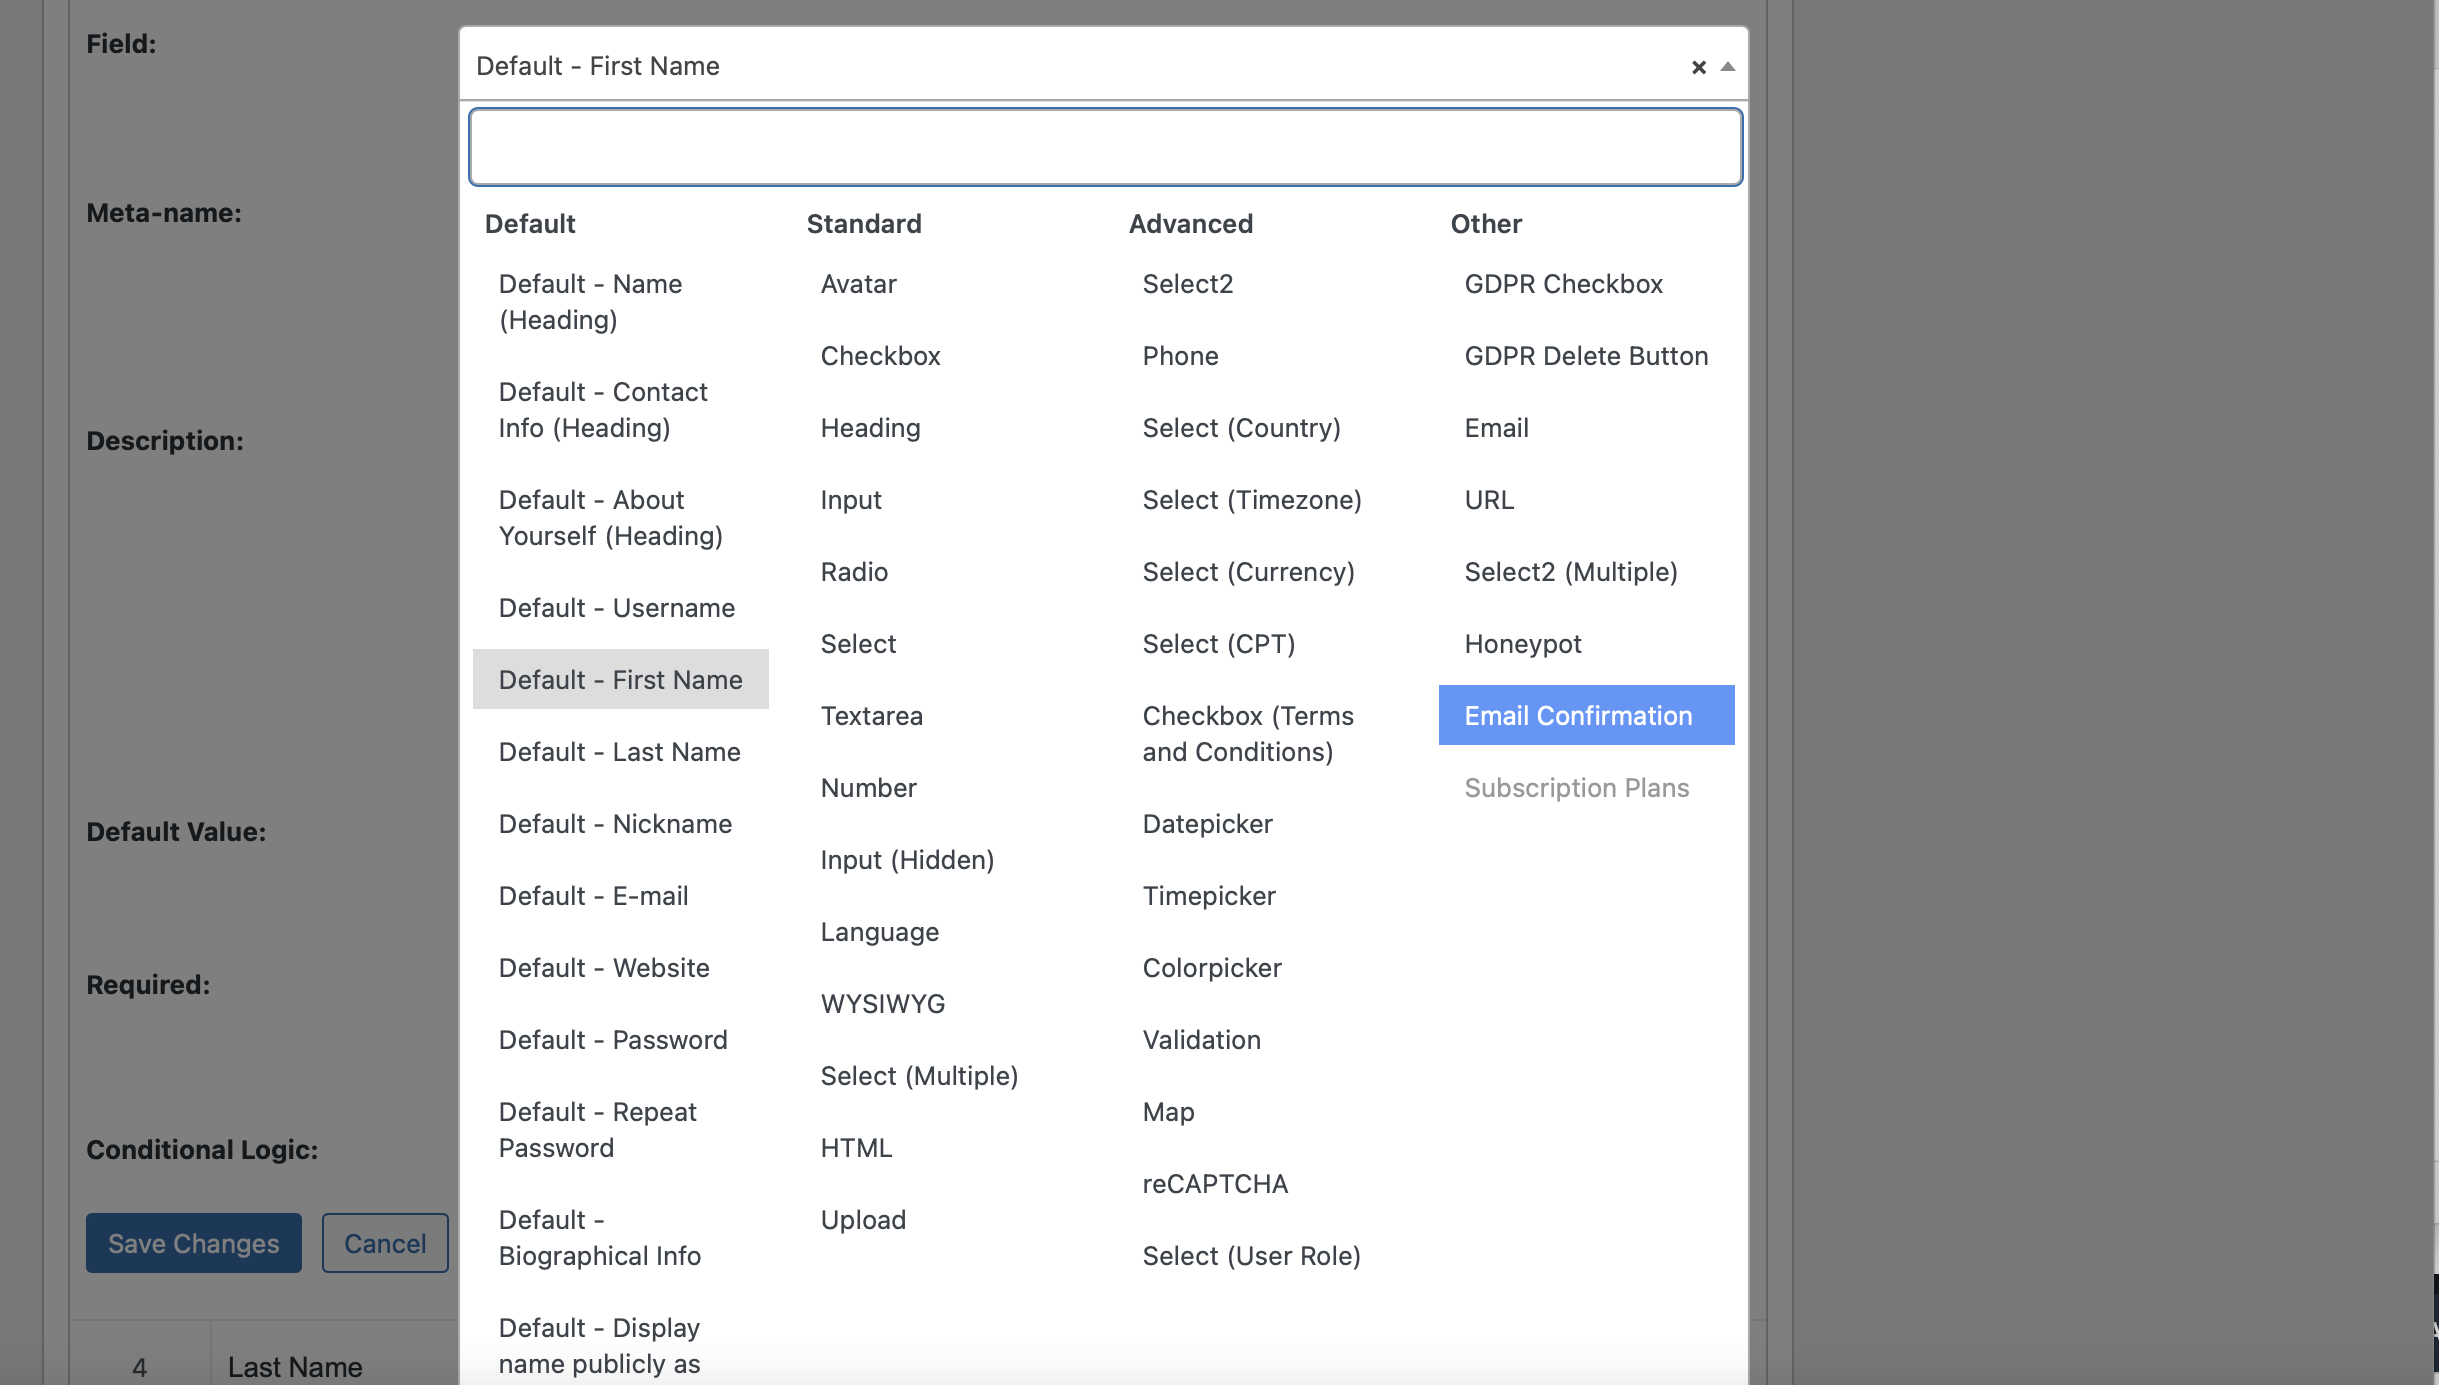
You can also use the Field dropdown at the top of the page to add a new field to the form. Here, enter a field title and description. Then, use the Field dropdown to select a field.
You’ll find tons of options including date pickers, timezones, URLs, checkboxes, and more:
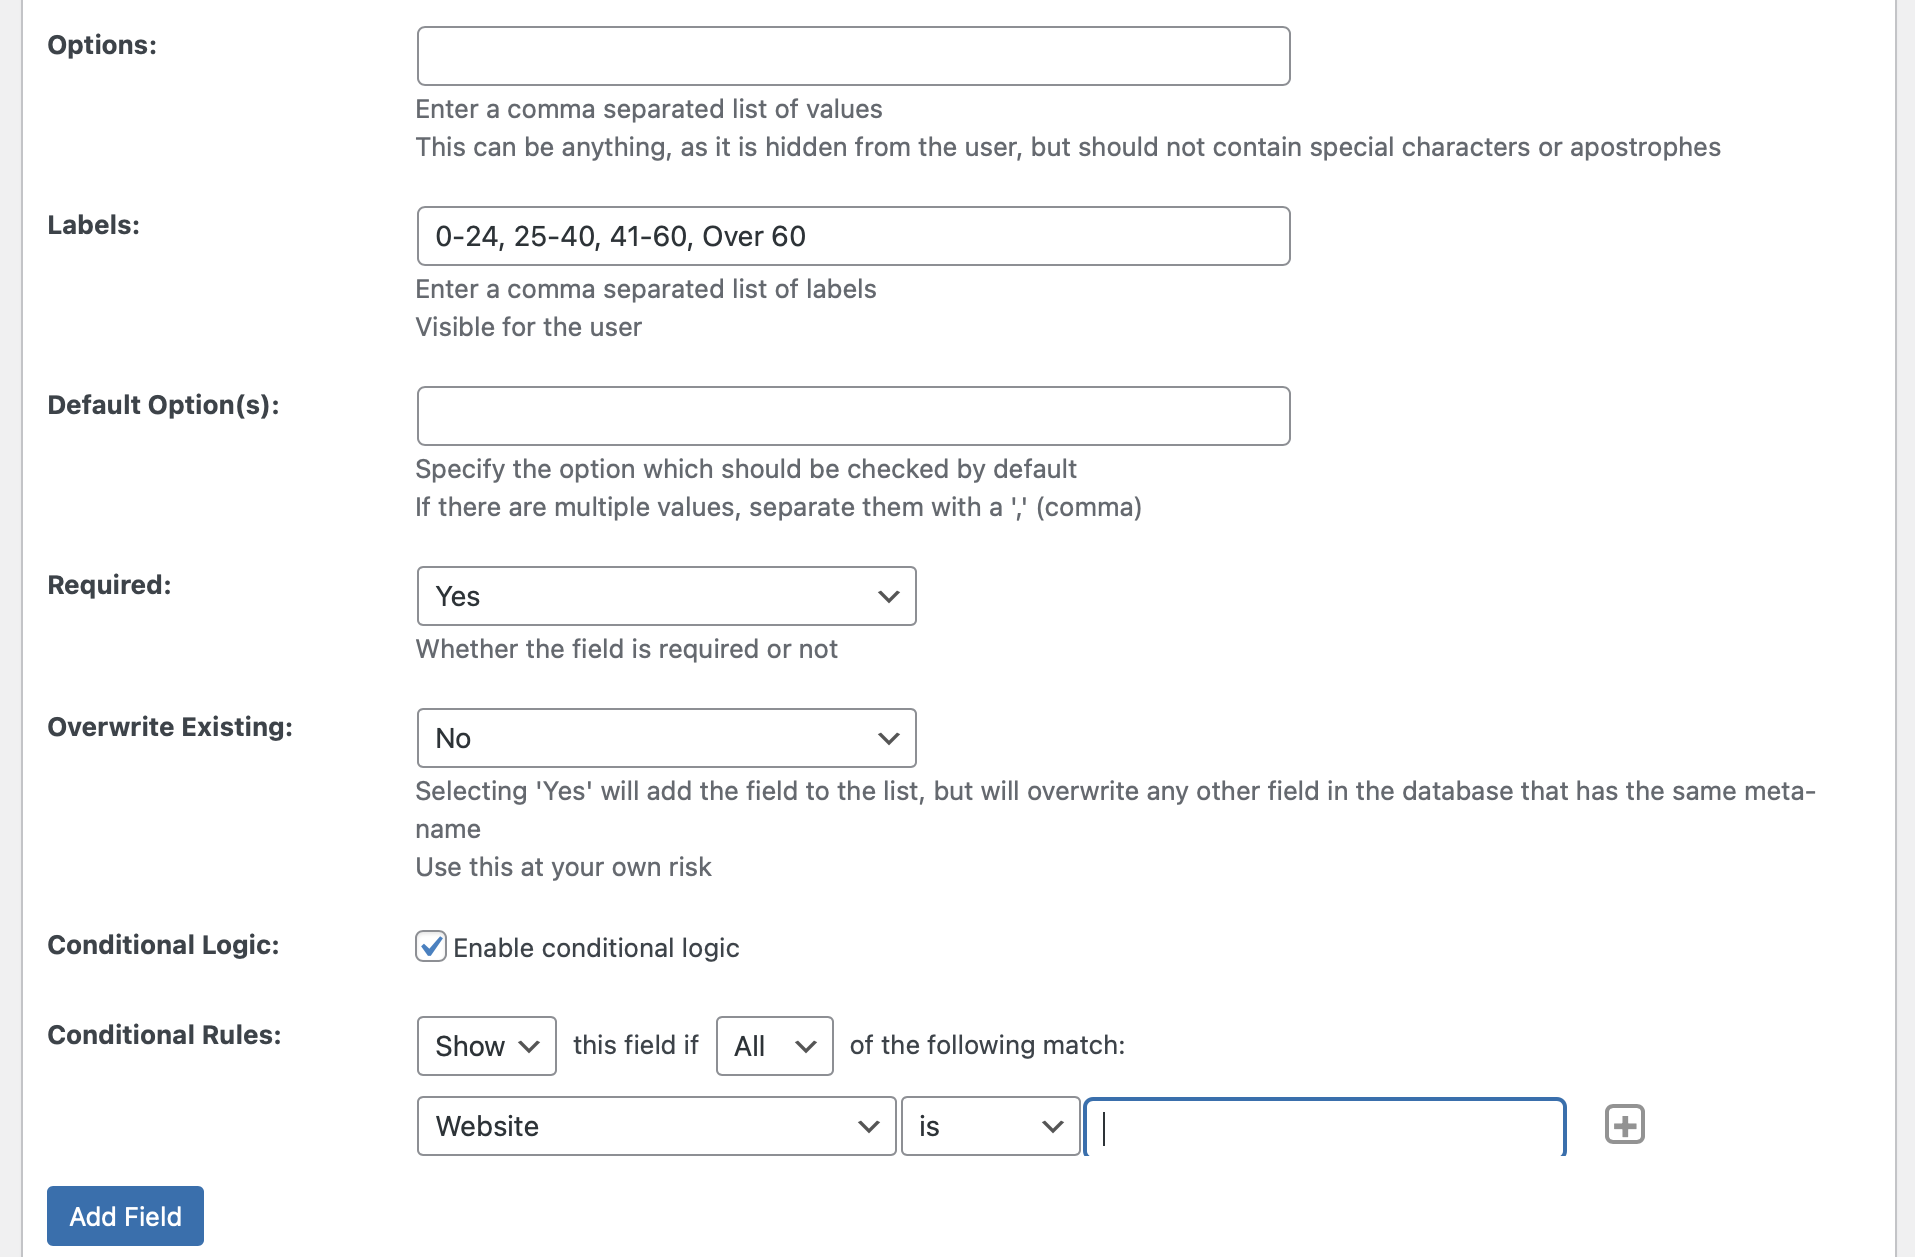
If you select a field like the Checkbox, you’ll need to enter your checkbox labels. Plus, you can specify a default option and make the field mandatory using the Required dropdown box.
Meanwhile, you can also enable conditional logic to show or hide fields based on user input:
Lastly, visit the Add-Ons tab to activate features that add more complexity to your form. You can enable multiple registration forms (with different fields for different user roles). Meanwhile, you’re able to set up custom redirects to other pages or activate integrations like BuddyPress.
Step 4: Add Your Registration Form to a Page
At this point, you’re ready to set up your custom registration page. If you navigate to the Basic Information tab of Profile Builder, you can click on Create Form Pages. This allows the plugin to automatically create a new page for your registration form:

However, if you want to add your form to an existing page, you can use a shortcode or insert a Register block. For the former option, you’ll need to add a new block to your WordPress page. Then, select Shortcode.
Now, paste the following code to add your form:
[wppb-register]
If you want to add your registration form using blocks, you can insert the Register block:
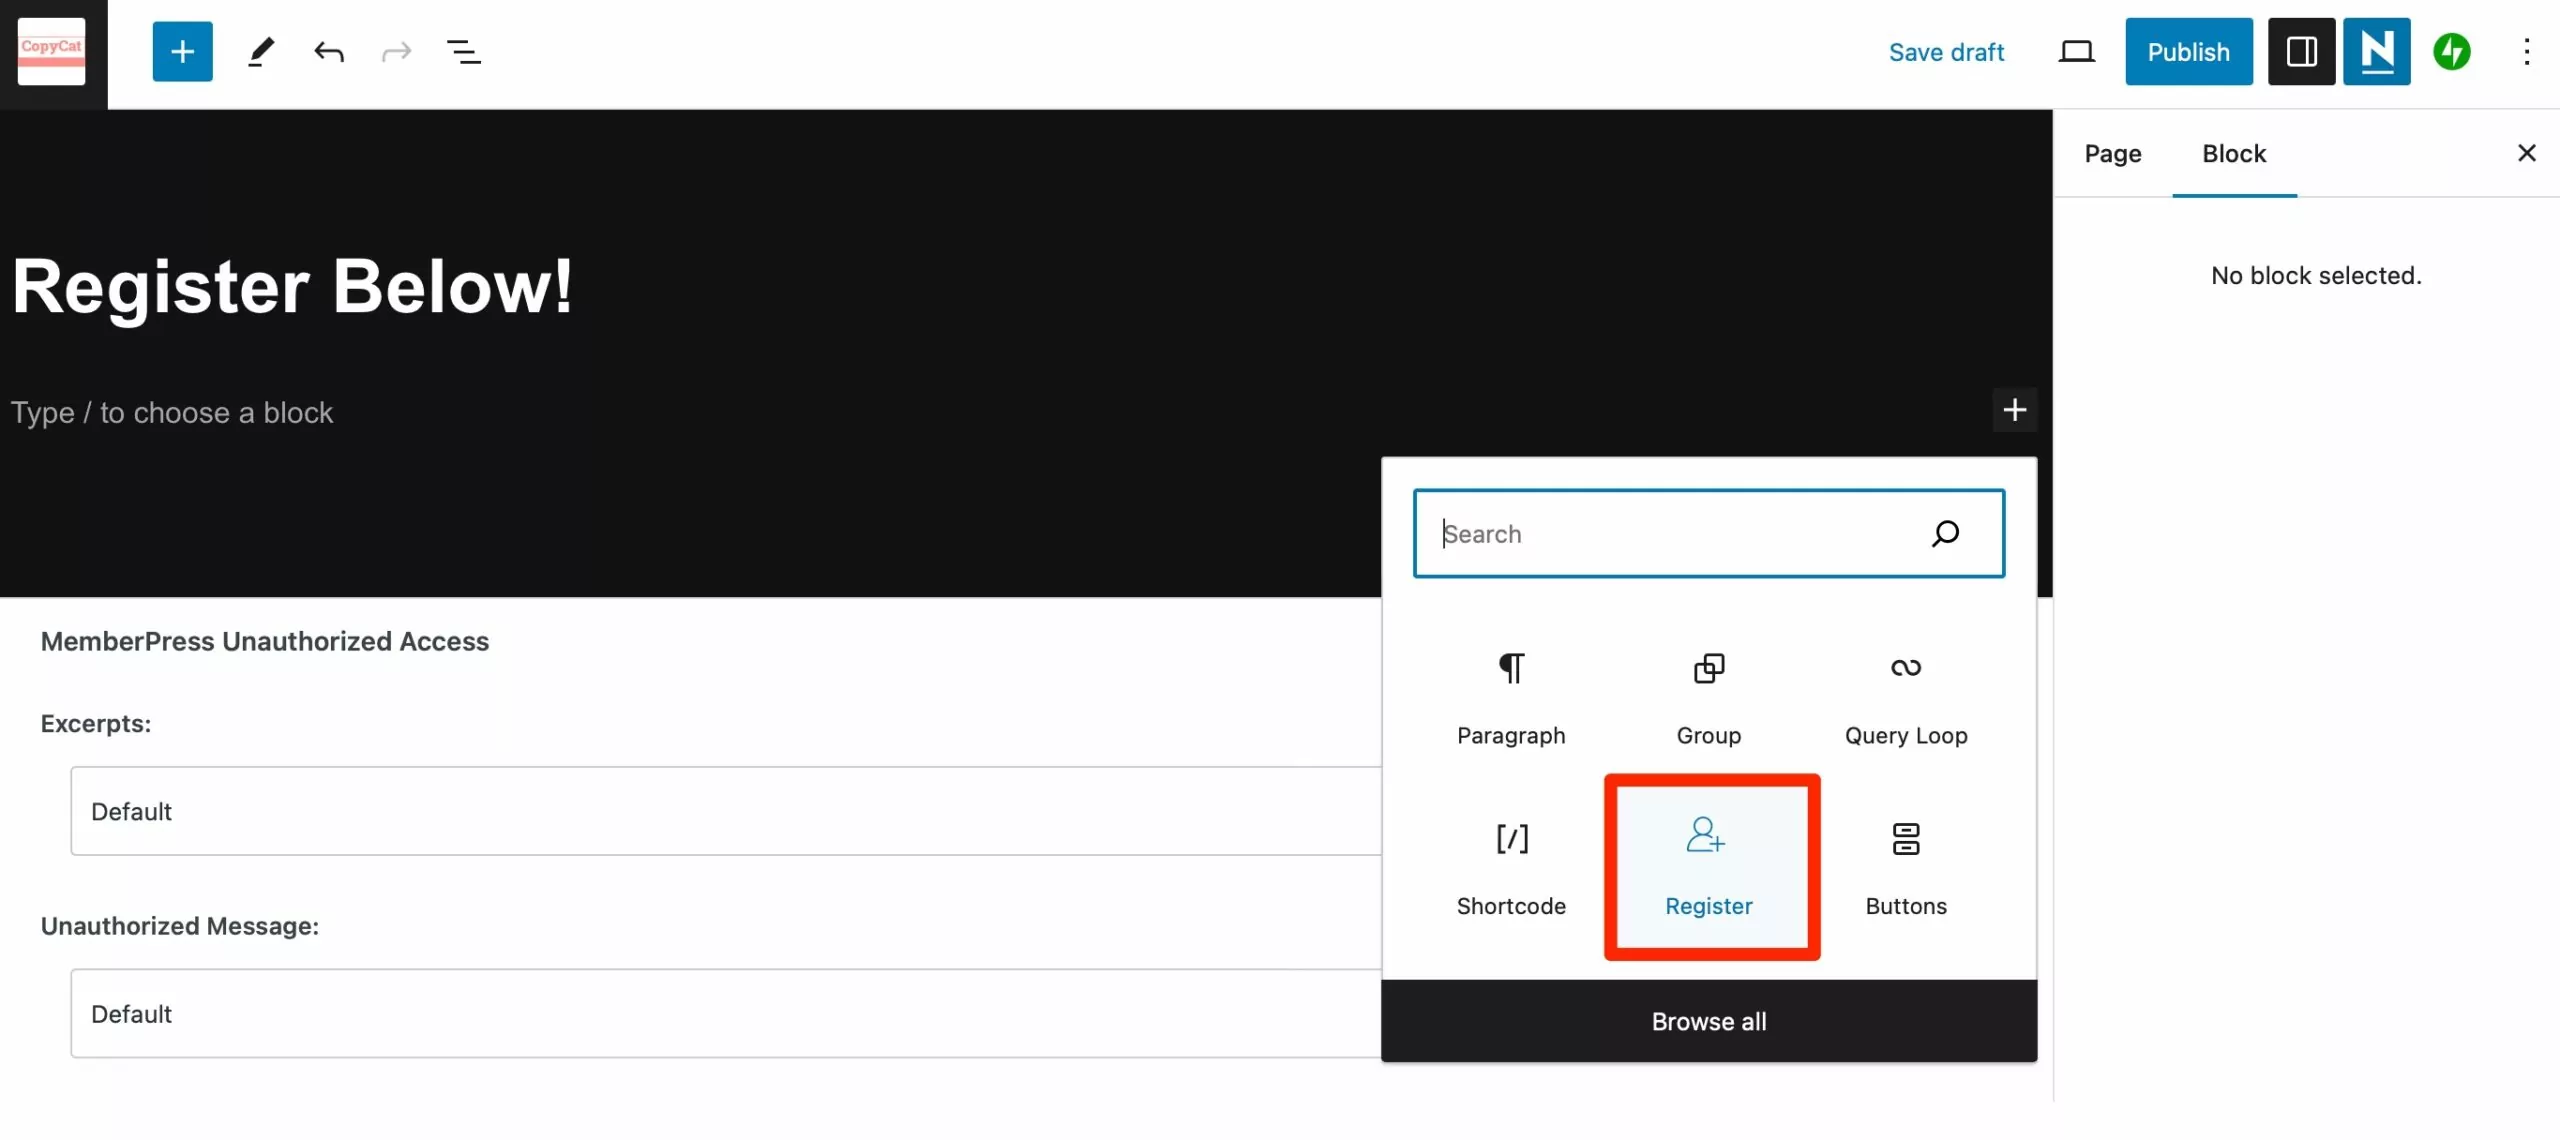
Instantly, your registration form will appear on your page.
Step 5: Test Your Registration Form
Before you make your registration form live, it’s a good idea to test it to make sure that it’s working properly for your visitors. Therefore, you can log out of your WordPress dashboard and enter your site’s URL in a fresh tab.
Now, complete all the fields and submit the form:
You can also test conditional logic fields to make sure the appropriate fields are visible based on your input.
Plus, you can test required fields by submitting the form without completing these elements. If you’re satisfied that everything is working as it should, head over to the page where you’ll display the registration form and click on Publish.
Conclusion
Although WordPress provides a default user registration form, it’s a good idea to build a custom registration form to deliver a consistent UX. Better yet, you can make sure that you receive all the relevant details from your users including contact details, documents, URLs, dates, and more.
To recap, here’s how to create a registration form for your WordPress site:
- Install Profile Builder Pro.
- Create your registration form.
- Configure your form settings.
- Add your registration form to a page.
- Test your registration form.
Create beautiful front-end registration and profile forms with custom fields. Setup member directories, custom redirects, cutomize user emails & more using the all in one user management plugin.![]()
Profile Builder Pro
Do you have any questions about how to create a registration form? Let us know in the comments below!
Related Articles

8 Best WordPress User Registration Plugins
Not sure what WordPress user registration plugin to use for your project? Going through all the WordPress user registration plugins can be disorienting. You may have spent hours and hours searching for plugins and tutorials to help you with your project, and you’re still as confused as you were when you started. Imagine finding the […]
Continue Reading
How to Customize the WooCommerce Login Page (No Code Needed)
Searching for a solution to customize the WooCommerce login page and otherwise control login behavior on your WooCommerce store? If you allow (or force) registration on your store, you'll want to create a user-friendly login experience so that your shoppers can easily log in to their accounts and access other key features. In this post, […]
Continue Reading
How to Customize the WooCommerce Register Page (Add Custom Fields)
Looking to create a custom WooCommerce register page for your store? Whether you want to create a dedicated registration page or add custom fields to the checkout register form (or both), we're going to show you an easy, code-free way to customize all parts of the WooCommerce registration process. By following this tutorial, you'll learn […]
Continue Reading