

Table of Contents
- 1 What You’ll Need to Enable 2 Factor Authentication on your WordPress Site
- 2 Activating Two-Factor Authentication for WordPress
- 3 How WordPress Two-Factor Authentication Works
- 4 Activating Two-Factor Authentication for WordPress as a User
- 5 Using Google Authenticator with WordPress (or Other 3rd Party Apps)
- 6 Enhancing Your 2FA Setup with Additional Features
- 7 Enable WordPress 2 Factor Authentication for Your Website Today
Security is key when you have a website with user registration and login functionalities.
This is why offering your site’s users the option to enable 2 factor authentication in WordPress when they log into their accounts might be essential in some cases. When users have access to sensitive information, systems, or data, you really don’t want hackers to steal their credentials. When using 2FA, password database theft or phishing campaigns will not affect the integrity of the protected accounts.
With the WordPress Two-Factor Authentication option from Profile Builder Pro activated, your visitors can log in securely using a third-party mobile authentication app (such as Google Authenticator) and not just their username and password.
This is exactly what we’ll talk about in this post. So let me show you how to set this up for your own website and secure your visitors’ accounts. Let’s get straight into it!
What You’ll Need to Enable 2 Factor Authentication on your WordPress Site
To enable this function on your website you can use the Profile Builder WordPress plugin, which is a full customization system for WordPress registration, login, and edit-profile behavior.
Apart from letting you create beautiful and fully personalized registration, login, and edit-profile forms, Profile Builder comes with lots of extra functionalities, such as email confirmation for new users, admin user approval, content restrictions, custom and conditional form fields, and many many more.
There is a free version of Profile Builder at WordPress.org, but in order to use the 2 factor authentication you do need one of the paid versions.
The easiest way to enable two-factor authentication for your website users.![]()
Profile Builder Pro
After your purchase, you’ll need to install and activate Profile Builder (Hobbyist or Pro) just like you would any other WordPress plugin. Just go to your WordPress dashboard and navigate to Plugins. Click the Add New button at the top and upload your purchased version.
Once you have your plugin up and running, it is time to set up two-factor authentication.
Activating Two-Factor Authentication for WordPress
To start this off, first go to Profile Builder → Settings from your WordPress dashboard and then navigate to the Two-Factor Authentication tab. Next, to activate the feature simply set the “Enable Two-Factor Authentication” option to Yes from the dropdown.
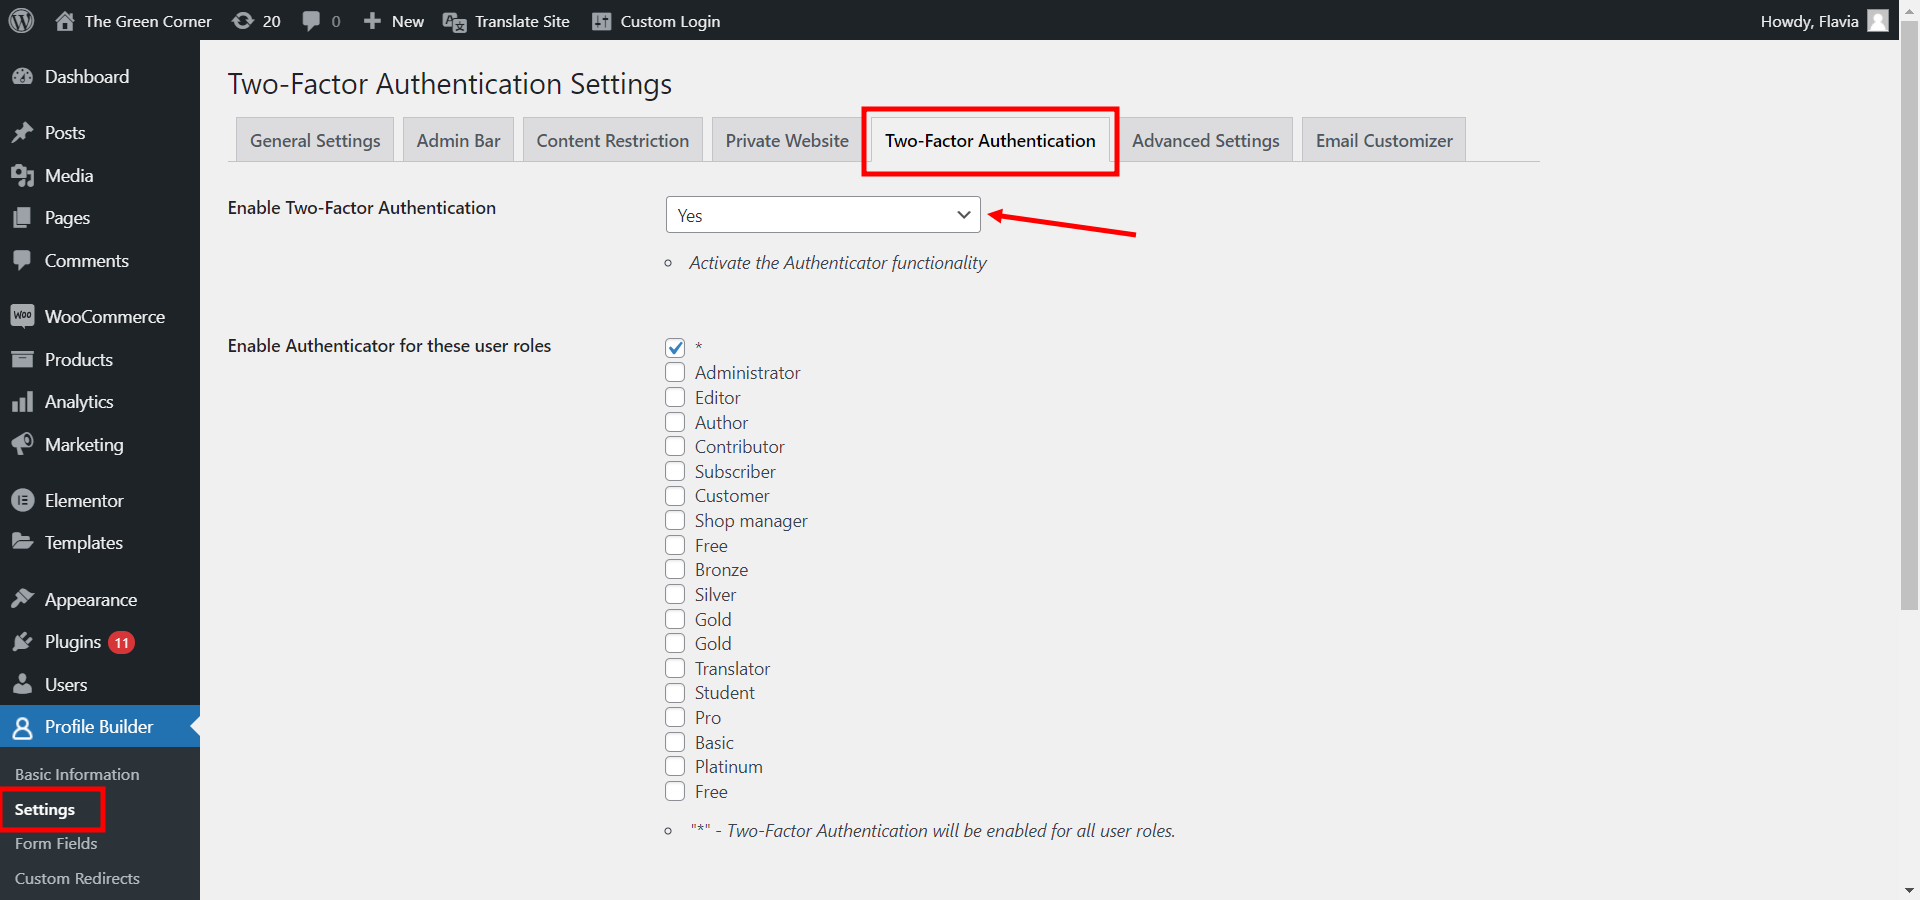
You can then choose what user roles will have access to this functionality. Once the changes are saved, the users with valid roles will now have the option to enable Two-Factor Authentication from the Edit-profile form.
By default, Profile Builder will show a new ‘Authentication code’ field on the login form only for those users that have activated the functionality themselves. But, in addition, the plugin also supports this shortcode argument [wppb-login show_2fa_field=yes] that will force the authentication field to always appear on the Profile Builder login form, no matter if the users activate this functionality or not. However, in this case, the users that have not yet activated two-factor authentication on their account will be able to log in leaving the authentication field empty.
How WordPress Two-Factor Authentication Works
The Two-Factor Authentication functionality lets your website users authenticate themselves at login using third-party authenticator apps like Google Authenticator, Microsoft Authenticator, LastPass Authenticator, and others for improved security.
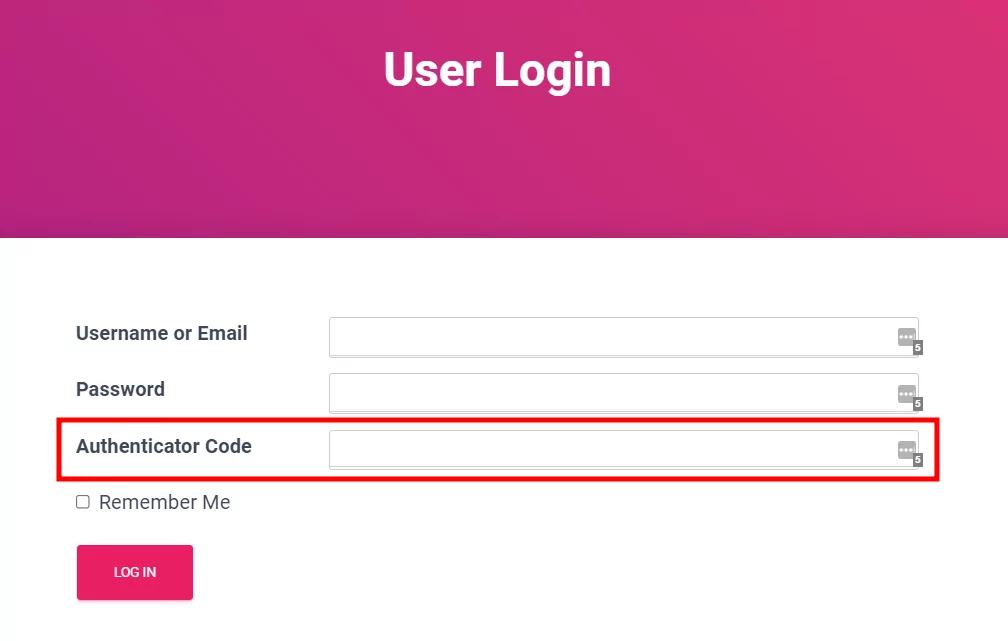
When the functionality is enabled, an ‘Authenticator Code’ field will show up on the login form. This is where the user will have to input their valid TOTP (Time-Based One-Time Password) provided by the mobile app they have chosen. Don’t worry, we’ll get more into this in the next section.
But all of this is only possible when the users themselves activate and set up the two-factor authentication for their own accounts. You cannot force users to activate this functionality, only strongly suggest they do so.
So, how do users enable 2 factor authentication for their own account? Luckily that’s what the next section is about.
Activating Two-Factor Authentication for WordPress as a User
When this functionality is enabled on your site, a ”Two-Factor Authentication” section will appear at the end of the edit-profile form for every user, in the front-end. If a user checks the Activate checkbox, the rest of the Two-Factor Authentication settings will be revealed.
From here on the user will be able to set up the following fields:
- Activate – this checkbox defines whether the user will need to use two-factor authentication at login or not.
- Relaxed Mode – checking this checkbox allows for higher time drifting and adds a few more minutes for the user to check their mobile app and come back with the TOTP.
- Description – what the user inputs here is what the authenticator app will display as the account name. By default, it will be set to the website name, but it can be customized at any time.
- Secret – this field contains a randomly generated secret key the user needs to input in order to set up the new entry in their selected authenticator app. Clicking the New Secret button below generates a new secret code if needed and the QR Code button will show the scannable code. *A new secret code must be generated every time the user makes changes to the Description field.
- Verify TOTP – this is where the users will input the Time-Based One-Time Password generated by their chosen authentication app after they’ve added the new entry. They’ll have to check the password validity (by clicking the Check button) before two-factor authentication is actually enabled. This is a way to make sure your users will not accidentally get locked out of their accounts if the two-factor authentication is not properly set up.
Using Google Authenticator with WordPress (or Other 3rd Party Apps)
In order for a user to activate 2 factor authentication for their account, they will have to either scan the generated QR code with the app of their choice or manually enter the Description and Secret key.
For example, when using Google Authenticator, this is where the user would manually input the description and key:
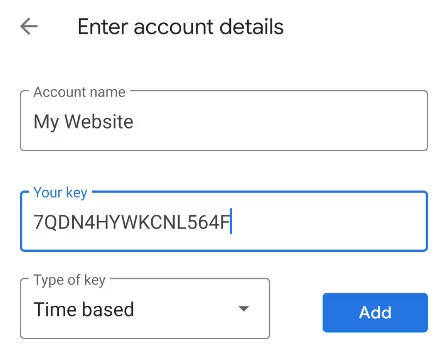
Once the user has added a new entry, the app will generate a TOTP for them to securely authenticate on the specified website. The code will only be available for a certain amount of time before it refreshes and a new code is generated. This should look something like this:
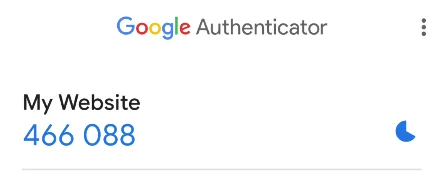
The user will then be able to input this one-time generated code in the ‘Authenticator code’ field on the login form and safely log into their account.
Enhancing Your 2FA Setup with Additional Features
If you’re looking for even more control and flexibility over your 2FA setup, you can always use a dedicated third-party solution like WP 2FA. This plugin is fully compatible with Profile Builder and offers more customization and features, including:
-
The ability to enforce 2FA policies;
-
White labeling options;
-
Easier user onboarding for websites with larger numbers of users;
-
Usage reports;
-
More 2FA methods to choose from.
You can download the plugin for free by searching for WP 2FA in your WordPress dashboard (Plugins → Add New). If you need any help with the plugin setup, check this guide out.
Enable WordPress 2 Factor Authentication for Your Website Today
Using Profile Builder Pro and its Two-Factor Authentication functionality you can give your website users the peace of mind they need knowing that their accounts are safe and sound.
In this post, we’ve shown you how you can let your site visitors secure their accounts using mobile authentication apps like:
- Google Authenticator;
- Microsoft Authenticator;
- LastPass Authenticator;
- And any others.
We’ve shown you how to globally enable the functionality on your site, but also how the users themselves can enable it on their particular accounts.
Profile Builder lets you create a fully customized and cohesive experience for your website users, both at registration and login, giving them the option to furthermore edit what they share on their profile at any time. And now they can do it in an even safer way.
Purchase Profile Builder and start offering your site users more secure accounts today:
The easiest way to enable two-factor authentication for your website users.![]()
Profile Builder Pro
Do you still have any questions about how to activate 2 factor authentication on your website? Let us know in the comments and we’ll try to help!
Related Articles

How to Customize the WooCommerce Login Page (No Code Needed)
Searching for a solution to customize the WooCommerce login page and otherwise control login behavior on your WooCommerce store? If you allow (or force) registration on your store, you'll want to create a user-friendly login experience so that your shoppers can easily log in to their accounts and access other key features. In this post, […]
Continue Reading
8 Best WordPress User Registration Plugins
Not sure what WordPress user registration plugin to use for your project? Going through all the WordPress user registration plugins can be disorienting. You may have spent hours and hours searching for plugins and tutorials to help you with your project, and you’re still as confused as you were when you started. Imagine finding the […]
Continue Reading
How to Customize WordPress Email Login Behavior (+ Registration)
Searching for a WordPress email login feature so that you can customize your site's login process, such as requiring users to use their email address instead of a username? By default, WordPress lets users log in with either their username and password or their email and password via the default login page. But if you […]
Continue Reading
Thanks – works just fine on a customers site. They use the Microsoft authinicator app.
Hi,
I can’t see the 2fa tab under my profile builder settings, i have the altest version of profile builder plugin
Hello,
The tab should appear if you also have a paid version of the plugin installed. Open a ticket for better help: https://www.cozmoslabs.com/support/
Regards.