

Table of Contents
- 1 So What Can You Do to Boost Registrations for Your Website?
- 2 What Information Do You Need to Capture From Your WordPress Registration Page?
- 3 Installing and Setting up the Profile Builder Pro Plugin
- 4 Creating A User Role For Students
- 5 Setting up Multiple WordPress Registration Forms
- 6 Creating Custom Registration Fields for Students
- 7 Creating the Student Registration Form
- 8 How Does the WordPress Register Page Look on the Front End?
- 9 Redirect Default WP Registration to your Custom WordPress Register Page
- 10 Strengthening Passwords for Students
- 11 What About A WordPress Register Form For Teachers?
- 12 Restricting Page/Post Content to Only Be Viewable to Students
- 13 Wrapping Things Up
Before we get into the nitty-gritty of building a custom WordPress registration page, let’s quickly cover why make a WordPress register page.
There are a few reasons for putting your own stamp on the WordPress register page, probably the most obvious one, look and feel.

By default, the WordPress register page is well; it’s quite bland, no fault of WordPress, you understand, it’s perfectly serviceable and works, but it is limited to what it can do.
What if you wanted to collect more information from registrations? Maybe you’d like to get to know your users, ask them questions.
The other issue with the standard WordPress registration page, a lot of different websites will offer the same style. Which I’m sure you can agree doesn’t do much for managing your brand identity.
It could also be confusing to new users who decide to register. They came to sign up to billsawesomesite.com. Now they’re confronted with something completely different, to the uninitiated, this may put users off.
There’s no consistency, no flow, plus if a visitor is unsure, they could always click on the WordPress logo and be taken away from your website; what have you got?
A lost registration.
So What Can You Do to Boost Registrations for Your Website?
To boost registrations and, more importantly, reassure visitors, we’ll need to create a custom WordPress registration page. Matching the look and feel of your website.
Relax, grab a coffee/tea; we’re going to show you how to do just that, with an in-depth guide. Oh, and we promise, there’s no code needed for this.
What Information Do You Need to Capture From Your WordPress Registration Page?
Before you build your custom WordPress register page, ask yourself what information do you need to capture? Nobody wants to sit there and feel like they’re filling in a government form.
Tips for an effective WordPress Register Page:
- Keep it simple, ask only for the information that will help you serve your new registrants.
- Making the process easy for users is crucial; a lengthy registration page will see visitors bounce.
- Redirect users from the default WordPress registration to your front-end custom register page. Remember, it’s a trust thing; a registration page should match your brand/website identity. It instills confidence and another way you can boost registrations.
In this example, we’re going to show you how to make a school’s custom registration page. Why? We need to have an example to show you the logic behind the process.
Installing and Setting up the Profile Builder Pro Plugin
For this tutorial we’ll be using the Profile Builder Pro plugin, which is an all in one user registration and profile plugin. It lets you setup beautiful front-end registration forms, populate them with a variety of fields and keep users from accessing the default WordPress registration by setting up proper redirects.
Profile Builder Pro
Create beautiful front-end registration and profile forms with custom fields. Setup member directories, custom redirects, cutomize user emails & more using the all in one user management plugin.
Get Profile BuilderFirst things first, let’s install Profile Builder Pro plugin to build our front-end registration form(s) for our students/teachers.
If you’d like to take the Profile Builder plugin for a spin, don’t forget we have a free version, so you can familiarize yourself before leaping into the premium version.

Once you’ve purchased Profile Builder Pro, you can install it by navigating to Plugins > Add New, then click Upload Plugin. Drag and drop the plugin into the choose file box or click to search for it on your device.
Installation Complete What’s Next?
Once installed, you’ll see a new addition to your WordPress back end; see below:

You have two options here, automatically create the form’s pages, or if you’d prefer, you can use the following shortcodes:
- [ wppb-login ] – for your login page.
- [ wppb-register ] – houses your registration form.
- [ wppb-edit-profile ] – allow users to edit their user profile.
We’ll concentrate on the registration side of things for this tutorial, so let’s build our first form. This form will be for students to register on the site.
We’re going to hold fire on creating the pages, for the time being, there are a few things we need to take care of first.
Creating A User Role For Students
Out of the box, WordPress comes with a selection of user roles. To create our form, first, we’ll need to create a custom user role for students.
Since Profile Builder allows us to assign users with a certain role at registration, it might make sense to set one up. This way we can also give different user roles different permissions on our website.
Heading over to settings in Profile Builder, and enable the “Roles Editor” option as below:

Once activated, click the link shown above-called Users > Role Editor.
Adding a new user role is straightforward; all we want our students to do is read content, things like class timetables, updates from the school, and sudden changes to the curriculum.
To do this, head on over to the role editor and click Add New Role as shown below:

Next, we’ll need to set up the role for student; see the screenshot below for how this works; role capability wise, we’ve gone with the basics, Read, which is the same as the subscriber role:

Creating A User Role For Teachers
Using the same process outlined above, we can create a role for teachers; teachers may need more privileges such as posting articles and so forth; using the Role Editor, you can do this easily:

Hide the Admin Bar for Students, Show For Teachers
Once you’ve created the user role, head over to Settings in Profile Builder Pro, click on the Admin Bar, and hide/show as below:

Hiding the admin bar based on the student role keeps things simple for them, they don’t need to see it, and we don’t want to confuse them by showing it.
For teachers, showing the admin bar makes sense; they may need to add content to the site or perform administrative tasks.
Setting up Multiple WordPress Registration Forms
As Profile Builder Pro is modular by design, you can activate only the features you require for your site. In this instance, we’ll use an add-on called, Multiple Registration Forms.
To access add-ons for Profile Builder Pro, click Add-ons in the Profile Builder menu, and activate.

This Pro add-on will allow you to set up multiple registration forms with fields for specific user roles. Precisely what we need for our student and teacher WordPress register page(s).
We’ll create two different registration forms, populate them with different fields, one for each role: student & teacher.
Creating Custom Registration Fields for Students
Profile Builder Pro has 13 default fields upon installation, designed to get you started up quickly. To access the fields in the Profile Builder Menu, click on Form Fields.

Three of the fields cannot be deleted (as highlighted) as WordPress requires them to process new user registrations.
Registration Information for Students
Earlier, we discussed the need to keep the forms simple, as not to put users off. So thinking about this, here’s the information we need from our students:
- Username? (Maybe not!)
- First Name
- Last Name
- Student ID number
- Teachers (allow students to choose multiple)
- Emergency Contact (text area)
- Avatar (image upload)
- Password
- Reconfirm Password
Removing the Username Field
As this is a student form, it might be prudent not to allow them to choose something that could come back and haunt them later!
To achieve this, head to the General Settings Tab in Profile Builder and change the following option to Email:

Doing this prevents the Username from being shown on the front-end, and it’s one less field to hinder our students:

Adding Fields for Students
The creation of form fields is located in the Profile Builder menu under Form Fields. It’s here you can add as many as you require—all with various settings available.
A quick click in the field selector box will display the available fields you can utilize, and there are 46 available options. You’ll find any form field type needed in this list:

In this particular case, we’re utilizing the following fields the field name is in brackets:
- First Name – ( Default – First Name )
- Last Name – ( Default – Last Name )
- Email – ( Default – E-mail )
- Student ID number – ( Number )
- Teacher – ( Checkbox )
- Emergency Contact – ( Textarea )
- Avatar – ( Avatar )
- Password – ( Default – Password )
- Reconfirm Password – ( Default – Repeat Password )
Creating the Student Registration Form
As we have the Multiple Registration Forms add-on installed and activated, we need to create one for our students.
In the Profile Builder, select Registration Forms, and not unlike WordPress blog posts, we’ll need to give our form a title:

As you can see from the above image, we’ve named our form Student Registration. There are a few more options available here, such as:
- Set Role, we’ve defined the user role for this as Student, thanks to the Role Editor add-on.
- Automatically Log in, set to yes to eliminate the username issue for students entering silly names!
- Redirect, an excellent feature and one our customers love. Using this option, you can redirect (once a user has logged in, to a page of your choosing!).
- Display Messages, you can select how long you’d like a success message to display in seconds.
- URL, in our example, we’re redirecting to a page dedicated for students.
Further down the Registration Form page, you can choose from the fields created in the Form Fields settings:

If you’re not happy with the order of your fields, you can change the order by simply dragging and dropping:

Once you’ve published the form, don’t forget the Form Shortcode, located on the right-hand side of the page:

Copying the shortcode: [ wppb-register form_name=”student-registration” ] from the prompt, we now need to add it into a page.
How Does the WordPress Register Page Look on the Front End?
Pasting the shortcode into a page of your choice, this is how it looks:

You’ll notice we’ve added a description to the Student ID number and various other fields from the screenshot. This helps clear up any confusion as to what a specific field needs.
Also, fields marked with * are required, so the form will not process unless all the available fields are completed; this is as simple as clicking on a checkbox when creating a Form Field.
In terms of styling each form inherits the style of your theme and Profile Builder offers several ways for you to style your forms.
Redirect Default WP Registration to your Custom WordPress Register Page
It’s all very well creating a custom WordPress registration page, totally pointless if the standard register page is still accessible, so what can you do to correct this?
It’s an easy fix by using the Profile Builder add-on called Custom Redirects:

Once the add-on is activated, you’ll see a new addition to the Profile Builder menu called Custom Redirects.
Accessing the Custom Redirects options, you’ll see four individual sections to add redirects:
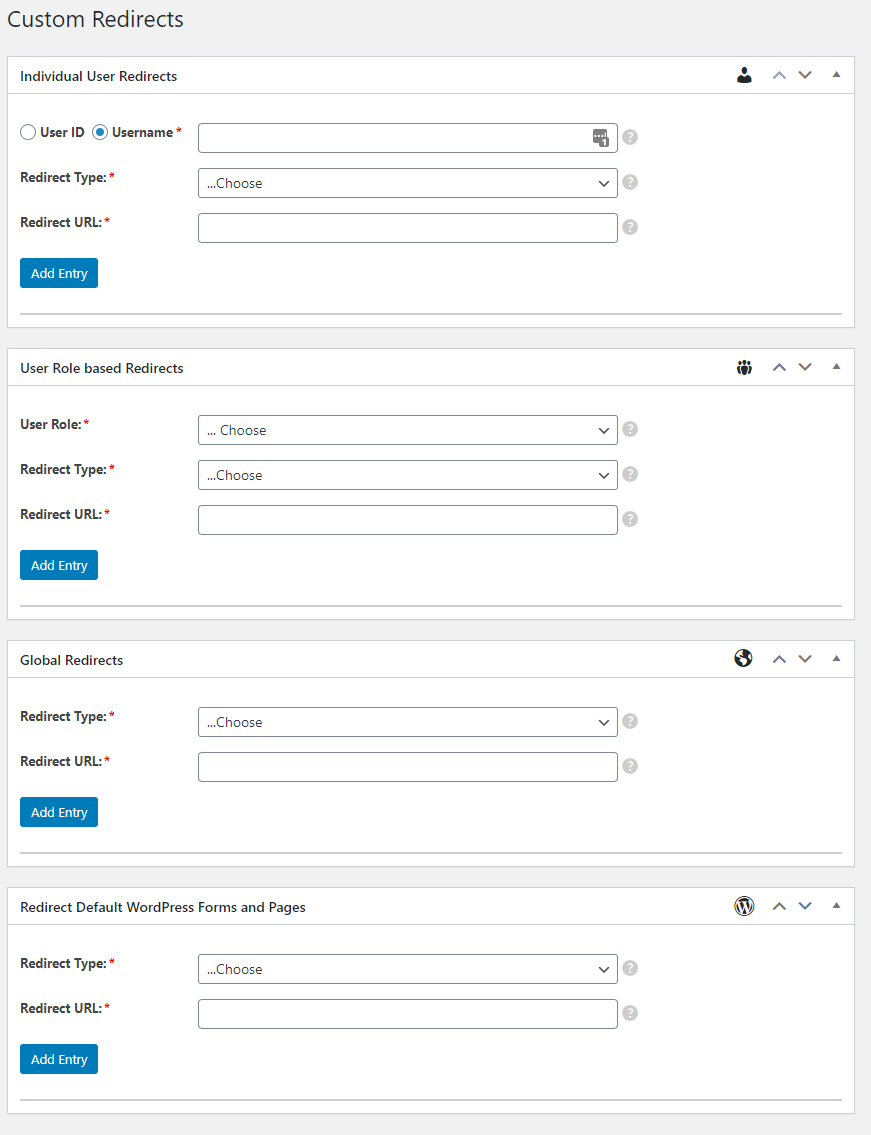
Individual User Redirects, this option allows you to set a redirect at a personal level. Here you can set a User ID or Username that this custom redirect will point to.
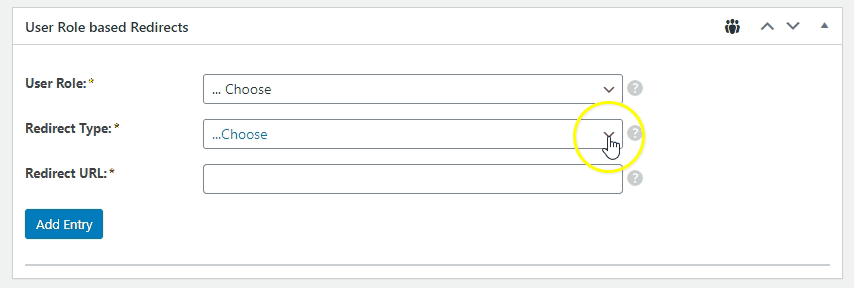
User Role based Redirects, here we can redirect students to a specific registration page based on their user role and the same for teachers by clicking on Add Entry.
Global Redirects, if you’d like to set a site-wide redirect, you can add an entry here, and all login attempts will redirect to specific URL(s) of your choosing.
The previously mentioned redirect options all have the same Redirect Types:
Using various methods, you can redirect students to URLs of your choosing based on multiple criteria, for example:
Student registers > redirect to mysite.com/welcome/
A student logs in > redirect to mysite.com/latest-news/
The possibilities are endless in terms of redirections.
For more information on Custom Redirects, along with how to use tags for dynamic URLs and more, please view our detailed guide covering everything you need to know.
Strengthening Passwords for Students
Back to the passwords for our students, as it stands, our password field could do with strengthening, to protect students, and of course, to prevent misuse.
To enforce strong passwords in Profile Builder, click Settings; in the General setting tab, scroll down till you see the following fields:

Here you can set a Minimum Password Length (enter a numerical value) and the Minimum Password Strength; in our instance, we have it set to strong.
Let’s revisit the front-end and see what happens by setting these options.
Filling in the form details, we’ve deliberately entered a password of abc123456 and re-entered the same in the repeat password field, and this is what happens:

Once the form is submitted, a message displays, requiring the user to use a stronger password for security.
Better for our students and security in general.
What About A WordPress Register Form For Teachers?
If you’ve come this far, then using the same methods as outlined previously, you can create a form for teachers and a registration form for them. Redirect them to a teachers hub and show them the WordPress admin bar for adding content.
And, of course, create a custom WordPress registration page, specifically for teachers.
Restricting Page/Post Content to Only Be Viewable to Students
The last thing we want to show you is restricting content. After all, all this is for nothing if everyone can see your content; we only wish for specific posts/pages to display to students. Nothing more.
Restricting content on pages/posts is straightforward; all you need to do is head on over to Settings then the Content Restriction tab:

Enable Content Restriction, select yes from the drop-down menu; you have two options when it comes to the Type of Restriction:
- Message, this option will display the Message for logged-out users; in the editor, you can define a message to show to students, along with a link to point to or whatever you need.
- Redirect, choosing this option means you can specify a URL to redirect users to the post/page that restricts content.
Further down the settings page, we can define a few more options:

- Message for logged-in users, here you can create a Message for logged-in users using the editor.
- Restricted Posts Preview, choose from none, or show the first (numerical value input) words of the post/page content. Or insert a read more tag in a post/page and only display the content above the tag.
Page/Post Restriction Settings
In this example, we’re using the block editor; Profile Builder Pro works in the classic editor too, so no need to worry.

Here we can create a Class Timetable page and restrict it to only being viewable to students and teachers.
Via a couple of checkboxes, you can set access for designated roles.
If you’d like to override the custom message, you can Enable Custom Messages and fill in descriptions for logged out users and logged in users.
Wrapping Things Up
Hopefully, we’ve demonstrated the flexibility you have in creating a custom WordPress register page using Profile Builder Pro. While this example is for students/teachers, you could use the tools featured above to setup any type of registration form and collect the information you need from your users.
Creating beautiful front-end forms that integrate with your site and brand, while keeping users from accessing the default WP registration, will have a positive effect on boosting registrations.
Profile Builder Pro
Interested in finding out more about Profile Builder Pro? Make sure to checkout the full suite of features Profile Builder Pro provides offers below:
Get Profile BuilderRelated Articles

WordPress Profile Builder: a Front-end User Registration, Login and Edit-Profile Plugin
Easily Login, Register and Edit your Profile Directly from the Front-end Profile Builder lets you add front-end forms that give your users a more flexible way to register, log in, and modify their profile information. If you allow public registration on your site, you don't want to force your users to use the backend WordPress […]
Continue Reading
8 Best WordPress User Registration Plugins
Not sure what WordPress user registration plugin to use for your project? Going through all the WordPress user registration plugins can be disorienting. You may have spent hours and hours searching for plugins and tutorials to help you with your project, and you’re still as confused as you were when you started. Imagine finding the […]
Continue Reading
5 Best WordPress Class and Course Registration Plugins with Tons of Customizations
WordPress is really flexible in that it allows users to implement specific functionalities easily without touching the code. You can add any kind of functionality to your WordPress site using plugins. So if you want to build a form for class registration or sell a course, then all you need is a WordPress class registration […]
Continue Reading