

Table of Contents
Selling group memberships on your WordPress site is a great way to increase revenue by making subscriptions purchase more convenient to certain customers. You don’t even need to completely reinvent the wheel if you already have a membership site of your own.
In this post, we’re going to walk you through the process of using Paid Member Subscriptions to setup and sell group memberships. First, let’s go over what group subscriptions are and who purchases them.
Why You Should Sell Group Memberships
Group memberships are beneficial for your business and customers alike. They’re most often used by businesses, companies and schools who need to purchase multiple subscriptions for staff and/or students. It’s much more convenient to purchase and manage one subscription that can be used by 10 individuals than it’d be to purchase 10 individual subscriptions.
Group memberships are nothing new and are actually becoming more popular due to the emergence of digital services. Take your family’s phones, for instance. Most families don’t purchase four separate phone plans for their family of four. They choose a plan that offers four lines, cheaper prices and one bill to manage. Entertainment subscriptions like Netflix, Spotify and Hulu work in a similar way.
Some services make signing up for group memberships complicated. This is the case with LinkedIn Learning, formerly Lynda.com, where you’re required to contact them and negotiate a group membership subscription.
We have a better way of doing things.
Setup and Sell Group Memberships using Paid Member Subscriptions
The ability to sell group memberships is available in a premium add-on for Paid Member Subscriptions, so you’ll need a Pro license and a copy of the plugin to use it.
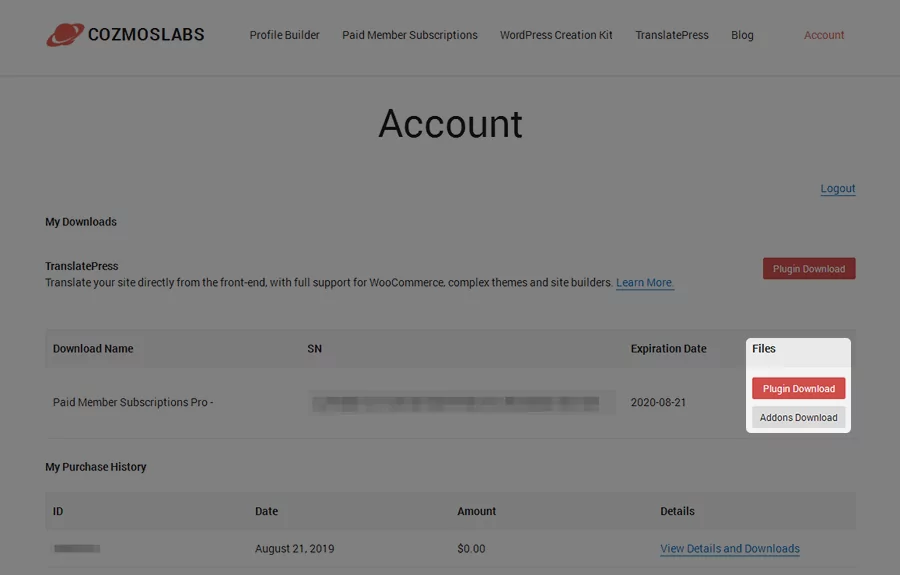
After purchasing a license, you can download it and the Group Memberships add-on from your Cozmoslabs account.
Start by installing the main plugin on your WordPress site by going to Plugins → Add New → Install plugins. Drag the ZIP folder to the Choose File box or use the Choose File button to select it from your computer’s file system. Either way, click Install Now once you upload it, and activate it upon installation.
The setup wizard appears as soon as the plugin is activated. We recommend going through the first page at the very least it as it’ll help you create key pages that control your membership site’s primary functionalities as well as how you get paid.
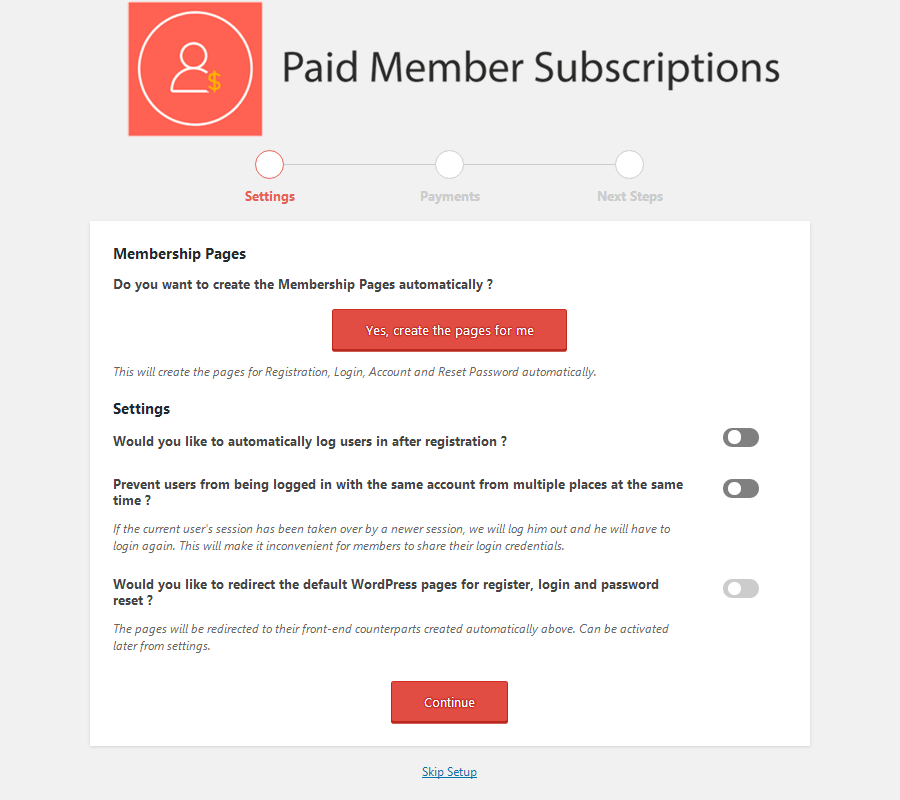
Since you want to sell group memberships as part of your membership site, make sure you enable the option that says Prevent users from being logged in with the same account from multiple places at the same time.
Disallowing users from being logged in from more than one location simultaneously will encourage them to purchase group memberships rather than buying an individual membership and sharing the login credentials for each.
Installing the Group Memberships Add-On
You need to activate your license serial number on the backend of WordPress in order to install premium add-ons. You’ll find this number under the ‘SN’ column on the account page.
From the backend of WordPress, go to Paid Member Subscriptions → Add-Ons, page your serial number, and click Save Changes.
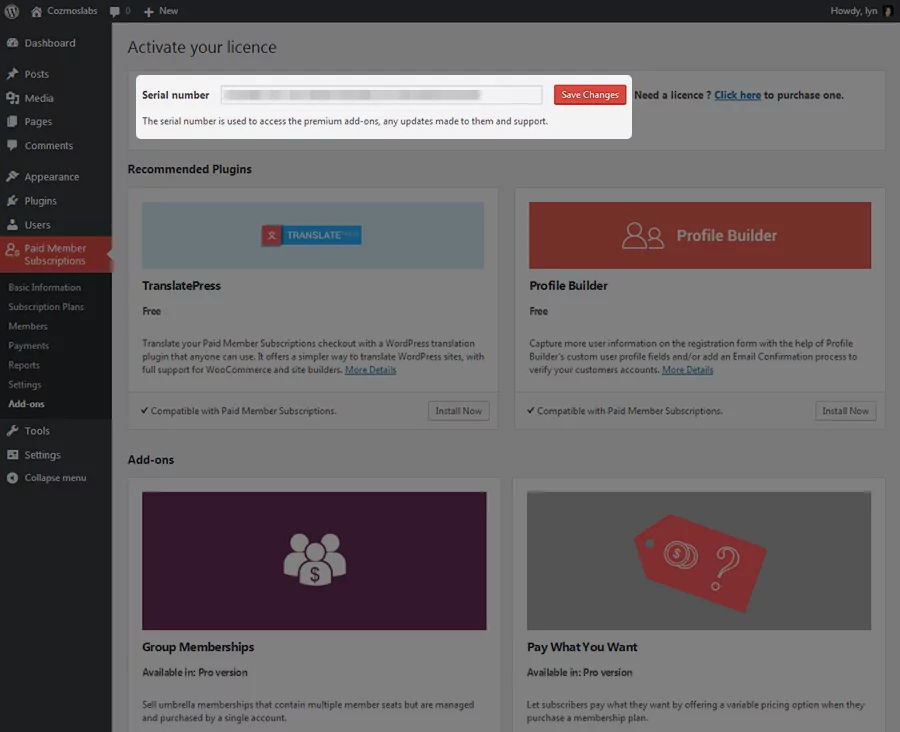
Once you do that, you can install and activate the Group Memberships add-on the same way you installed the main plugin.
Deciding On Subscription Tiers for Your Membership Site
Before you create group memberships, you need to determine the number of subscription tiers you want to create for your membership site. Start by determining the features, products or courses you want to offer. You can also think of tiers in terms of subscription duration, such as monthly subscriptions and annual subscriptions.
Let’s say I have a website about math and offer a few different courses, such as Basic Algebra, Basic Geometry, Advanced Algebra and Advanced Geometry. We’ll also pretend this site has a blog and video series, and I want to add premium content to each.
There are a few different ways I can go about creating subscription tiers for this type of membership site. Using the latter example and creating two tiers, one monthly and one annual, is a simple way to go.
Adding all of my courses and premium content to each tier but having annual subscribers benefit by receiving 12 months for the price of 10 is a great option as well. I can also make premium content available exclusively only to annual subscribers.
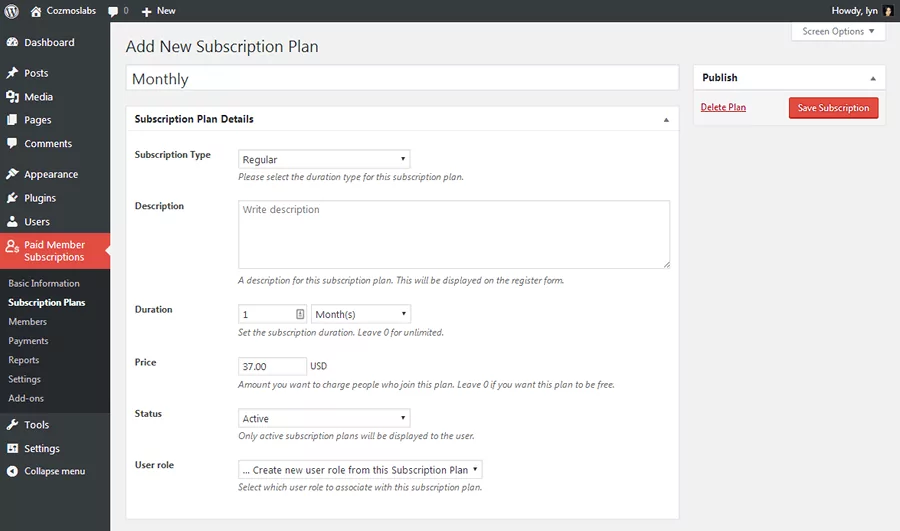
You can add your own subscription tiers by going to Paid Member Subscriptions → Subscriptions.
Let’s say I want three tiers, and I want them all to have the same duration but different prices. I can add premium content as a feature for Tier 1, premium content plus the basic courses as features for Tier 2 and everything as features for Tier 3.
The possibilities are endless. Take a bit of time, and decide which features and products you’d like to add to your membership site. It’s just a matter of organizing those features into tiers and choosing prices for those tiers after that. You can also create free tiers as a Pro user.
It should be noted that you can assign if and how each tier renews, but you’ll need to have PayPal and/or Stripe enabled as payment gateways via the Recurring Payments for PayPal Standard, PayPal Pro and PayPal Express, and Stripe add-ons.
Here’s a quick list of features you can add to your tiers for a bit of inspiration:
- Premium content
- Products, including courses and WooCommerce products
- Support, including priority support options for higher tiers
- Add-ons and additional downloadable materials, such as worksheets and workbooks
- Forum access
How to Sell Group Memberships with Group-Specific Tiers
When you install the Group Memberships add-on on your site, you have the option of changing the Subscription Type to Group. A new setting called ‘Seats’ appears on the Add New Subscription page when you do.
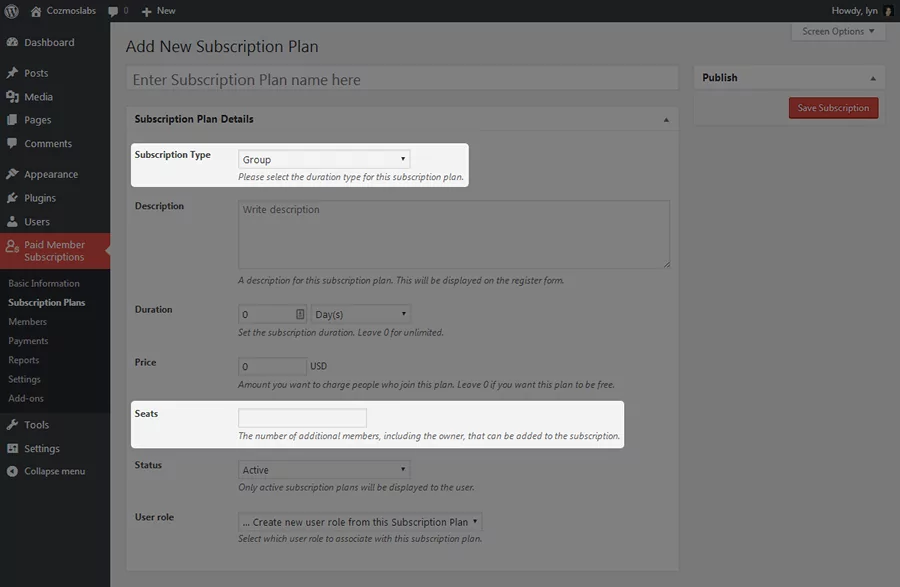
“Seats” refers to the number of users a subscription to that individual group tier gives you access to. If you enter the number four in this field, the user who purchases the subscription plus three additional users will receive all of the features and benefits that tier offers.
Just like Regular tiers, there are a few different ways you can go about creating group memberships. The simplest way would be to create duplicate tiers where the Group tiers offer the same features as the Regular tiers. They could be named Bronze, Bronze (Group), Silver, Silver (Group), etc.
If this is the way you’d like to go, you’ll also need to determine how you’d like to handle subscription prices for group memberships. Discounts, such as four seats for the price of three, are a great way to incentivize potential customers into buying group memberships.
However, because some businesses and organizations buy group memberships as a way to simplify the process of buying subscriptions on a mass scale, you don’t necessarily need to offer lower prices. The convenience factor alone is an incentive.
You can also create unique tiers for groups if it’s appropriate. For example, you could offer exclusive products and discounts at your WooCommerce store and restrict access to them to non members.
What Your Customers See On the Frontend
You can view your registration form, the form customers will use when they choose a subscription to purchase, by viewing the Register page Paid Member Subscriptions created for you in the setup wizard. If you skipped the setup wizard entirely, create your own registration page, and add the pms-register shortcode to it.
Here’s what my registration page looks like after creating three subscription tiers and three additional tiers for groups.
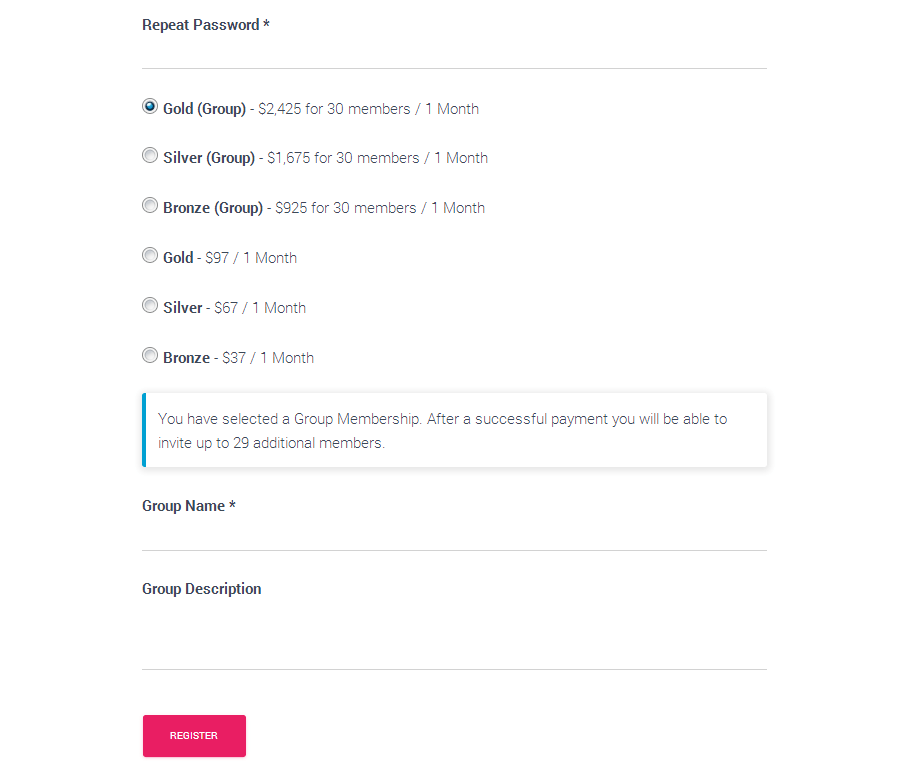
You can see how the registration form requires them to name the group membership account and provide an optional description for it. This extra bit of information will help customers you sell group memberships to manage the group membership subscriptions they purchase a little easier.
The owner of the subscription manages the group membership account on the frontend. From here, they can upgrade, renew and cancel the subscription. Most importantly, they’ll be able to invite other members to the account using each member’s email address.
If you’d prefer a more aesthetically-pleasing way to showcase your subscription plans, check out our guide on creating pricing tables.
Let’s talk about how to implement all of the features you want to add to your membership site.
How to Restrict Content and Products When You Sell Group Memberships
You can control the messages non-members and logged-out members see when they come across restricted content by going to the Content Restriction tab on the Settings page.
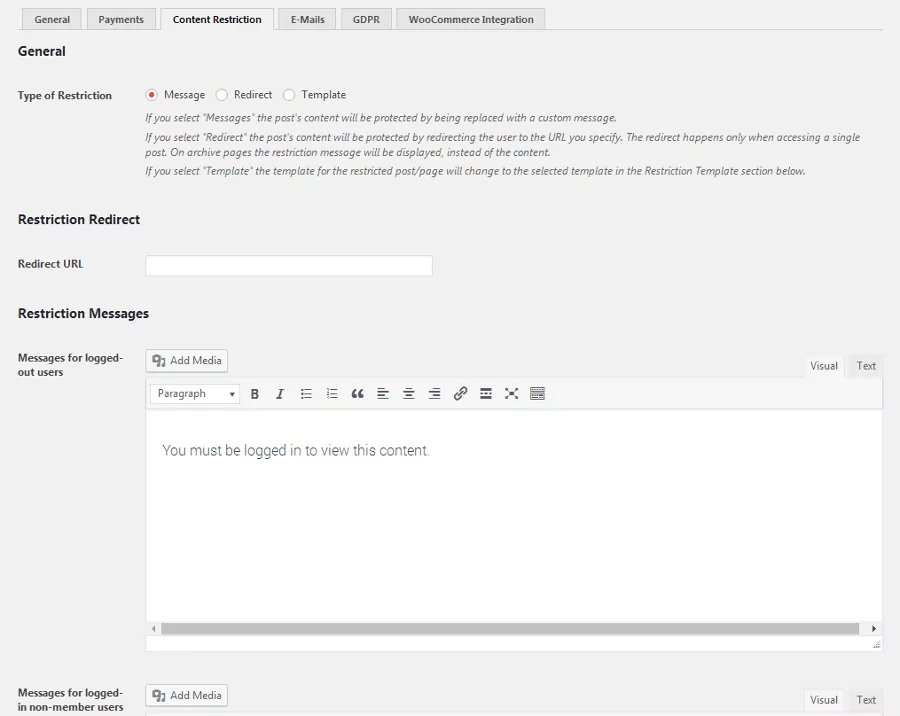
Choose the way you’d like the message to be delivered. If you choose the Message option, read through each Message text editor on the page and make changes where you see fit. For example, you may want to say “You must have a Silver subscription or higher to view this content” instead of the default message.
If you choose the Redirect option, create a page that explains the restricted content on your site, and add a link to it in the Redirect URL field. Alternatively, you can add a link to your product page or member’s login page to this field instead.
Restricting Products with Paid Member Subscriptions
As far as how to restrict content when you sell group memberships, let’s start with restricting WooCommerce products. The integration between these two plugins works seamlessly so long as you have them both activated.
You’ll find two new metaboxes on the Add New Product page when you have Paid Member Subscriptions activated. Let’s start with the Content Restriction box. You’ll see this box on the Edit Page/Post pages as well.
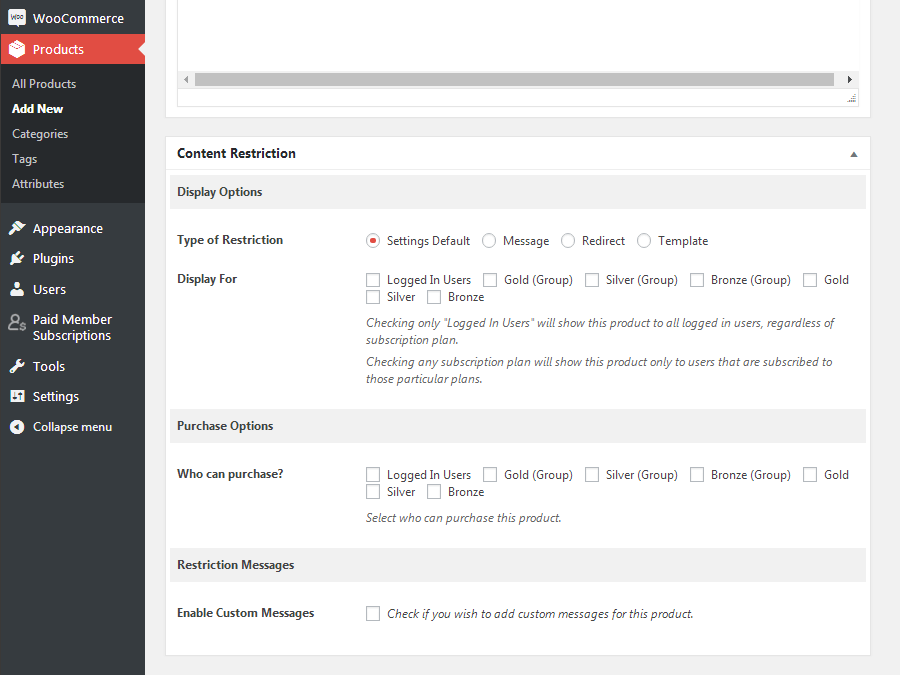
Right off the bat, you’ll notice how you can override the restriction method you configured on the Settings page for individual products, pages and posts. For products, you can restrict this content in two ways—restricting who can see it and who can purchase it.
It may be more beneficial for you to show restricted products to non-members for marketing reasons. Seeing discounts or exclusive products but not having access to them may encourage some users to purchase or upgrade their memberships.
Furthermore, if this is an exclusive product available for members only, select the types of users and/or subscription levels you’d like to give purchasing privileges to.
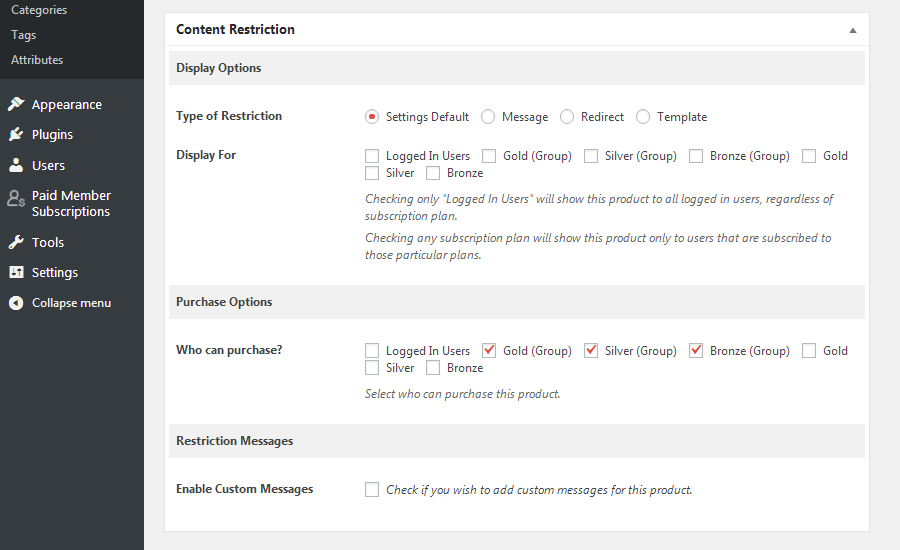
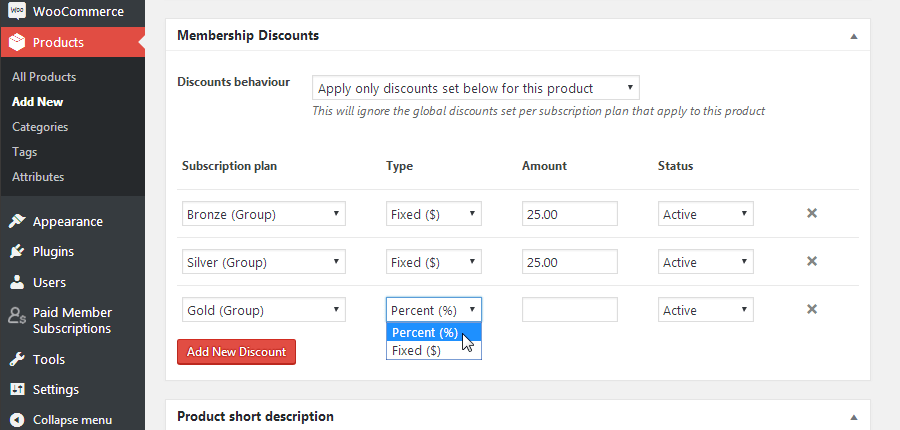
Let’s say you want this product to be available for everyone but would like to offer exclusive discounts for groups as incentives when you sell group memberships. In this case, leave the above selections blank, and use the Membership Discounts metabox instead.
Start by changing the Discounts Behavior setting to Apply only discounts set below for this product. You can then create specific discounts for individual subscription plans. Choose a discount type, and enter an amount for each.
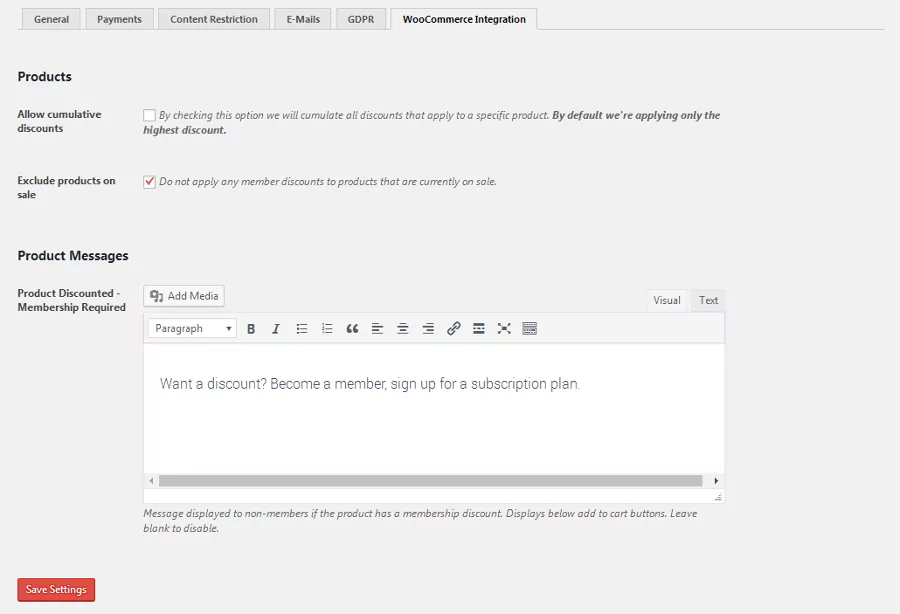
To prevent users from receiving discounts higher than these when you put these products on sale, head back to the main Settings page, click over to the WooCommerce Integration tab, and enable the Exclude Products On Sale option.
Let’s talk about restricting pages and posts.
Restricting Content with Paid Member Subscriptions
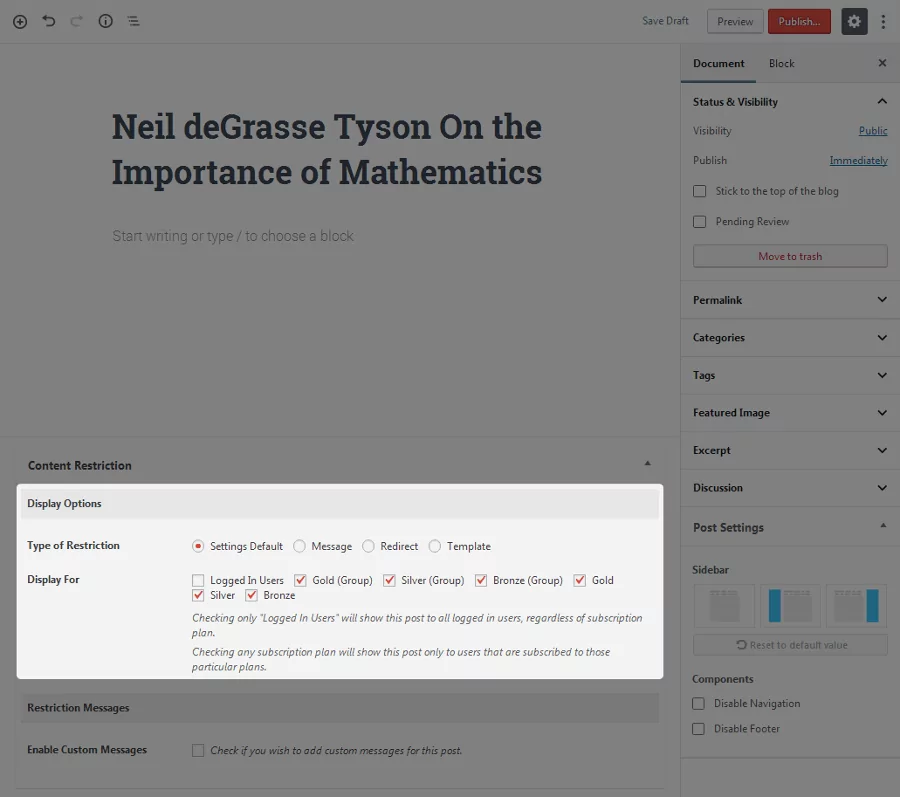
The Content Restriction metabox is how you’ll restrict premium content to members only. It works the same way as it does on the Add New Product page. This means if you have a post or page you only want paying members to have access to, you should select every subscription level in the Display For section of the metabox except ‘Logged In Users.’
You can also restrict parts of a post or page by surrounding its content in shortcodes.

Paid Member Subscriptions content restriction works great with Elementor page builder as well, so you can easily restrict Elementor sections and widgets based on membership plans.
How to Drip Course Content
Since you have a Pro license, you also have access to the Content Dripping add-on. It allows you to delay a subscriber’s access to a particular piece of content based on how long they’ve been subscribed.
We have an entire post on how to create content drip sets, if you’re interested. Alternatively, you can use content drip sets to prevent new subscribers from consuming all of your content before their subscription renews.
Final Thoughts
Selling group memberships is a fantastic way to make purchasing subscriptions from your site more convenient for certain customers. It’s also a wonderful way to bring in more revenue through bulk orders.
All in all, setting up and selling group memberships is really easy using Paid Member Subscriptions and the Group Memberships add-on.
Get Paid Member Subscriptions Pro
All that’s left after setting up group subscriptions is determining which types of groups will be purchasing them, the features you feel they’ll specifically need and the prices they expect to be charged.
While you can simply sell group memberships where each membership costs the same as an individual membership, most consumers expect to receive discounts when they buy in bulk.
Related Articles

How to Set Up WooCommerce Stripe Subscriptions with Recurring Payments (3 Methods)
Are you searching for a way to set up WooCommerce Stripe subscriptions? Setting up recurring subscriptions is a great way to build regular, dependable revenue for your website. And when it comes to processing payments, Stripe is one of the top options thanks to its competitive fees and flexible feature set. However, WooCommerce doesn't include […]
Continue Reading
How to Use a Membership Website Builder
In this article, we’ll cover what you need to build a membership website, the main features, and take a look at some of the best membership website builder plugins.
Continue Reading
How to Build a Successful Video Membership Site
There are all kinds of membership or subscription sites out there: veg boxes, shaving products, entertainment tickets, and so on. But one subscription platform reigns supreme: video. Just look at the success of Netflix, Hulu, Amazon Prime, and the dozens of other niche streaming networks that have sprung up over the past few years. This […]
Continue Reading
Please do you have other payments option apart from paypal
Hello,
The paid version offers a Stripe integration as well.
Regards.
What of countries where paypal and stripe cannot be used to accept payments?? which payment platform can we use.???