

Table of Contents
Looking to create a custom WooCommerce register page for your store?
Whether you want to create a dedicated registration page or add custom fields to the checkout register form (or both), we’re going to show you an easy, code-free way to customize all parts of the WooCommerce registration process.
By following this tutorial, you’ll learn how to:
- Create a custom WooCommerce register page at any URL, complete with custom fields and useful features like conditional logic. You can even create multiple forms and connect them to different WooCommerce user roles.
- Add custom redirects to send users to a certain page after they register.
- Add custom fields to the WooCommerce registration form that shows on the checkout page (if you’ve enabled registration at checkout).
- Create a custom WooCommerce edit profile form to go along with your register page.
- Require manual admin approval for some/all new registrants.
Basically, you’ll be able to fully customize how users register at your store.
Here’s an example of one type of modification that you’ll be able to set up by the time you finish this tutorial:

Ready to get started? Let’s dig in…
What You Need to Create a Custom WooCommerce Register Page
To customize your store’s registration process, you can use the beginner-friendly Profile Builder plugin. Profile Builder gives you a code-free way to manage all aspects of your site’s users, including customizing the registration, login, and edit profile forms.
With the premium version and its WooCommerce Sync add-on, you can sync all of your users and forms with WooCommerce to give you full control over your store’s registration and user management.
Beyond that, Profile Builder Pro also comes with lots of other useful features such as restricting access to some/all of your WooCommerce products, creating multi-step registration forms, repeater fields, and more.
To get started with the tutorials below, make sure to purchase at least the Hobbyist license of Profile Builder Pro so that you can access the WooCommerce Sync add-on.
Once you’ve made your purchase, install both Profile Builder Pro and the WooCommerce Sync add-on and then continue on to learn how to set everything up…
Profile Builder Pro
The best plugin to customize the WooCommerce register page without any code.
Get Profile BuilderHow to Customize the WooCommerce Register Page
Profile Builder gives you three main ways to customize the WooCommerce register page. You can…
- Customize the existing register form, which appears when an anonymous user tries to access the “My Account” page.
- Create one or more completely new register forms that you can add anywhere on your site using a shortcode.
- Customize the registration form fields that appear on the WooCommerce checkout, if you’ve enabled the ability to register at checkout in WooCommerce’s settings.
We’ll show you how to make all three changes below – you can choose as many of them as you want. That is, you could set up all three registration options, or you could just set up one or two. It’s completely up to you.
How to Customize the Existing WooCommerce Register Form
When we talk about the “existing” register form, we mean the simple three-field form that appears when an anonymous user tries to access the “My Account” page. Here’s an example of what it might look like – the exact design depends on your theme:
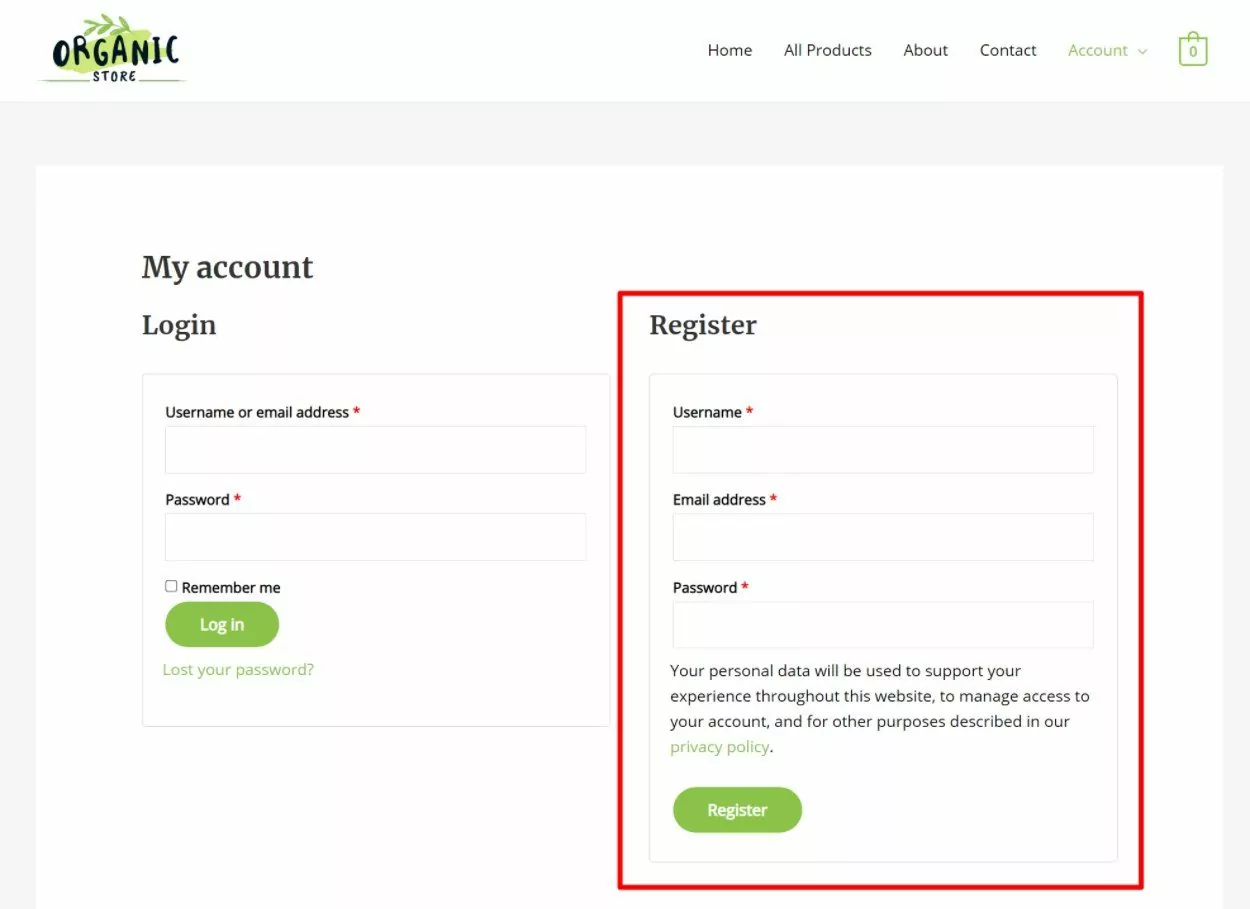
With Profile Builder, you can customize the register form to include additional form fields as needed and also set up other behavior like after-registration redirects.
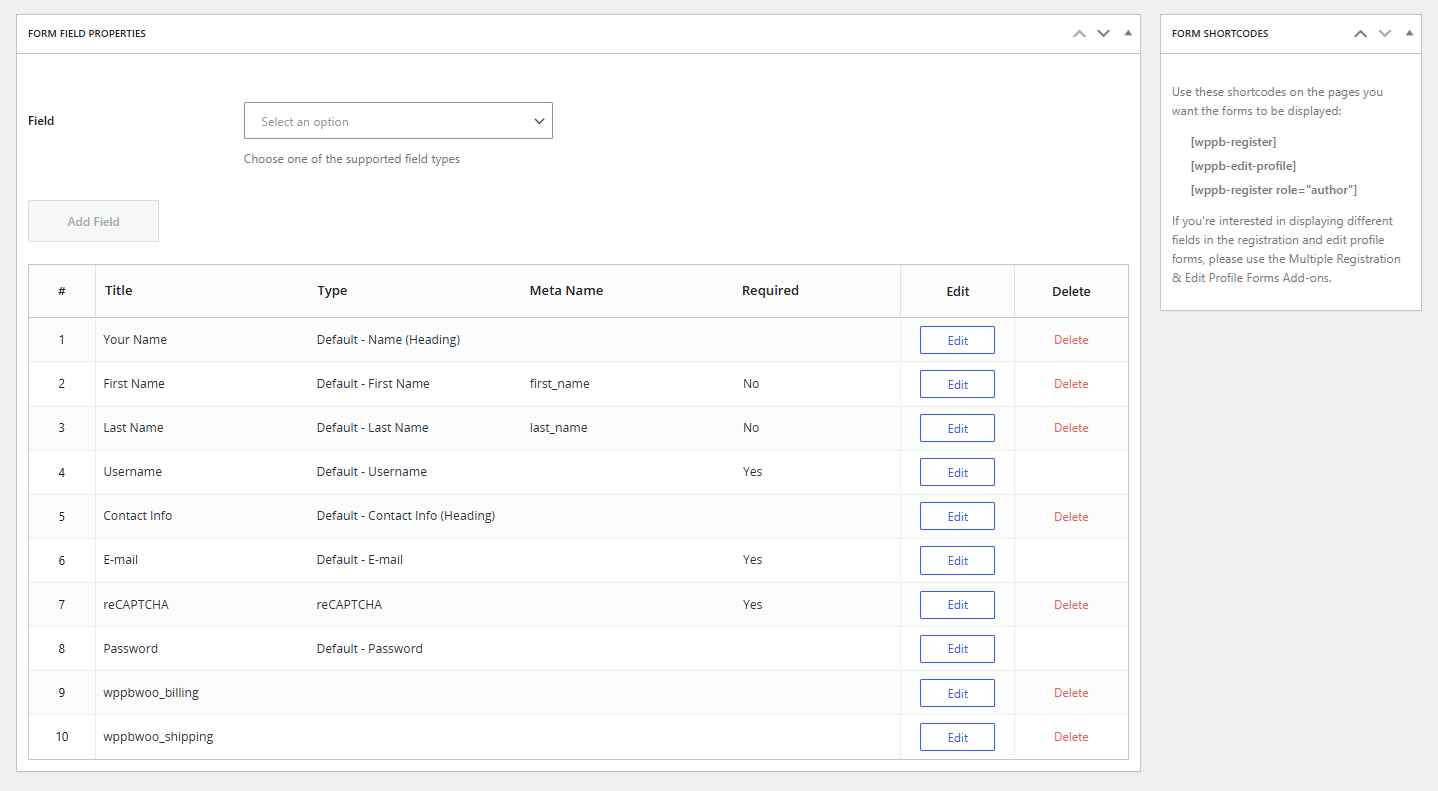
To customize the form fields, go to Profile Builder → Form Fields. Here, you can customize all of the fields that appear on the register form. You can:
- Add new fields using the drop-down at the top. You can choose from all the default WordPress/WooCommerce fields and also add your own custom fields if needed.
- Delete any of the existing fields.
- Use drag-and-drop to change the order of the fields.
Whenyou add or edit a field, you’ll be able to configure its labels, default values, whether it’s required, etc. For advanced uses, you can also set up conditional logic, which lets you show/hide certain registration fields based on how users have answered previous fields:
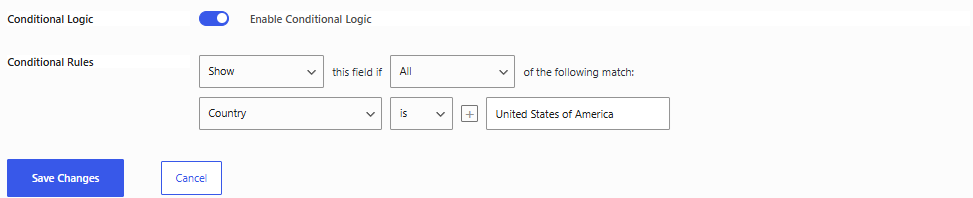
Once you’re happy with your changes, make sure to save your changes.
Now, all that’s left is to tell Profile Builder to replace the default WooCommerce register form with your new custom form. To do that, go to Profile Builder → WooCommerce Sync and set the Choose Register form to display on My Account page drop-down equal to Default Register:
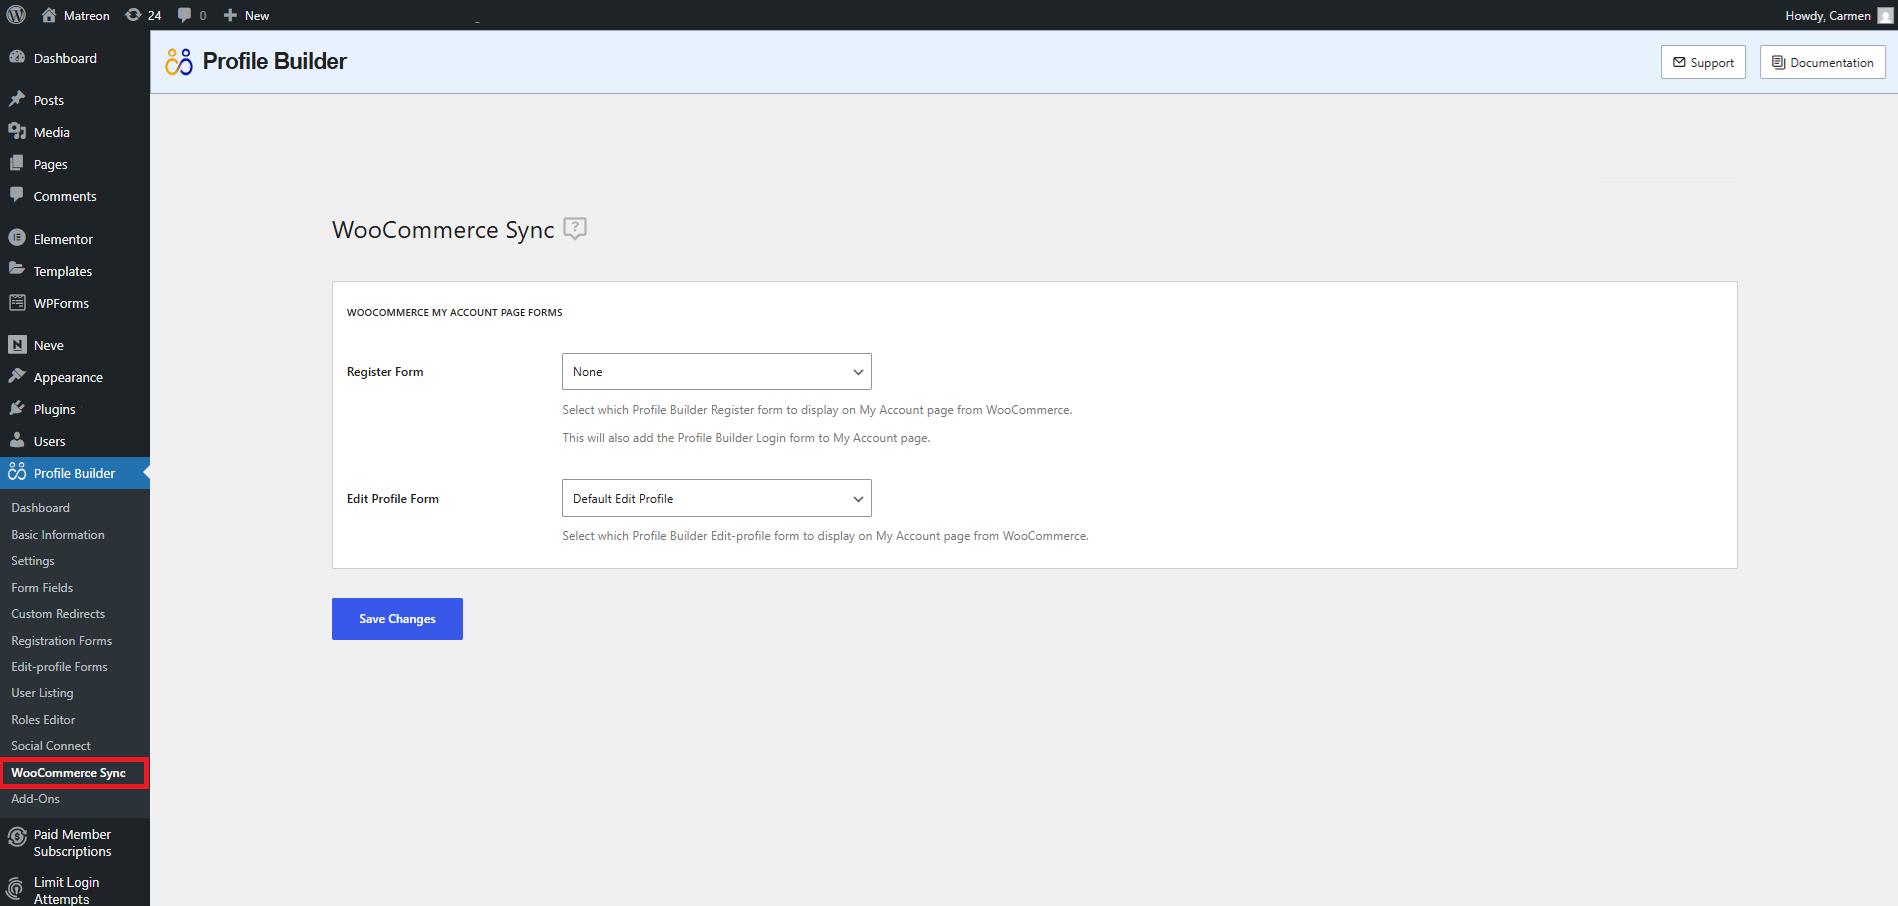
Now, guest users will see your new custom form when they go to the “My Account” page:
How to Create a Custom WooCommerce Register Page
To make things easier for users, you might want to create a dedicated registration page instead of or in addition to the default form from the previous section. For example, https://yoursite.com/register.
To set this up, you can use Profile Builder’s registration form shortcode.
To get started, go to Profile Builder → Form Fields to control the fields that appear on your registration form.
Just as with the previous section, you can use this area to add, remove, or edit all of the fields that appear on your registration form:
Once you’re happy with your registration form, you can display it anywhere on your site using the following shortcode:
[wppb-register role="customer"]
If you’re using custom WooCommerce user roles (e.g. for role-based pricing or wholesale customers), you can change the role=”X” shortcode parameter to a different user role.
In addition to adding the shortcode, you can also use the regular WordPress editor to include additional content as needed, which helps you further customize your registration page:

Here’s how that might look on the front-end of your site:

Create Multiple Unique Registration Forms
For more complex scenarios, Profile Builder also gives you the option to create multiple different unique registration pages. For example, with a wholesale store, you could create one registration form for retail customers and another registration form for wholesale customers.
You could then assign users to different WooCommerce user roles depending on which form they choose.
To create additional forms beyond the default form (Profile Builder → Form Fields), you can go to Profile Builder → Registration Forms. This area will allow you to create unlimited new registration forms.
You can customize each form using the same interface that you saw above and each form will get its own dedicated shortcode that you can use to embed the form anywhere on your site:

How to Customize Registration Fields on the WooCommerce Checkout
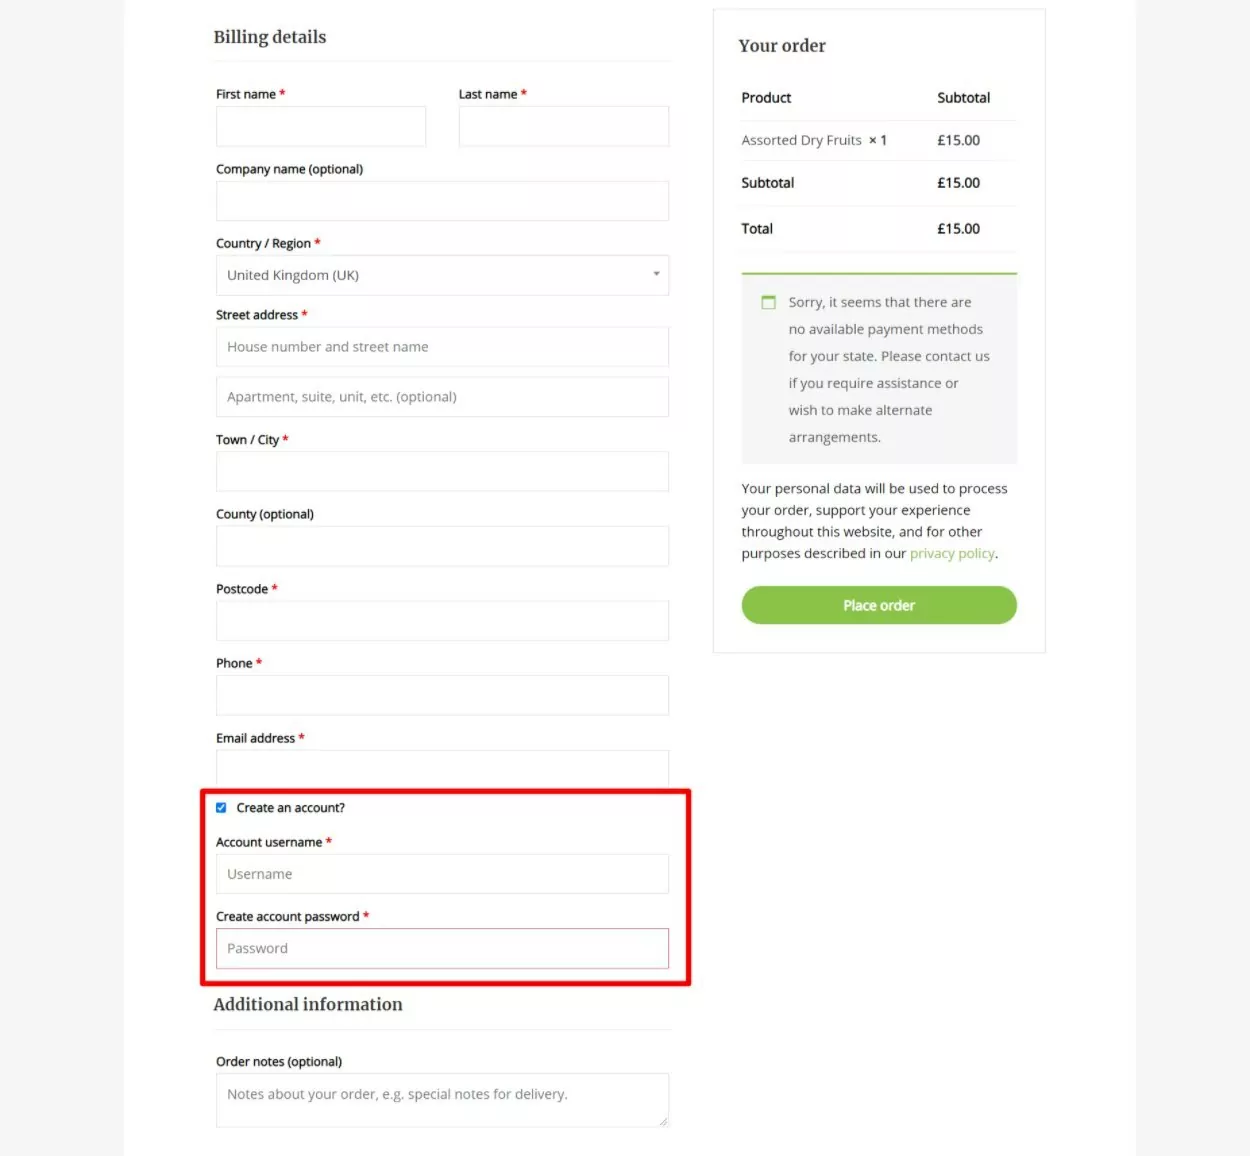
The final option is to add new fields to the WooCommerce registration form that’s integrated into the WooCommerce checkout process. If you’ve enabled the option for users to create an account during the checkout process (WooCommerce → Settings → Accounts & Privacy → Account creation), it looks something like this:
With Profile Builder, you can customize this area to include additional fields as needed.
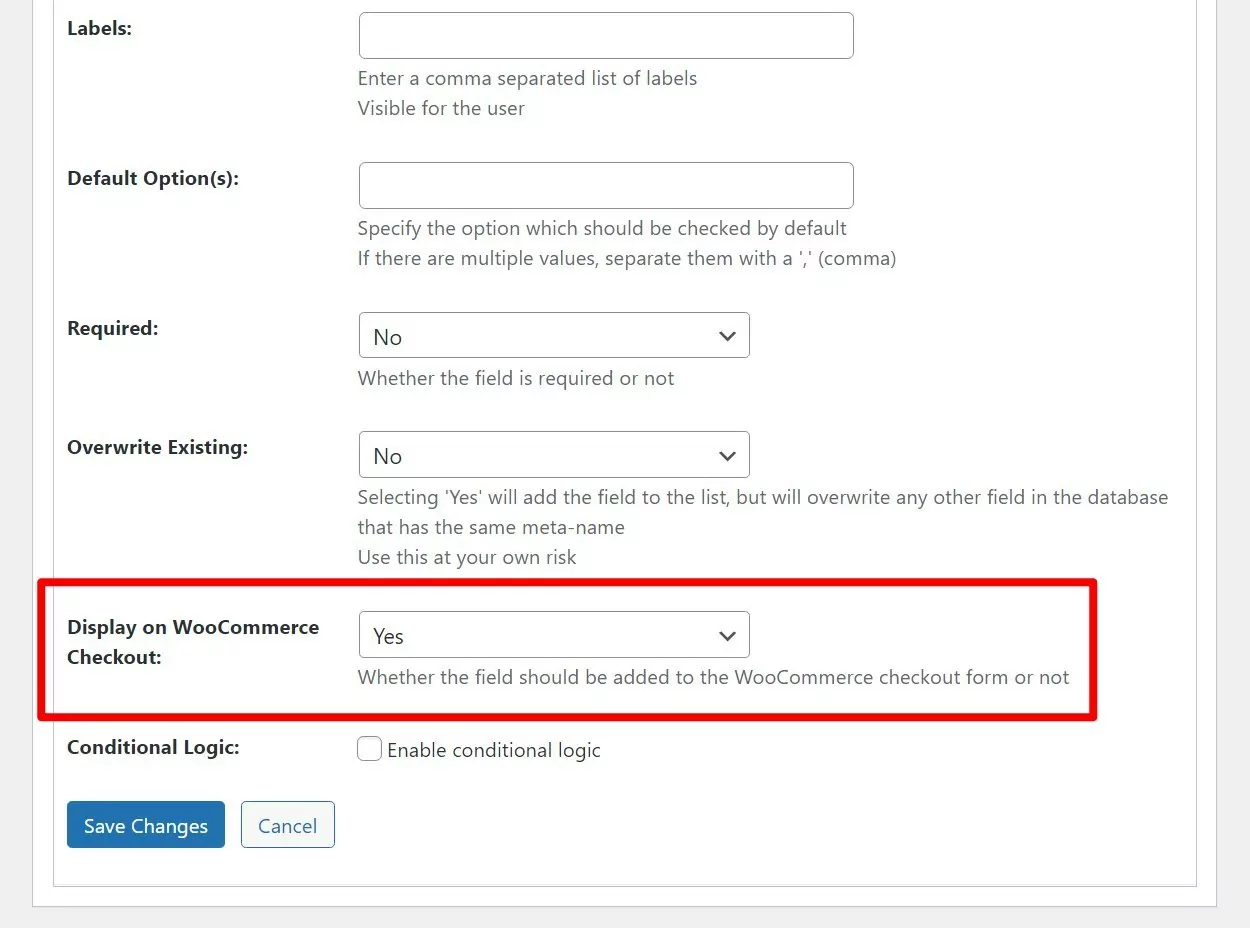
To add those fields, go to Profile Builder → Form Fields to pull up a list of all the form fields from your regular registration page. Then, edit one of the fields that you want to include on the checkout page and set the Display on WooCommerce Checkout drop-down equal to Yes:
To include more fields, you can repeat the same process for each field that you want to add to the checkout registration form.
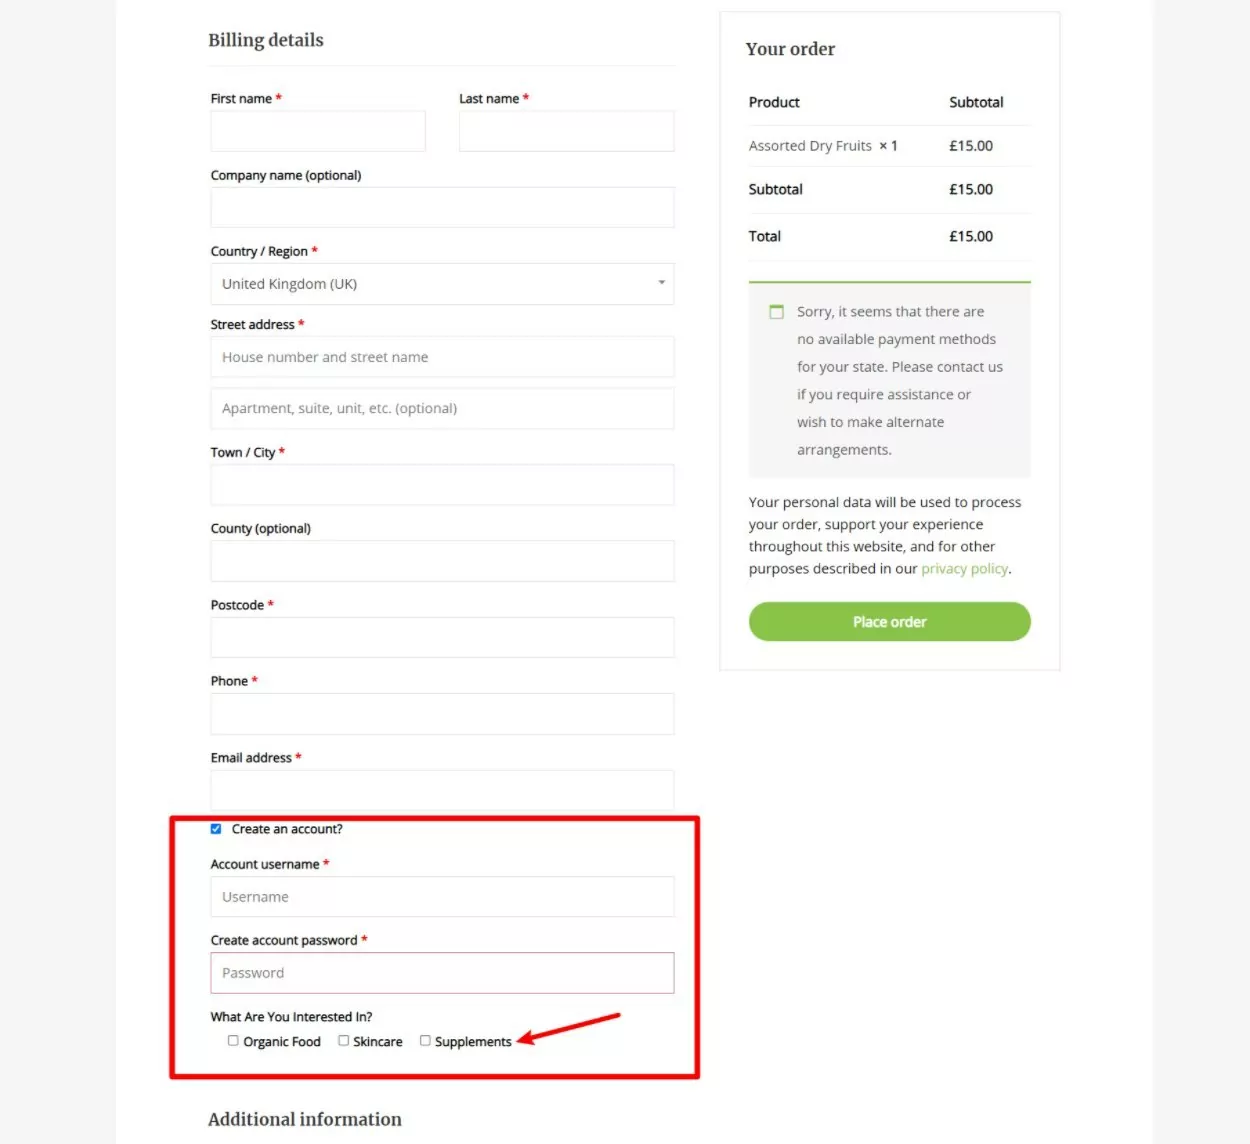
Once you’ve added all the fields and saved your changes, you should see all those new fields on the checkout page – you can see an example of a custom field in the screenshot below:
And that’s it! We just showed you three options for customizing the WooCommerce register page at your store. Now, let’s go over some additional options for further modifying the behavior of WooCommerce registration and user management.
How to Further Modify WooCommerce Registration and User Profile Behavior
Here are some other useful changes that Profile Builder Pro can help you make to your store’s registration and user management.
Set Up Custom After-Register Redirects
Redirecting users after registration is a great way to create a more user-friendly store and/or promote your most valuable products. For example, after a user registers, you could redirect them to a page that shows the best-selling products at your store to encourage them to make a purchase.
Or, if you have a wholesale store, you could redirect new wholesale users to a dedicated page that explains your wholesale policies.
There are two ways that you can set up after-registration redirects with Profile Builder Pro:
- You can set up redirects at the form level by adding a shortcode parameter to the registration form shortcode.
- You can use the Custom Redirects manager to set up redirects for certain user roles.
To set up a redirect at the form level, add the redirect_url=”https://www.yourdomain.com/page” parameter to the shortcode. For example, like so:
[wppb-register role="customer" redirect_url="https://www.yourdomain.com/page"]
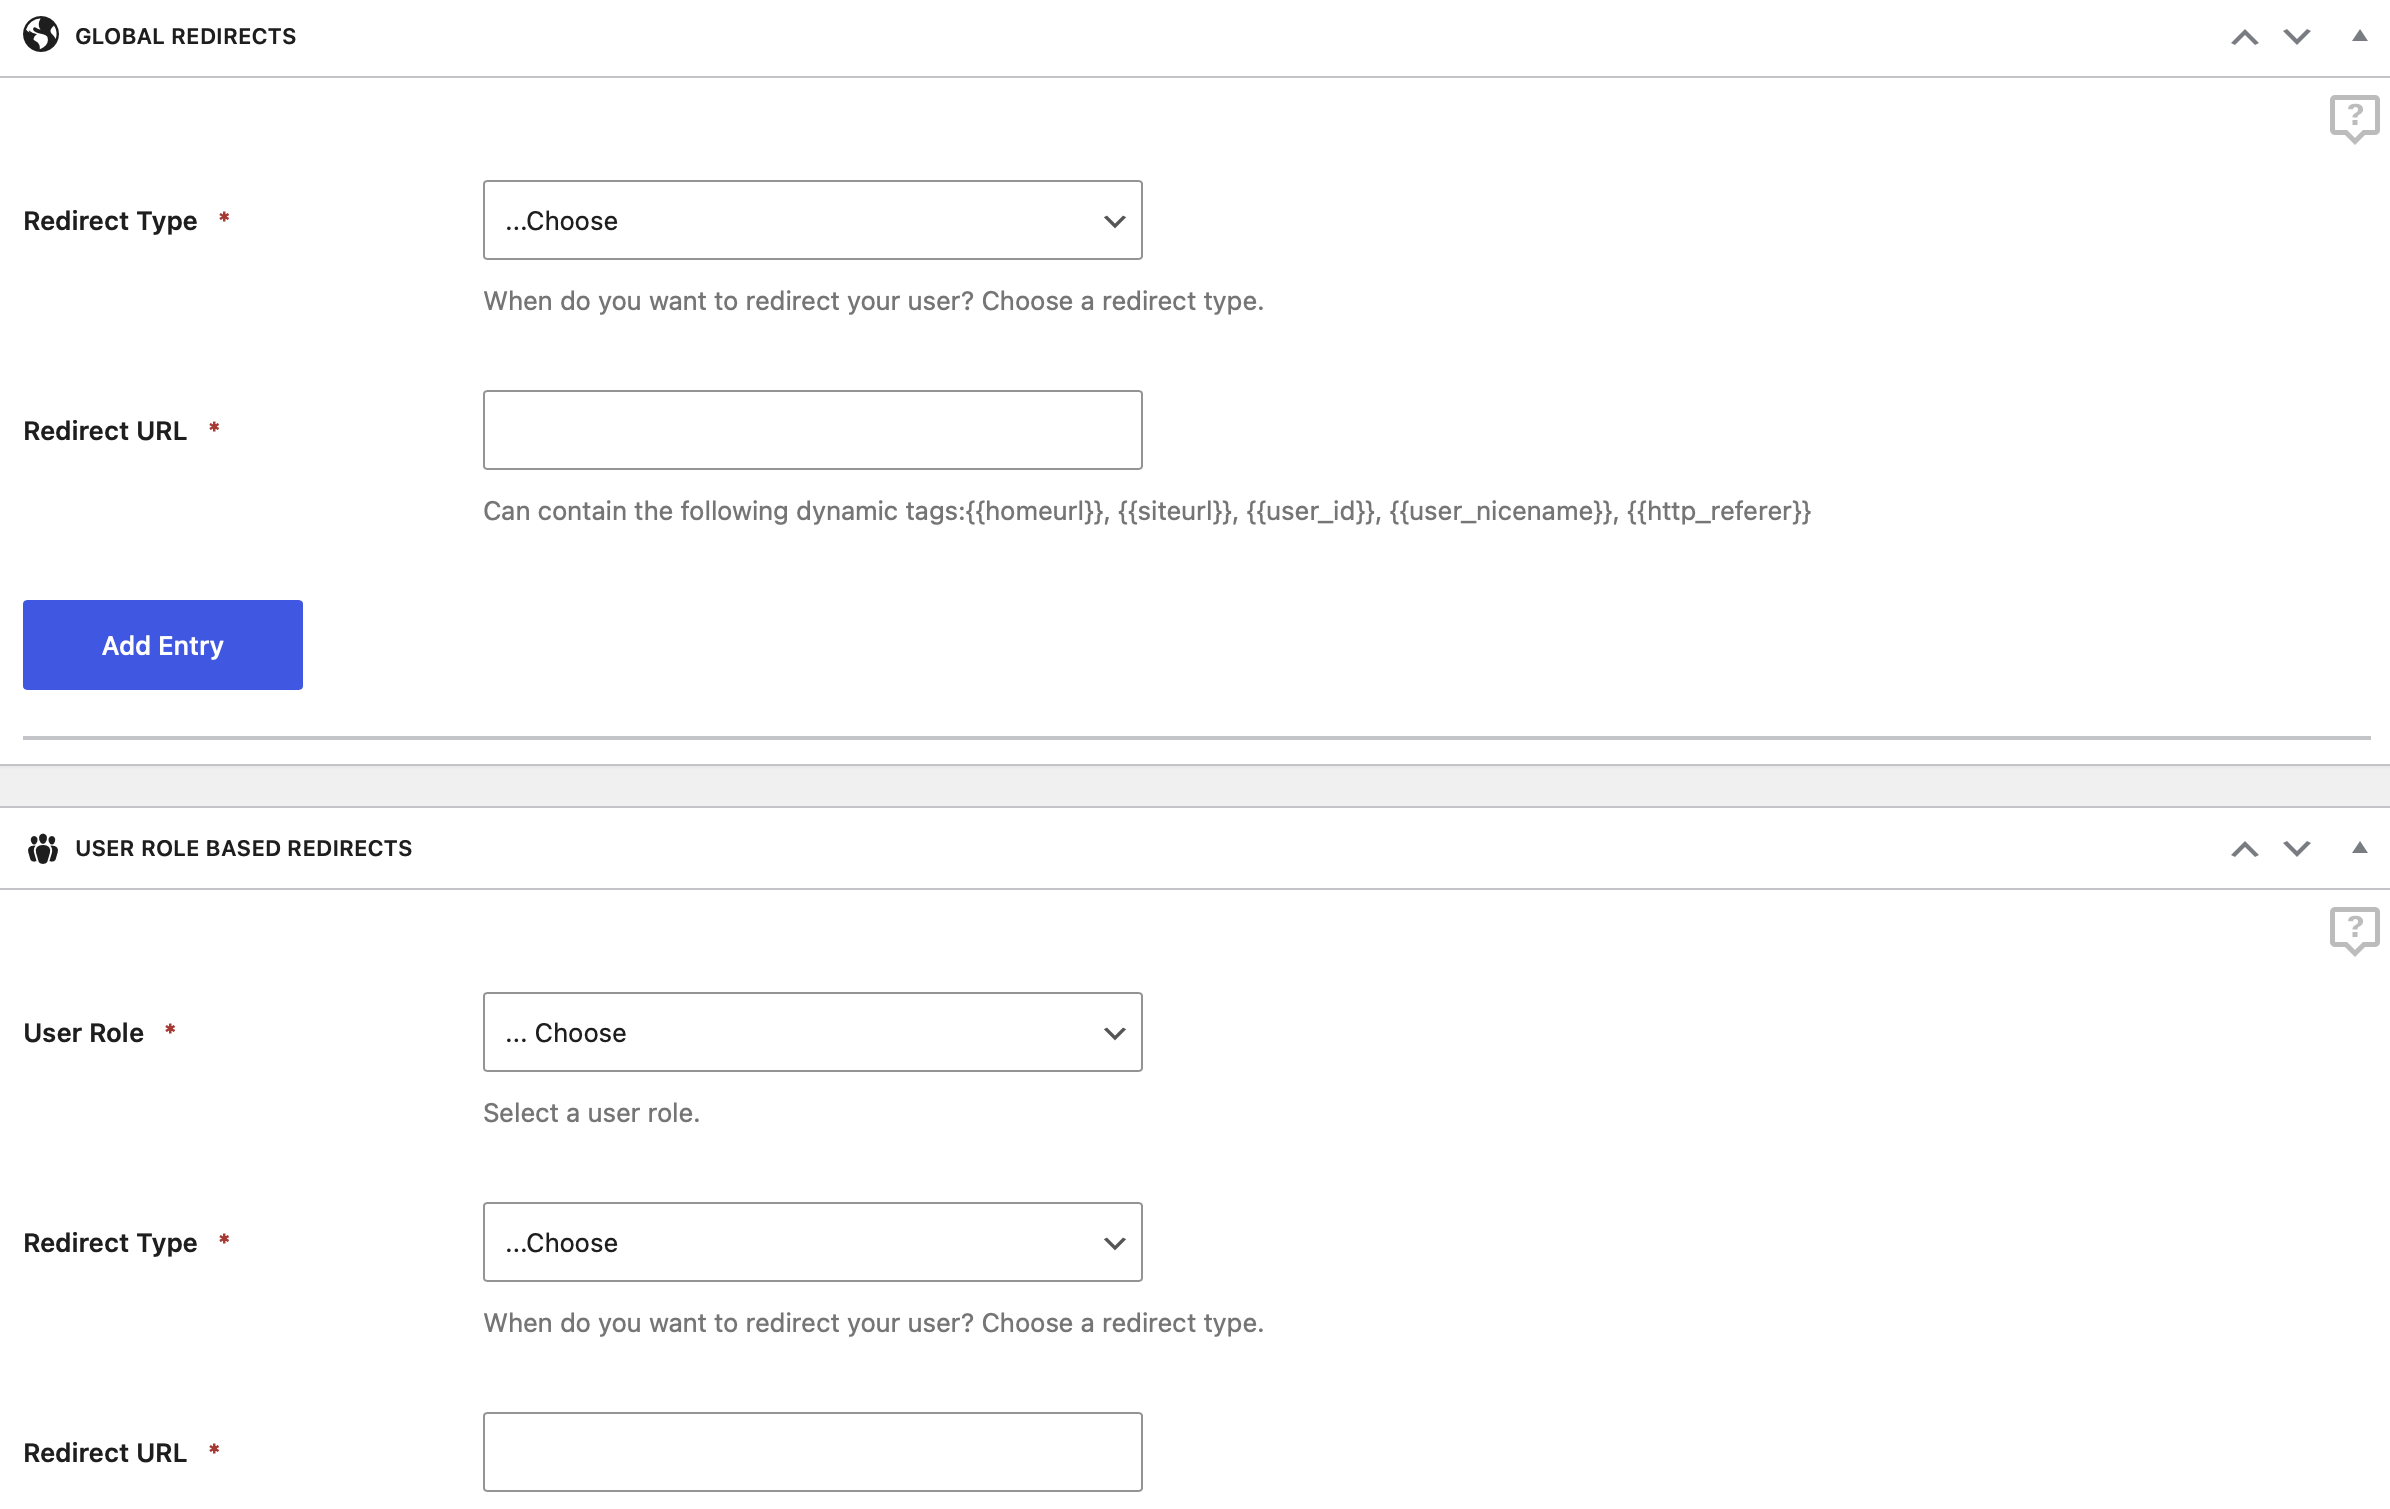
To use the custom redirects manager, go to Profile Builder → Custom Redirects and use the options to set up rules for After Registration:
Assign Users to Default WooCommerce Roles
We touched on this a bit earlier, but it’s worth singling out how you can use your custom registration forms to assign users to different WooCommerce user roles (if your store has multiple roles).
One option is to use the role parameter of the registration shortcode to assign all users who use a certain form to a certain role. For example, [wppb-register role="retail_customer"] or [wppb-register role="wholesale_customer"].
Another option is to actually let people choose their WooCommerce role in the registration form, which you can do by adding the Select (User Role) form field. When you add the field, you can use the User Roles checkboxes to select which roles should be available for users to choose from:
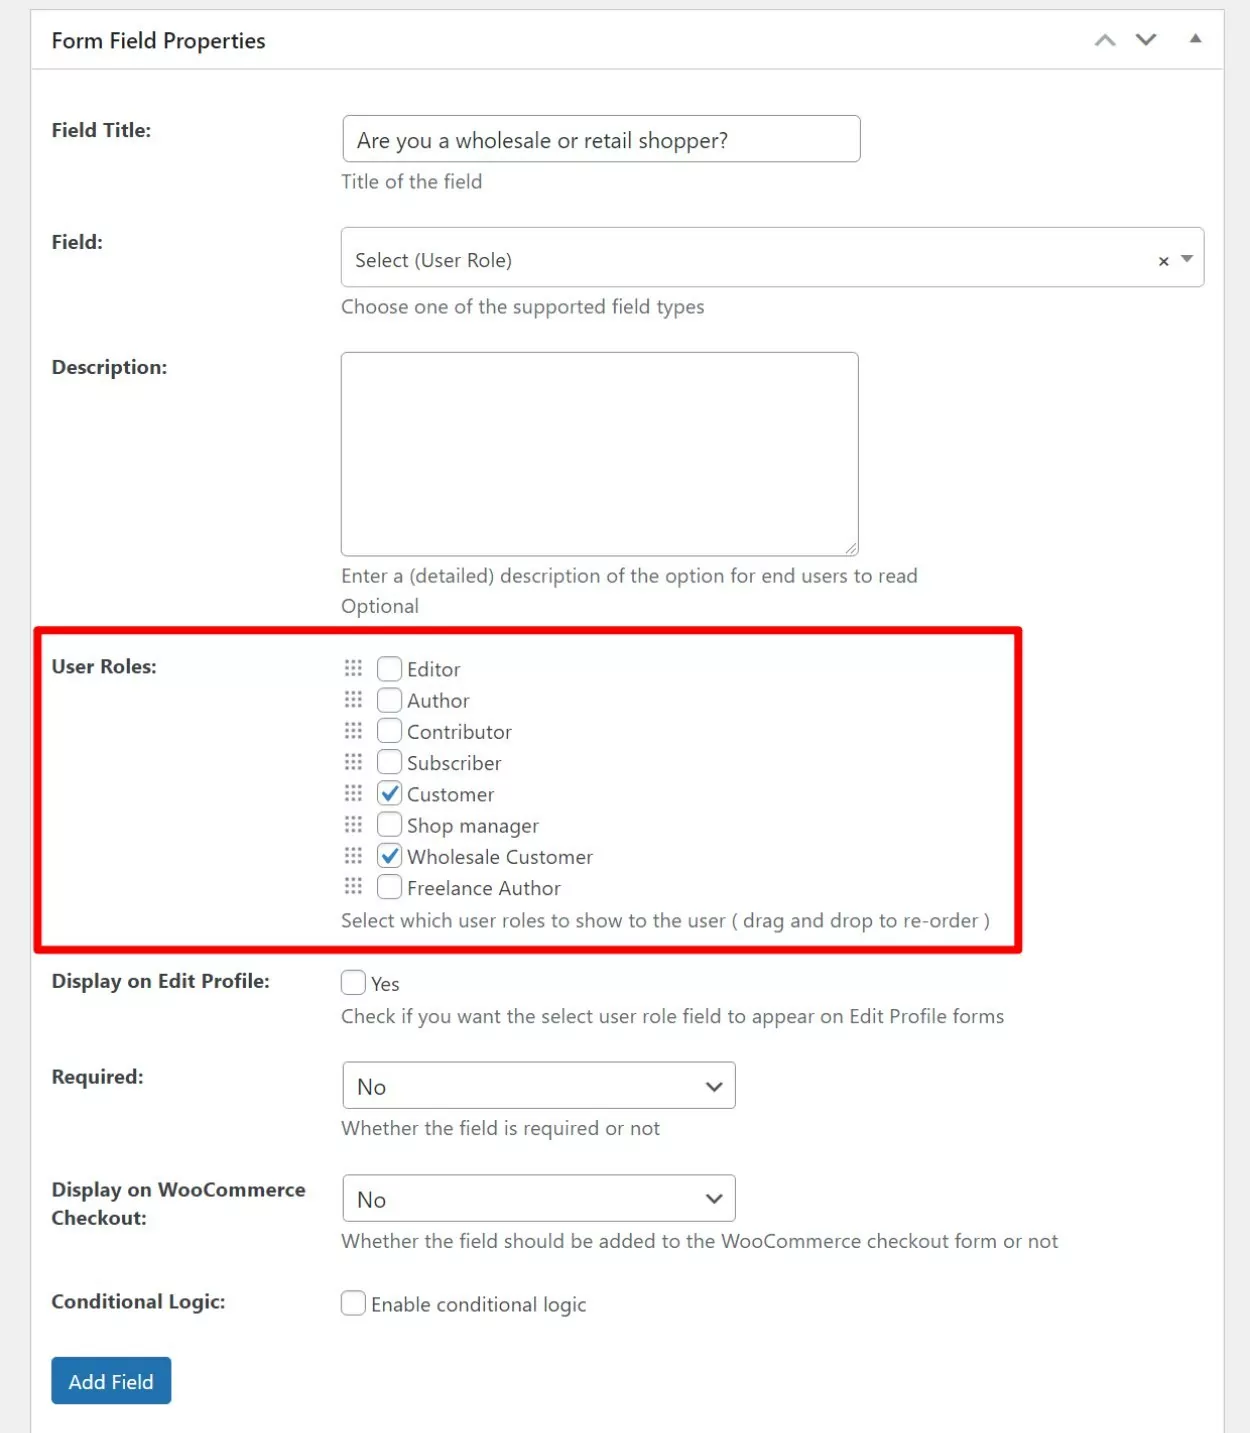
Visitors will then be able to choose a certain user role when they register.
Hold New Registrants for Manual Admin Approval
If you want more control over the users that register at your store, Profile Builder Pro also includes a feature that lets you hold some/all new registrants for manual admin approval.
More specifically, you can require admin approval for certain user roles. For example, you could automatically approve new retail shoppers but require manual approval for wholesale customers.
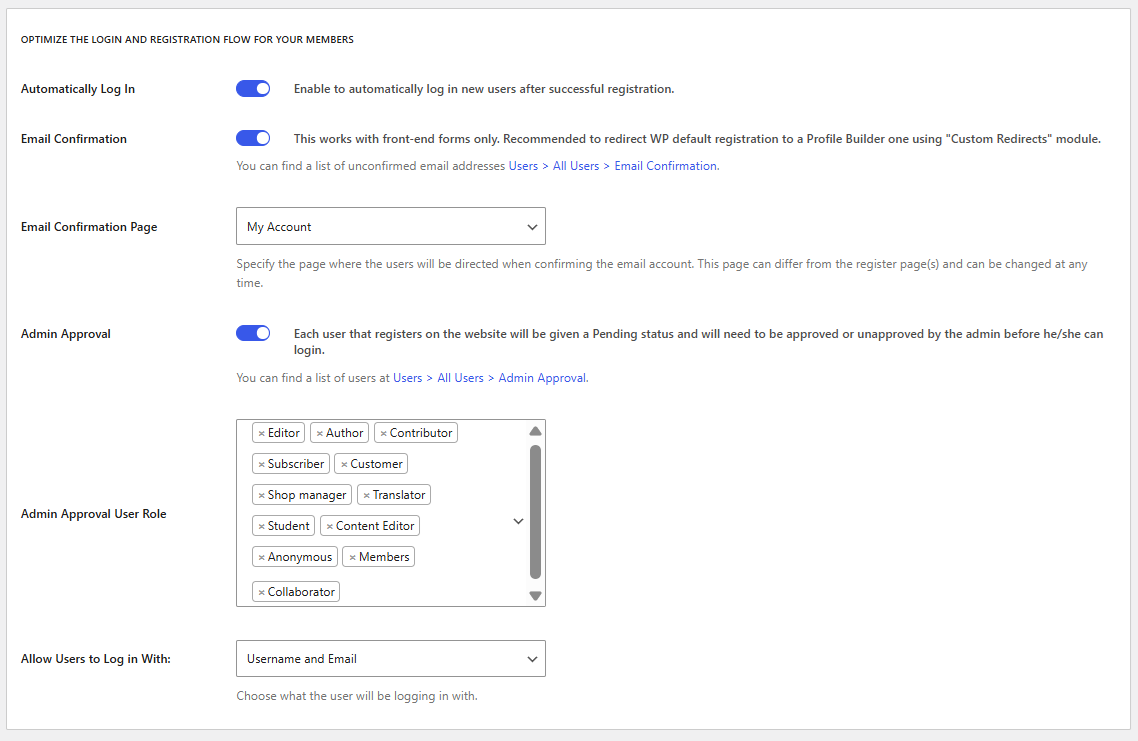
To set up manual admin approval, go to Profile Builder → Settings and set the “Admin Approval” Activated drop-down equal to Yes.
Then, you can use the checkboxes to choose which user roles should require admin approval:
Create a Custom WooCommerce Edit Profile Form
If you have custom fields on your register form, you might want to also give users the option to edit those fields after they register. To help you do this, Profile Builder also lets you create custom edit profile forms.
With the WooCommerce Sync add-on, you can also replace the default WooCommerce edit profile form in the “My Account” area with your own custom form.
To give users access to all of the fields from your main registration form (the one you set up in the Form Fields area), go to Profile Builder → WooCommerce Sync and set the Choose Edit Profile form to display on My Account page drop-down equal to Default Edit Profile:
If you only want to give users access to some fields, you can create a custom edit profile form by going to Profile Builder → Edit-Profile Forms. You could then use the WooCommerce Sync add-on to assign this form to the WooCommerce “My Account” area as we showed you in the screenshot above.
Create Your Custom WooCommerce Register Page Today
With Profile Builder Pro and its WooCommerce Sync add-on, you can easily customize the WooCommerce register page, along with other aspects of your store’s user management.
In this post, we’ve shown you three different high-level ways to customize WooCommerce registration behavior:
- Customize the default WooCommerce register form on the “My Account” page.
- Create your own custom register page(s) using a shortcode.
- Add fields to the registration form at WooCommerce checkout.
We’ve also covered some other ways that you can control your store’s registration process, like redirecting users after they register and holding certain user roles for manual admin approval.
Beyond WooCommerce user registration, Profile Builder Pro can also help you in other ways, like creating a custom WooCommerce login page or extending the WooCommerce “My Account” page.
To get started and gain more control over your store’s registration processes, purchase Profile Builder Pro today:
Profile Builder Pro
The best plugin to customize the WooCommerce register page without any code.
Get Profile BuilderDo you still have any questions about customizing or extending the registration page on your store? Ask us in the comments!
Related Articles

WordPress Profile Builder: a Front-end User Registration, Login and Edit-Profile Plugin
Easily Login, Register and Edit your Profile Directly from the Front-end Profile Builder lets you add front-end forms that give your users a more flexible way to register, log in, and modify their profile information. If you allow public registration on your site, you don't want to force your users to use the backend WordPress […]
Continue Reading
How to Edit WooCommerce My Account Page (Add Fields + More)
Looking for a simple way to customize the WooCommerce account page to add extra user fields and let customers manage their data from the front-end? How about adding custom user fields to the WooCommerce checkout page? In this post, you'll learn how to easily customize the WooCommerce account page using the Profile Builder plugin and its WooCommerce Sync add-on.
Continue Reading
How To Customize WooCommerce Registration Form (2026 Ultimate Guide)
Customizing the WooCommerce registration form in WordPress is something you should consider doing if you want to get more from your WooCommerce store and from the customer registration process. However, the WooCommerce plugin only allows you to collect basic information about your new users. If you customize it using Profile Builder Pro, you can collect […]
Continue Reading