

Table of Contents
- 1 What You Need for WooCommerce Role-Based Pricing
- 2 How to Customize WooCommerce Prices by User Role
- 2.1 1. Install Paid Member Subscriptions and Run Setup Wizard
- 2.2 2. Create a New Subscription Plan
- 2.3 3. Add a Role-Based Discount for Some/All of Your Products
- 2.4 4. Adjust Role-Based Pricing for Individual Products If Needed
- 2.5 5. Configure WooCommerce Integration Settings
- 2.6 6. Restrict Access to Products to Create a Members-Only Store (Optional)
- 2.7 6. Create Custom Registration Forms (Optional)
- 3 Set Up WooCommerce Role-Based Pricing Today
Looking for a solution to set up WooCommerce role-based pricing on your store?
Adjusting WooCommerce prices by user role gives you a chance to offer customized purchasing experiences for different types of users at your store. For example, you might have one lower price for wholesale customers or VIPs and another price for regular customers.
WooCommerce doesn’t include a built-in feature to handle role-based pricing, but you can easily add this functionality using a plugin, which is the focus of this post.
In this guide, we’ll show you step-by-step how to set up WooCommerce role-based pricing using the Paid Member Subscriptions plugin. Then, we’ll also show you a few other useful tweaks you can implement, such as hiding prices from guest users or otherwise restricting who can view/purchase products (in addition to offering different prices).
What You Need for WooCommerce Role-Based Pricing
To follow this tutorial and customize WooCommerce prices by user role, you’ll need the Paid Member Subscriptions plugin.
Paid Member Subscriptions is a full WordPress membership solution with a detailed WooCommerce integration that supports flexible role-based pricing.
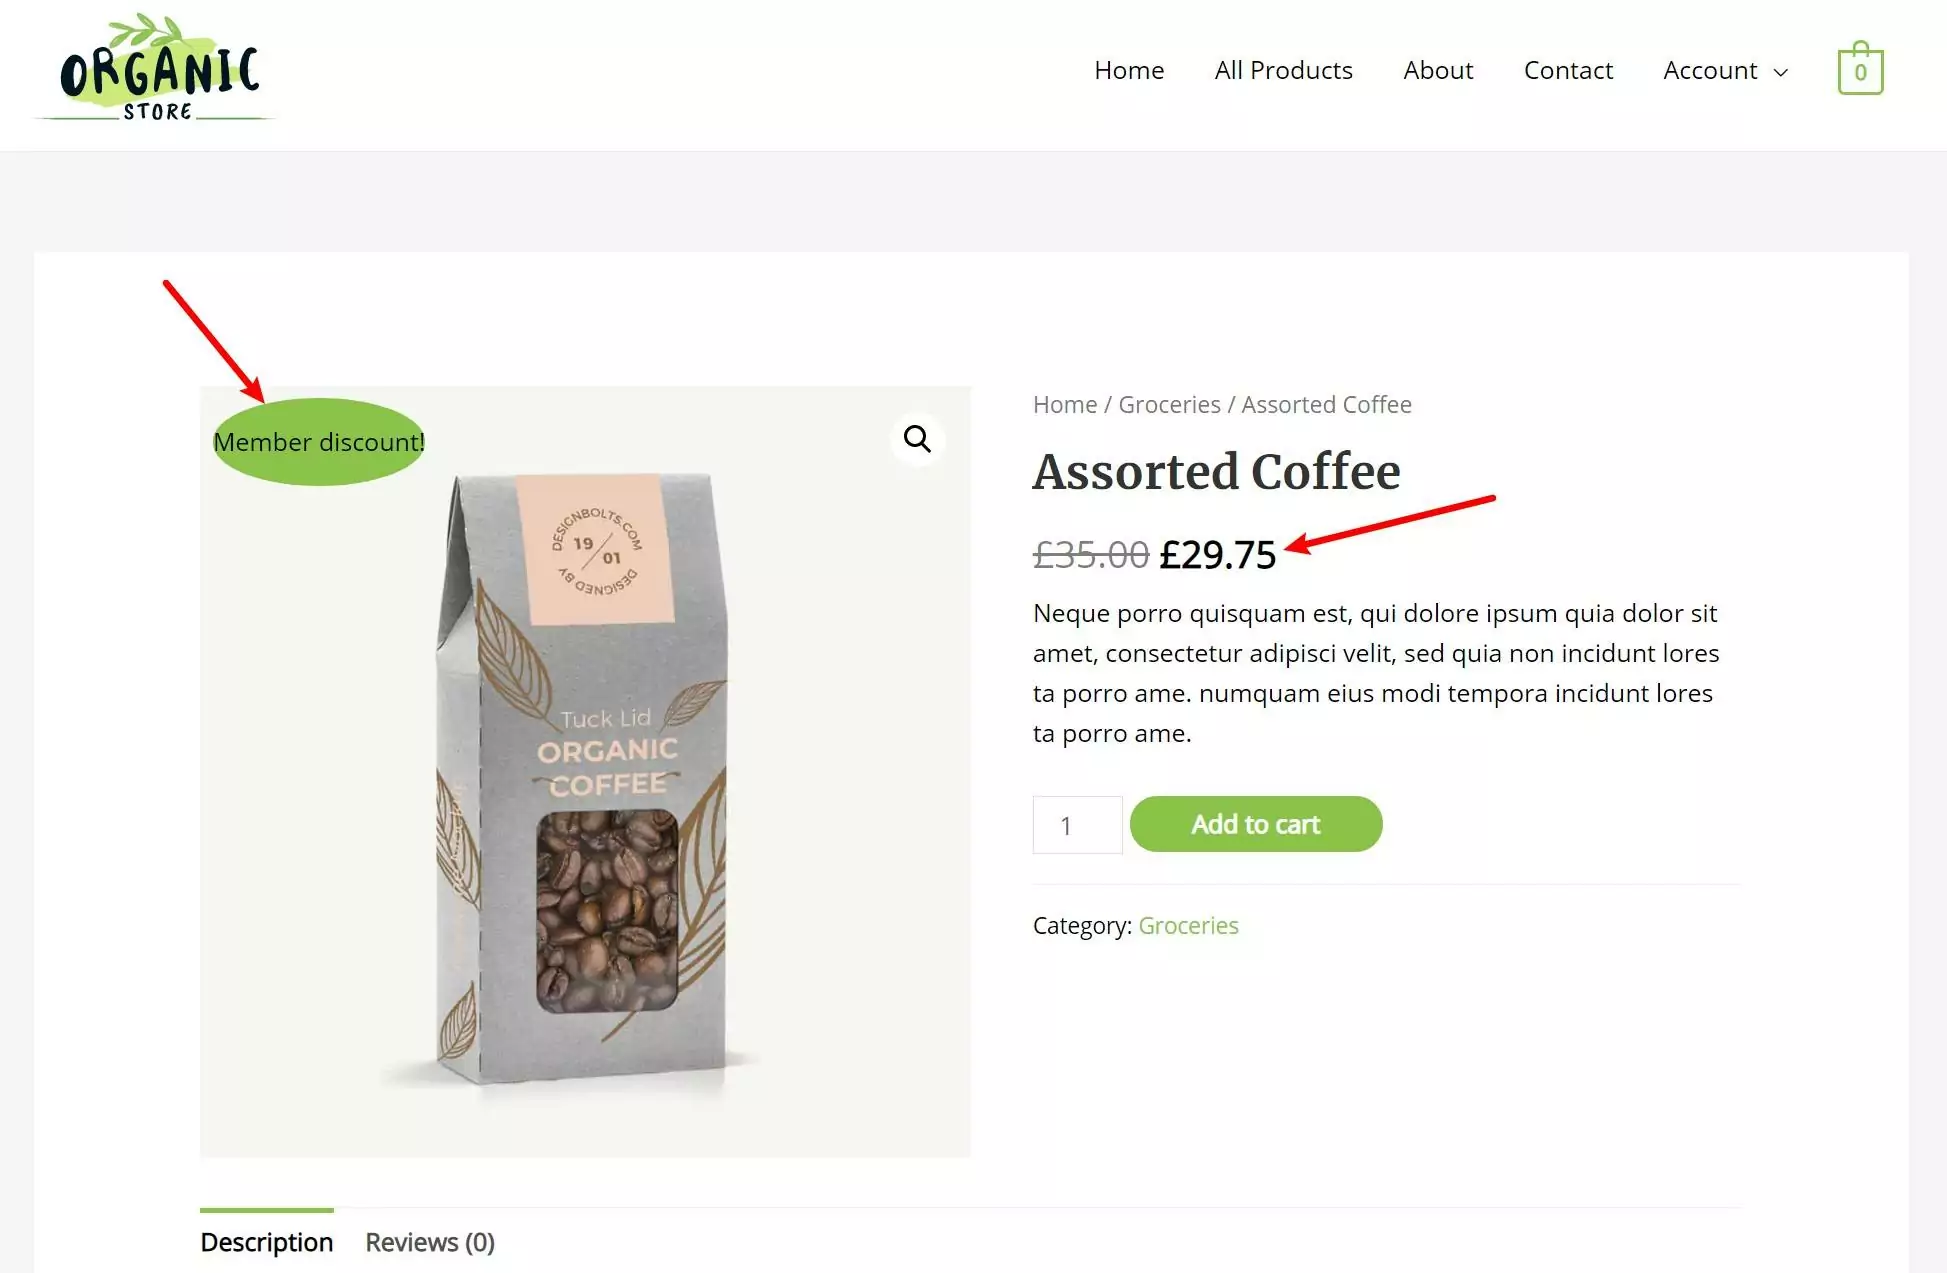
You can create free or paid membership levels that are linked to WordPress user roles and then use those plans to change prices and also restrict access to products if needed. Here’s an example of the role-based pricing behavior that you’ll be able to create:
You can also set up multiple role-based pricing options, using different prices for an unlimited number of user roles according to your needs.
Below, we’ll show you how you can set up all of these options using the plugin.
While there is a free version of Paid Member Subscriptions at WordPress.org, you’ll need to purchase any premium license to access the WooCommerce integration, which is what lets you customize your store’s prices and behavior by user role.
Paid Member Subscriptions Pro
The best plugin to set up WooCommerce role-based pricing for your store.
Get Paid Member SubscriptionsHow to Customize WooCommerce Prices by User Role
Now, let’s get into how to customize prices by user role for WooCommerce using Paid Member Subscriptions.
To begin, we’ll assume that you already have a working WooCommerce store set up. Other than that, we’ll take you through every step to set up role-based pricing for your store.
1. Install Paid Member Subscriptions and Run Setup Wizard
To get started, install the premium version of Paid Member Subscriptions if you haven’t done so already.
Once you activate the plugin, it should automatically launch its setup wizard:
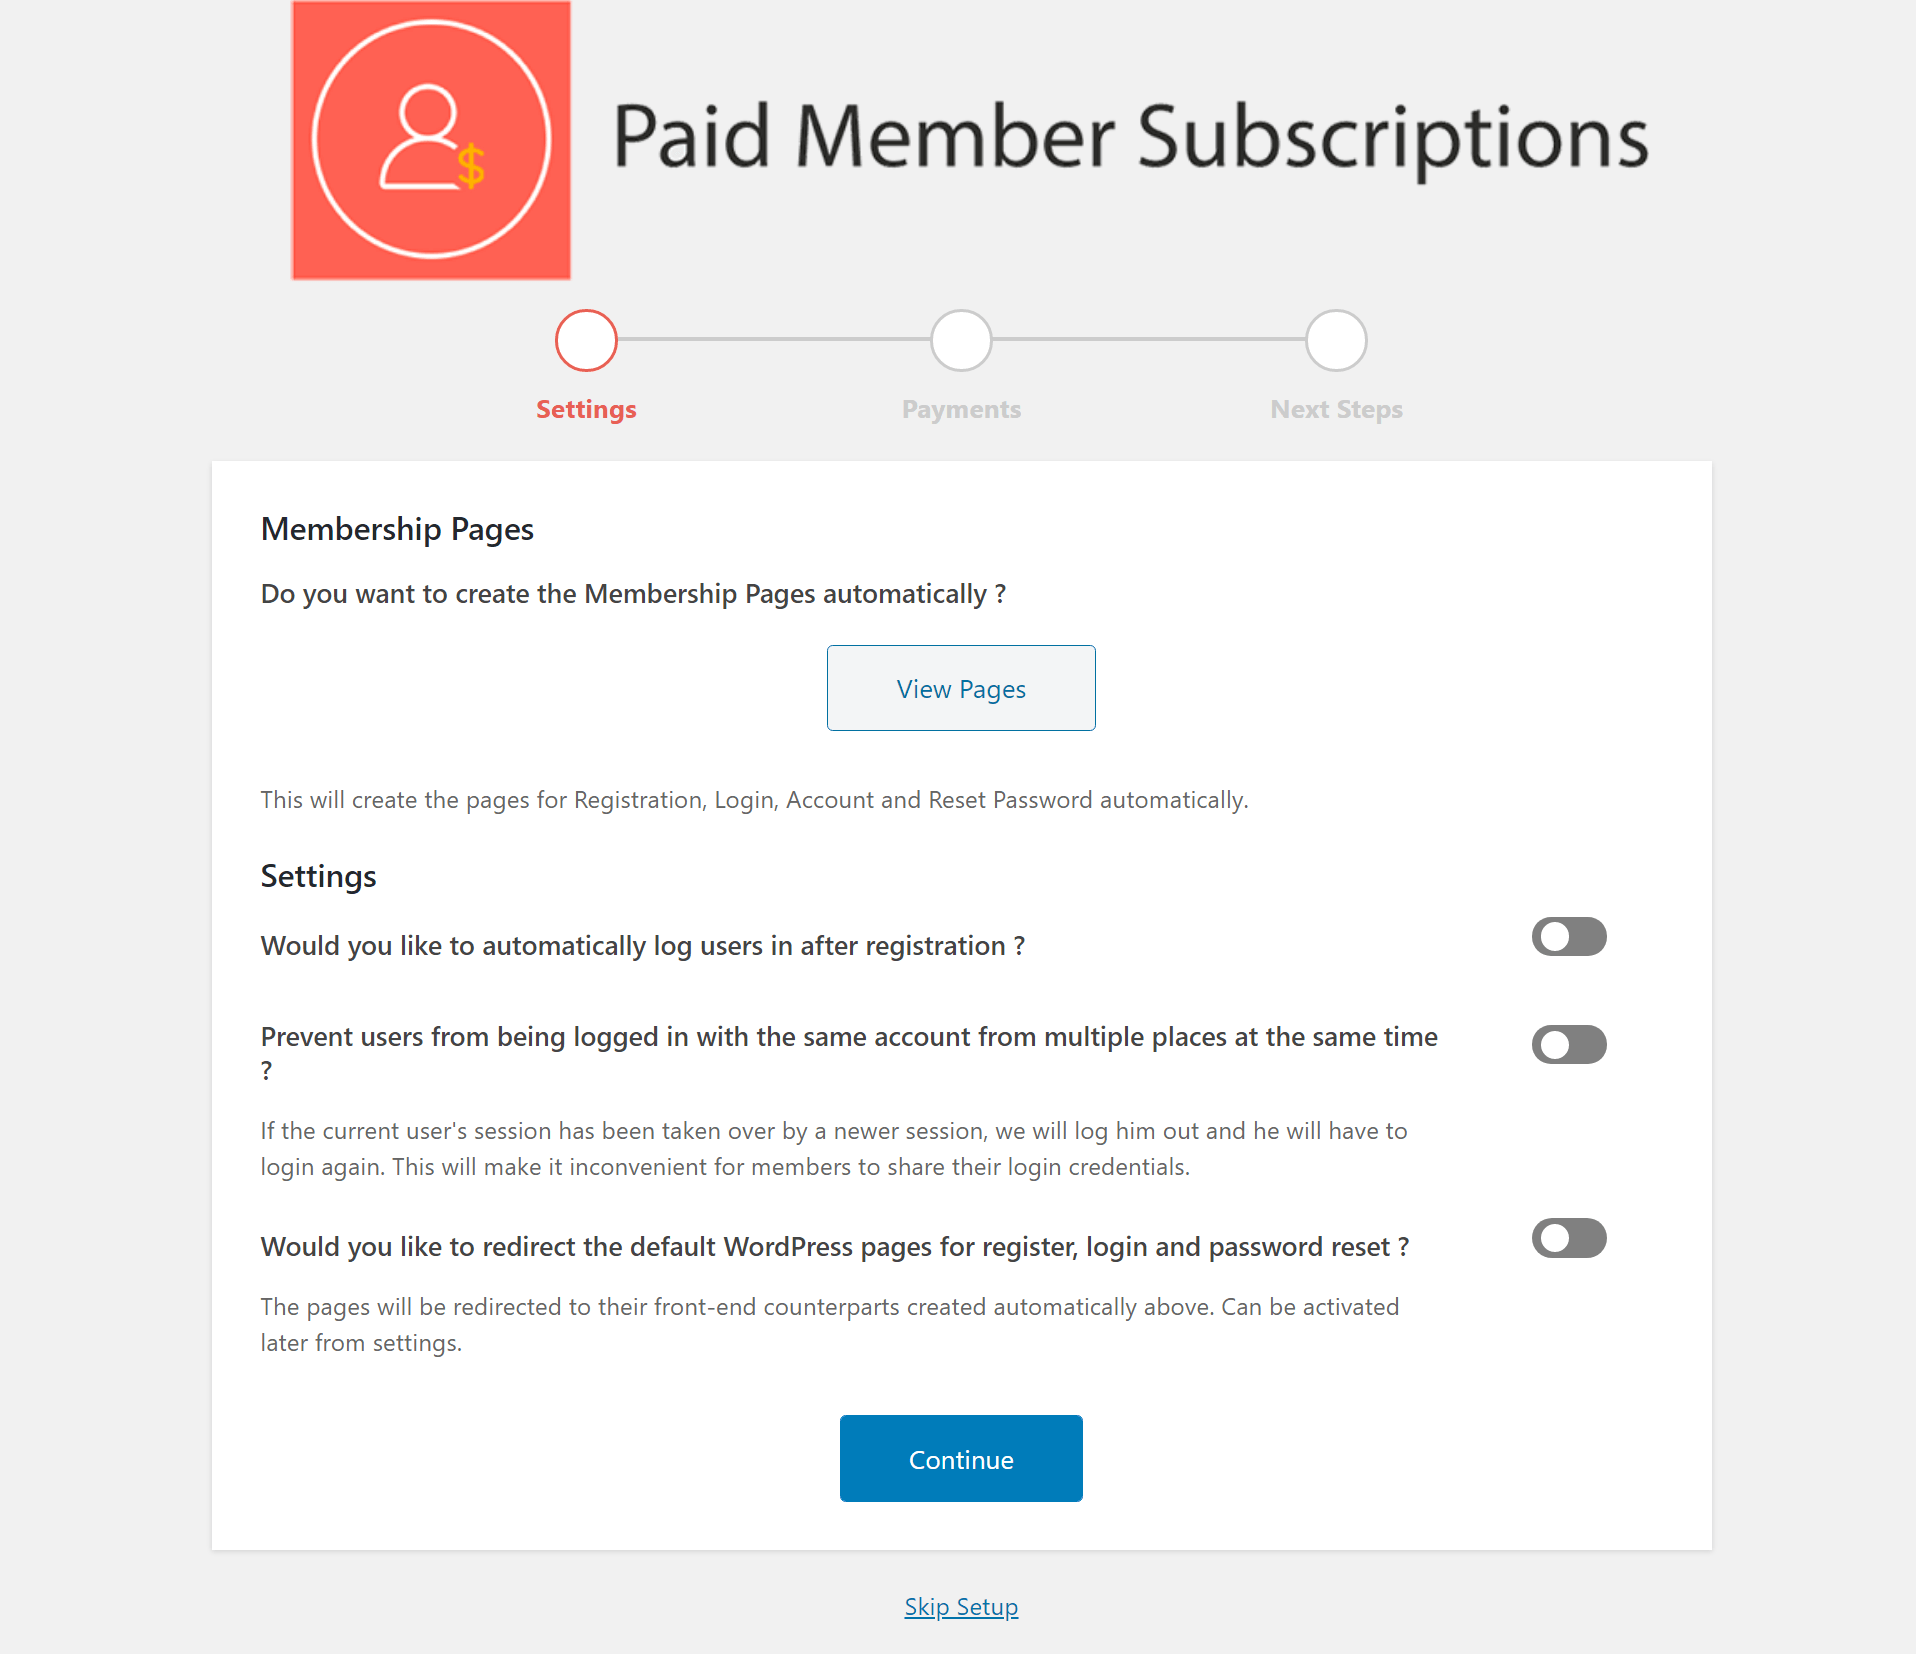
Go through the steps to configure important basics. If you don’t plan to charge a fee to access your role-based pricing, you can ignore the payment gateways in the Payments setup.
2. Create a New Subscription Plan
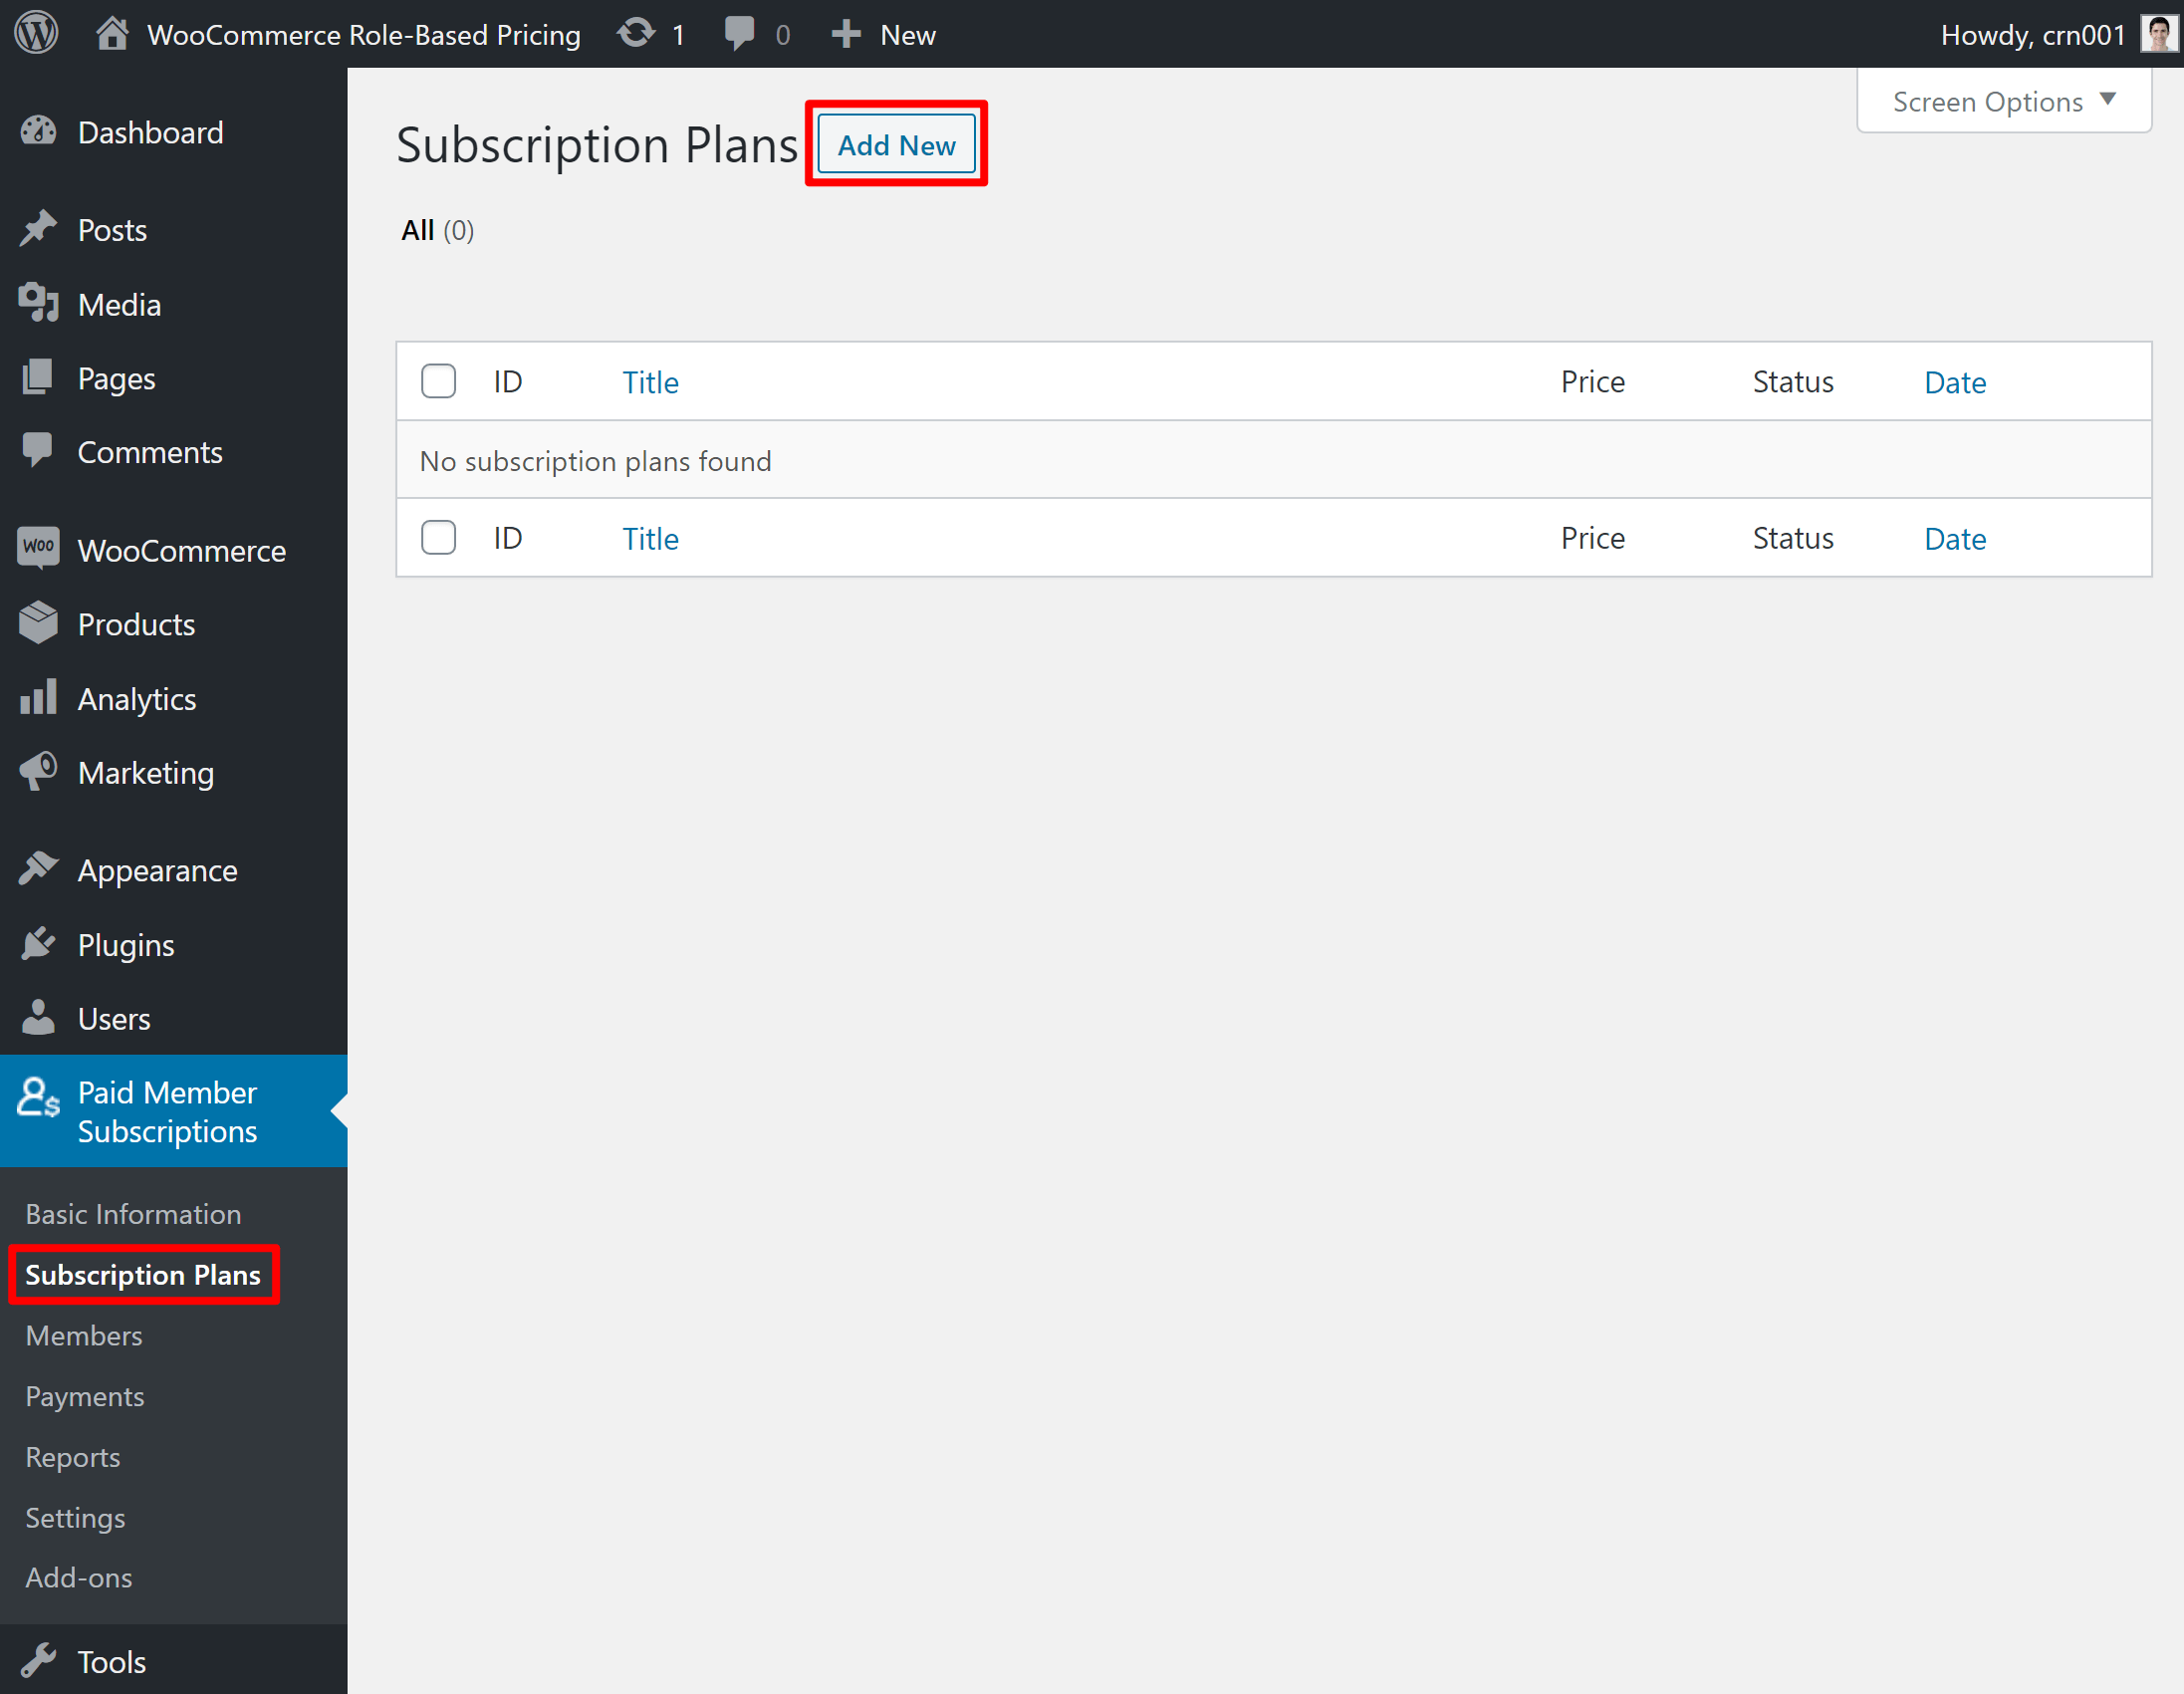
To set up role-based pricing, you can create a subscription plan by going to Paid Member Subscriptions → Subscription Plans → Add New.
You can think of a subscription plan as the same as a user role. In fact, you can either link your subscription plan to an existing user role on your site (the one to which you want to offer discounts) or you can have the plugin automatically create a new user role for you.
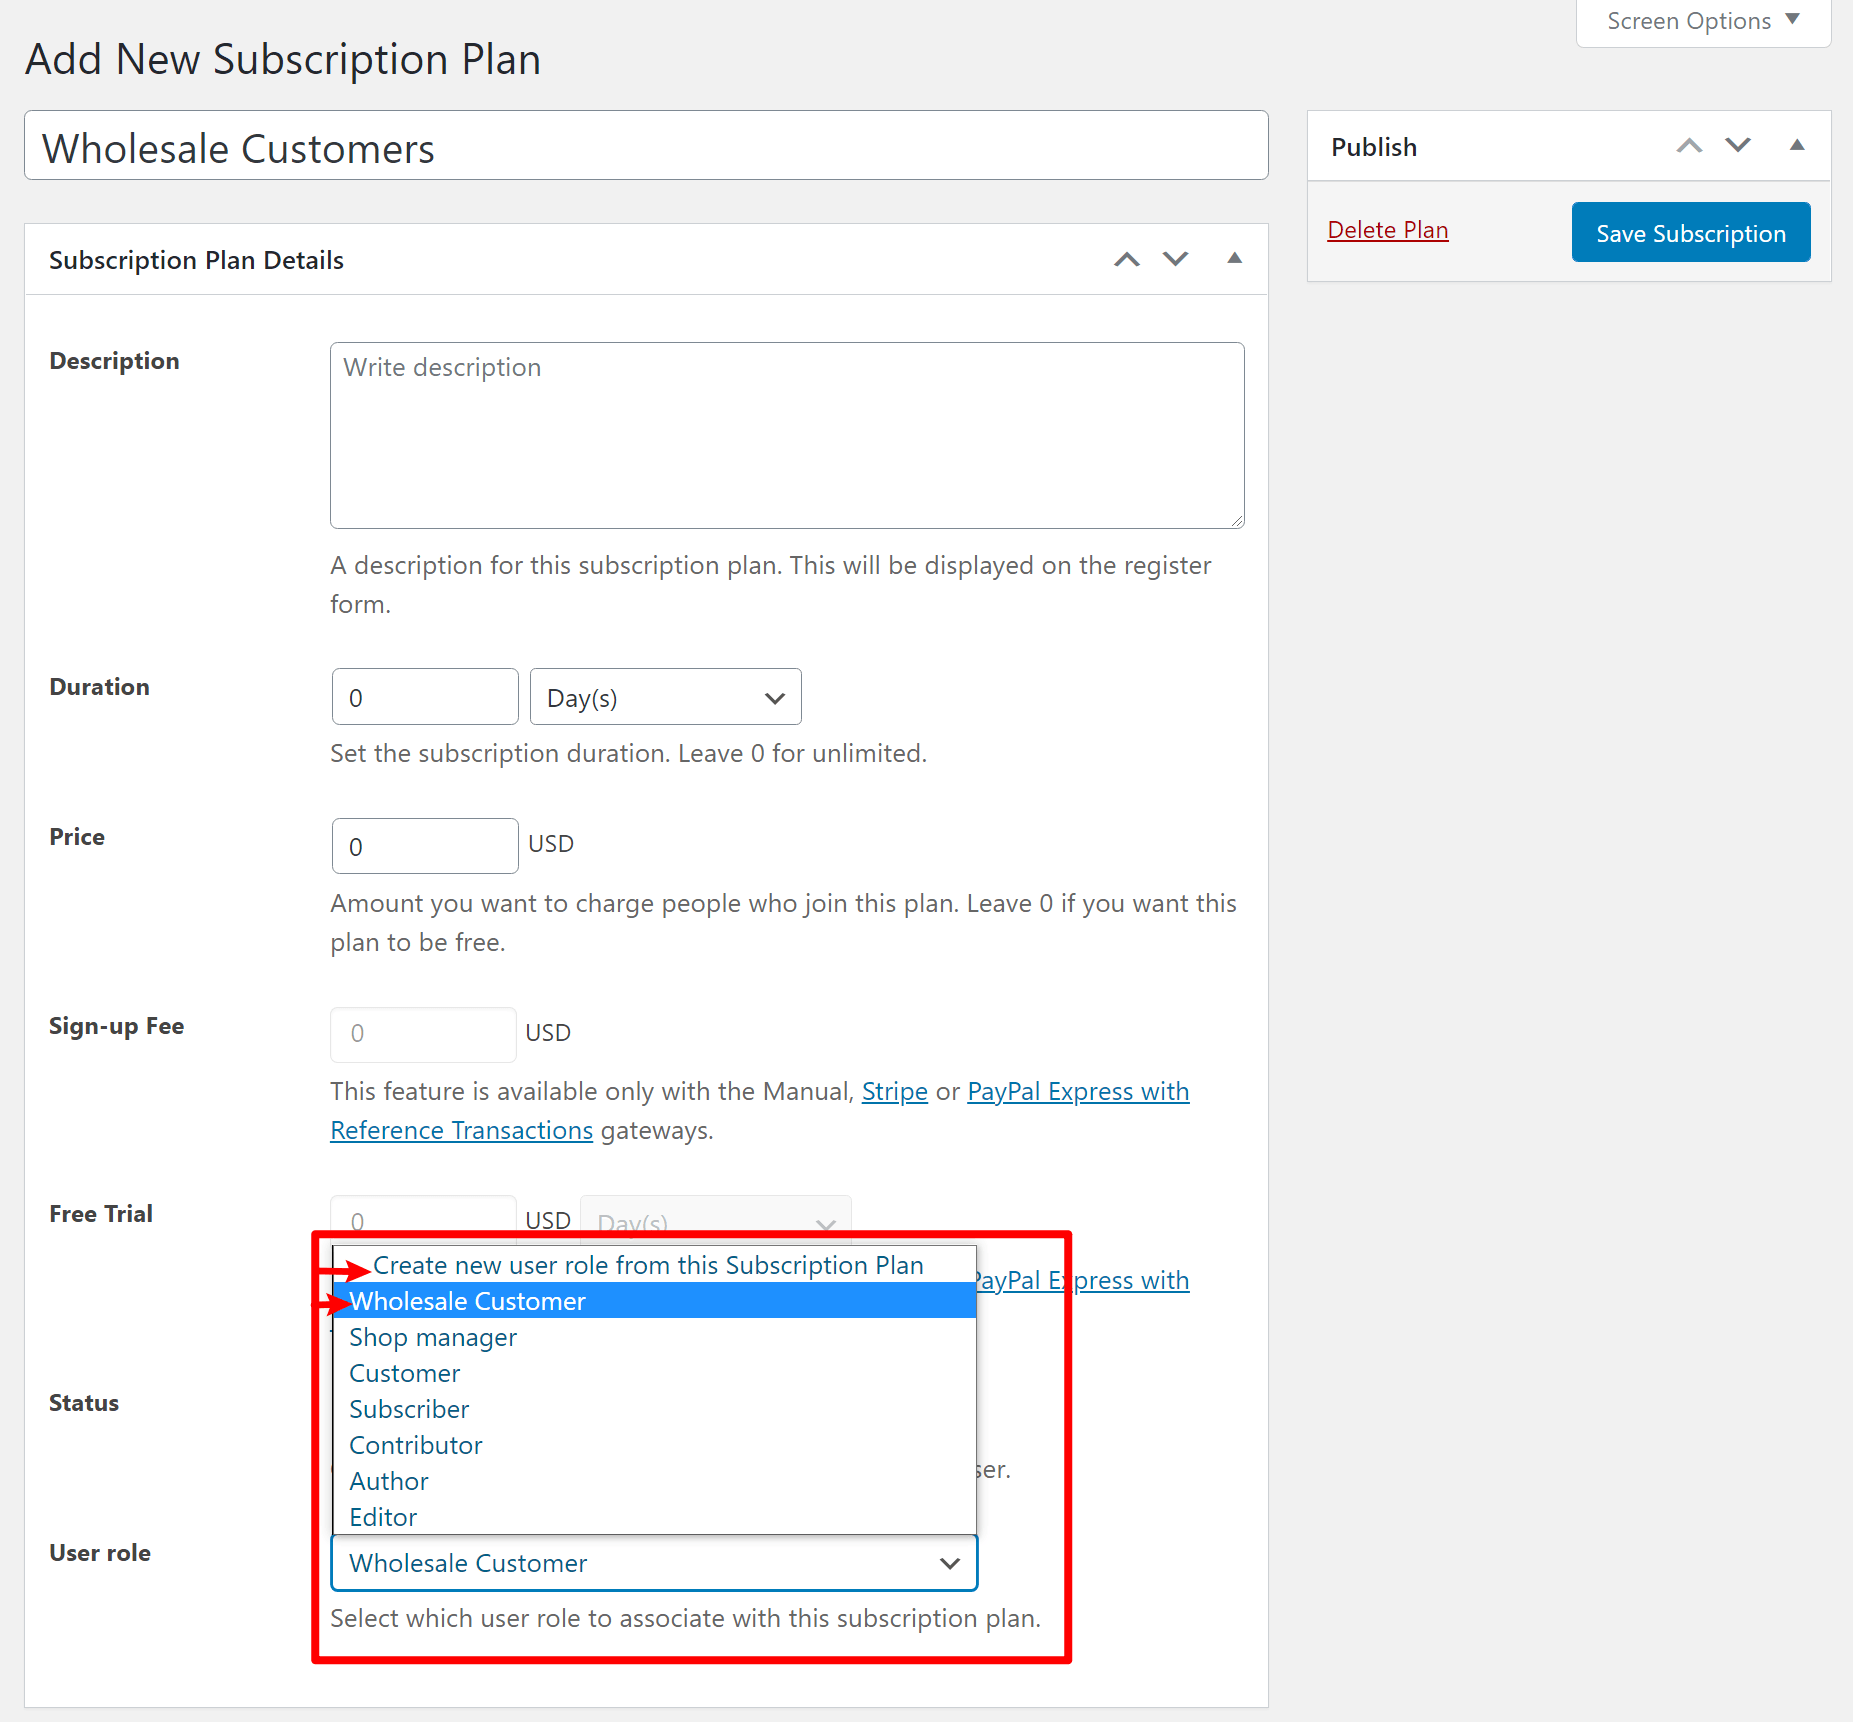
For example, if you want to offer special role-based prices for wholesale customers, you would create a new subscription plan for “Wholesale Customers”.
In the Subscription Plan Details box, you can configure how the plan works. To make this plan free and last forever, you can just leave all of the settings as the defaults.
However, you also have the option to charge for access to this plan and/or limit how long its access lasts. For example, you could create your own sort of Amazon Prime system where users pay a one-time or recurring fee in order to get access to special prices on products.
If you do want to configure this behavior, adjust the Duration, Price, and other related fields according to your needs.
Then, use the User role box to select the existing user role that you want to offer role-based pricing for. Or, you can also have the plugin create a new role for you:
3. Add a Role-Based Discount for Some/All of Your Products
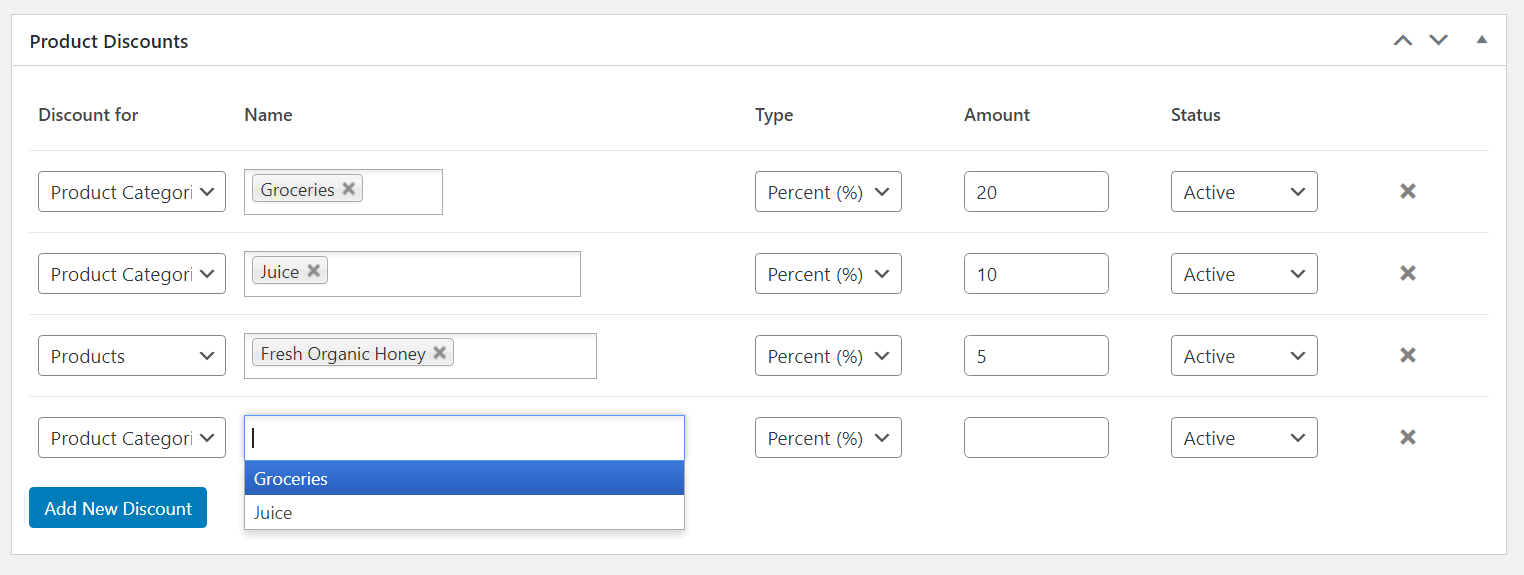
Next, scroll down to the Product Discounts box. This box lets you set up role-based pricing by applying discounts to the list price of some or all of your WooCommerce products. You can offer flat or percentage discounts.
For example, if you wanted to make prices for the wholesale user role 10% lower than the retail prices, you could apply a 10% discount to all your products for that user role.
You can apply your discounts to:
- One or more individual products;
- One or more product categories.
You can also set up different pricing rules for different products and product categories, which gives you very granular pricing for this user role.
For example, you could make prices 20% lower for products in one category but only 10% lower in another category:
Once you’ve set up all your role-based pricing rules, make sure to click the Save Subscription button to make your changes live.
If you want to adjust pricing for multiple user roles, you can repeat the process in steps #2 and #3 to create as many subscription plans and pricing rules as needed.
4. Adjust Role-Based Pricing for Individual Products If Needed
You might have some situations where you want to adjust the price of a specific product to either:
- Offer a larger/smaller discount;
- Exclude it from role-based pricing entirely and charge full price for all visitors.
To set this up, Paid Member Subscriptions also lets you control role-based pricing for individual products from the product editor interface.
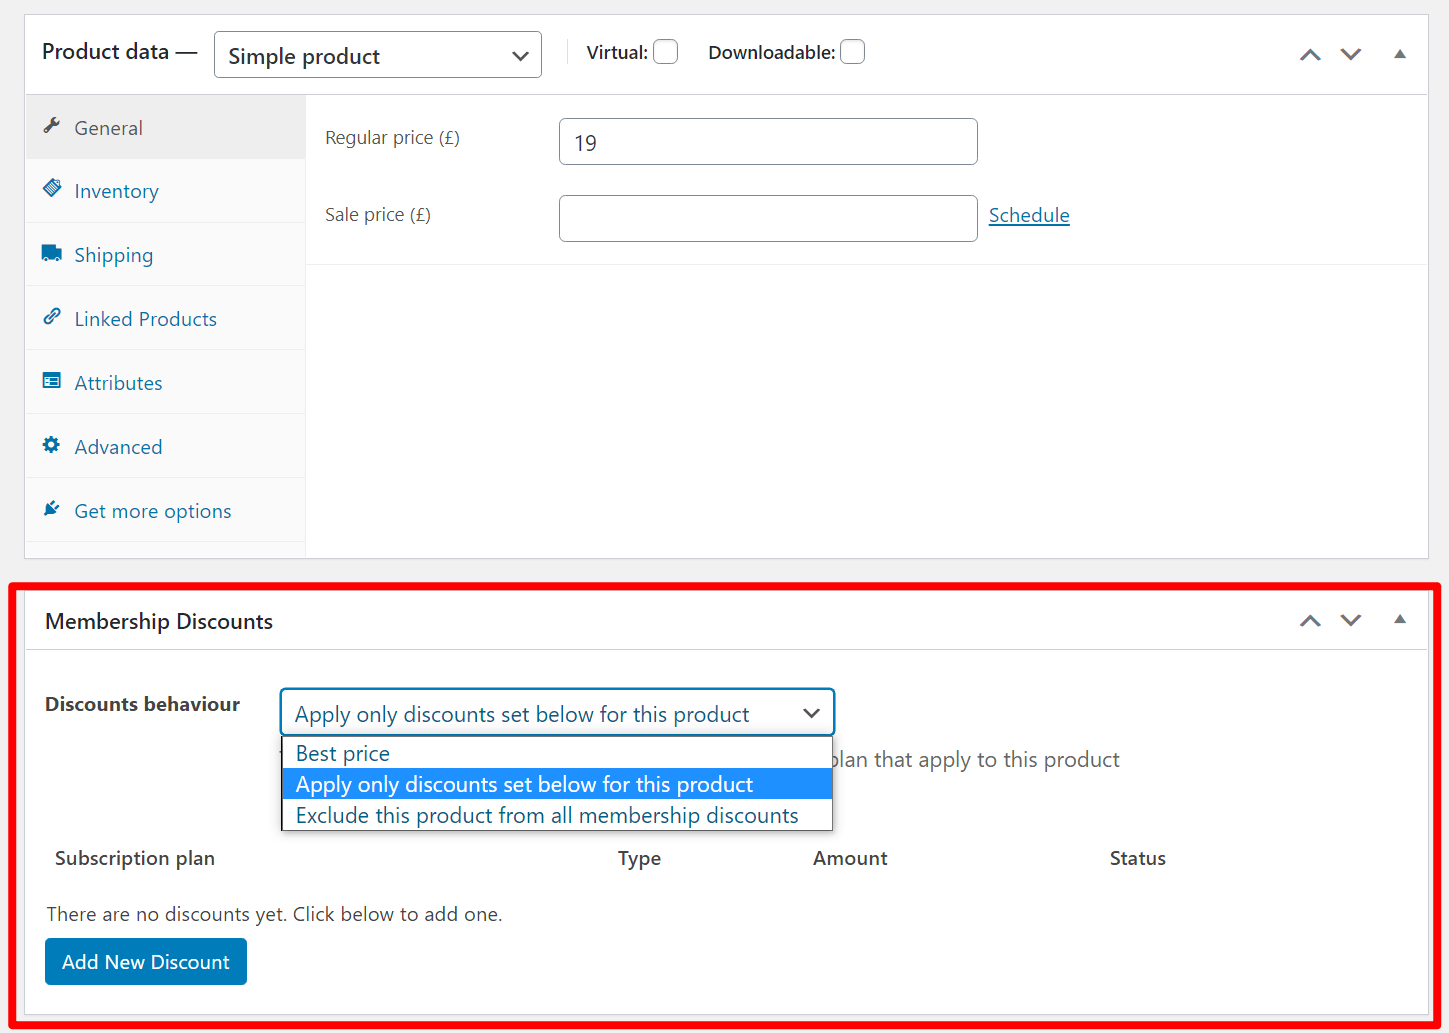
While editing a product, scroll down to the Membership Discounts box. Here, you can choose from three different types of behavior:
- Best price (default) – users will see the best price possible based on their role. For example, let’s say there are two overlapping rules – one with a 10% discount and one with a 5% discount. With the best price setting, the user would get the 10% discount.
- Apply only discounts set below… – you can manually set up discounts using the editor below and the product will only be eligible for these pricing rules.
- Exclude this product… – this specific product will be excluded from all role-based pricing rules. Every user will see the regular price.
5. Configure WooCommerce Integration Settings
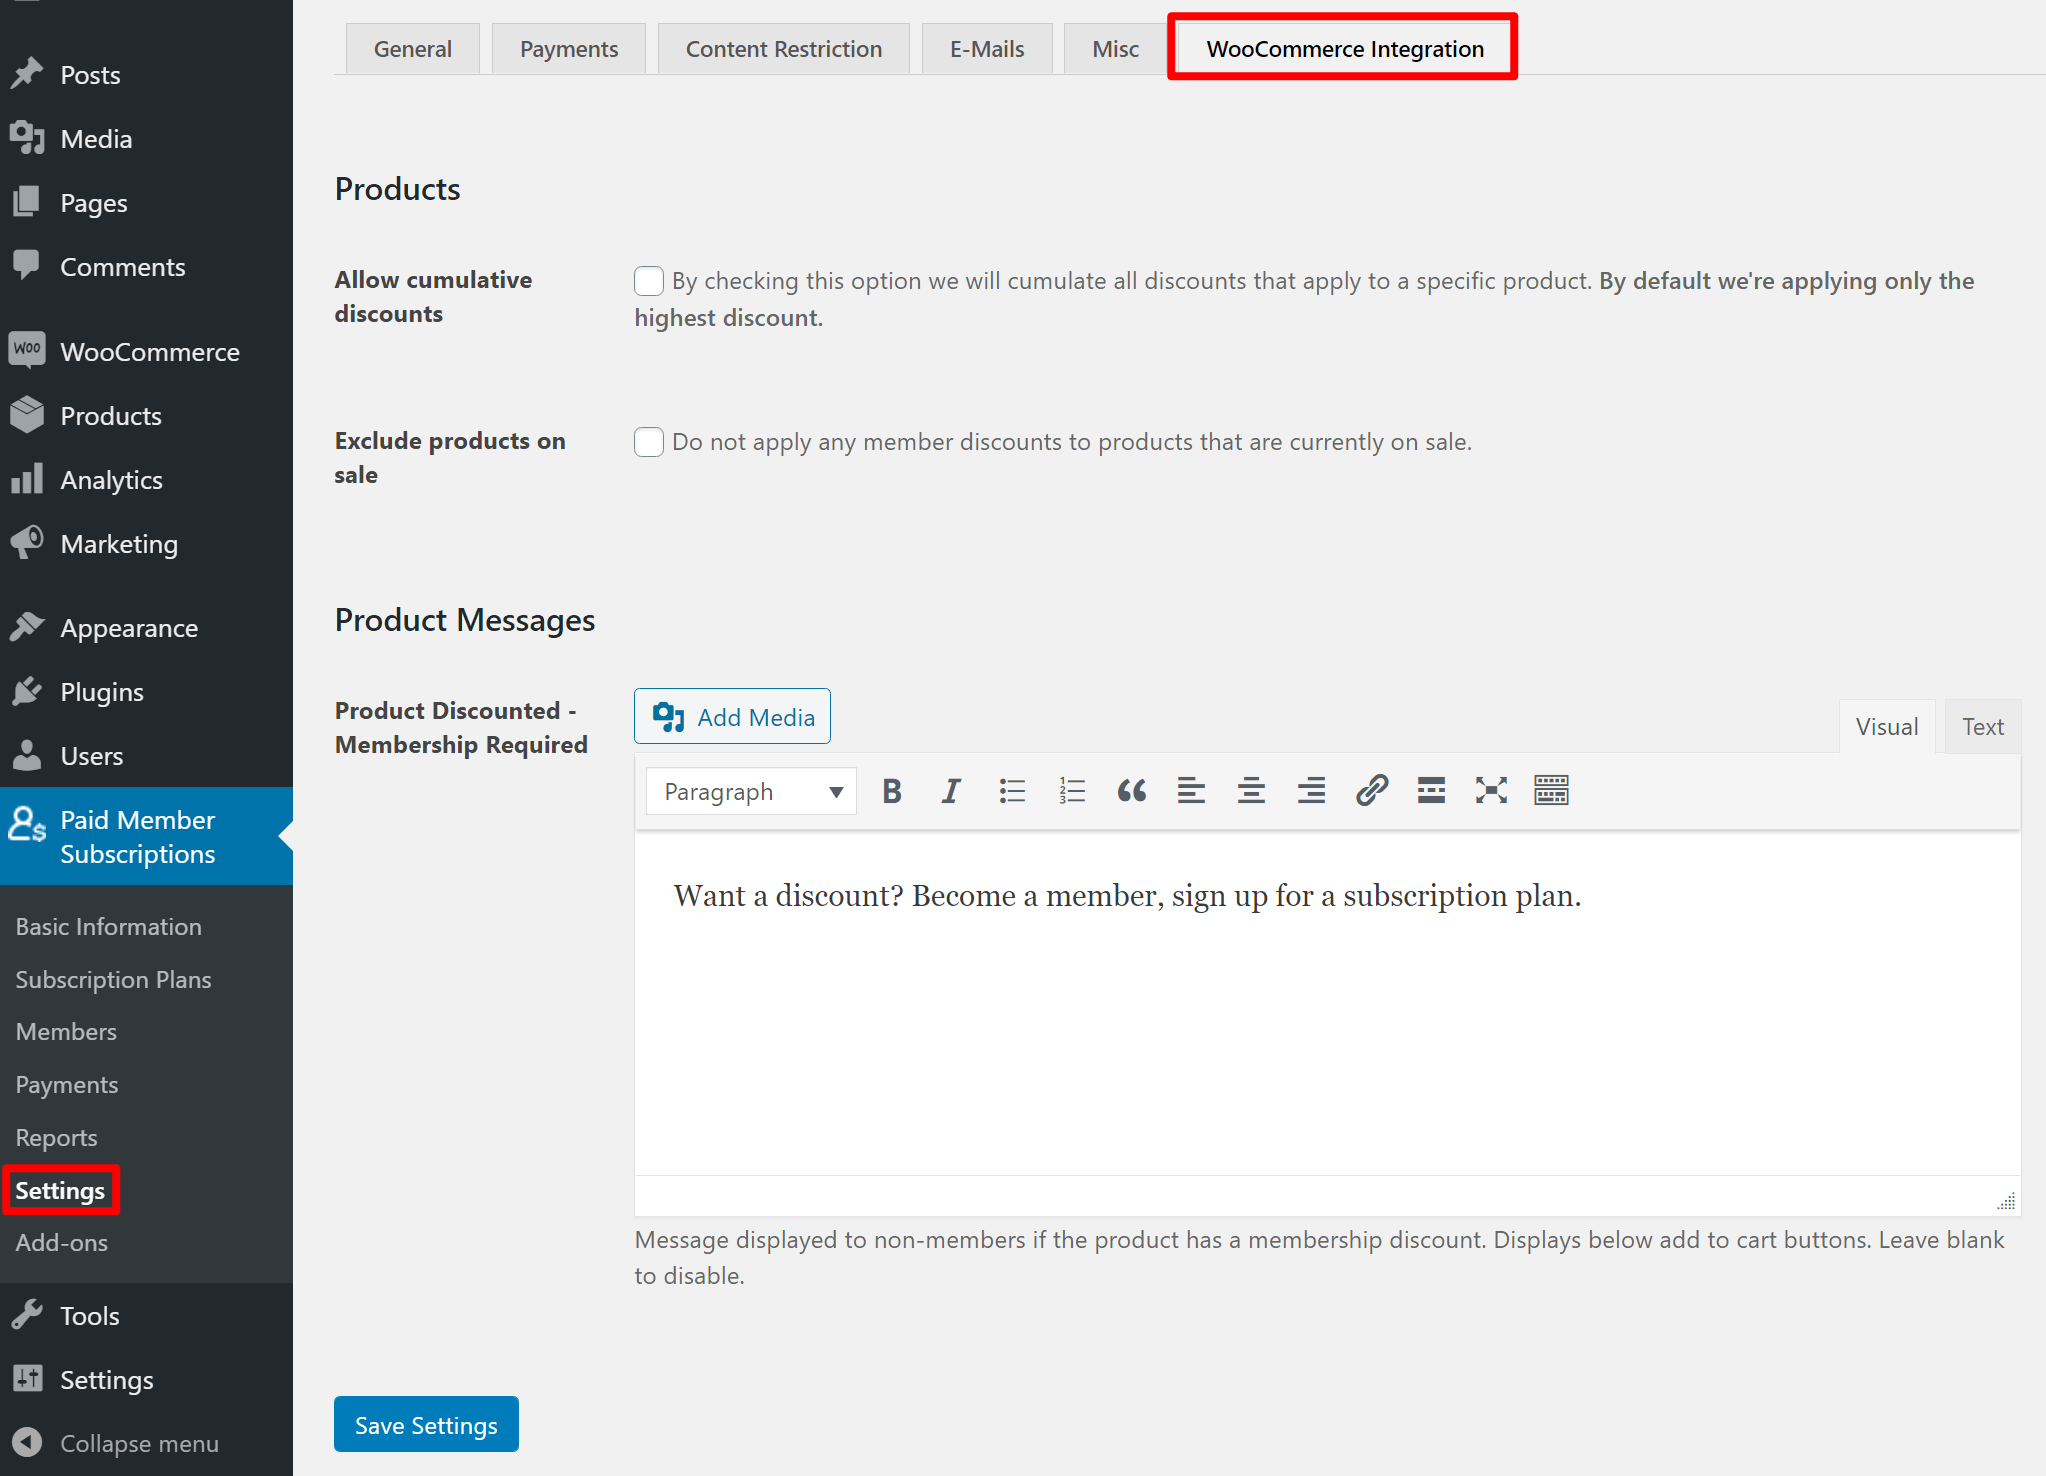
Paid Member Subscriptions also offers some general settings for the WooCommerce integration, which you can access by going to Paid Member Subscriptions → Settings → WooCommerce Integration.
Two useful settings for pricing here are the option to exclude role-based pricing products from other discounts and/or exclude “on sale” products from role-based pricing rules:
6. Restrict Access to Products to Create a Members-Only Store (Optional)
In addition to helping you set up WooCommerce role-based pricing, Paid Member Subscriptions can also help you restrict who can view and/or purchase your products.
For example, you could make it so that anonymous guest visitors cannot view or purchase some or all of your products until they register for an account, which lets you create a members-only store.
This is 100% optional – you can also just use role-based without any other restrictions.
If you do want to restrict viewing/purchasing for products, you can do so in two ways:
- You can restrict individual products;
- You can bulk restrict all products or categories of products.
To restrict individual products, you can use the new Content Restriction box in the product editor:
- Display Options – these let you restrict which users/user roles can view products.
- Purchase Options – these let you restrict which users/user roles can purchase products.
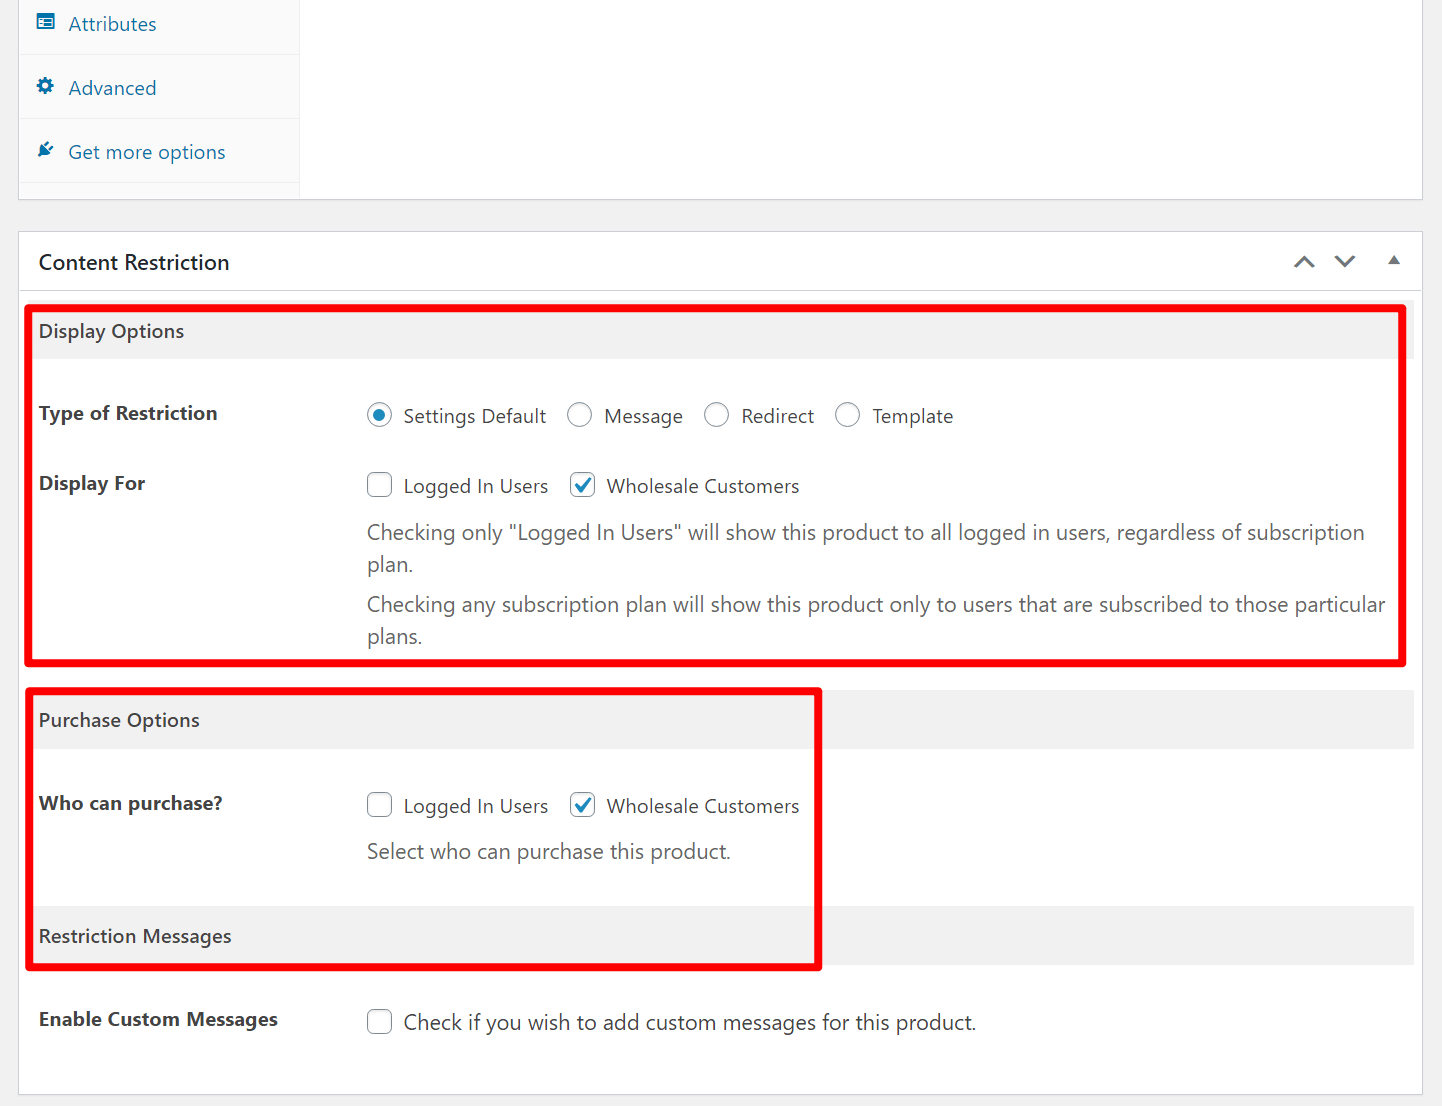
For example, you could make the product visible to all users, but only purchasable by certain user roles.
6. Create Custom Registration Forms (Optional)
At this point, your role-based pricing system is fully-functioning. However, you still need a way to get users into the right subscription plan/user role so that they can access the proper pricing.
To accomplish this, Paid Member Subscriptions can help you create custom front-end registration forms that add users to the proper role.
For example, to add users to a specific role, you could use the [pms-register] shortcode with a modifier like so:
[pms-register subscription_plans="1,2"]
You can learn more about these registration shortcodes in this documentation article.
Set Up WooCommerce Role-Based Pricing Today
Role-based pricing lets you create a more optimal pricing structure at your store. With it, you can offer special prices to wholesale customers, VIP customers, or any other group of customers that fits your needs.
For the easiest way to customize WooCommerce prices by user role, you can use the Paid Member Subscriptions plugin as we’ve shown you in this tutorial.
With Paid Member Subscriptions, you get granular options to control role-based pricing at the individual product level or the product category level. You can customize the pricing rules as needed, even offering different role-based pricing for every single product.
You can also set up multiple role-based pricing for different user roles, letting you create as many customizations as needed to properly configure your store.
If you’re ready to get started, purchase the premium license today to get access to Paid Member Subscriptions’ WooCommerce features.
Paid Member Subscriptions Pro
The best plugin to set up WooCommerce role-based pricing for your store.
Get Paid Member SubscriptionsDo you have any questions regarding WooCommerce role-based pricing? Ask us in the comments below!
Related Articles

How to Set Up WooCommerce Stripe Subscriptions with Recurring Payments (3 Methods)
Are you searching for a way to set up WooCommerce Stripe subscriptions? Setting up recurring subscriptions is a great way to build regular, dependable revenue for your website. And when it comes to processing payments, Stripe is one of the top options thanks to its competitive fees and flexible feature set. However, WooCommerce doesn't include […]
Continue Reading
How to Set Up WooCommerce Recurring Payments
Can't figure out how to set up WooCommerce recurring payments for your business? You aren't alone. Building a subscription business is daunting, especially if it's your first time. There are many moving parts at any given time. Whether it's laying the foundation, creating content, marketing your membership site, or managing payments, there are plenty of […]
Continue Reading
Best WooCommerce Subscriptions Alternative: Paid Member Subscriptions, a More Affordable and Complete Solution
Are you looking to sell subscription products on your WooCommerce site? One of the most popular ways to sell subscription products in WooCommerce is with the WooCommerce Subscriptions plugin. It lets you create WooCommerce products with recurring payments as a way to offer subscriptions to your customers. While this is an official extension from WooCommerce, […]
Continue Reading