

Table of Contents
- 1 What Does a Successful WordPress Paid Membership Community Need?
- 2 Bringing It All Together
- 2.1 1. Set Up Profile Builder Pro
- 2.2 2. Set Up Paid Member Subscriptions
- 2.3 3. Create Member Pages
- 2.4 4. Create a Login Widget
- 2.5 5. Restrict Your Content
- 2.6 6. Customize Your Menus for Different Subscription Levels (Optional)
- 2.7 7. Set up Content Dripping (Optional)
- 2.8 8. Set up Email Reminders (Optional)
- 3 Create Your Paid Membership Community with WordPress Plugins Today!
Building a successful paid membership community is very different from managing a blog or small business website, but in this article, that’s exactly what we are going to show you how to do.
One of the most important hurdles to overcome when building a successful paid membership community with WordPress is that this software was designed to help you create websites that are open and accessible to anyone. However, when running a paid membership community, we need to restrict access to parts of our website to registered users only.
You can create this protected area of your site, manage access to it, collect payments, and all of the other components required to build a successful paid membership community with just a few WordPress plugins. In this article, we will explore what you need to make a paid membership website successful and the easiest way to get it set up.
What Does a Successful WordPress Paid Membership Community Need?
A paid membership community will need these four things to become a success:
- Valuable content that people are willing to pay to access
- A WordPress installation and reliable hosting
- WordPress plugins that can help restrict access to content
- Plugins that can take care of all the other aspects of running a membership site
Let’s take a look at these core components in more detail, including a tutorial covering how to build a successful paid membership community with WordPress plugins.
High Quality Content People Will Pay For
The most important factor in whether a membership site will be a success or not is its content and the value it provides to its users.
Successful subscription and membership websites can take many forms, including courses, online communities, and a whole lot more. Aside from the technical aspects – which we will get to shortly –
the most important factor in whether a membership site will be a success or not is its content and the value it provides to its users.
You could write an entire book on what constitutes high-quality content and how to provide value to a community. However, some points to consider include:
- Is your content the best of its kind available online?
- Does your content help, entertain, or provide value in some other way?
- Is your website and its content easy to use and consume?
If you can answer yes to all three of those questions, then there’s a good chance your website will be one of the successful ones.
A WordPress Installation and Reliable Hosting
Although content is king, if your website foundations aren’t solid, your hard work will be for nothing. Therefore, it’s vital that you choose a proven and reliable platform for your membership community.
Due to its robust and flexible nature, WordPress is the perfect platform for building a professional membership community. If you combine this software with a high-quality web host like SiteGround, you’ll be off to a great start.
As this article is primarily about the technical side of setting up a paid membership community, we’ll assume you have the content and hosting covered.
WordPress Plugins to Transform an Open Site into a Paid Community
Using the right WordPress paid membership community plugins from the outset will make your life much easier. The easiest way to set up your members-only site is using Profile Builder Pro and Paid Member Subscriptions.
The first is a premium plugin, and the second is free but can be extended with several paid add-ons you may want to consider. The financial outlay at this step will help you save a ton of time and hassle down the road if you outgrow free alternatives. After all, if you’re charging people to access your website, you want the best quality architecture to manage it.
Bringing It All Together
Now that we have our list of ingredients, how do we bring it all together and create a successful paid membership community?
First, go ahead and download both Profile Builder Pro and Paid Member Subscriptions. Add them to your WordPress site by navigating to Plugins > Add New and uploading the .zip files containing the plugins. Activate both plugins once installed.
1. Set Up Profile Builder Pro
Profile Builder Pro upgrades the user profile capabilities of your default WordPress website to meet the requirements of a paid membership community. The plugin adds functionality to your website that makes it easy for visitors to sign up, login, and manage their profiles from the front end of your site, as opposed to the WordPress dashboard. You can also use the plugin to create a searchable member directory on your site.
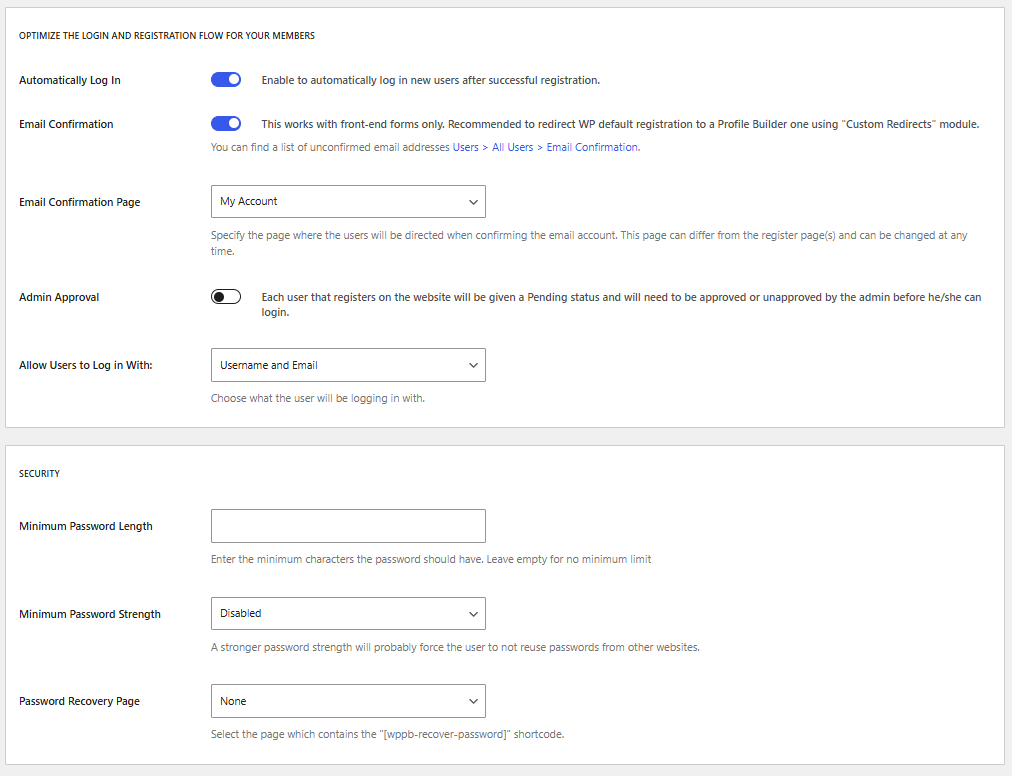
To get the plugin ready to use, navigate to Profile Builder > General Settings. Here you can select how you allow users to login, which is set to “Username and Email” by default. Set the minimum password length and the minimum acceptable password strength.
2. Set Up Paid Member Subscriptions
Paid Member Subscriptions is fully compatible with the previous plugin and manages the payment and paywall aspects of your subscription website. It’s a simple but very capable plugin that gives you complete control over subscription plans, content restriction, member management, automated account messaging, and more.
Paid Member Subscriptions takes care of subscription plans, member roles, content restriction, payments and access control. It also provides a convenient way for members to upgrade or cancel their subscription which is obviously an important feature for a membership site! There are also a number of paid add-ons available to extend its functionality in different ways.
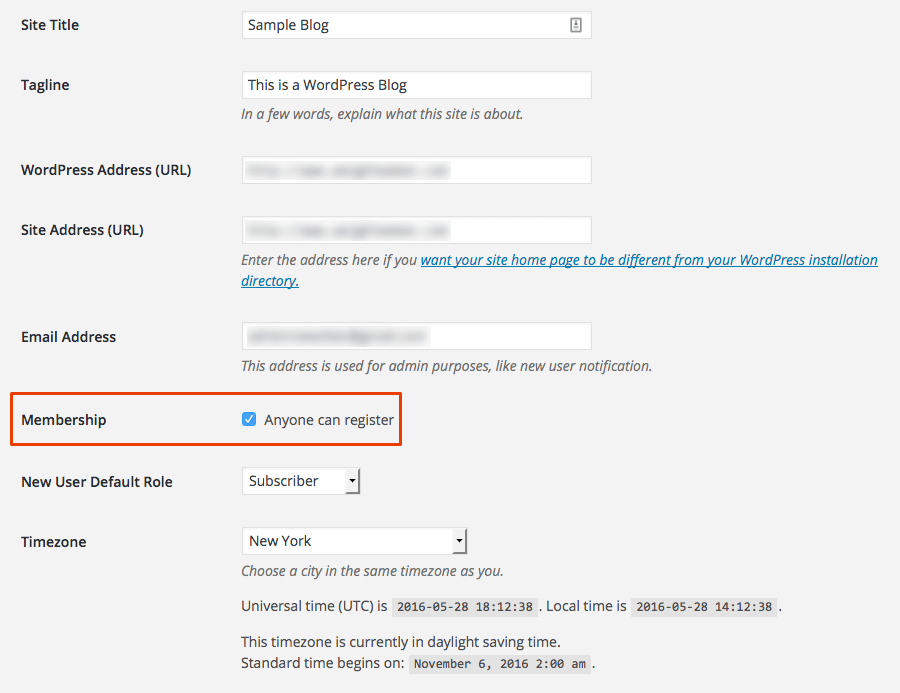
To get started, first, navigate to Settings > General and check the box next to “Membership” as we want anyone to be able to register.
Next, navigate to Paid Member Subscriptions > Settings > Payments. Choose the desired options to ensure you receive payments.
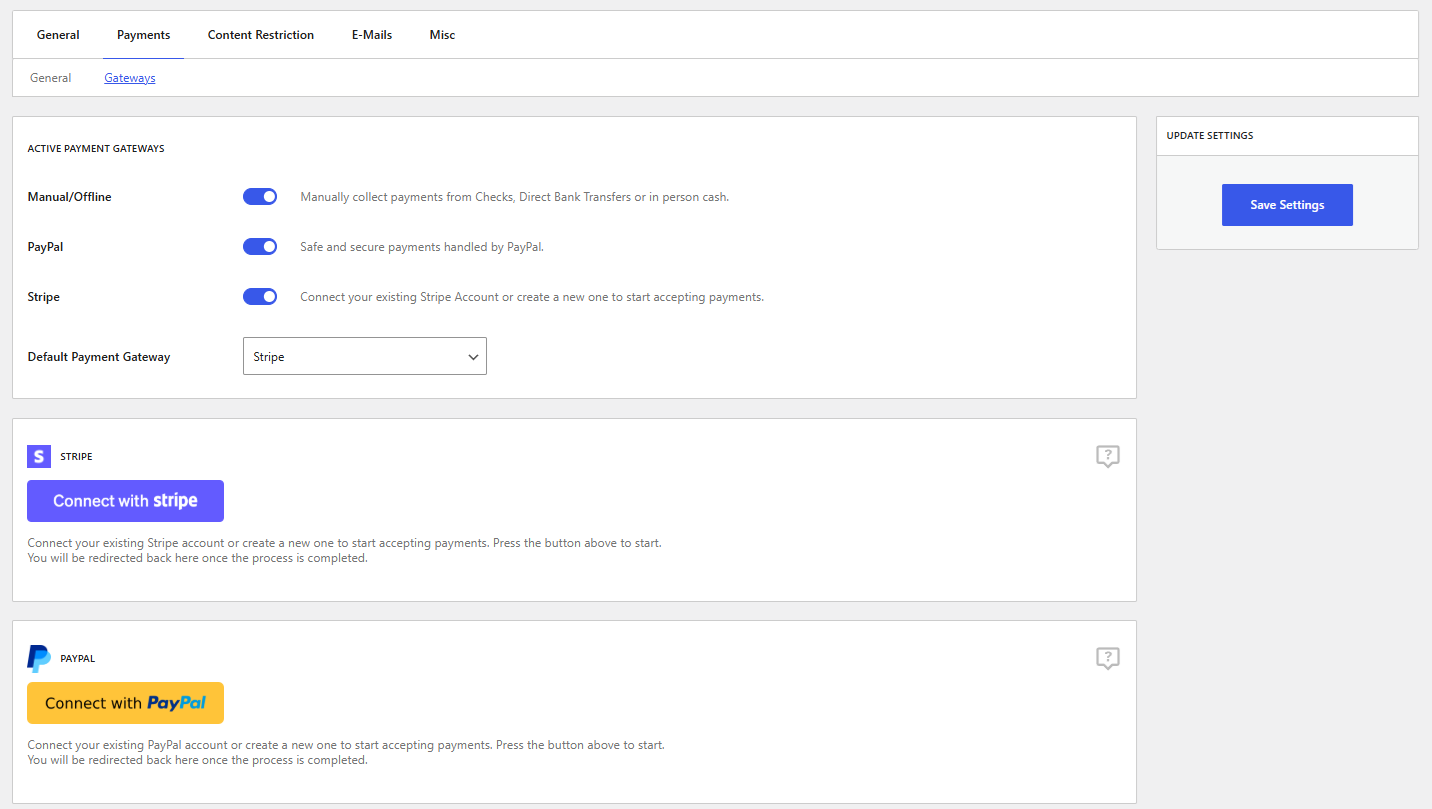
It is worth mentioning here that if you want to set up recurring payments through PayPal Standard, you should consider this add-on. Other available add-ons allow you to add a Stripe payment gateway or accept payments through PayPal Pro and PayPal Express. If you are planning to use several add-ons, you can save money by purchasing the full set in a bundle.
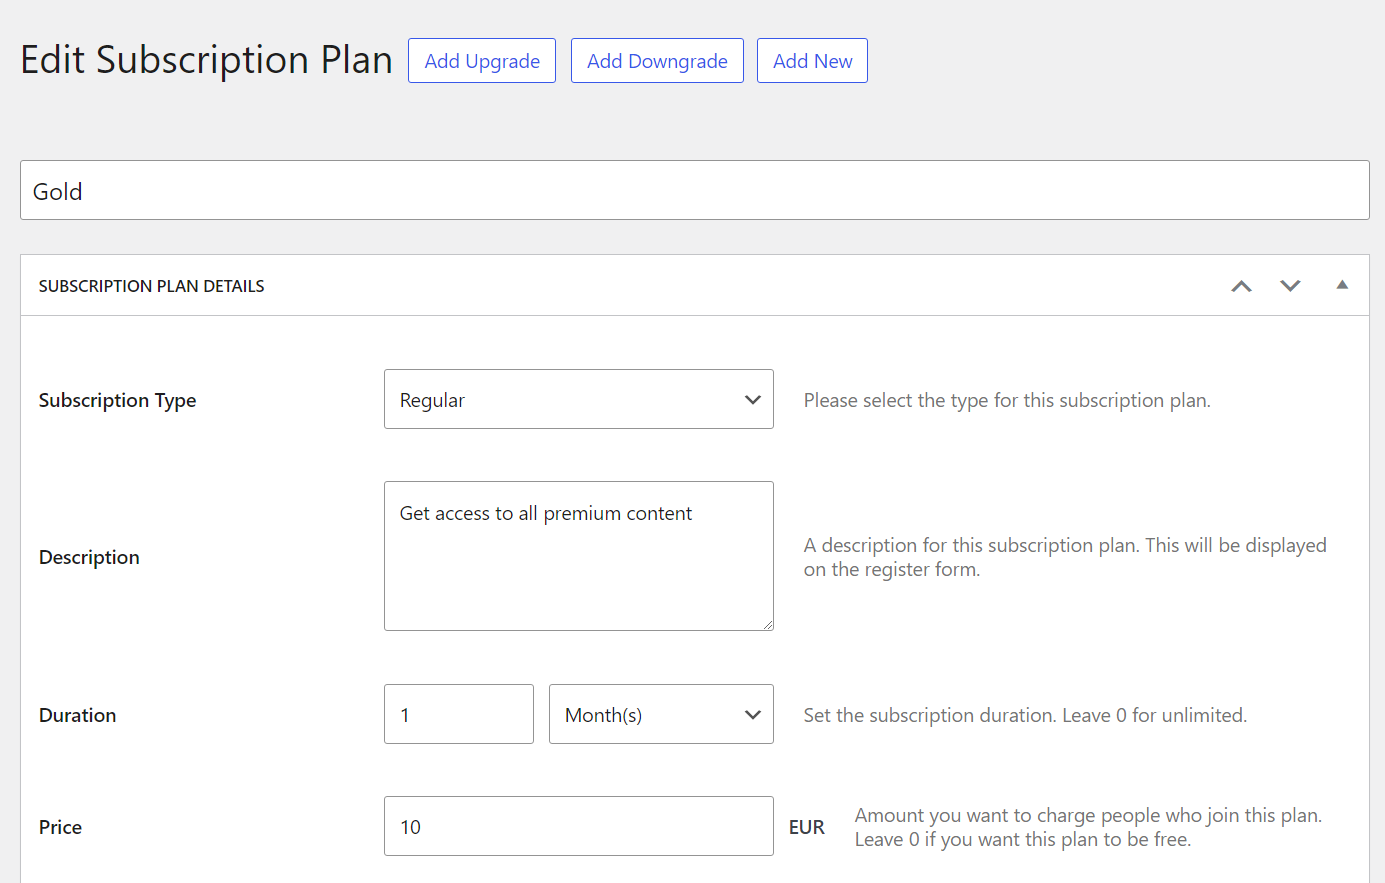
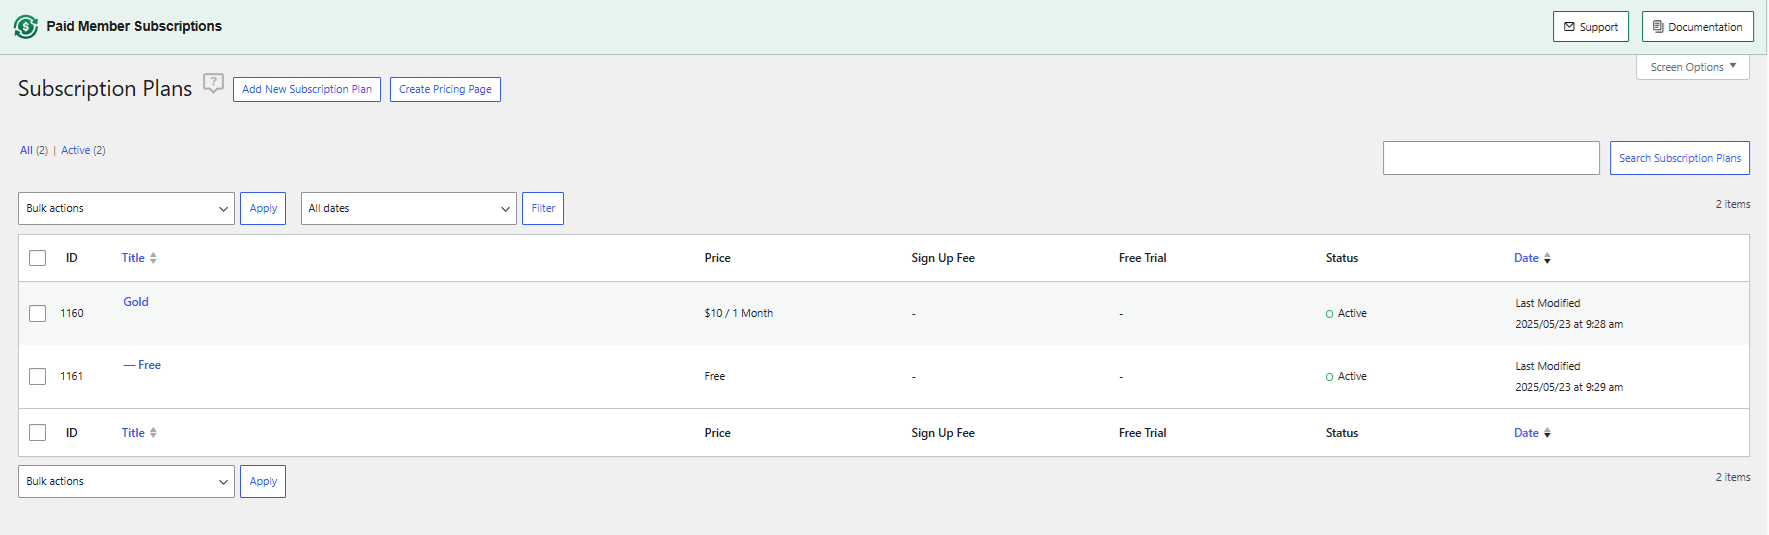
Next, navigate to Paid Member Subscriptions > Subscription Plans and click the Add New Subscription Plan button.
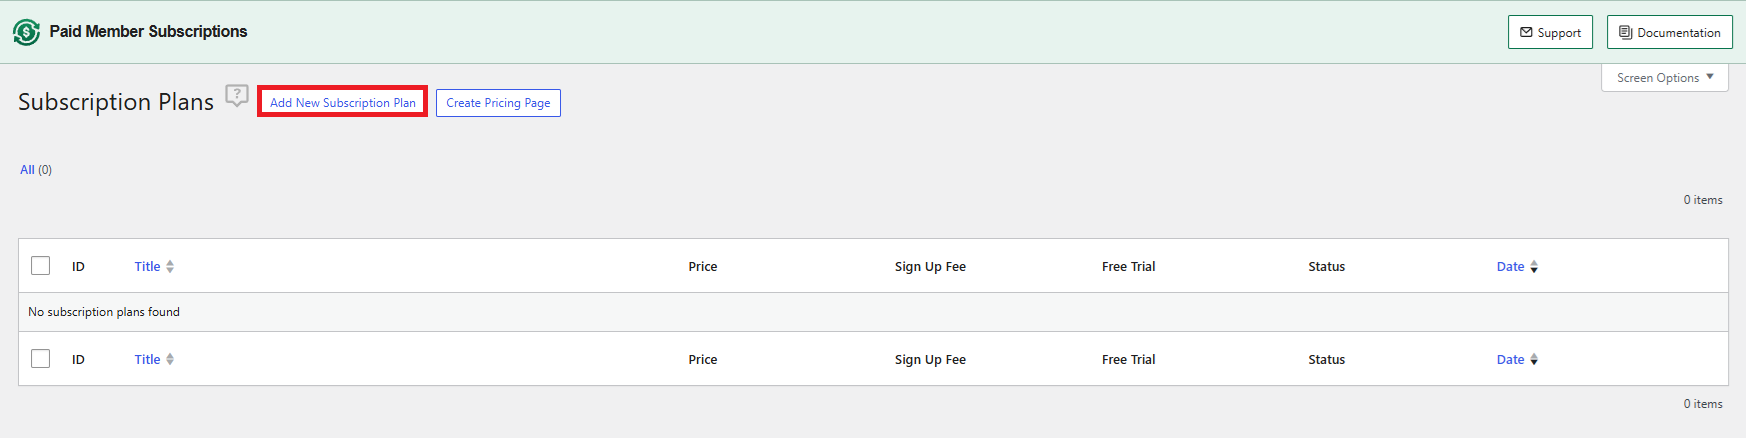
On the screen that appears, give your subscription plan a name, description, duration (the amount of time before it must be renewed), and price. Make sure it is active and leave the setting for Paid Member Subscriptions to create a new user role for it. Click the Save Subscription button when you are done.
It is easy to add tiered levels of membership using the Add Upgrade and Add Downgrade options. It’s generally a good idea to offer free membership to give new users a taste of what your content is like to entice them to sign up. To create a free level of membership, click the Add Downgrade button and fill in the settings, being sure to leave price at 0.
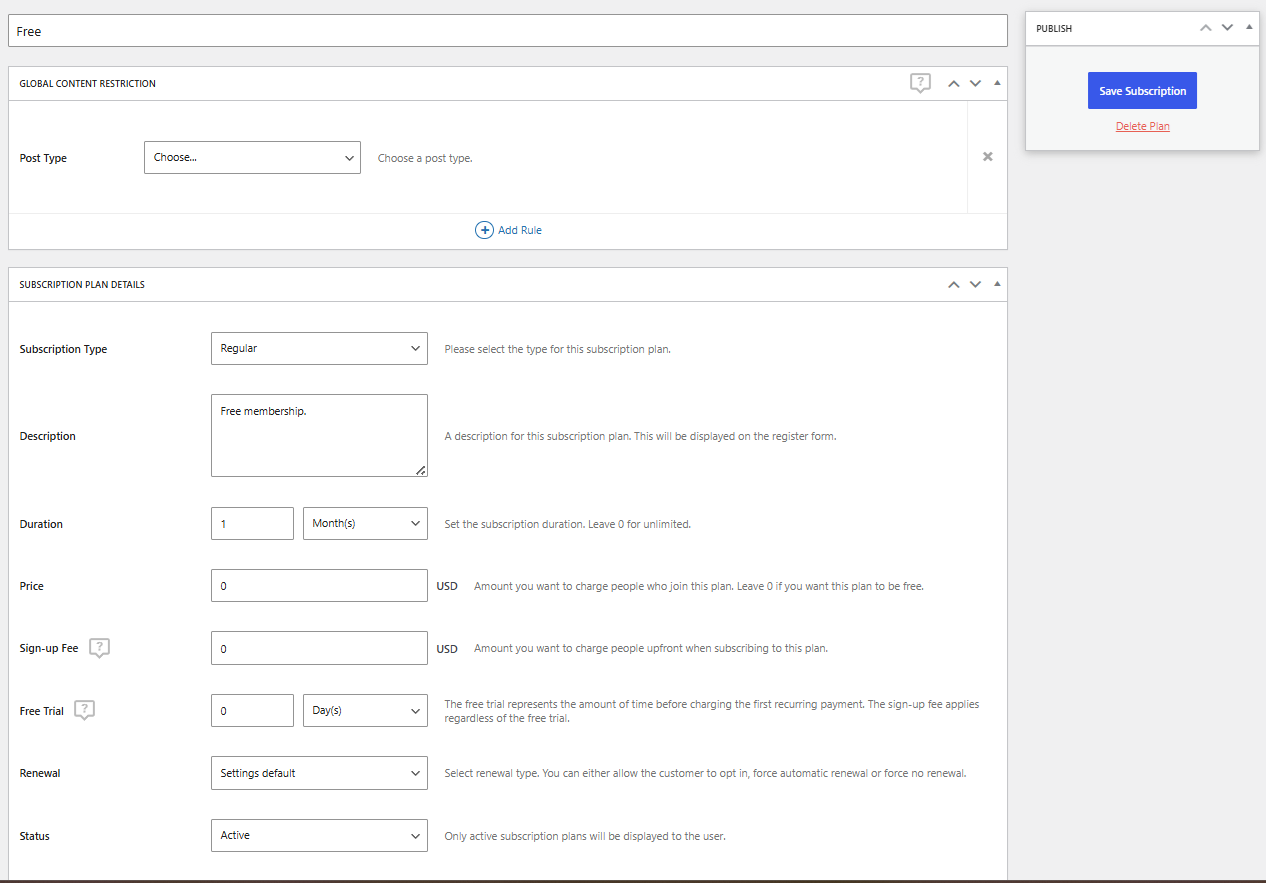
After you save the free level of subscription, you officially have at least two levels of membership. You can create as many levels as you need; for example, maybe all paid subscribers can access your written content, but only a higher tier can access your video content.
Now that we have a few levels of membership, we need to make these subscription plans options when new users sign up. This is done back in Profile Builder.
Navigate to Profile Builder > Manage Form Fields. Here you can customize the data you collect from your users. How much you want to collect is up to you, but from a user-friendliness perspective, the less, the better.
To allow your users to sign up for a subscription, select Subscription Plans from the dropdown and fill out the information that appears. Be sure to check the box beside all the subscription plans you would like to make available to your subscribers, then click Add Field.

3. Create Member Pages
With those settings finalized, we can create our registration, login, and edit profile pages.
Go to Pages > Add New. Create three new pages called “Register,” “Login,” and “Edit Profile.” On each page, at a minimum you need to add the Profile Builder Pro shortcodes, which are [ wppb-register ], [ wppb-login ], and [ wppb-edit-profile ], respectively. If you’d like, you can add extra descriptions or content using the WordPress editor. You can read more about creating these pages, and other pages you might want to add, here.
4. Create a Login Widget
Next, we’ll want to add a login widget to your WordPress site’s sidebar. This will give your users a place to log in and access your premium content.
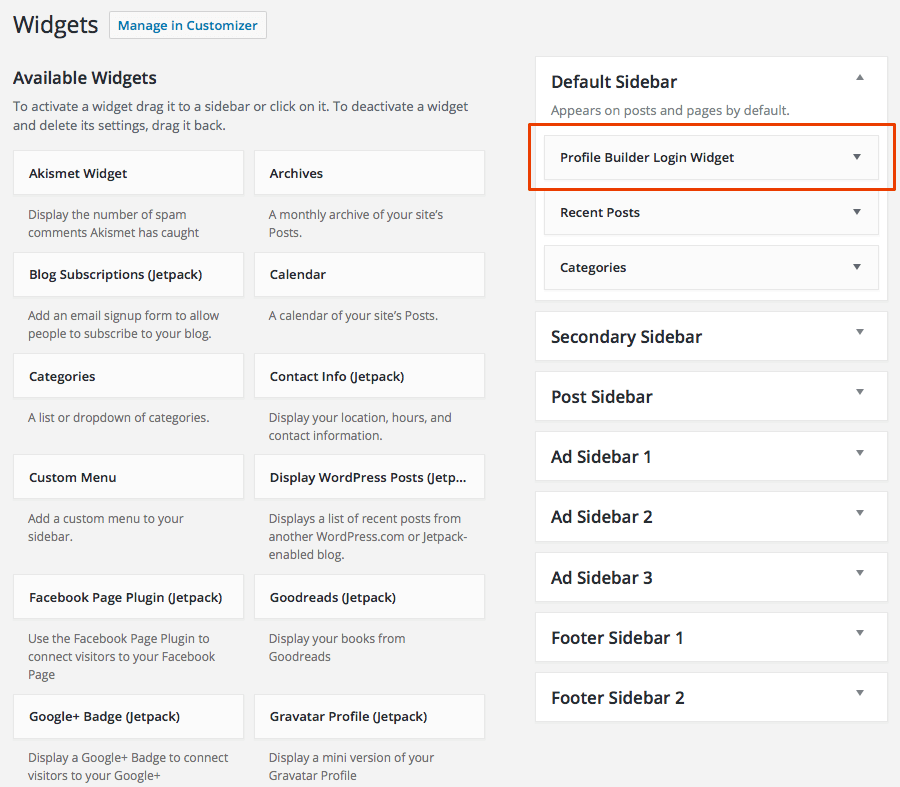
Simply navigate to Appearance > Widgets and drag the Profile Builder Login Widget to the spot you would like it to appear in the sidebar.
5. Restrict Your Content
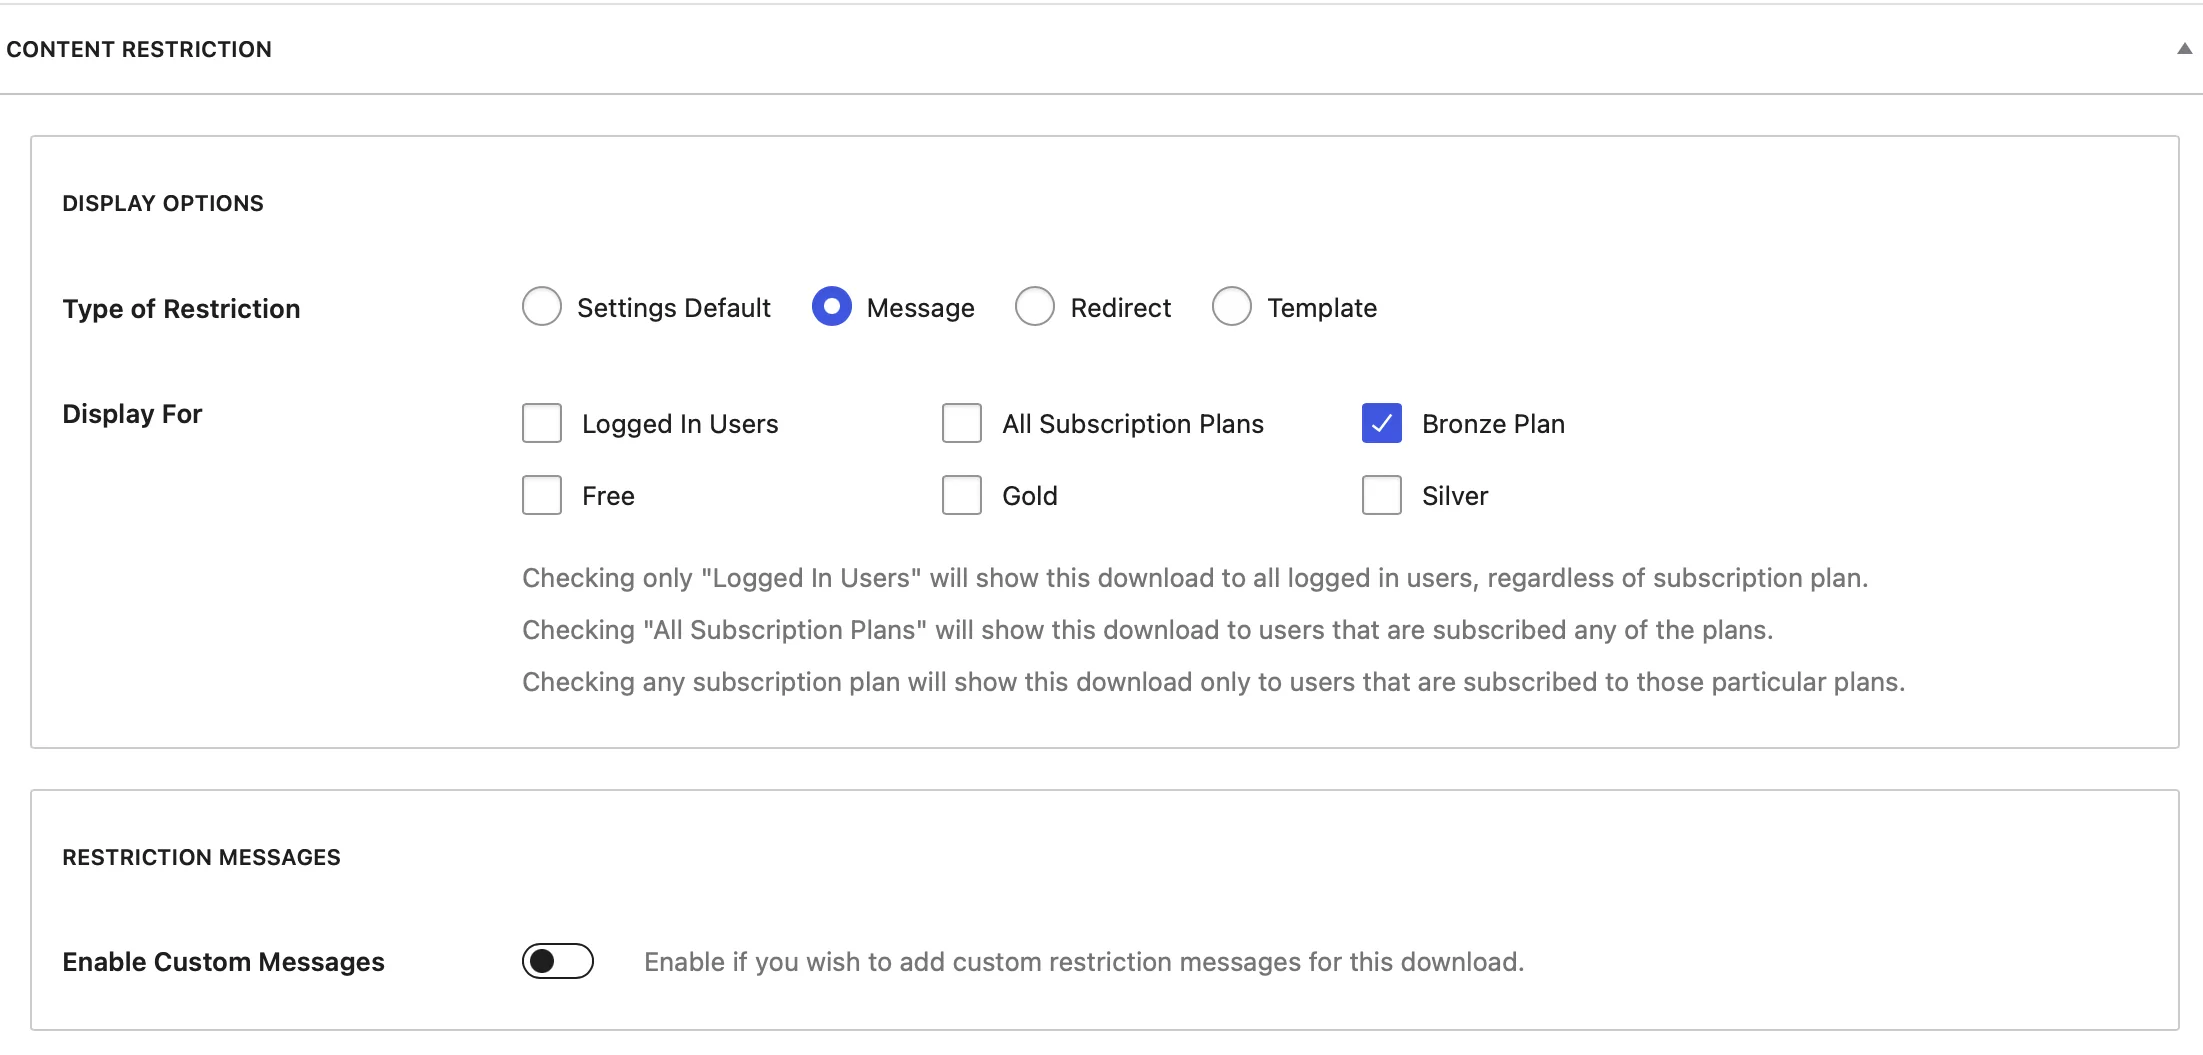
Now that you have created subscription plans and added the supporting pages to your site, it is time to restrict your content to specific users.
Paid Member Subscriptions adds a new box for this below the post editor. Select to display the content only to logged in users, and check off which subscription plans can view the content.
If you already have a lot of content on your site that you want to go back and restrict in different ways, you will be very interested in the Global Content Restriction add-on. It gives you much more control over how you restrict your content, based on post type, taxonomy, and other terms.
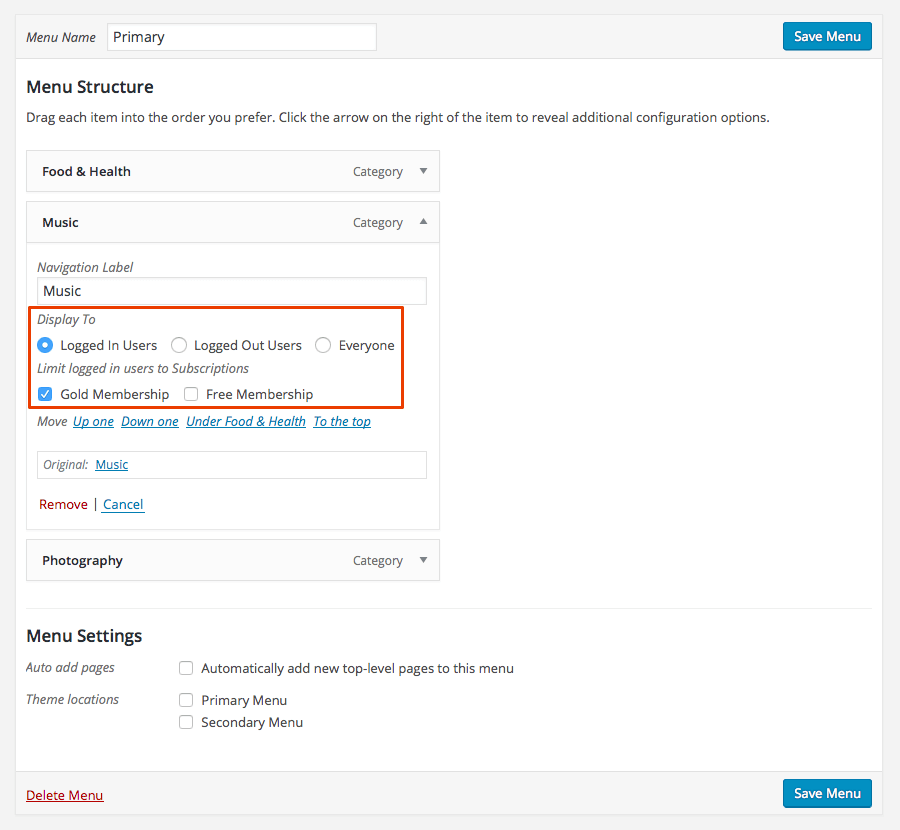
6. Customize Your Menus for Different Subscription Levels (Optional)

If you want to display different menu items to different types of members, you can install the Nav Menu Filtering add-on. If you do choose this add-on, go to Appearance > Menus to customize your navigation. Some new options will appear for you to choose who sees which categories in the menu.
7. Set up Content Dripping (Optional)

With your paid membership set up and ready to go, you should consider setting up content dripping. This is a marketing model where you drip-feed content to members to keep them coming back for more. It is also ideal for pace-controlled e-learning and other content types where spacing your contact out is appropriate.
To get started with content dripping, install the Content Dripping add-on and follow this guide.
8. Set up Email Reminders (Optional)

Email reminders are another important and easy to automate method of keeping in contact with your subscribers. Using the Email Reminders add-on, you can create messages that follow all kinds of triggers, from an attempt to woo back an abandoned signup to a gentle reminder about a near-expired subscription. You can read a highly detailed guide to getting this set up here.
Create Your Paid Membership Community with WordPress Plugins Today!
This is obviously only a high-level overview of how to build a successful paid membership community with WordPress plugins.
Both plugins featured here have plenty more functions to explore but this simple guide is enough to get you up and running with content for both free and premium members.
If you have any questions about setting up a paid membership community with WordPress, please leave a comment below.
Related Articles
How To Create a Divi Membership Site
If you’re thinking of building a membership site in WordPress, you’ll need a solid theme and a membership plugin that pairs well with it. In this complete guide, we’ll show you how to create a Divi membership site using the popular Divi theme in combination with the Paid Member Subscriptions plugin.
Continue Reading
7 Best WordPress Community Plugins to Grow Your Community Website
Quality content can go a long way, but creating a community around your site is another effective way to grow your business. It can make it easier to retain and engage your visitors and enable you to form long-lasting relationships with your users. The good news is that you can add this functionality to WordPress […]
Continue Reading
How to Build an Online Community Website – Best Method in 2025
Are you trying to create an online community website but not sure where to start? Building an online community platform is a great way to bring together a group of members around a specific topic. And by creating your own platform, you can fully own the relationship with your members so that you're never at […]
Continue Reading