

Table of Contents
Depending on the type of WordPress site you run, there are several reasons why you might want to create a custom login page for WordPress. And, you can easily do so by using a dedicated plugin.
Using a customized login form can help you minimize hacking risks and related security issues as well as improve privacy. And if you’re a design agency, you might need to white-label the default login page or login URL for your clients to give them a better way of accessing their WordPress dashboard.
In this article, we’ll show you how to create a custom login page for WordPress using the Profile Builder Pro plugin. We’ll also walk you through a step-by-step process on how you can set up redirects and hide the admin bar. Let’s get to it!
An Introduction to WordPress Custom Login Pages
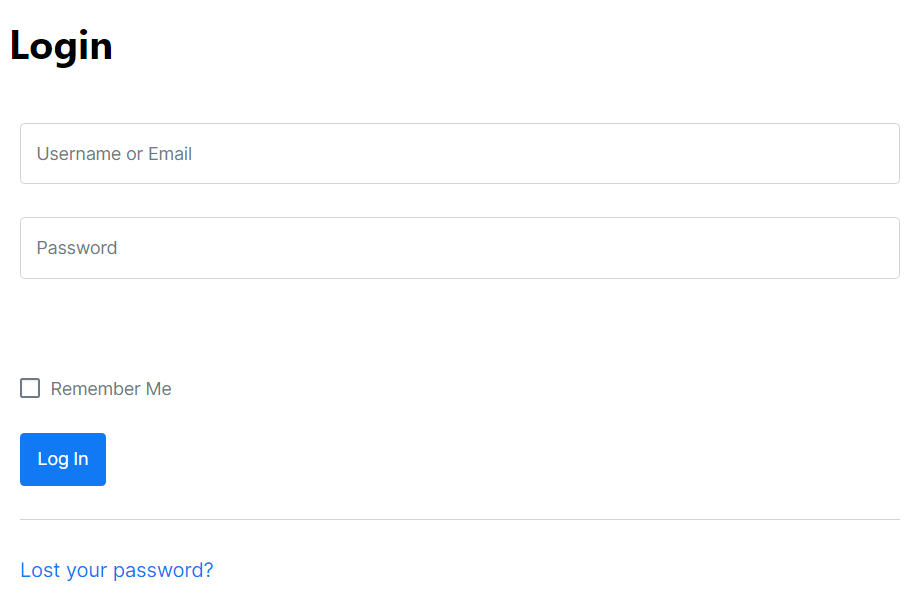
As a WordPress site owner, you’re probably familiar with the default user login page. In terms of design, it’s pretty generic. You can’t customize login with a simple background image.
Users can log in by visiting the /wp-admin or /wp-login.php login URL and entering their username and password. It’s also worth mentioning that, out of the box, the login page isn’t particularly difficult to access. Anyone who knows about the wp-admin URL or wp-login.php page can get to the login screen and try to access the admin dashboard.
With that in mind, let’s go over a few reasons why you should create a custom user login page for your WordPress website:
- Improved user experience and security. If you have users who need to access the dashboard, you can improve their experience by offering a custom WordPress login page or form, or even features such as social logins. You can also set a custom URL for the new login page. This will make it harder for attackers to find it.
- Preventing brute force attacks. WordPress websites can be common targets for brute force attacks. Changing the login URL and implementing security features such as CAPTCHAs can help prevent these types of attacks.
- White-labeling the login page. If you’re a freelancer, solopreneur, or part of an agency, you might want to offer clients the option to white-label their login pages. For example, you could add branding elements (like the logo, background color, and background images) to the login screen, or a personalized message to the admin custom login form.
Custom WordPress login pages can also implement redirects. You can set up redirects to send users to different parts of the dashboard or the site, so they don’t need to spend much time navigating to the pages they’re interested in.
Why Set Up Login Redirects in WordPress
If you’re running a WordPress website that allows users (members, students, customers, subscribers, etc) to log in from the front end, you’ll want an easy way to redirect them to specific pages. For example, you might want to redirect students to your main course page or homepage after a successful login. You might also consider redirecting new users to the Edit Profile page if it’s their first time logging in after registering.
Redirecting users to a specific page after login also lets you keep them out of the WordPress back-end and the WordPress dashboard. This minimizes any chance of confusion since Subscribers and other end-user roles in WordPress don’t have the necessary permissions to do anything within the dashboard.
Profile Builder Pro’s Custom Redirects add-on makes it easy for you to set up redirections and get better control over where users go within the site. This add-on is available with the Agency and Pro licenses. Out of the box, the add-on offers the following redirect types based on user actions:
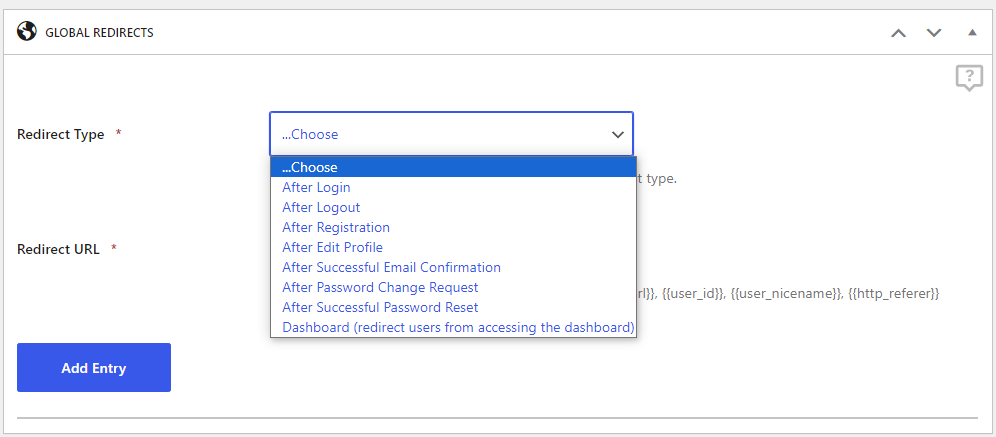
The Custom Redirects add-on also enables targeting specific users with various filters. This can be useful when you need to redirect specific users or user roles. The add-on also lets you set up global WordPress redirects.
How to Redirect Users to a Front-End Login
Using Profile Builder Pro’s Custom Redirects add-on, you can easily set up a redirect that targets users who try to access the default login URL. With a redirect in place, you can re-route users to a custom front-end login that doesn’t send them to the WordPress dashboard.
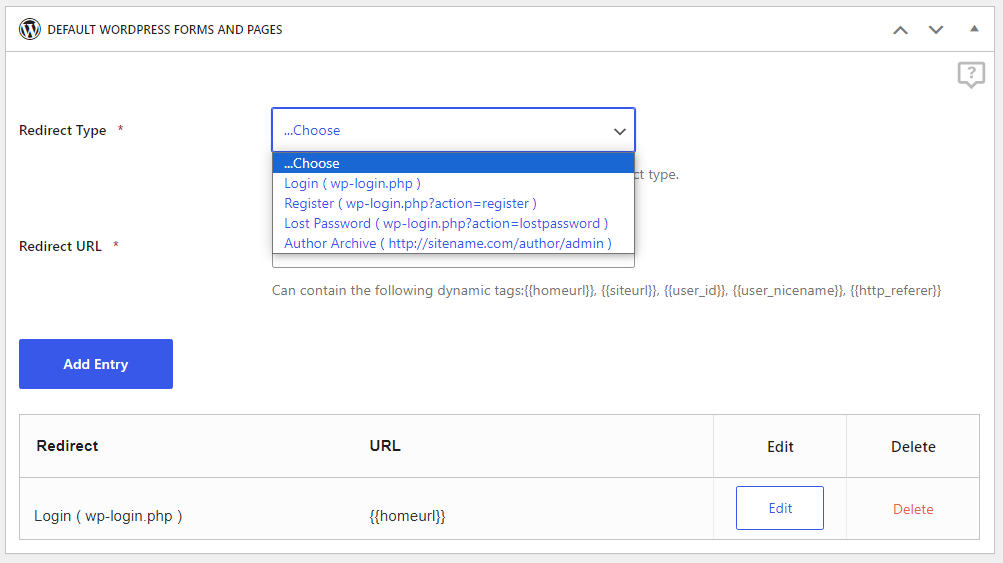
To get started, access the dashboard and go to Profile Builder → Custom Redirects. Locate the DEFAULT WORDPRESS FORM AND PAGES section, where you’ll get to choose a redirect type and URL:
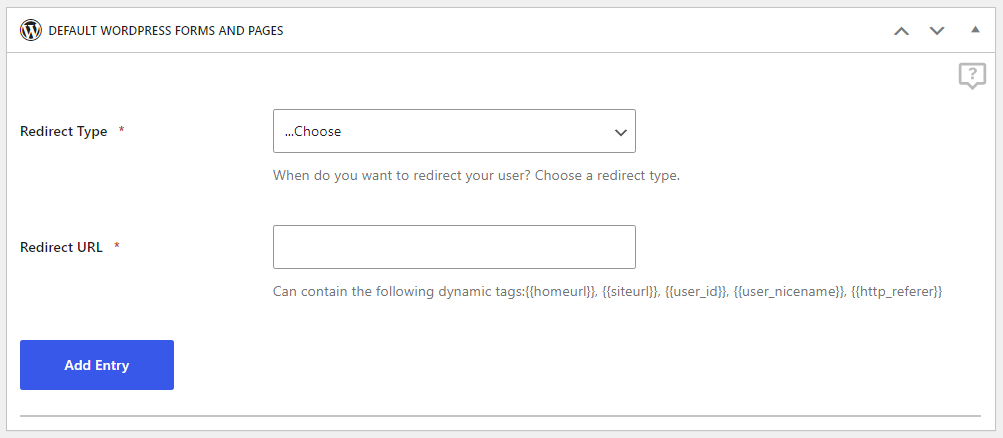
Select the Login (wp-login.php) option under the Redirect Type menu. This means that WordPress will redirect anyone who visits that URL to one of your choosing. Now move on to the Redirect URL field and enter the address where you want to send users from the default login page.
Note that the Custom Redirects add-on enables you to set up multiple redirects. Once you settle on the configuration you want, click on Add Entry. The redirect will show up in a list below the Add Entry button and you can set up additional redirects right away.
There are a lot of interesting ways to use the Custom Redirects module beyond sending users to a front end login form. You can read about other use cases in our article about how to redirect users after they register.
How to Hide the WordPress Admin Bar After Login
With Profile Builder Pro, you can easily hide the WordPress admin bar and admin area after users login. You can use the plugin to configure which user roles get to see the admin bar so only team members can use it.
To get started, access the dashboard and go to Profile Builder → Settings. Scroll down to the Other Features section and look for the option that says Hide Admin Bar for User Roles. Click on the menu for that option and it’ll open a list of user roles you can select from:
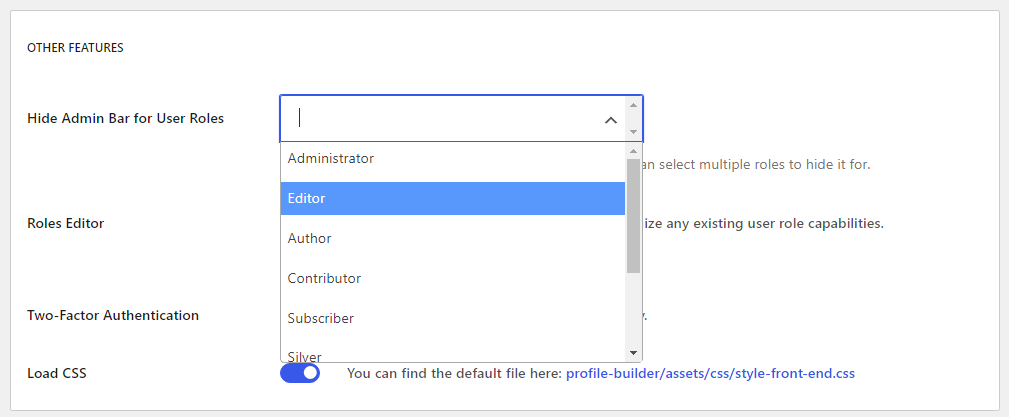
You can select multiple options, so go ahead and pick all end-user roles. Roles that require access to the dashboard to do their work, such as authors or editors, shouldn’t be included here since they need to see the admin bar.
How to Customize the WordPress Login Screen
The WordPress login page is just like any other page on your WordPress site. That means you can customize its design and style using the WordPress editor and custom CSS. You can also add custom features to the page if you’re comfortable writing code and editing WordPress files.
You can also use tools like Profile Builder Pro to simplify the editing process. In this next section, we’ll show you some useful customizations that you can make to the WordPress login screen using the plugin.
Customize the Login Page URL
Profile Builder Pro enables you to set up a custom login page for WordPress using blocks. This means you can add a login form to any page on your site and edit that page’s style using the Block Editor. In other words, you get full control over how the login looks.
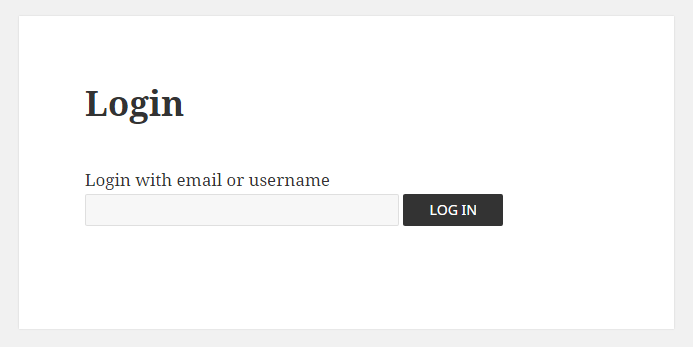
To do this, create a new page where you want to add the custom login form. Add a new block to the page and select the Login option. Here’s what a Profile Builder Pro custom login form looks like using the Sublime style from the plugin’s options:
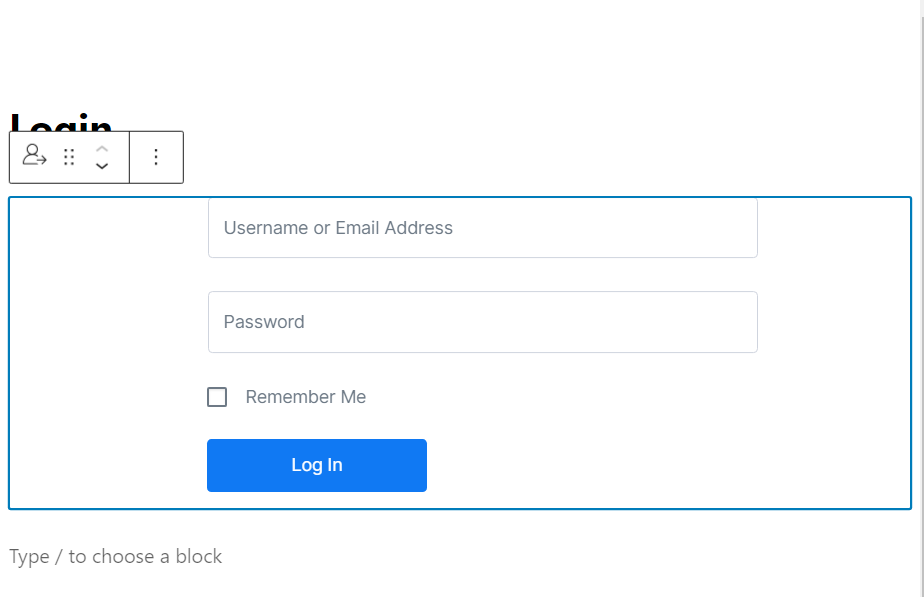
With the login form in place, you can change the page’s permalink within the editor. This new URL will be the one that users will need to visit to access the site. You can also choose to redirect users from the default login URL to this new page, which we discussed how to do earlier in the guide.
Enable Users to Recover Their Password
You might have noticed that the custom login forms you can add using Profile Builder Pro don’t include an option for recovering lost passwords. The plugin includes a separate password recovery block, which adds the form that users need to recover their credentials.
To add the form to the page, open the editor and look for the Recover Password block. Here’s what it looks like using a custom style:
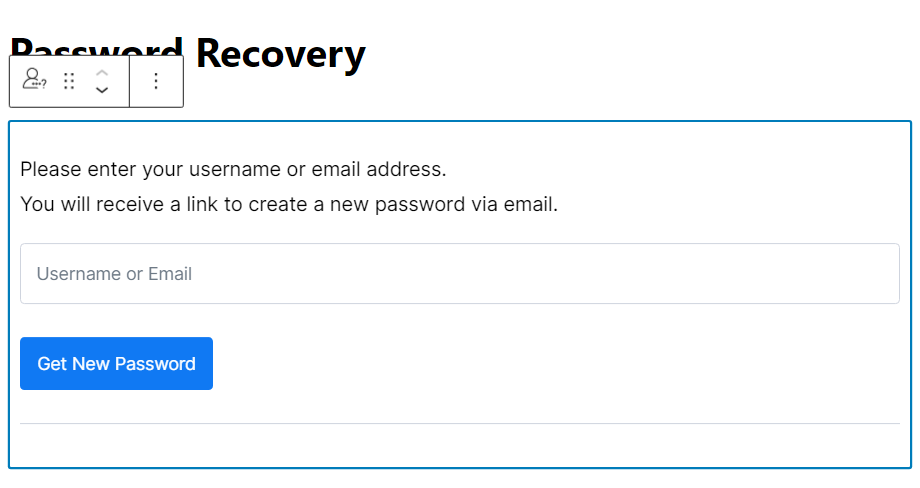
Note that both the custom login and password recovery forms should be published at the same time. This way, you won’t run into a scenario where visitors can only use the new login form but have no way to recover their passwords.
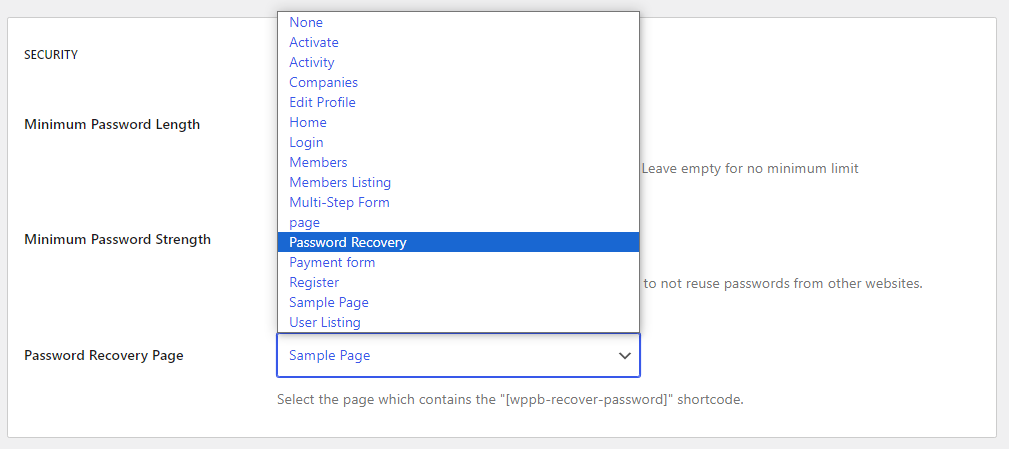
Once you create a page with a custom password recovery form, go to Profile Builder → Settings and look for the Password Recovery Page option under SECURITY. Use the menu next to Password Recovery Page to select the page with the custom password recovery form:
Once you set a page for the Password Recovery Page option, a new Lost your password? link will appear under your custom login form:
Remember to click on Save Changes before exiting the page. Now your custom login form is almost done, but we still need to increase its security.
Adding reCAPTCHA
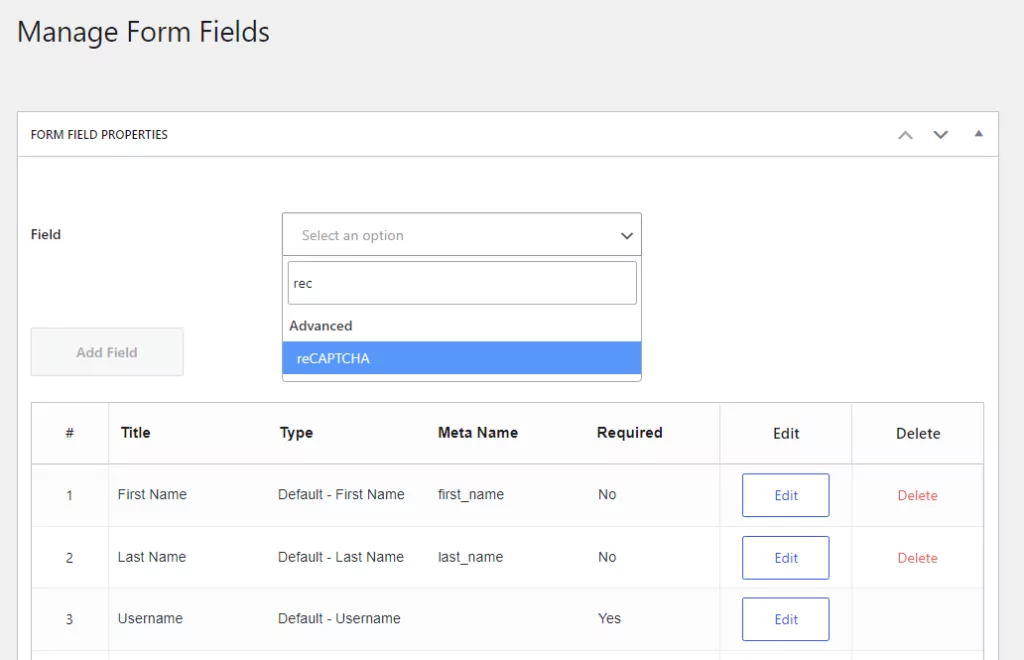
You can add Google reCAPTCHA to improve your login page’s security. To do this, you must generate keys (site key and secret key) from the Google reCAPTCHA website. Once you have the keys, go to Profile Builder → Form Fields and look for the Field option near the top of the page.
Select the menu next to Fields and look for the reCAPTCHA entry among the available options:
As soon as you select reCAPTCHA, a new FORM FIELD PROPERTIES section will pop up including configuration settings for the field:
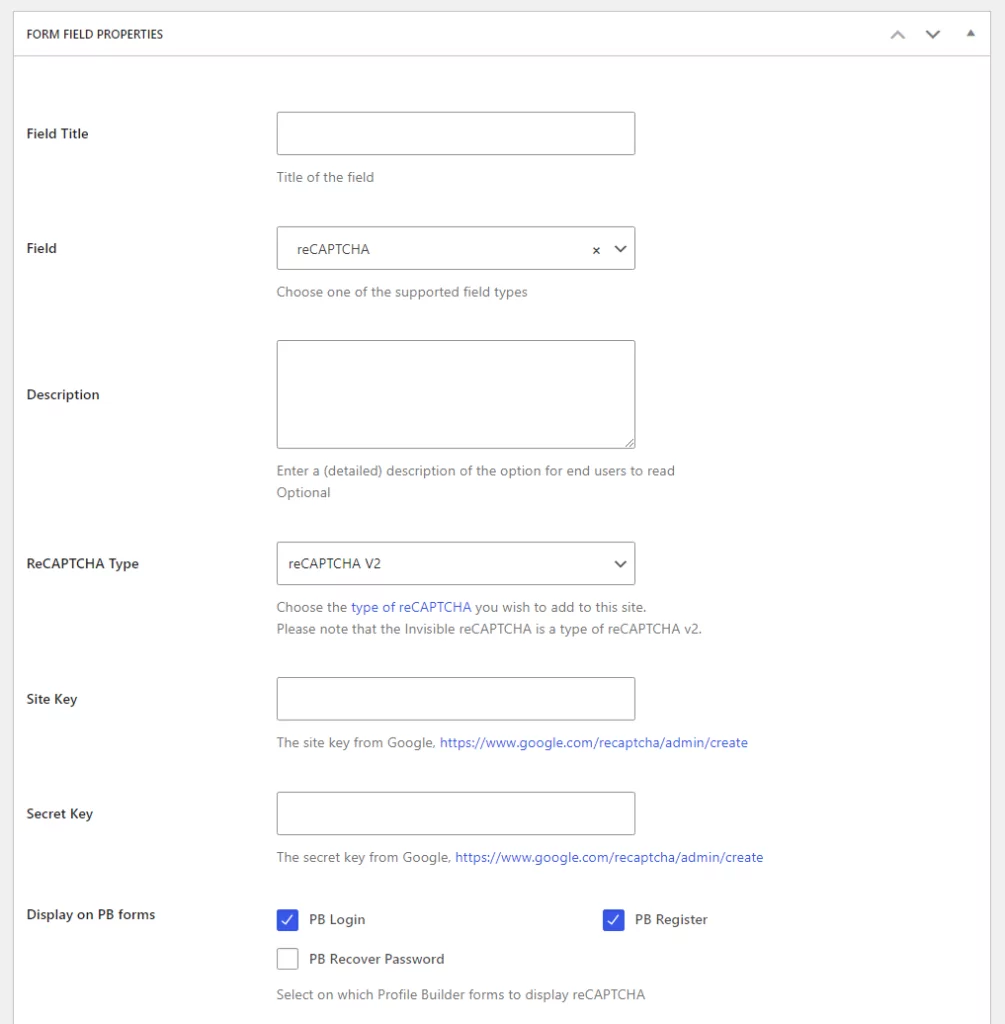
For the reCAPTCHA field to work, you’ll need to fill out the following settings:
- Enter field details (title and description).
- Select a reCAPTCHA type (either reCAPTCHA V2 or Invisible reCAPTCHA).
- Enter your site key and secret key.
- Make sure the PB Login box is selected next to the Display on PB forms
When you’re ready, click on the Add Field button to proceed. The reCAPTCHA will automatically be added to your custom WordPress login form. Here’s an example of what that form might look like on the front end:
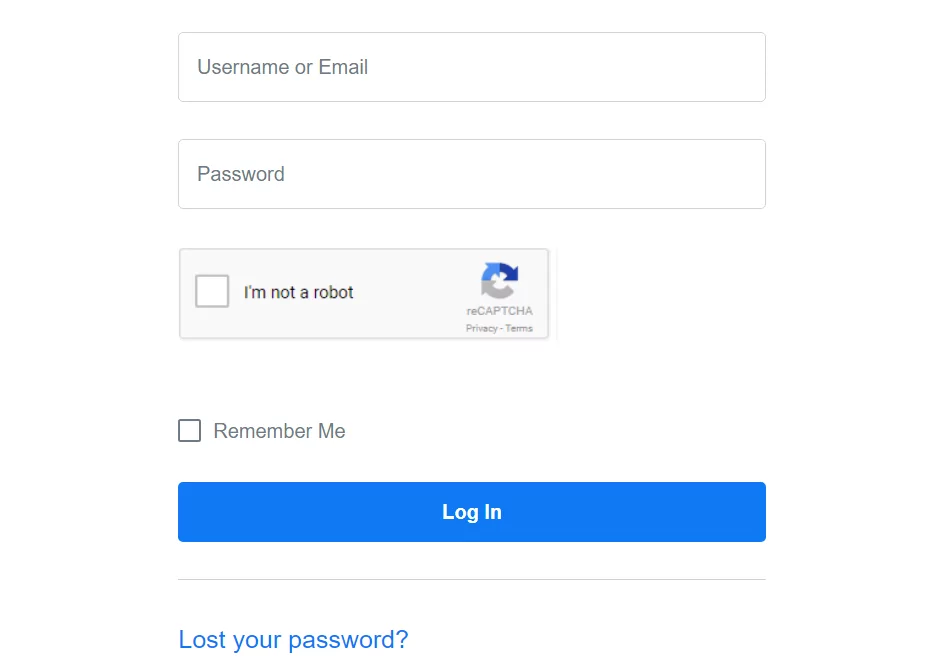
Note that reCAPTCHA can help increase site security by preventing bots from being able to try and brute force their way into the dashboard. With that in mind, we recommend enabling reCAPTCHA for critical forms, such as login and registration.
Enable Users to Login Using Social Media Accounts
The Social Connect add-on for Profile Builder Pro adds social login options to WordPress. With this add-on, users will be able to login to your website with their social media accounts. It works with both custom and default WordPress login forms.
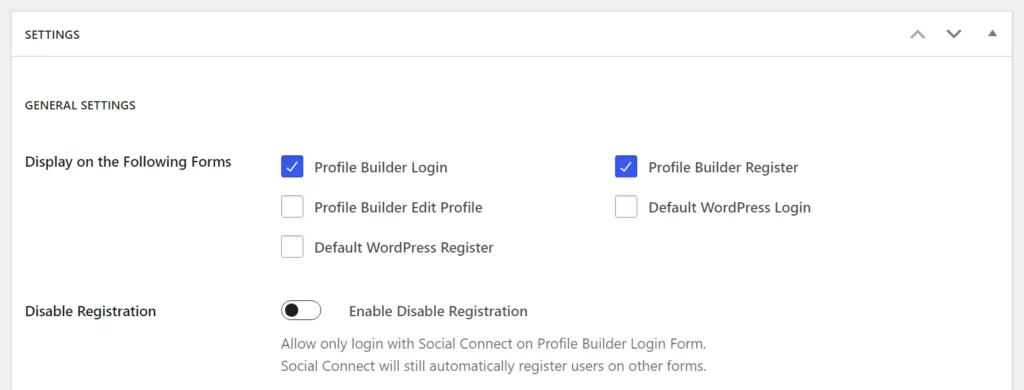
The Social Connect add-on is available for Basic, Pro, and Agency licenses. Once you install and activate the add-on, go to Profile Builder → Social Connect. For starters, you’ll be able to choose for which forms to enable the social logins:
Next up, look for the APPLICATION SETTINGS section. Now, go ahead and select which social media platforms visitors will be able to use to login. The plugin supports Facebook, Google, Twitter, and LinkedIn:
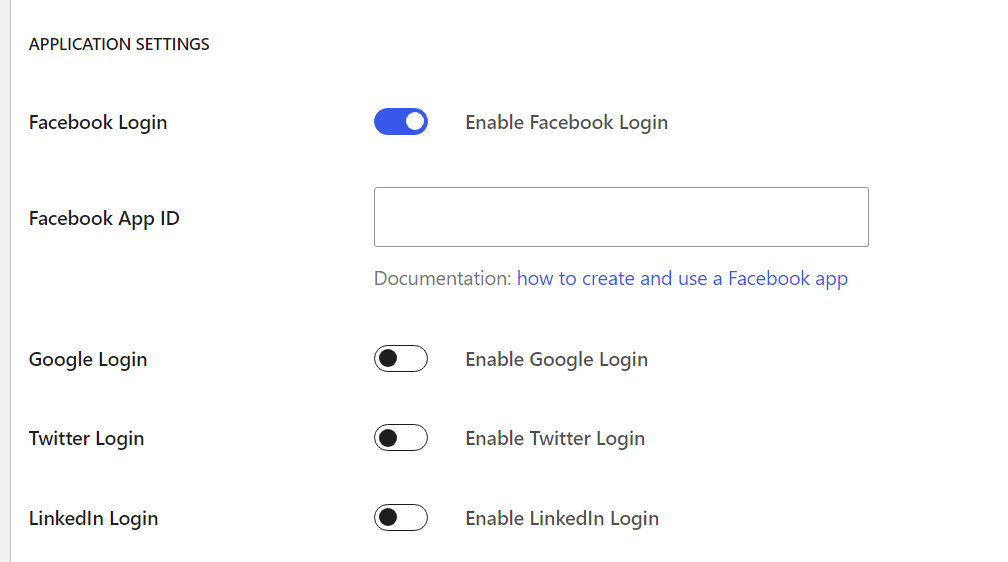
Note that every option will require you to set up an app through that platform’s developer options. Profile Builder Pro includes links alongside each option that will take you to guides on how to set up the apps you need to enable these settings.
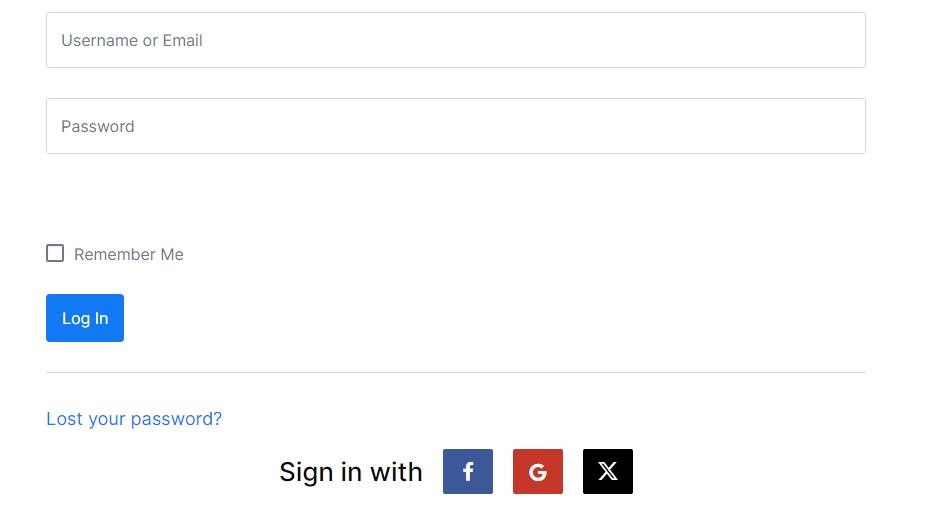
Once you’ve configured the necessary settings, the corresponding social media options will show up alongside your login form. Users can click on any of these options and it will guide them through the login process:
Profile Builder Pro also gives you the option of changing the style of these social media buttons and their location within the login form. You can experiment with these settings by returning to the Profile Builder → Social Connect screen.
Enabling Logins Without Passwords
Profile Builder Pro also offers an add-on called Passwordless Login. With this add-on, users can enter either their email or username into a login form and receive an email message containing a login link for the site. This link lasts around ten minutes, to prevent abuse.
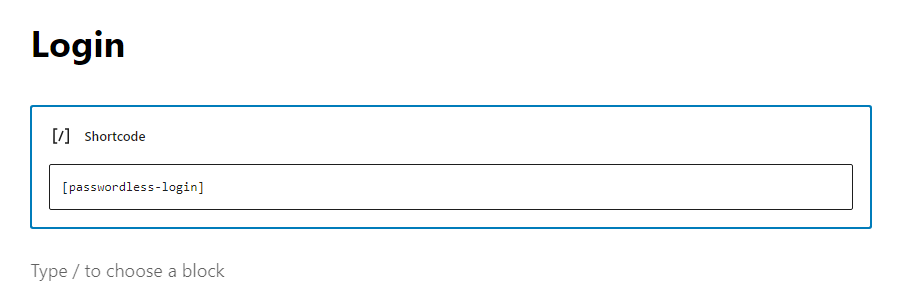
To enable passwordless login, you’ll want to create a new login page. If you’re already using a Profile Builder Pro custom login form, you’ll need to replace it with a passwordless option.
You can do this by opening the editor and selecting the Shortcode block. Place the block where you want the passwordless login form to appear and enter the [passwordless-login] shortcode:
Save the changes to the page and visit it from the front end. Here’s what the passwordless login form should look like:
The downside of using passwordless login is that you lose out on any style customizations you can make to a custom Profile Builder Pro login form. Whether to use this approach or not depends on what kind of login experience you think your users will prefer.
Use a Custom Login Page Template
Profile Builder Pro works well with the Custom Login Page Templates plugin. You can use this tool to change the look and feel of your WordPress login page:
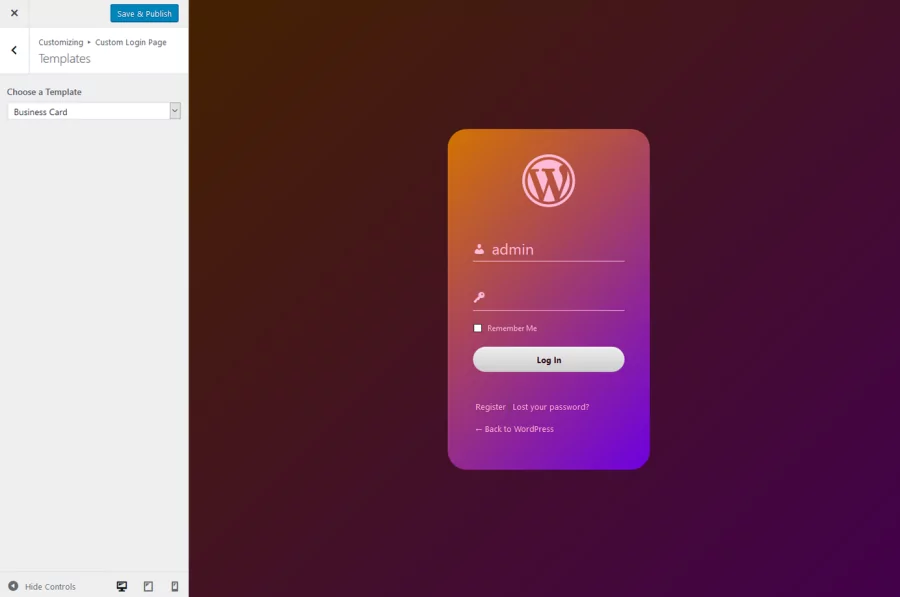
You can choose one of the available templates and customize it to fit your brand. The plugin includes options such as:
- Uploading custom logos
- Adding background pictures
- Enabling random background images from Wikimedia that change every day
- Tweaking the design using custom CSS
We recommend using this plugin if you want to go above and beyond when designing a custom login page. The templates it includes feature modern designs, and you should be able to find an option that suits your site’s style.
Create a Custom Login Page for WordPress
By creating a custom login page for WordPress, you can support a more welcoming (and secure) environment for users, members, students, and clients.
Let’s quickly recap some of the different ways you can customize the WordPress login page using Profile Builder Pro:
- Set up redirects from the default WordPress login page to a front-end login page.
- Hide the admin bar after successful user login for specific user roles such as customers and subscribers.
- Allow users to recover their passwords.
- Add Google reCAPTCHA to your login page to protect against spammers and bots.
- Enable users to login with their social media profiles.
- Use the custom form styles that come with Profile Builder Pro.
- Enable passwordless login.
Profile Builder Pro
Create beautiful front-end registration and profile forms with custom fields. Setup member directories, custom redirects, cutomize user emails & more using the all in one user management plugin.
Get Profile BuilderDo you have any questions about how to create a custom WordPress login form? Let us know in the comments section below!
Related Articles

How to Customize the WooCommerce Login Page (No Code Needed)
Searching for a solution to customize the WooCommerce login page and otherwise control login behavior on your WooCommerce store? If you allow (or force) registration on your store, you'll want to create a user-friendly login experience so that your shoppers can easily log in to their accounts and access other key features. In this post, […]
Continue Reading
8 Best WordPress User Registration Plugins
Not sure what WordPress user registration plugin to use for your project? Going through all the WordPress user registration plugins can be disorienting. You may have spent hours and hours searching for plugins and tutorials to help you with your project, and you’re still as confused as you were when you started. Imagine finding the […]
Continue Reading
How to Customize WordPress Email Login Behavior (+ Registration)
Searching for a WordPress email login feature so that you can customize your site's login process, such as requiring users to use their email address instead of a username? By default, WordPress lets users log in with either their username and password or their email and password via the default login page. But if you […]
Continue Reading