

Table of Contents
- 1 How to Plan Your Membership Site the Right Way
- 2 How to Start a Membership Site (Fast and Easy)
- 3 How to Optimize Your Store for Conversions and Earn More Revenue
- 4 How To Start A Membership Site with Paid Member Subscriptions Today
Recurring revenue is the holy grail for most online business owners. One of the most popular ways to monetize your website and add consistent recurring revenue is by learning how to start a membership site.
You can either build a membership site from square one or add membership functionality to your existing site. With the right tools, you can mostly automate your site’s membership program, which means you’ll be able to generate passive income with minimal additional input.
In this step-by-step tutorial, you’ll learn how to start a membership site from scratch, including planning out your membership strategy, choosing a WordPress membership theme, and setting up the Paid Member Subscriptions plugin. We’ll also look at how you can make some key tweaks to optimize your conversions.
Paid Member Subscriptions Pro
Accept (recurring) payments, create subscription plans and restrict content on your website. Easily setup a WordPress membership site using Paid Member Subscriptions.
Get Paid Member SubscriptionsHow to Plan Your Membership Site the Right Way
All successful online membership businesses start with a solid plan. The niche you choose is crucial. Choose the wrong niche, or create the wrong kind of membership site, and all that effort will be wasted.
These two steps, however, will get you moving in the right direction:
1. Determine What Makes Your Site Unique
Why would people join your membership site over another site, similar product, or online course?
Are you offering a membership course to solve a specific problem? Are you creating a unique “tribe”? Do you have exclusive content?
Here are a few examples of unique membership sites:
- Orchids Made Easy. This membership site drip-feeds regular content about how to grow orchids.
- International Gem Society. This membership site provides a huge online community and educational resources dedicated to gemology.
- Training Beta. This membership site is dedicated to helping people level up their skills as rock climbers.
- Food Blogger Pro. This membership site is dedicated to helping people become successful food bloggers.
As you can see, there’s room for a successful membership site in almost every niche.
2. Evaluate Your Idea and Need
Here are two questions you’ll need to ask to evaluate the quality of your own membership site’s business model:
Is There Existing Competition?
Competition is a good thing; the last thing you want is to go into a space with zero competition. Why? Because when you can find competitors, this means that people are comfortable with the idea of spending money in that space.
Look for competing websites or even membership sites in the same niche. You don’t want to build the same website style, but you can come up with new content in an already successful niche.
What is Being Sold?
There are various types of membership websites: some are simply exclusive blogging sites; some sell digital products; others are based on physical eCommerce products.
Take note of what’s currently working and see if there are any gaps in the market. For example, perhaps there are a handful of solid membership email marketing webinars, but what’s really missing is a high-level content marketing strategy course.
You can definitely sell similar products, but if you can uncover a pressing need that isn’t being served by the existing products, that’s even better.
How to Start a Membership Site (Fast and Easy)
Building a membership site doesn’t have to be complicated. As long as you have the right tools, adding complex membership site functionality can be a breeze.
So, here’s a six-step process you can follow to learn how to start a membership website.
1. Lay Your WordPress Foundation
If you’re starting entirely from scratch, then you’ll need to pick up a domain, web hosting, and install WordPress. SiteGround is a great place to start for beginners since it comes with a one-click WordPress install and a variety of domains to choose from.
You’ll also need to choose a WordPress theme that supports a membership site. We’ve compiled an entire list of the best WordPress membership themes to make your search easier.
With your domain and hosting setup, WordPress installed, and your theme activated, it’s time to start building out your membership site.
2. Install and Set Up Paid Member Subscriptions
Next, you’re going to need Paid Member Subscriptions, a powerful all-in-one WordPress membership plugin.
Once you download the plugin from your account, you can upload it via your WordPress dashboard by navigating to Plugins → Add New, then uploading the .zip file containing the plugin.
Once you’ve activated the plugin, you’ll go through a setup wizard, which will help you configure the plugin, create membership pages, and set up your PayPal account for processing payments.
3. Set up Payments
One part of the plugin you’ll want to get familiar with is the payment interface.
Here you’ll be able to see existing payments, monitor the status of payments, edit payments, and be able to diagnose issues in case payment fails to go through.
To pull up your payment interface, navigate to Paid Member Subscriptions → Payments:
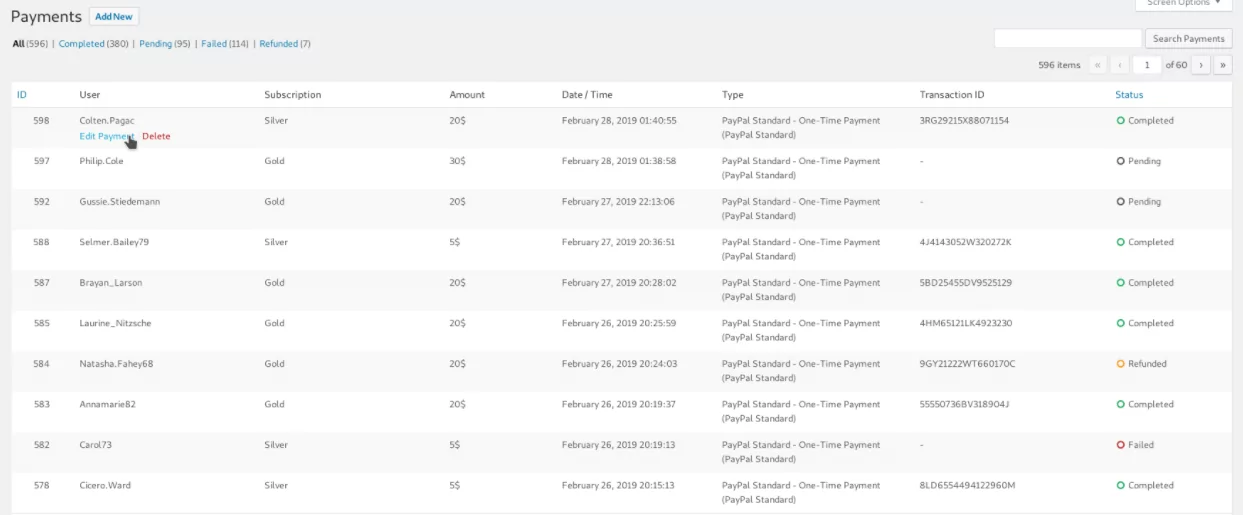
Here are the main payment statuses you’ll need to be aware of:
- Completed. If the payment has been processed effectively, then the status will be marked ‘Completed,’ and you’ll see the associated transaction ID. Once the payment is completed, the user’s subscription will become active.
- Pending. If the user has been redirected to PayPal to complete the purchase, the payment will be marked as ‘Pending.’ Once the payment is complete, PayPal will send a notification, and the status will change to ‘Complete.’
- Failed. If a credit card payment doesn’t go through, the status will be marked as ‘Failed’. You can check the Payment Logs to determine why the transaction didn’t go through.
4. Create Subscription Plans
One of the essential elements of your membership site is going to be your subscription plans. With Paid Member Subscriptions, you can set up tiered subscription plans and allow your users to upgrade or downgrade their plans quickly, depending on your membership model.
To create a subscription plan, navigate to Paid Member Subscriptions → Subscription Plans.
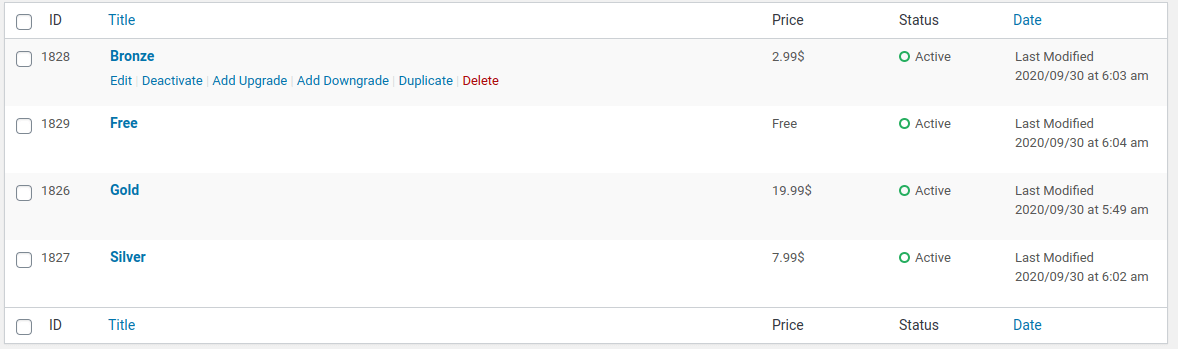
Here you’ll be able to create as many subscription plans as you like, including a free tier, if you want to give users basic access to your membership site.
To add new subscription plans, navigate to Paid Member Subscriptions → Subscription Plans → Add New.
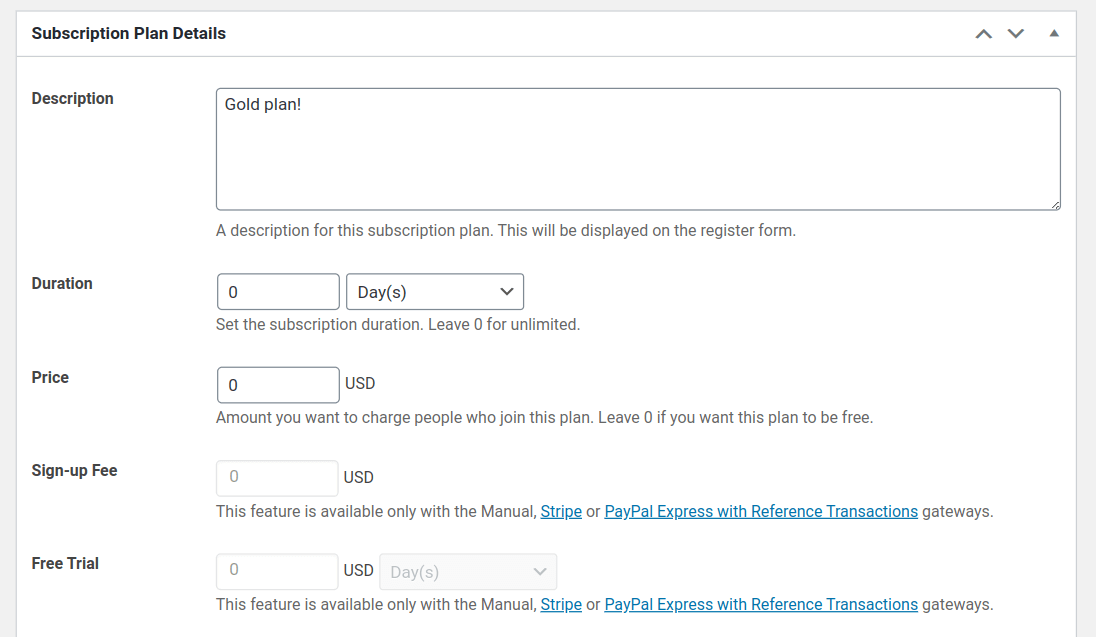
On this screen, you’ll enter information about your subscription plan, including:
- Membership description;
- The duration of the subscription;
- The price of the subscription;
- Whether it’s an active subscription (meaning users can enroll);
- Whether you want to add a user role to the plan, such as “author”.
5. Using and Understanding Shortcodes
Paid Member Subscriptions is equipped with a ton of different shortcodes you can use anywhere across your site. These shortcodes let you add other forms and registration features to your site.
Here’s a breakdown of the shortcodes:
[pms-register]– Creates a registration form that lets users sign up for a subscription plan;[pms-login]– Creates a simple user login form;[pms-logout]– Creates a front end user logout text and link to navigate to another page;[pms-account]– Creates an account form that lets users manage their account information and subscription plans;[pms-recover-password]– Creates a form that lets users securely recover their password;[pms-restrict]– Restricts certain content within a post or page so that you can have protected and non-protected content sharing the same page;[pms-payment-history]– Add a front end table to your site that shows a member’s payment history;[pms-action]– Generate a link that’s tied to a specific action like renewing a subscription, retrying a payment, and more.
Here are a few examples of the shortcodes in action:
Member Registration Form Shortcode
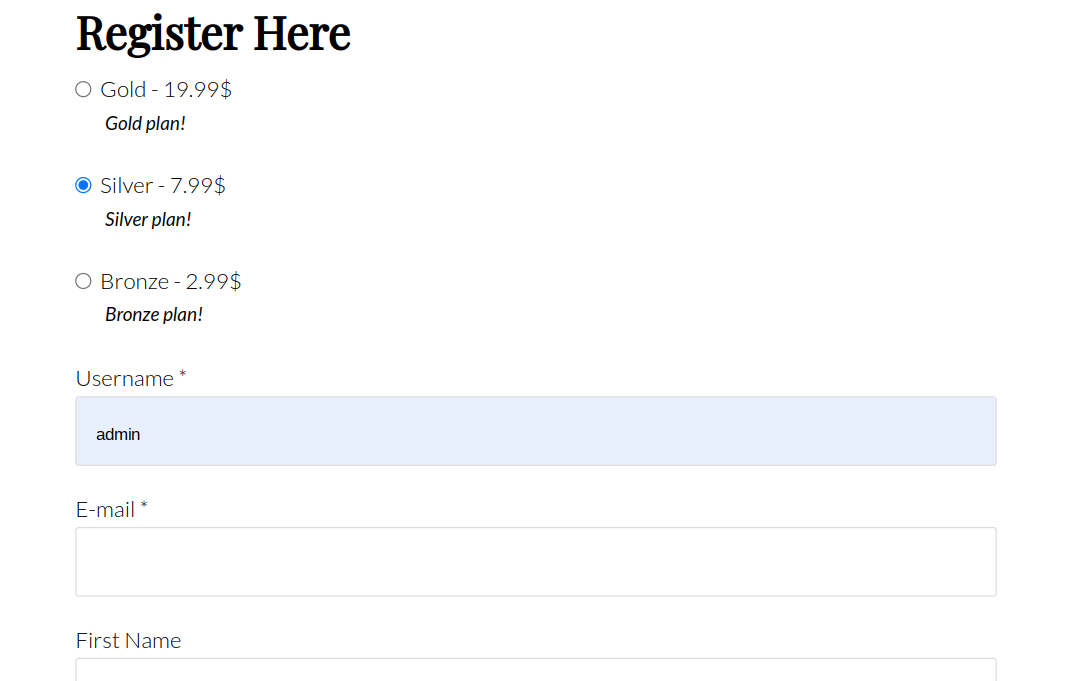
The member registration form shortcode is the simplest shortcode to use. This will display the standard registration form anywhere on your site. Just add the shortcode [pms-register] into any text area.
You can also customize this shortcode with parameters. For example, you can rearrange the order of your registration form fields.
We modified the original shortcode to include ‘subscription_plans’, ‘plans_position’, and ‘selected’: [pms-register subscription_plans="1826,1827,1828" plans_position="top" selected="1827"].
This will list our subscription plans above the rest of the form fields, with the Silver plan automatically selected.
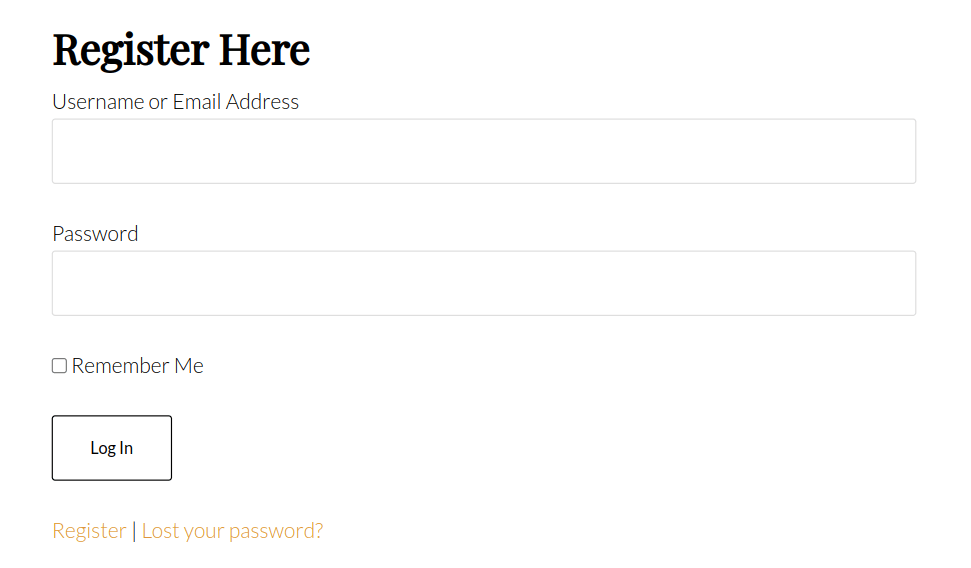
Login Form Shortcode
The login form shortcode [pms-login] lets you add a user login form to your site. This allows your users to log in using a front-end login form instead of the standard WordPress login form.
Here’s how this form will appear to your users:
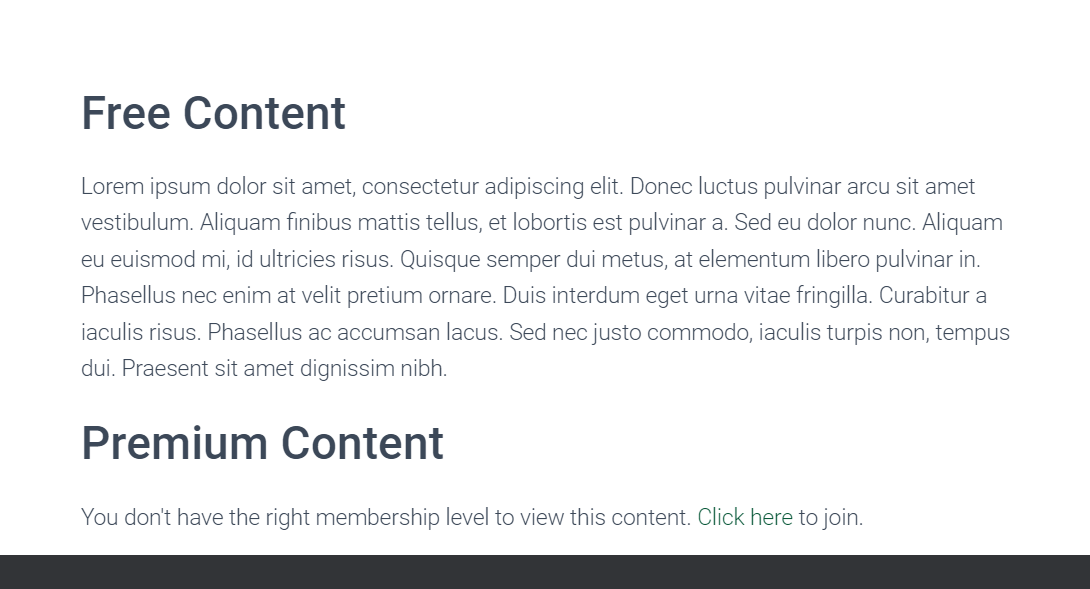
Premium Content Restriction Shortcode
Another great shortcode is the restricted content shortcode. This lets you have private and free content (for non-members) on the same page.
All you have to do is add the content you want to be restricted in between the [pms-restrict] and [/pms-restrict] shortcodes.
Here’s how this will appear to your front end visitors who aren’t logged in:
6. Managing Your Members
With Paid Member Subscriptions, you can manage all of your members, see what subscription level they’re subscribed to, edit membership information, and even manually add new members.
To view your current memberships, navigate to Paid Member Subscriptions → Members:
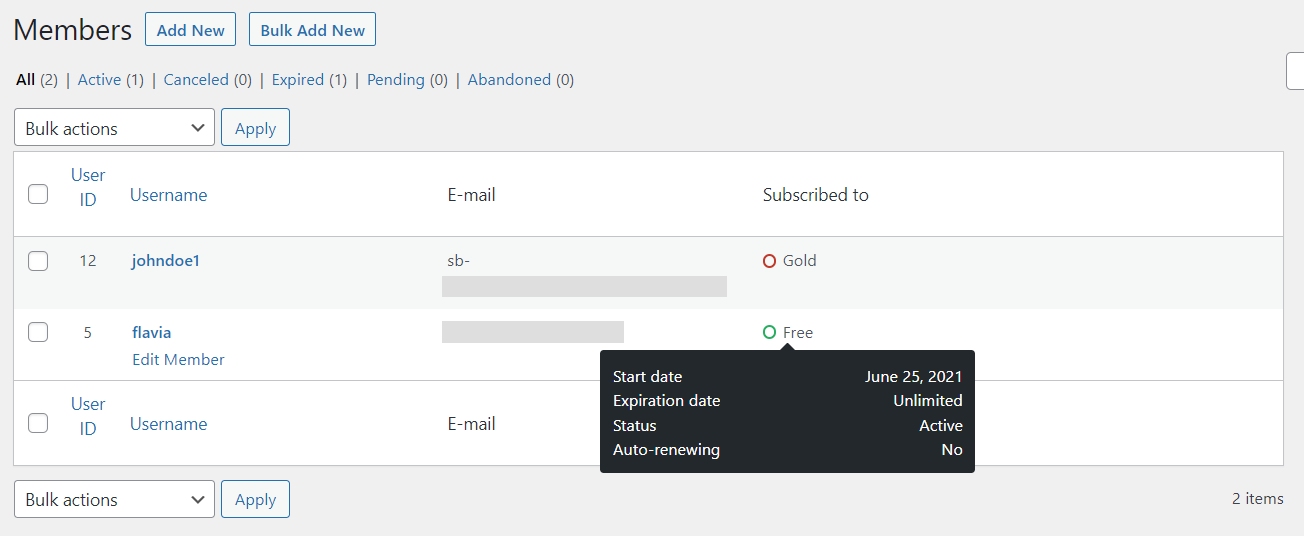
You can filter the membership list based on the plan they’re subscribed to, or whether or not the subscription is active. If you want to view more information about the individual subscription plans, just hover over the plan, and you’ll see a breakdown of that user’s information.
Editing Your Members
When you hover over a specific member, an Edit Member button will appear right under it. On the Edit Member screen, you’ll see a breakdown of the user and any relevant subscription information.
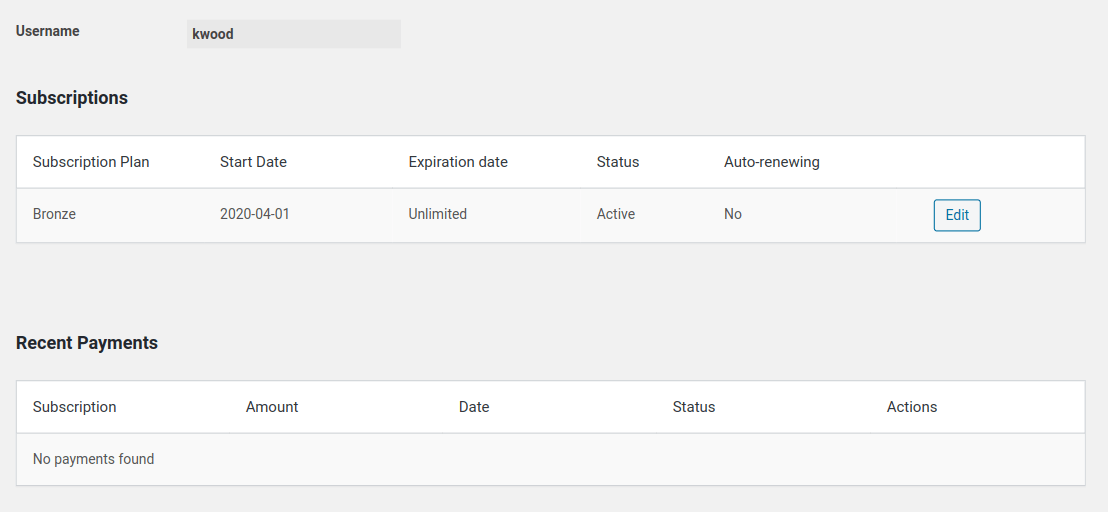
You can modify the following aspects of the member’s account:
- The subscription plan they’re on;
- The start date of the plan;
- The expiration date of the plan;
- The stats of their plan.
Adding New Members
You can manually add a subscription to users on your site who are not yet members. This can be useful if that user is having technical issues or you’ve switched up membership options on your site.
When you open up a member profile, you’ll have the option to change their subscription information.

How to Optimize Your Store for Conversions and Earn More Revenue
Once you have your membership site built and have members rolling in, you’ll want to optimize your store to improve your revenue.
This will help you earn more income with the traffic you already have and encourage more people to sign up and become members.
Here are a few ways you can use Paid Member Subscriptions’ add-ons to improve conversions:
1. Using Discount Codes
Who doesn’t love a discount or coupon code?
The Discount Codes add-on lets you easily add discount codes to your membership levels, products, and more.
You can run promotions on social media and offer new members discounts (or even free membership for a limited time) to encourage them to sign up or reward your existing subscribers to deepen the relationship even further.
2. Automatic Email Reminders
The Email Reminders add-on lets you send automated emails to members when events take place or are about to take place.
For example, you can send emails when a user’s subscription is about to expire or send an automated email when a user hasn’t logged in in a set amount of time. You can also send emails when a subscription has been activated or fully expired.
Staying on top of your email lists is one of the most effective ways to ensure your users continue to subscribe and stay engaged over the long run. This will go a long way towards improving member retention.
3. Offer a Fixed Period Membership
Depending on the type of membership site you’re running, a fixed period membership could be more beneficial. For example, if you have an annual billing period, your users could forget that they signed up, which leads to a very unhappy user when a payment automatically re-bills.
Beyond customer satisfaction, you can also offer a fixed price that’s cheaper overall than the monthly membership option. This lets users pay more upfront and save money compared to the standard monthly pricing plan. This is common practice for most online software memberships.
The Fixed Period Membership add-on lets you set a specific end date for a subscription, no matter when a user subscribes.
4. Recurring Payments
The Recurring Payments add-on lets you accept recurring payments with your PayPal account.
When you have recurring payments, you can offer a lower monthly price to your users. The smaller monthly fee spread out over a year (or however long your user keeps their subscription) can reduce buyer friction since the investment is smaller.
Recurring payments also make it easier for you and your members. Their membership will renew automatically every single month, with no complex billing process.
How To Start A Membership Site with Paid Member Subscriptions Today
Learning how to start a membership site or adding membership functionality to your existing website can be a great revenue source for your business.
Using WordPress, a solid WordPress membership theme, and Paid Member Subscriptions, creating a successful membership site is entirely possible.
The easiest way to get started is by using the Paid Member Subscriptions plugin. This allows you to add paid membership functionality to your site quickly and gives you access to advanced features down the road to further increase your membership site revenue.
Paid Member Subscriptions Pro
Accept (recurring) payments, create subscription plans and restrict content on your website. Easily setup a WordPress membership site using Paid Member Subscriptions.
Get Paid Member SubscriptionsDo you still have questions on how to start a membership site? Ask us in the comments below!
Related Articles
How To Create a Divi Membership Site
If you’re thinking of building a membership site in WordPress, you’ll need a solid theme and a membership plugin that pairs well with it. In this complete guide, we’ll show you how to create a Divi membership site using the popular Divi theme in combination with the Paid Member Subscriptions plugin.
Continue Reading
Membership Blog: Why Start One, Popular Examples and How To
I think you will agree starting a membership blog seems daunting, especially for a first-timer. Talk to just about any beginner who has never created a membership blog (or even a simple website), and they will field questions such as: Why should I start a membership blog? What kind of content, products, or services should […]
Continue Reading
How to Build an Elementor Membership Site with Paid Member Subscriptions
Are you looking to add membership functionality to your Elementor site in WordPress? Perhaps you want to create subscription plans, restrict access to premium content, and accept payments within the popular page builder. The good news is that you can use Paid Member Subscriptions to do all this and more. For example, you can customize restriction […]
Continue Reading