WCK Custom Fields Creator offers an UI for setting up Custom Meta Boxes with Custom Fields for your Posts, Pages or Custom Post Types.
Custom fields are stored as post meta and all the data handling is done with ajax.
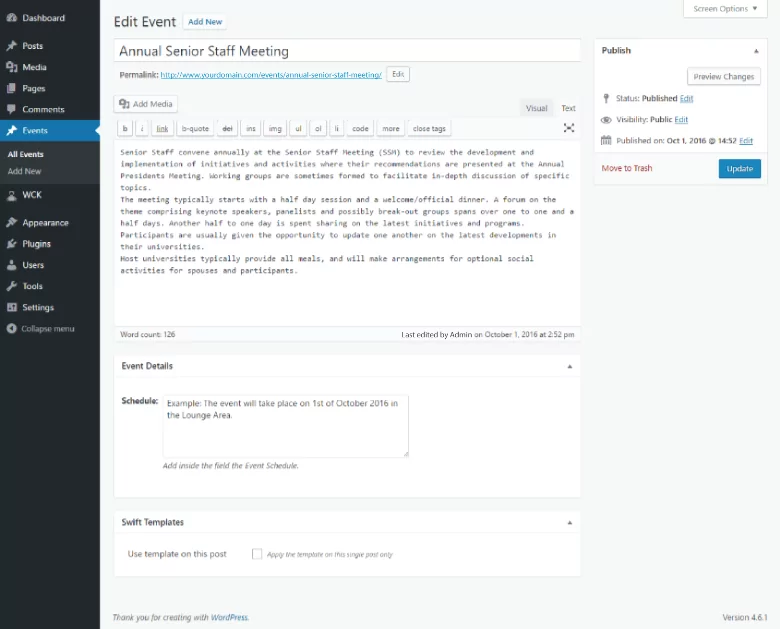
After we setup our Custom Meta Box we can use the Custom Field that is attached to our Custom Post Type.
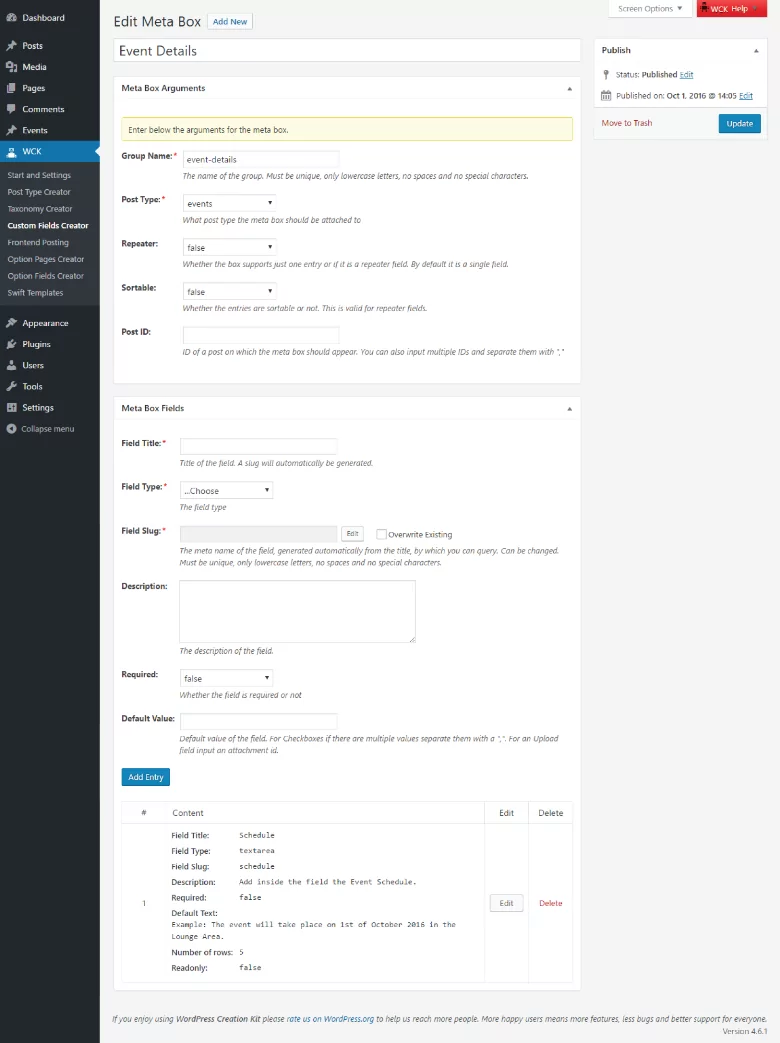
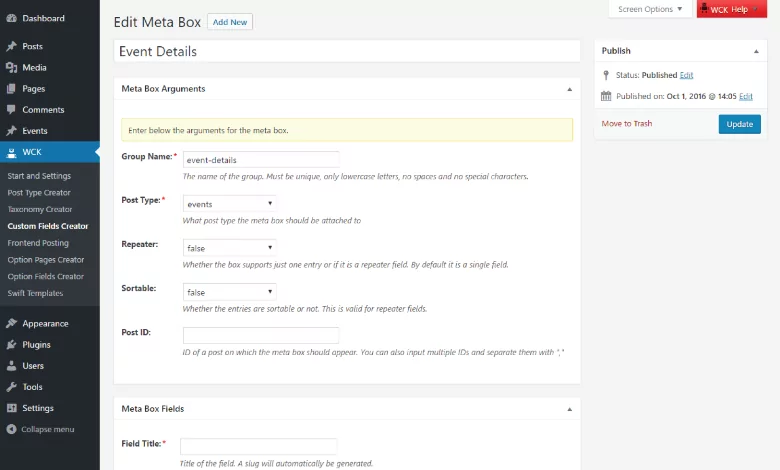
For the Custom Meta Box we can set the following Arguments: Group Name, Post Type, Repeater, Sortable, Post ID and Page Template.
Meta Box Arguments:
You can create 2 types of Custom Meta Boxes: Single Custom Meta Boxes and Repeater Custom Meta Boxes (for Repeater Custom Fields).
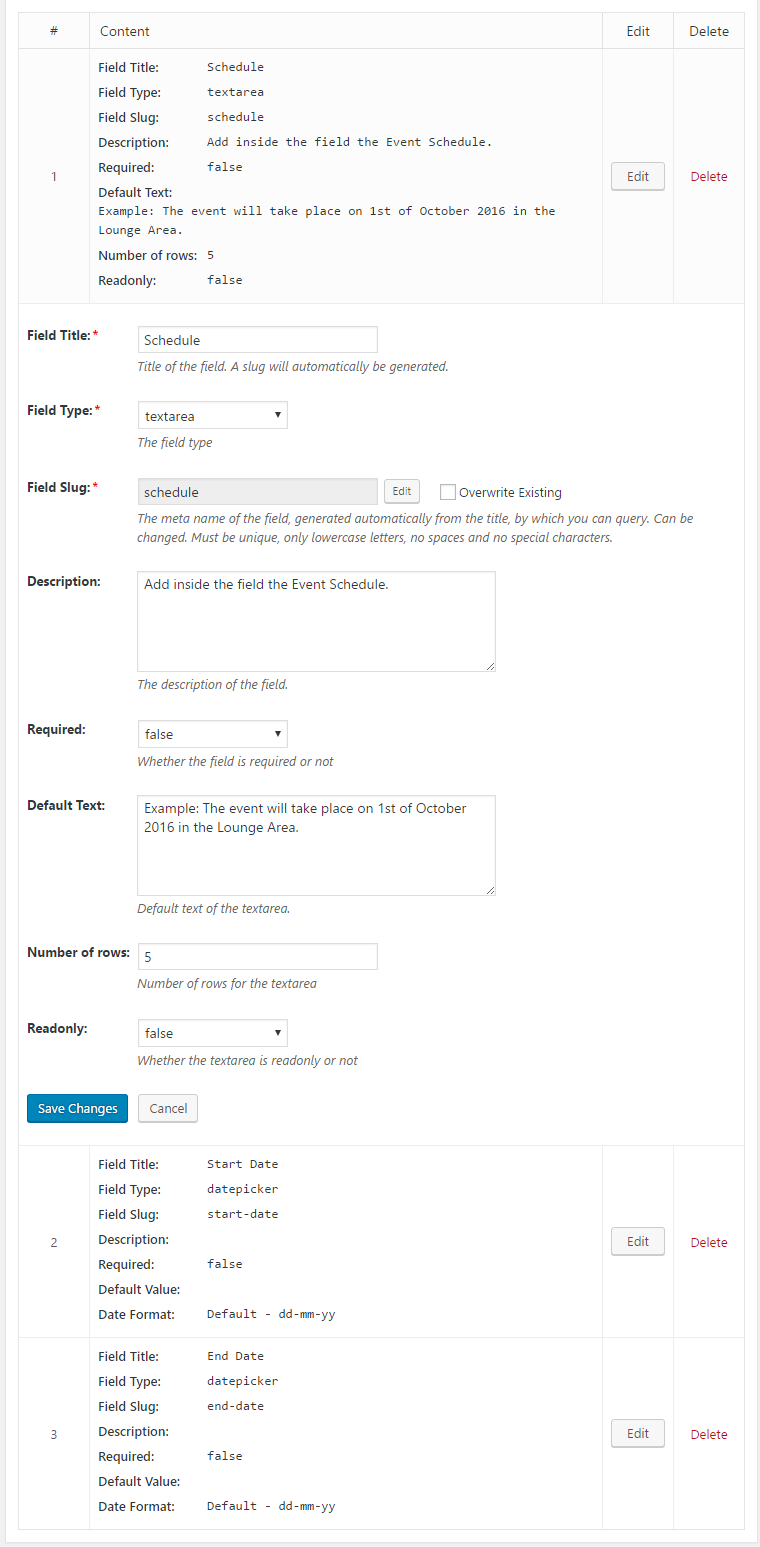
All the Custom Fields created with CFC are displayed inside a Custom Meta Box.
Custom Fields Arguments:
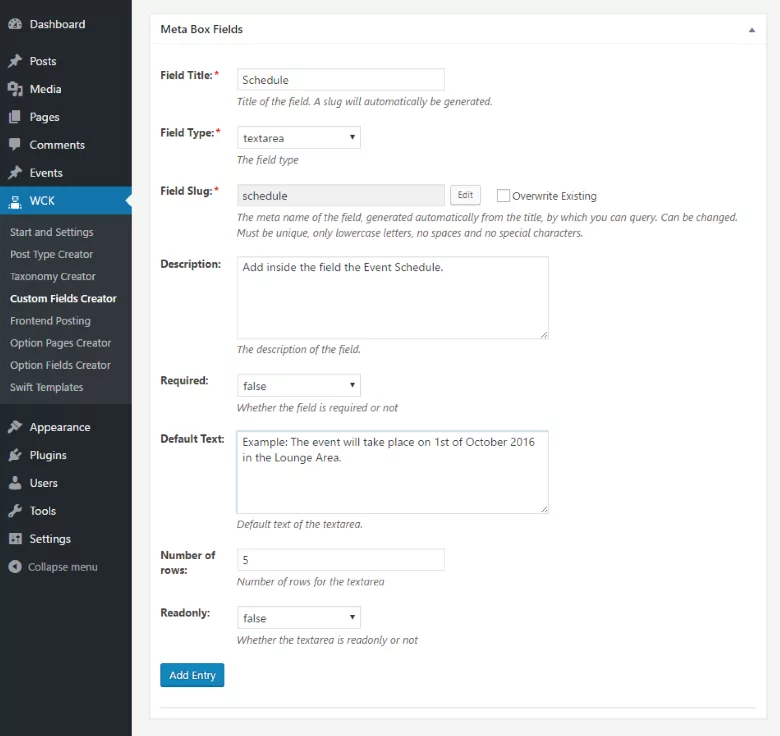
WCK makes it really easy to add Default and Extra Fields Types inside your Custom Meta Box. Under the Meta Box Fields tab, you’ll find an intuitive interface for Adding, Editing, Deleting or Reordering fields.
You can add a field to the Custom Meta Box by simply choosing one of the supported fields from the Field Type drop-down.
Once you select a field type you’ll need to fill in the field properties:
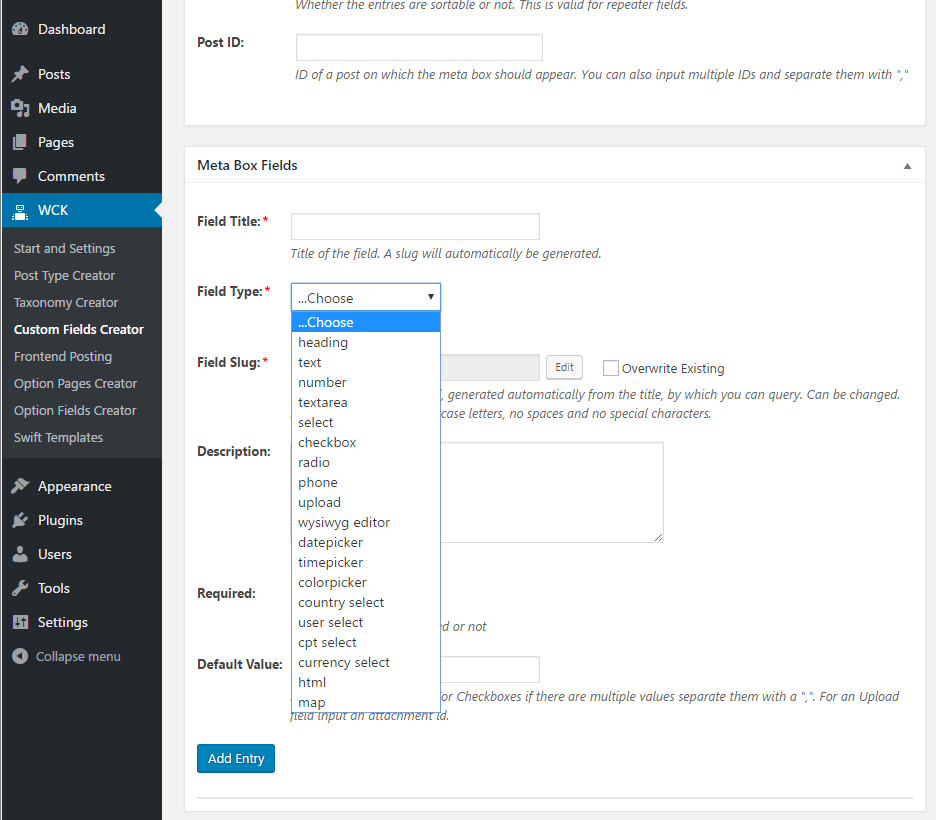
All Free and Premium versions of WordPress Creation Kit supports the following Default Fields Types:
WordPress Creation Kit, both PRO and Hobbyist versions, supports a wide range of Extra Fields Types:
If, before using WCK, you already have a couple of fields attached to Post, Pages or CPTs being saved in the database and want to display and manage them using WCK, all you need to do is create a Meta Box and add each one of them under the Meta Box Fields tab, give them the same meta-name and check the “Overwrite existing” option.

This way you’ll be able to display and update existing fields with WCK.
Meta Box Fields provides a Drag & Drop interface for sorting and reordering both default and extra fields.
You’ll be able to easily mix default and extra fields to fit your needs.
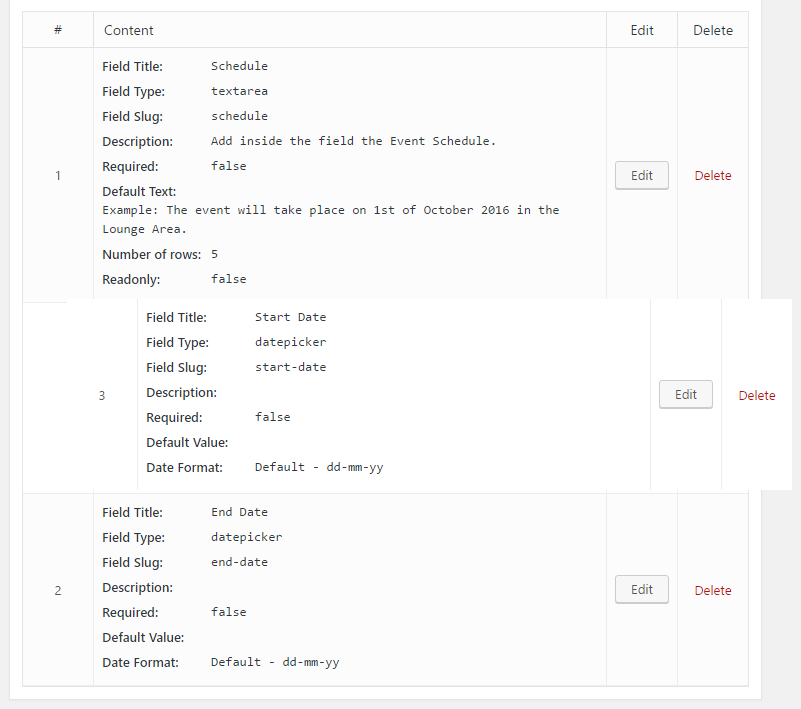
This way you don’t need to worry about the order in which you create your Custom Fields. You can always rearrange them to your liking.
Editing or deleting a field is done by clicking the Edit or Delete buttons from the fields table.
To add HTML tags inside input fields like the Text field you will need to use the following custom code:
add_filter( 'wck_pre_sanitize_value', 'wck_bypass_default_sanitization' );
function wck_bypass_default_sanitization( $bool ){
return true;
}

add_filter( 'wck_sanitize_value', 'wck_sanitize_value_change', 10, 2 );
function wck_sanitize_value_change( $value, $meta_name ){
if( is_array( $value ) )
$value = array_map( 'wck_basic_sanitize_value', $value );
else
$value = wck_basic_sanitize_value( $value );

return $value;
}

function wck_basic_sanitize_value( $string ){
return preg_replace( '/<script\b[^>]*>(.*?)<\/script>/is', '', $string );
}
Combine the power of Profile Builder with Paid Member Subscriptions to set up user registration, memberships, and recurring revenue.
Get 25% off with the bundle
