Table of Contents
This Default Field Type is available in WordPress Creation Kit free version. The Checkbox Field creates a list of thickbox options. A Checkbox Field can be used to get Yes / No responses from the user.
To add a Checkbox Field to a previously created Custom Meta Box, under the Meta Box Fields tab simply insert a Field Title and under Field Type make sure you select Checkbox.
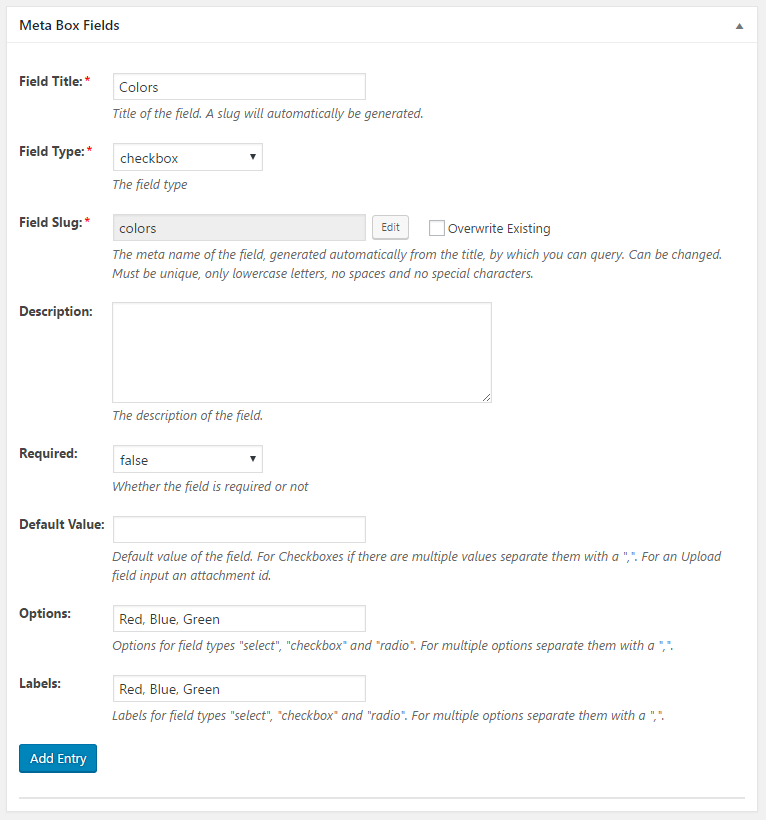
The Checkbox Field contains options to customize it:
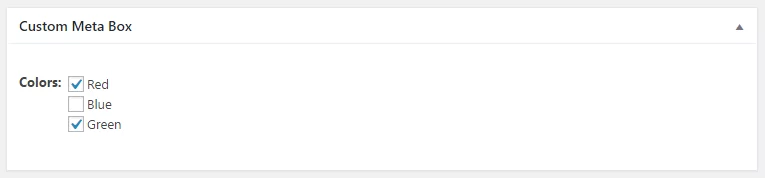
This is how the Checkbox Field we created above looks like in the Edit Screen:
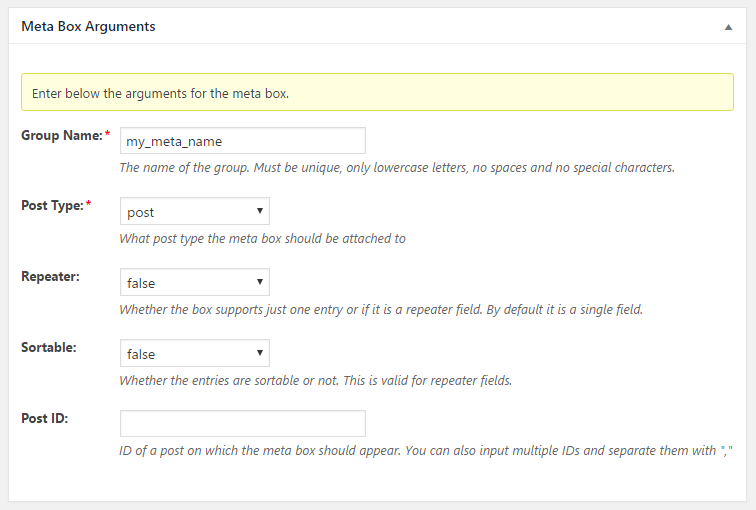
The following examples are for a Custom Meta Box with the “Group Name” argument “my_meta_name“. Make sure to replace this with the “Group Name” you have set up. The Custom Meta Box below is setup to be attached to a post.
The Checkbox Field returns a string or an array.
To output a value inside the loop we use the function the_cfc_field() which for the Checkbox Field echoes a string with all the selected values separated by comma.
Colors:
To assign the value to a variable we use the function get_cfc_field() which for the Checkbox Field returns an array of all the selected values:
To output all the “Colors” entries from the repeater field we use the functions get_cfc_meta() and the_cfc_field():
To output a specific “Colors” entry from the repeater field (e.g. the second entry), we use the function the_cfc_field():
The index starts at 0 so that’s why we pass “1” to the function. For the first entry it would be “0”, the second is “1”, the third is “2” and so on…
The Checkbox Field returns a string or an array.
To output all the “Colors” entries in the repeater field:
To output a specific “Colors” entry from the repeater field (e.g. the second entry):
The index starts at 0 so that’s why we pass “1” to the function. For the first entry it would be “0”, the second is “1”, the third is “2” and so on…
Combine the power of Profile Builder with Paid Member Subscriptions to set up user registration, memberships, and recurring revenue.
Get 25% off with the bundle
