

Table of Contents
By default, WordPress sends boring, plain text emails for key actions such as new user registration, password resets, and so on. Therefore, you may be searching for a way to customize WordPress emails with your own unique designs.
That’s where the Profile Builder plugin comes in. This tool enables you to customize a variety of email templates. For example, you can adjust their designs to match your site and edit the content to provide as much information as you’d like.
In this post, we’ll look at some important WordPress emails that you might want to customize. Then, we’ll show you how to create your own WordPress custom email template. Let’s dive right in!
Types of WordPress Emails You Can Customize
Before we get into the tutorial, let’s talk about the types of WordPress custom emails that you’ll be able to customize.
In this tutorial, we’ll focus on emails that your site sends to users for key actions, including:
- Registration email success message
- Registration email asking for email confirmation
- Admin approval for new registration (or disapproval)
- Password reset email
- Password reset success email
- Changed email address
To customize these WordPress emails, you’ll need the Profile Builder plugin.
Profile Builder Pro
The best plugin to customize WordPress emails without needing any technical knowledge.
Get Profile BuilderProfile Builder gives you full control over the WordPress registration, login, and edit profile functionalities. You can create custom registration and edit profile forms and then you can also customize all of the emails involved in that.
You can use the same template for all of your emails and just adjust the content. Alternatively, you can create unique templates for each email if you prefer
Best of all, this method requires zero technical knowledge and you’ll be able to customize the email designs using a visual, drag-and-drop builder. With Profile Builder, you can fully customize your emails using custom HTML as well as merge tags to insert dynamic information such as a user’s name, email, and so on.
The email customizer feature is available on the Pro license.
Profile Builder Pro
The best plugin to customize WordPress emails without needing any technical knowledge.
Get Profile BuilderHowever, if you’re not a developer, you might not be able to write the custom HTML for your email design. Don’t worry! As we promised above, you do not need to be a developer to follow this tutorial.
Instead, you can use one of the many free email editors out there to create the HTML design of your email using a visual, drag-and-drop editor.
For this tutorial, we’ll use the Beefree editor, but the same process applies to other email editors as well.
Then, you’ll be able to use that design for your WordPress emails thanks to Profile Builder – all you’ll need to do is copy and paste the code from Beefree (or the editor of your choosing) to Profile Builder.
Note: If you’re using Paid Member Subscriptions to create a membership site, we’ll also talk about how to customize all of the emails that it sends, including subscription activation, renewal, and so on.
How to Customize WordPress Emails Using Profile Builder
Now, let’s get into our step-by-step guide on how to customize WordPress emails using Profile Builder and Beefree.
1. Install and Configure Profile Builder
To begin, you’ll want to install and activate the Profile Builder plugin on your WordPress site.
The Email Customizer requires the Pro license, so make sure to purchase at least the Pro license.
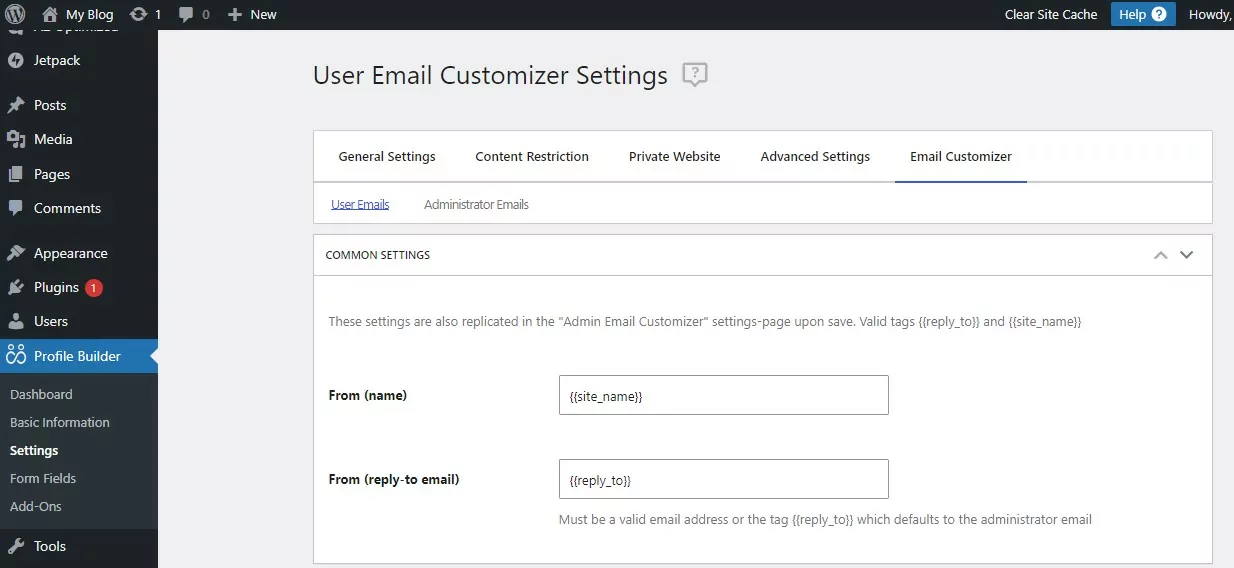
Once you’ve activated the pro version of the Profile Builder plugin, you can go to Profile Builder → Settings → Email Customizer:
Note that you can also use Profile Builder to create a custom registration page and login page. While that isn’t the focus of this article, we do have lots of posts on how to use Profile Builder to improve your site’s registration and user account functionality.
Here are some useful guides if you’re interested:
- Create a custom registration form
- Create a custom frontend user profile page
- Add a custom login form anywhere on your site
2. Create Your Email Template Using an Email Editor
Now, you’re ready to design the WordPress custom email template that you’ll use for your emails.
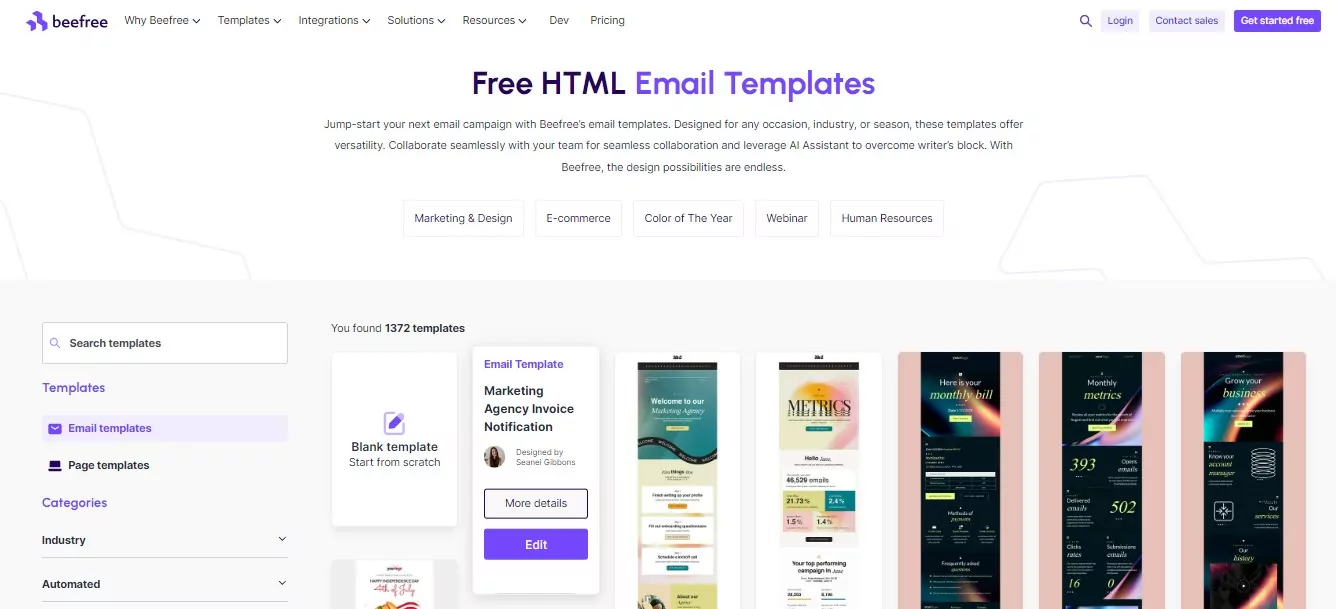
To create this without needing any technical knowledge, you can use the free Beefree editor. You can click here to view free email templates from Beefree.
In terms of the starting point of your design, you have two options:
- You can select a premade template by hovering over it and clicking on Edit.
- You can design your own template from scratch by clicking on the Start Designing button under the Blank Template option.
Choosing one of those options will launch you into the visual Beefree editor. You’ll either see a blank canvas or the template that you selected.
You can now use the editor to create/tweak your design. If you’ve ever used a WordPress page builder plugin, the editor uses a similar interface.
You can drag content elements in from the right and then customize them to adjust your design. You can also use rows to group content elements together and create multi-column layouts if needed:

Make sure to preview your emails on both desktop and mobile so that you can see how they’ll look for all visitors. The mobile preview option is in the top-left corner of the editor:

Beefree also includes an option to let you send a test email so that you can see how it will look in your email client.
Optional: Add Merge Tags to Insert Dynamic Information
This step is optional. However, you might have situations where you want to dynamically insert a user’s information in your emails.
For example, you might want to include someone’s username in the registration confirmation email.
To do this, all you need to do is add one of Profile Builder’s merge tags where you want the dynamic information to appear.
For example, to address each user by their username, you could write something like this in Beefree:
“Hi {{username}}, welcome to {{site_name}}”
To see a full list of merge tags for the email that you’re designing, you can open your WordPress dashboard and go to Profile Builder → Settings → Email Customizer. Find the email that you want to customize and then look for the Available Tags list:

You can copy any of these tags into your email template.
3. Download Email Template HTML
Once you’re happy with how your email template looks, you’re ready to export and download the HTML for that template.
To do this, click on the Save button in the Beefree editor. That will prompt you to create a free Beefree account.
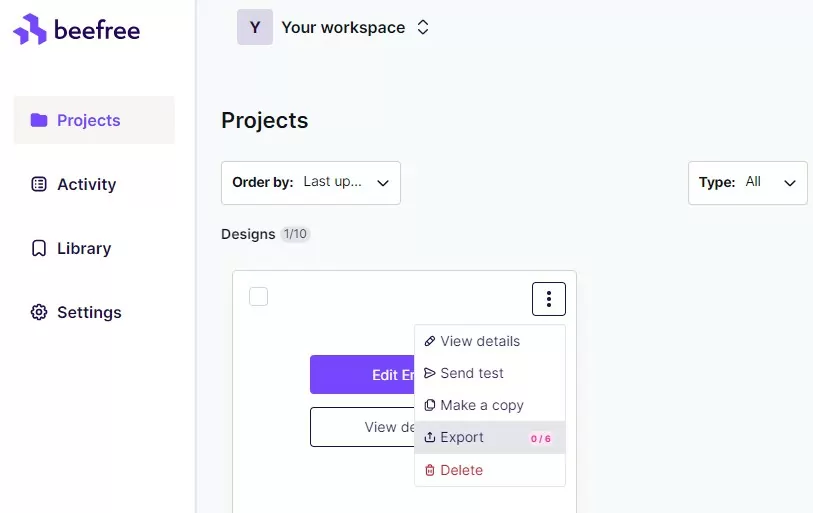
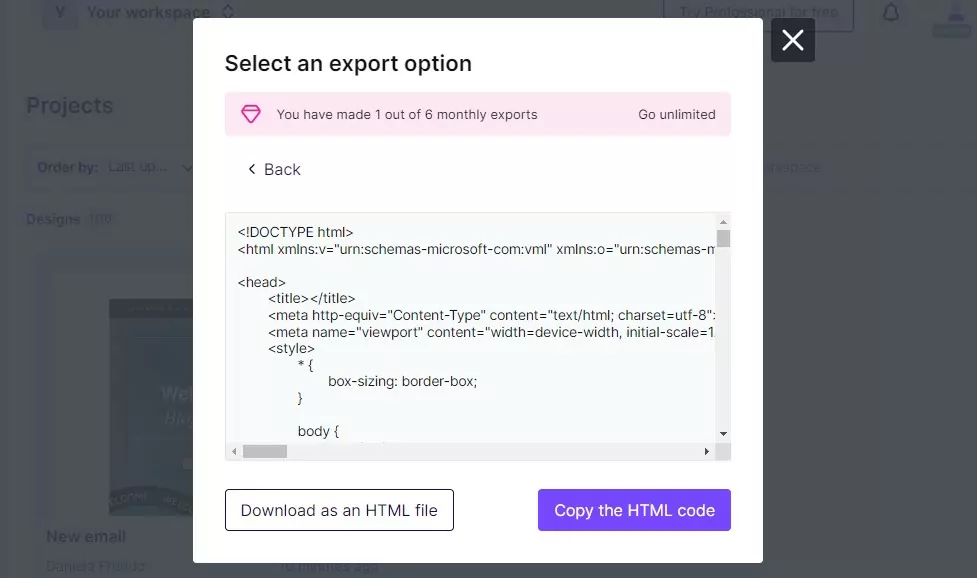
Once you do that, you’ll be able to see your Projects list. Select the template that you just created by clicking the three dots icon and selecting Export:
In the popup that appears, select the option to Copy the HTML:
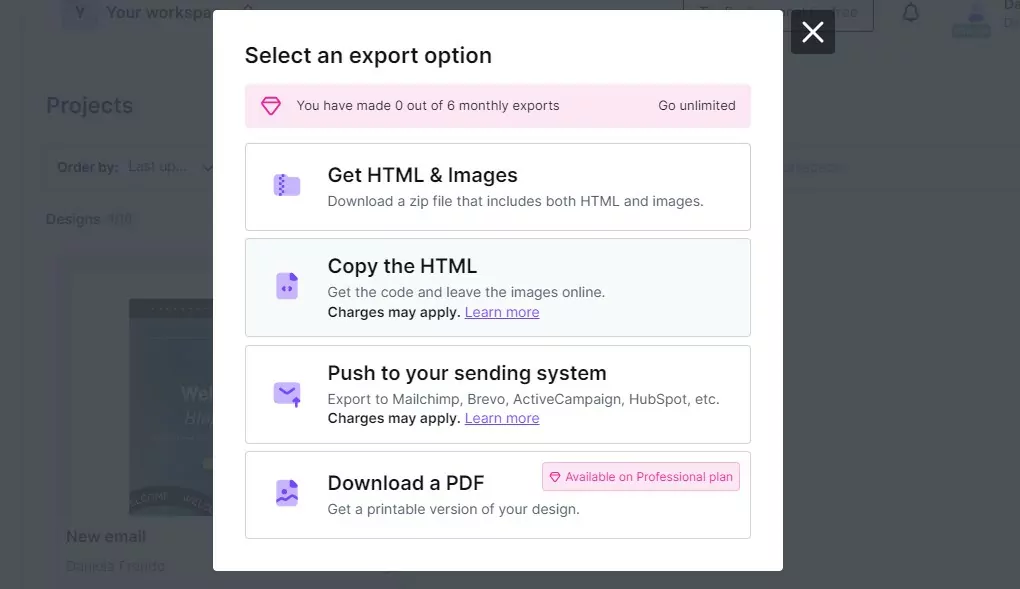
If you included images in your design, you can also select the Get HTML & Images option. This will download everything to your computer. You’d need to open the HTML in a text editor and then upload the images to your WordPress site (and update the image URL locations in the HTML).
If you chose Copy the HTML, you’ll now see a code snippet in the popup. Select the option to Copy the HTML code to save it to your clipboard:
That’s it. You can now return to your WordPress website
4. Add HTML Email Template to Profile Builder
Now that you have the HTML code for your email template, you’ll need to add it to your WordPress site.
In your WordPress dashboard, go to Profile Builder → Settings → Email Customizer. Locate the email template that you want to customize. Then, paste the HTML that you copied from Beefree into the HTML editor box for that email:
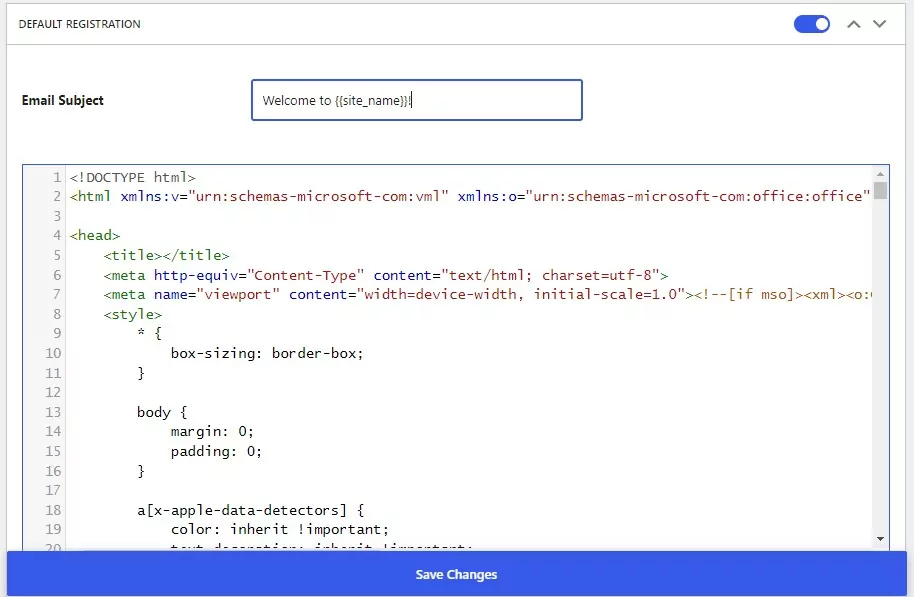
Then, click on the Save Changes button.
And that’s it! Your site will now start using this custom email template!
5. Repeat for Other Emails
If you want to customize additional emails, you can repeat the steps above as needed to create unique emails for different actions.
You can use your existing email template as the base and just adjust the text/content. Or, you can create a completely different template with a unique design if you’d prefer.
In addition to customizing the emails that your site sends to users, you can even customize the emails that site admins receive from the Administrator Emails tab:
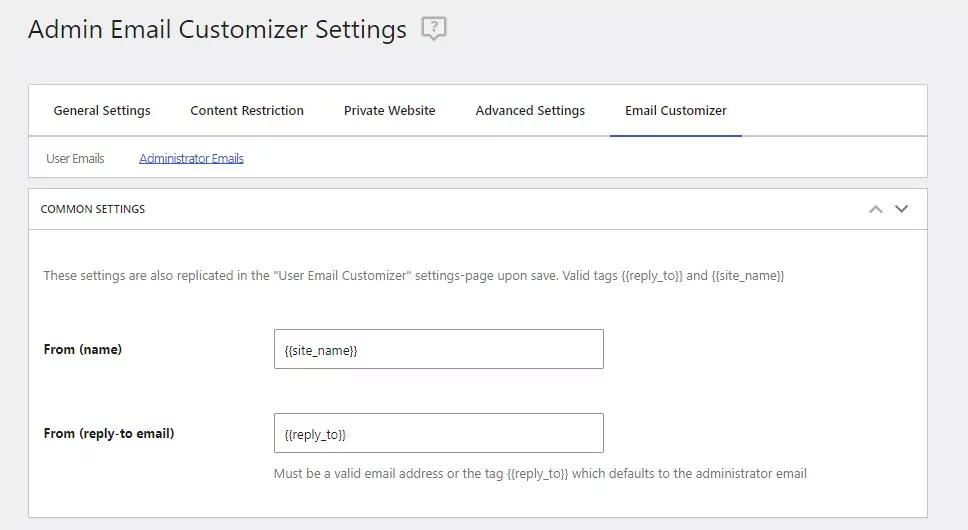
You can just follow the same process as above.
Bonus: How to Work With Custom WordPress Emails in Paid Member Subscriptions
If you want to customize the core WordPress registration, login, and edit profile emails, you’ll just need the Profile Builder plugin.
However, if you’re using Paid Member Subscriptions to create a WordPress membership site, you might also want to customize the emails that the plugin sends for important actions such as new subscriptions, upcoming renewals, and so on.
Paid Member Subscriptions Pro
Accept (recurring) payments, create subscription plans and restrict content on your website. Easily setup a WordPress membership site using Paid Member Subscriptions.
Get Paid Member SubscriptionsCreating custom WordPress emails for Paid Member Subscriptions works pretty much the same, just with a few minor differences.
To begin, you can use the free Beefree editor as we showed you above. All of the steps are the same, from creating the template to exporting the HTML. However, you’ll need to add them to WordPress in a slightly different way because you’re working in Paid Member Subscriptions instead of Profile Builder.
Once you’ve exported the HTML for your email, you can go to Paid Member Subscriptions → Settings → E-Mails:
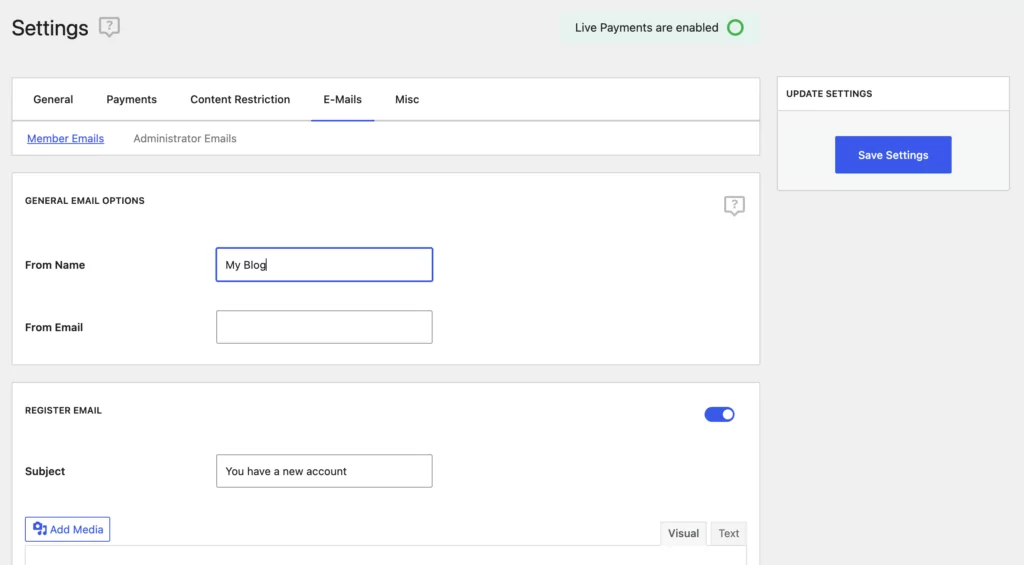
Find the email that you want to customize and just paste in the HTML for your email in the text box.
This is also where you can find the relevant merge tags for Paid Member Subscriptions, if you’d like to include them in your Beefree email design. You have different options here than what you get with Profile Builder, so you might need to adjust the merge tags in your emails.
Customize Your WordPress Emails Today
With Profile Builder and the free Beefree editor, it’s easy to fully customize WordPress emails. You can also use any other email editor to create the template design for your emails without needing any HTML or CSS knowledge. Profile Builder makes it easy to apply those HTML templates to WordPress, along with inserting dynamic information using merge tags when needed.
Profile Builder Pro
The best plugin to customize WordPress emails without needing any technical knowledge.
Get Profile BuilderPlus, Profile Builder can also help you customize other aspects of your site’s user experience, such as building custom registration forms. If you’re using Paid Member Subscriptions to create a WordPress membership site, you can also use the same approach to customize all of the emails sent to users.
Do you still have any questions about how to customize WordPress emails when using Profile Builder? Let us know in the comments!
Related Articles

How to Automate WordPress with a Workflow Automation Tool
Interested in WordPress automation but not sure where to begin? In this post, we're going to cover everything that you need to know about automating WordPress. We'll start with some of the different reasons to consider using automations. After that, we'll give you a generalized tutorial on how to use a WordPress automation plugin named […]
Continue Reading
Roundup of WordPress ecosystem #1 – January 2017
After writing the article "Overview of the WordPress Community in 2016" and getting feedback for the article on various platforms, I decided to continue writing them, but I changed its name into "Roundup of WordPress ecosystem". This is the first article from a monthly series that will showcase what happened around the whole ecosystem in […]
Continue Reading
How to Create a Website for Affiliate Marketing
If you’re looking for a side hustle or want to create a passive income stream, affiliate marketing can be a good option. This involves promoting products by other companies, which can lead to commissions on sales and leads. But to get started, you’ll need to set up a website. Thanks to WordPress, creating a website […]
Continue Reading