

Table of Contents
Trying to add RECAPTCHA to WordPress?
Because WordPress is so popular, it’s an attractive target for spammers who are looking to create fake registrations or try to brute force your login page to take over your site.
One easy way to protect your site from spam and to secure your login process is to add a WordPress login CAPTCHA powered by Google reCAPTCHA. If you allow public registration, you also might want to add a CAPTCHA to your registration and lost password forms to prevent abuse there as well.
There’s no built-in reCAPTCHA WordPress functionality in the core software, but you can easily add reCAPTCHA to WordPress with a plugin, and that’s what this post is focused on.
In this beginner-friendly guide, we’ll show you how to add reCAPTCHA to WordPress login, registration, and lost password forms using the free Profile Builder plugin.
This method is free and requires zero code or technical knowledge – all you need to do is install a plugin and click some buttons and you can start protecting your site like this:
Ready to get started? Let’s jump in.
What Is Profile Builder? How Does It Help You With WordPress reCAPTCHA?
Profile Builder is a free WordPress plugin that helps you upgrade your WordPress login, registration, and user profile functionality.
With Profile Builder, you have two options for using reCAPTCHA:
- You can add reCAPTCHA to your default WordPress login, register, and password recovery forms.
- You can use Profile Builder to create new, custom login, registration, and password recovery forms that include reCAPTCHA. The advantages of this approach are that you can place the forms anywhere on your site and you can also fully customize the fields on your registration form.
Or, you can do both! Let’s look at some examples…
Examples of the WordPress Login CAPTCHA
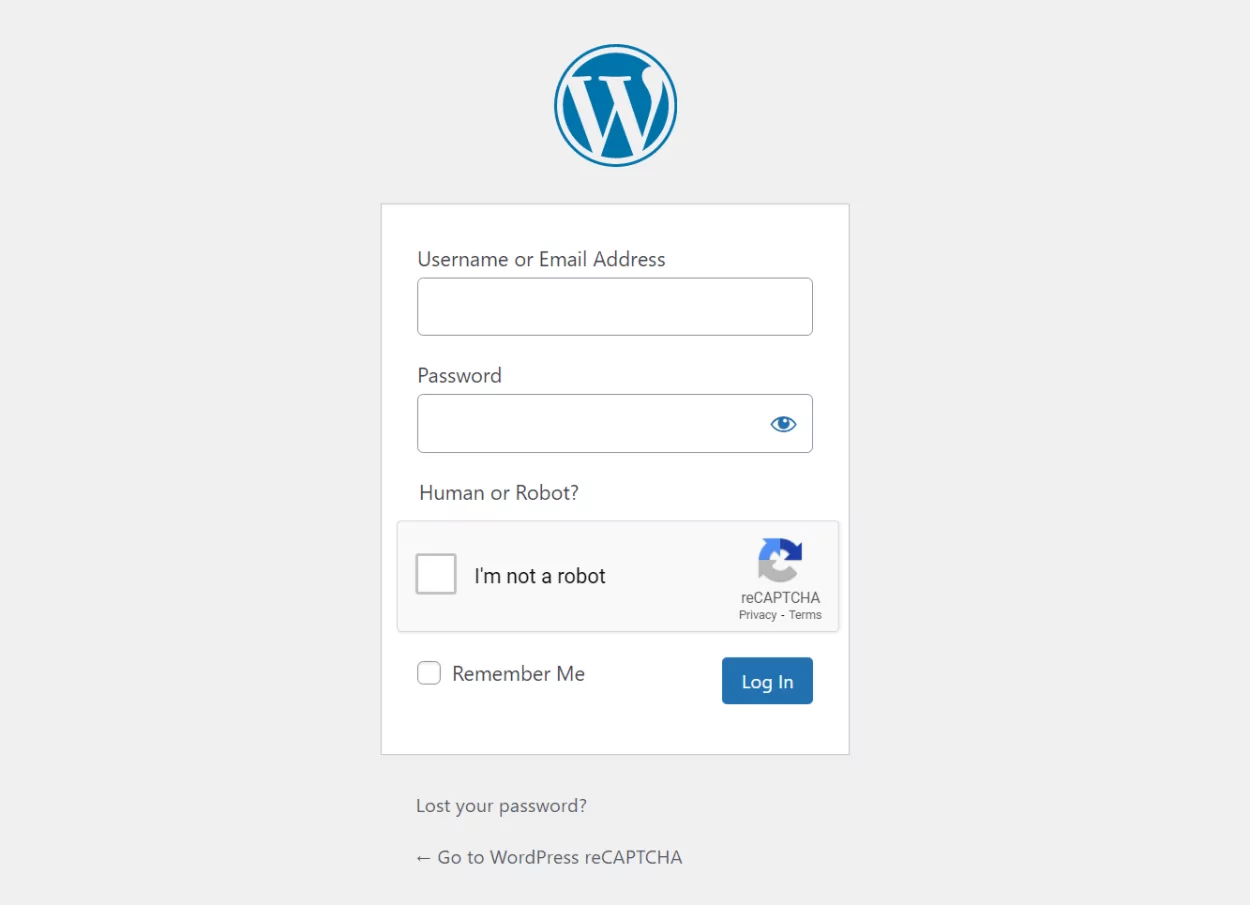
Here’s an example of what a WordPress login CAPTCHA looks like on the default WordPress login form:
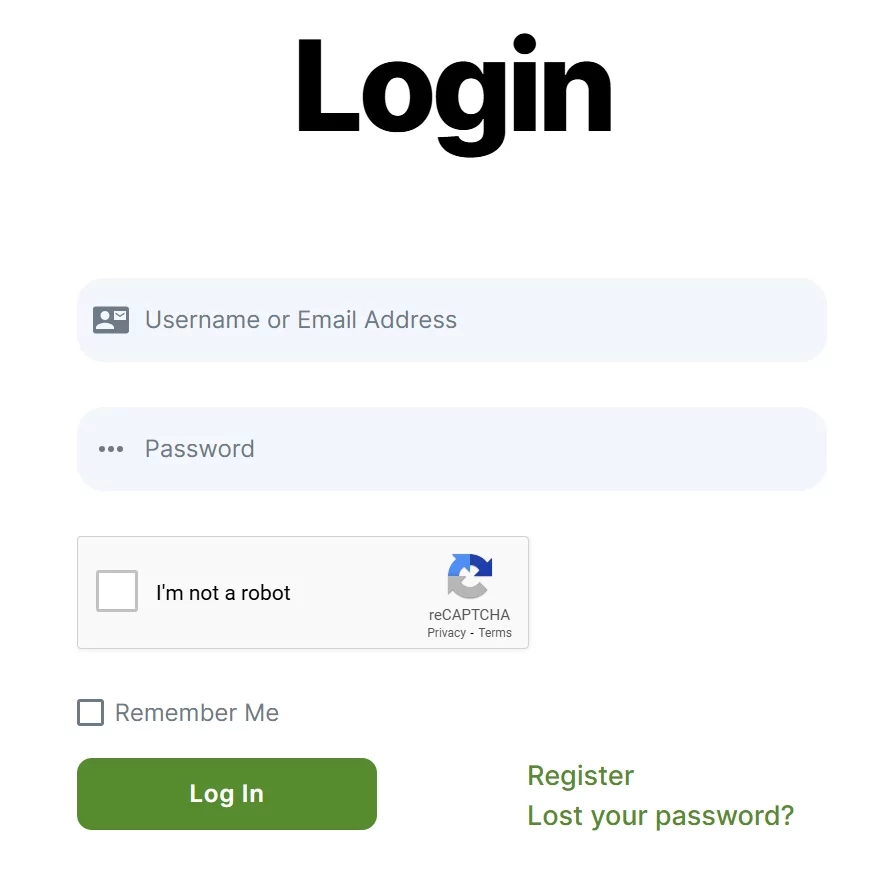
And here’s an example of what the WordPress login CAPTCHA looks like on a custom form:
If you allow registration, you can also add reCAPTCHA to the default or custom registration form, as well as your password reset forms.
Profile Builder Pro
Create beautiful front-end registration and profile forms with custom fields. Setup member directories, custom redirects, cutomize user emails & more using the all in one user management plugin.
Get Profile BuilderHow to Add reCAPTCHA to WordPress
Now that you know how Profile Builder works, let’s get into how you can use it to set up reCAPTCHA on your site. Watch the short video below, or keep scrolling for the full tutorial.
1. Install and Activate the Profile Builder Plugin
To begin, install and activate the free Profile Builder plugin from WordPress.org.
While there is a premium version of Profile Builder that adds lots of useful features, the reCAPTCHA functionality is available in the free version, so you won’t need to pay anything to add reCAPTCHA to your site.
2. Customize and Display Your Forms (Optional)
You can skip this step and go to the next one if you want to continue using the default WordPress login, registration, and lost password forms.
However, as we mentioned earlier, one of the advantages of using Profile Builder over another reCAPTCHA WordPress plugin is that Profile Builder lets you create your own custom registration, login, and lost password forms (as well as a front-end edit profile form, though you don’t need a CAPTCHA for that because it’s only visible to logged-in users).
You can use shortcodes to place these forms anywhere on your site, including in page builder designs from plugins like Elementor. This means that you can create a better URL (e.g. yoursite.com/login) and you can also customize the design of your login and registration pages.
What’s more, if you allow public registration, you can also fully customize the fields on your registration form.
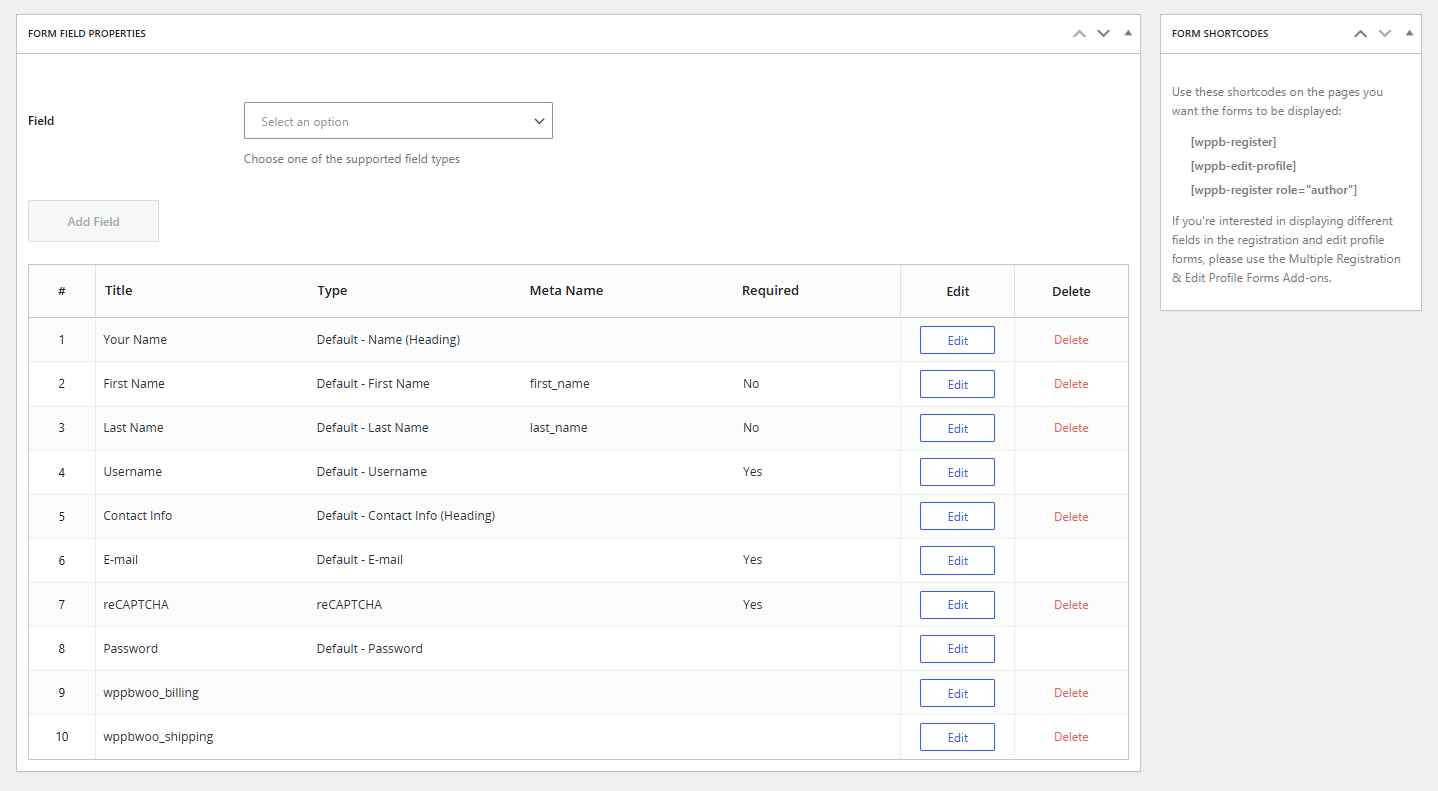
If you do want to do this, go to Profile Builder → Form Fields to control the fields that appear on your form. You can add new fields and edit/remove the existing fields. You can also use drag-and-drop to change the order of the fields on your form.
For more details here, check out these posts:
Once you’re happy with the fields on your form, you can use Profile Builder’s shortcodes to display your forms anywhere on your site.
Here are the shortcodes that you’ll need to add:
- Registration form –
[wppb-register]– you can also add a role parameter to automatically assign users who use this form to a specific WordPress user role. For example,[wppb-register role="author"]. - Login form –
[wppb-login]– you can also redirect users to a custom page after they login by adding a parameter like this. - Lost password form –
[wppb-recover-password]
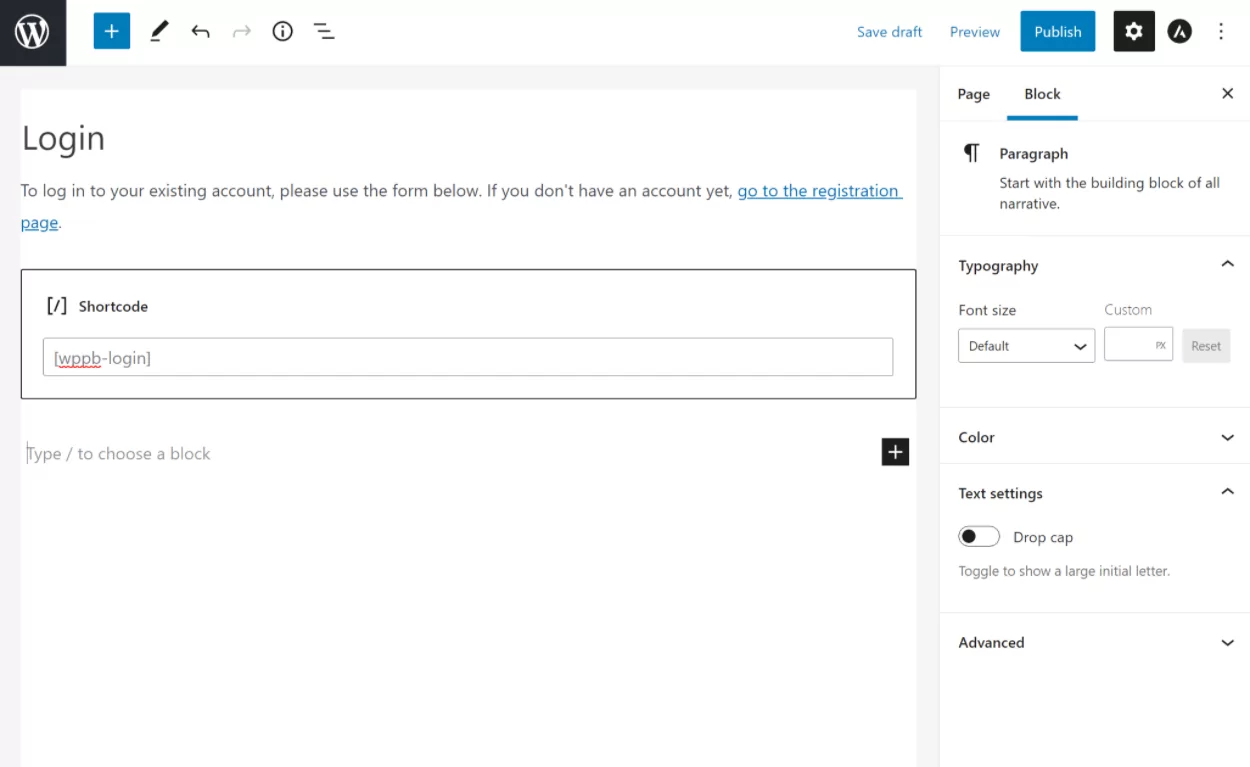
For example, to create a dedicated login page, you would create a new page (Pages → Add New) and include the shortcode. You can also add your own custom content if needed:
3. Create Your Google reCAPTCHA API Key
In order to connect your WordPress site to the Google reCAPTCHA service, you need to generate a reCAPTCHA API key from Google.
This API key is free to generate and use (up to one million requests per month, which your site will almost certainly never come close to exceeding).
To create a key, you can click this link.
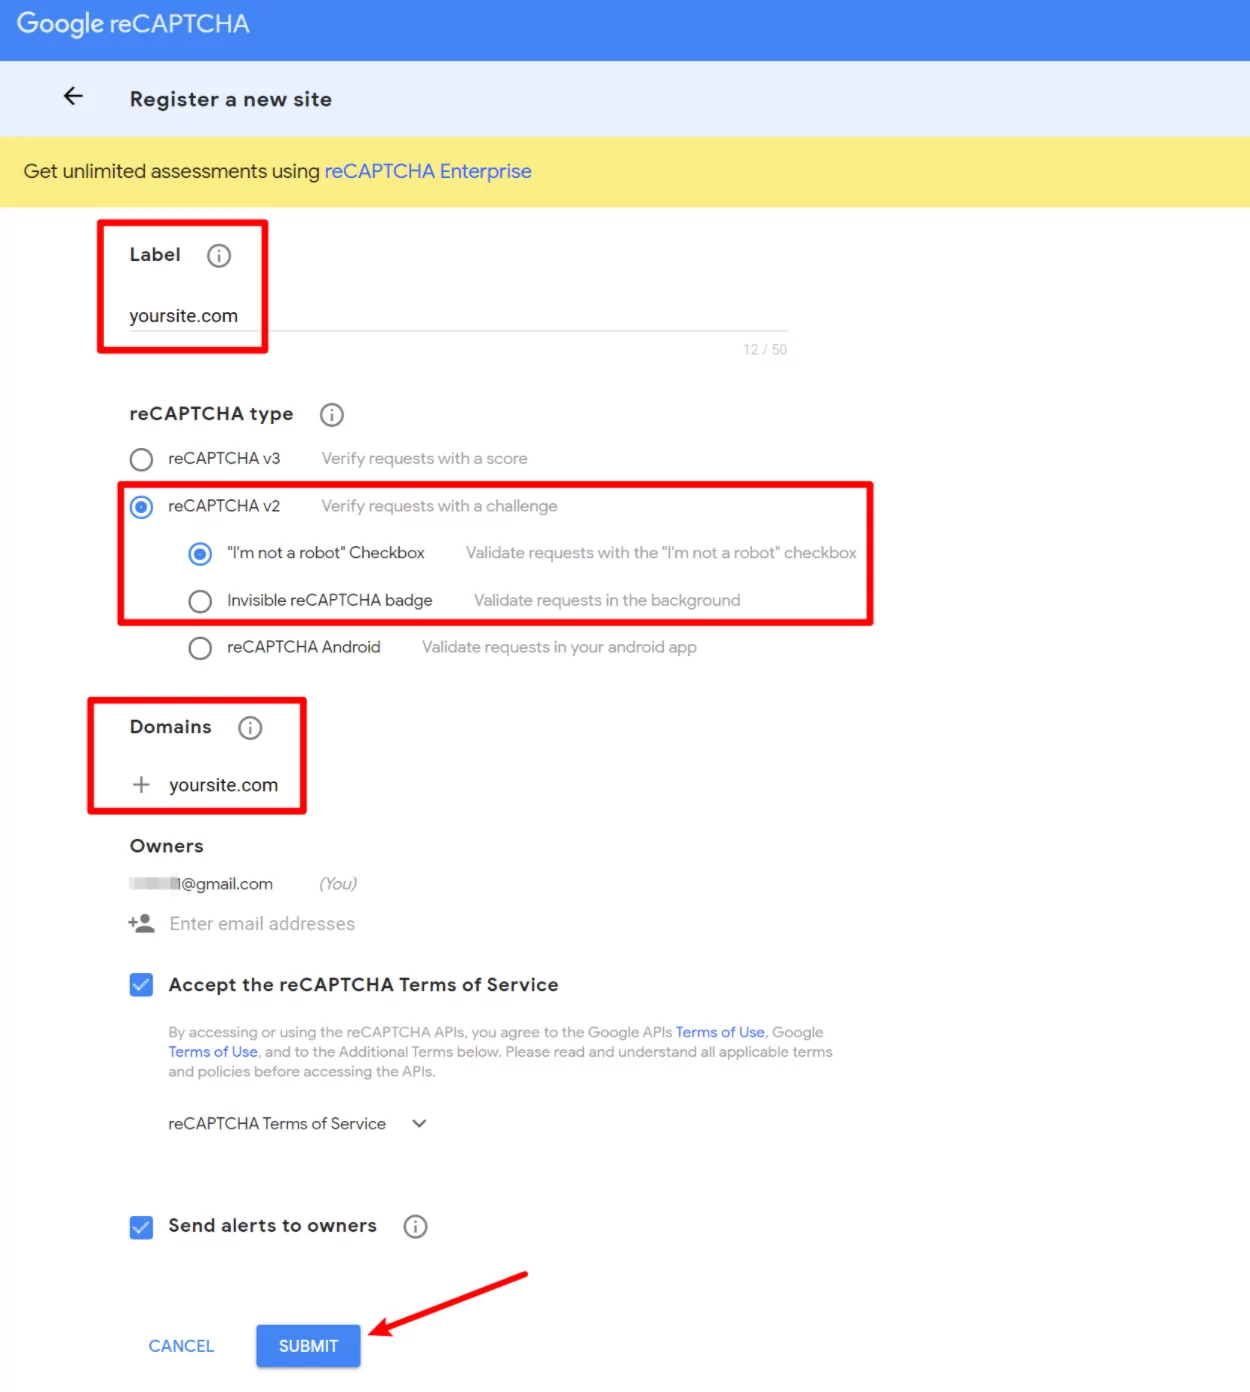
First, enter your website name in the Label box.
Then, you can choose your reCAPTCHA type. Profile Builder supports two types of reCAPTCHA v2 protection, which is the most popular method of implementing Google reCAPTCHA:
- “I’m not a robot” Checkbox – the normal “I’m not a robot” checkbox that you’ve probably encountered on sites from time to time. For legitimate users, all they have to do is check the box. If the visit seems suspicious, however, they’ll need to solve a CAPTCHA in addition to checking the box.
- Invisible reCAPTCHA badge – this does not require the user to click a checkbox. Instead, it activates when the user clicks the existing button on your form. It will only display a CAPTCHA for traffic that seems suspicious – legitimate users won’t have to solve a CAPTCHA (unless there’s a false positive).
To learn more about the differences, you can consult Google’s docs.
For this example, we’ll use the “I’m not a robot” Checkbox method of reCAPTCHA v2, but you can use the Invisible reCAPTCHA badge if you prefer.
To finish things out, do the following:
- Add your website’s domain name to the Domains box;
- Accept the terms of service;
- Click the Submit button.
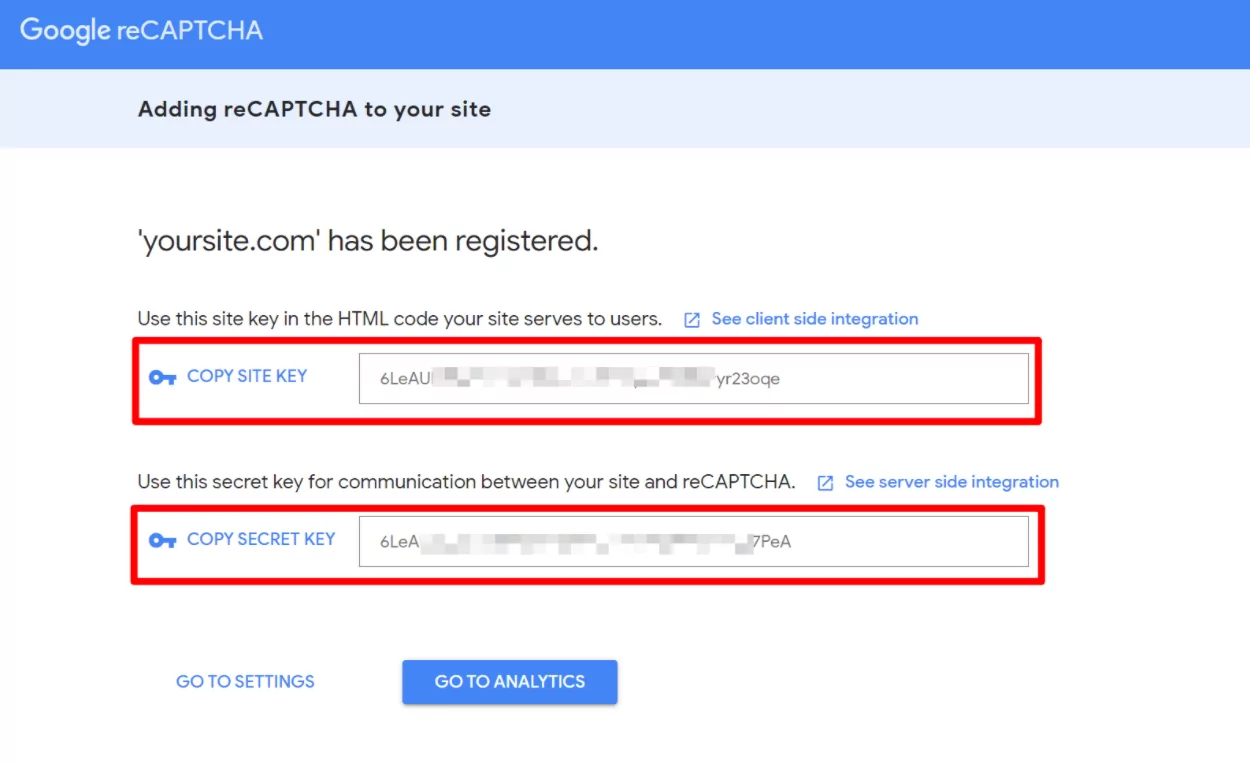
On the next screen, you’ll see two pieces of information – your site key and your secret key. Leave this tab open and keep this information handy because you’ll need it in a second when you’re working in your WordPress dashboard:
4. Add the reCAPTCHA Field to Your Form With Profile Builder
Now, you’re ready to add reCAPTCHA to your WordPress forms.
Whether you’ve created your own custom forms per the previous section or you’re using the native WordPress forms, you’ll do this in the same way.
To begin, go to Profile Builder → Form Fields. Then, add a reCAPTCHA field to the form.
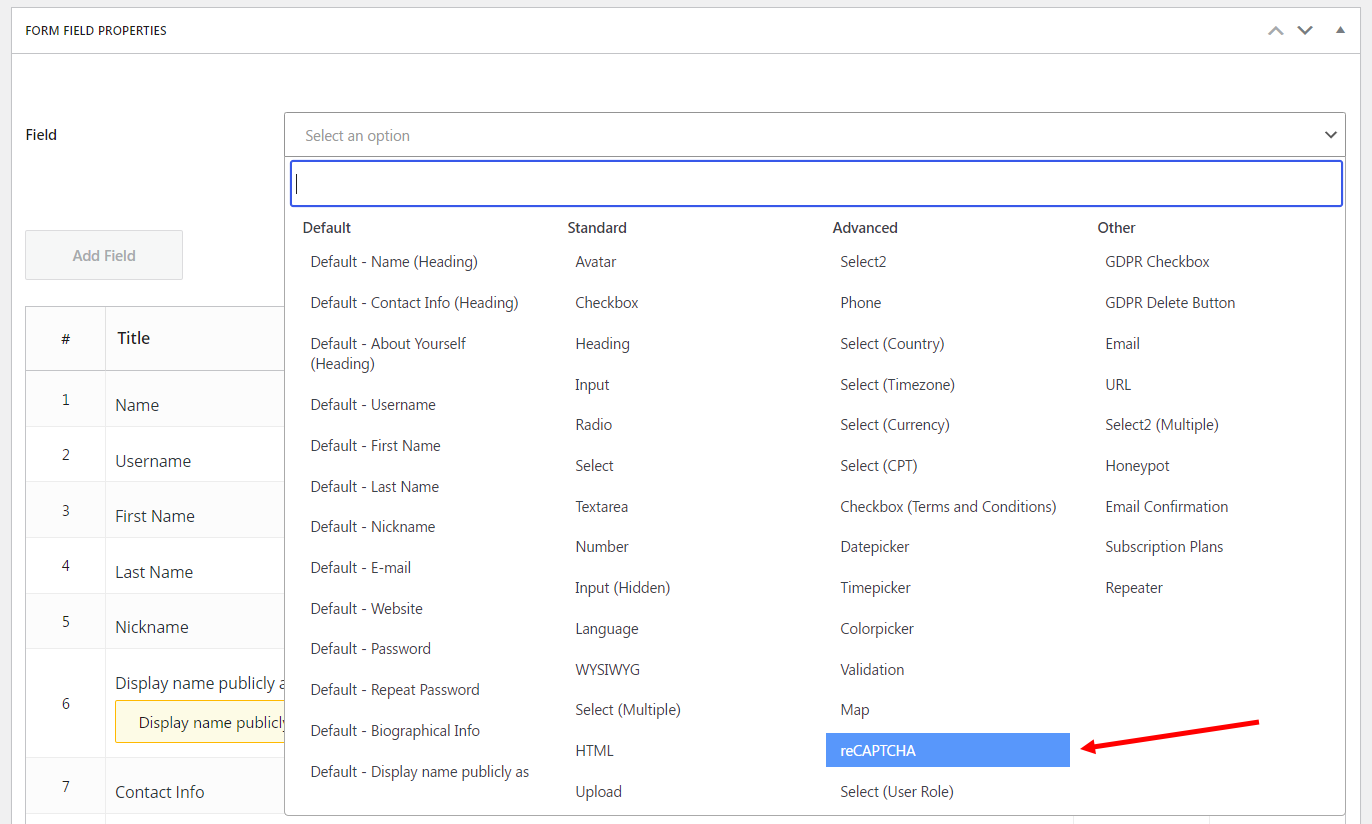
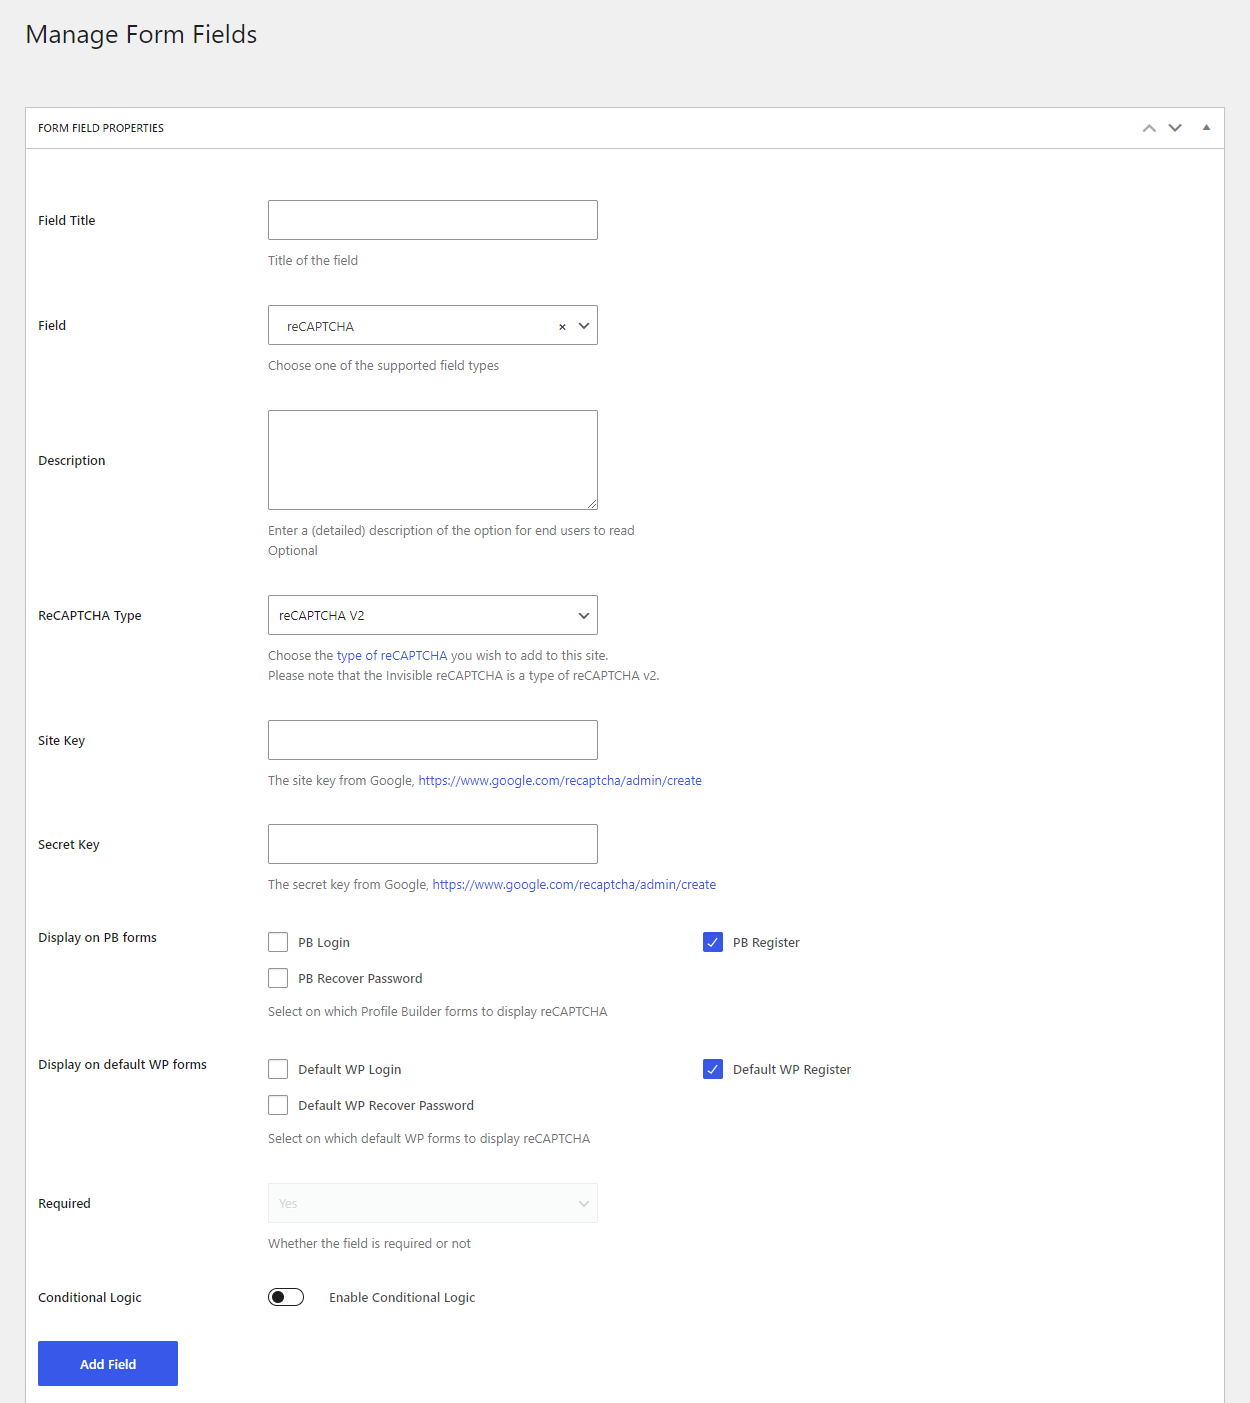
Once you add the field, you should see the field’s settings, which is where you can configure your reCAPTCHA behavior.
First, use the ReCAPTCHA Type drop-down to choose what kind of CAPTCHA to add to your site. This should match the selection that you chose when you created your reCAPTCHA API key in the previous step.
Next, paste in the Site Key and Secret Key that you got in the previous step.
Finally, choose which forms you want to use reCAPTCHA on. You’ll get separate options for your custom Profile Builder forms and the default WordPress forms.
When you’ve made your choices, click the Add Field button:
And that’s it! You should now see the Google reCAPTCHA on all of the forms that you’ve selected.
Remember, you can always choose to use reCAPTCHA V3 if you prefer not to display a checkbox on the front end of your form.
Set Up Your WordPress reCAPTCHA Today
If you want to add reCAPTCHA to WordPress forms, Profile Builder gives you an easy way to protect your login, registration, and password reset forms.
You can either create new custom forms that include reCAPTCHA or you can add reCAPTCHA to the default WordPress forms (or both)!
If you’re ready to get started, install and activate the free version of Profile Builder from WordPress.org today.
And if you want to learn about all of the other useful ways that Profile Builder can help your site, click here to learn about Profile Builder Pro.
Profile Builder Pro
Create beautiful front-end registration and profile forms with custom fields. Setup member directories, custom redirects, cutomize user emails & more using the all in one user management plugin.
Get Profile BuilderDo you still have any questions about how to add Google reCAPTCHA to WordPress? Let us know in the comments!
Related Articles

How to Customize the WooCommerce Login Page (No Code Needed)
Searching for a solution to customize the WooCommerce login page and otherwise control login behavior on your WooCommerce store? If you allow (or force) registration on your store, you'll want to create a user-friendly login experience so that your shoppers can easily log in to their accounts and access other key features. In this post, […]
Continue Reading
8 Best WordPress User Registration Plugins
Not sure what WordPress user registration plugin to use for your project? Going through all the WordPress user registration plugins can be disorienting. You may have spent hours and hours searching for plugins and tutorials to help you with your project, and you’re still as confused as you were when you started. Imagine finding the […]
Continue Reading
How to Customize WordPress Email Login Behavior (+ Registration)
Searching for a WordPress email login feature so that you can customize your site's login process, such as requiring users to use their email address instead of a username? By default, WordPress lets users log in with either their username and password or their email and password via the default login page. But if you […]
Continue Reading