

Table of Contents
- 1 What You Need to Create an Elementor Register Form for Free
- 2 How to Create a Custom Register Form in Elementor With Profile Builder
- 2.1 1. Create Your Registration Form
- 2.2 2. Add Your Registration Form to Elementor
- 2.3 3. Style Your Registration Form Using Elementor
- 2.4 4. Create a Custom Elementor Login Form or Password Recovery Form (Optional)
- 2.5 5. Create a Custom Elementor Edit Profile Form (Optional)
- 2.6 6. Restrict Access to Elementor Widgets
- 2.7 7. Create a List of Users with the User Listing Widget (Optional)
- 3 Upgrade to Profile Builder Pro for More Features
- 3.1 Access More Field Types
- 3.2 Create Multiple Unique Registration Forms
- 3.3 Create Custom WooCommerce Registration Forms With Elementor
- 3.4 Use Conditional Logic in Your Registration Forms
- 3.5 Use Repeater Fields in Your Registration Forms
- 3.6 Require Admin Approval for Elementor Registration Forms
- 3.7 Create Custom Elementor Edit Profile Forms
- 4 Create Your Custom Elementor Register Page Today
Are you looking to create a custom register form for your website? There are plenty of WordPress tools that let you do this, with Elementor being a popular option. However, the free version of the plugin may only let you create a basic form.
Fortunately, there are ways to bypass the limitations of an Elementor register form. You can combine the drag-and-drop builder with a solution that enables you to register new users and collect additional information.
In this post, we’ll take a look at some of the plugins you’ll need to get started. Then, we’ll show you how to create an Elementor register form for free. Let’s jump right in!
What You Need to Create an Elementor Register Form for Free
Before we show you how to create a custom Elementor register form, there are some plugins you’ll need to install on your WordPress website.
Of course, you’ll need Elementor. You can use the free plugin for this tutorial.
While the free version doesn’t offer a registration widget (it’s only available with Elementor Pro), you can use the Profile Builder plugin (also free) to add this functionality to your site.
Profile Builder Pro
Create beautiful front-end registration and profile forms with custom fields. Setup member directories, custom redirects, cutomize user emails & more using the all in one user management plugin.
Get Profile BuilderYou can download the free version of the Profile Builder from WordPress.org. However, if you upgrade to the premium version, you’ll also be able to add conditional logic, repeater fields, admin approval, and other advanced features to your forms.
How to Create a Custom Register Form in Elementor With Profile Builder
Now, let’s get into the step-by-step tutorial. Here’s a high-level view of how it works, and then we’ll take you through every step below:
- Set up the fields on your registration form from the Profile Builder interface.
- Add the dedicated registration form widget in the Elementor interface.
- Use Elementor’s style and layout rules to design the registration form.
To get started, make sure to install and activate the free version of Profile Builder from WordPress.org.
1. Create Your Registration Form
First, you’ll need to configure the form. This means choosing which form fields to include on your registration form and adding headings/instructions.
In your WordPress dashboard, go to Profile Builder → Form Fields:
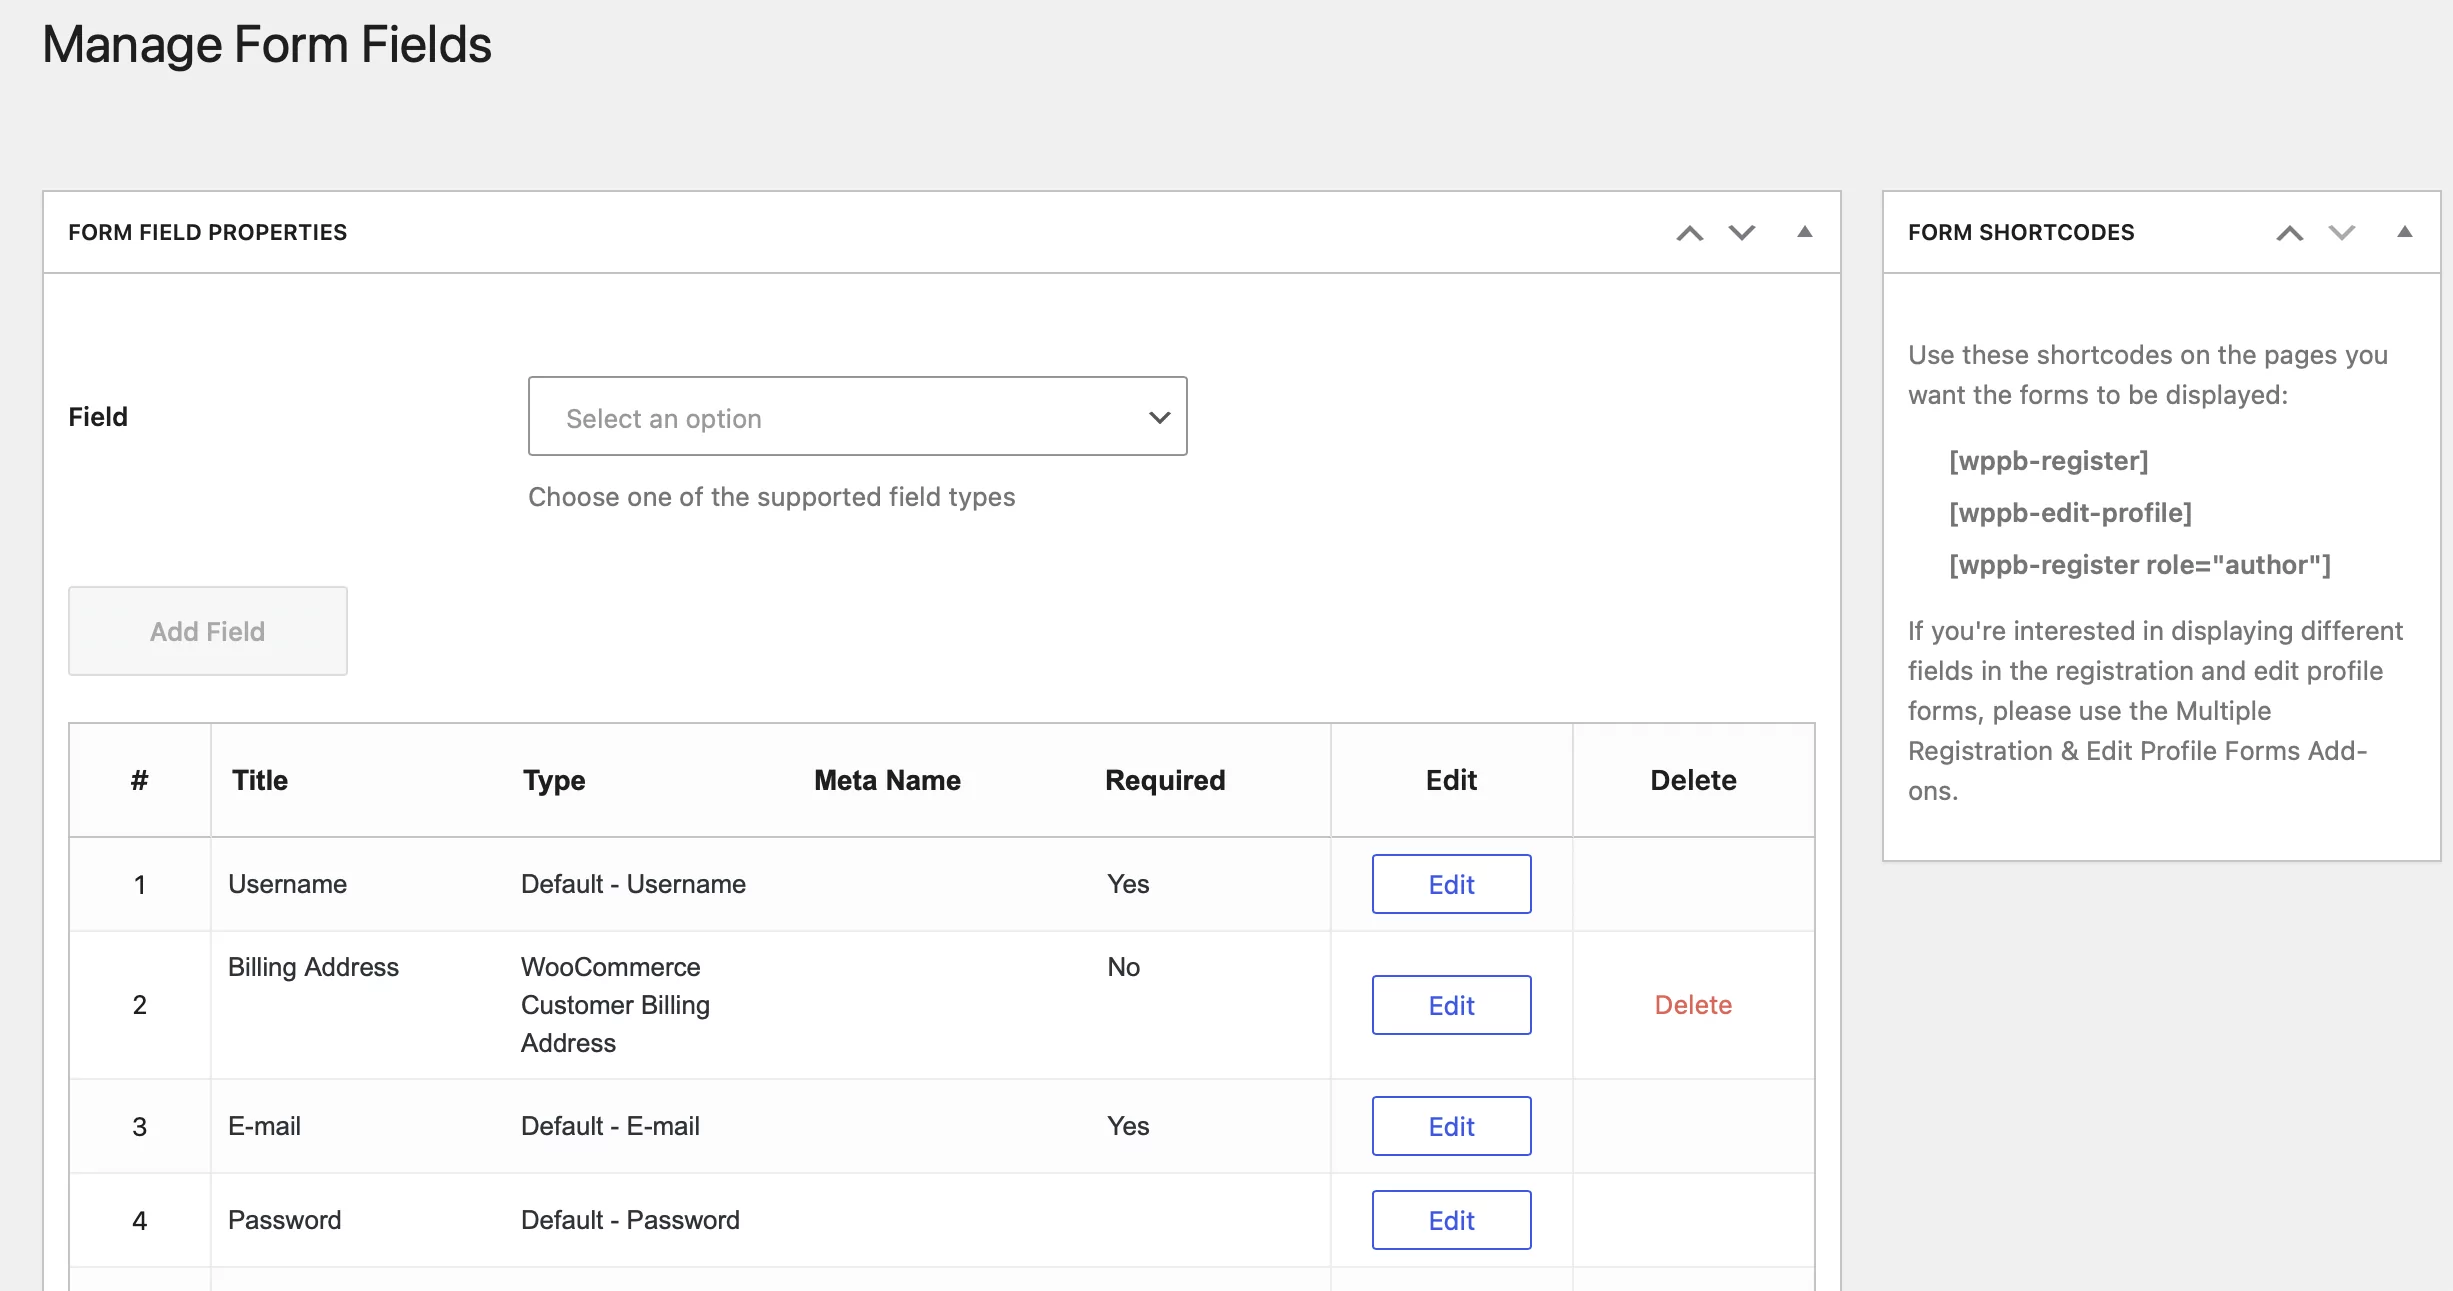
Here, you can rearrange the fields using the drag-and-drop functionality. You can also remove any fields you don’t need. However, the form must include the fields for username, email, and password.
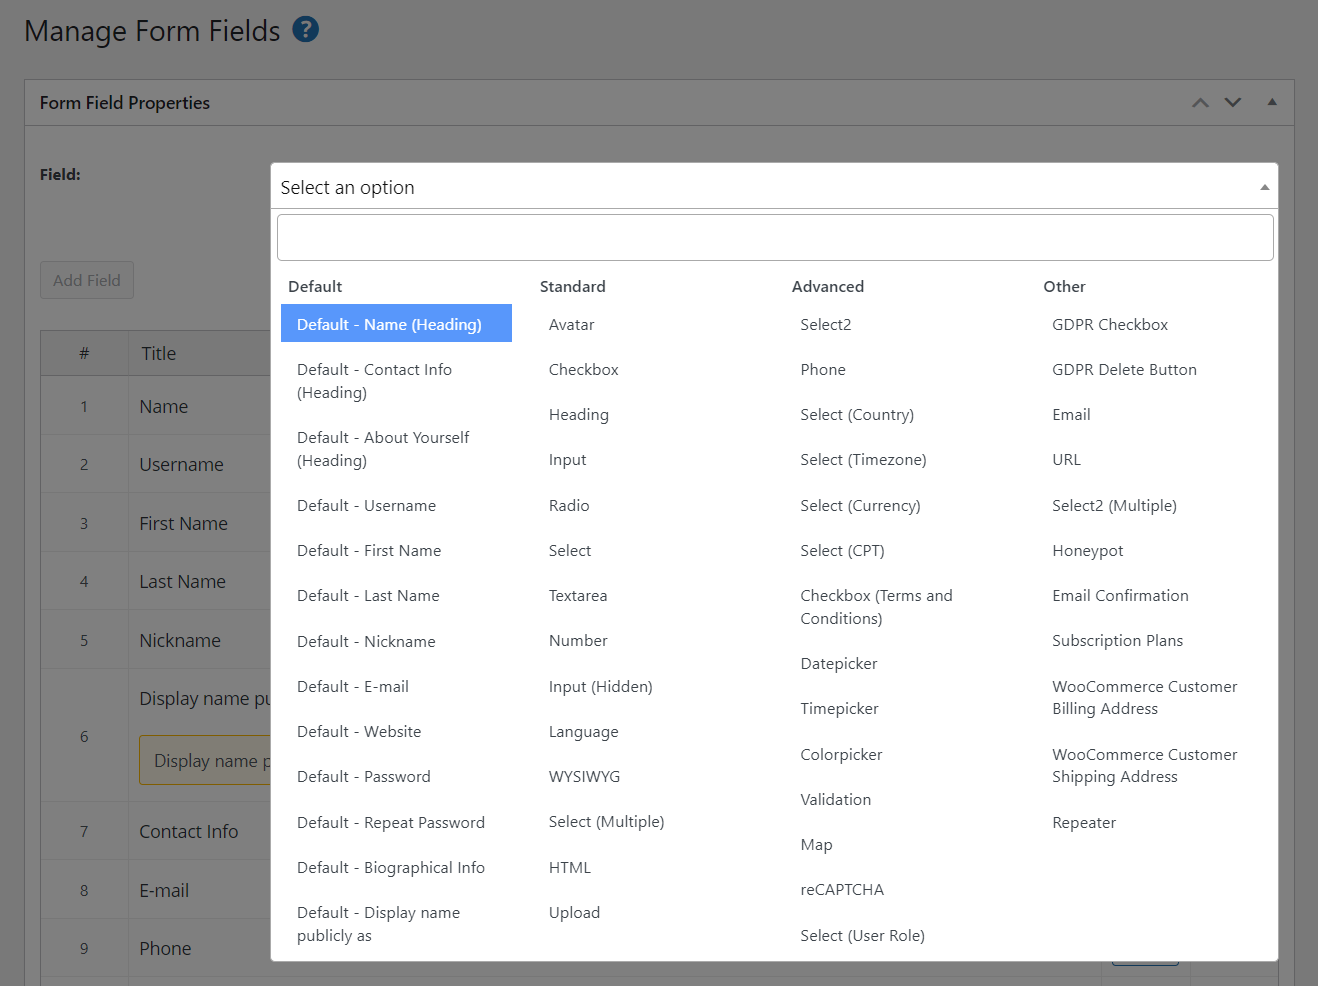
You can also add new fields by using the drop-down at the top. The free version of Profile Builder supports all of the native WordPress user profile fields, including some extra fields for reCAPTCHA, selecting user role, GDPR, and more:
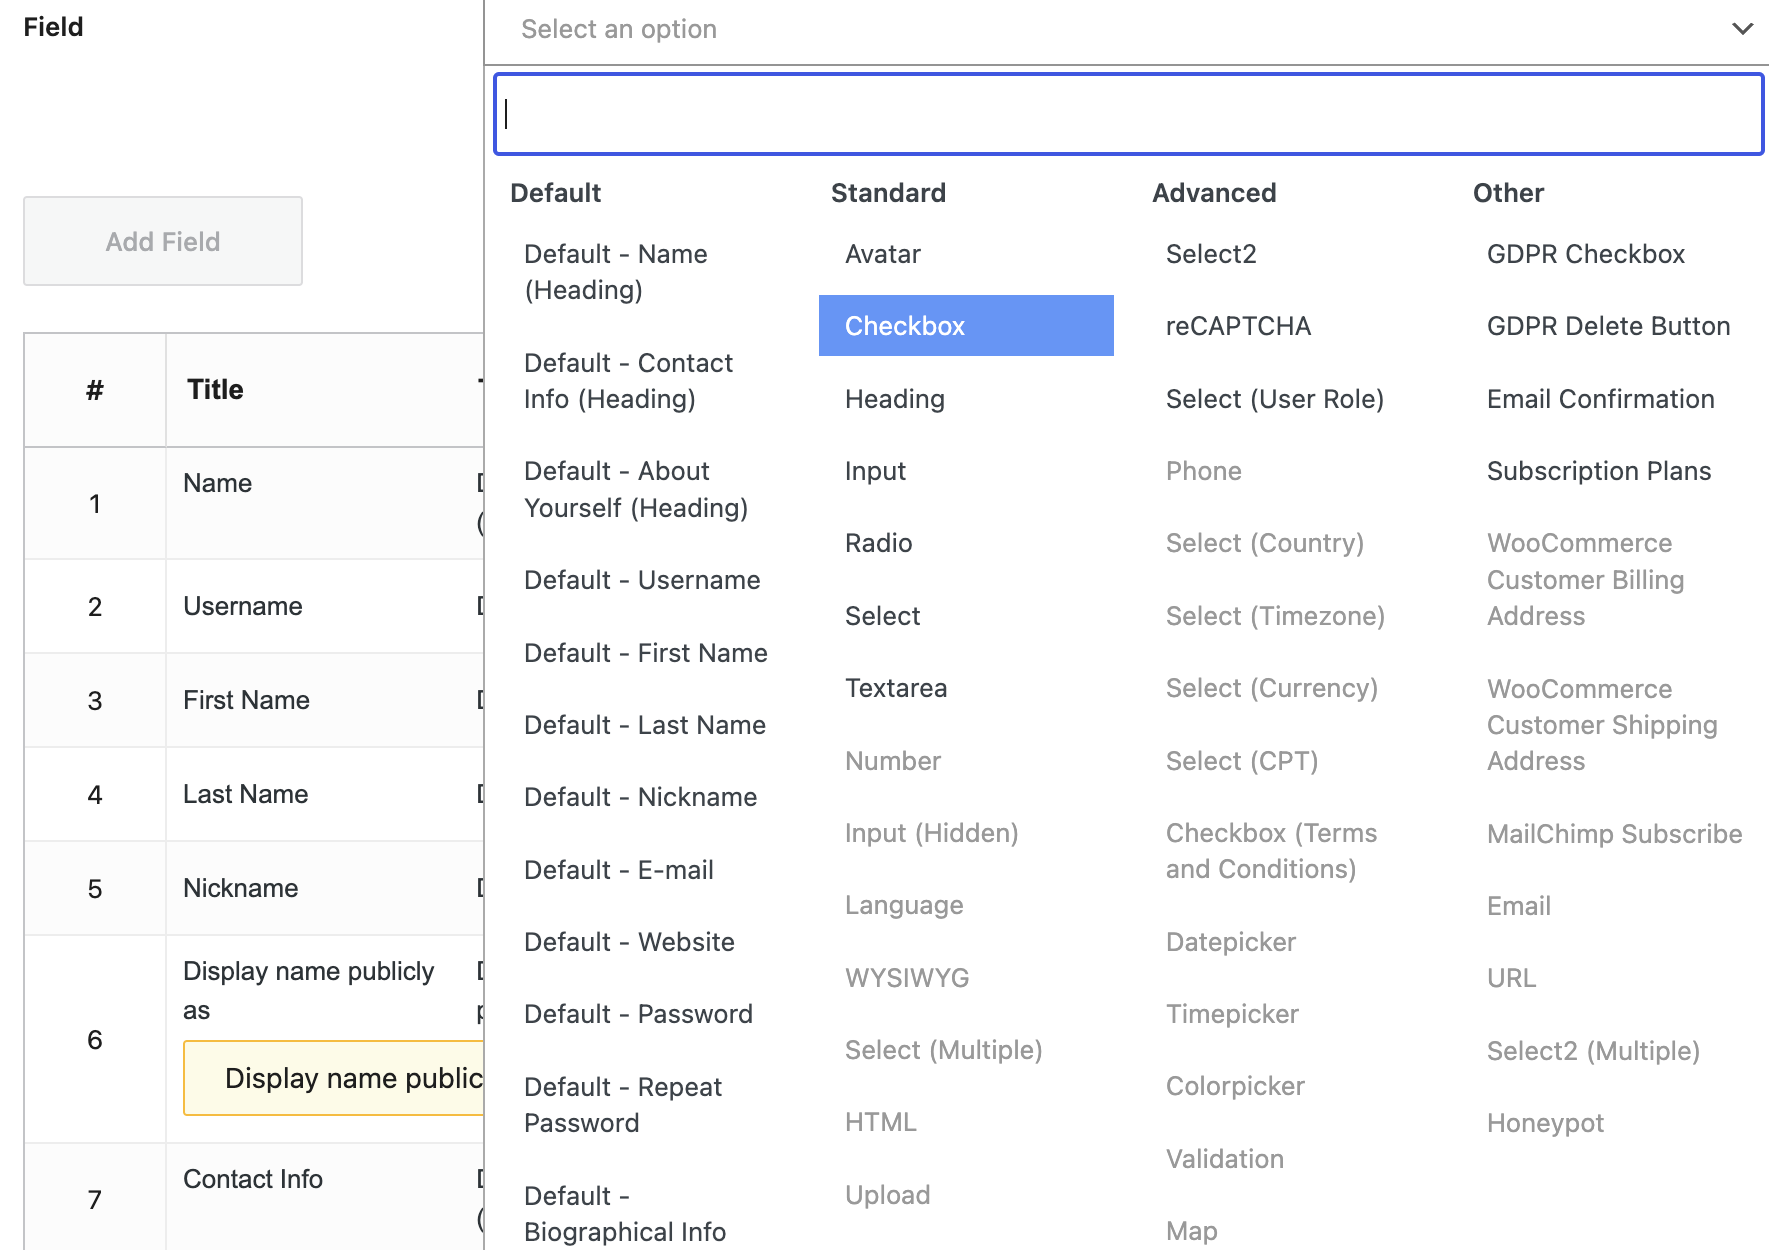
If you upgrade to the premium version, you’ll also be able to add custom fields using different field types including text, text area, checkmark, radio button, and more.
When you add a new field, you can change the title and mark whether it’s required or not. Once you’re happy with your form, you’re ready to embed it in Elementor.
2. Add Your Registration Form to Elementor
Open the Elementor editor for the post or page where you want to add your custom registration form. If you want to add other content besides your form (e.g. headings, text, or images), you can go ahead and do that now using Elementor’s widgets.
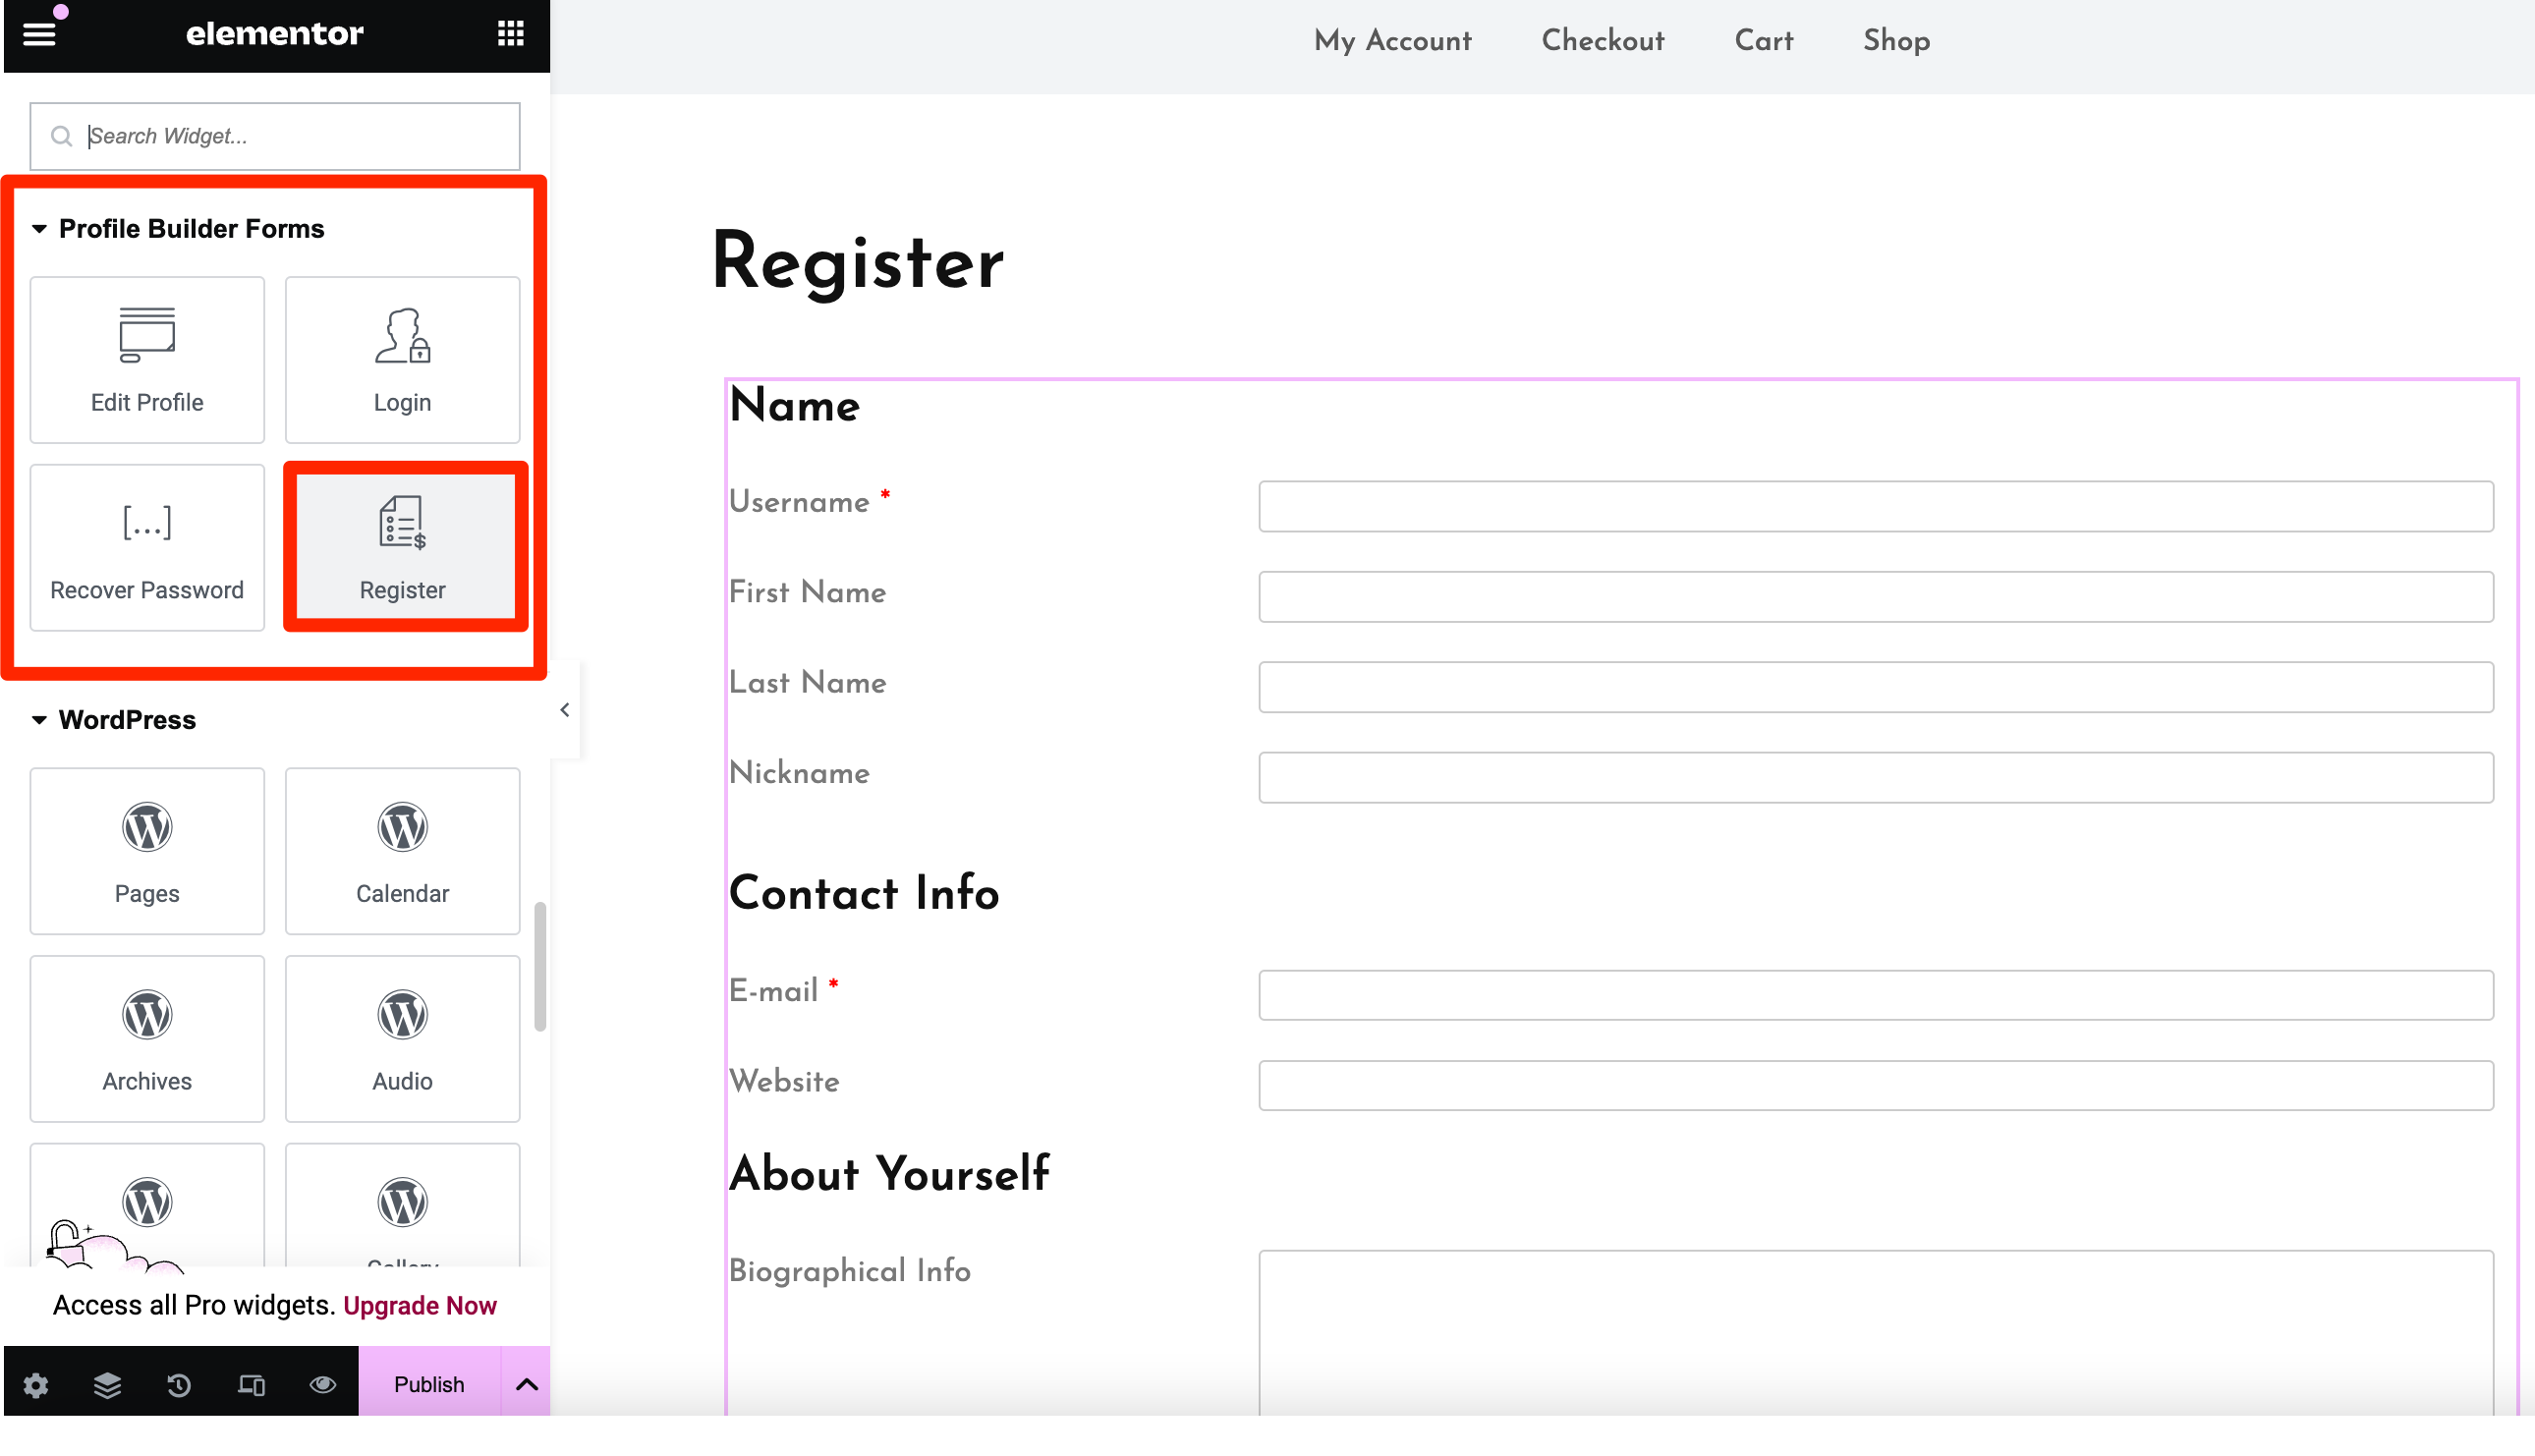
When you’re ready to add your registration form, scroll down to the Profile Builder Forms section in the Elementor widget list. Then, drag the Register form widget onto your page:
In the registration form widget’s settings, you’ll be able to make a few important selection:
- Form. If you upgrade to the premium version of Profile Builder, you can create unlimited custom registration forms. However, the free version only supports one form, so you’ll just leave this as the default.
- Assigned Role. You can choose which WordPress user role to assign to users who register through this form. If you’re not sure what roles are, you can check out our full post on WordPress user roles.
- Automatic Login. You can also choose whether you want to automatically log in users after they register via this form.
Here’s what the settings should look like:
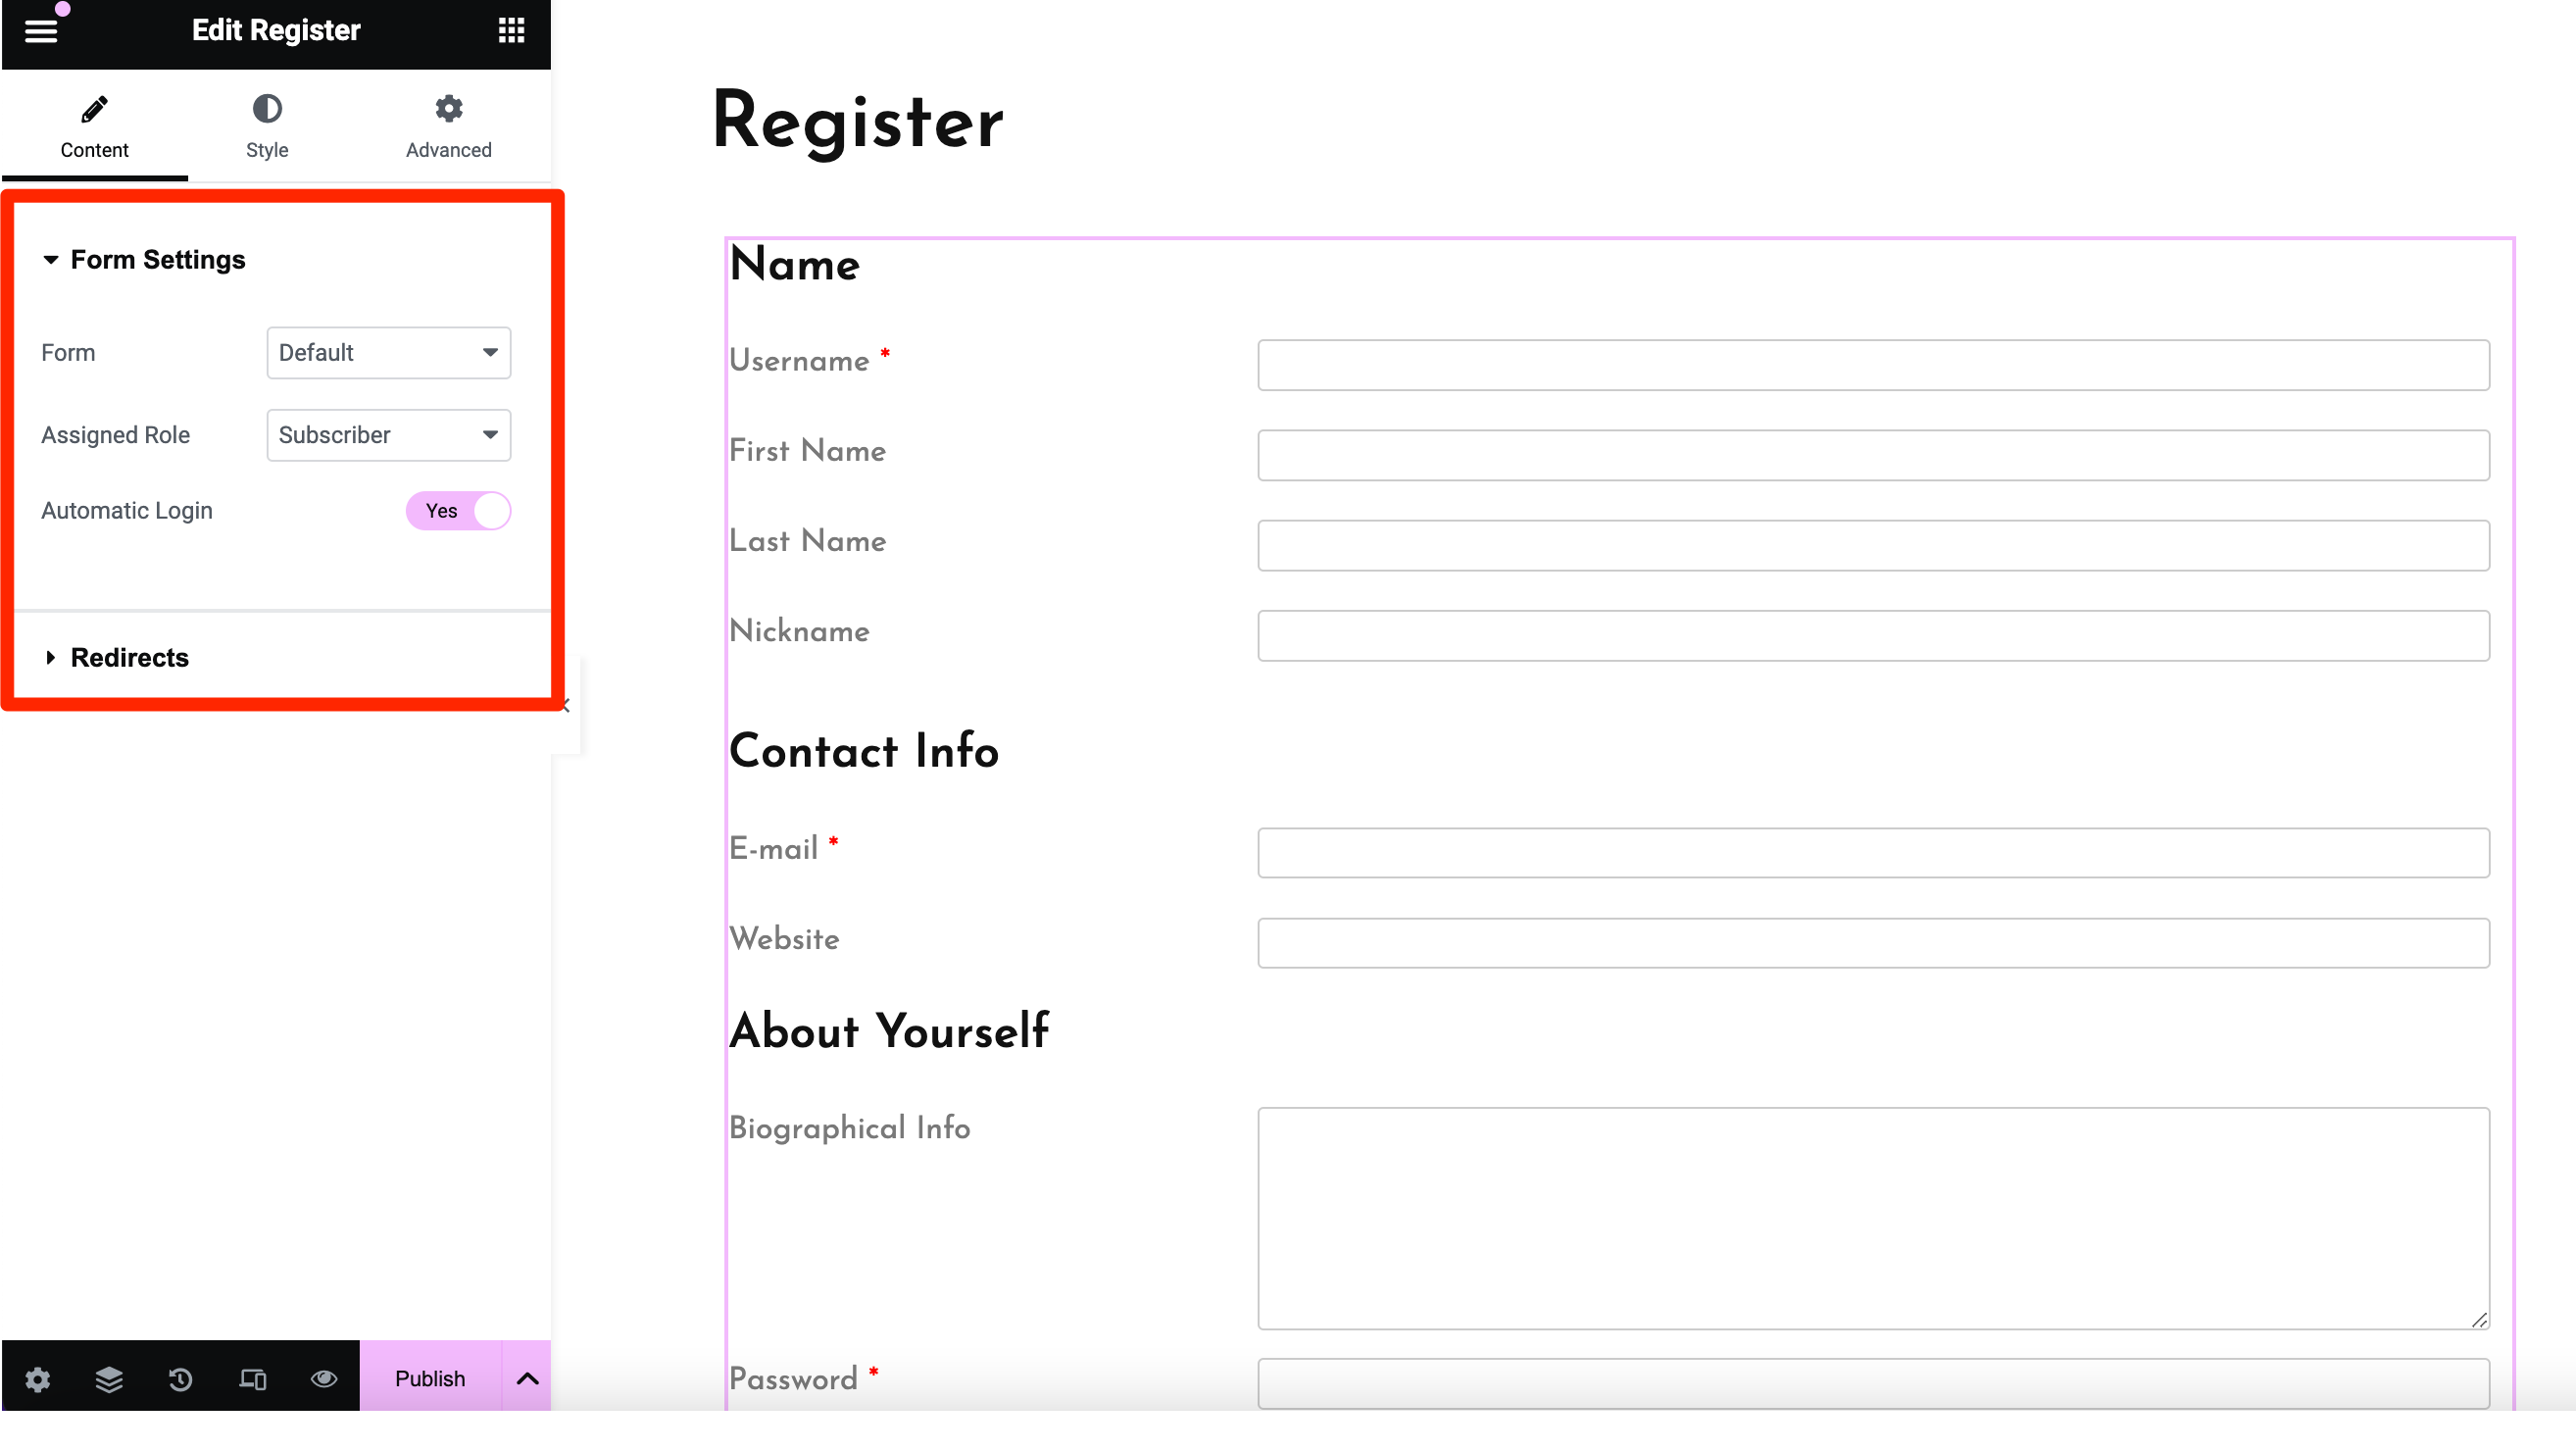
Additionally, you can expand the Redirects section beneath the Form Settings if you want to automatically redirect users to a custom page after they register.
3. Style Your Registration Form Using Elementor
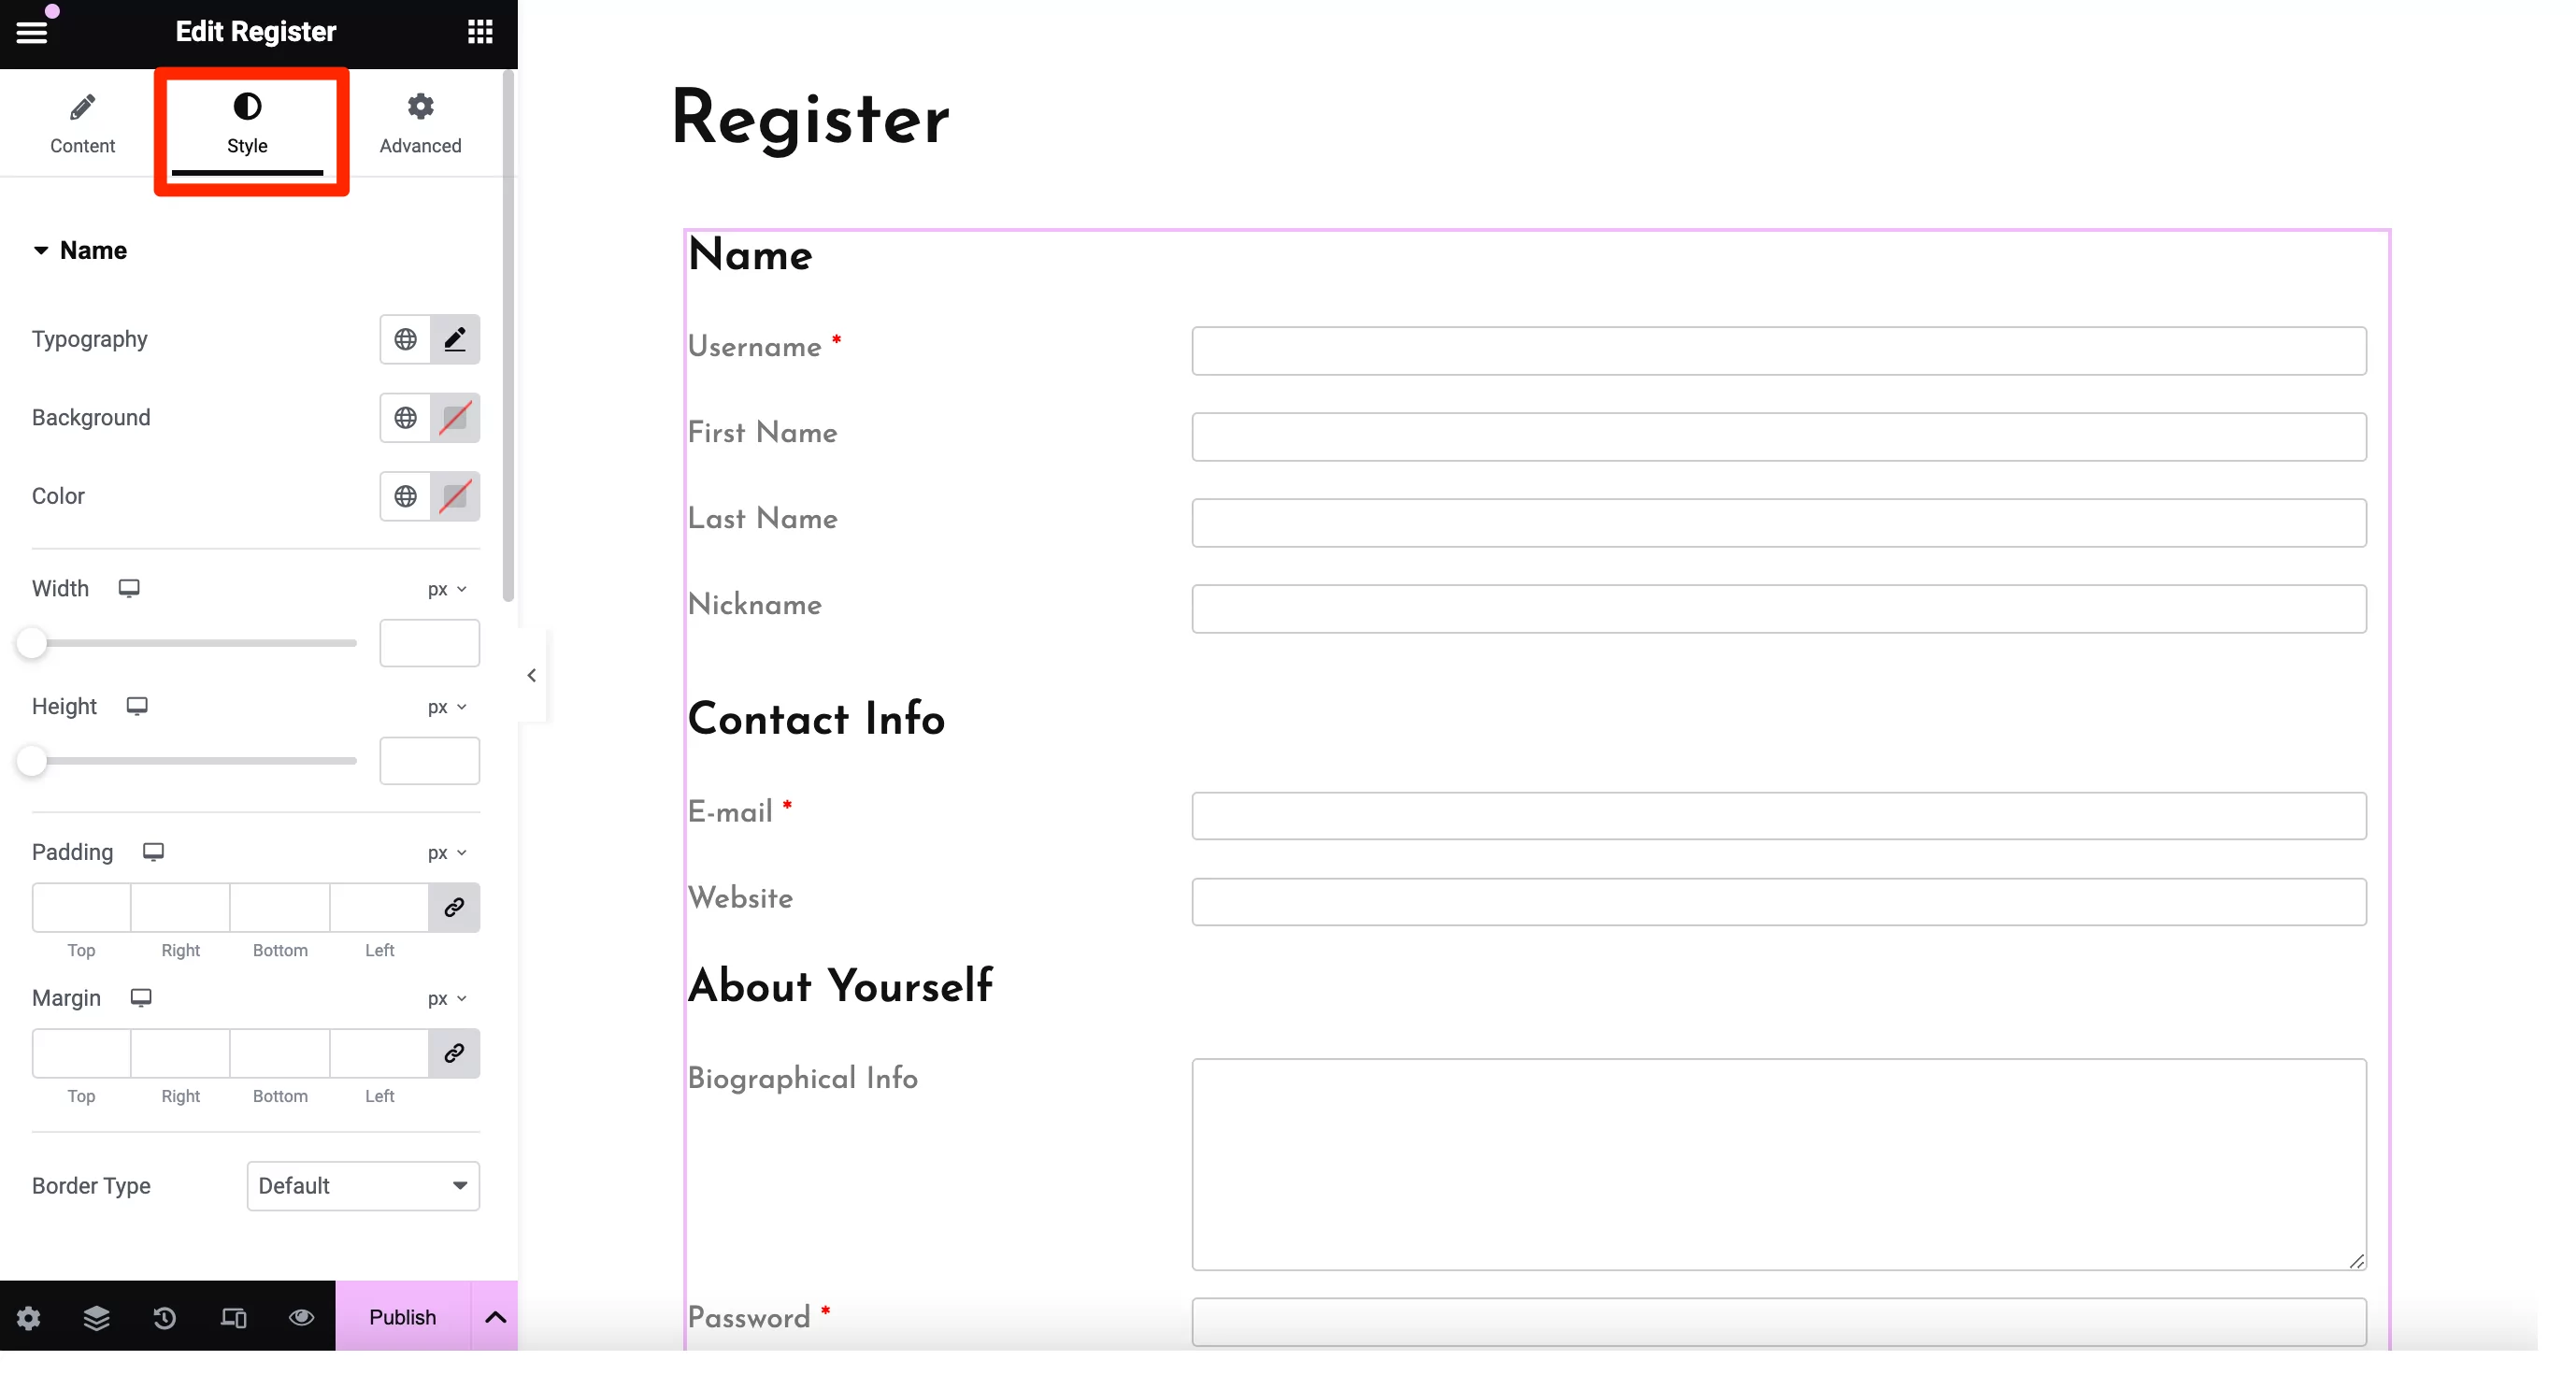
Since Profile Builder adds its own custom registration widget, you’re able to style your registration form using all of Elementor’s native style options. You can access these settings from the Style tab.
Here, you’ll get a full set of style options for each element/field in your registration form:
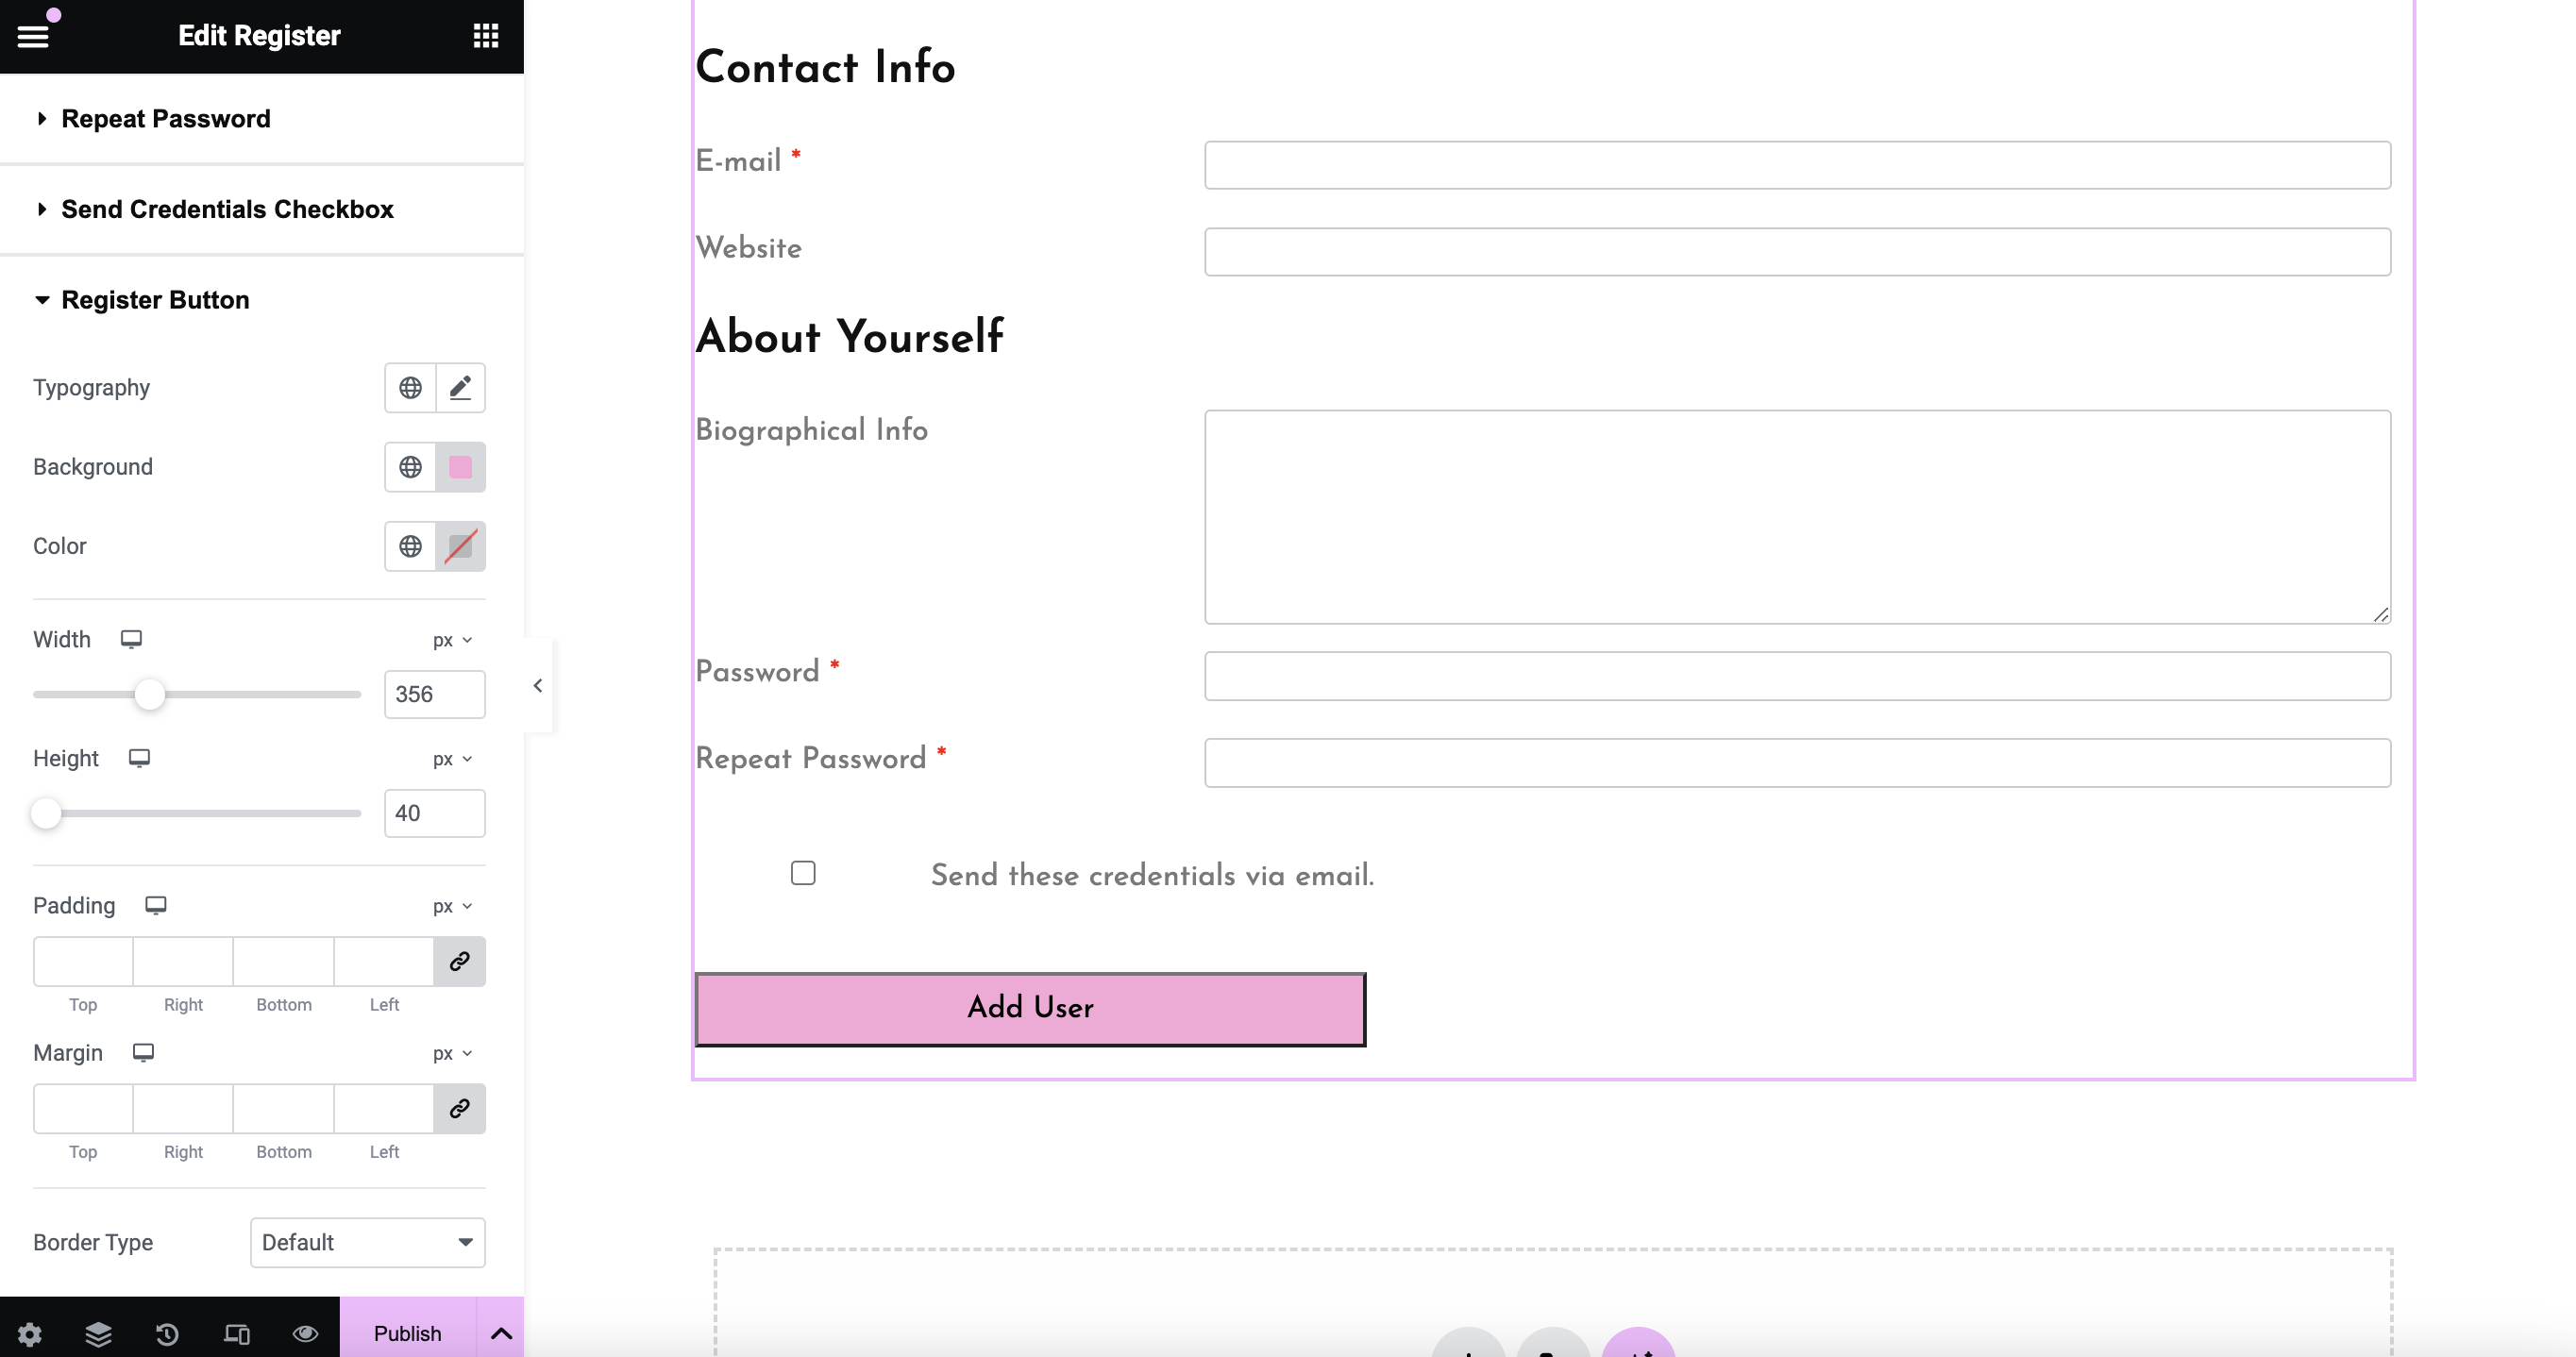
You’ll also be able to style the button and the checkboxes. For example, you can see that we’ve changed the button color and made it wider:
You can also go to the Advanced tab to access custom spacing, motion effects, and all of the other usual options that Elementor gives you.
And that’s it! You just created your very own custom Elementor register form. However, Profile Builder can do a lot more, so let’s keep looking at some of the other things you can do with the free version and premium versions.
4. Create a Custom Elementor Login Form or Password Recovery Form (Optional)
Profile Builder isn’t just for registration forms. It also gives you Elementor widgets to add a login form and/or a password recovery form.
You can use these widgets just like the Register widget:
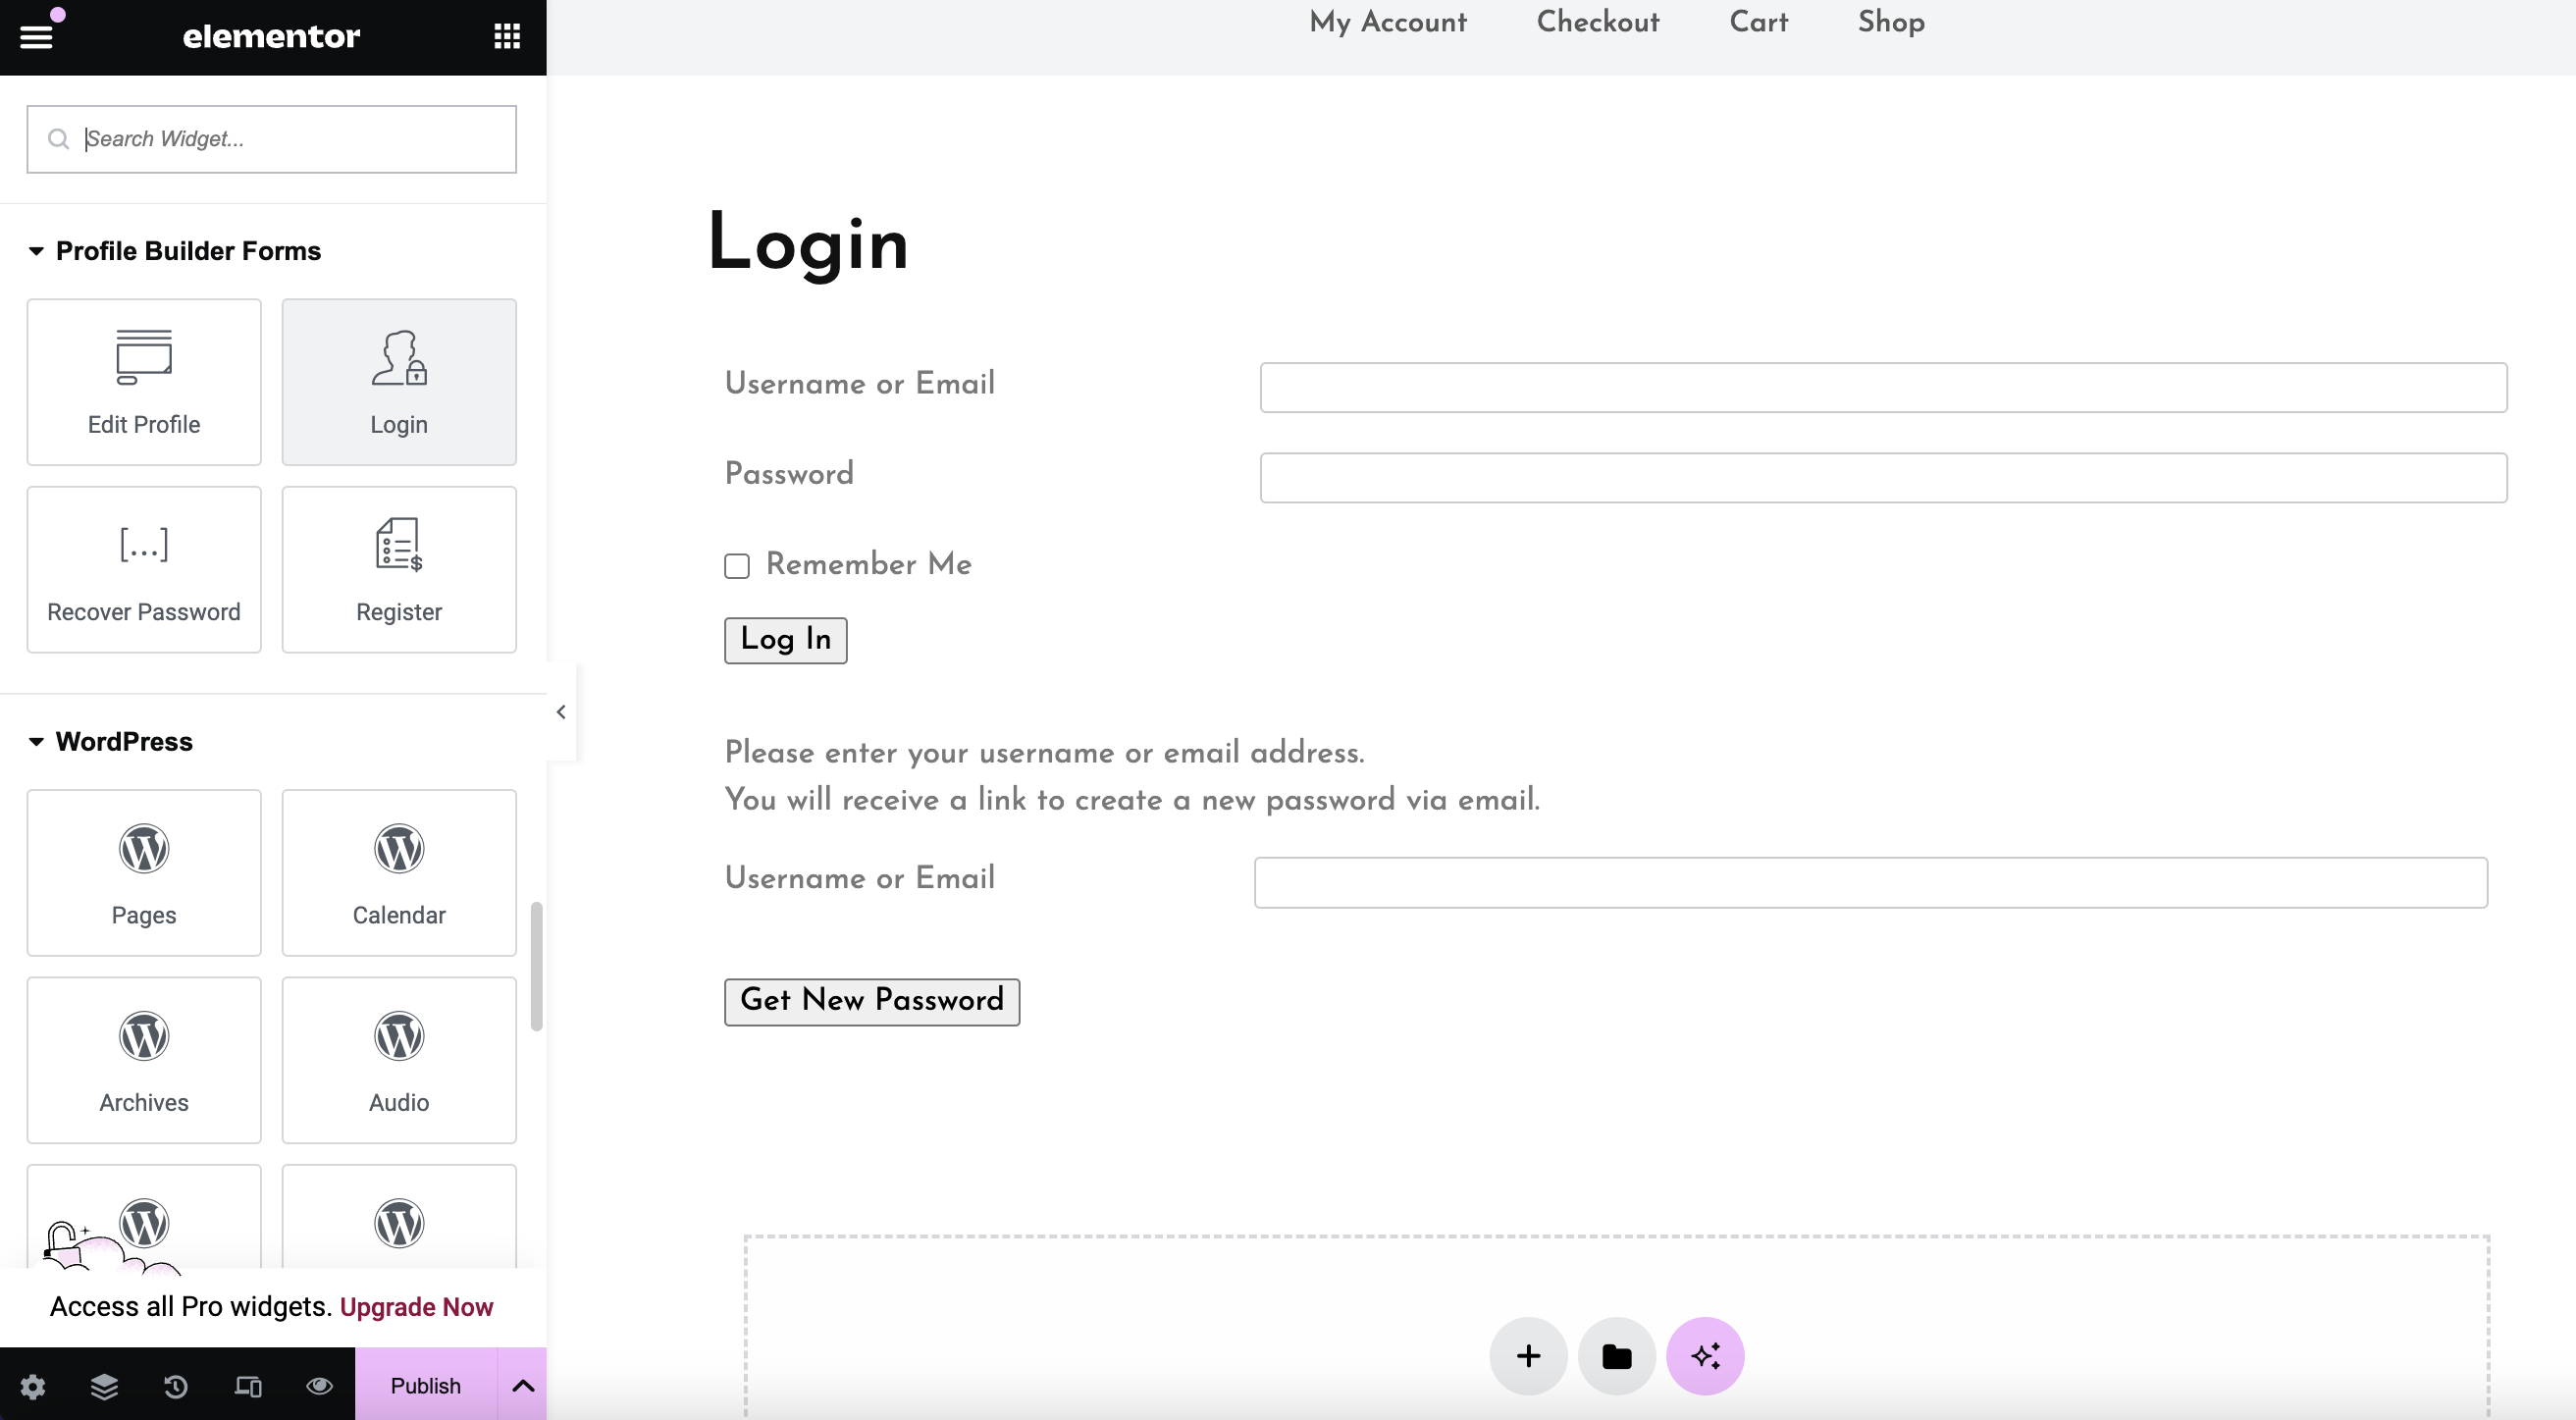
All you have to do is find the relevant form within the Profile Builder section and drag it onto your page.
5. Create a Custom Elementor Edit Profile Form (Optional)
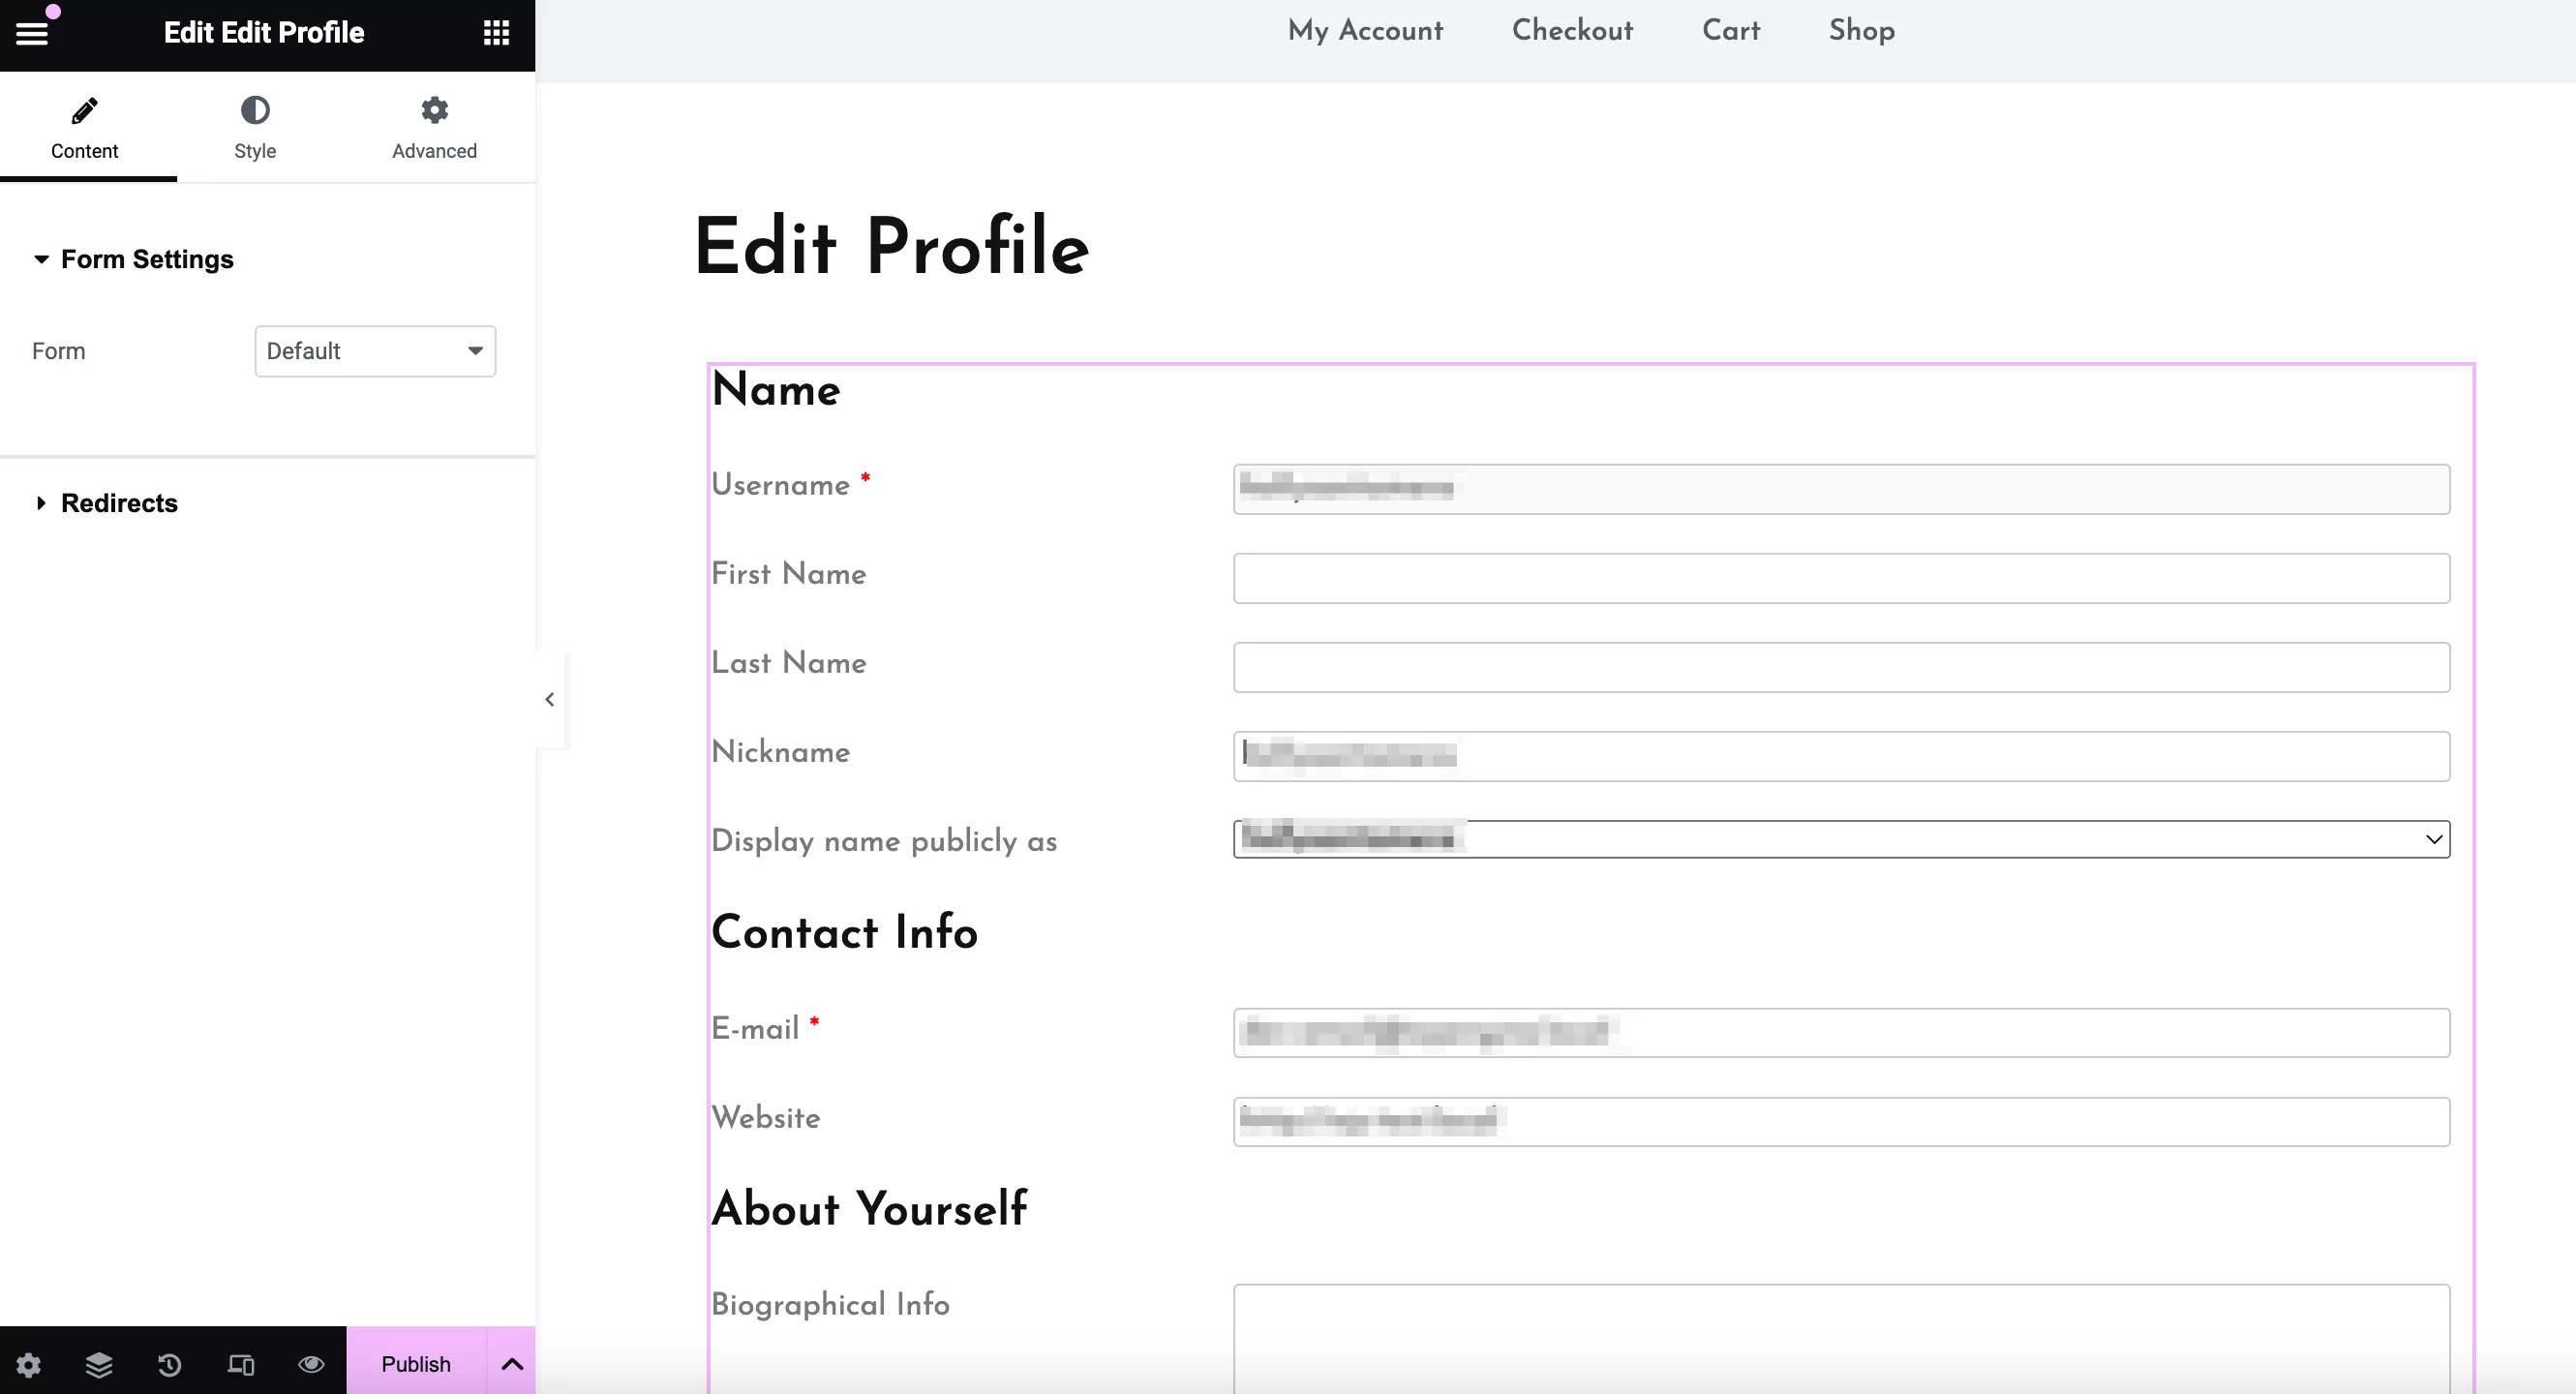
Profile Builder also gives you a dedicated Edit Profile widget for Elementor. You can add this widget anywhere on your site to create a front-end profile area that lets users edit fields on your registration form:
If you upgrade to the premium version of Profile Builder, you’ll also be able to create unique edit profile forms that include different fields from your registration form. You can even get access to different form layouts with Profile Builder Pro.
6. Restrict Access to Elementor Widgets
As we have seen, Profile Builder provides dedicated Elementor widgets. But it also enables you to restrict access to Elementor sections, columns, or widgets based on a user’s logged-in status or user role.
You can find these options in the Advanced tab of any section, column, or widget – just look for the Profile Builder Content Restriction section:
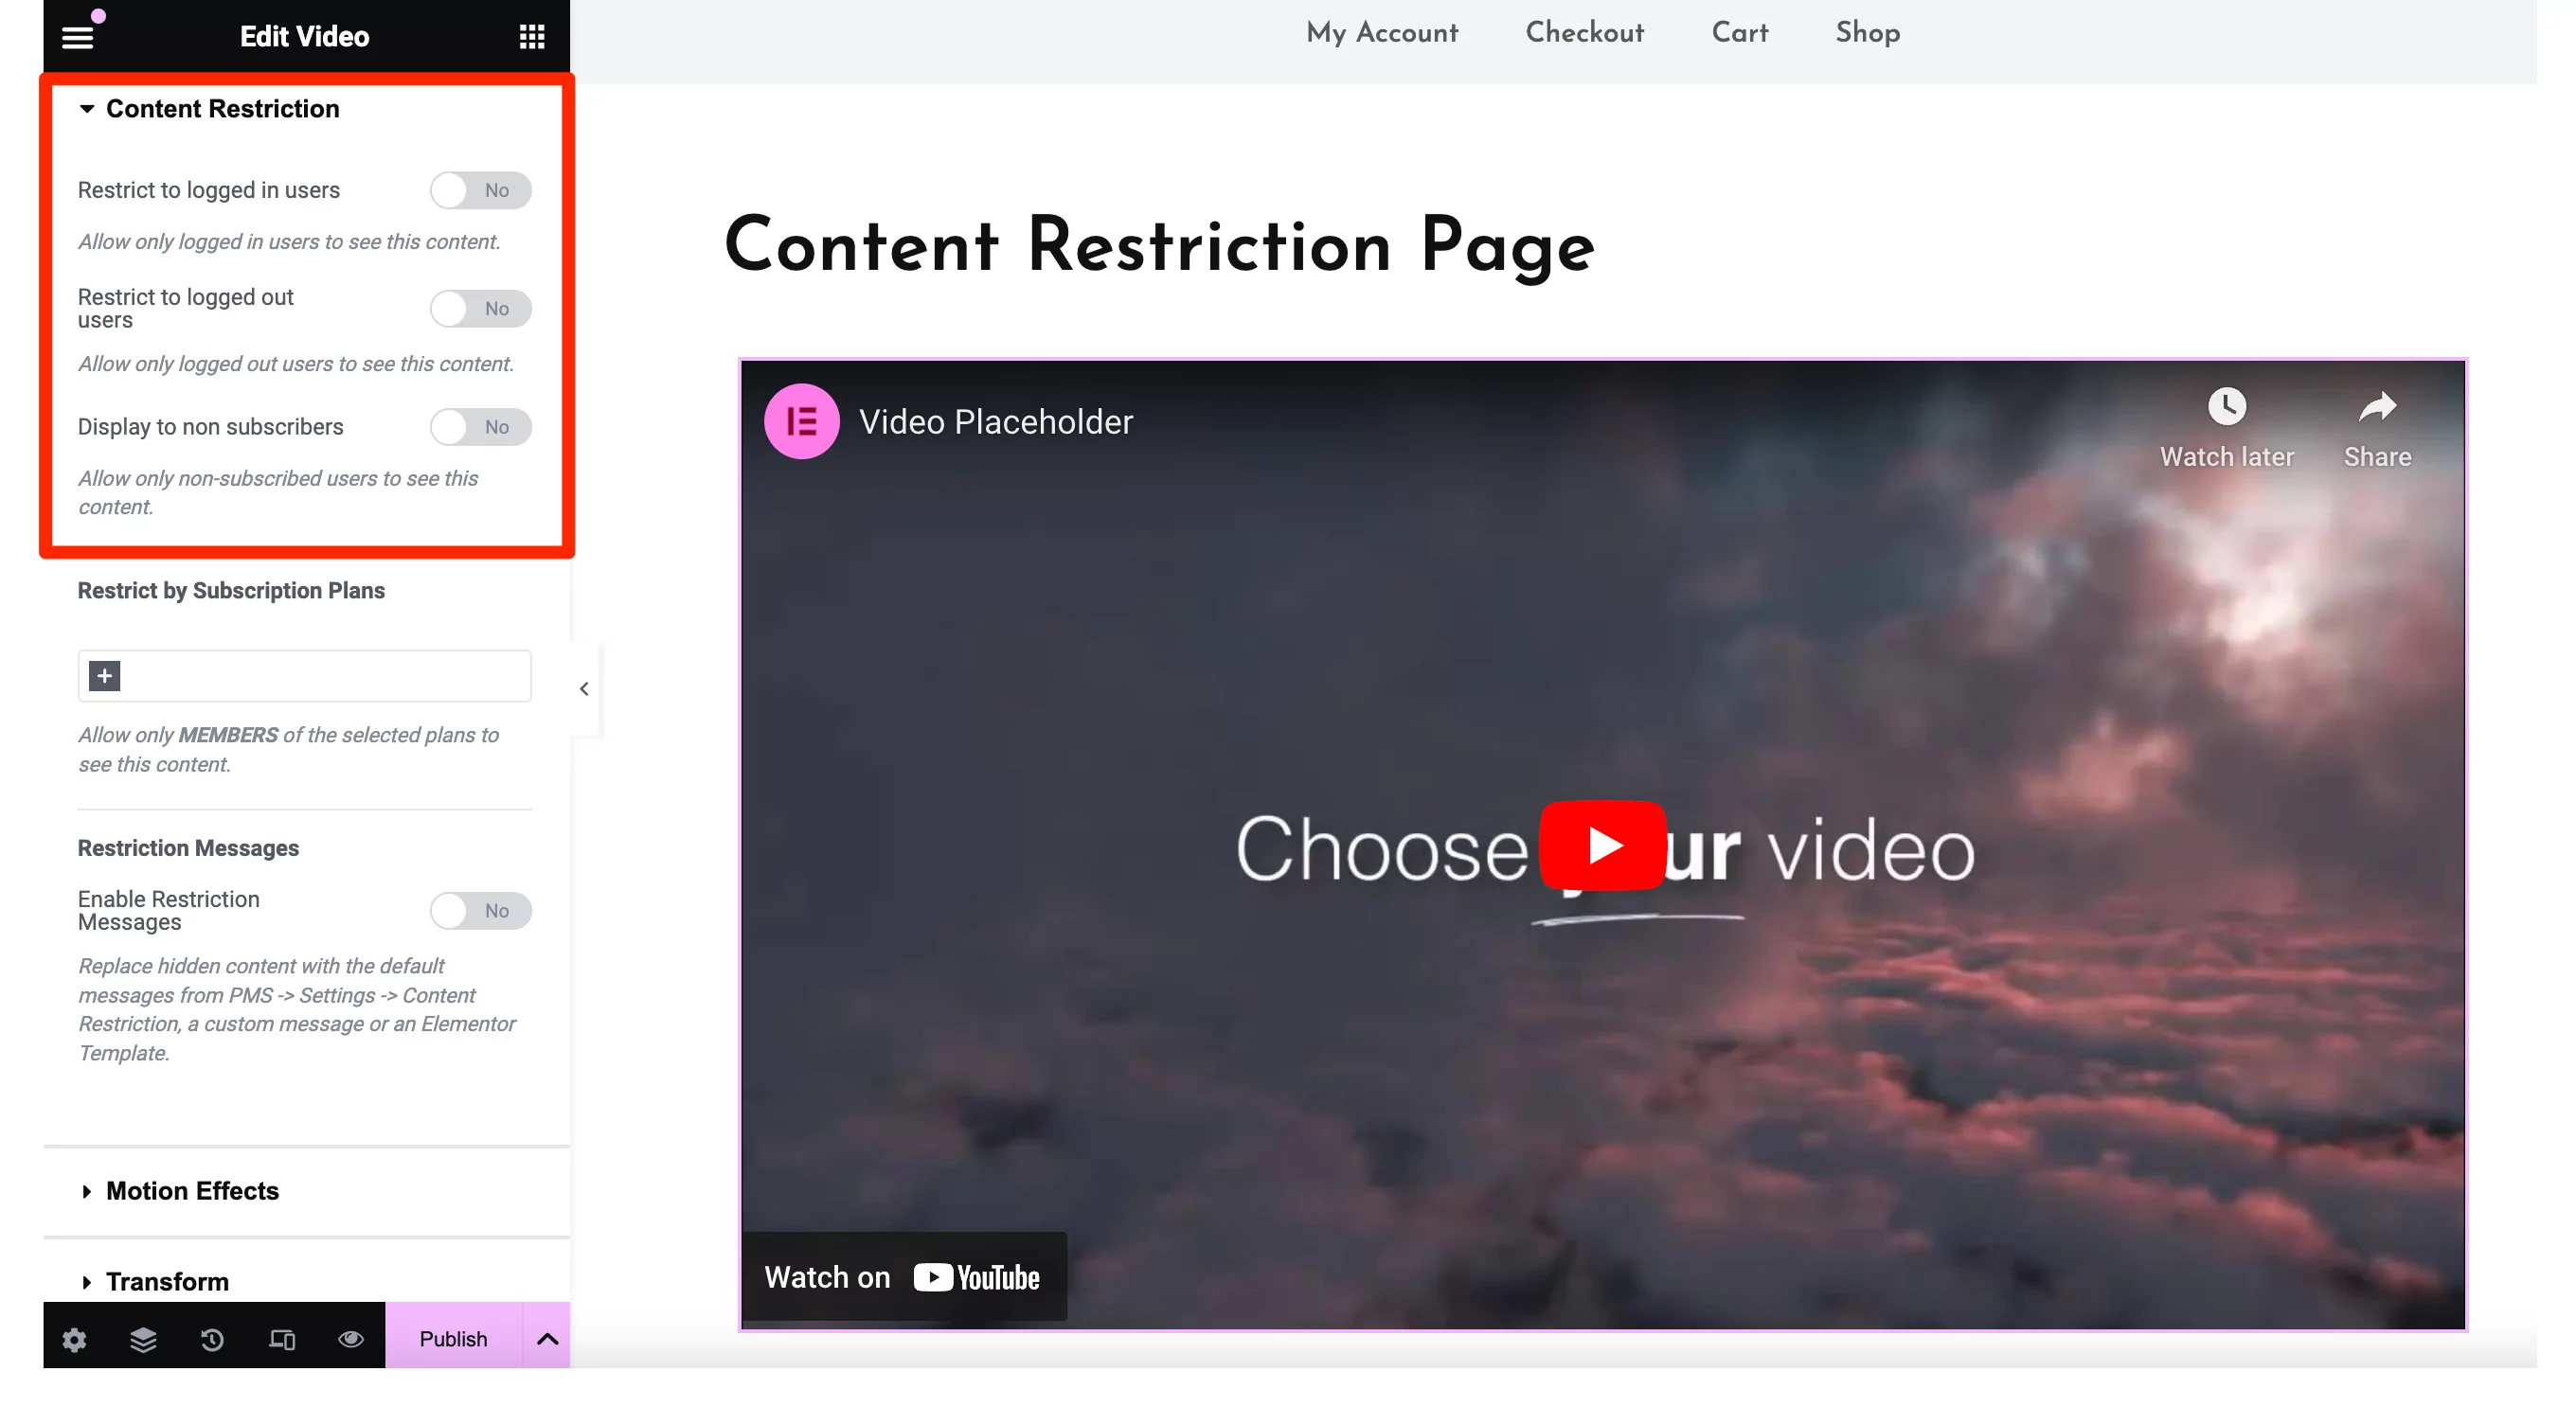
Here, you can also enable content restriction messages (and set up custom messages in the plugin’s settings).
7. Create a List of Users with the User Listing Widget (Optional)
The User Listing functionality lets you display a list of all website users on the front end. This is especially useful if you’re looking to create a members directory or an online community where users can easily find each other.
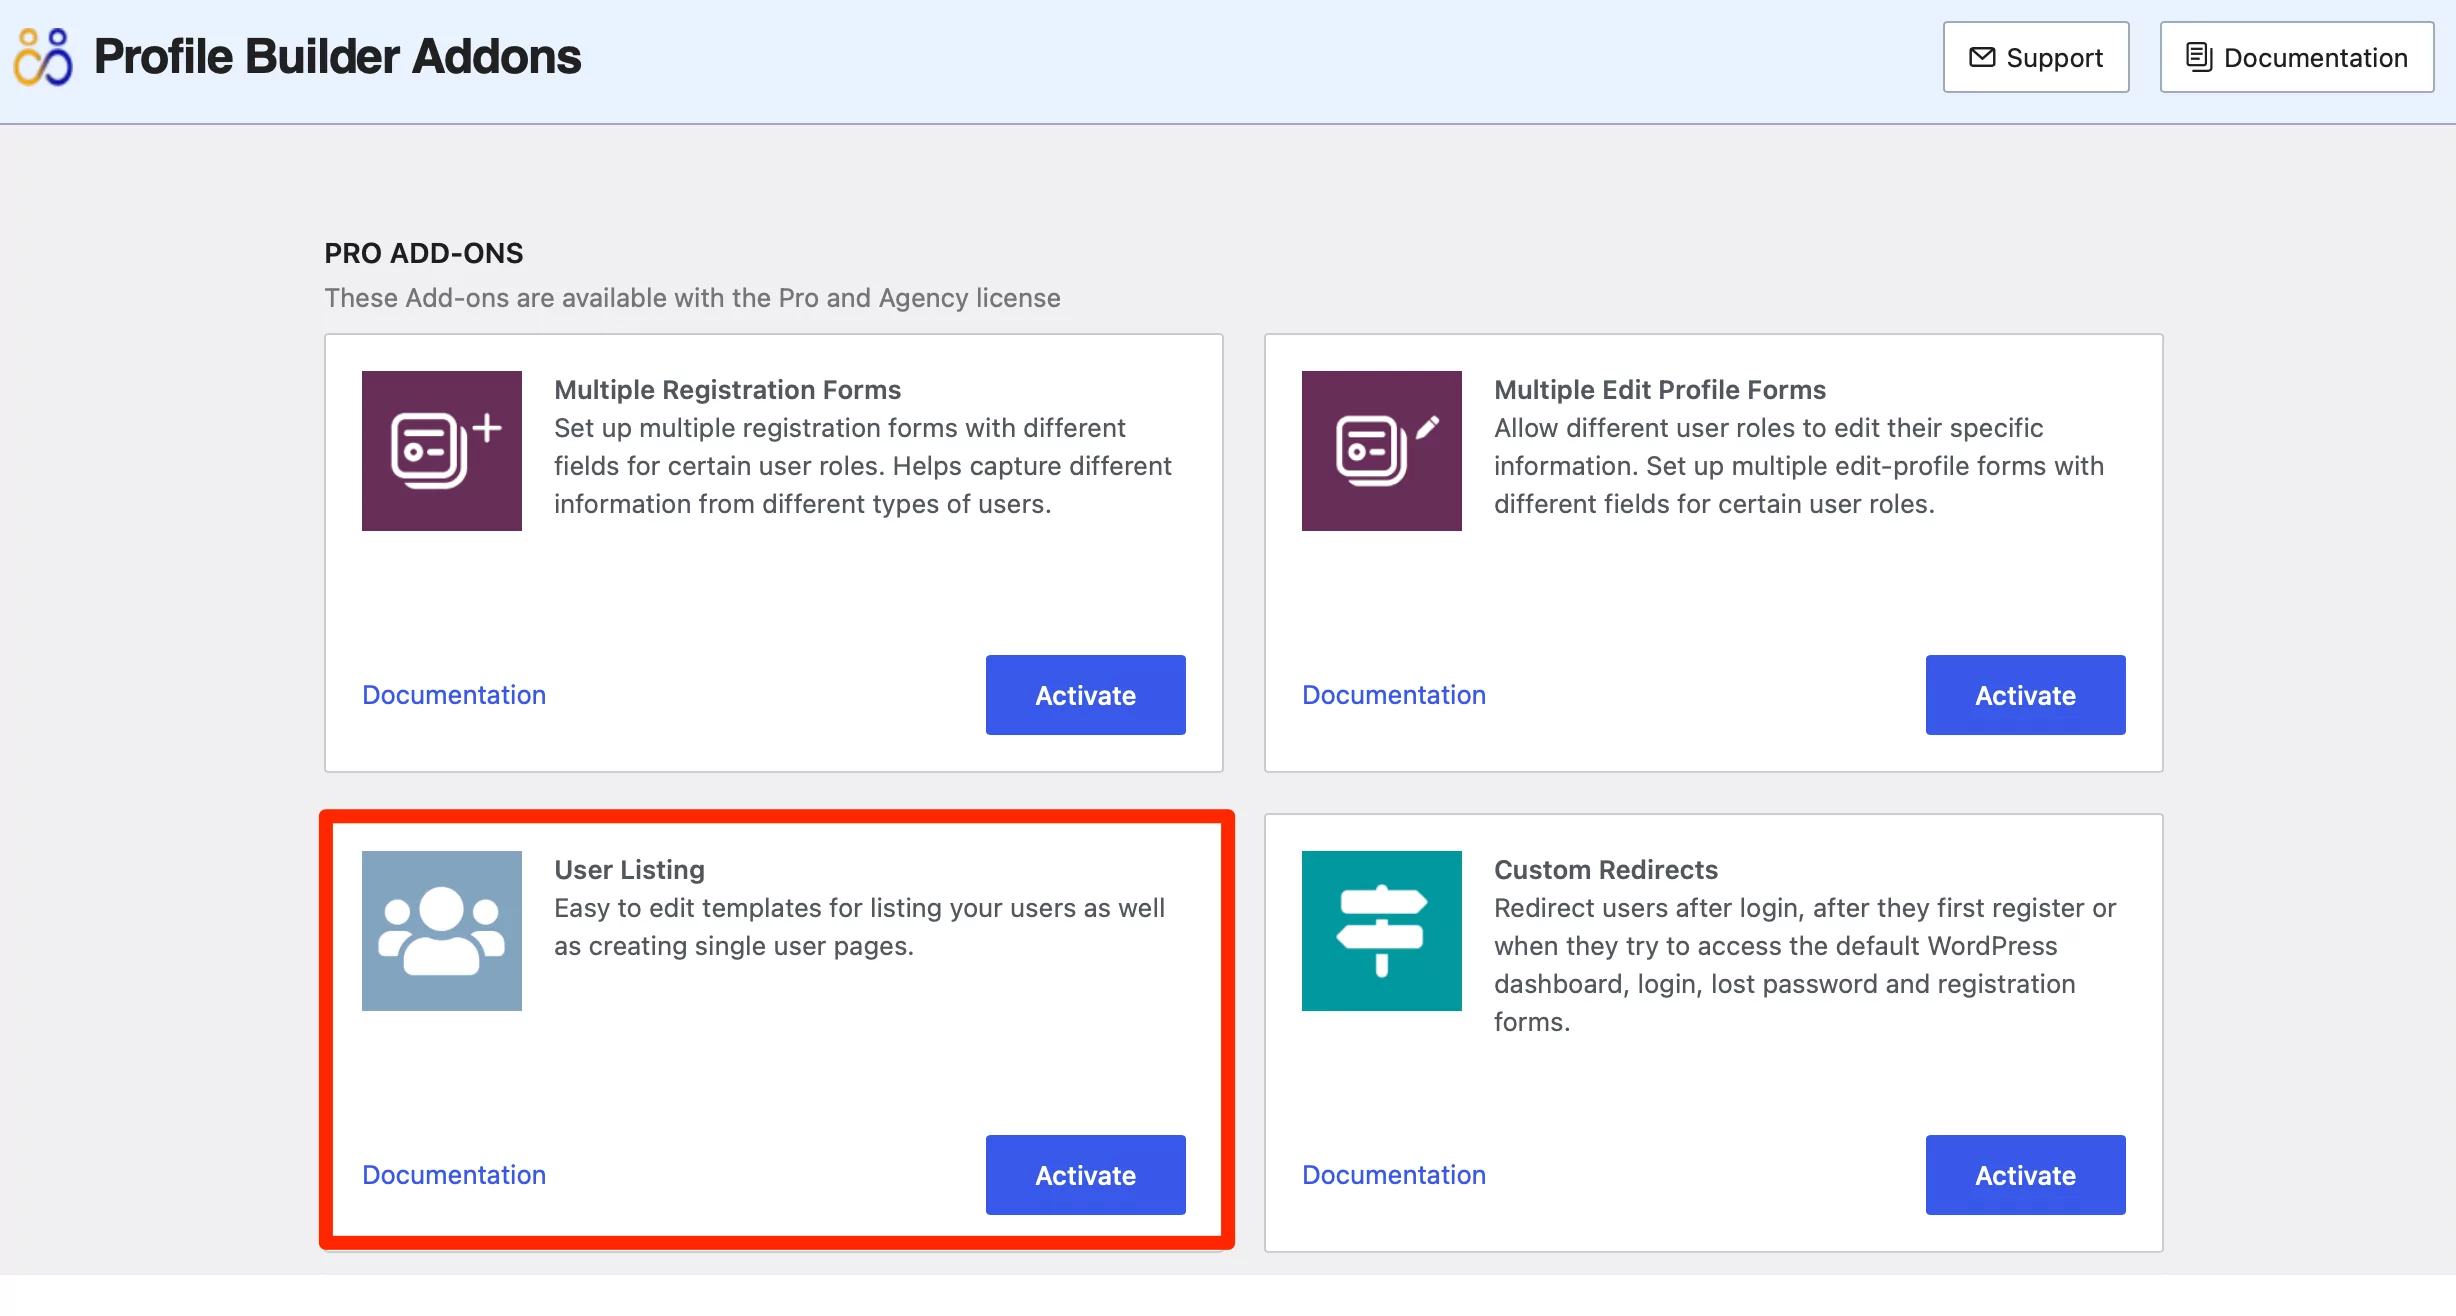
However, this functionality is only available in the paid versions of Profile Builder. To get started, locate the User Listing Add-on from the Profile Builder Add-ons section.
Then, click on the Activate button to the right of the add-on:
Next, you’ll have to create and set up your list of users. To do this, go to Profile Builder → User Listing, and click on the Add new button at the top of the page:
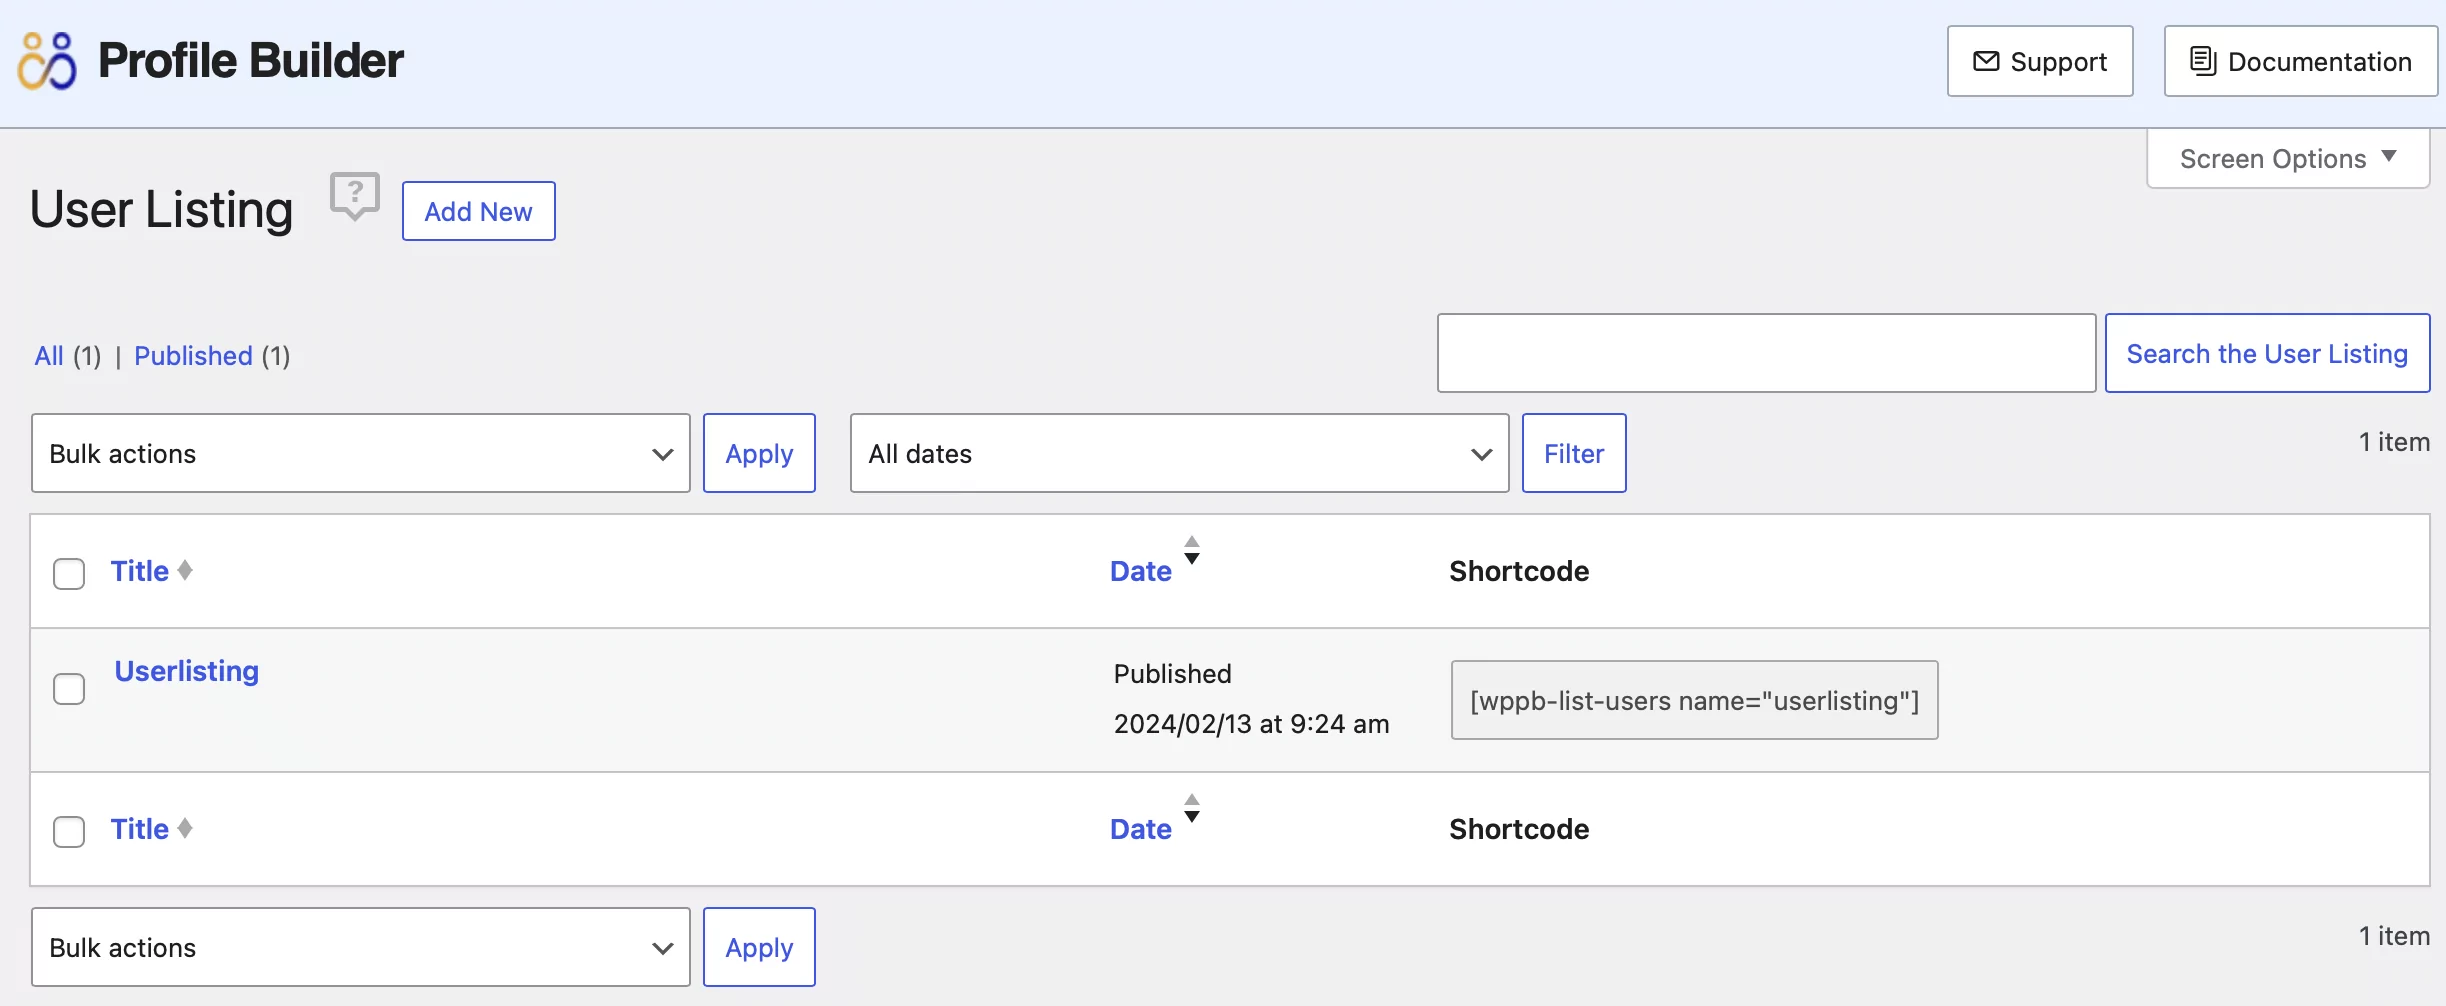
This will take you to the User Listing Settings area. Here, you can set the roles you want to display the list for, select the number of users listed per page, choose the sorting criteria and order, and more.
You’ll also be able to choose a pre-designed template and set up faceted menus, giving your users the option to filter out entries based on your chosen criteria. Here’s an extended article on how to list users in WordPress.
Once your list of users is created, you can add it to an Elementor page by finding the User Listing widget under the Profile Builder Forms section:

Drag the widget into place and your user list should immediately appear on your page preview:
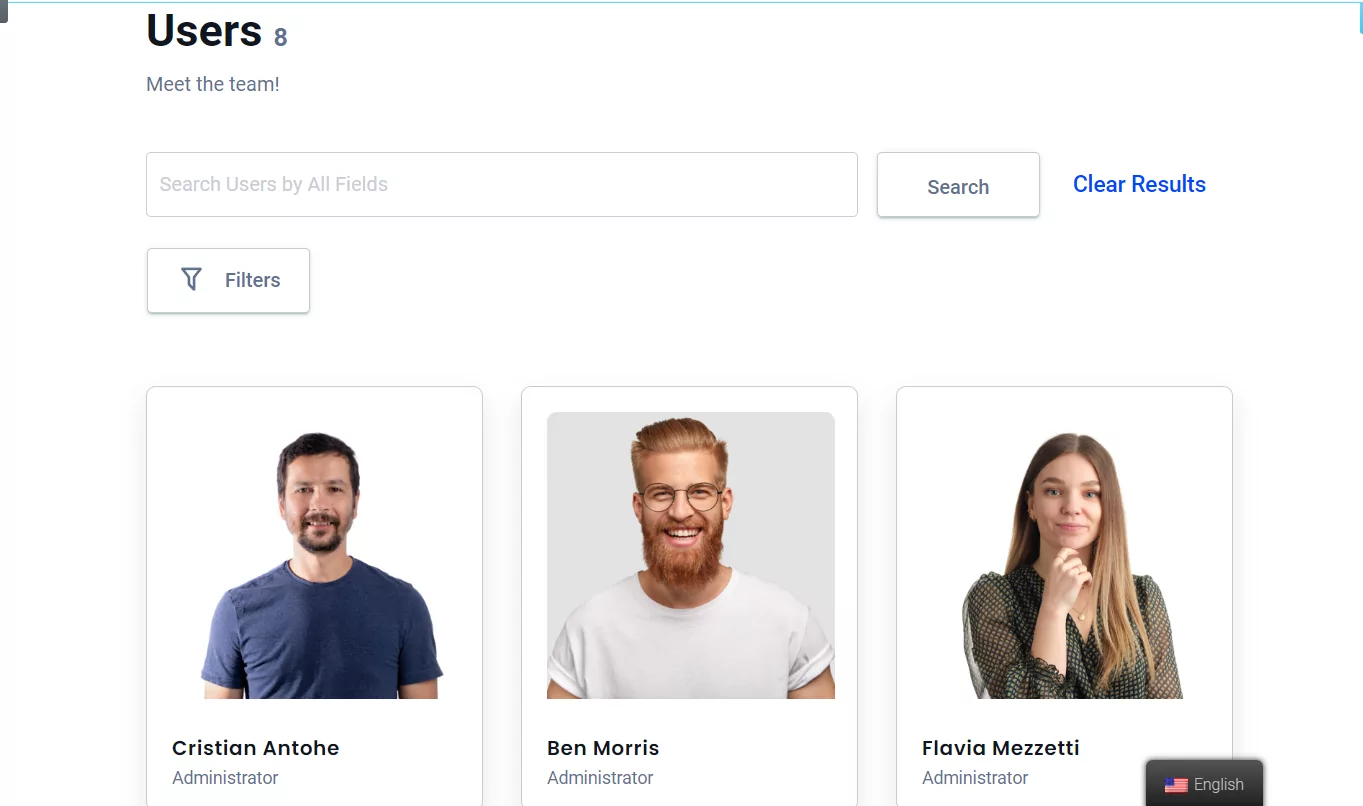
Then, you can configure how your list displays using the options in the Listing Settings. And, if you go to Profile Builder → User Listing, you’ll be able to choose between five pre-designed templates:
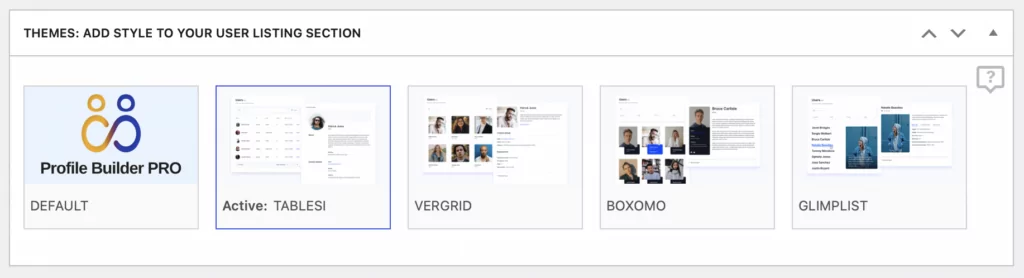
Simply scroll down to the Themes section to preview each theme and activate the one you like best.
Upgrade to Profile Builder Pro for More Features
Except for the user listing feature, everything we’ve shown you so far is available in the free version of Profile Builder. However, there are a few unique options in the premium version that you can use to further enhance your Elementor registration forms.
Access More Field Types
The free version of Profile Builder lets you add all of the native WordPress profile fields, but the premium version extends that with the ability to add custom fields using a variety of field types:
This lets you collect and store more information about users who register on your site.
Create Multiple Unique Registration Forms
The free version of Profile Builder lets you create a single custom registration form. However, the premium version lets you create unlimited registration forms, each with its unique set of form fields and options
For example, if you have an online course marketplace, you could create one registration form for students and another for instructors.
Create Custom WooCommerce Registration Forms With Elementor
With the premium version, you’ll get access to the WooCommerce Sync add-on. This way, you can create custom WooCommerce registration forms in Elementor.
This provides new fields that sync with the WooCommerce billing and shipping information, which you can use in your Elementor registration forms.
Use Conditional Logic in Your Registration Forms
In addition to more field types, the premium version lets you use conditional logic in your Elementor registration forms. This means you can display different sets of fields based on how a user answered previous questions in your form:
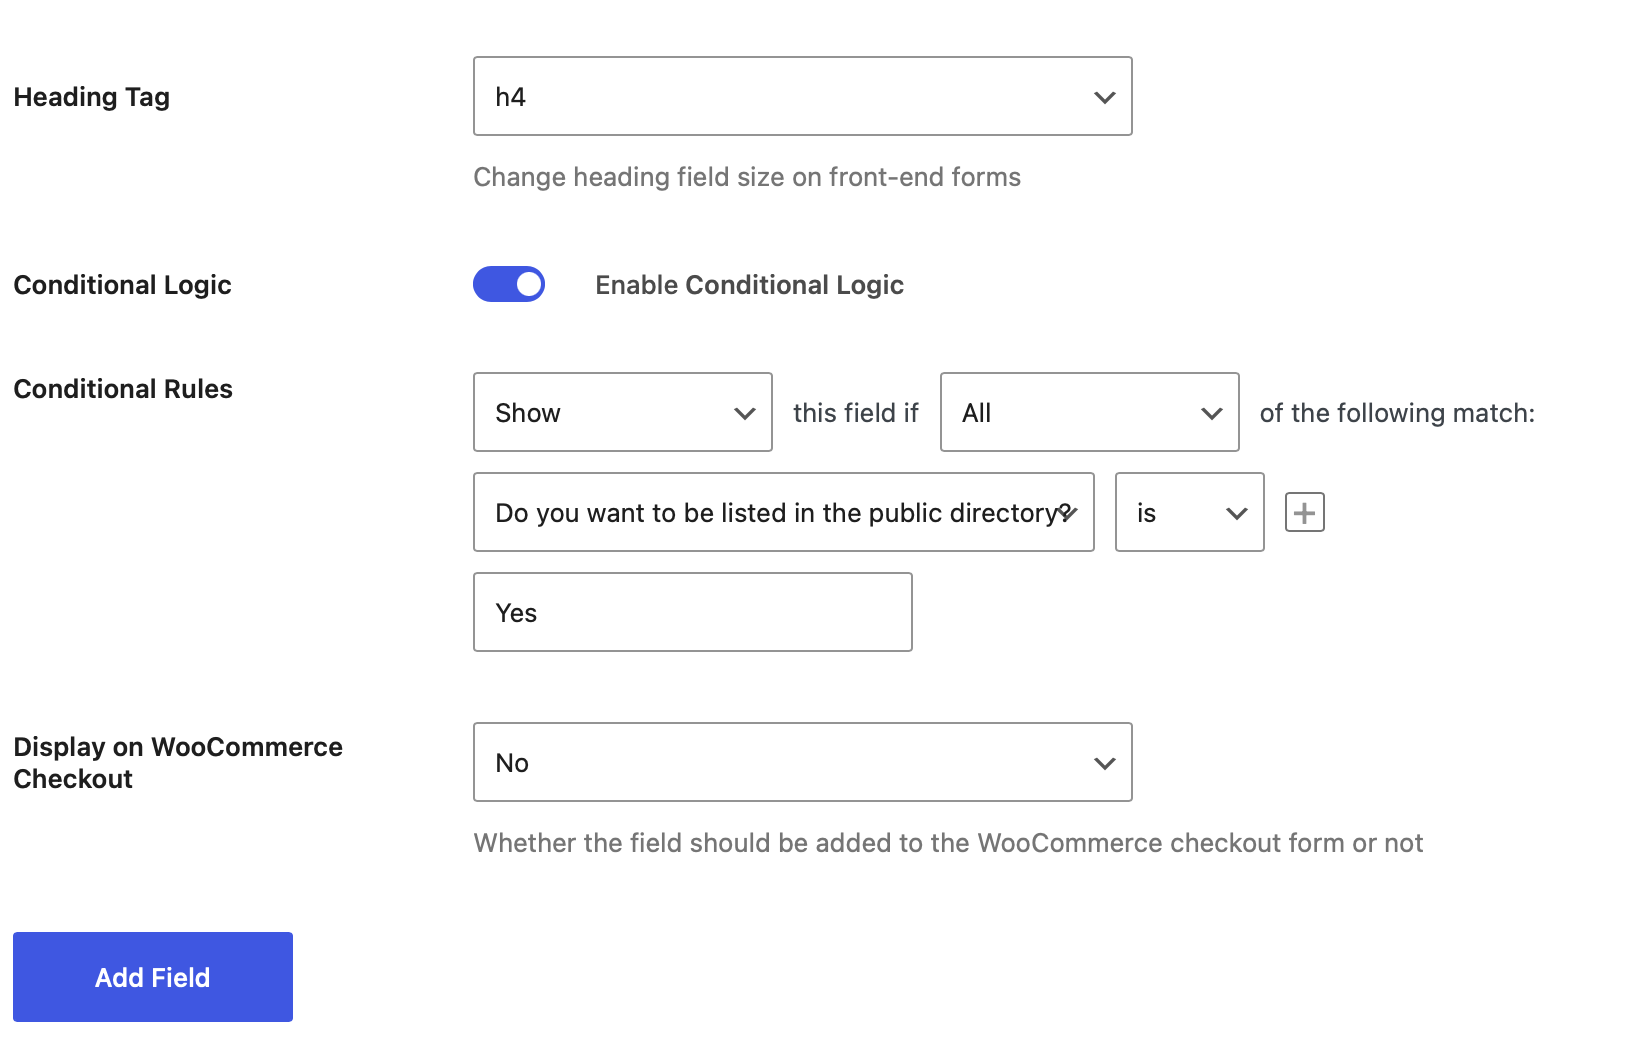
In the example above, you can see that it’s possible to ask users whether they want to be listed in the public directory. If they answer “yes”, you can then collect additional information about them.
Use Repeater Fields in Your Registration Forms
Another advanced field type that you get is the ability to use repeater fields in your Elementor registration form. For example, you could ask a user to list their education experience.
Then, you could add a repeater field that lets them add a new entry for each piece of their education history. Inside the repeater field, you can specify one or more fields that will repeat.
Require Admin Approval for Elementor Registration Forms
With the premium version, Profile Builder lets you hold some or all of your new users for manual admin approval before they can access their accounts. You can enable admin approval by going to Profile Builder → Settings:
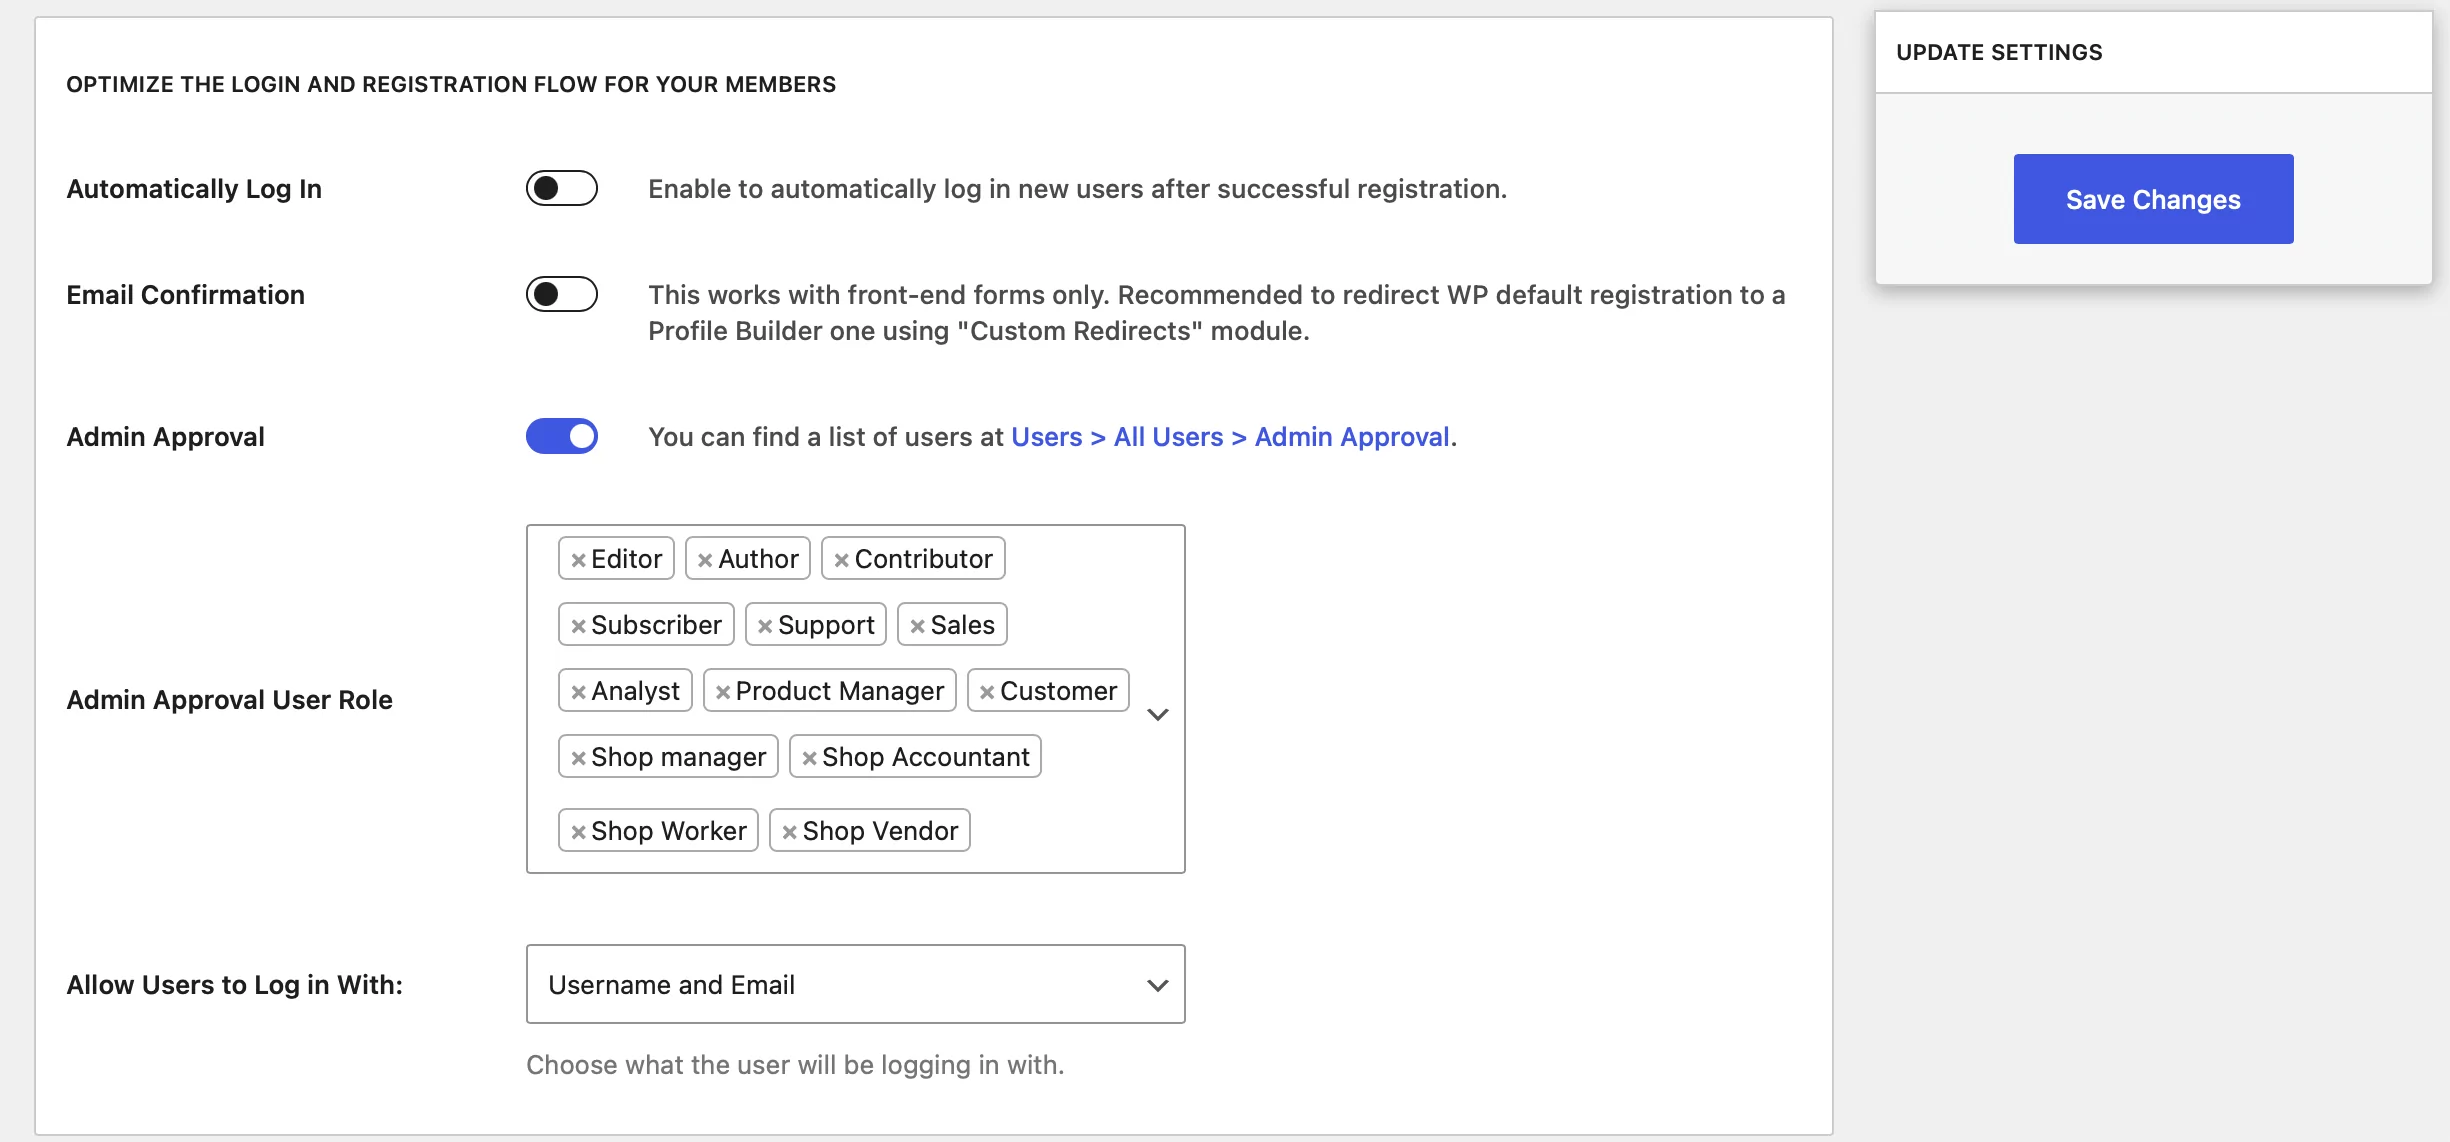
Here, you can either require admin approval for all new users or you can pick and choose certain user roles.
Create Custom Elementor Edit Profile Forms
With the free version, Profile Builder lets you create an Elementor edit profile form where users can edit all of the fields from the registration form. With the premium version, though, you can pick and choose which fields are available so that users can only edit certain parts of their profiles.
Create Your Custom Elementor Register Page Today
With Profile Builder, you can create your own custom register form in Elementor (with the free version). And if you do have Elementor Pro, Profile Builder gives you more flexibility.
However, you can also use the premium version of Profile Builder to add custom fields and get advanced features like conditional logic. Plus, you can create multiple Elementor registration forms. The plugin also integrates with WooCommerce and provides backend features like admin approval.
Do you have any questions on how to create your custom Elementor register form? Let us know in the comments below!
Related Articles

8 Best WordPress User Registration Plugins
Not sure what WordPress user registration plugin to use for your project? Going through all the WordPress user registration plugins can be disorienting. You may have spent hours and hours searching for plugins and tutorials to help you with your project, and you’re still as confused as you were when you started. Imagine finding the […]
Continue Reading
How to Customize the WooCommerce Login Page (No Code Needed)
Searching for a solution to customize the WooCommerce login page and otherwise control login behavior on your WooCommerce store? If you allow (or force) registration on your store, you'll want to create a user-friendly login experience so that your shoppers can easily log in to their accounts and access other key features. In this post, […]
Continue Reading
How to Customize the WooCommerce Register Page (Add Custom Fields)
Looking to create a custom WooCommerce register page for your store? Whether you want to create a dedicated registration page or add custom fields to the checkout register form (or both), we're going to show you an easy, code-free way to customize all parts of the WooCommerce registration process. By following this tutorial, you'll learn […]
Continue Reading