
Table of Contents
Searching for a way to let users on your site upload a custom WordPress user avatar or profile picture?
By default, WordPress relies on the Gravatar service for user profile pictures, which means that your site will show the avatar associated with each user’s email in Gravatar. However, this isn’t ideal because not all users have a Gravatar account and it means that users will have to edit their user avatar from the Gravatar website (instead of your WordPress site).
To create a more user-friendly experience and make it easier for users to customize their profile pictures for your site, you might want the option to let people upload a custom user profile picture from WordPress.
That way, your users can still benefit from being able to create their own personalized profile, but without needing to use a third-party service (like Gravatar).
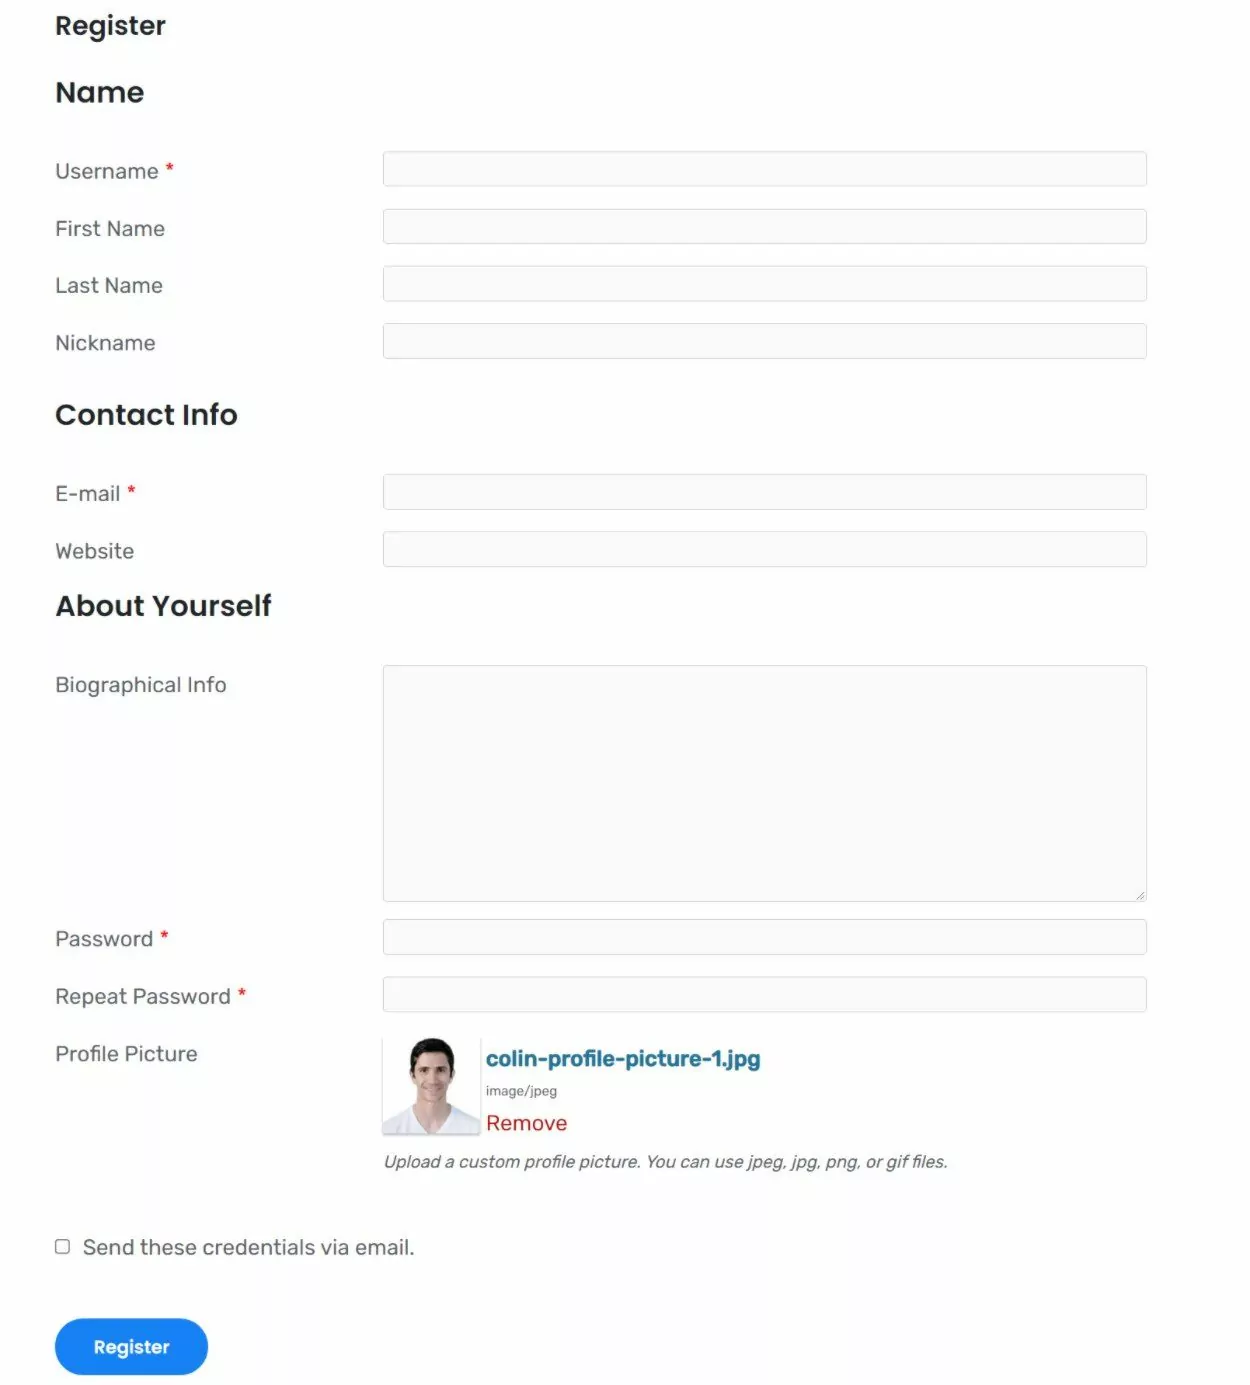
That’s the topic of this post – we’ll show you step-by-step how you can use Profile Builder to give users the option to upload a custom user avatar from the front-end of your site in a few different ways. Here’s one example of a dedicated user profile upload form, but you can also include the option as part of a full registration or edit profile form:
![]()
Ready to learn how it works? Let’s dig in…
What You Need to Allow Custom WordPress User Avatars
To let users upload their own custom avatar pictures, you can use the Profile Builder plugin.
Profile Builder is a full system for customizing the WordPress registration and edit profile behavior.
If you want, you can use it to create a custom registration form for your site to replace the default WordPress one. Or, you can keep using the existing WordPress registration form – it’s up to you.
If you do opt to create a custom registration form, Profile Builder lets you give users the option to upload a custom avatar when they create their account. You’ll also be able to add tons of other fields to your registration form if needed, including custom fields.
Then, you can also use Profile Builder to create a custom edit profile form that lets users edit some or all of their profile information from the front-end of your site. You can also give users the option to edit their avatar here. So:
- If you included the avatar field on your registration form, users can edit their avatar field here if they change their minds.
- If you didn’t, you can give users the option to upload their avatar after they’ve already registered.
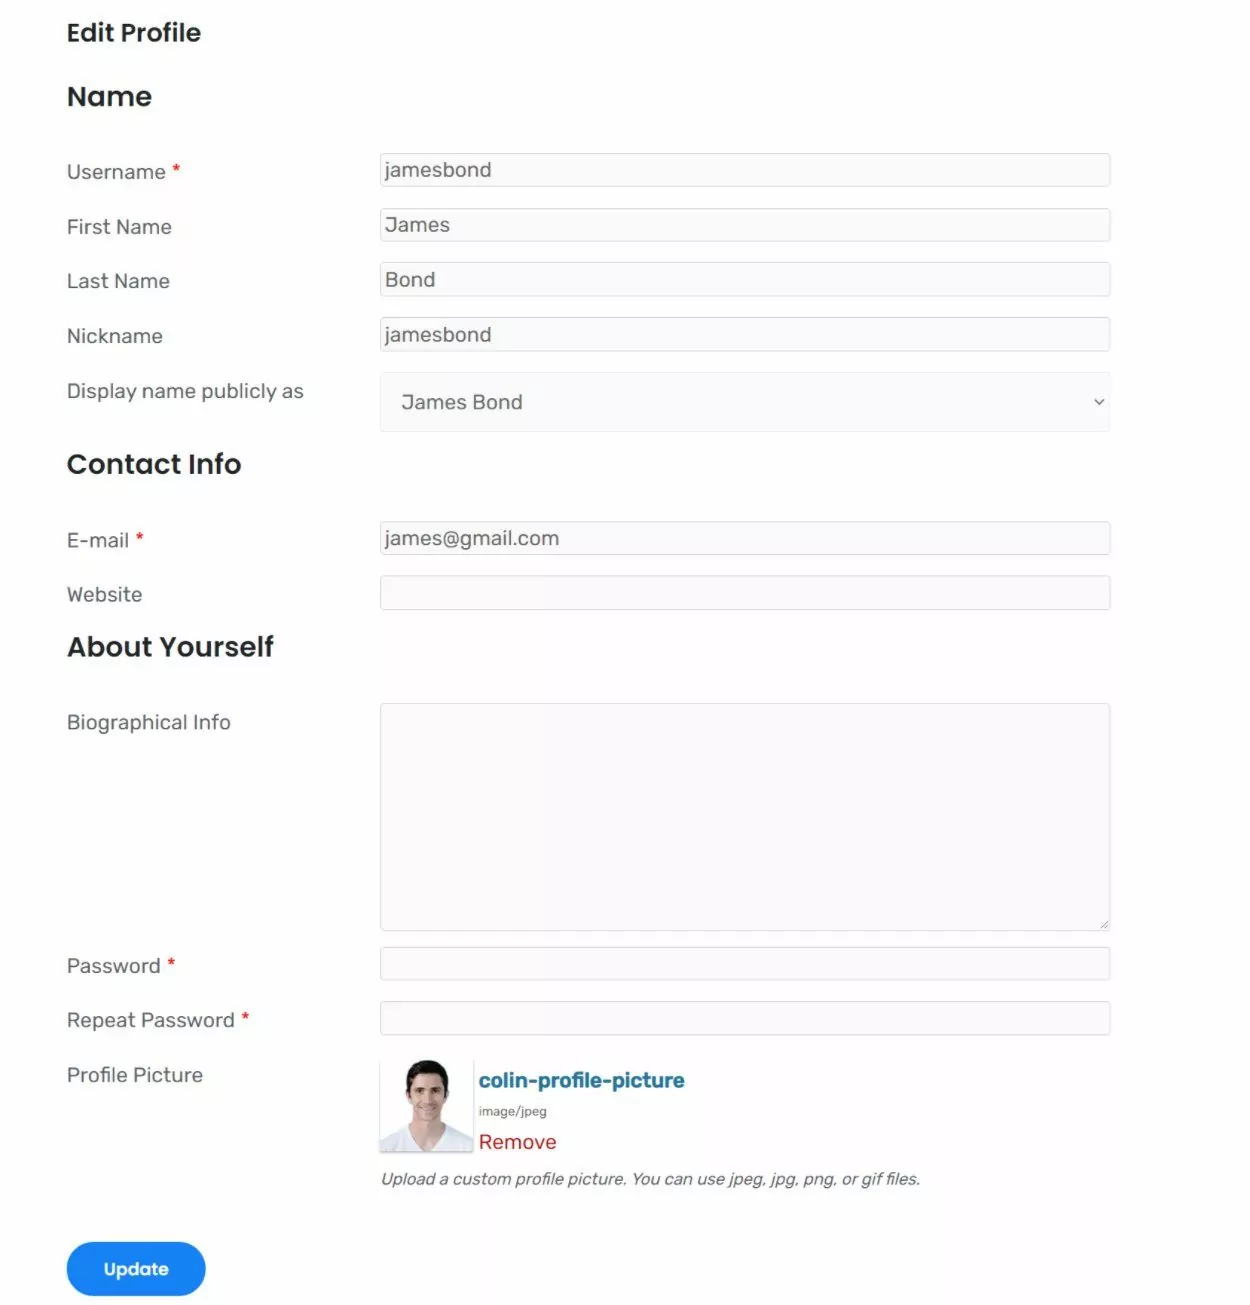
In addition to including the option to edit their profile picture as part of a full edit profile form, you also have the option to create a page that’s 100% dedicated to just the avatar picture. Here’s an example:
![]()
The cool thing about Profile Builder’s user avatar field (and other features) is that it integrates with a lot of the other plugins that you might be using including:
- bbPress
- BuddyPress
- WooCommerce
For example, let’s say you created a forum with bbPress. With Profile Builder, you can give users the option to choose the avatar that displays when they start a thread or make a reply in the forum.
Profile Builder does have a free version at WordPress.org. However, to access the avatar upload field, you’ll need at least the Hobbyist license of the premium version. You can purchase it by clicking here or using the button below:
Profile Builder Pro
The easiest way to let users upload custom profile pictures from front-end registration or edit profile forms.
Get Profile BuilderTo get started, make sure to install and activate the Profile Builder Pro plugin on your site.
Then, here’s how to set it up…
How to Add a Custom Avatar Upload Field to Registration or Edit Profile Forms
In this first section, we’ll show you how to add a user avatar upload field to both your registration and edit profile forms. Then, in the next section, we’ll show you how you can create unique forms for either registration or edit profile, including creating a dedicated form just for letting a user control their avatar.
For example, maybe you don’t want to require users to upload an avatar right upon registration and you only want them to upload their profile picture from their own account page on your site, using an edit profile form. Don’t worry, we’ll show you how that works in the next section.
But for now, let’s assume you want to give users the option to set a custom user avatar on both the registration and edit profile forms.
1. Customize Your Form Fields
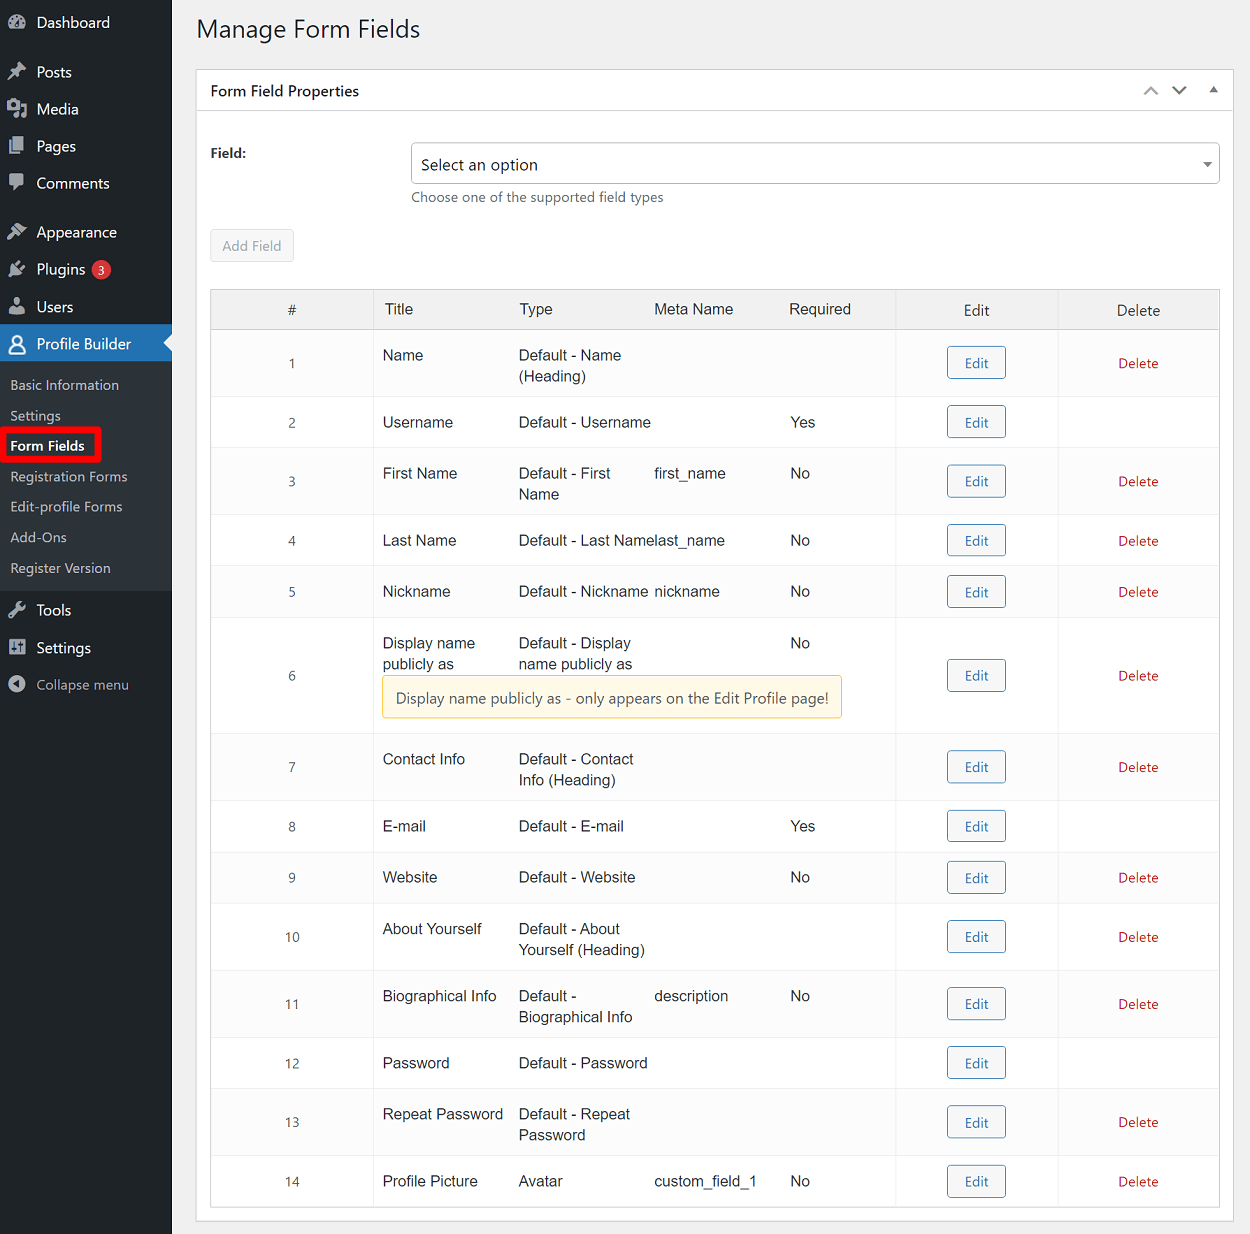
To begin, go to Profile Builder → Form Fields. This is where you can control all of the fields that display on your registration or edit profile forms, including the user avatar field.
In this interface, you can:
- Add new fields.
- Delete any existing fields.
- Rearrange the order of fields using drag-and-drop.
- Customize how each field works.
By default, this form will include regular profile fields to collect details like the user’s name, username, contact info, biography, password, etc.
You can feel free to customize these existing fields as much as you want.
When you’re ready to add your WordPress user avatar upload field, use the drop-down at the top to add the Avatar field:
![]()
Then, you’ll be able to customize how the avatar field works. In addition to the general field options, there are a few important avatar-specific settings here:
- Allowed Image Extensions – by default, the field supports uploads for jpg, jpeg, png, and gif. However, you can customize this if needed by entering the specific extensions that you want to allow.
- Use Simple Upload – whether you want to use the simple browser upload field instead of the WordPress upload field (we’ll show you some example screenshots of this below).
- Avatar Size – the size that you want to use for avatars – between 20 to 200 px.
Once you’re happy with those settings, click Add Field:
![]()
You can then use drag-and-drop to change the placement of the avatar field in your form if needed.
So – what’s the difference between the WordPress upload field and the simple upload field?
Well, the WordPress upload field will use the styling from your theme and the WordPress Media Library interface – here’s an example of how it might look using the Astra theme:
![]()
Clicking the button will open an interface that looks a lot like the WordPress Media Library uploader in the backend:
![]()
On the other hand, the simple upload field will just use the default browser design like this:
![]()
Clicking the upload button will open the normal file browser prompt that lets users browse the files on their computers.
Feel free to choose whichever approach fits your situation the best.
2. Display Your Forms
Once you’re happy with your form fields, you can use Profile Builder’s shortcodes to display the register and edit profile forms on the front-end of your site:
- Registration form –
[wppb-register] - Edit profile form –
[wppb-edit-profile]
For example, to create the edit profile form where users can upload/edit their WordPress user avatar, just create a regular page and include the proper shortcode. You can also add static text on the page if needed.
![]()
Once you publish your page, users will be able to use it to edit all of the fields from the registration form. In the next section, we’ll show you how to customize which fields are available.
You can repeat the same steps to create a page for your registration form.
Profile Builder also includes lots of options for customizing registration form behavior, including letting you automatically assign a user role to people who use the form. To learn more, check out these posts on how to…
- Create a custom WordPress registration form.
- Redirect users after registration.
- Require manual admin approval for new users.
How to Create Separate Register and Edit Profile Fields (Including a Dedicated Profile Picture Form)
Above, we showed you how it works to include the user avatar upload field on both the registration and edit profile forms.
However, you might have situations where you only want to include the user avatar upload field on one or the other. Or, you might want to use different form fields for each, or even create a dedicated form just for letting people control their avatar pictures.
To help you set this up, the premium version of Profile Builder gives you the option to create unlimited unique registration or edit profile forms.
To begin, go to Profile Builder → Add-Ons and make sure that you’ve enabled the add-ons for Multiple Registration Forms and Multiple Edit Profile Forms.
![]()
Then, to create a unique form, you can go to either Profile Builder → Registration Forms → Add New or Profile Builder → Edit-profile Forms → Add New, depending on the type of form that you want to create.
For this example, let’s say you want to create a custom edit profile form that’s 100% dedicated to the user avatar field.
You would go to Profile Builder → Edit-profile Forms → Add New and give it a name. Then, you could set it up so that it only includes the custom avatar field that you set up before:
![]()
Now, when you embed that form using its unique shortcode, it will only display a single field for users to edit or upload their avatar picture:
![]()
Get Started With WordPress User Avatars Today
By default, WordPress uses Gravatar to generate user avatar pictures. This is fine as a starting point, but it has two issues if you want more control over how your site uses avatars:
- Users cannot edit their user avatar for just your site. And if they want to change their overall avatar, they need to do it from the Gravatar website.
- Gravatar images are stored on and served from Gravatar’s servers, which can be an issue from a performance perspective. We didn’t talk about this above, but it’s another consideration.
With Profile Builder, you get a more user-friendly and flexible way to handle user profile pictures. You can let users upload their own custom avatar on your registration form, in an edit profile form, or from a dedicated profile picture form.
All of the avatar pictures will be hosted locally on your site’s server and users will be able to fully manage their avatars without leaving your site.
Are you ready to get started with your own WordPress user avatar system? Purchase Profile Builder today to get started:
Profile Builder Pro
The easiest way to let users upload custom profile pictures from front-end registration or edit profile forms.
Get Profile BuilderStill have any questions about how to set up WordPress user profile pictures with Profile Builder? Let us know in the comments!
Related Articles

How to Customize the WooCommerce Login Page (No Code Needed)
Searching for a solution to customize the WooCommerce login page and otherwise control login behavior on your WooCommerce store? If you allow (or force) registration on your store, you'll want to create a user-friendly login experience so that your shoppers can easily log in to their accounts and access other key features. In this post, […]
Continue Reading
8 Best WordPress User Registration Plugins
Not sure what WordPress user registration plugin to use for your project? Going through all the WordPress user registration plugins can be disorienting. You may have spent hours and hours searching for plugins and tutorials to help you with your project, and you’re still as confused as you were when you started. Imagine finding the […]
Continue Reading
How to Create a Custom Reset Password Page in WordPress
If you’re building a user-focused website, creating a WordPress custom reset password page is a no-brainer. Users forgetting the password to their accounts is inevitable, so it only makes sense to offer them a way to recover their password. In this post, you will learn everything there is to know about creating a WordPress reset […]
Continue Reading