

Table of Contents
- 1 Different Types of Private WordPress Pages
- 2 How to Setup Private Pages for Subscribers in WordPress using Paid Member Subscriptions
- 3 Different Types of Content Restrictions With Paid Member Subscriptions
- 4 Setup WordPress Private Pages for Subscribers Today
You might not want every page of your site visible to the world. In some cases, you’ll want to set up WordPress private pages for subscribers.
You could create pages with subscriber-only resources and private content, build a separate membership site, or even restrict content to paying members.
Creating WordPress private pages for subscribers can bring you advantages like:
- Increasing email sign-ups by offering subscriber-only resources;
- Adding a new income stream via paid memberships;
- Allowing you to offer VIP membership for your WooCommerce store;
- Adding paid forums to your site.
In this article, you’ll learn the different types of private pages you can create and how the Paid Member Subscriptions WordPress plugin can help you quickly set them up on your WordPress site.
Different Types of Private WordPress Pages
When you’re creating a private page in WordPress, you’ll have two different options for restricting access to different user roles:
- Restrict access to logged-in users. You can create a resource page for email subscribers to encourage sign-ups, or make users create an account to view your eCommerce store or forum.
- Restrict access to subscribers. You can create multiple subscriber levels and create a password-protected membership site.
How to Setup Private Pages for Subscribers in WordPress using Paid Member Subscriptions
The simplest way to set up private WordPress pages is by using a dedicated plugin to do all the hard work for you automatically.
The Paid Member Subscriptions plugin lets you quickly and easily create a wide range of different private pages.
Whether you’re running a blog, WooCommerce store, or forum, you’ll be able to use this plugin to create subscriber and member-only portions of your website.
Here are four ways you can add private pages or content for your subscribers:
1. How to Make Posts and Pages Private
Creating subscription-only blog posts and pages can be a simple way to add membership functionality to your website.
If you already get a decent amount of traffic, then creating premium content such as private posts can be an easy way to generate additional revenue.
Once you’ve created different membership levels, you can start restricting access to private posts and pages to only certain levels or user roles.
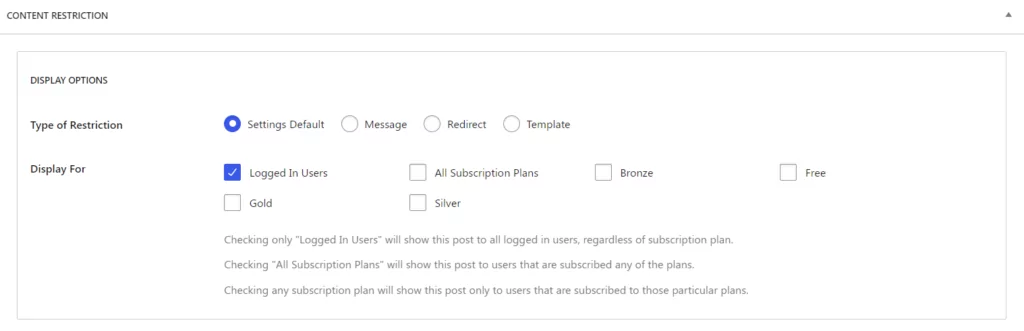
Navigate to a page or post you want to restrict, then scroll down underneath the main content section, where you’ll find a meta box labeled Content Restriction.
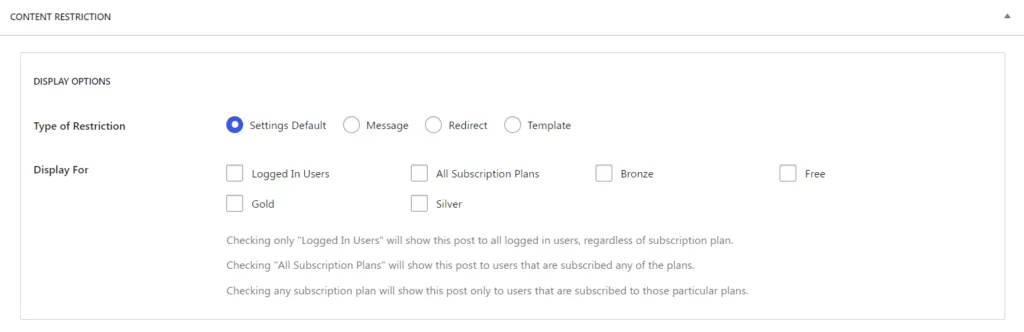
Here you can choose which subscription plan you want to be able to read private posts, or simply restrict the page from non-logged-in users, so users need to create an account to view the content.
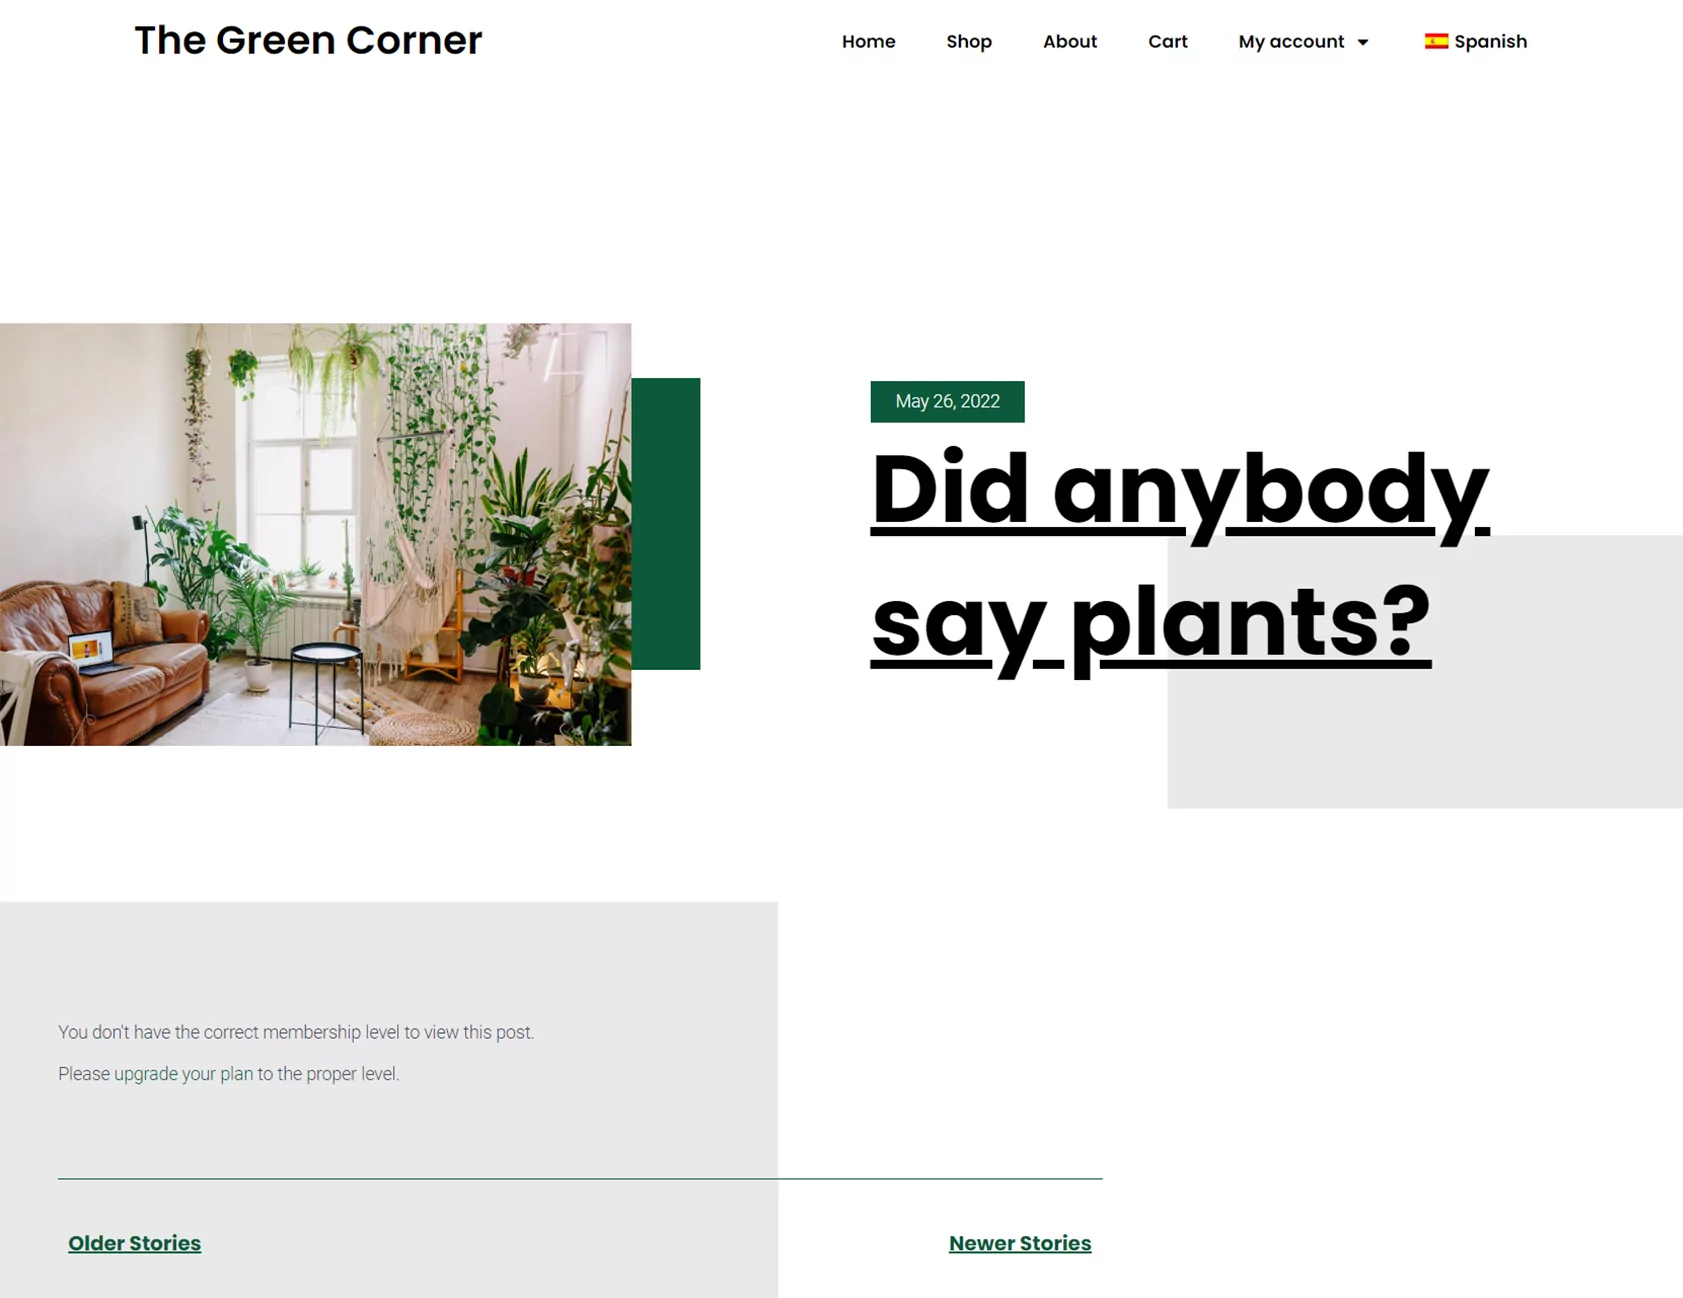
Here’s how a restricted page or post will look with a custom content restriction message:
2. How to Make Custom Post Types Private
Custom post types are used to help you better organize your content on an internal level. Instead of a standard WordPress blog post, you can choose a custom post type, which will be separate from standard blog posts and pages.
This not only helps you organize content for your readers, but it can make it easier to create types of subscription content.
There are all kinds of custom post types you can create:
- Client and customer testimonials;
- Real estate agent home listings;
- Vehicle listings for an auto dealership;
And many more!
To create a custom post type, you’ll want to use the WCK plugin, which makes it easy to create a custom post type without any complex code. Follow this beginner’s guide to custom post types for a walk through the entire setup process.
Once you’ve created a custom post type you’ll be able to make it a private post by following the same steps from the section above.
3. How to Make WooCommerce Products or Entire Shop Private
With Paid Member Subscriptions and WooCommerce, you can build an eCommerce site that also has membership functionality. This allows you to create a VIP-only store – where visitors have to sign up for access – or restrict product viewing or purchase to specific membership levels.
Once you’ve set up your products and subscription plans, you can set up your product visibility. You’ll be able to do this whenever you add new products as well.
Open up the product you want to edit, and underneath the product content (just like the post and pages restrictions section), you’ll find a box titled Content Restriction. Under Display Options, you can choose which subscription levels you want the product to display for.
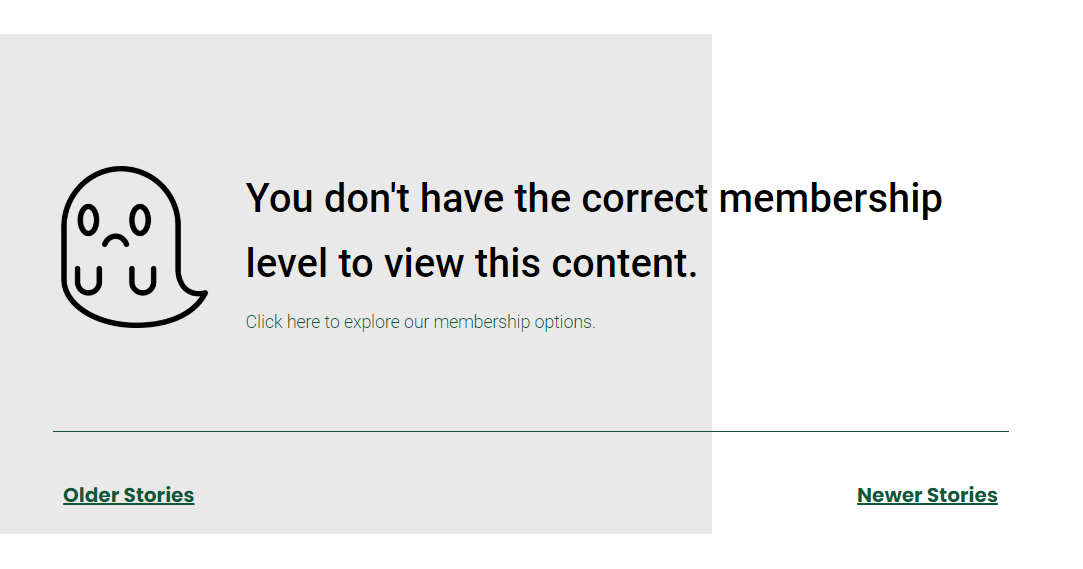
Here’s what your users will see if they don’t have the right membership level:
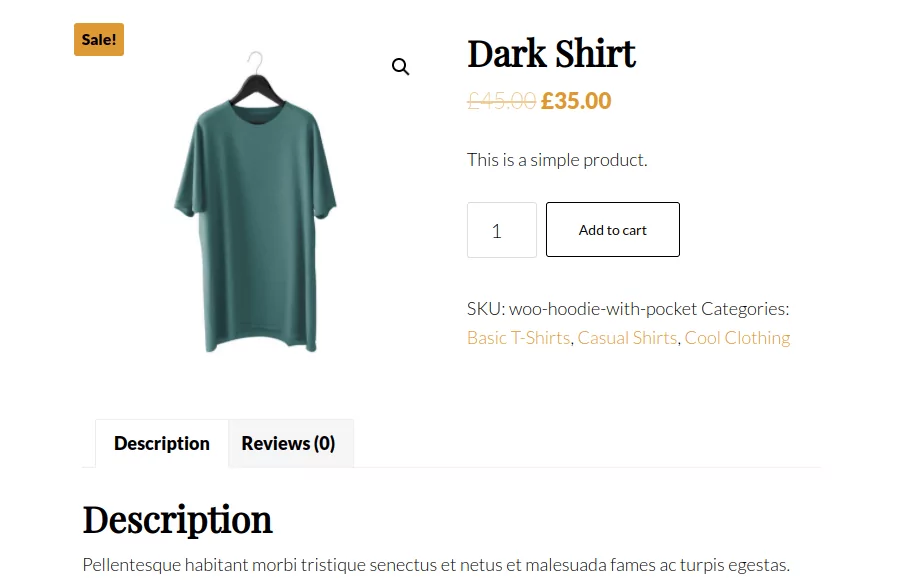
Here’s the standard product view, when the user has the correct membership level:
You can also restrict access to your entire WooCommerce store. Just navigate to Pages → All Pages and open up your WooCommerce Shop page.
Click Edit Page and this will open your Shop page. Underneath the content box, you’ll find the same meta box labeled Content Restriction. In the Display Options section you can restrict who you want the shop page to show up for, or make it completely private.
Restrict Product Viewing
Underneath the content section, you’ll see the Content Restriction meta box.
In the Content Restriction meta box, you can select which subscription plans will be allowed to see the product. This is an easy way to hide your product from people who aren’t logged in or members who don’t have the right subscription level.
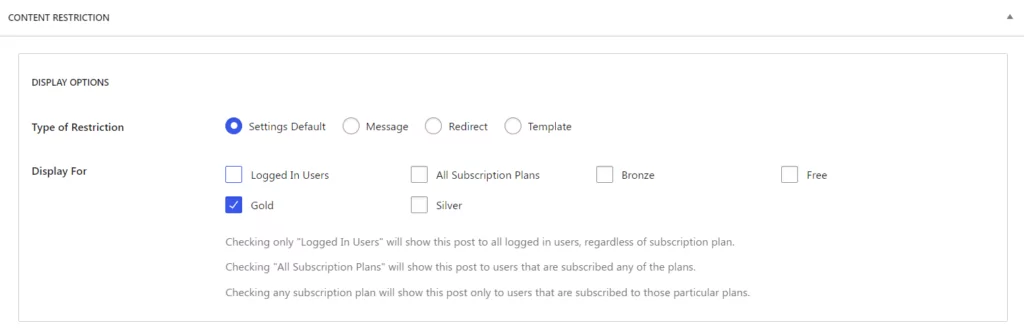
In the example above, only members who have signed up for the Gold plan will be able to view this product.
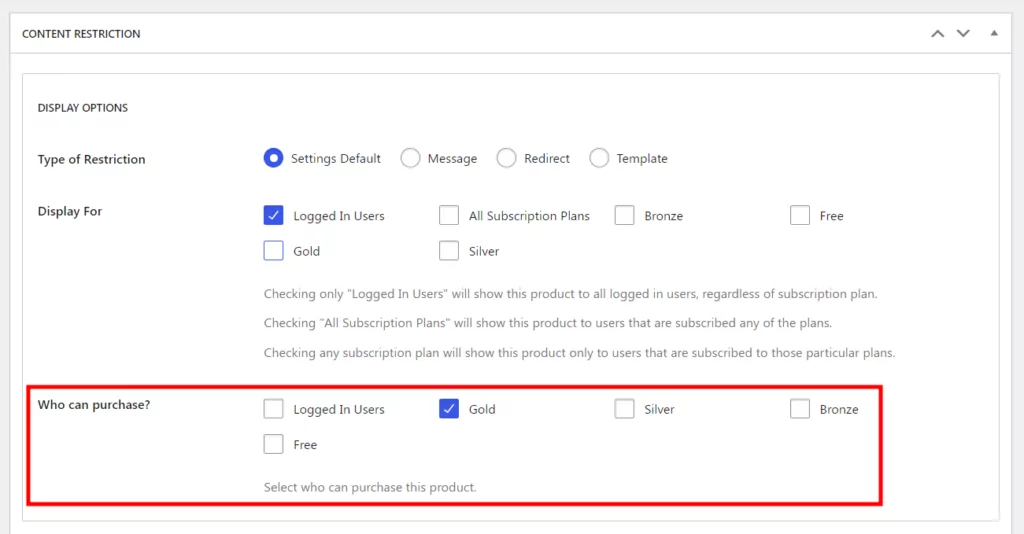
Restrict Product Purchase Options
Beyond restricting product viewing, you can take this a step further and restrict who can actually purchase the product. If you take this approach, you can make your products visible to everyone but limit purchasing certain products to encourage new users to sign up.
In the Purchase Options box, on the same product edit screen, you can set which membership levels can purchase the product.
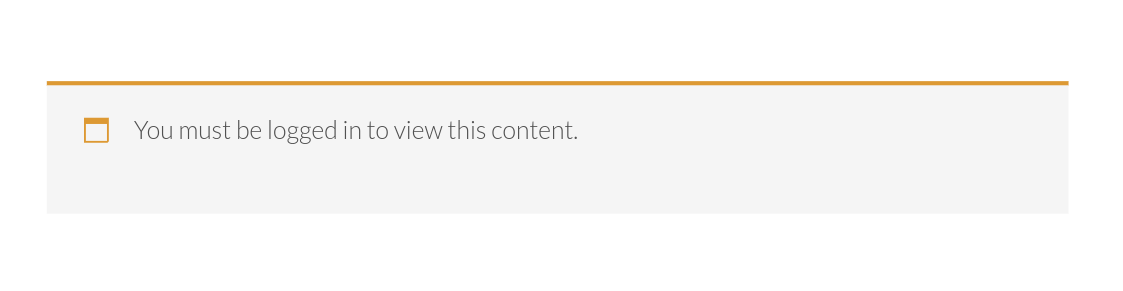
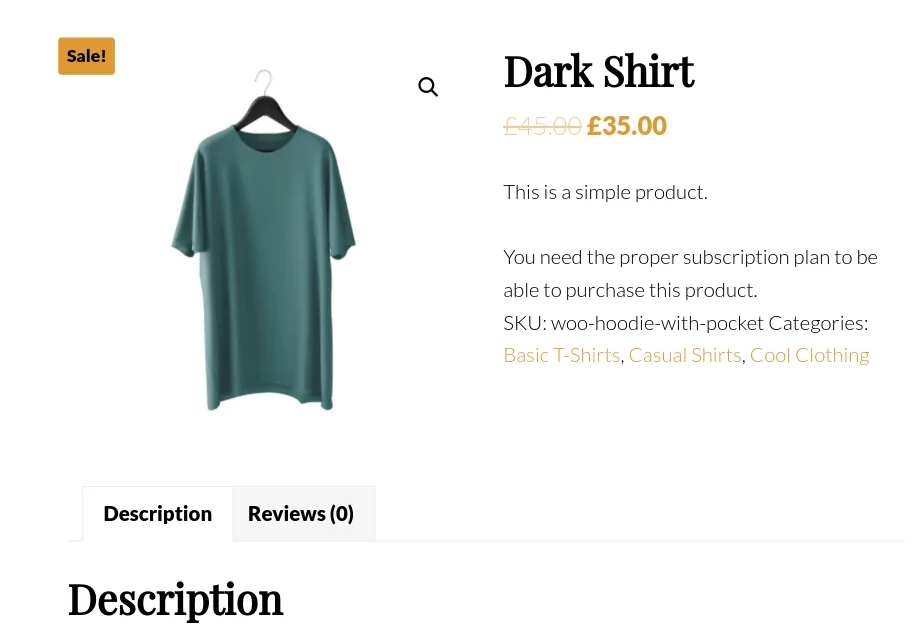
Here’s what the user will see if they don’t have the right membership level. Note the message requiring the appropriate subscription plan:
4. How to Make bbPress Forums and Topics Private
Building a membership community can be a great way to add a revenue source to your blog.
Once people invest time and energy into your site by creating a profile, they’ll return time and time again, especially if you’ve created a valuable online community.
To restrict your bbPress forum to members, you’ll first need to have your forum built and created. You can even create multiple forums, have one for more general users available to everyone, and a premium forum for paying subscribers.
Making Your Forum Private
Restricting access to forums is similar to how it’s done for posts and pages. You might want to do this to increase the sense of community for your users or add caps on how many users your forum can have. When you’re restricting your forum content, you’ll have an additional option called Topic Restriction Mode which gives you more control over your forum.
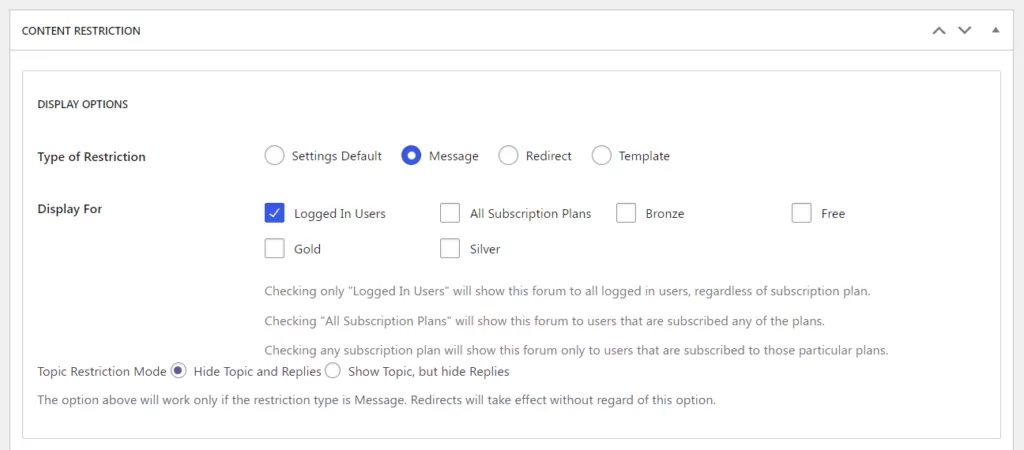
- Hide Topics and Replies. This option will hide your entire forum. Instead of displaying a list of topics, a redirection message will be displayed, or a custom redirect will be enabled.
- Show Topic and Hide Replies. This will show the list of topics currently in the forum, and your visitors will be able to access the topic content. However, only the topic content will be displayed. Any replies to the topic will be hidden, and a restriction message will be displayed. Only users with a membership will be able to see forum replies.
If you choose to hide both topics and replies, then your visitors will see an image like the one below. You can customize the message to encourage visitors to sign up, add images, links, and more.
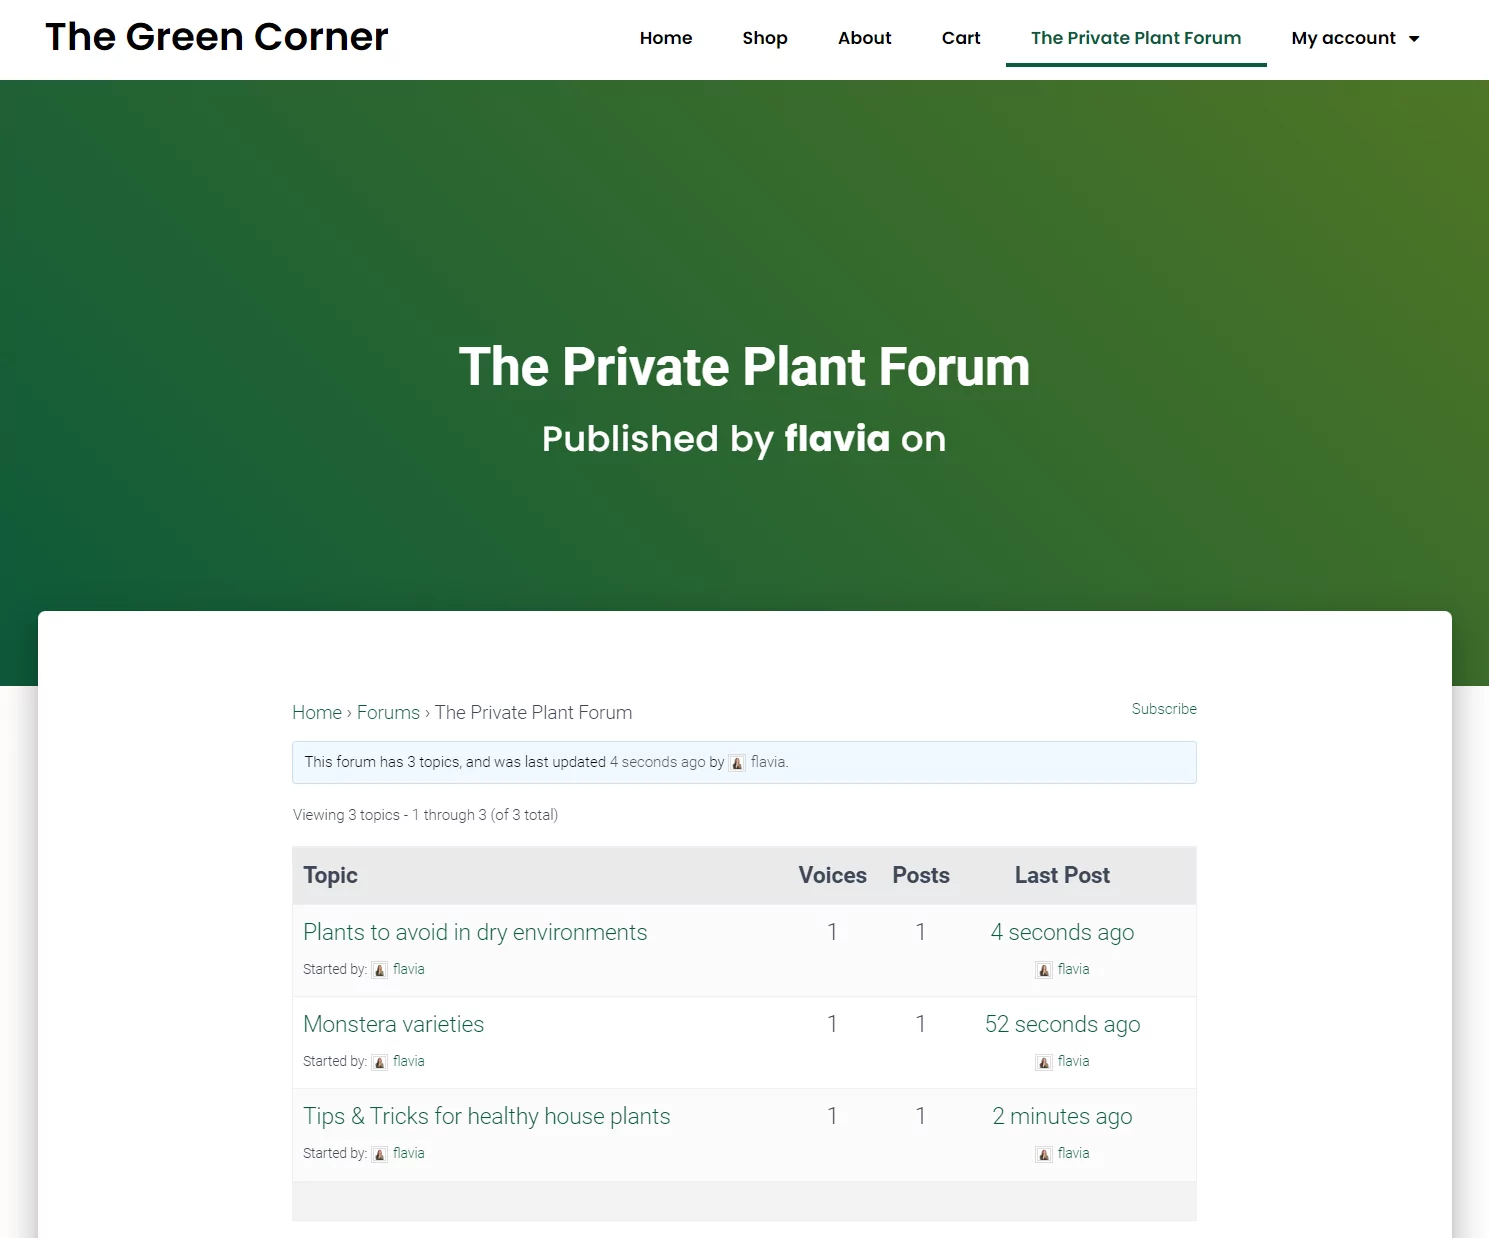
Here’s what your forum will look like to visitors who have the right membership level:
And here’s how your forum will appear with a simple restriction message, with both topics and replies hidden:

Different Types of Content Restrictions With Paid Member Subscriptions
Depending on the type of website you run and the reason you’re creating WordPress private pages for subscribers, you’ll have different options for visitors who aren’t subscribed.
With Paid Member Subscriptions, you choose the action you want your visitor to take if they aren’t subscribed.
Restriction Message
You can create your own message for your content restrictions to encourage users to sign up and become members.
Simply navigate to Paid Member Subscriptions → Settings → Content Restriction and scroll to the Restriction Messages section.
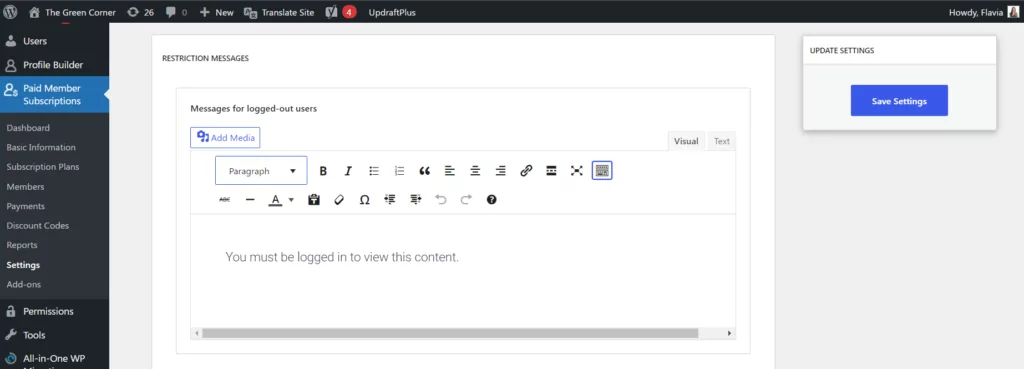
Here, you can set restriction messages for different types of users at a global level across your website.
However, you can also set restriction messages for specific pages, posts, or products. You can do this by going to the Restriction Messages meta box underneath any of the individual elements mentioned:

This allows you to create a unique restriction message on your home page, individual posts, pages, and products. Just don’t forget to check the Enable Custom Messages checkbox.
Here’s what your visitors will see if a custom restriction message is enabled:
Redirect to Another Page
The redirect option will let you create another page to redirect users to if they don’t have the right membership level to view the content they’re trying to access.
This could allow you to redirect visitors to a landing page that breaks down your subscription plans and can convert more visitors into paying subscribers, or a members’ login page.
You can change your redirect URL by navigating to Paid Member Subscriptions → Settings → Content Restriction.
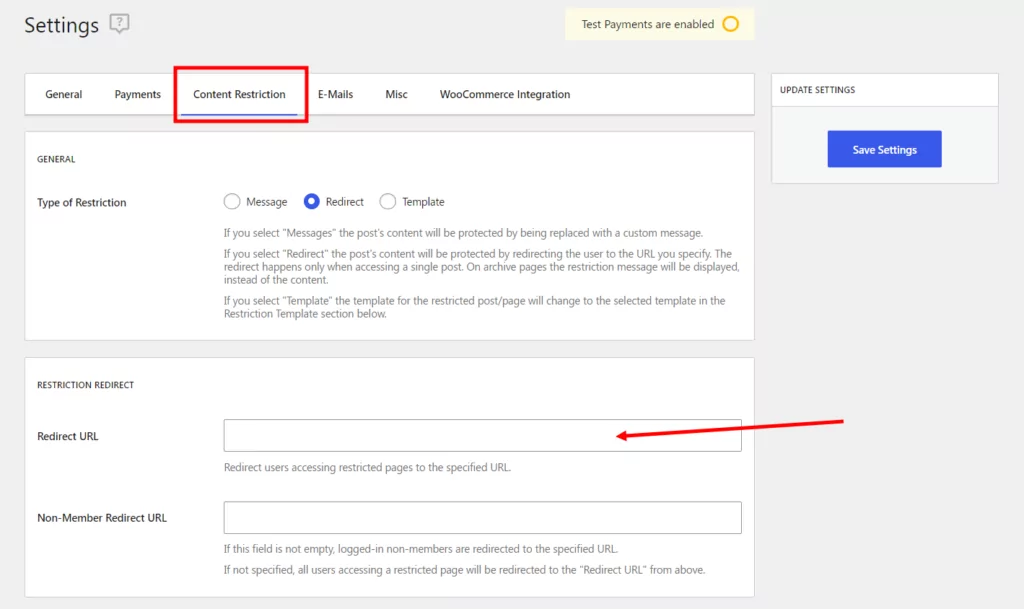
You can also create individual URL redirects, which will apply to whatever page or post you’re editing. This can be useful if you have multiple different subscription options, like eCommerce products, digital products, and more.
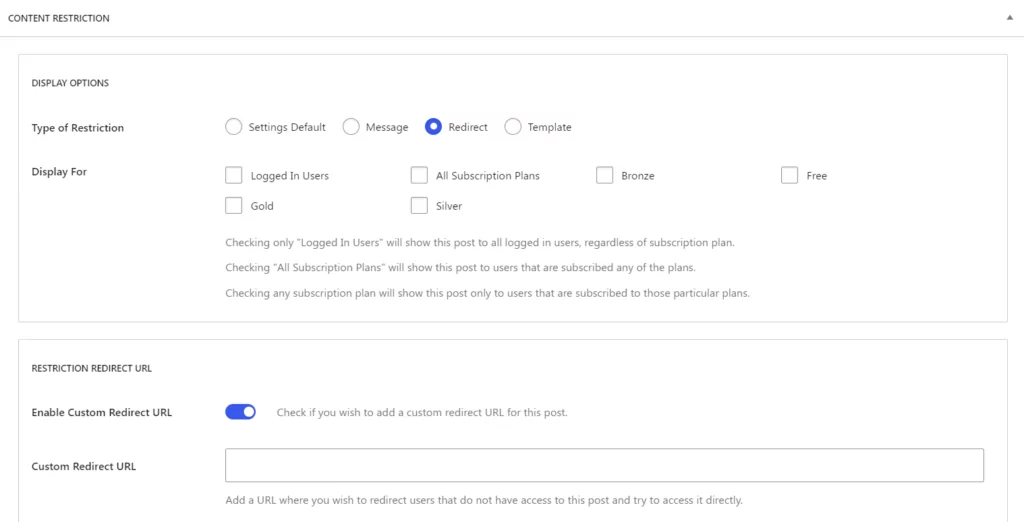
To do this, first go to any page or post, and in the Content Restriction meta box, choose Redirect as your type of restriction. Then check the Enable Custom Redirect URL checkbox to open up the Custom Redirect URL section where you’ll input your desired URL:
Restrict Content Shortcode
Your final option is to use the restricted content shortcode. This shortcode allows for greater control and customization in terms of the content that’s being restricted.
You can add the shortcode wherever you’d like to restrict content.
The main shortcodes are [pms-restrict] and [/pms-restrict]; all of the added content in between the shortcodes will only be visible to users who are logged in.
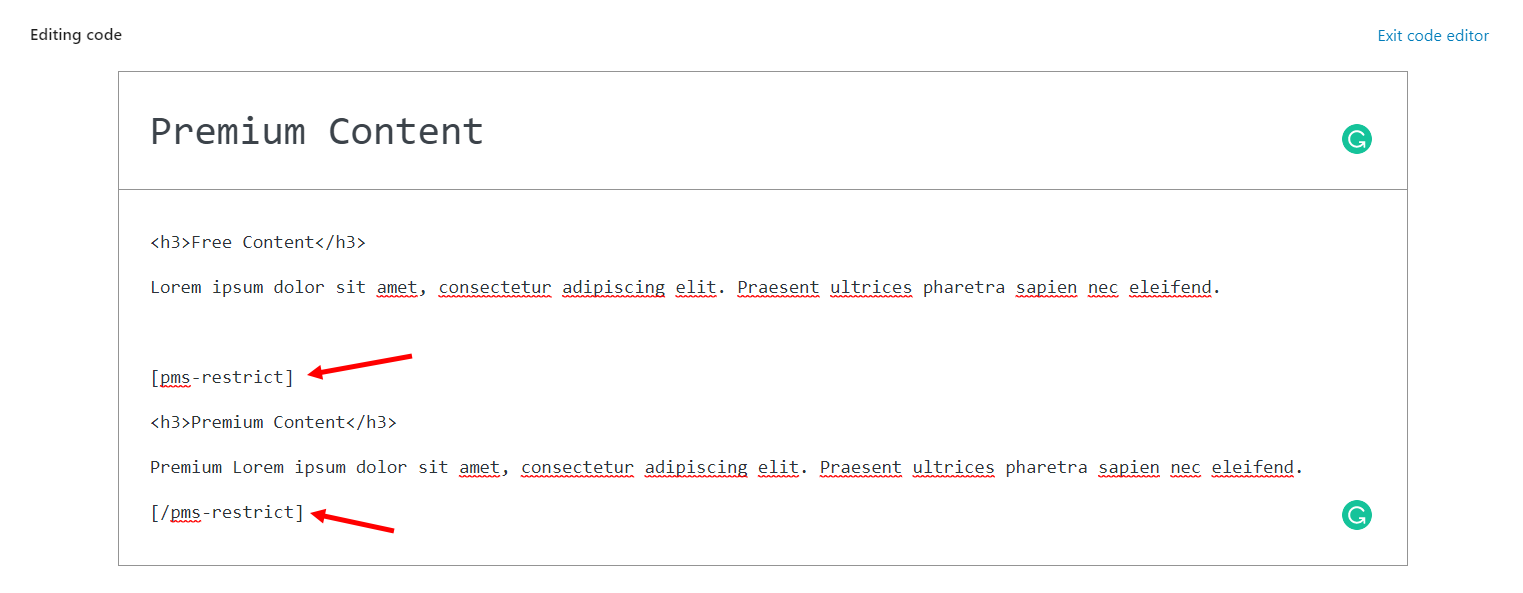
If you want to restrict content based on a subscription plan, then you’ll need to use the subscription_plans parameter within the shortcode.
For example, if we used the shortcode [pms-restrict subscription_plans=“155”] this could make all of the content only available to subscribers on the Gold plan. You can find the corresponding ID on your subscription plans page. You can read more about parameters in this Documentation article.
Setup WordPress Private Pages for Subscribers Today
By now, we’ve seen how you can set up a variety of different WordPress private pages for subscribers. You can restrict blog content and specific pages based on subscriber level, create a members-only store and products, create a private forum, and create custom post types that are automatically private.
The Paid Member Subscriptions plugin makes it easy to create private portions of your existing WordPress website – so get started today! Download the free version from WordPress.org or click the button below to go for all of the extra features.
Paid Member Subscriptions Pro
Accept (recurring) payments, create subscription plans and restrict content on your website. Easily setup a WordPress membership site using Paid Member Subscriptions.
Get Paid Member SubscriptionsStill have questions on how to set up private pages for subscribers in WordPress? Ask them below!
Related Articles
How To Create a Divi Membership Site
If you’re thinking of building a membership site in WordPress, you’ll need a solid theme and a membership plugin that pairs well with it. In this complete guide, we’ll show you how to create a Divi membership site using the popular Divi theme in combination with the Paid Member Subscriptions plugin.
Continue Reading
Membership Blog: Why Start One, Popular Examples and How To
I think you will agree starting a membership blog seems daunting, especially for a first-timer. Talk to just about any beginner who has never created a membership blog (or even a simple website), and they will field questions such as: Why should I start a membership blog? What kind of content, products, or services should […]
Continue Reading
How to Build an Elementor Membership Site with Paid Member Subscriptions
Are you looking to add membership functionality to your Elementor site in WordPress? Perhaps you want to create subscription plans, restrict access to premium content, and accept payments within the popular page builder. The good news is that you can use Paid Member Subscriptions to do all this and more. For example, you can customize restriction […]
Continue Reading
Can this be used for just restricting some content to logged in subscribers only? I do not have a monetized site only have some posts I wish to share only with family and friends.
Thanks,
Rita
Absolutely, that’s one of the main uses of Paid Member Subscriptions. You can easily restrict content to active subscribers.
Hi,
The free plugin is great for starters, I will likely upgrade later when I am used to using it. Can I set up a private members page where they can create posts? So a members posting page? If so that would be done by just adding a page, making it private at the bottom then adding a posting form? Is that correct?