

Table of Contents
With over 700 million using WordPress right now, WordPress remains the most popular website builder. While WordPress is the global preferred CMS, and the platform is relatively intuitive, it doesn’t mean there isn’t a slight learning curve when it comes to more complex tasks like adding a user to WordPress.
Here are the topics this post will cover to teach you how to add a user to WordPress:
- The steps you need to take to add a user to WordPress manually
- How to let users register themselves with Profile Builder Pro
- The benefits of front-end user registration
- How to bulk import users using Profile Builder Pro
Let’s get started!
How to add a user to WordPress manually and assign user roles
If you want to add a user and users roles to WordPress from within the WordPress dashboard, here are the steps you need to follow.
- Log in to the respective WordPress account by entering your username and password via the wp-admin page.

- Once you have logged in to your account, turn your attention to the dashboard on the right-hand side of the screen. Hover your cursor over “Users” and click on “Add New.”
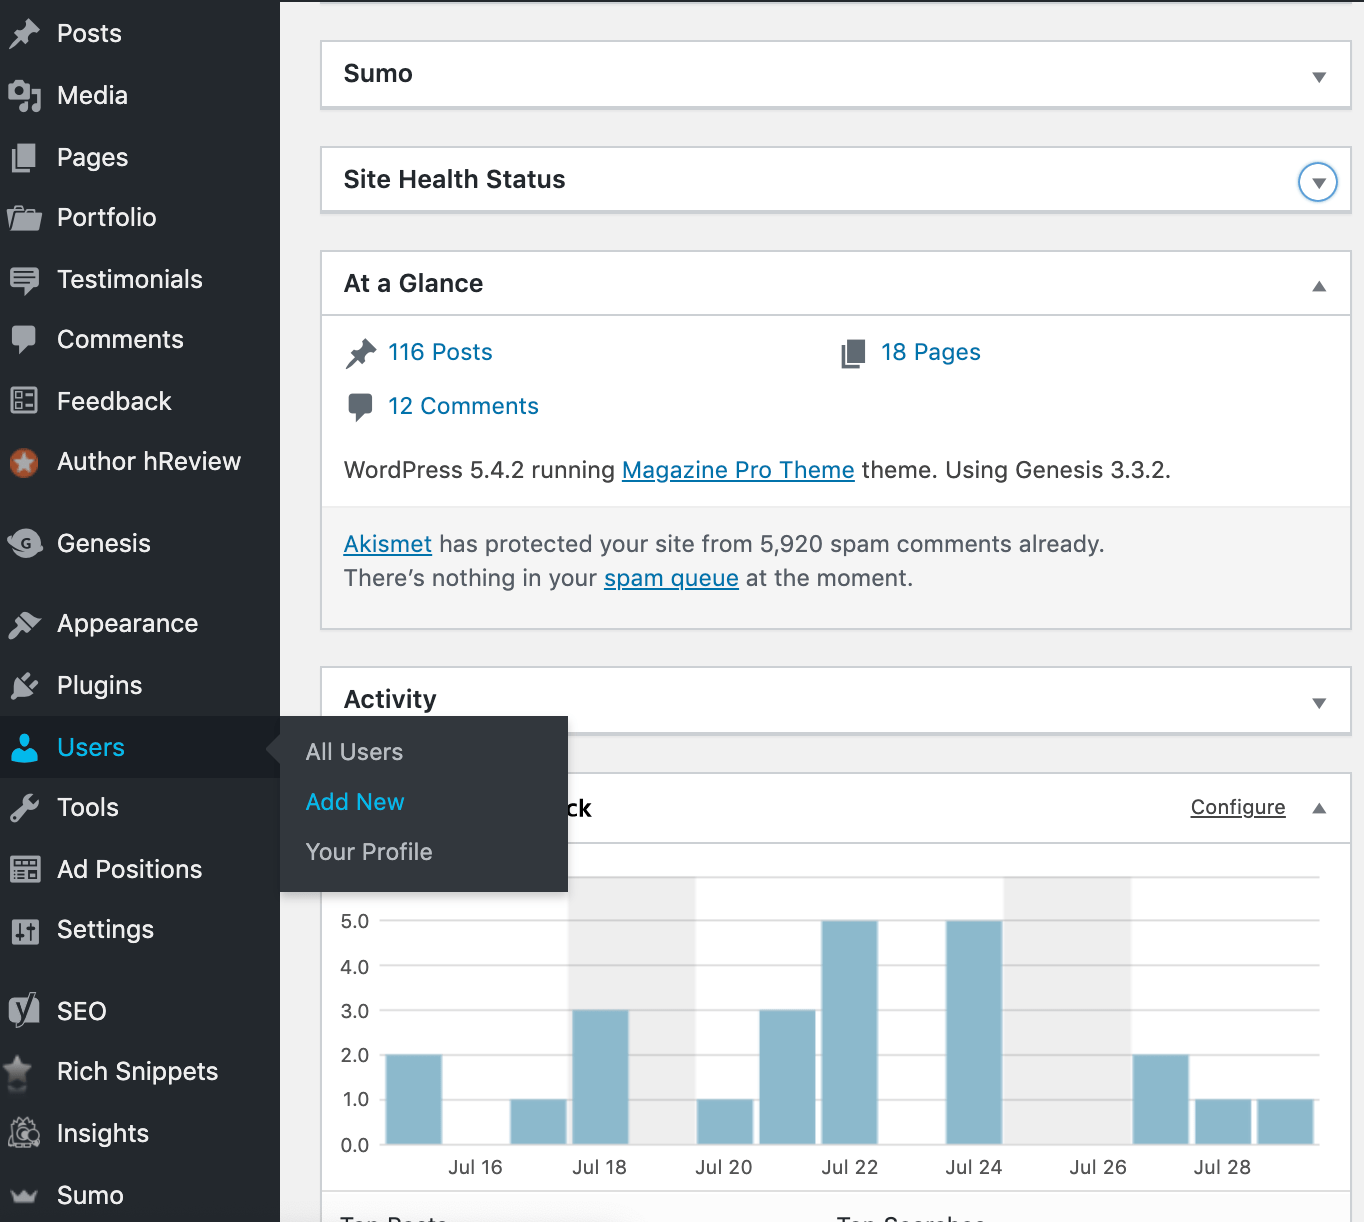
Alternatively, you can click on “Users” and then click on “Add New” at the top of the next page. Either method will take you to the next step.
- Once you click “Add New,” WordPress will direct you to the screen where you can add a new user to WordPress. From here, you will enter the new user’s username, email address, first name, last name, and generate a password.
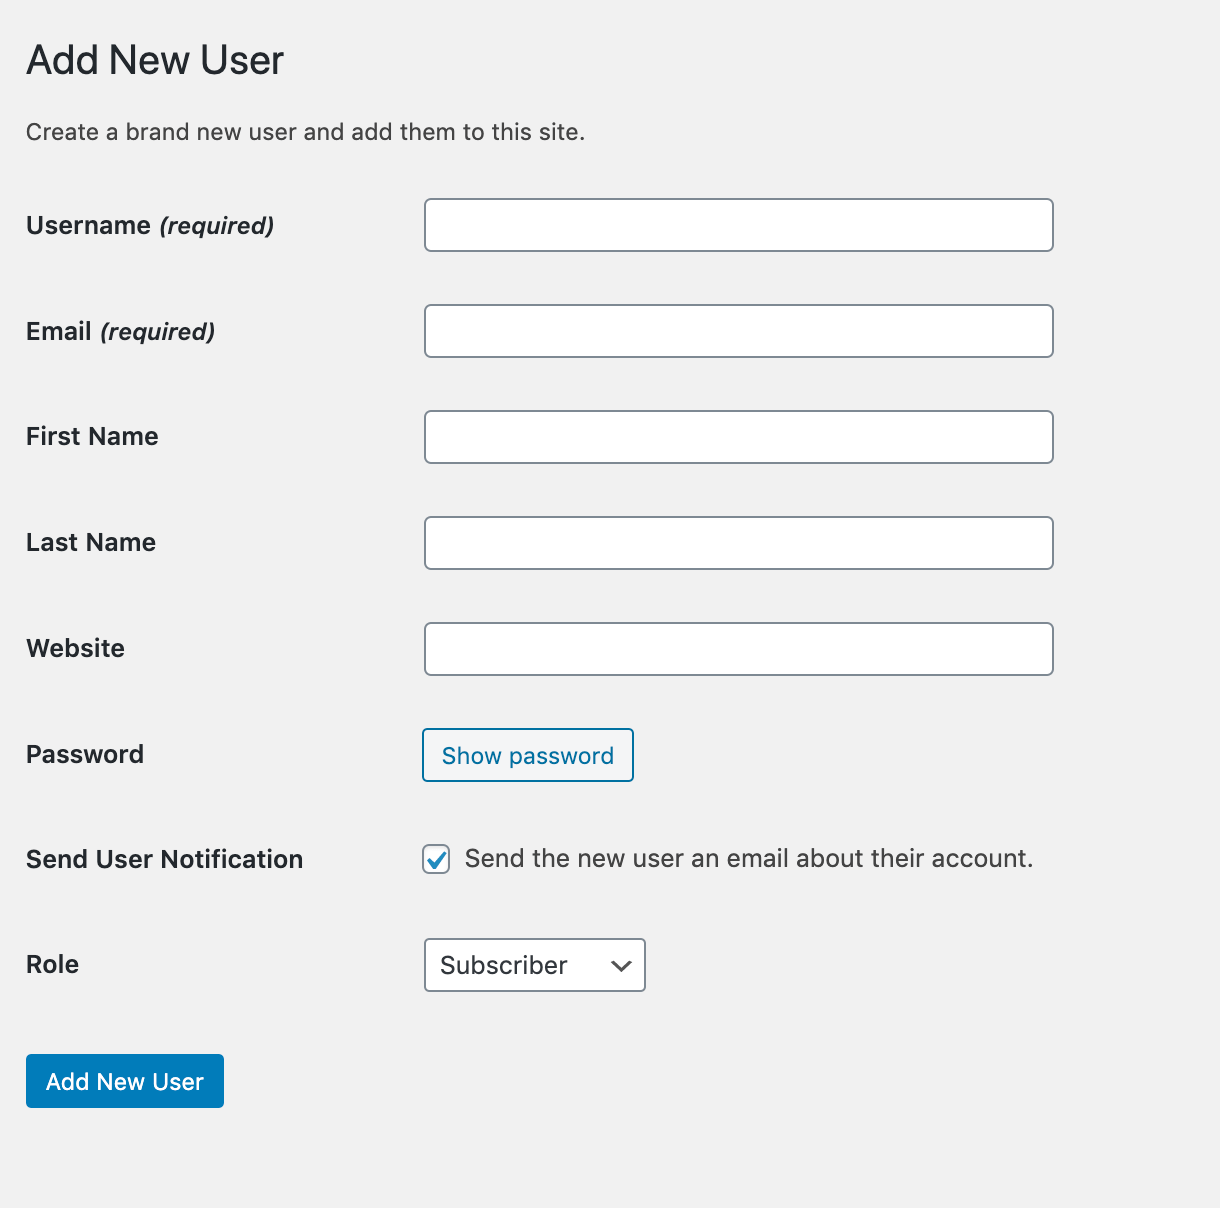
You do have the option to choose your own password. For security reasons, it’s often best to let WordPress generate the password and send it to the new user. When the new user logs into the WordPress account with their own password, they can choose a new secure password.
- The next step is to choose a user role. You’ll notice there is a box that says “Role” with a drop-down menu.
From here, you can select any of the following roles:
- Subscriber – A user that can only manage their own profile.
- Contributor – A person that can write and manage blog posts, but doesn’t have publishing access.
- Author – A user that can write, manage, and publish their own blog posts.
- Editor – Someone who can write, manage, and publish their own blog posts and the blog posts of others.
- Administrator – A user with complete administrator access to the WordPress site.
Each of the roles come with different WordPress access and functionality, so it’s critical to select the right role.
- Once you have picked a new subscriber role, you can press “Add New User,” and WordPress will add that new user and contributor role to your WordPress account.
- WordPress will direct you to a page where you can see the new user. From here you can add more users to WordPress or you can edit user roles.
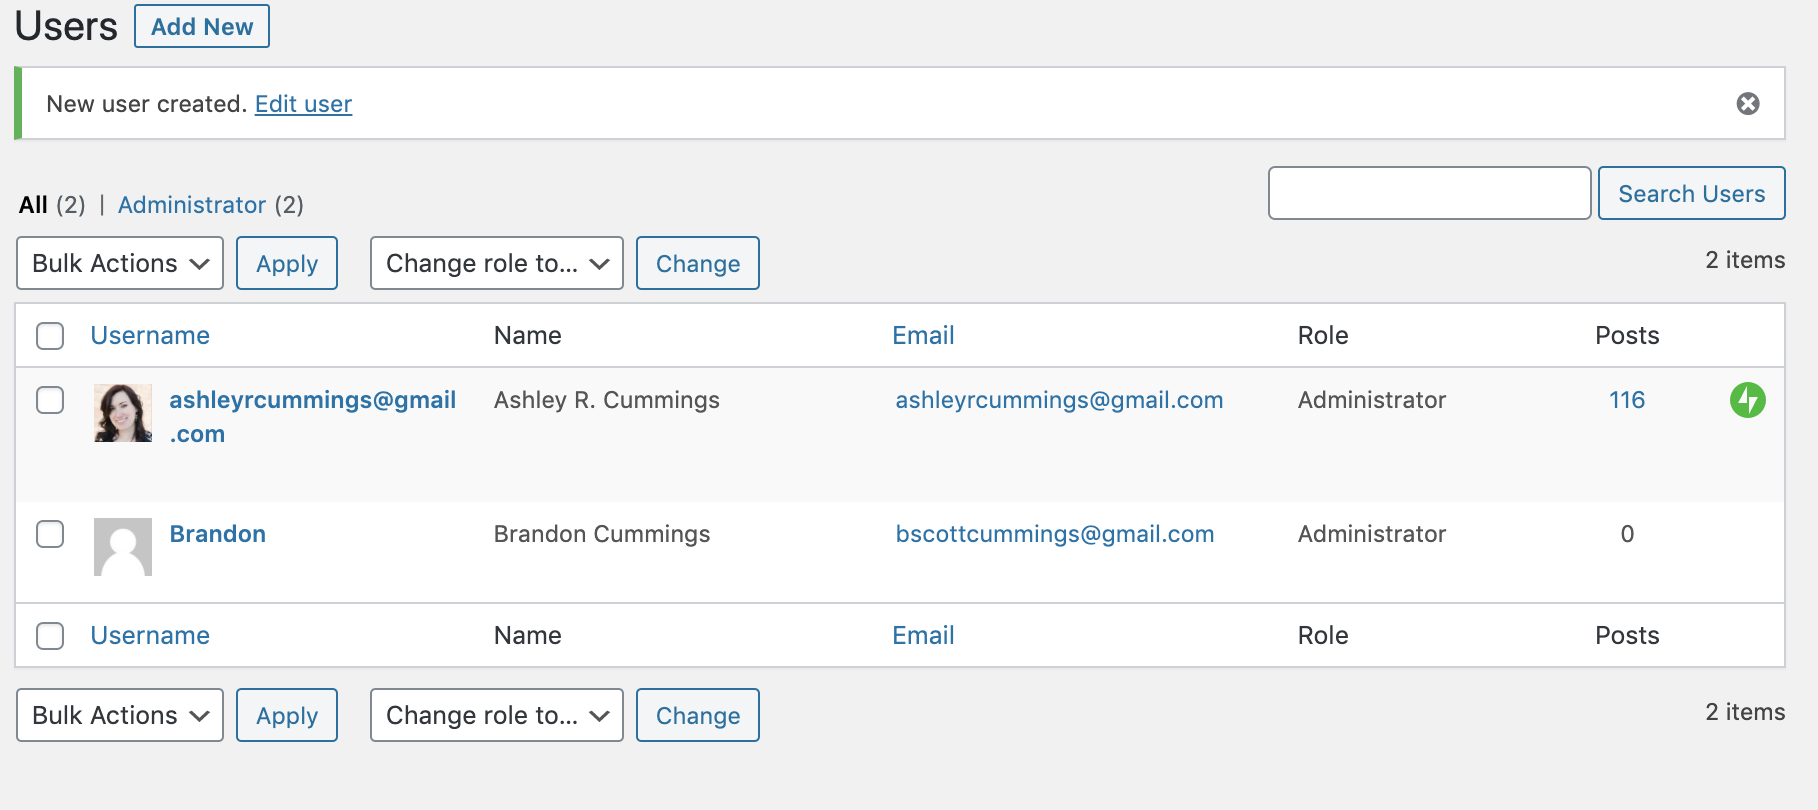
And, that’s it! Rinse and repeat until you have added all the users to WordPress that you want.
How users can register themselves directly from the front-end
Now that you know how to add a user to WordPress from within the WordPress platform, you’re ready to learn how to make the job a lot easier.
If you have several users that will be logging in to your WordPress site, the last thing you want to do is sit down and assign new users through WordPress manually. While working to add a user to WordPress manually via WordPress is an excellent option for a small team, it’s a tedious process if you have a large team.
A better option is to let all new users register themselves with the Profile Builder Pro plugin.
As a quick review, WordPress doesn’t have a stand-alone feature where users can register themselves as a user. To accomplish this, the owner of the respective WordPress account will have to install a plugin. One of the best options on the market for building extensive front-end registration forms is by using the Profile Builder Pro plugin.
Profile Builder Pro
Create beautiful front-end registration and profile forms with custom fields. Setup member directories, custom redirects, cutomize user emails & more using the all in one user management plugin.
Get Profile BuilderHow to install the Profile Builder Pro plugin into WordPress
Click on this link to purchase a license and to log in to your Cozmoslabs Account. Then, from your account, you will be able to download your plugin, check out add-ons, and see your licence number. Next, you will want to download the .zip file for your plugin and follow the steps to install it.
Here is how you can install your new plugin into WordPress:
- Hover your cursor over “Plugins” on the WordPress dashboard and select “Add New.”
- Once you get to the “Add New” page, click on “Upload.”
- Next, you will want to select the .zip file you just purchased and downloaded from Cozmoslabs.
- Press “Install Now.”
- As soon as you press “Install Now,” WordPress will install the Profile Builder Pro plugin. When it finishes installing, you can click “Activate” and follow the steps to activate the plugin.
- Once you have installed your WordPress plugin, you’ll notice your dashboard on the left side of the screen has a new menu item called “Profile Builder.” When you click on this new menu item, you can explore the various plugin options from within your WordPress account.
Now that you have installed the plugin, you’re ready to use the front-end user management feature. Let’s talk about how.
How to add a user to WordPress using a front end registration form
Profile Builder Pro makes it easy for you to create and display a front end registration form. Here are the steps.
- On your WordPress dashboard, hover your cursor over the “Pages” option, and click “Add New.”
- Profile Builder Pro offers a series of shortcodes. You will want to enter the registration shortcode using a text or shortcode block, or the Classic Editor. The shortcode you will need to add is: [Only an administrator can create pages with the register shortcode.].
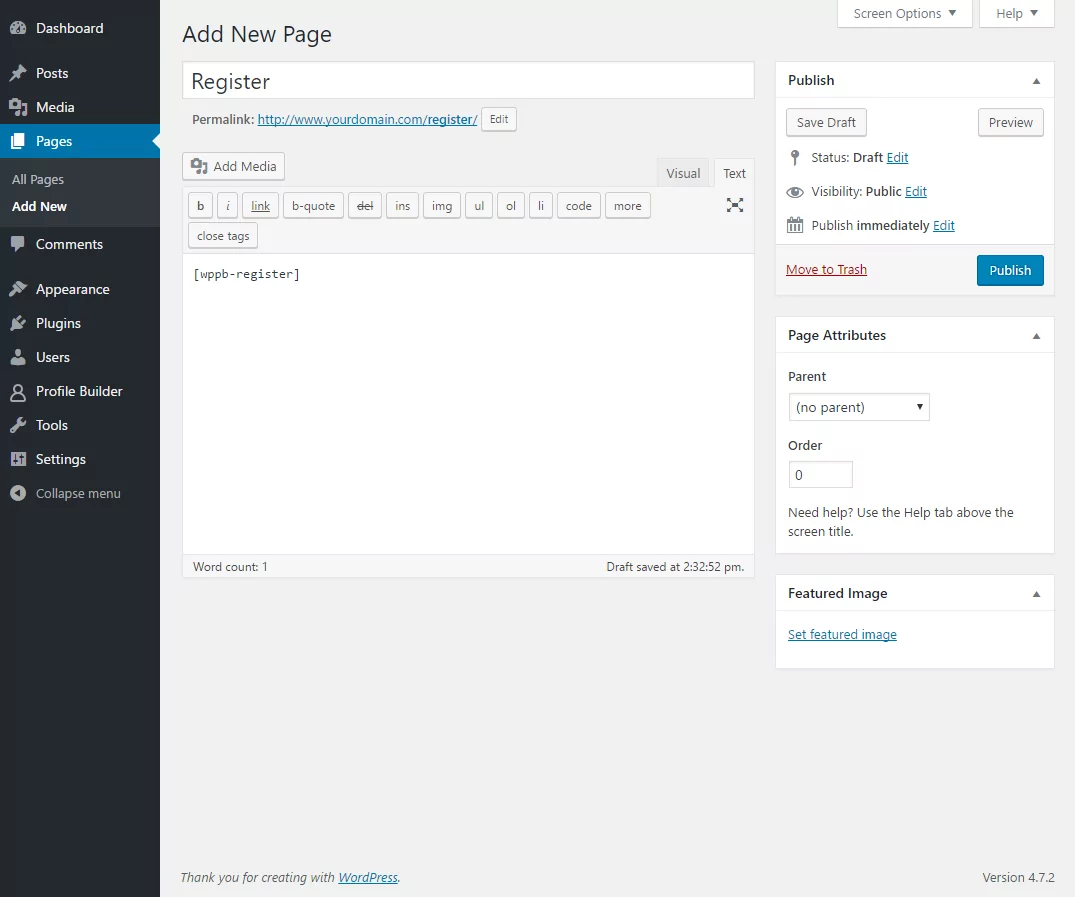
- Hit publish.
- After you hit publish, you can go to your new page and you will see your registration form.
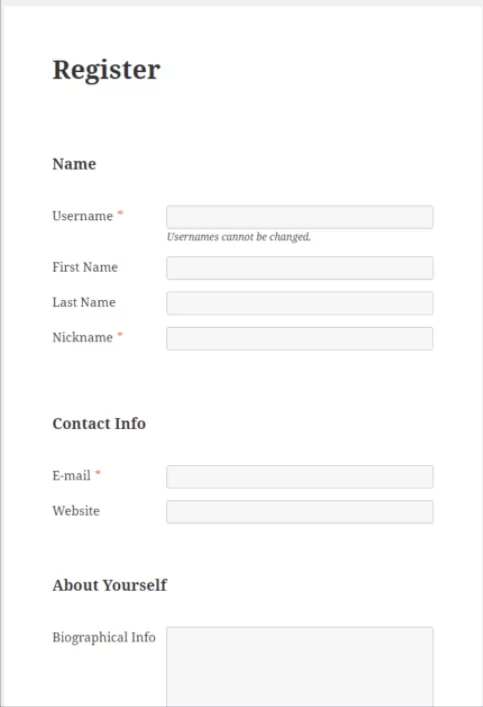
Once this page is published, you don’t have to add all your users to WordPress manually. People will be able to add themselves as a user.
Not only does this plugin help with front-end user registration, but it also allows you to create front end login forms and sign up forms.
How to create a front end login form with Profile Builder Pro
The steps for creating a front end login form are similar to setting up a front end registration form. The main difference is you will use a different shortcode. Here are the steps to follow.
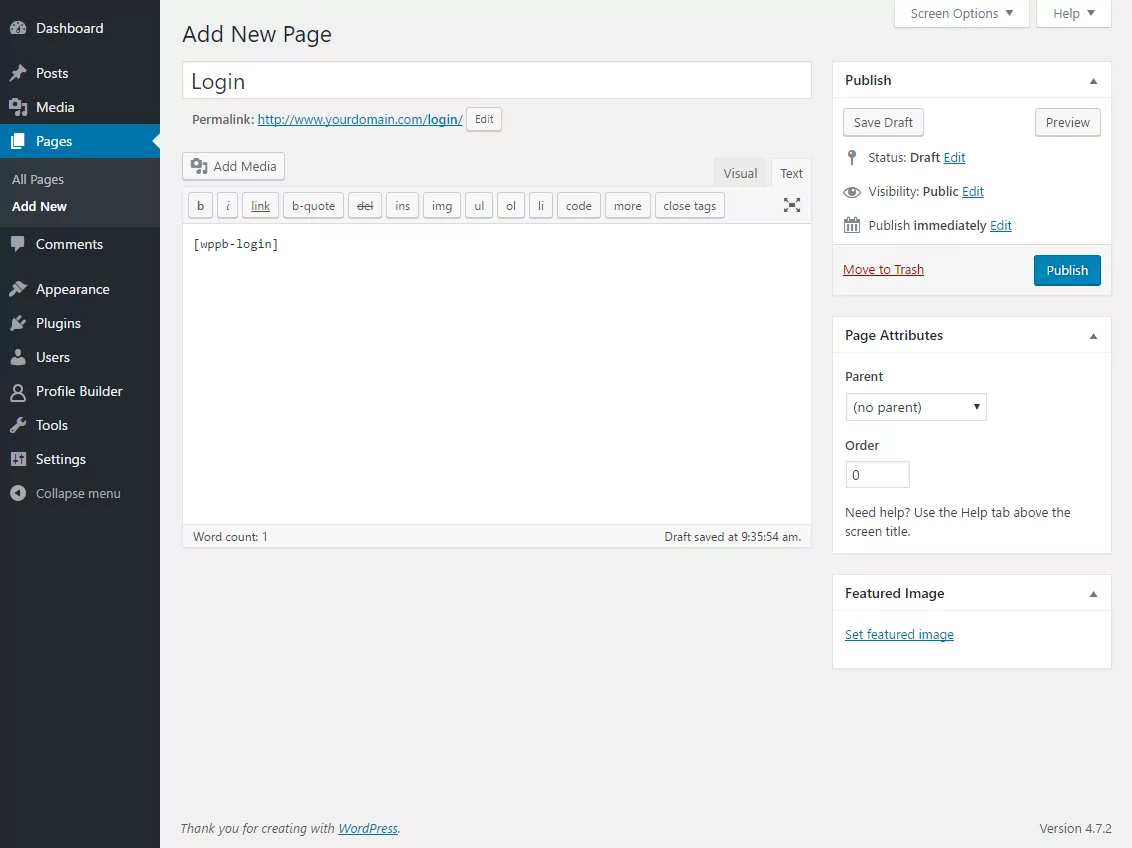
- Create a new page and name it your login page.
- Add the [wppb-login] shortcode inside the text box. Remember to use the Text Editor, not the Visual editor. If you use the Visual Editor, all you will see on the page is [wppb-login]. If you use the Text Editor, WordPress will know you are entering in code.
- Hit publish.
- Once you publish your shortcode, you will see the following form on your page.
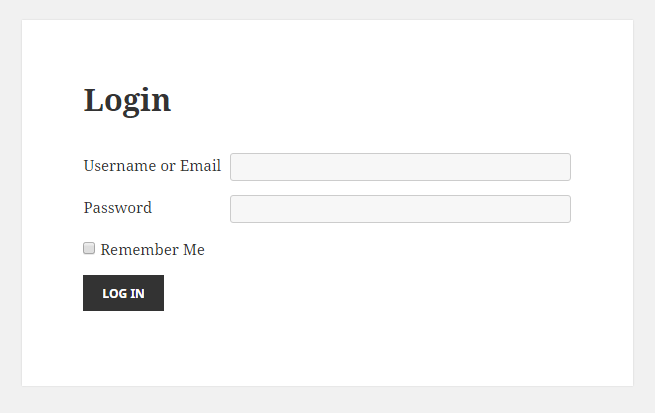
Once you publish this page, new users will be able to login to the account with their username and password.
An added bonus to the login feature is you can redirect users to specific pages upon login and logout. All you have to do is use a redirect argument.
The login redirect argument is: [wppb-login redirect_url="https://www.yourdomain.com/page"].
The logout redirect argument is: [wppb-login logout_redirect_url="https://www.yourdomain.com/page"].
Remember you cannot redirect a user to an external page. This feature will only direct users to a specific page within your WordPress website.
The benefits of front-end user registration
You’ll notice that it’s fairly easy for an administrator to add a user to WordPress within the platform. It’s also simple to use the plugin to have people register themselves. This begs the question, why pay for a plugin if you can do it for free in WordPress?
Here are the benefits of front-end user registration that make the small plugin fee pay for itself a hundred times over:
- It saves your administrator time and energy when users can register themselves.
- The plugin keeps users out of the WordPress dashboard, which provides better user experience.
- The default WordPress registration form is basic. With the plugin, you can collect detailed user information at registration by using custom fields.
- It’s easy to fight user registration spam with enhanced functionality (e.g., ReCaptcha, email confirmation, admin approval, and more).
- The plugin automatically gives users a certain role at registration (e.g., you can have different registration forms for different users).
- Adding redirects after registration is simple with the plugin, and it’s super useful for on-boarding a new user.
- You can create custom redirects to send people to specific pages.
- Users can upload avatars to their profiles.
- You can restrict access to sensitive content (e.g. you could restrict access to your product pages).
- It’s possible to make custom profile menus so you can choose what information users can share.
- You can collect payments at registration with Paid Member Subscriptions, Cozmoslabs’ other plugin.
- The default WordPress user feature allows users to create weak passwords. The plugin has the option for you to institute a minimum password length and strength to keep user accounts safe.
One of the top benefits of this plugin is you can import or export a user database to or from a third party. In other words, it lets you bulk import to add multiple users to your WordPress account. Let’s take a look into how this works.
How to add users to WordPress in bulk using Profile Builder Pro
If you don’t want to add users to WordPress manually or set up a front-end registration form, no worries. Profile Builder Pro also allows you to import multiple users in WordPress. Here are the steps to follow to utilize this feature.
- Download and install the plugin “Import and export users and customers.”
- Using Profile Builder, take the time to create all your desired Extra Fields Types before you import. You will want to assign them the same meta names as the ones from the CSV file you imported. Also, set the “Overwrite Existing” option to “Yes.”
- Structure your CSV file correctly:
- 1st column – username
- 2nd column – email
- 3rd column – password
- The additional column should be the meta names you created in Profile Builder -> Manage Fields
Important tip: Make sure your username, emails, passwords, etc on the CSV file match the entries in your database.
- Download a sample CSV file.
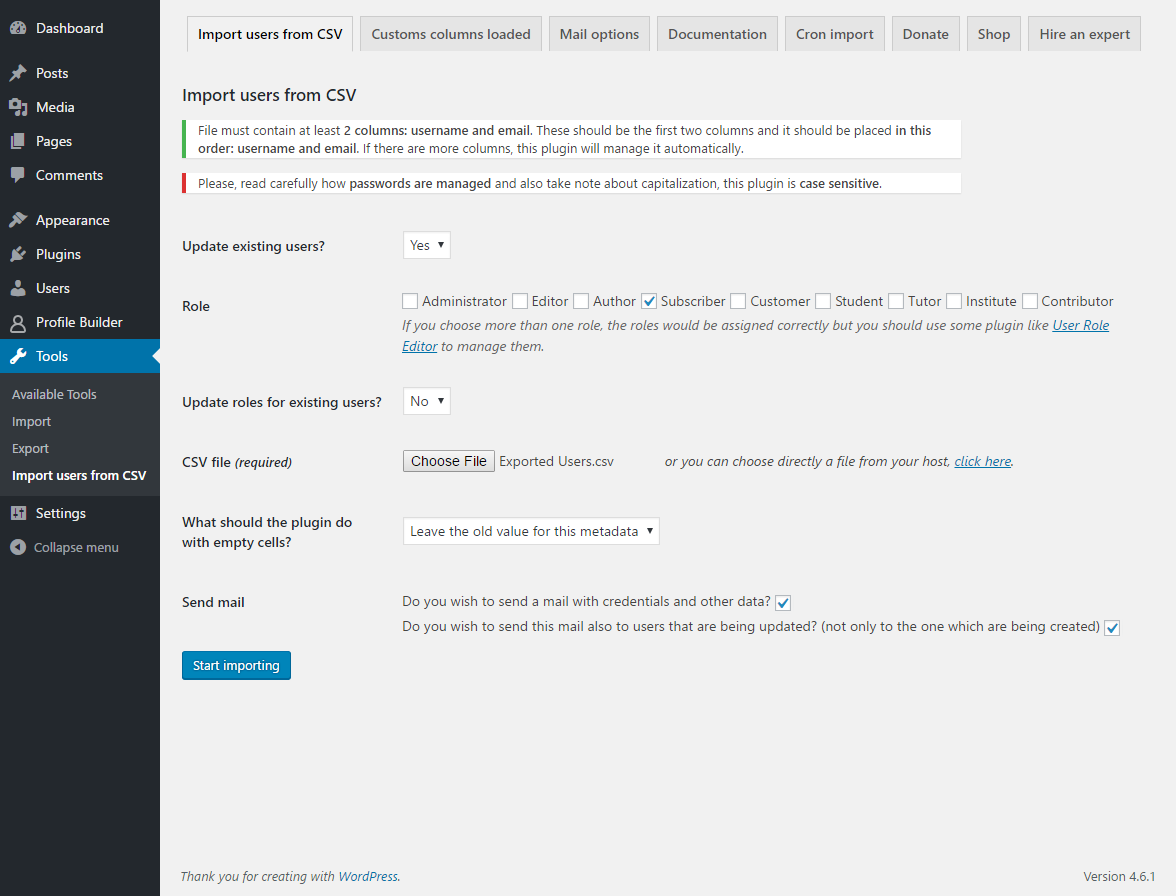
- You’ll see the Import users settings under Tools -> Import users from CSV.
- Select whether or not you want to update existing users and make other relevant selections.
- Click “Start Importing.”
Once you’ve completed these steps, you’ll see your new users in your WordPress account.
Wrapping Up
While it’s possible to add a new user via WordPress, there are several advantages to using the Profile Builder Pro plugin instead.
The Profile Builder Pro plugin is one of the best front-end registration plugins on the market. It makes it easy for you to add a group of new users at once, allow users to register themselves and it provides a wide range of user management tools for site admins.
Check out the Profile Builder Pro plugin today, and follow the instructions above to allow front-end user registration functionality or to bulk import your users.
Profile Builder Pro
Create beautiful front-end registration and profile forms with custom fields. Setup member directories, custom redirects, cutomize user emails & more using the all in one user management plugin.
Get Profile BuilderRelated Articles

How to Customize the WooCommerce Login Page (No Code Needed)
Searching for a solution to customize the WooCommerce login page and otherwise control login behavior on your WooCommerce store? If you allow (or force) registration on your store, you'll want to create a user-friendly login experience so that your shoppers can easily log in to their accounts and access other key features. In this post, […]
Continue Reading
8 Best WordPress User Registration Plugins
Not sure what WordPress user registration plugin to use for your project? Going through all the WordPress user registration plugins can be disorienting. You may have spent hours and hours searching for plugins and tutorials to help you with your project, and you’re still as confused as you were when you started. Imagine finding the […]
Continue Reading
How to Customize WordPress Email Login Behavior (+ Registration)
Searching for a WordPress email login feature so that you can customize your site's login process, such as requiring users to use their email address instead of a username? By default, WordPress lets users log in with either their username and password or their email and password via the default login page. But if you […]
Continue Reading