

Table of Contents
- 1 What is a WordPress Social Network Website?
- 2 Anatomy of a WordPress Social Network Site
- 3 How to Build a Social Network with WordPress And Profile Builder Pro
- 3.1 Profile Builder Pro
- 3.2 Step #1: Install and Activate the Profile Builder Pro Plugin
- 3.3 Step #2: Set Up Social Network Sign Up and Edit Profile Forms
- 3.4 Step #3: Create a User Directory (Optional)
- 3.5 Step #4: Create Social Network Forums and Topics
- 3.6 Step #4: Launch Your New WordPress Social Network
- 4 Create a Social Network Using WordPress Today
Are you looking to create a community around your products or services? Start your own WordPress social networking website.
Creating a WordPress social network website can help you create a better sense of community around your brand and encourage more users to stay engaged with your content. With more than 4.62 billion users of social media websites, setting up a niche social network site is a great way to make your website appeal to a much larger audience.
However, creating a social network can be quite daunting, especially if you’re not very tech-savvy. This is why it’s best to use a social network plugin for WordPress to create a social network on your own website.
In this article, we’ll show you step-by-step how to create a social network in WordPress.
What is a WordPress Social Network Website?
Before we jump into creating a WordPress social network, it’s important to first understand what it is.
A social network in WordPress is essentially a WordPress site that is converted or designed in a way that’s similar to a social media website such as Facebook or Twitter.
It lets users interact with each other, publish content, go over other users’ profiles, and stay connected with your brand. For a better understanding of what social network websites look like, let’s take a look at some popular social media websites:
AngelList
AngelList is a social media network that focuses on helping job seekers and companies connect with each other through an intuitive, modern-looking platform. With over 6 million successful connections, it’s one of the best ways to reach out to companies to find jobs or find the right talent for your business. In addition to this, it lets users feature their user profiles so companies can find them and calculate their salaries so they have an upper hand when negotiating with companies.
LinkedIn is a community-based social network website that helps professionals from all over the world connect with each other and make business connections. Once a “connection” is made, users can view other connected users’ published posts, likes, and other interactions on their “Feed Wall”. This is a great way to reach out to more people that are in your industry and make connections that help you grow your business or advance in your career.
Opportunity
Opportunity, like the name suggests, gives opportunities for job seekers and businesses to network and interact with each other. It has members from over 190 countries so you’re likely to find professionals in your industry from all over the world. This can help you build better business connections or find the perfect candidate for your brand’s job posting.
Anatomy of a WordPress Social Network Site
While WordPress by default doesn’t let you create a social network, you can use a social network plugin to do this.
Here’s what you need to create a social network website yourself:
- WordPress. First, you will need WordPress as the CMS for your website. This way, you’ll have an easier time adding social networking features to your site using plugins. It’s incredibly easy to use, even for people who aren’t particularly tech-savvy.
- Profile Builder Pro. Profile Builder Pro is a robust profile plugin for WordPress that lets you set up custom login, registration, and edit profile forms on your site. These features make it easy to create custom social network sign-up and login forms.
- bbPress. bbPress is a simple yet powerful plugin that lets you set up discussion forums on your WordPress site. This way, you can let registered social network users interact with each other in the forums.
How to Build a Social Network with WordPress And Profile Builder Pro
Here, we’ll show you step-by-step how to build a social network with WordPress using the intuitive Profile Builder Pro plugin and the bbPress plugin.
Profile Builder Pro offers an all-in-one solution for creating customized login, registration, and edit-profile pages on your WordPress site.
You have full control over how your forms look on your WordPress site which is a great way to make your social network site look exactly how you want. The best part is that Profile Builder Pro also seamlessly integrates with the popular forums plugin as the PRO version of the plugin comes with the bbPress add-on. This makes it easier for you to create discussion forums on your social network website and link them with the Profile Builder Pro plugin.
For this, you will need a WordPress site with the Profile Builder Pro plugin. In addition to this, you will also need the bbPress plugin to create social network forums and topics for your audience to interact with.
Step #1: Install and Activate the Profile Builder Pro Plugin
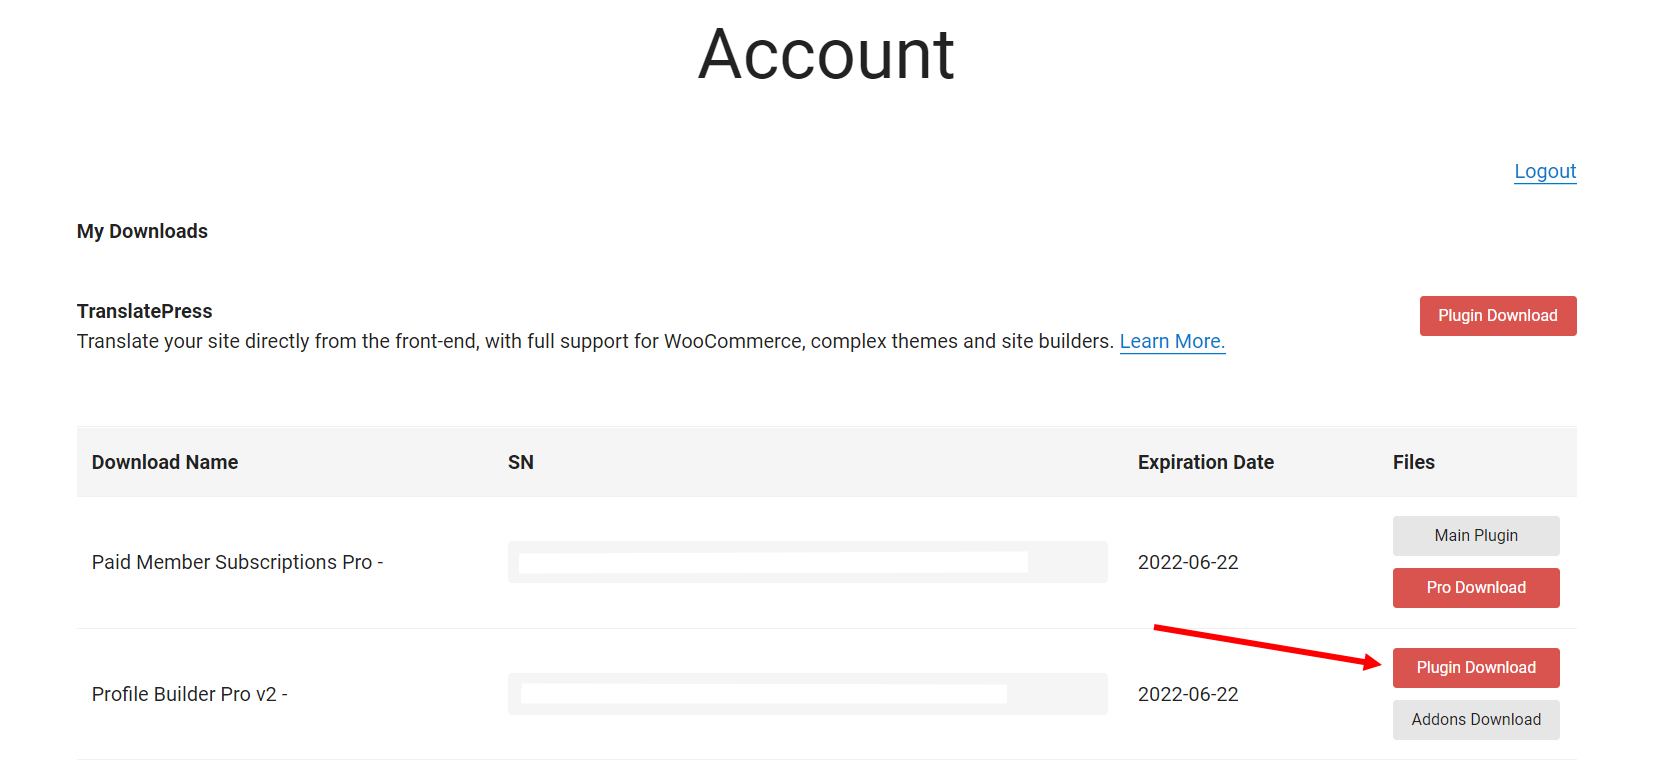
Start off by getting the Profile Builder Pro plugin and installing it on your WordPress site.
Once that’s done, you will need to activate the plugin’s license key. Navigate to Profile Builder → Register Version and enter the license key provided to you at the time of purchase.
Once you’re done, click on the Save changes button to continue.
If you’re looking to create a WordPress social network site, you will need the premium version of Profile Builder as it comes with the bbPress add-on and a lot of other useful modules. However, if you just want to test out the plugin’s capabilities, you can download it for free from the WordPress Plugin Directory.
Step #2: Set Up Social Network Sign Up and Edit Profile Forms
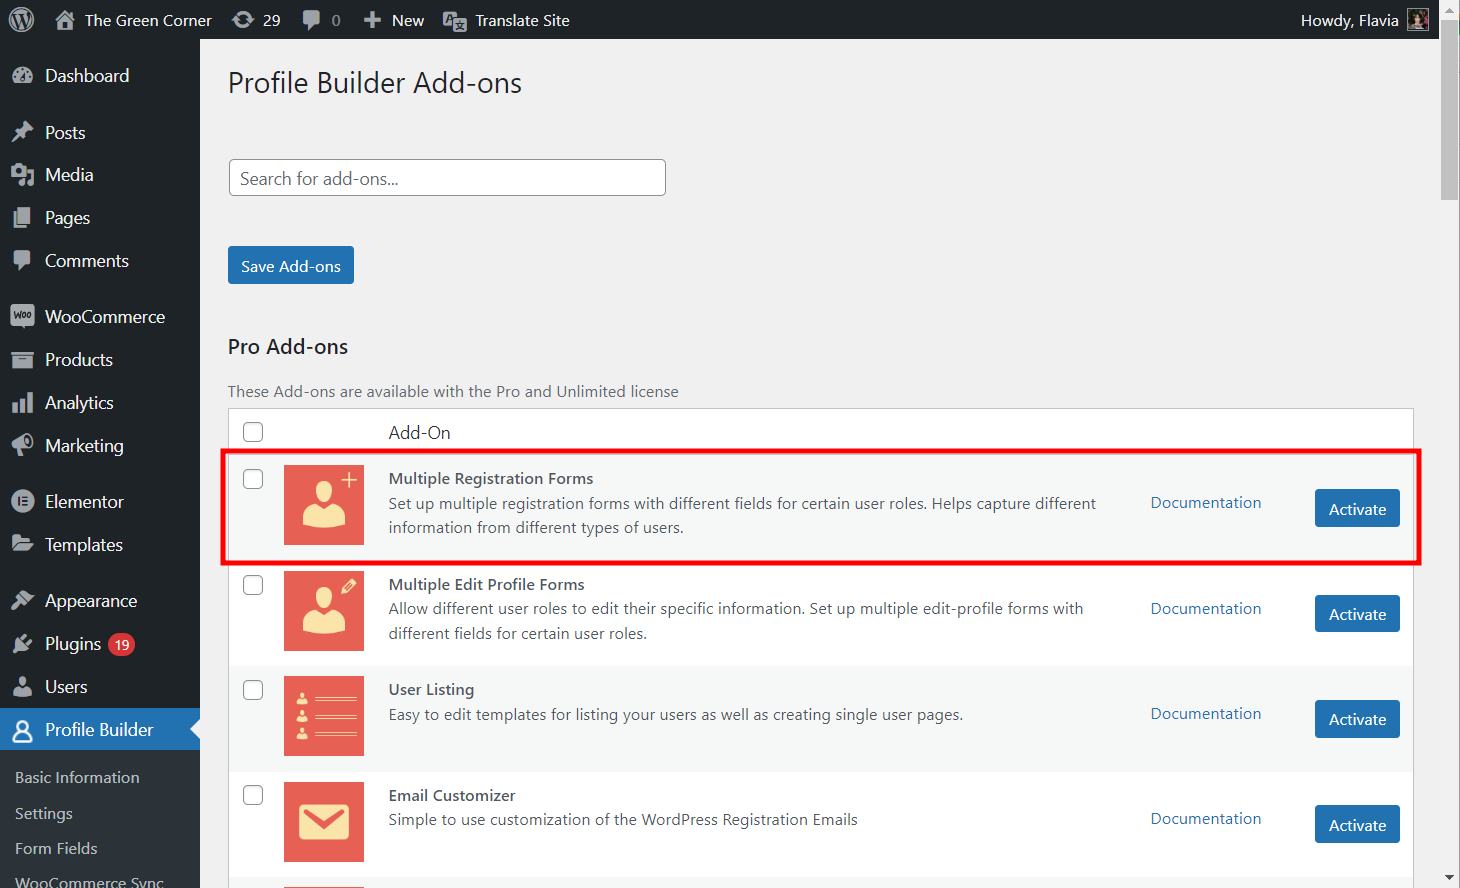
For this next step, we’ll use the Multiple Registration Forms add-on—available with the Pro version of the plugin—because we want to show you the most customizable option you have when creating your social network.
With the Profile Builder Pro plugin and Multiple Registration Forms add-on activated, navigate to Profile Builder → Registration Forms and click on the Add New button to create your social network sign-up form.
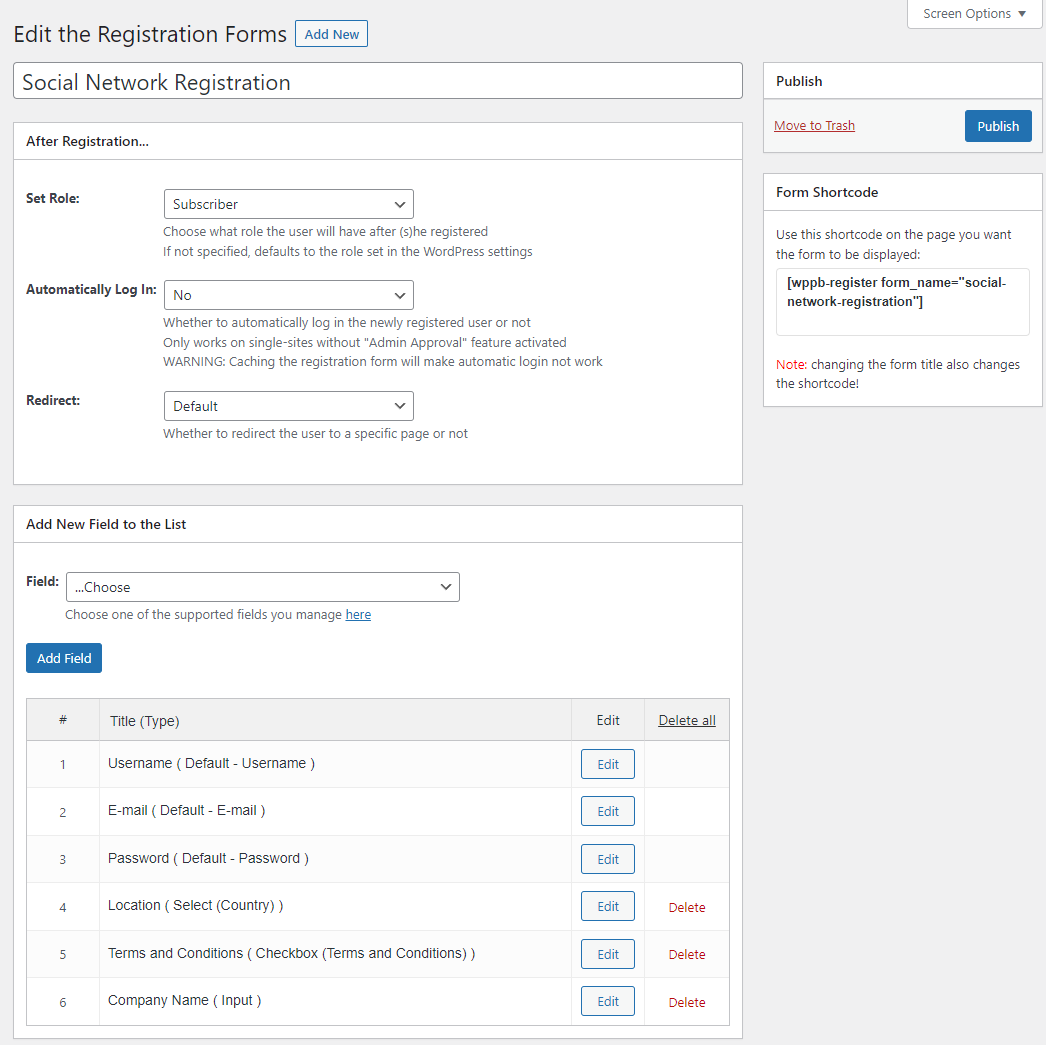
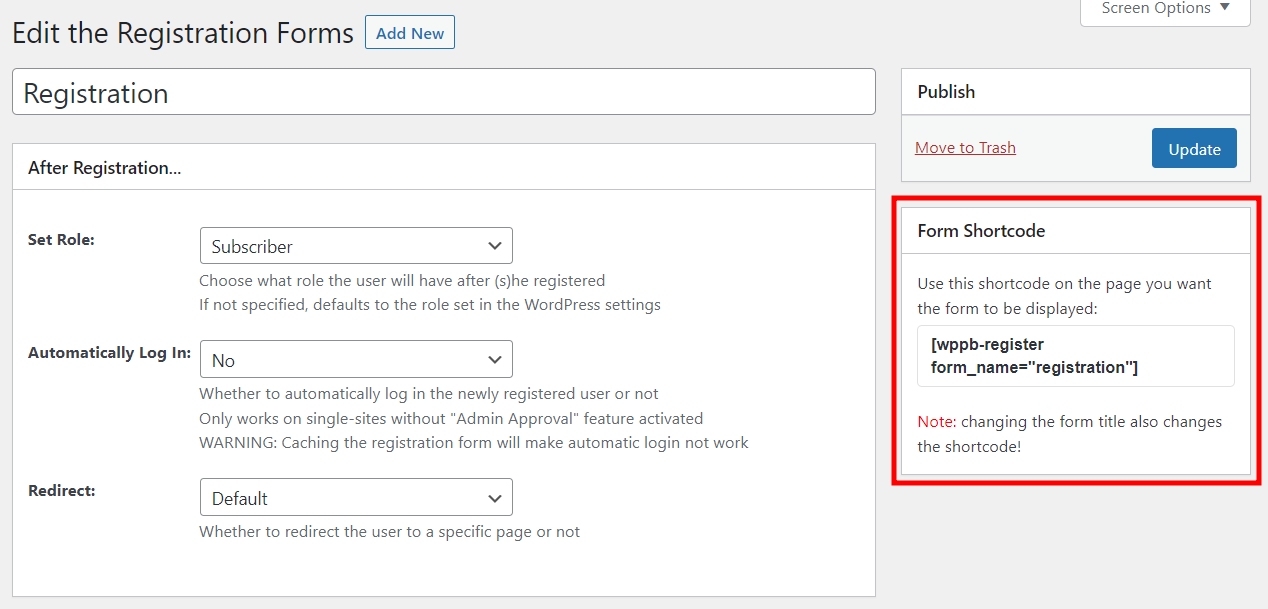
Give your registration form a new title and set which role to give users who register using the Set Role: dropdown menu.
You can also add new fields to the registration form by selecting one using the Field dropdown menu under the Add New Field to the List section. Once you’re ready, click on the Publish button to continue.
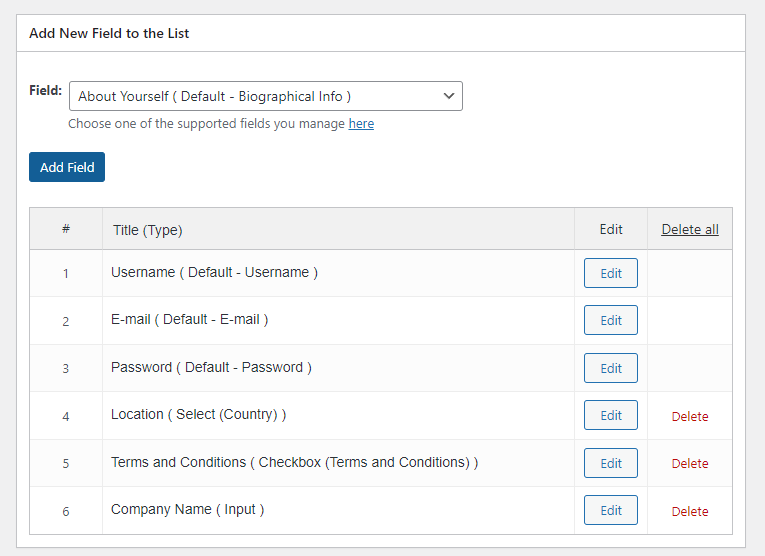
For adding custom fields to your registration or sign-up forms, navigate to Profile Builder → Form Fields and use the Select an option dropdown menu to choose from a wide selection of fields.

Once you click on the field selection, it will automatically open the field edit page.
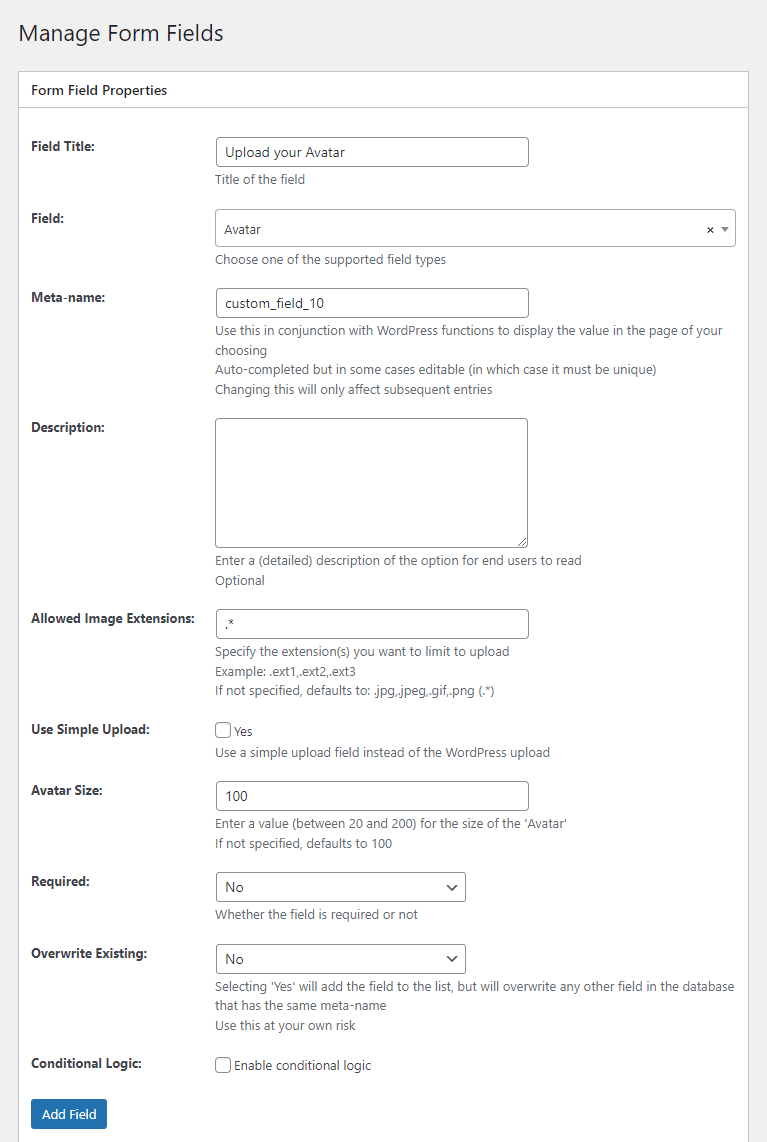
Now set field details and click on the Add Field button. Similarly, you can add as many fields as you’d like which can later be used to create custom registration and edit-profile forms.
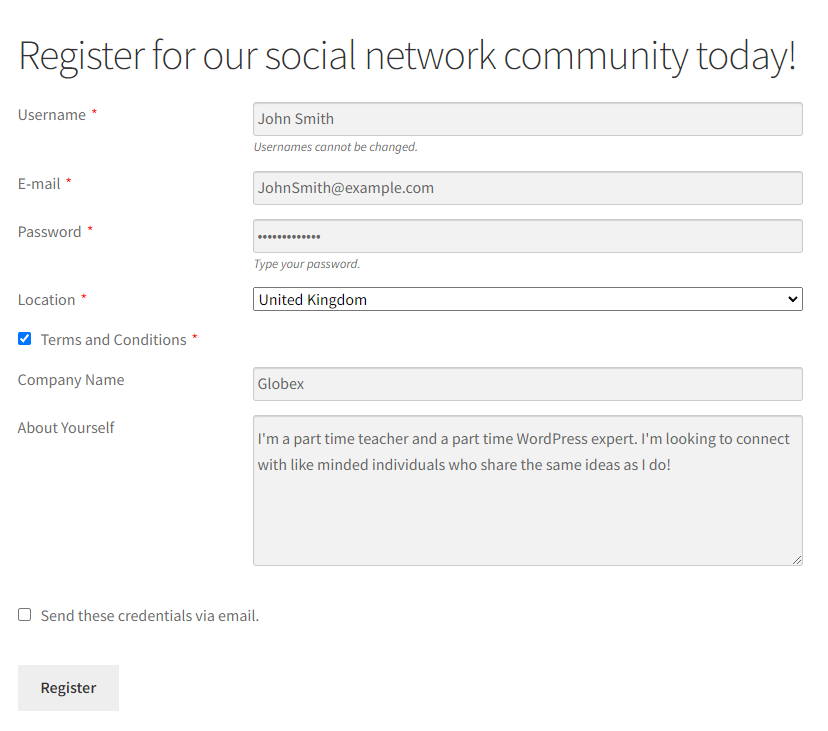
Once your fields are all set up and you’re happy with your registration form. It’s time to place it on a proper registration page.
To do this, all you have to do is copy the form’s shortcode and paste it on a new page.
Give your new page an appropriate name—such as “Register” or “Sign Up”—and add any other relevant content to it so your visitors know what to expect.

Click on the Update button to continue.
Set Up an Edit Profile Form
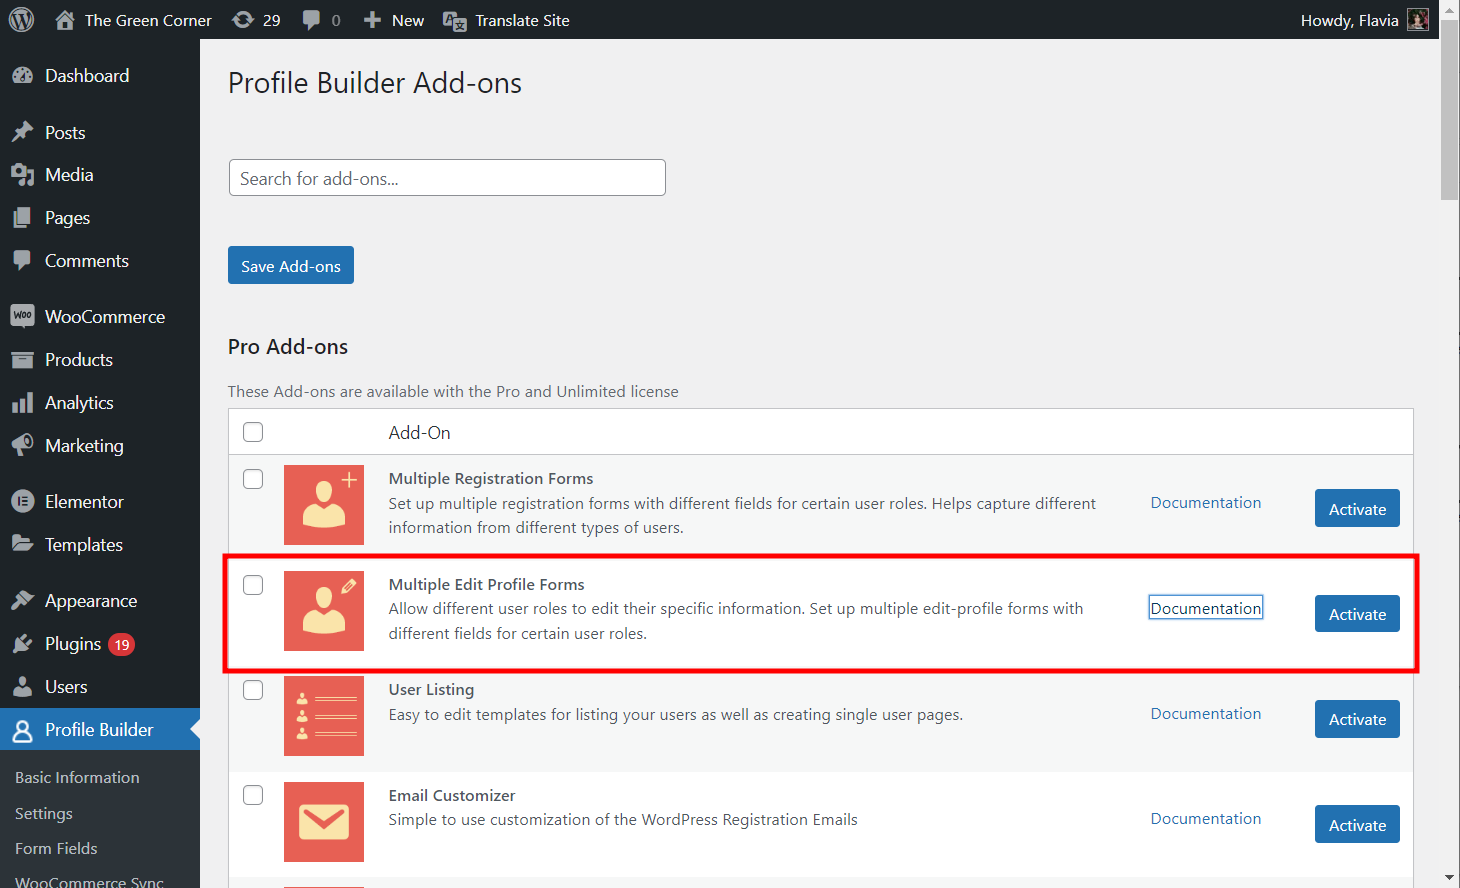
Additionally, it’s also useful to create a custom edit-profile page so that it better suits your social network website. To make this step as easy as possible, you’ll first need to activate the Multiple Edit Profile Forms add-on.
To create a custom edit profile page, navigate to Profile Builder → Edit-profile Forms and click on the Add New button.
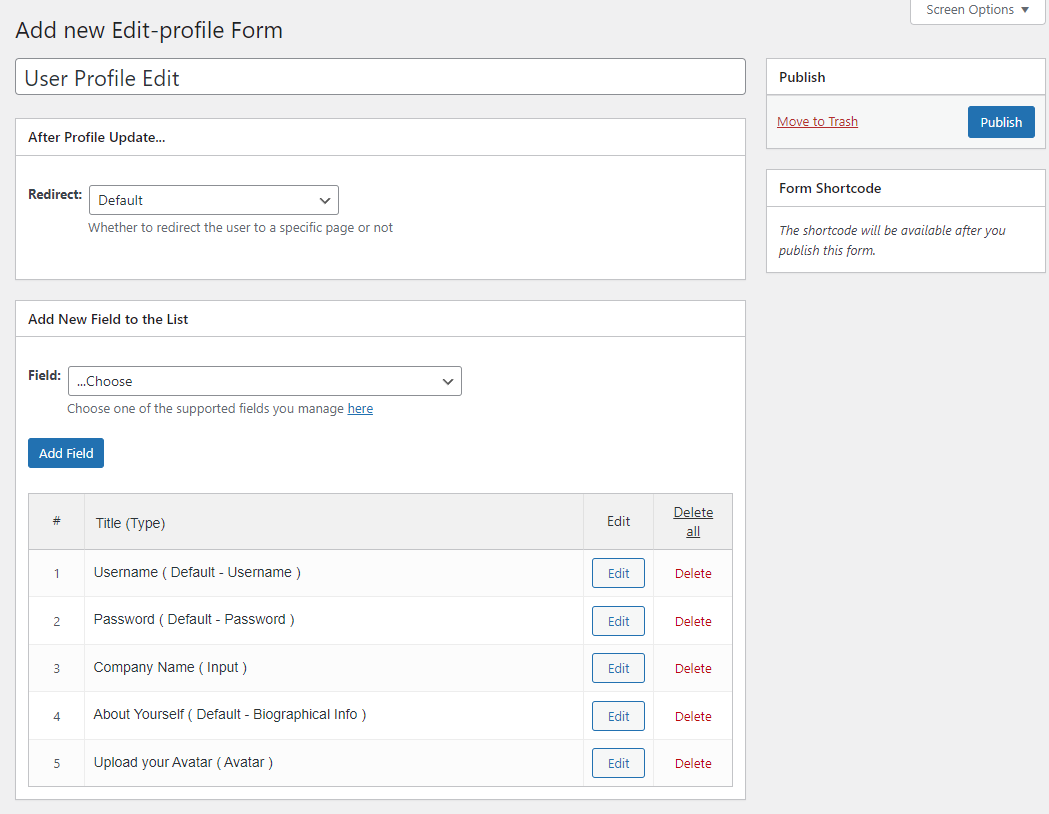
Same as before, add or remove fields as required and let users customize their profiles after they log in. Once you’re done make sure to click on the Publish button.
Now, place this form on a separate page by copying and pasting the form shortcode, just like you did with the registration form. Next, give the page an appropriate title—like “Profile” or “My Account”—and then add any other content you’d like to see on it.
Step #3: Create a User Directory (Optional)
Ideally, you also want to create a “user directory” and showcase all registered users on the front-end of your site. This step is optional, but implementing it adds an extra layer to your social network.
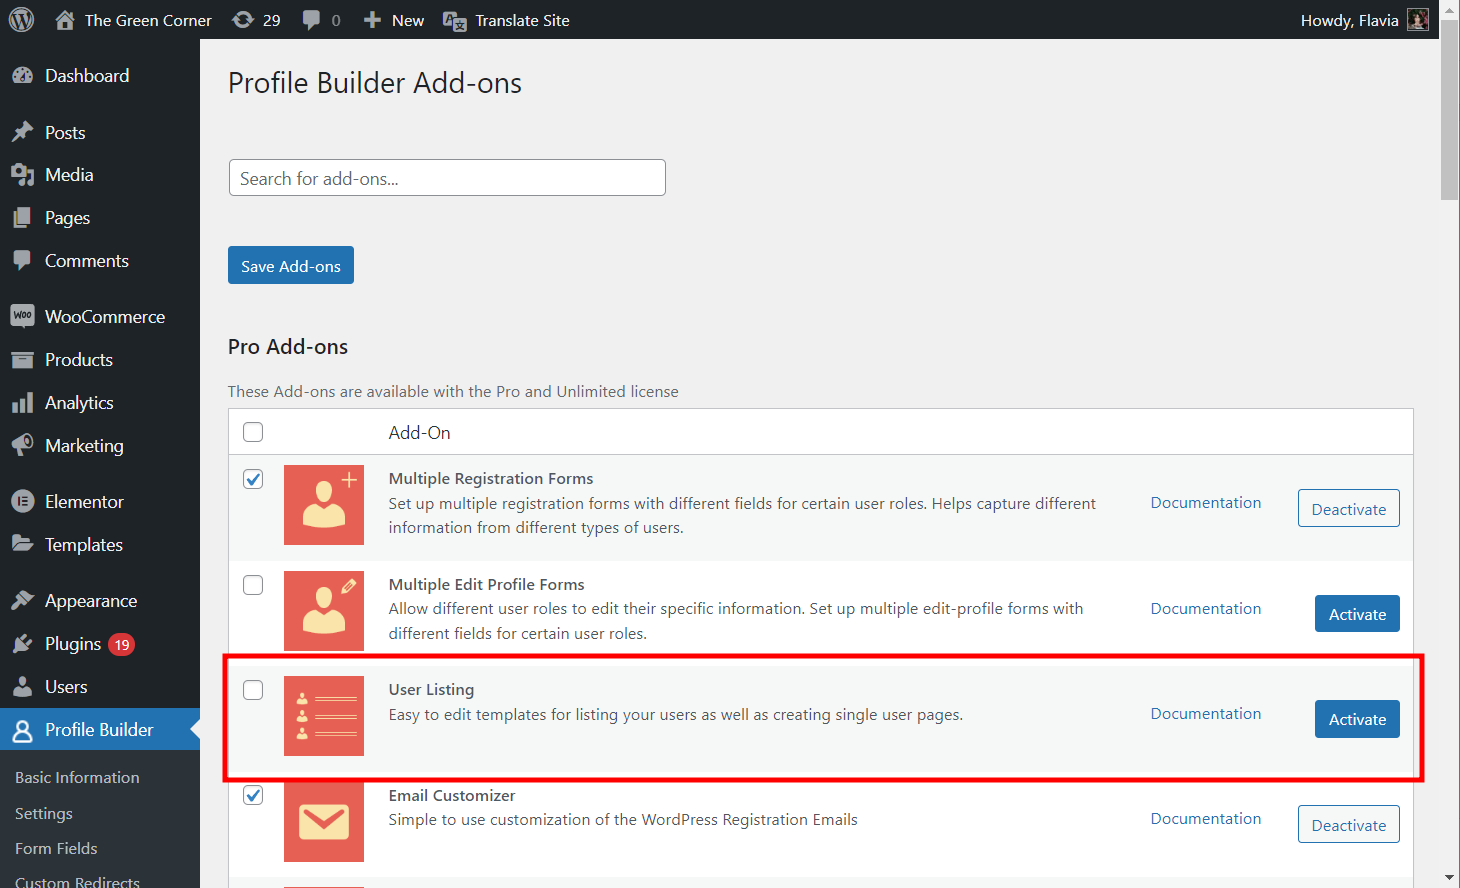
To create the user’s directory, first navigate to Profile Builder → Add-ons to activate the User Listing add-on.
Next, go to Profile Builder → User Listing and click on the Add New button.
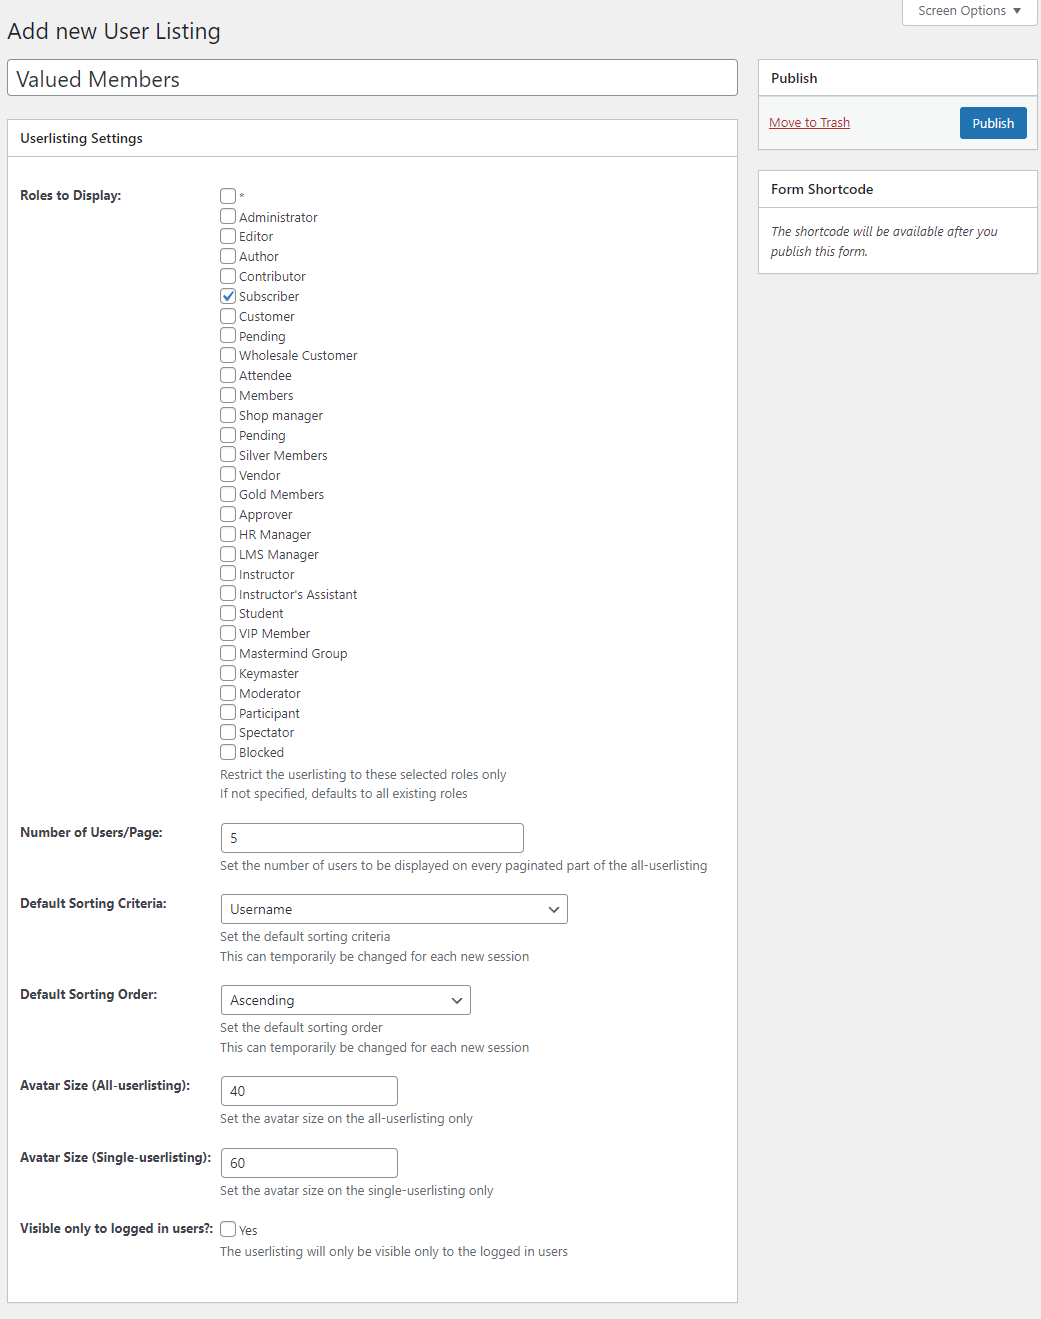
Select the user roles you want to display on your user listing and set which search fields to display on the front-end using the Search Settings section. Once you’re ready, click on the Publish button to continue.
Step #4: Create Social Network Forums and Topics
With registration and profile edit forms set up and ready to go, you can start creating your social network forums or topics that your users will engage with. Make sure you have the bbPress plugin installed and activated on your WordPress site.
Next, you’ll need to activate Profile Builder’s bbPress add-on from the Add-ons section, just like you did with the User Listing add-on.

Now go to Forums → Add New and give your forum a title.
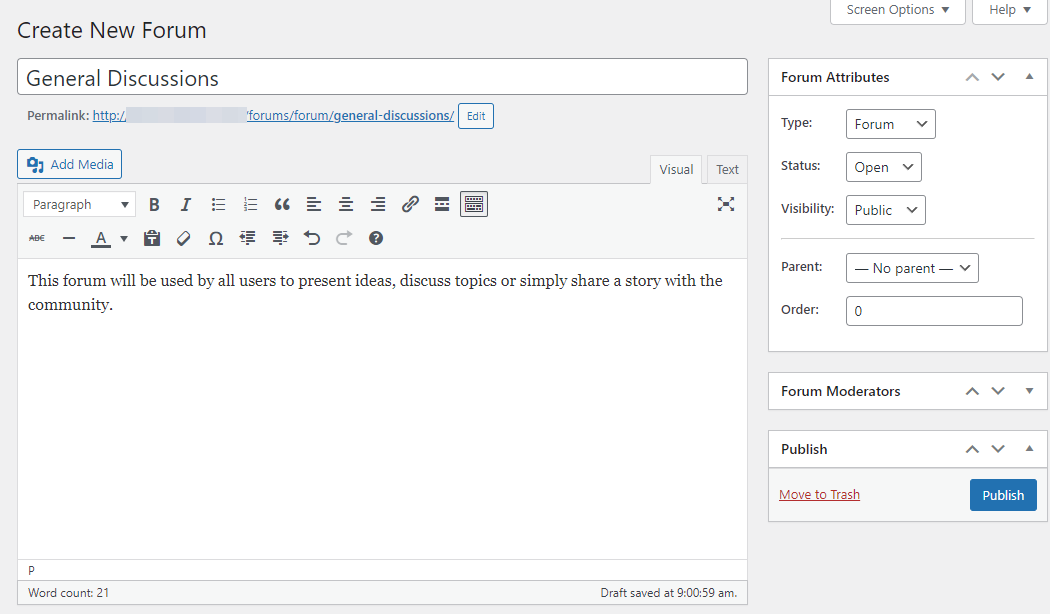
After you’re done setting description details and Forum Attributes, scroll down to the Profile Builder Content Restriction section.
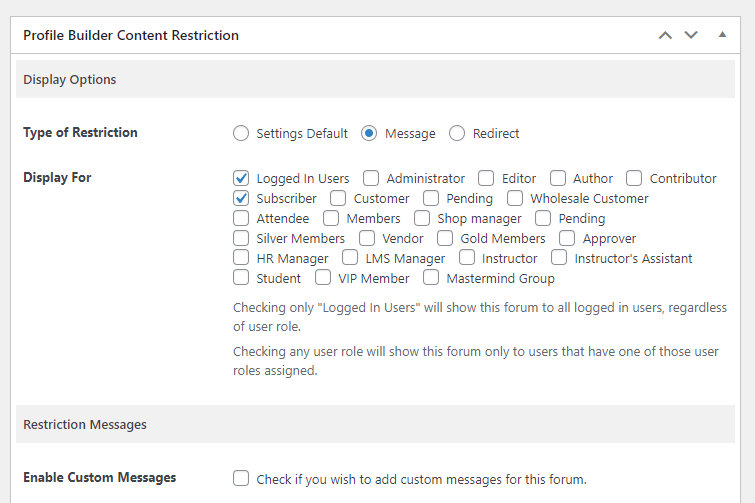
Here, you can also set restriction options so that only registered users can send messages on the social network discussion forum. Click on the Publish button once you’re ready.
Now, go to Profile Builder → bbPress and select the option to display Profile Builder forms instead of the default bbPress ones.
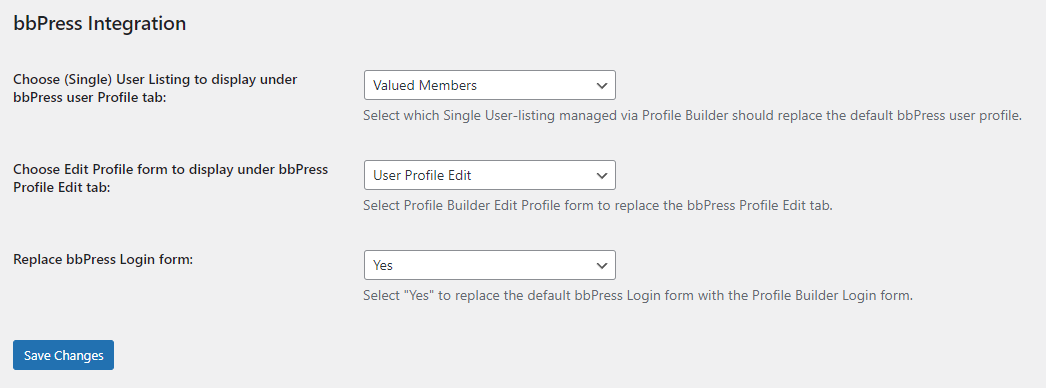
Once you’re done, make sure to click on the Save changes button.
Step #4: Launch Your New WordPress Social Network
It’s time to finally launch your WordPress social network on your own site.
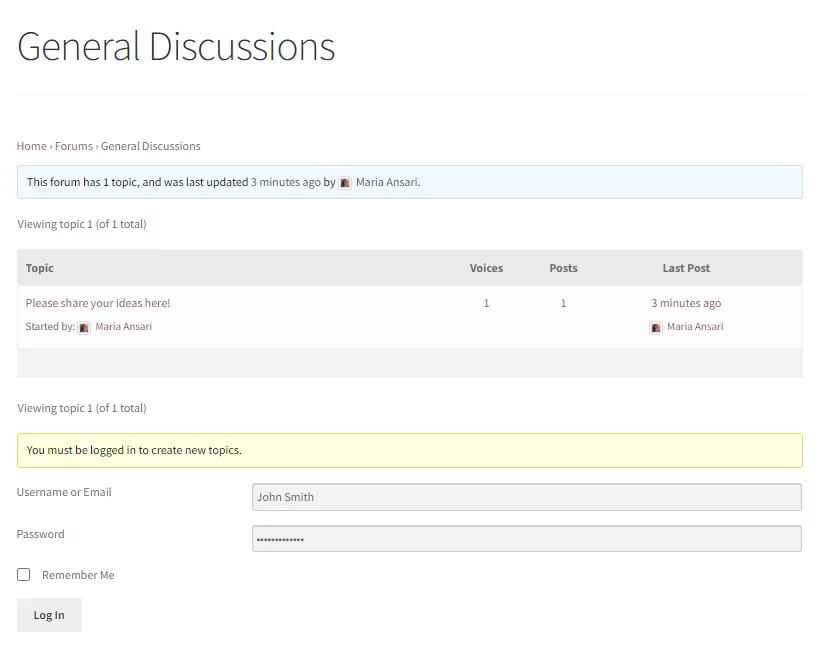
Once users successfully register on your site using the social network registration form, they will be able to log in and view discussion forums on your site and interact with eachother.
When viewing forums on your site, users can log in to their accounts directly from the same screen.
Users can also reply to threads created by other users and view their account details by clicking on the user’s name.
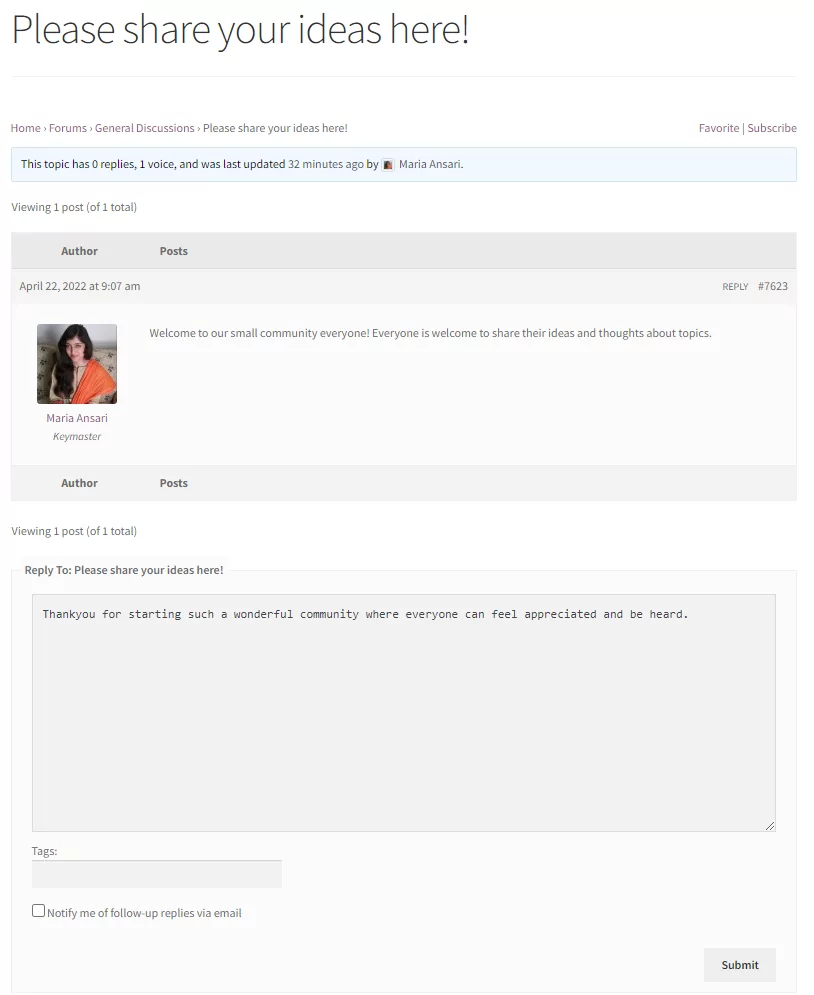
This will also let users easily edit their user profile using the Profile Builder Pro custom edit-profile form.

Create a Social Network Using WordPress Today
Creating a WordPress social network site may seem a little intimidating at first. But with the right tools, it becomes a lot easier.
Other than allowing you to create profile pages and login pages, Profile Builder Pro also lets you create customizable registration forms for events, membership websites, or online stores. It’s an all-in-one solution that also lets you set advanced content restriction features and gives you the ability to showcase custom user directories on the front-end of your site.
Ready to build a social network with WordPress? Get Profile Builder Pro today!
Do you still have questions on how to create a social network with WordPress and this friendly plugin? Ask them in the comments section below!
Related Articles

8 Best WordPress User Registration Plugins
Not sure what WordPress user registration plugin to use for your project? Going through all the WordPress user registration plugins can be disorienting. You may have spent hours and hours searching for plugins and tutorials to help you with your project, and you’re still as confused as you were when you started. Imagine finding the […]
Continue Reading
How to Customize WordPress Email Login Behavior (+ Registration)
Searching for a WordPress email login feature so that you can customize your site's login process, such as requiring users to use their email address instead of a username? By default, WordPress lets users log in with either their username and password or their email and password via the default login page. But if you […]
Continue Reading
How to Password Protect Content, Posts, and Categories in WordPress
There are many use cases for password-protected content in WordPress. For example, you might be a content creator who wants to monetize premium content in the form of subscriptions or memberships. As with everything related to WordPress, password-protecting posts doesn’t have to be difficult. If you’re wondering how to password-protect WordPress content, posts, and even […]
Continue Reading