

Table of Contents
Regardless of the type of website you run, an email list is a great asset. It enables you to communicate regularly with your audience. Plus, it’s a great way to nurture leads and warm them up to the idea of a sale. But building a mailing list from scratch can sound like a daunting task.
With the right tools, the process can be very straightforward. Profile Builder is a complete user registration plugin that integrates nicely with MailPoet. You can use these tools to provide opt-in functionality when new people register for an account on your site.
In this post, we’ll show you how to build a mailing list from WordPress. Let’s get started!
What You’ll Need to Build a Mailing List
Before we show you how to build a mailing list from WordPress, let’s take a look at the tools you’ll need.
For this tutorial, we’ll assume you already have a WordPress site set up. Here are the two plugins you’ll need to install:
Profile Builder is an all-in-one user registration plugin that lets you create custom registration forms, login forms, and edit profile forms:
Profile Builder Pro
Create beautiful front-end registration and profile forms with custom fields. Setup member directories, custom redirects, cutomize user emails & more using the all in one user management plugin.
Get Profile BuilderIt’s a great option for membership sites, ecommerce sites, and growing online communities. Plus, you can use the plugin for free to access the base functionality.
However, the premium plans give you access to more features and integrations. In particular, you’ll need at least the Profile Builder Basic plan to use the MailPoet add-on.
But before you activate the add-on, you’ll need to install the MailPoet Newsletter plugin. Although there are tons of email marketing services, MailPoet is a great option because you can use it for free if you have less than 500 contacts.
How to Build a Mailing List from Your WordPress Site (Using MailPoet)
Now that you know what tools you need for the job, let’s take a look at three steps to build your mailing list from WordPress.
Step 1: Install the Plugins
Before you can send emails from WordPress, you’ll need to install and activate the tools in your dashboard. Since we’re working with an integration add-on, you will need to install both Profile Builder and the MailPoet Newsletters plugins first. Otherwise, the MailPoet integration won’t work.
The MailPoet Newsletter plugin is completely free, so you can install it directly within the WordPress dashboard. Simply go to Plugins → Add New and use the search bar to find it:
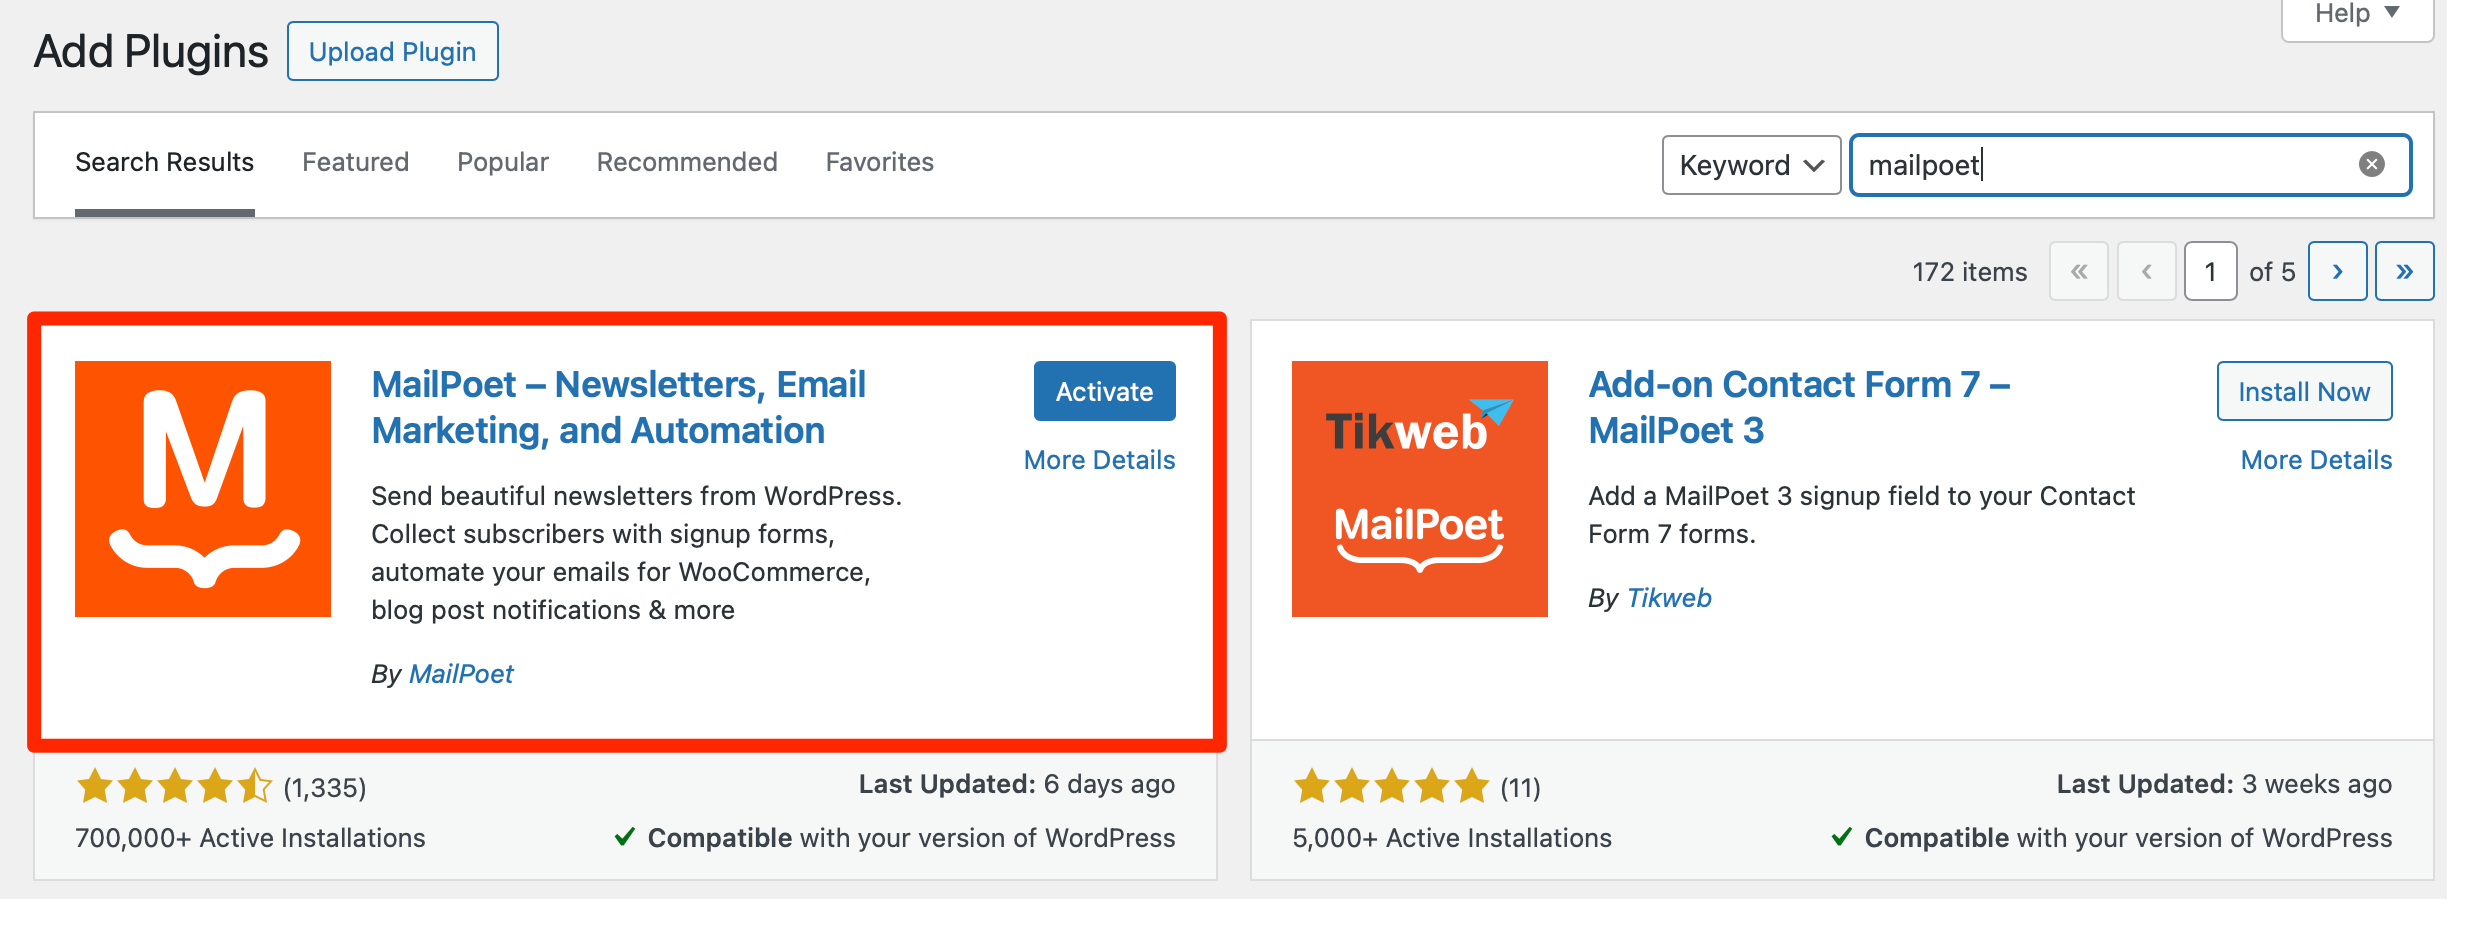
Then, click on Install Now → Activate. You’ll be guided through a speedy setup process where you can select a MailPoet plan (you can choose the free one).
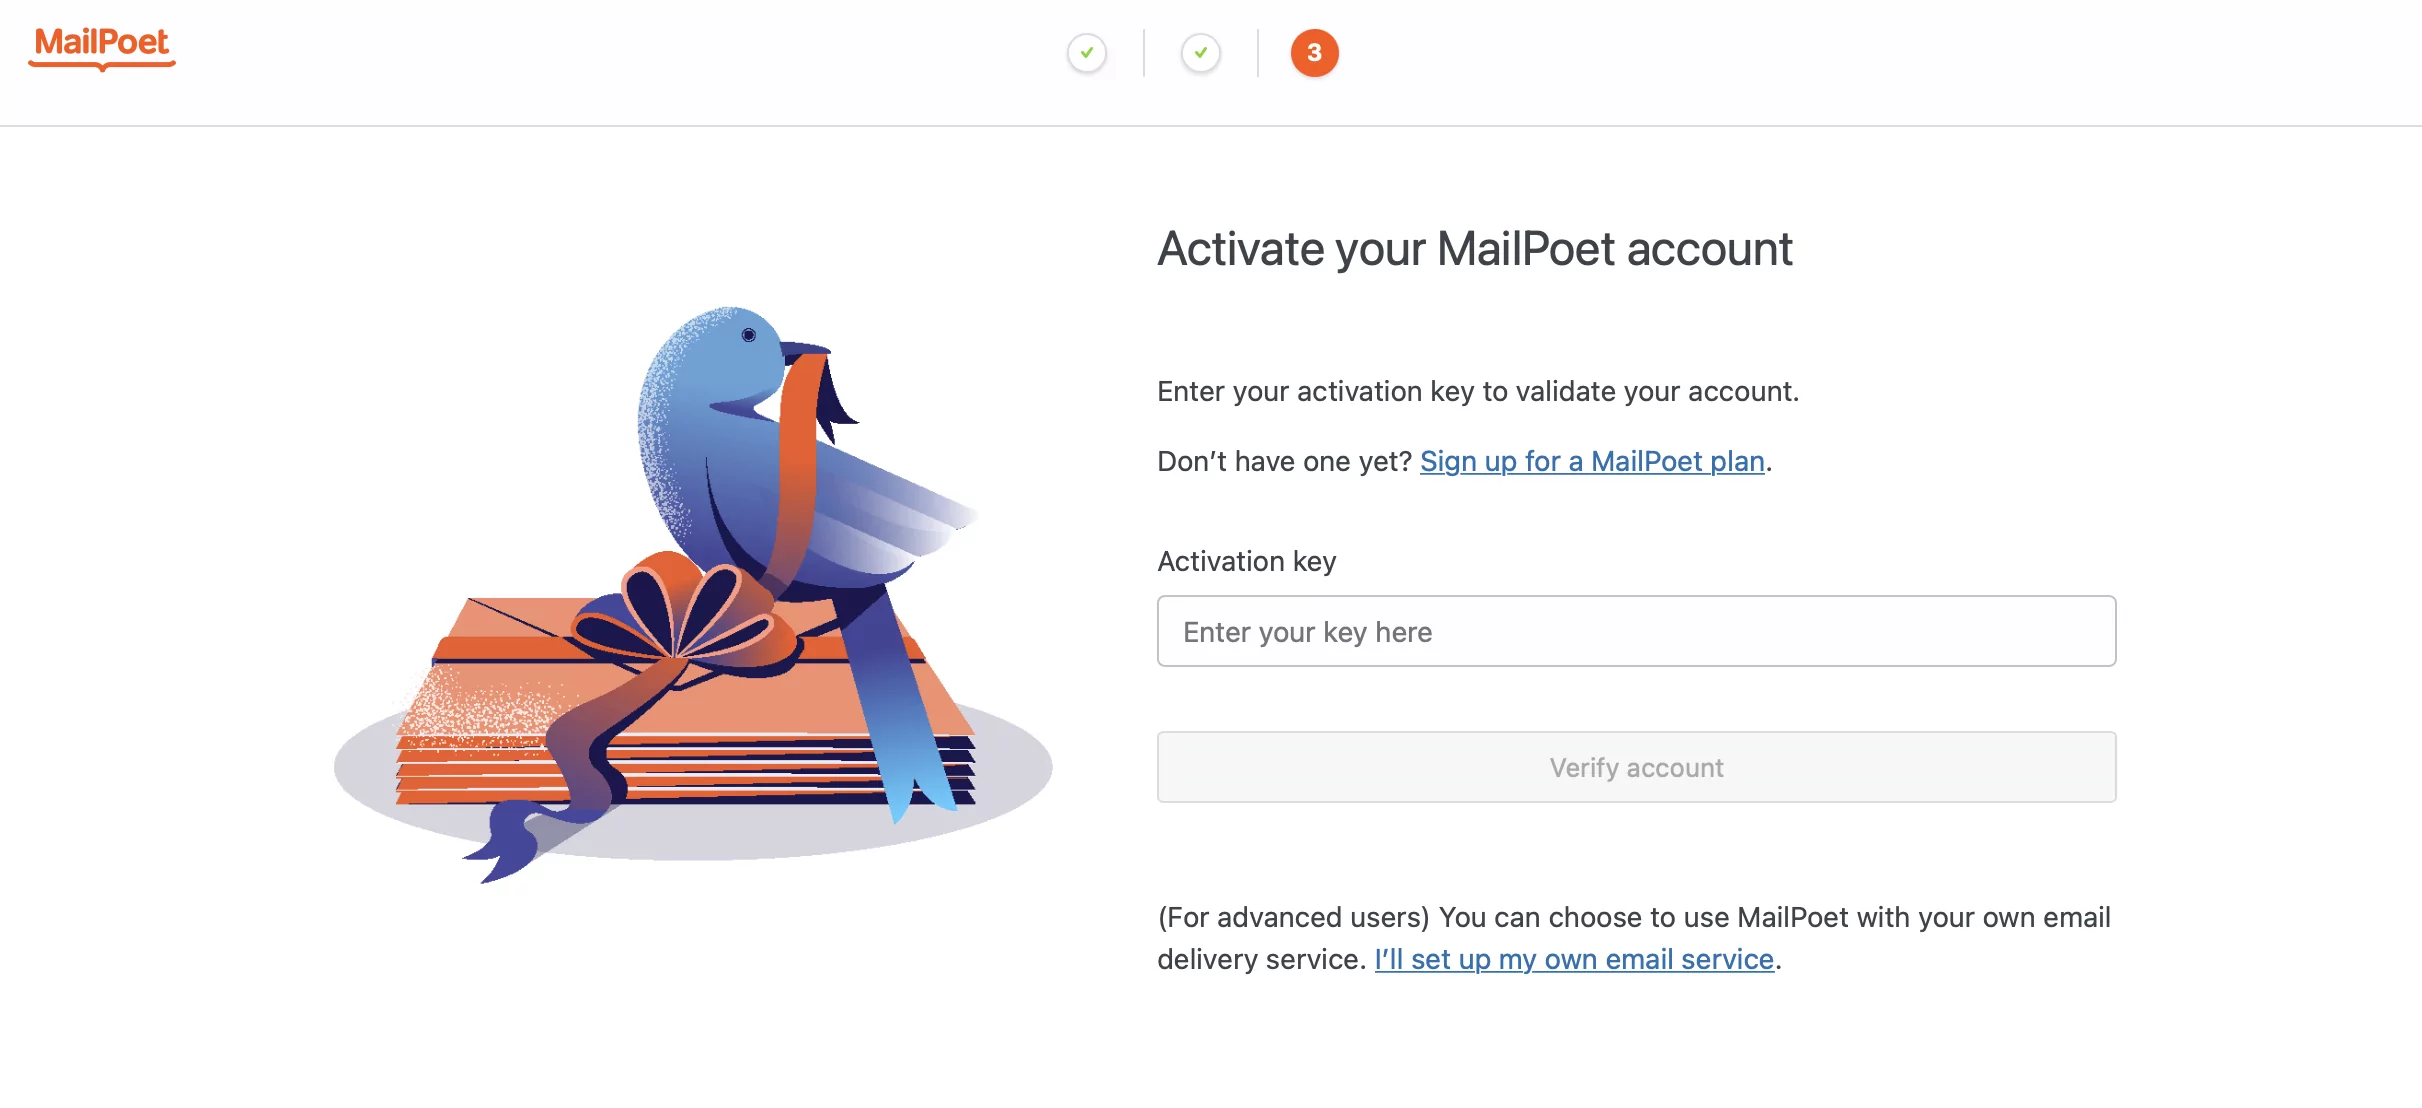
Plus, you’ll need to register for a MailPoet account (if you don’t already have one). After verifying your email address, you can connect your WordPress site to your MailPoet account using an API key:
At that point, you’re ready to install the Profile Builder plugin. All you have to do is follow the same steps above, but you’ll need to click on Upload Plugin and find the zip file that you purchased and downloaded from the Cozmoslabs website.
Finally, you can activate the MailPoet integration. To do this, go to Profile Builder → Add-Ons and scroll down to the Basic Add-Ons section. Here, find the MailPoet option and click on Activate.
Step 2: Add the MailPoet Subscribe Checkbox to Your Forms
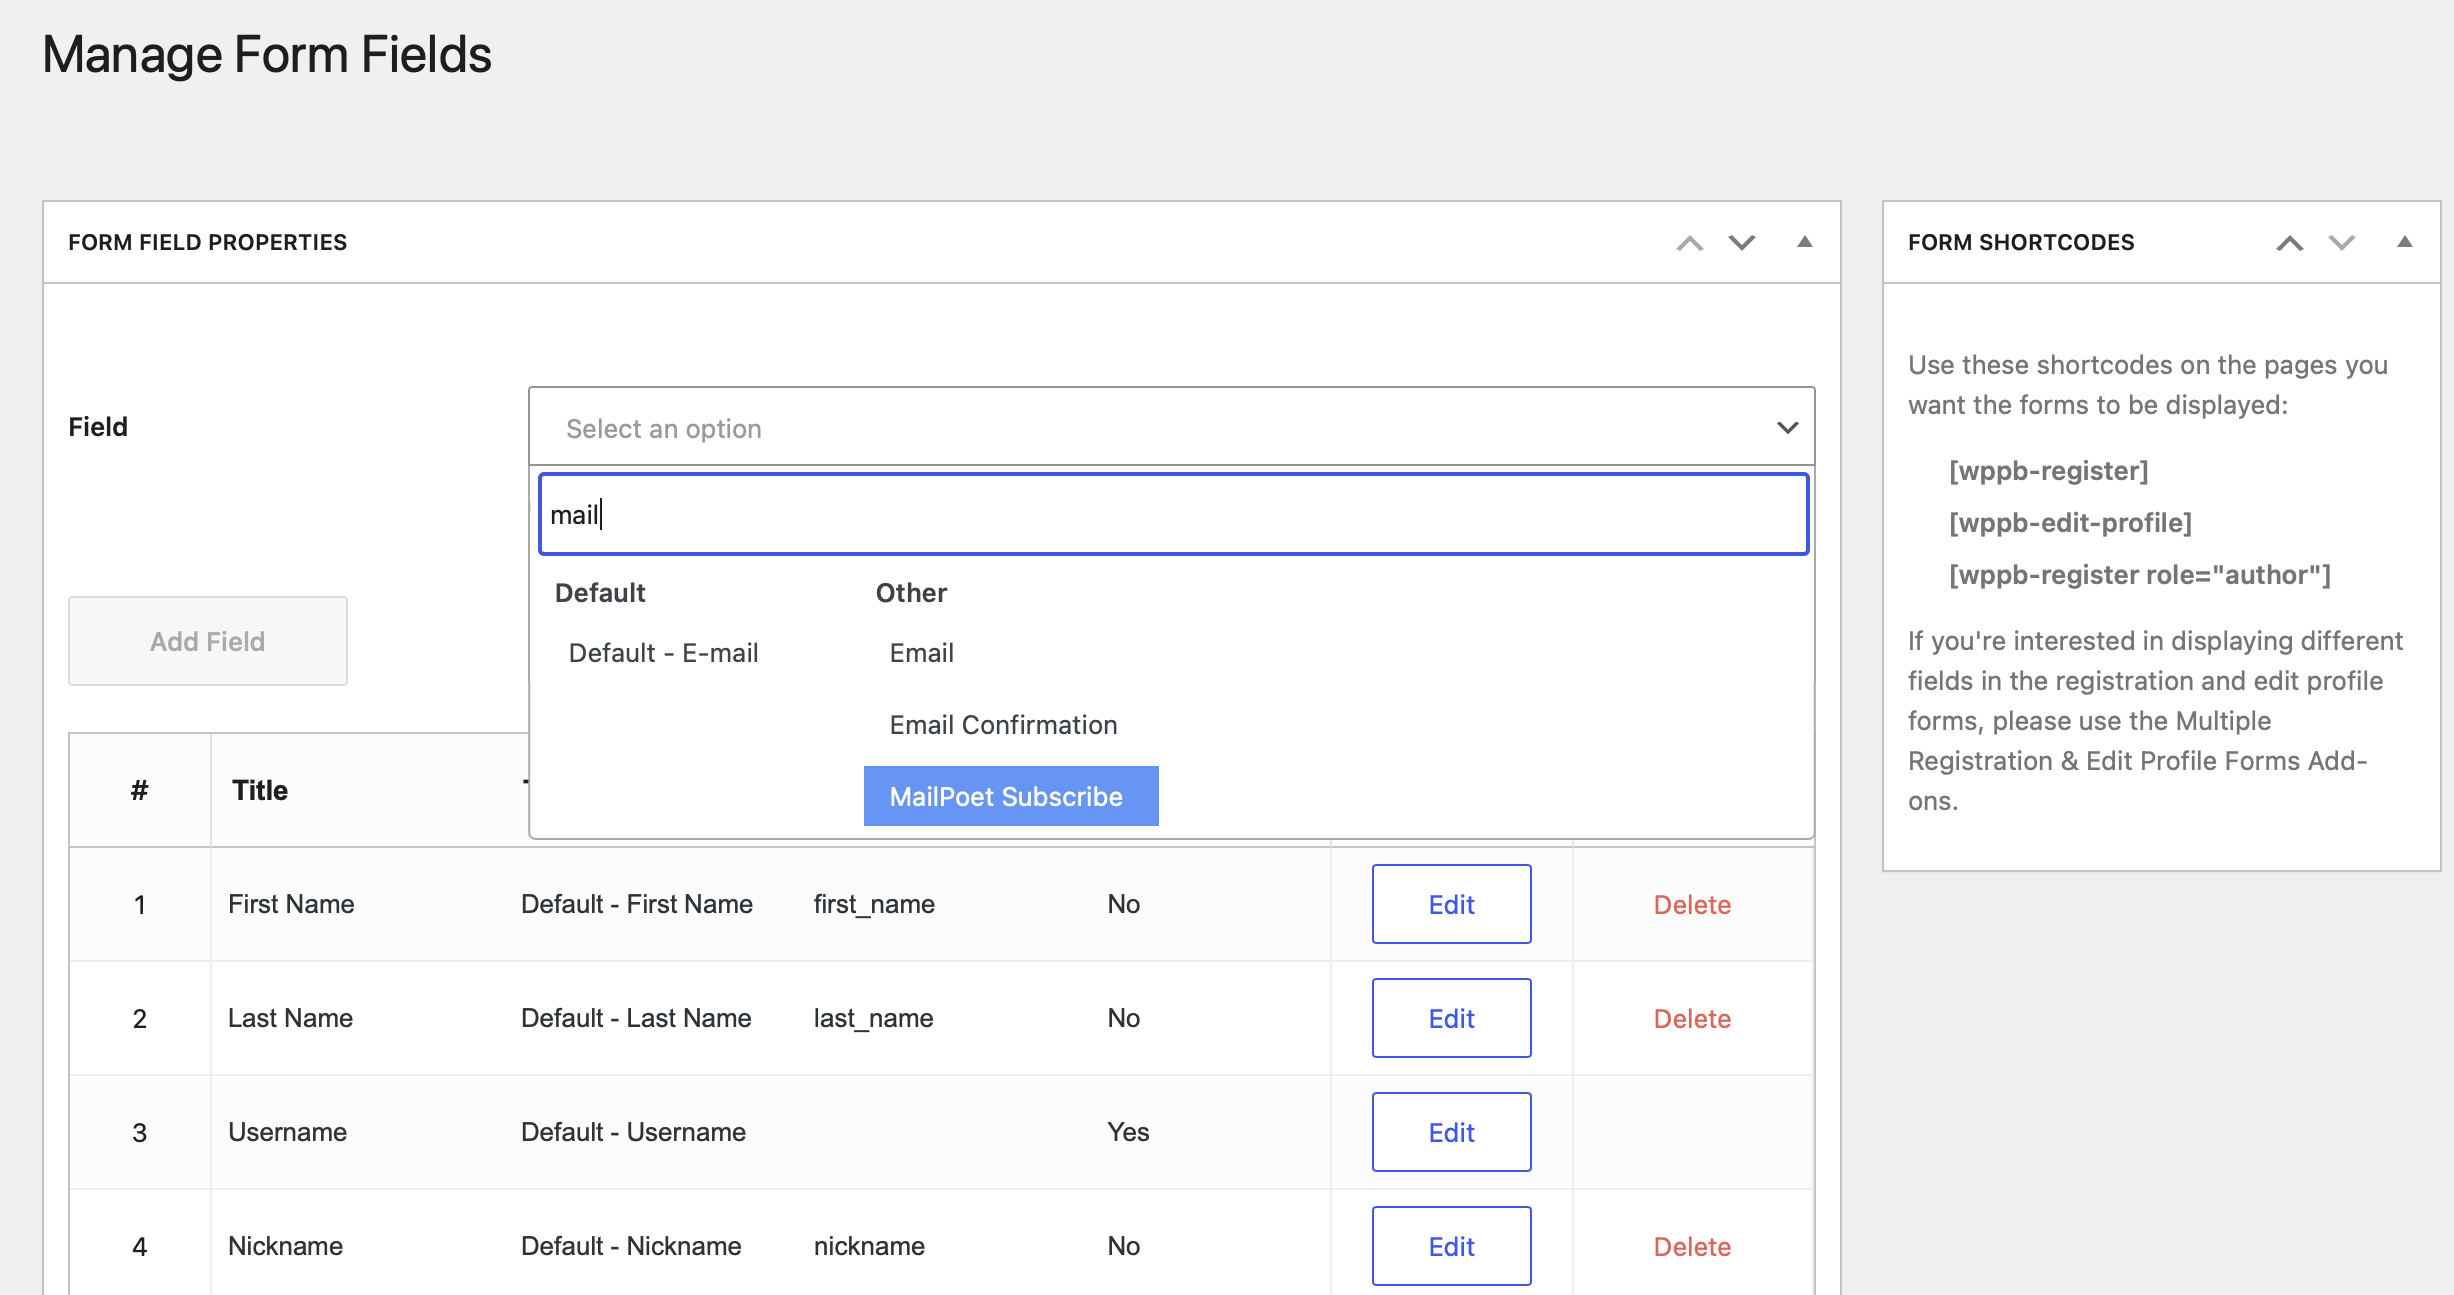
With the MailPoet integration successfully configured on your site, you’re ready to add the MailPoet Subscribe field to your forms. So, navigate to Profile Builder → Form Fields.
Here, you can add new fields to your forms, edit/remove fields, re-order fields, and adjust other important settings. At the top of the page, use the Field drop-down menu to select MailPoet Subscribe:
Then, you can add an appropriate field title and select a list from your pre-configured MailPoet lists. This way, users can choose to subscribe to that specific list:
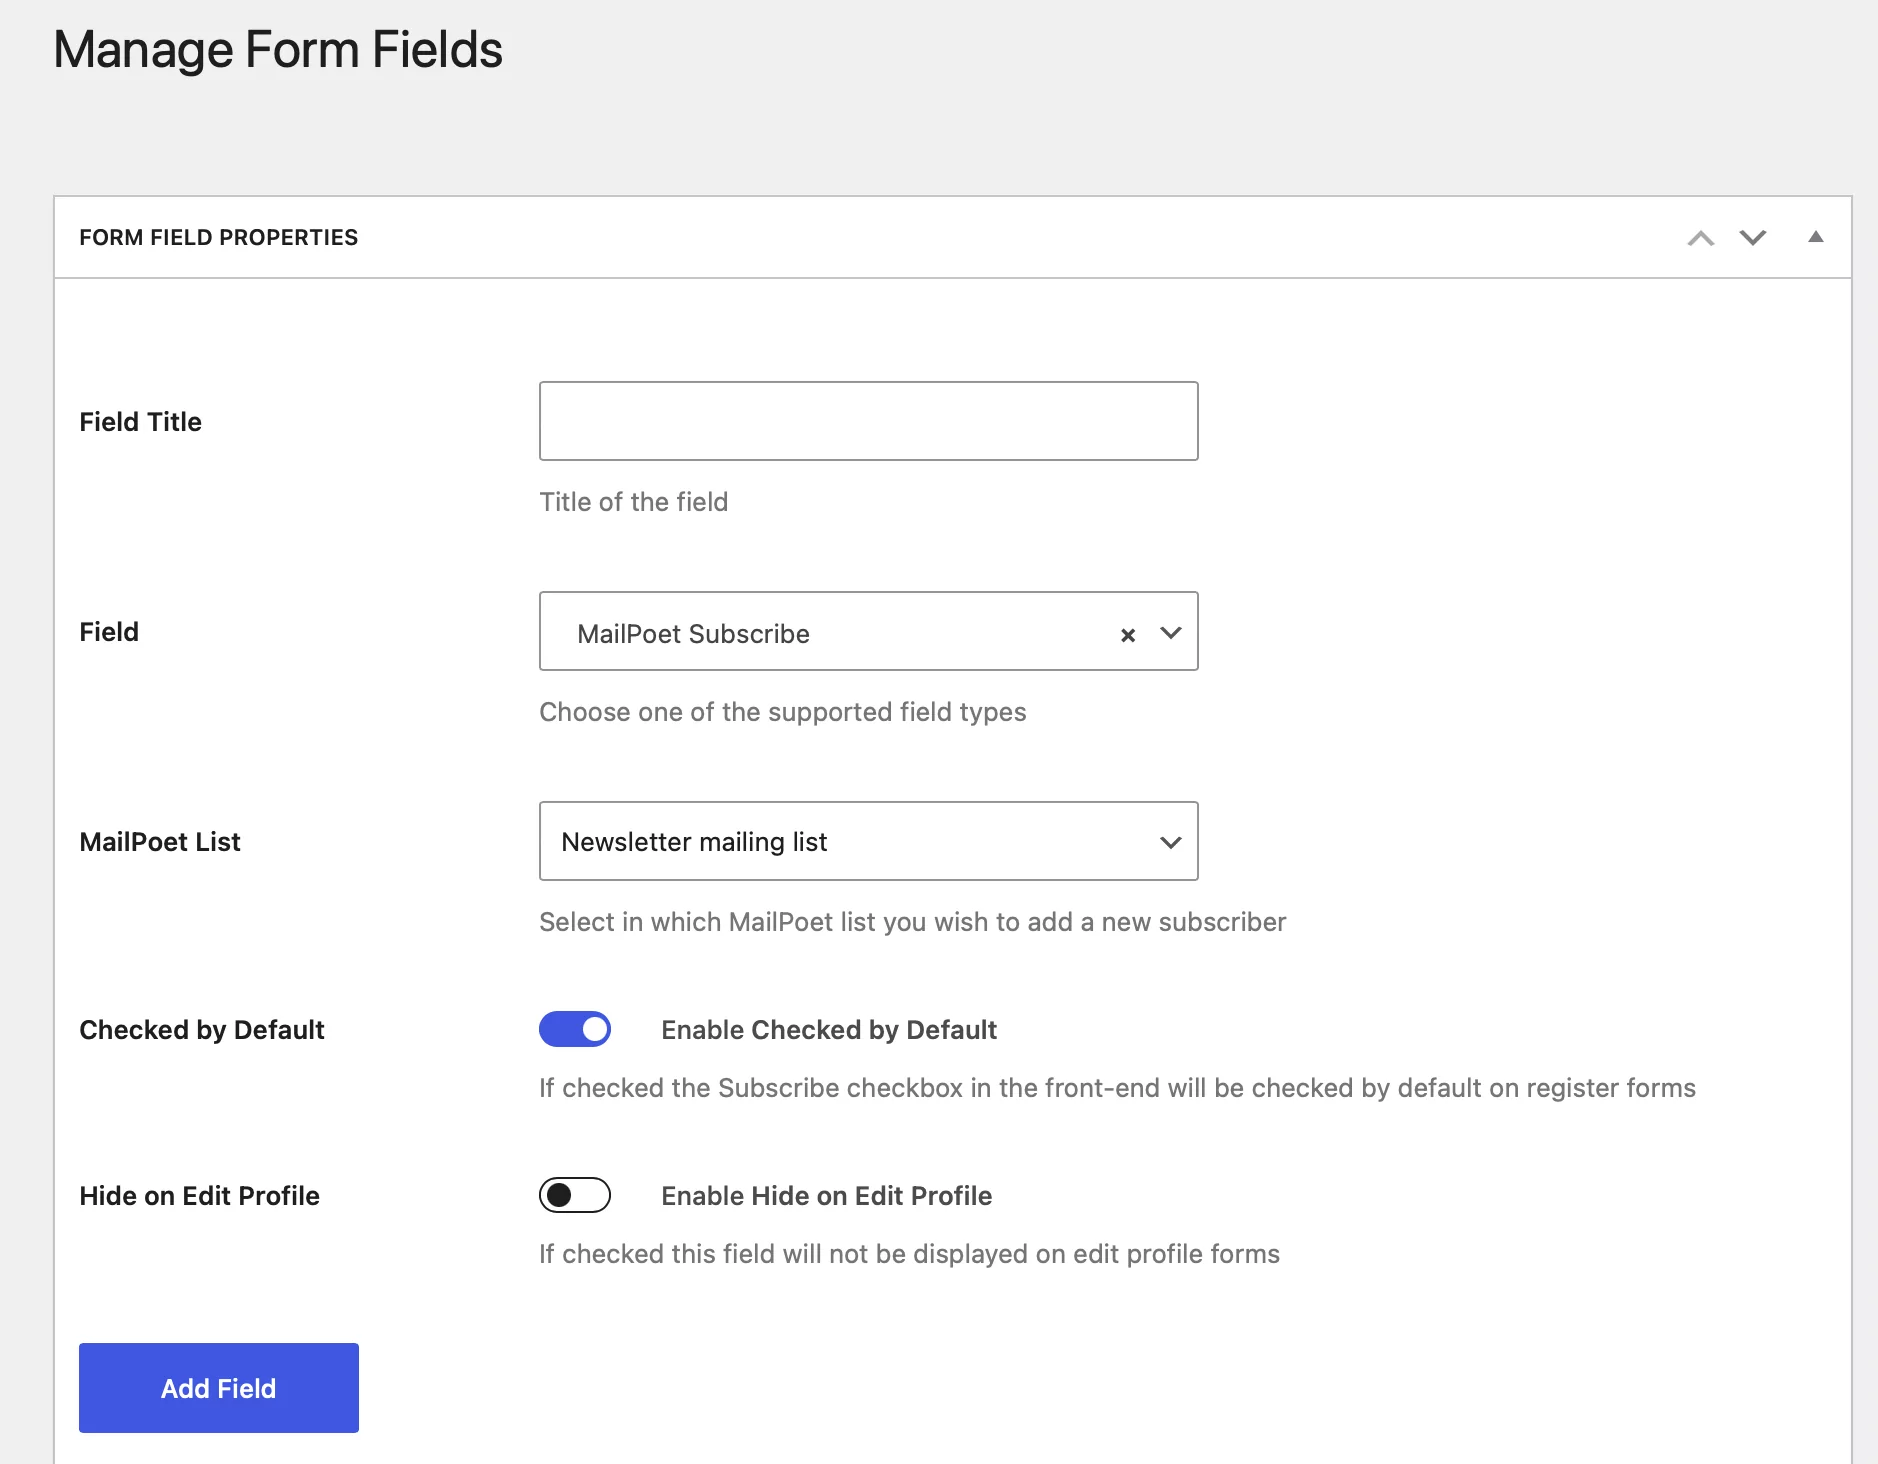
If you don’t have any mailing lists configured, head to MailPoet → Lists. For example, you might create a daily mailing list as well as a separate monthly newsletter list.
After that, decide whether the field should be checked by default. You can also choose whether to display the field on your Edit Profile forms. When you are done, click on Add Field.
Below, you should see that the MailPoet Subscribe field has been added to your list of fields. You can then drag and drop the field to change the position or edit the field options.
Step 3: Preview the Front-End Registration Form
Now that you’ve added the MailPoet Subscribe field to your forms, let’s see how it looks on the registration form. When you install Profile Builder, the plugin can automatically set up your registration pages for you (as well as login pages and edit profile pages).
But, you can also set up new registration forms by going to Profile Builder → Registration Forms → Add New:
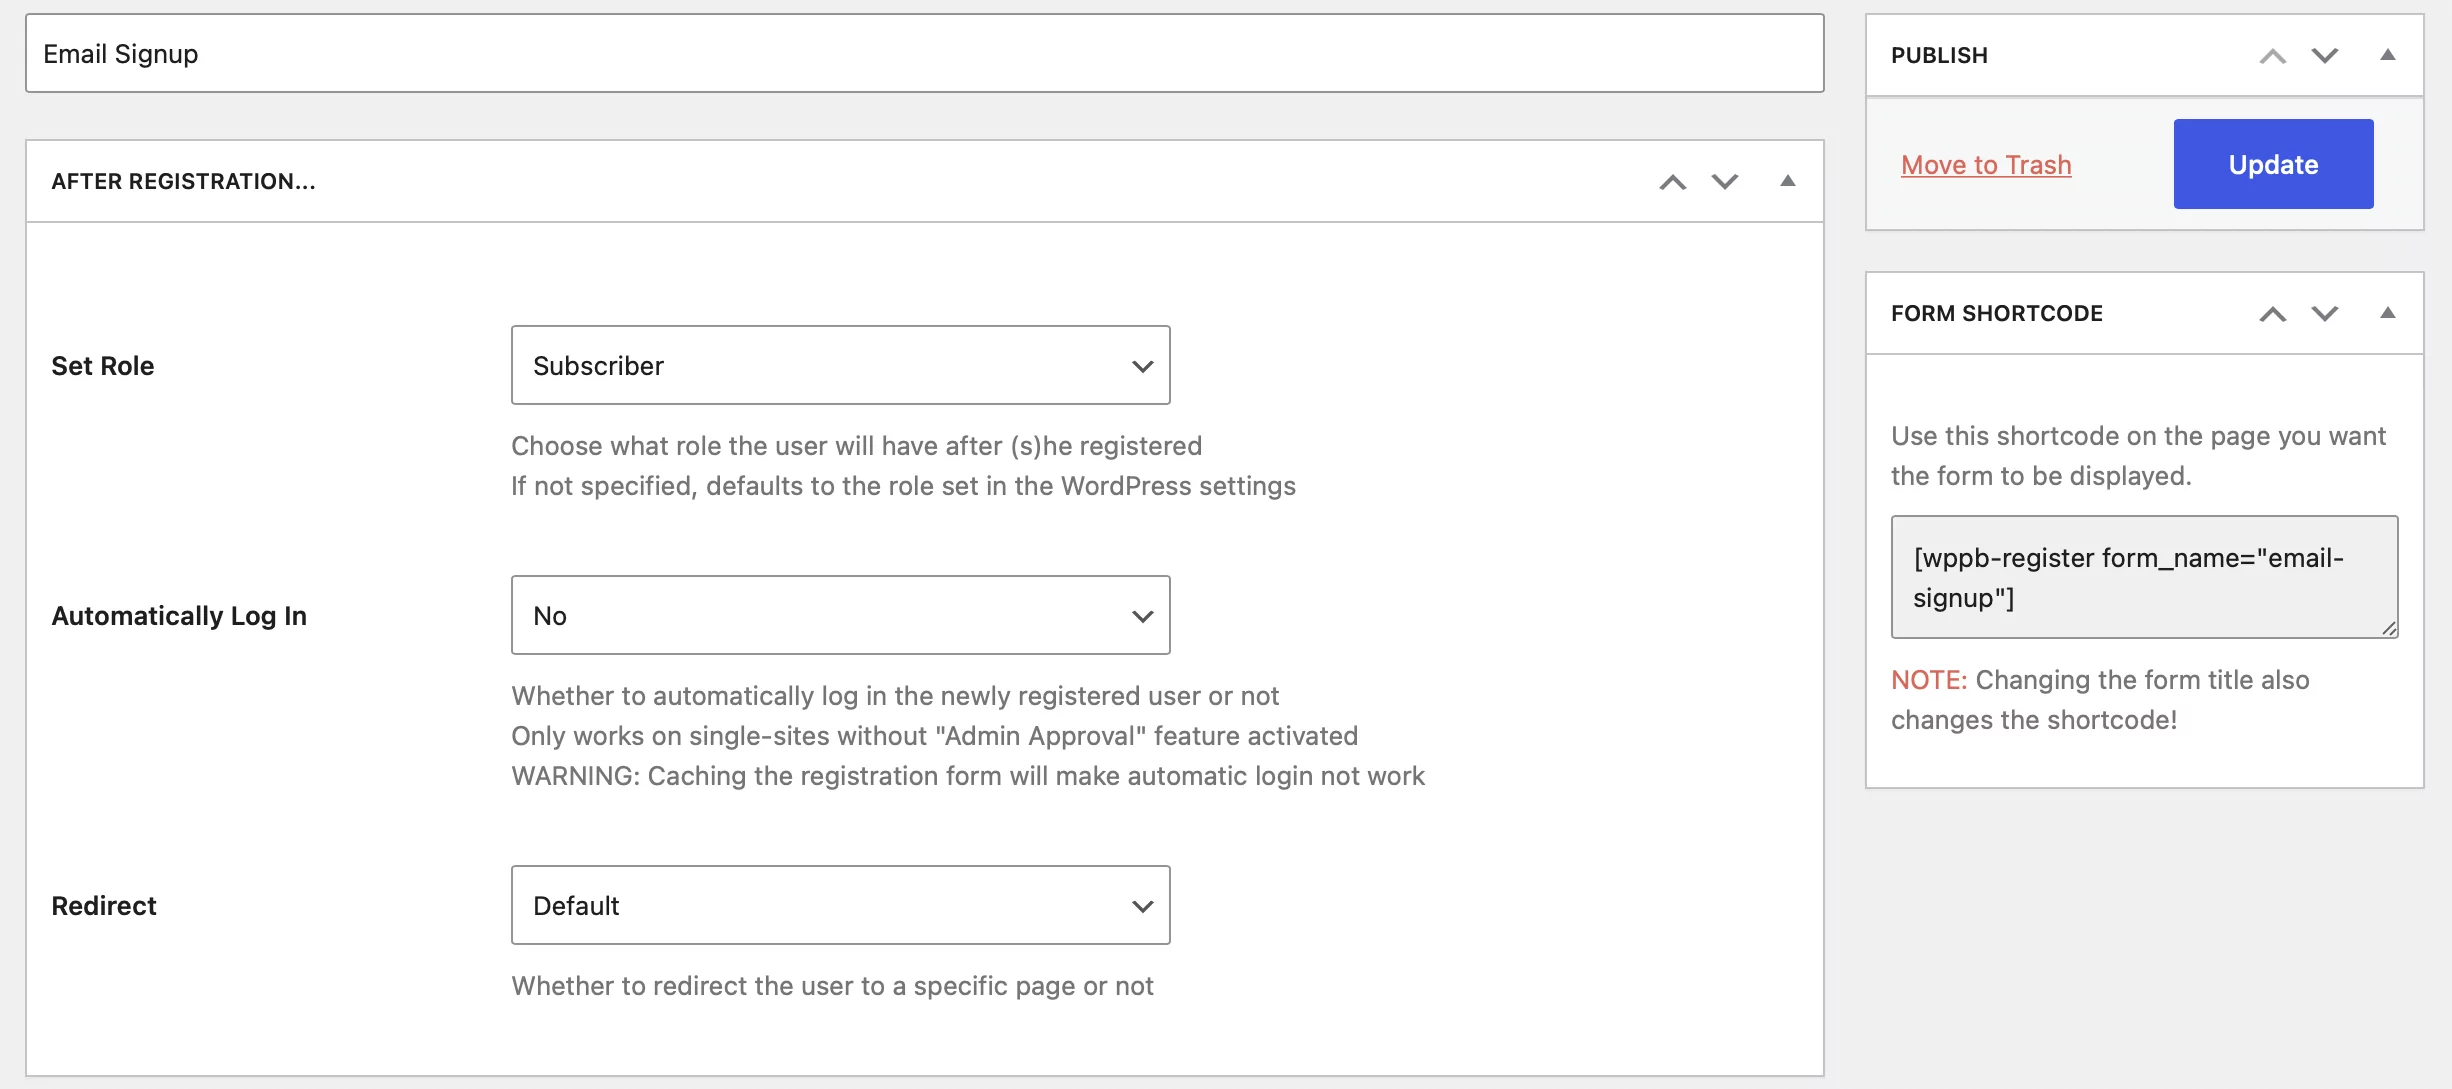
Here, you can name your registration form and define some post-registration settings like automatic logins and redirects. Further down, you can refine the list of form fields that you want to appear on your form. Make sure the MailPoet Subscribe field is present.
Then, you can add your registration form to a post or page in WordPress. You can either use the shortcode that’s accessible from the Registration Forms page, or click to add a new block.
You’ll need to select the Register block that’s available with Profile Builder. Then, locate the Form Settings on the right side of the screen. You can use the Form drop-down menu to select the registration form that you just created (which contains the MailPoet Subscribe field):
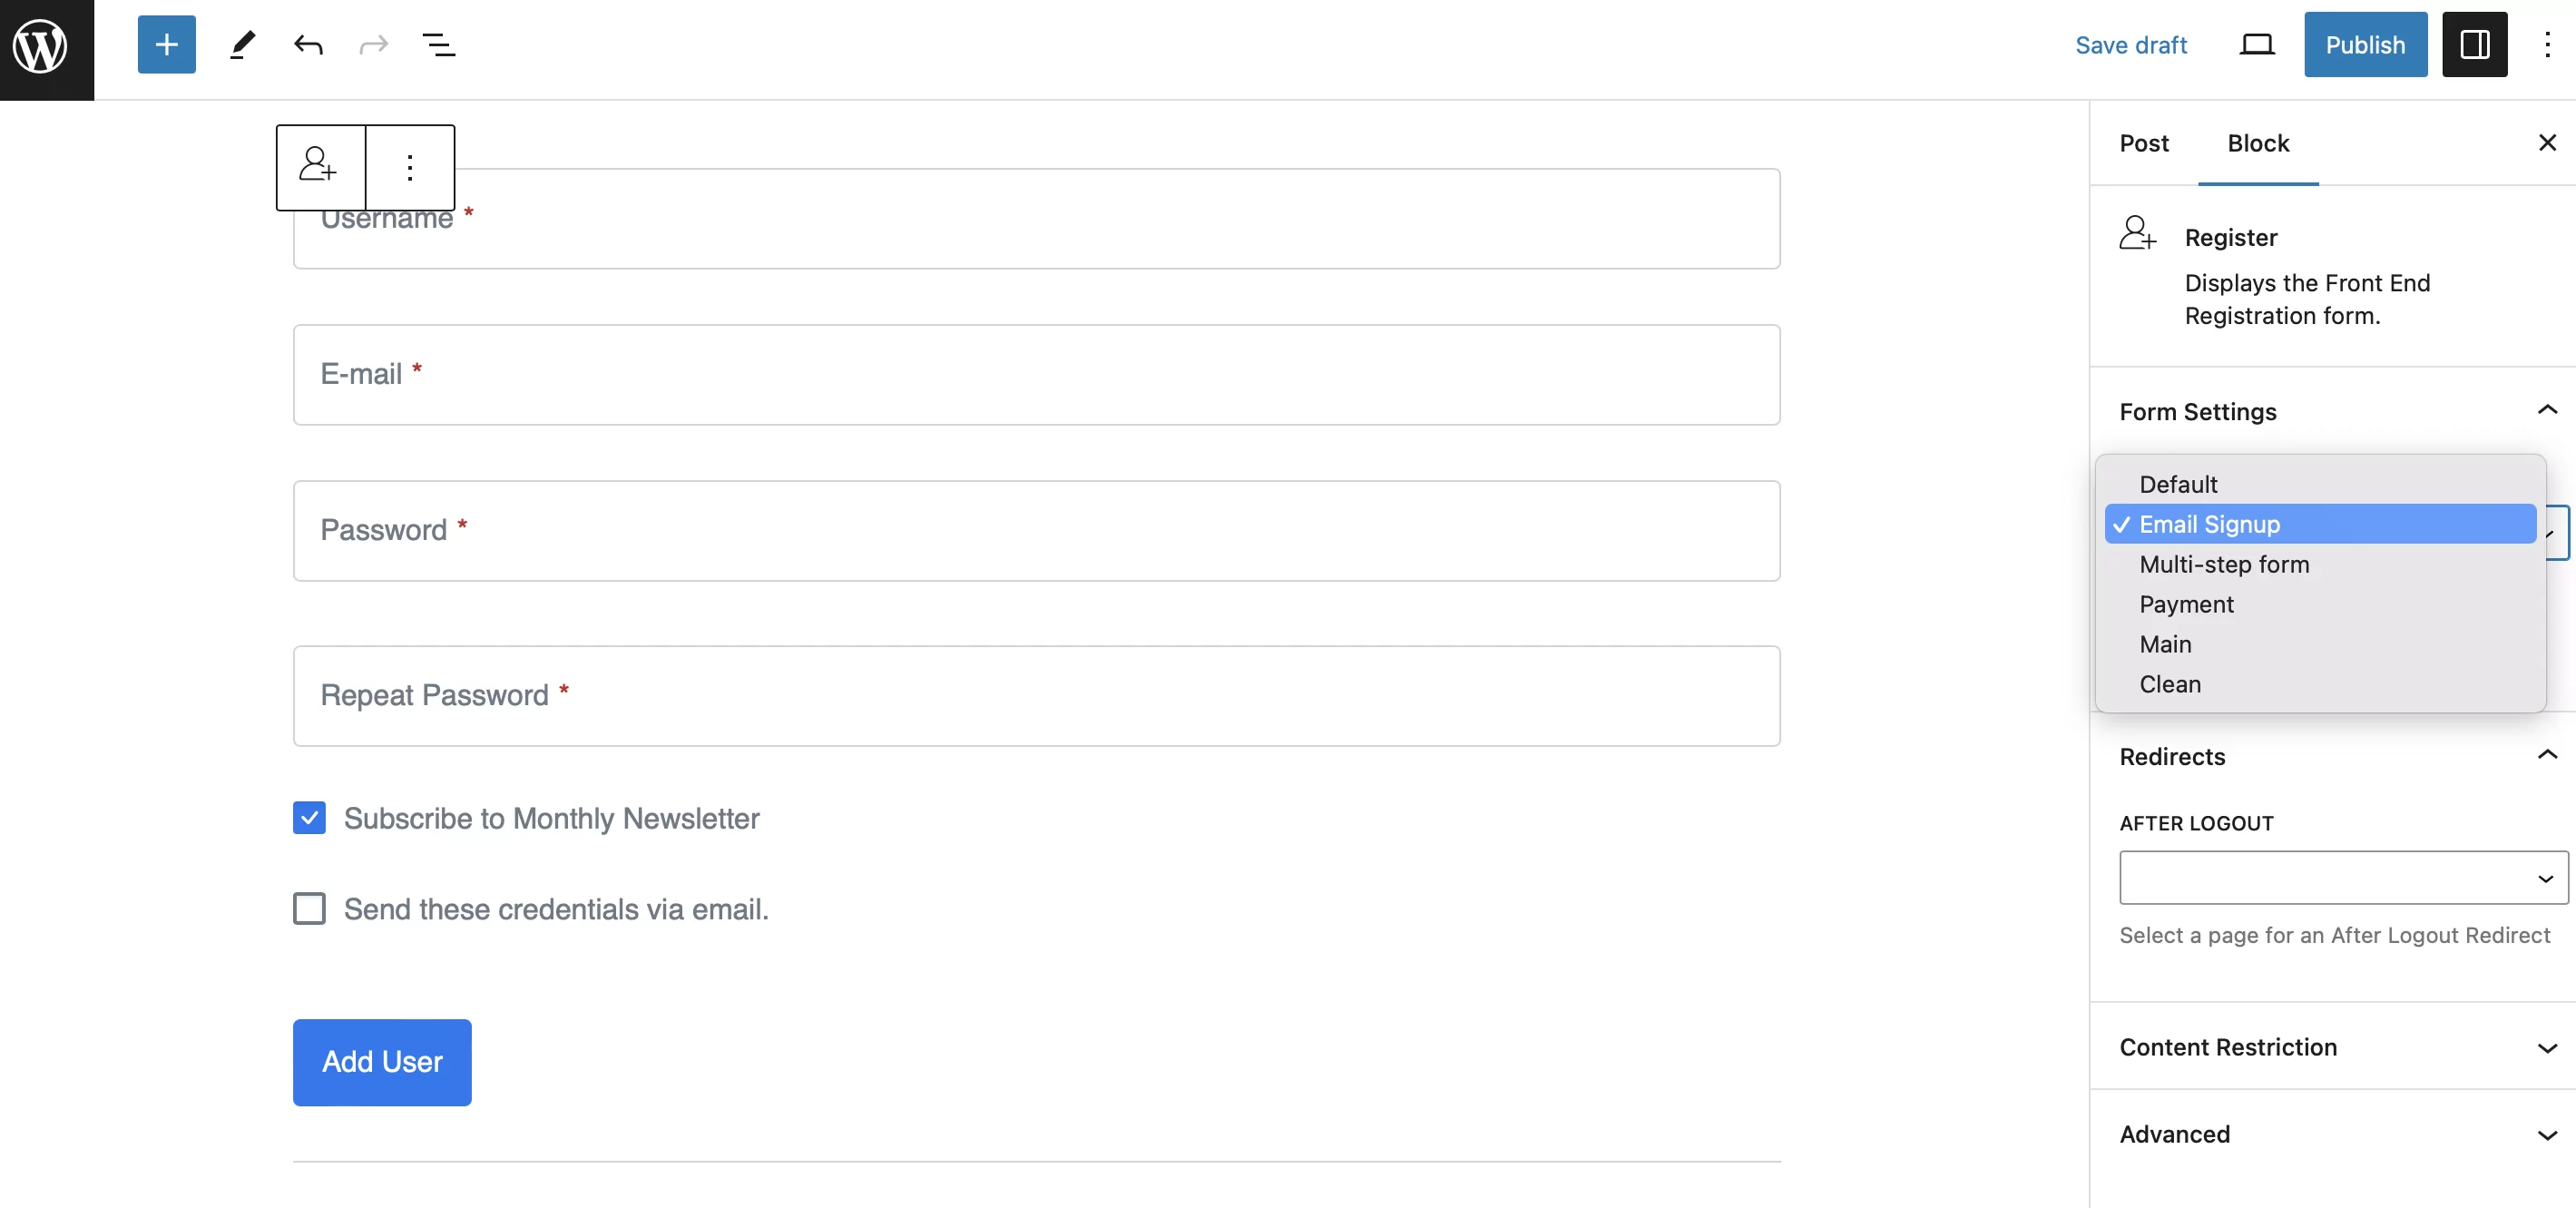
At this point, the registration form that you just designed should be visible on your page. Simply publish the form and view it on the front end of your site.
If you want to change the design of the form, log back into WordPress and go to Profile Builder → Settings. Here, you’ll find four design options in the Design and User Experience section.
Subscribe New Users to Your Mailing List
If you want to grow your audience and stay in touch with subscribers, it’s a good idea to start a mailing list. Although it may sound like a technical process, it’s relatively straightforward using the right tools. All you need is the Profile Builder Basic license and the free MailPoet Newsletter plugin.
To recap, here are three steps to build a mailing list from your WordPress site:
- Install both plugins and activate the MailPoet add-on.
- Add the MailPoet Subscribe checkbox to your forms.
- Preview the front-end registration form.
Profile Builder Pro
Create beautiful front-end registration and profile forms with custom fields. Setup member directories, custom redirects, cutomize user emails & more using the all in one user management plugin.
Get Profile BuilderDo you have any questions about how to use MailPoet to automate emails and newsletters from your site? Let us know in the comments below!
Related Articles

WordPress Profile Builder: a Front-end User Registration, Login and Edit-Profile Plugin
Easily Login, Register and Edit your Profile Directly from the Front-end Profile Builder lets you add front-end forms that give your users a more flexible way to register, log in, and modify their profile information. If you allow public registration on your site, you don't want to force your users to use the backend WordPress […]
Continue Reading
Profile Builder Update: No More Profile Builder Hobbyist?
If you’re already a Profile Builder user, you might have noticed some changes around here in the past few weeks. And that’s especially if you’ve purchased the Hobbyist version of Profile Builder. And you’d be right! Some changes did take place within the plugin, and thus, that’s what we’ll talk about in this blog post, […]
Continue Reading
Top 10 Gravity Forms Alternatives You Need to Consider in 2026 (Free & Paid)
In the market for Gravity Forms alternatives? I think you will agree that finding the best online form builder is a bit tricky, especially with the many options out there. One such option is Gravity Forms, a well-known form builder in the game. But even with all the rave reviews, is it the best software […]
Continue Reading
One question – Mailpoet is in the midst of a (much needed) upgrade to a 3.0 release. Will this plugin work with the new release?
Hello Andrew,
I will contact MailPoet authors to get my hands on the new, yet unreleased, 3.0 version so I can test it out. I’ll make sure there are no compatibility issues.
I think 3.0 is supposed to release in a few weeks. The beta has been stable for some time. Let me know if you’d like us to test something for you. Thanks.
Thank you for your offer. We will perform the needed updates to our add-on soon and let you know about it.
Hello Andrew,
I just wanted to let you know that we have updated the Profile Builder MailPoet Add-on to support MailPoet 3.