

Table of Contents
As an online business owner, there are many reasons why you might consider restricting access to content. For example, if you’re running a membership site, selling online courses or paid subscriptions, or you’d like to make it easy for the sales department to access marketing collateral on the go.
For this, you’ll need a content restriction plugin – we’ll use Paid Member Subscriptions – and an easy way to be able to showcase the members-only content. Maybe you want to create a searchable, filterable table listing members-only blog posts, downloadable documents, or other resources. You can do this by listing the hidden content in a searchable front-end table layout using Posts Table Pro.
In this article, we’ll show you how to use Posts Table Pro with Paid Member Subscriptions to:
- Restrict a page to a specific membership subscription plan and add a dynamic table to it.
- Restrict specific posts, WooCommerce products or other information, and list it in a table layout so that each user can only click on items that they have access to.
Before we begin, let’s quickly take a look at the different types of content you might need to restrict access to, along with some example use cases.
Types of Members-Only Content
Depending on the type of business you’re running, you might need to list different types of content in a searchable table. This could include blog posts, articles, downloadable resources, documents, media files, software, events, or even e-commerce products.
It’s also important to consider how you’ll grant access to the content. For example, should visitors be able to see the title of the restricted posts? Or should the entire page they’re listed on be hidden from public view?
Here are some examples of content you might need to list in a table layout and protect:
- Documents and files. If you’re offering online services you might need to restrict access to important business documents such as contracts, NDAs, or internal memos. Or, you might need to grant members access to downloadable resources.
- Media files. For instance, you could sell stock photography on your website and grant members access to your collection. Alternatively, if you’re a wedding photographer, you might upload each client’s wedding album and only grant access to specific users. You could also restrict access to video content (such as training material, online courses, and webinars) or audio content (such as lectures) through your membership site.
- Software. If you sell software subscriptions, you might need a way to only allow paying users to access the tool. This is great for selling access to applications that follow the SaaS model.
- WooCommerce products. As an online business owner, if you sell any sort of physical products (for example merchandise), you could set it up in a way that only members are able to buy products from you. This is a great way to offer exclusive access to products. However, to list WooCommerce products that are restricted to specific members in a table layout, you’ll need to use Posts Table Pro’s sister plugin, WooCommerce Product Table which works exactly the same way. The plugin gives you extra features such as the add to cart functionality and support for product variations.
- Forums. You might want to restrict bbPress forums & topics based on membership plan.
With Paid Member Subscriptions, you can easily restrict access to content so that only logged in members or subscribers of a certain plan can access it.
Introducing Posts Table Pro
Posts Table Pro is a dynamic WordPress table plugin that allows users to list:
- Posts
- Pages
- Documents
- Audio files
- Custom post types
… in a searchable, sortable table layout with filters.
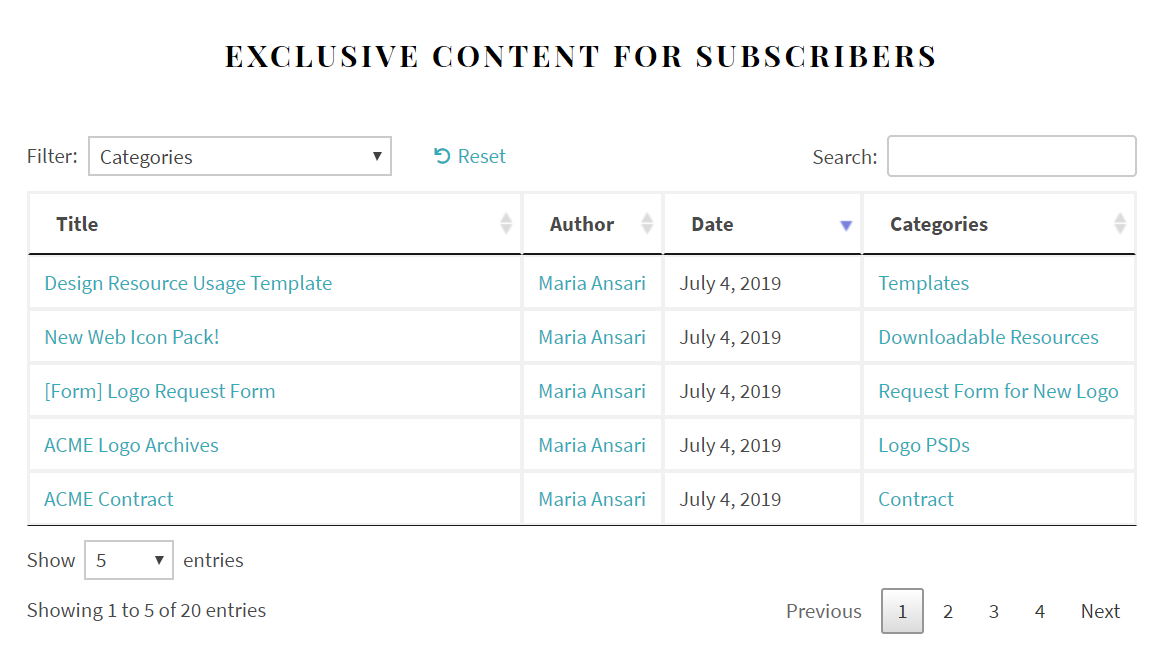
The table is fully customizable which means you can decide which columns appear in the table. For example, if you’re restricting access to content, you might consider displaying the article’s title, author, and date published in the table layout. You can also choose to display custom fields and taxonomies without having to mess around with code.
Additionally, the table is intuitive and incredibly easy to use. Your site’s members and visitors will be able to use the search bar, sortable columns, and filter dropdowns to quickly find the content they’re looking for. It’s much more user-friendly than listing members-only content in a standard blog-style layout.
How to Use Posts Table Pro With Paid Member Subscriptions to Restrict Access to Content
Since Posts Table Pro integrates seamlessly with the Paid Member Subscriptions plugin, there are several different ways you can restrict access to content on your WordPress website. In this tutorial, we’ll show you two different ways to restrict access to content:
- Restricting a page to a specific membership subscription plan and adding the posts table to it.
- Restrict access to specific posts and list them in a dynamic WordPress table layout on a public page.
Assuming you have your membership site set up with the Paid Member Subscriptions plugin installed, here’s what you need to do to list content in a table layout:
Method #1: Restrict a Page to a Specific Membership Subscription Plan
The idea behind this first method is to restrict a page to a specific membership plan and then add the posts table to the restricted page. So, when a visitor tries to access the page, they’ll see “You must be logged in to view this content” message. This way, only users with the correct user role(s) or subscription will be able to access the restricted page.
Here’s what you need to do:
Step #1: Install and Activate Posts Table Pro
Get the Posts Table Pro plugin and install it to your WordPress website. Head over to Settings > Posts Table Pro and enter the plugin’s license key.
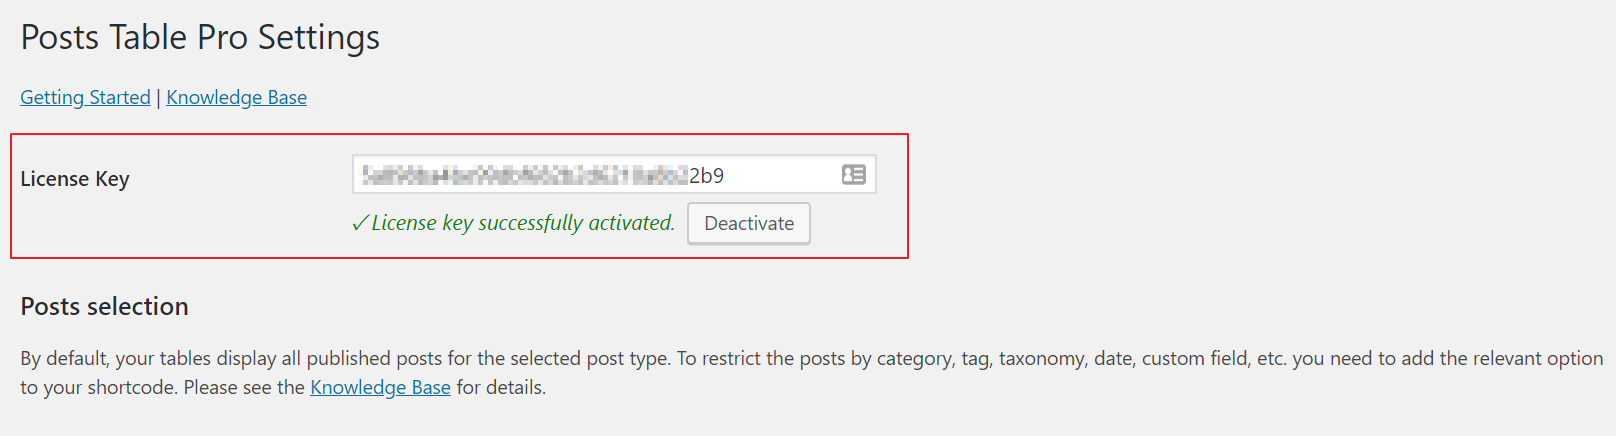
Click the Save Changes button at the bottom of the screen to proceed.
You can configure Posts Table Pro’s settings from this same screen to make your posts table look the way you want. For example, you can choose which columns to include in the table, decide how many posts to display per page, and set table controls.
Step #2: Create a Page and Restrict User Access to It
The next step is to create a new page (or edit an existing page) and restrict it to a specific membership subscription plan.
Navigate to Pages > Add New and give your page a title. Next, scroll down to the Content Restriction section and select the membership subscription plan you’d like to restrict it to.
Click the Save Draft button to proceed.
Step #3: Add a Posts Table to the Restricted Page
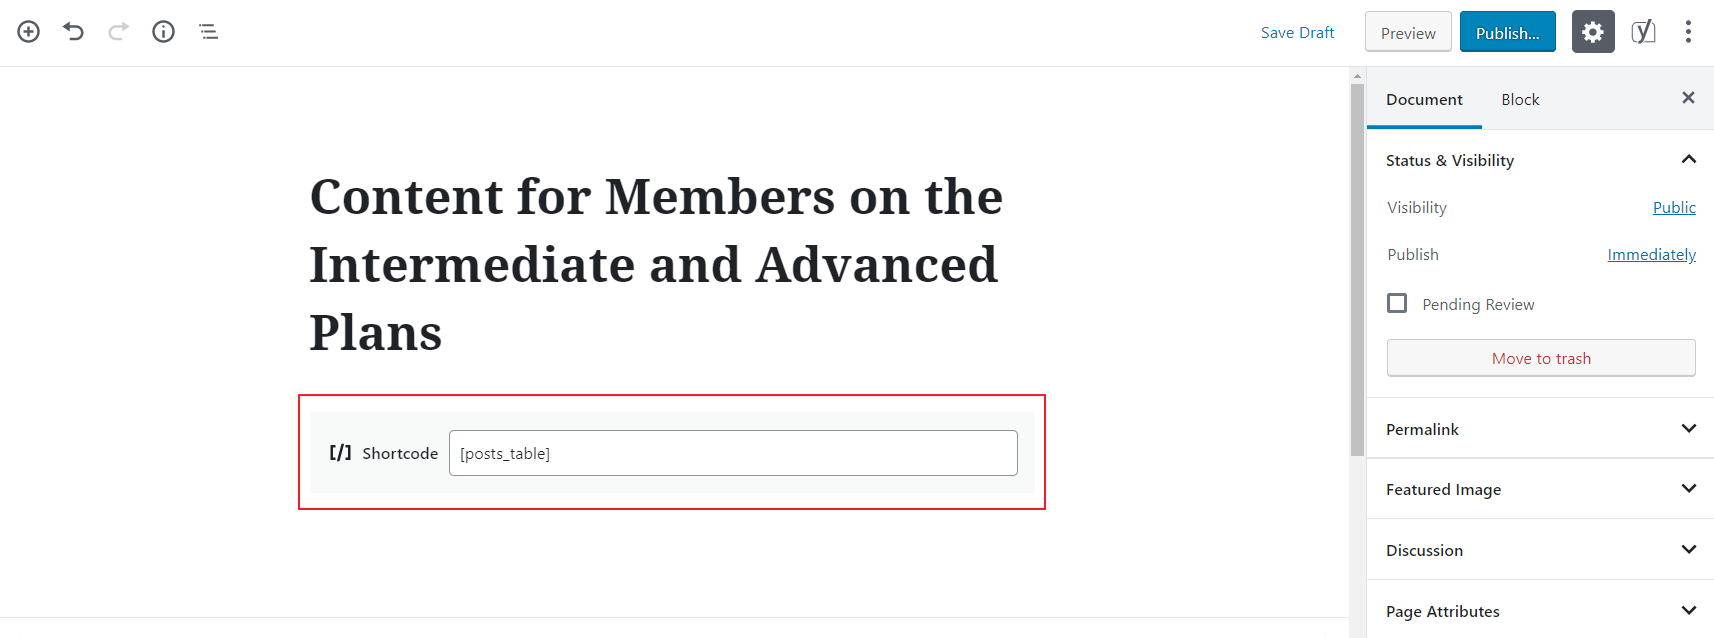
Now that we have a page that’s restricted to subscribers on a membership subscription plan, all that’s left to do is add the posts table containing restricted content. If you’re using the Gutenberg editor, add a Shortcode block and insert the [[posts_table]] shortcode to it.
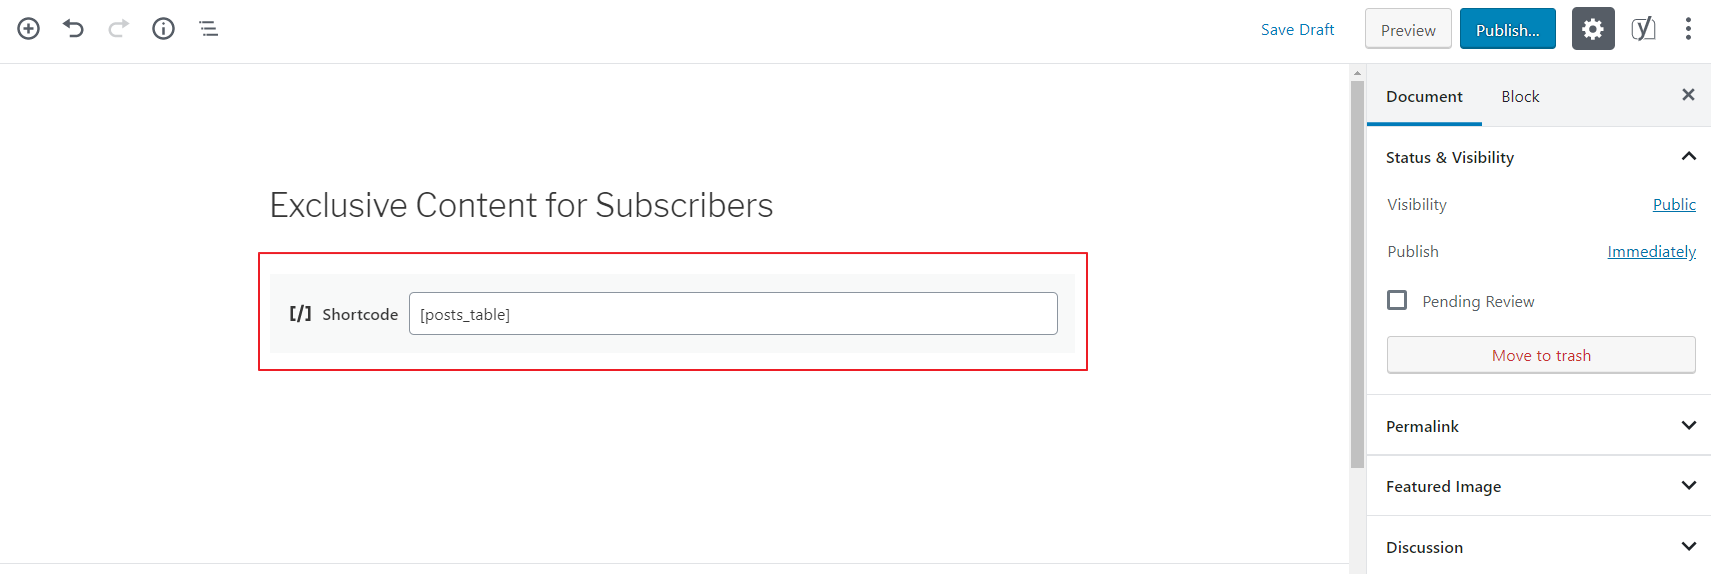
(Alternatively, if you’re using the classic editor, simply insert the shortcode into the text editor.)
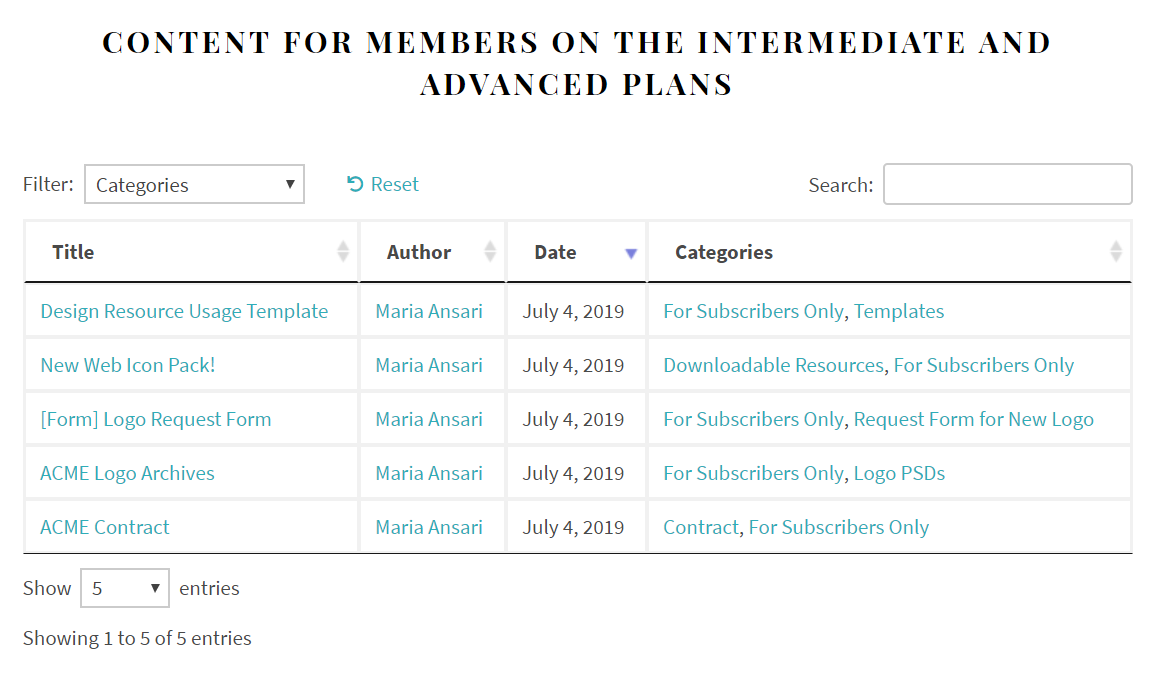
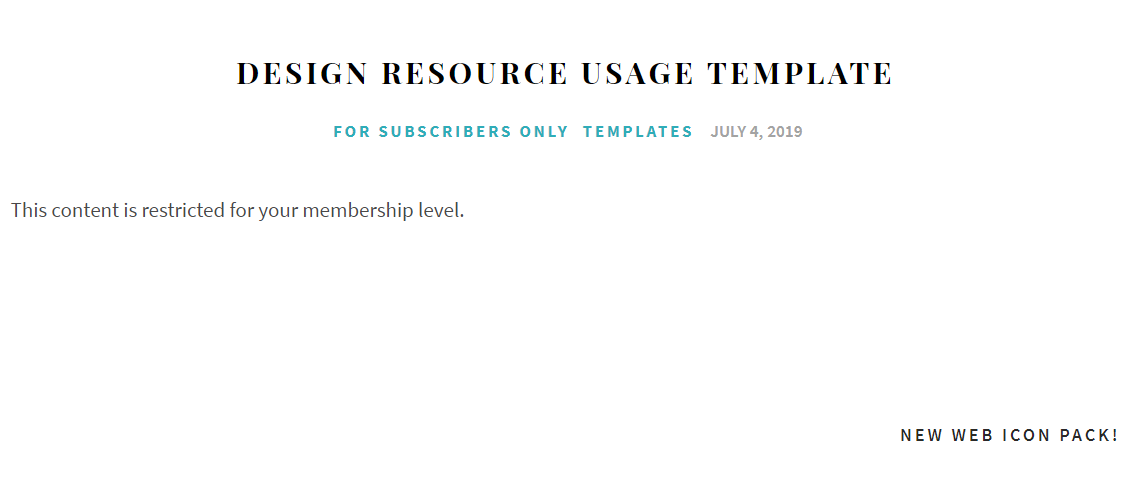
If you preview the page on your site’s front-end, it might look something like this:
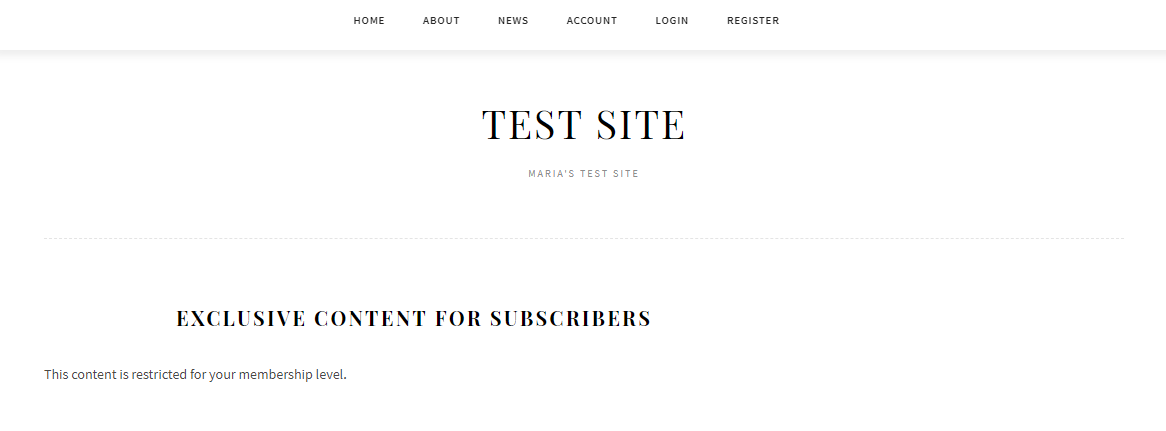
If anyone without the correct user role or subscription tries to access the page, they’ll see a restriction message:
This way, only members who are subscribed to the correct membership subscription plan will be able to view the page with the posts table.
For added security, you can also use the same method – with slight tweaks – to restrict access to all of the posts (or products) in the table layout. This way, you can rest assured that there aren’t any back doors to access the restricted content.
To do this, all you have to do is change the Content Restriction settings on the individual posts (or pages) you’d like to protect.
Method #2: Restrict Specific Posts and List Them on a Public Page
Another way to use Posts Table Pro with the Paid Member Subscriptions plugin is by restricting specific posts (or products) and listing them in a table on a public-facing page. The benefit of this approach is that all of the posts (or products) will appear in the table – regardless of the visitor’s user role or the plan they’ve subscribed to.
But, when the visitor clicks on one of the posts (or products) in the table layout, to access the single post (or single product page), Paid Member Subscriptions will display the content restriction message for non-members. If you restrict specific WooCommerce products, the add to cart button will automatically change to Read more so visitors can’t buy the restricted product from the table.
Here’s what you need to do:
Step #1: Install and Activate Posts Table Pro
Same as before, make sure the plugin is installed and activated.
Step #2: Restrict Access to Specific Posts
Go to Posts > All Posts, find the post you’d like to restrict access to, and click the Edit link. From the Edit Post screen, scroll down till you reach the Content Restriction settings.
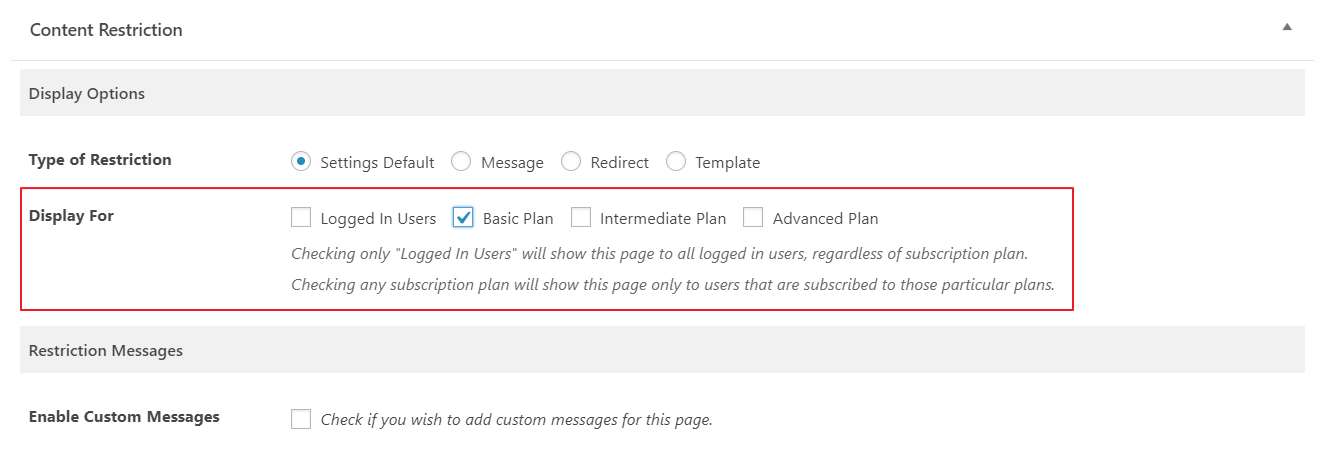
From here, you can select the type of restriction, choose which visitors can view the post, and add a custom message.
In order to restrict user access, you’ll need to tick the checkbox next to whichever subscription plans you’d like to grant access to.

So, for example, if you wanted to allow all members, you would tick the checkbox next to all three membership subscription plans i.e. Basic Plan, Intermediate Plan, and Advanced Plan.
On the other hand, if you wanted to only allow members on the Intermediate Plan and Advanced Plan access to the content, you’d tick those two checkboxes.
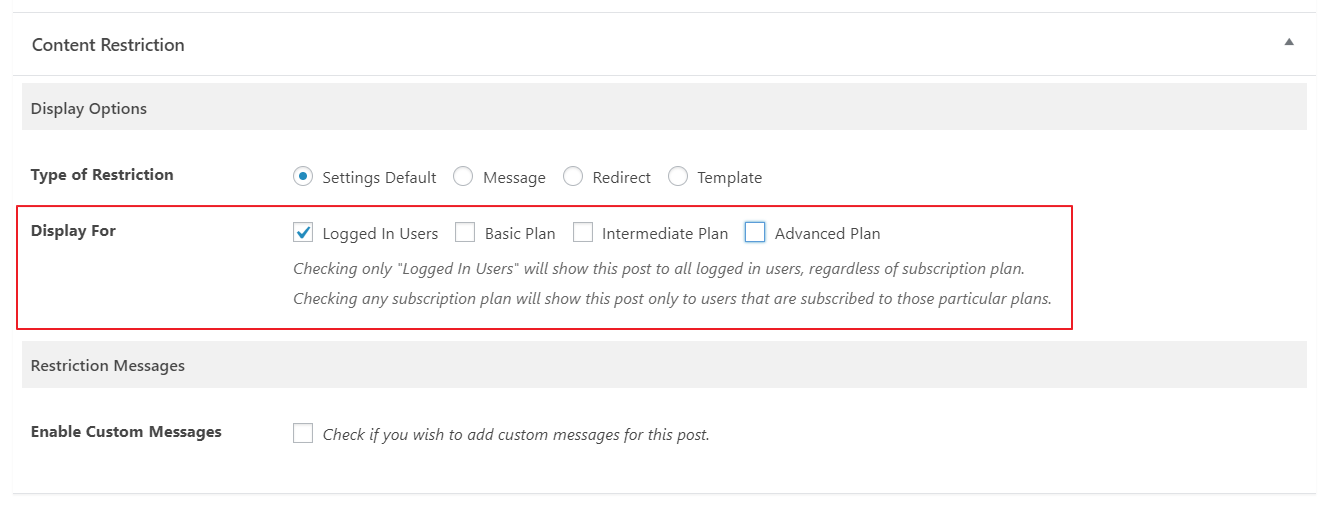
And if you’d like to grant access to all logged in users (regardless of their subscription), simply tick the checkbox next to the Logged In Users option.
Repeat this step for all of the posts you’d like to restrict user access to. Also keep in mind that you can also restrict content globally per subscription using the Global Content Restriction add-on for Paid Member Subscriptions, instead of doing it for each page, post or custom post type individually.
Step #3: Add a Posts Table to a New Page
Now that we’ve restricted access to specific posts, we can list them in a table layout. Here’s what you need to do:
Create a new page by going to Pages > Add New. (Alternatively, you can edit an existing page.) If you’re using the Gutenberg editor, add a Shortcode block and insert the [posts_table] shortcode to it. (Alternatively, if you’re using the classic editor, simply insert the shortcode into the text editor.)
If you want to list all of your posts in the table then you’re all done. However, if you’ve only restricted access to a handful of posts and would only like to list those posts in the table, you’ll need to specify which ones to display in the table layout.
One way to do this is by creating a new category (such as For Subscribers Only) and assigning the restricted posts to that category. This way, you can use the shortcode [posts_table category=”for-subscribers-only”] to only display the restricted posts.

With Posts Table Pro, you can create tables with specific posts based on category, taxonomies, custom fields, date, and more. In addition to this, you can also include or exclude posts by post ID.
If you preview the page on your site’s front-end, it might look something like this:
If anyone without the correct user role or subscription tries to open the restricted content, they’ll see the restriction message:
This way, only members who are subscribed to the correct membership subscription plan will be able to view the content.
Conclusion
Used together, Posts Table Pro and Paid Member Subscriptions allow you to list restricted content in a neat, front-end table layout. You can easily create dymanic wordpress tables that only members can see.
This makes it easy for members to quickly find what they’re looking for. It also makes it easier to restrict user access to content based on whether they’re logged in to their account, or which membership plan they’ve subscribed to.
Do you have any questions about how to use Posts Table Pro with Paid Member Subscriptions? Are you looking for a slightly different implementation? Let us know in the comments below.
Related Articles
How To Create a Divi Membership Site
If you’re thinking of building a membership site in WordPress, you’ll need a solid theme and a membership plugin that pairs well with it. In this complete guide, we’ll show you how to create a Divi membership site using the popular Divi theme in combination with the Paid Member Subscriptions plugin.
Continue Reading
Membership Blog: Why Start One, Popular Examples and How To
I think you will agree starting a membership blog seems daunting, especially for a first-timer. Talk to just about any beginner who has never created a membership blog (or even a simple website), and they will field questions such as: Why should I start a membership blog? What kind of content, products, or services should […]
Continue Reading
How to Build an Elementor Membership Site with Paid Member Subscriptions
Are you looking to add membership functionality to your Elementor site in WordPress? Perhaps you want to create subscription plans, restrict access to premium content, and accept payments within the popular page builder. The good news is that you can use Paid Member Subscriptions to do all this and more. For example, you can customize restriction […]
Continue Reading