

Table of Contents
If you run a membership site, you already know refunds are just part of the job. Maybe someone forgot to cancel, maybe they had a billing issue, or maybe they simply changed their mind. Whatever the reason, at some point you’ll need to refund a subscription.
The problem? Handling a subscription refund the old way is clunky. You’d log into Stripe or PayPal, find the payment, issue the refund there, then jump back into WordPress to adjust the member’s subscription manually. That back-and-forth is a real time sink.
Now, with automatic refunds in Paid Member Subscriptions, the whole process happens right inside your WordPress dashboard. No more juggling between multiple platforms.
Why Automatic Refunds Save You Time
Automatic refunds cut out the manual steps. Instead of logging into your payment processor, you can manage everything in one place:
- Issue full or partial refunds in seconds.
- Add notes for context (so you remember why the refund was made).
- Choose what happens to the member’s subscription after the refund.
It doesn’t matter if you need to refund a membership after a billing mistake or quickly cancel a subscription and refund a customer who requested it—you can handle it all from the same screen.
Accept (recurring) payments, create subscription plans and restrict content on your website. Easily setup a WordPress membership site using Paid Member Subscriptions.![]()
Paid Member Subscriptions Pro
How to Setup Automatic Refunds in WordPress
You may be thinking “Easier said than done.”, huh? Well, there are actually three ways you can make this happen. But let’s take it step by step:
Get a Paid Member Subscriptions License
To enable automatic refunds, you’ll first need to install Paid Member Subscriptions on your site. The plugin takes care of memberships, subscriptions, and now, thanks to the refund feature, your refund process too.
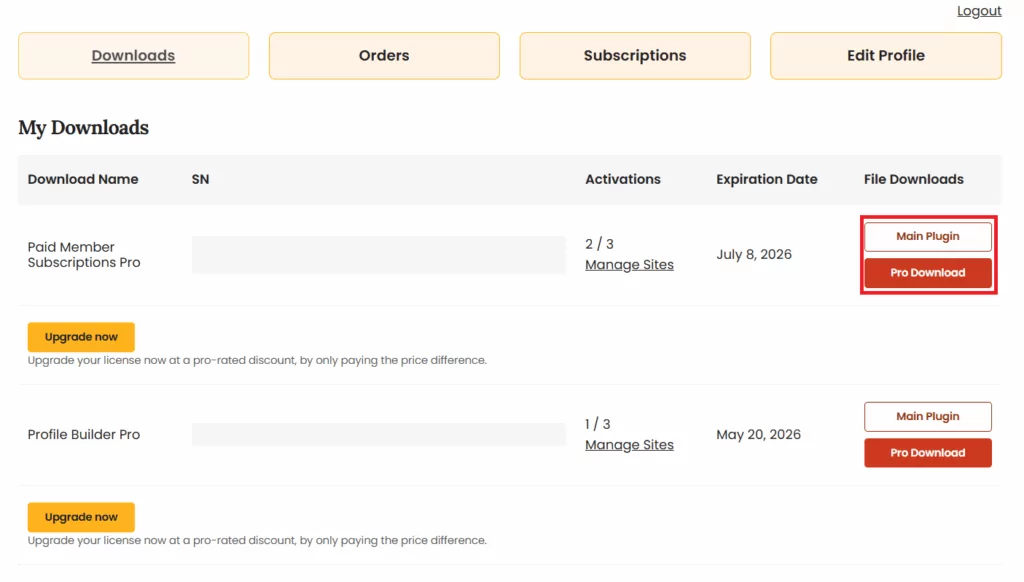
Just head over to the Cozmoslabs website, choose the plan that fits your needs, and download the plugin. After purchase, you’ll find both the free and Pro versions in your account.
Then, install it on your WordPress site just like any other plugin:
- Go to Plugins → Add New → Upload Plugin.
- Upload the downloaded files.
- Hit Install Now and then Activate.
Once activated, you’re ready to start creating subscription plans and managing payments.
Create Your Subscription Plans
Next, you’ll want to set up the actual products or memberships people can subscribe to. Subscription plans define what members get access to, how much it costs, and how often they’re billed.
In your WordPress dashboard, navigate to Paid Member Subscriptions → Subscription Plans → Add New.
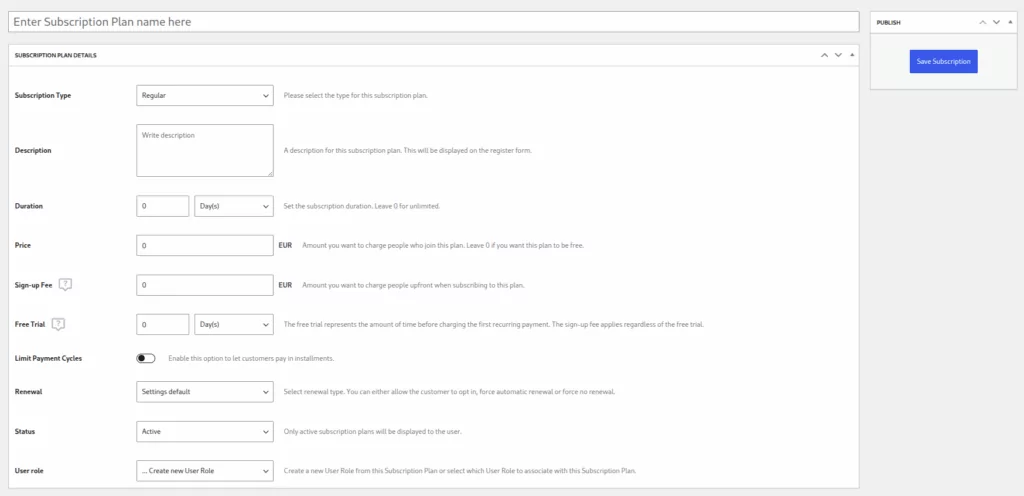
From here, you can give your plan a name (e.g., Monthly Membership, Pro Plan, etc.), set the price and billing cycle (monthly, yearly, or even installments if you’d like), and most importantly, decide what content or perks this plan unlocks.
Once saved, your plan is live and ready for new members to join.
Set Up Your Payment Gateways
Before you can issue refunds, your site needs to know where the money is coming from and where it should go back. That’s where payment gateways like Stripe and PayPal come in. Without them, the refund button simply won’t work.
To set this up, head to Paid Member Subscriptions → Settings → Payments tab. Then, choose the Gateways subtab to set up your payment gateways.
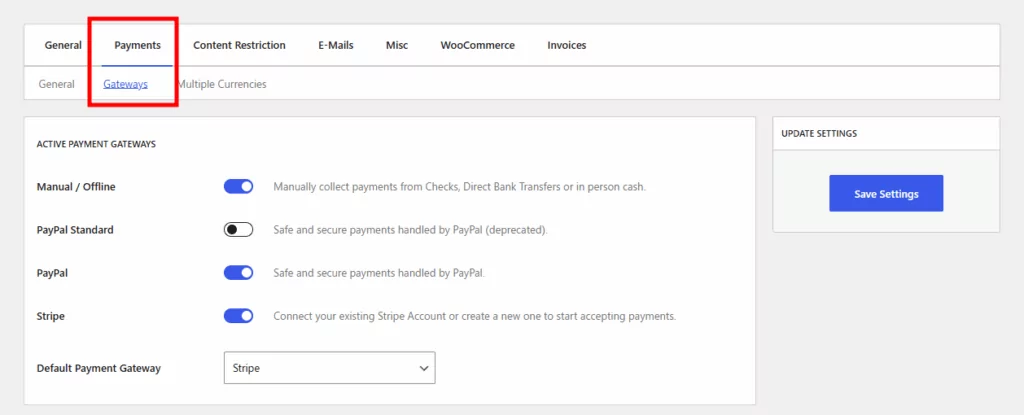
In this section, you will be able to enable your preferred payment gateways and configure them. If you want to go with Stripe or PayPal, you’ll need to connect your existing account here.
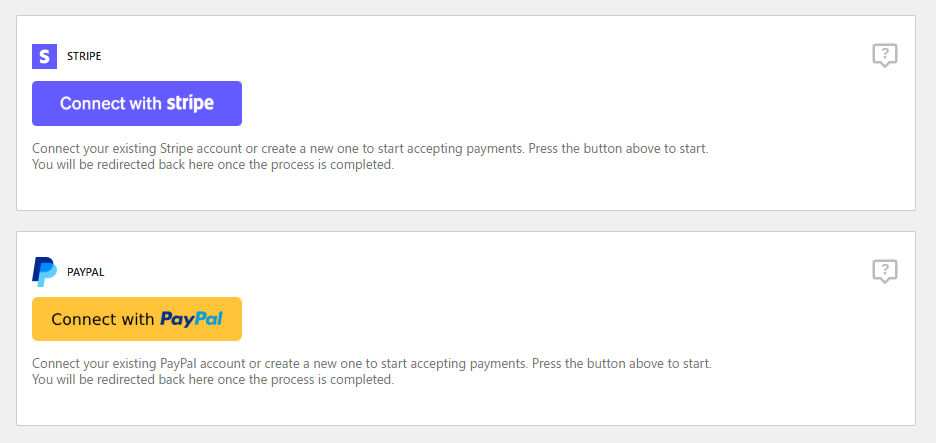
Once your gateways are configured, all new payments will easily flow through them.
Set Up Refunds for Your Subscription Plans
Now that your users can subscribe to paid plans and actually make payments, here’s where you’ll want to learn more about refunds.
So, once you have completed payments on your site, you can easily refund them in 2 ways.
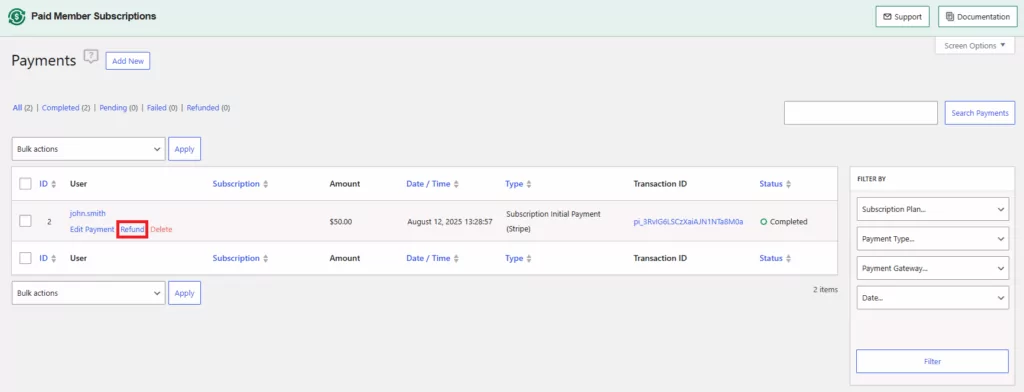
Method 1. From the Payments List
Go to Paid Member Subscriptions → Payments, hover over the payment you need refunded, and click Refund.
A modal will pop up with the payment details. From here you can:
- Enter the amount you want to refund (you can’t go over the original payment).
- Add a refund note, like “user requested cancellation”.
- Decide what to do with the subscription:
- Keep Current Status – leave it unchanged.
- Expire Subscription – end it right away.
- Cancel Subscription – cancel it at the next renewal date.
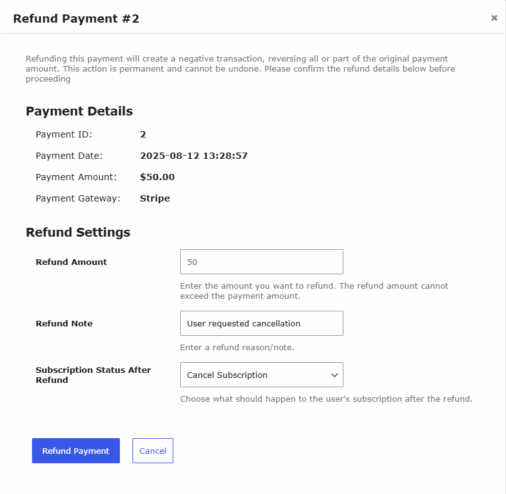
Hit Refund Payment, and you’re done.
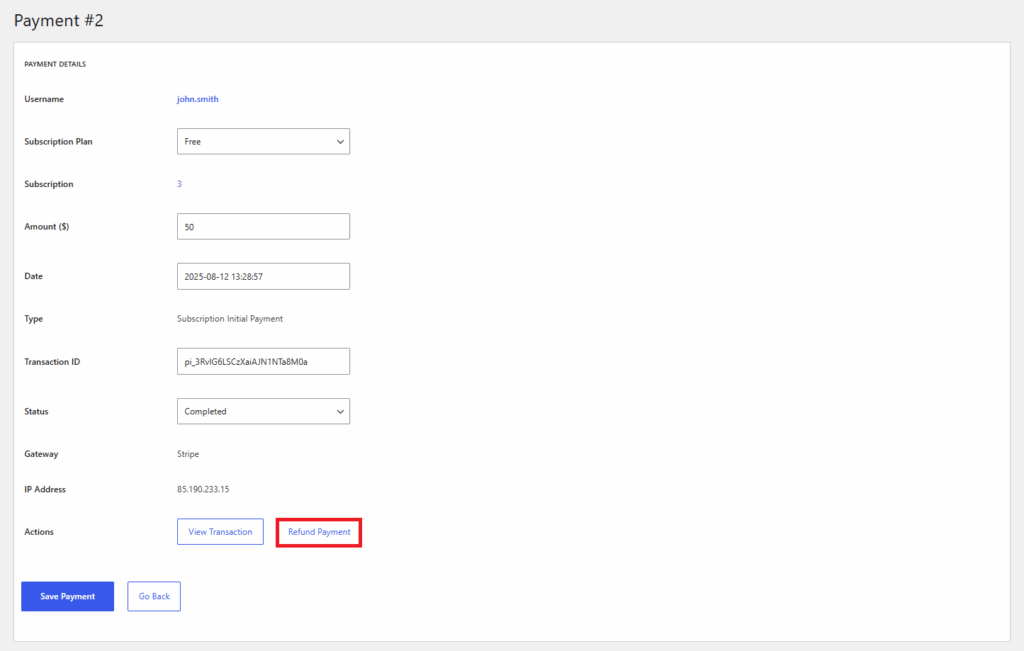
Method 2. From an Individual Payment Page
Another option to use this functionality is if you’re already viewing a payment record. So, when editing a payment, you will see the Refund Payment button towards the end of the page. Click it and that’s it!
Review Your Changes
One of the biggest headaches with refunds isn’t just issuing them, it’s keeping track of them afterwards. If you’ve ever had to dig through emails or payment processor dashboards to figure out what happened with a particular customer, you know how frustrating it can be.
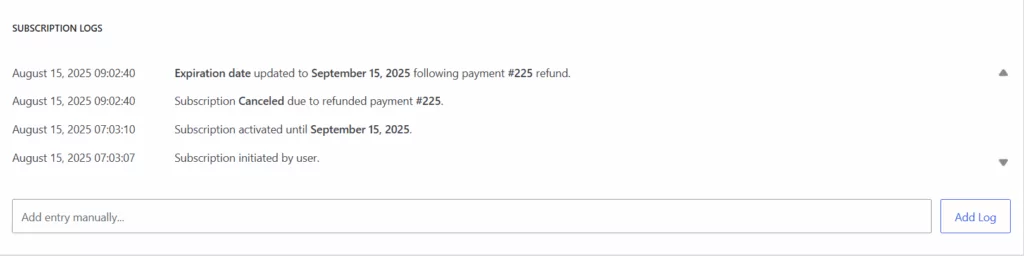
Good news is that each subscription refund is logged automatically.
Payment Logs will show who issued the refund, when it happened, and if there are any notes.
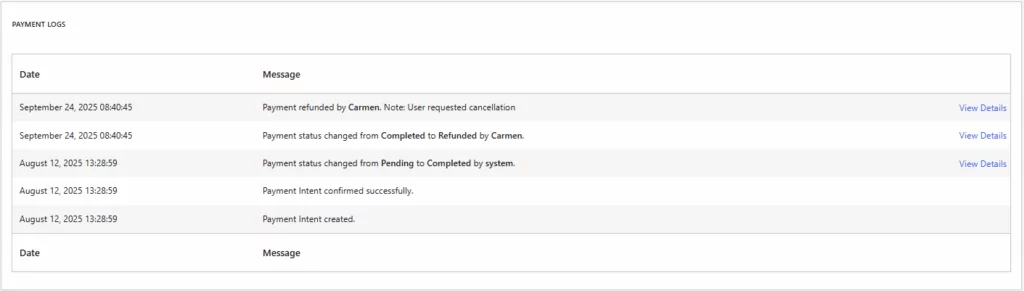
Subscription Logs will update if the subscription status changes.
Final Thoughts
Refunds are never the most exciting part of running a membership site, but they’re a reality. Maybe someone signed up by mistake, maybe they decided a plan wasn’t right for them, or maybe you just want to provide great customer service by making the process hassle-free.
The good news is that refunds don’t have to eat up your time or turn into a back-and-forth with payment processors. With automatic subscription refunds, you can handle everything right inside WordPress.
Try them out for yourself and tell us in the comments if you notice the difference!
Accept (recurring) payments, create subscription plans and restrict content on your website. Easily setup a WordPress membership site using Paid Member Subscriptions.![]()
Paid Member Subscriptions Pro
Related Articles
How To Create a Divi Membership Site
If you’re thinking of building a membership site in WordPress, you’ll need a solid theme and a membership plugin that pairs well with it. In this complete guide, we’ll show you how to create a Divi membership site using the popular Divi theme in combination with the Paid Member Subscriptions plugin.
Continue Reading
How to Hide Products by User Roles in WooCommerce?
Do you want to easily hide products by user roles in WooCommerce? Some WooCommerce store owners have a unique requirement where they want to hide certain products from all but a few specific groups of users. There may be many reasons for this, including selling exclusive products only to the more loyal customers, with a […]
Continue Reading
How to Create WordPress Redirects to Another Page, External URLs, or a Subdomain
There are different reasons WordPress site owners want to create WordPress redirects to another page, external URL, or a subdomain. The redirect can be based on an important user action or set up to redirect all users landing on a particular page. Whatever the type or need of your redirect, WordPress offers the flexibility to […]
Continue Reading