

Table of Contents
Nobody enjoys lengthy, disorganized forms, let’s face it. Whether it’s a checkout form or a registration page, users are much more likely to finish it if it seems brief and easy. In this case, 2 column forms might save the day.
In this post, I’ll explain why they are a wise choice for improved user experience, what to avoid when creating them, and how to quickly set them up in WordPress using the Form Fields in Columns add-on and Profile Builder. Simply drag, drop, and publish (no code is required).
Let’s get started.
Why Use 2 Column Forms?
If you have ever filled out an endless form, you are familiar with the sensation of scrolling, scrolling, and then… quitting. When forms seem excessively lengthy or haphazard, users leave.
However, 2 column forms allow you to:
- Cut down the vertical space to make the forms appear shorter
- Create a cleaner, more professional look (especially on desktop)
- Group related fields next to each other to improve flow
- Improve completion rates by making the form easier to scan
Tips for Structuring a 2 Column Form
Here are some important best practices to remember before you start using columns to build your form. These can assist you in avoiding typical usability errors and guarantee that your forms perform better rather than merely look better.
Maintain top-to-bottom logic
Even in a multi column form, users still scan from top to bottom. The field order should make sense vertically, not just left-to-right.
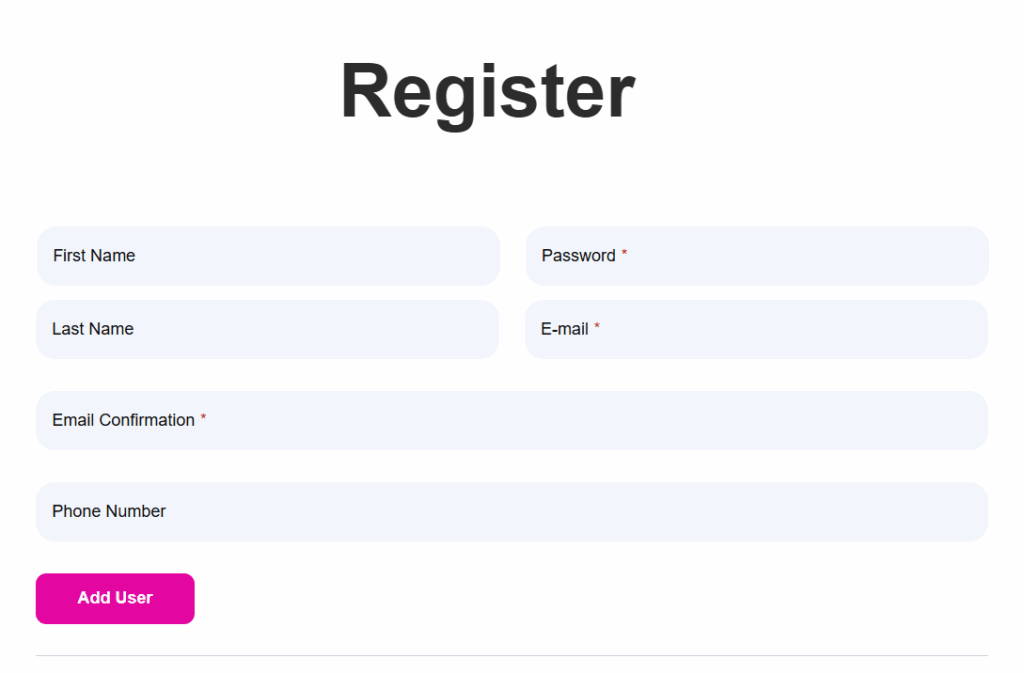
- For example, a bad layout would look like:
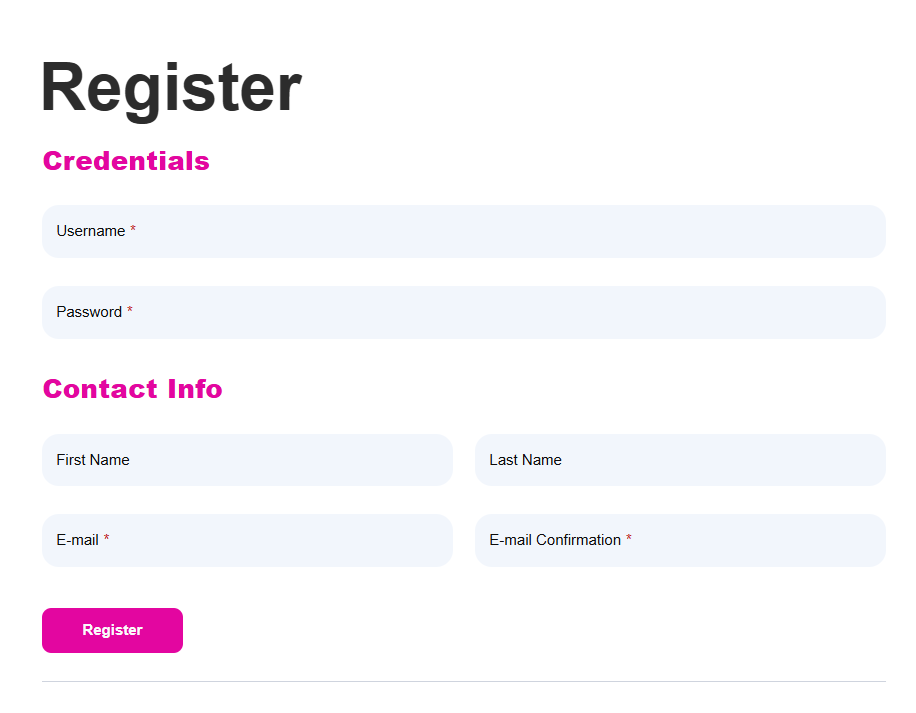
- Whereas a better layout should look something like this:

For the sake of symmetry, it is tempting to put two fields in each row. However, that only functions if the fields make sense. For instance:
✅ First & Last Name
✅ City & ZIP Code
❌ Email & Password (different mental steps = cognitive friction)
Stick to logical groupings that reduce your users’ effort, not increase it. Also, make sure to only include the custom fields you actually need, and not overcrowd your form.
Use headings to break up sections
Use distinct headings to divide your form into sections if it is lengthy or gathers a variety of information. This way, users will find it easier to read and feel less overwhelmed. For instance:
- Credentials
- Personal Info
- Account Details
- Billing Info
Additionally, this gives the form a more structured and professional feel.
Use pre-made templates if possible
Instead of starting from scratch, many form plugins provide pre-built templates that offer you a good starting point. These templates help you get the structure right faster and can be fully customized to match your layout and field needs.
Using these types of templates, besides making everything easier for you, they also leave less room for error in displaying the form, since multi-column structures can be very tricky.
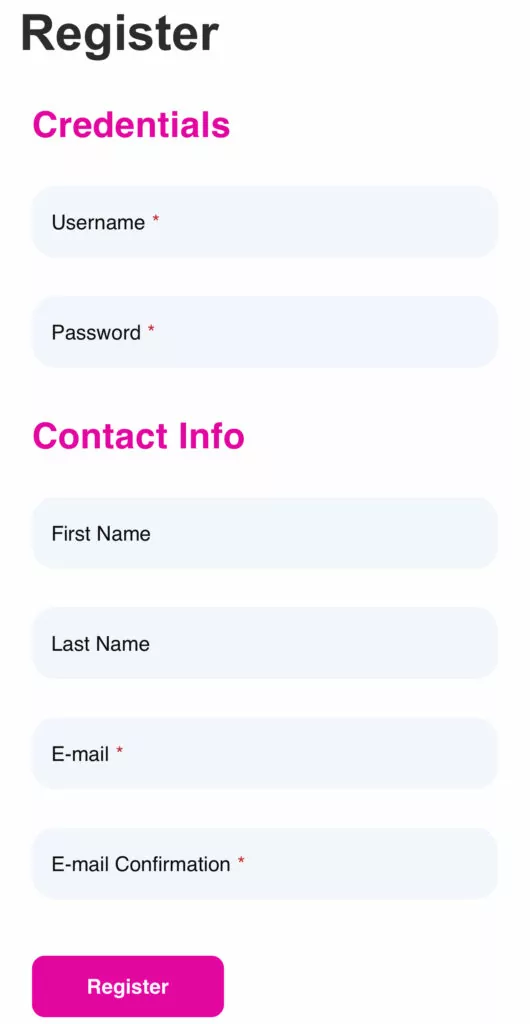
Always test on mobile
While multi-column forms can look clean and efficient on desktop, they often don’t translate well to smaller screens. Most mobile devices simply don’t have enough space to comfortably display form fields side by side, and forcing columns can lead to cramped layouts, hard-to-read inputs, or even broken forms.
That’s why I think it’s generally best to stack fields vertically on mobile, ensuring that everything remains readable, accessible, and easy to complete. That’s why I like Profile Builder, because it takes care of this automatically.
If you’re really set on keeping columns on mobile, you can still do it with some custom CSS.
Just a heads-up though: it can be risky. Since screen sizes vary so much, it can be tricky to make sure everything looks great everywhere. So if you go this route, be prepared to test things out on multiple devices to make sure the form still feels clean and easy to use.
How I Build a Multi Column Form in WordPress (The Easy Way)
For this tutorial, I’m using Profile Builder Pro and the Form Fields in Columns add-on. With just a few simple clicks, it’s by far the easiest method for creating 2-column forms and even more complex layouts like multi-steps forms.
Create beautiful front-end registration and profile forms with custom fields. Setup member directories, custom redirects, cutomize user emails & more using the all in one user management plugin.![]()
Profile Builder Pro
Step 1: Install Profile Builder Pro and activate the Form Fields in Columns add-on
Profile Builder installs and is activated just like any other WordPress plugin. All you have to do is:
- Go to the official website and choose your preferred plan. After purchasing the plugin, you’ll be able to download it from your Account page (you’ll need to download both the main plugin and the pro version).
- In your WordPress website, navigate to Plugins → Add New and hit the Upload Plugin button at the top.
- Choose your downloaded files, hit Install Now, and make sure to also Activate them after.
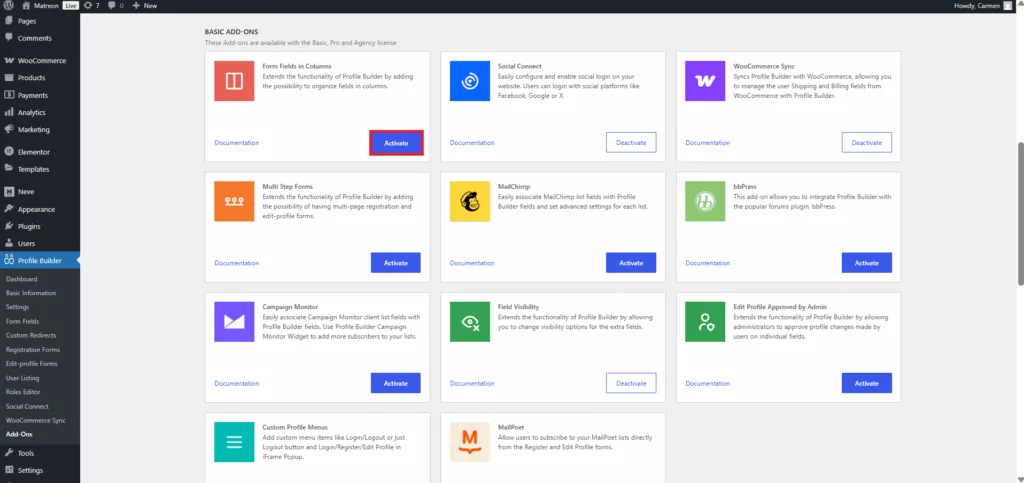
Next, simply head over to Profile Builder → Add-Ons, and activate the Form Fields in Columns add-on.
Step 2: Start with a form template and customize your fields
Now, before we get to the form structure, let’s customize the form’s overall look and feel.
Templates are a great way to save time because they give you a good structure right out of the box, giving you the possibility to tweak them however you like. To access Profile Builder’s form templates, just go to Profile Builder → General Settings tab in your WordPress dashboard, and locate the Design & User Experience section.
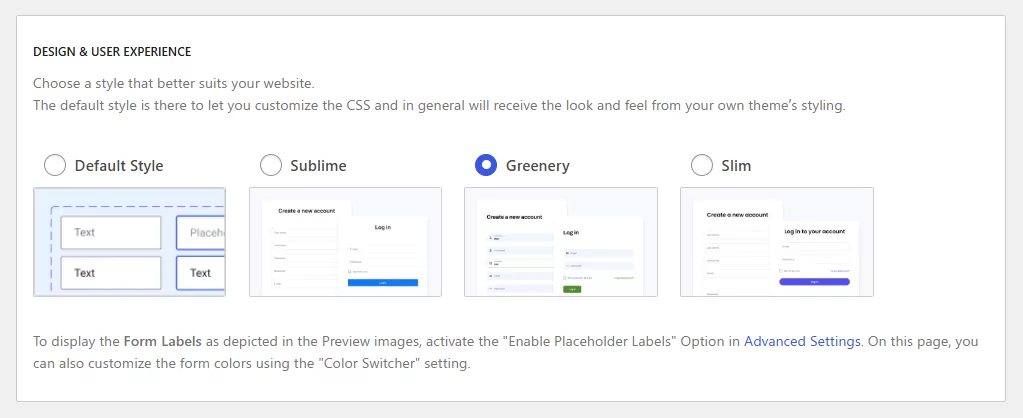
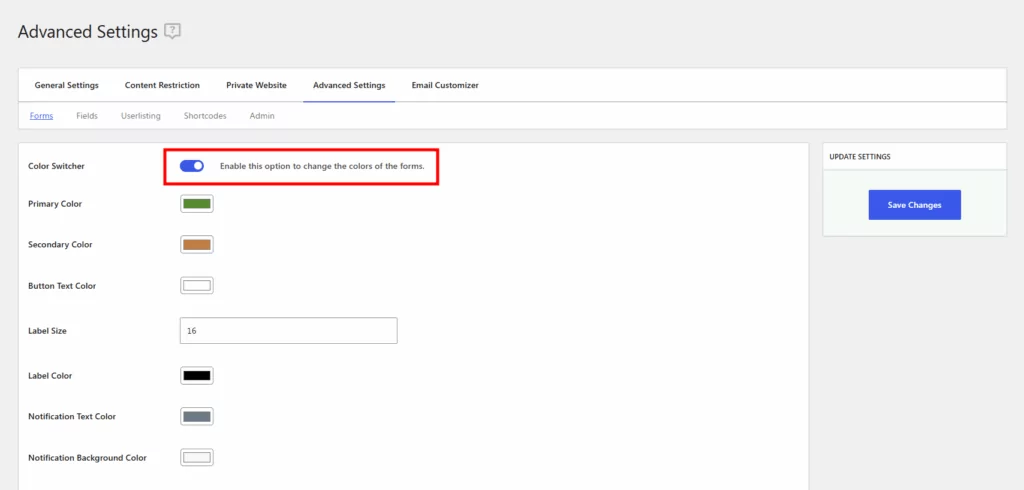
Choose the template that best matches your website’s design, and then, if you want to customize it some more, you can do so from the Color Switcher. To enable the Color Switcher, navigate to the Advanced Settings tab, and go to the Forms subtab.
Once your form looks exactly like you envisioned, head over to Profile Builder → Form Fields to set up your desired form fields. In this area, you can manage all your fields, no matter if they are registration forms or edit profile forms.
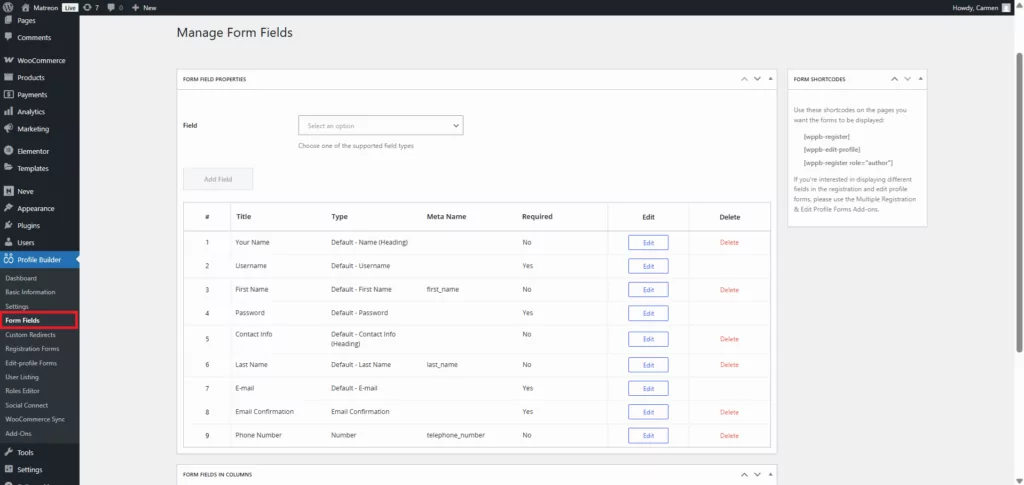
You can:
- Add standard fields like First Name, Email, or Password
- Drop in more advanced fields like File Uploads, GDPR Consent, Date Pickers, or even Repeater fields
- Rearrange field order, change visibility settings, and fine-tune the layout.
Quick note: if you want to create multiple registration forms, for example, you can also customize each and every one of them to match your desired layout.
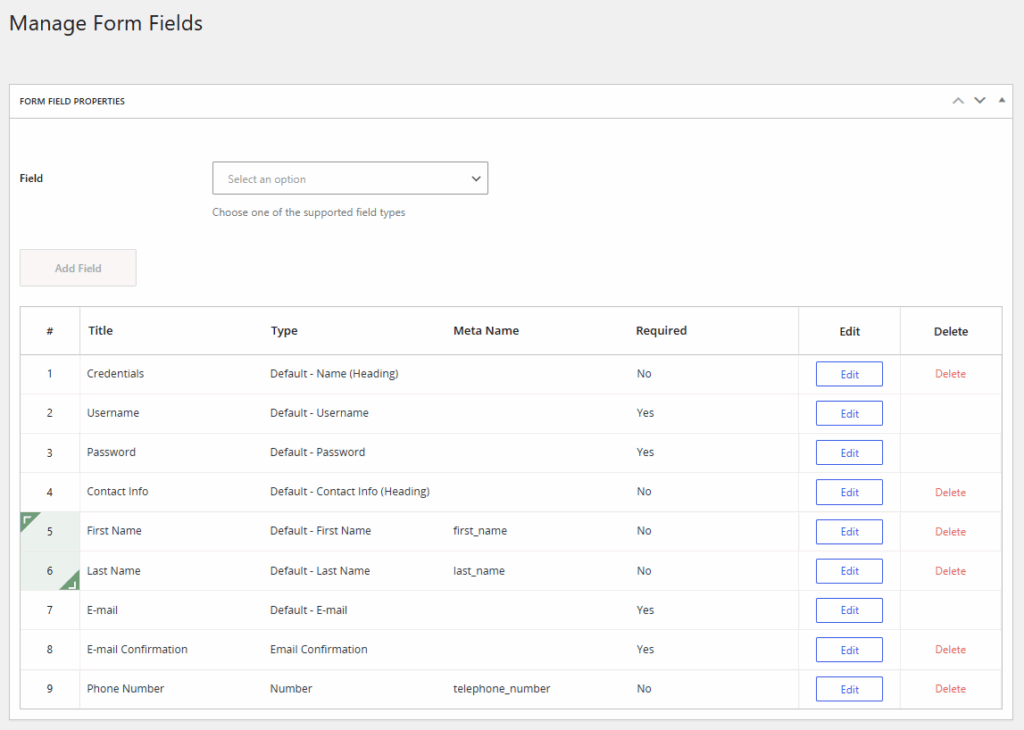
Step 3: Use column groups to customize the layout
After activating the add-on, you will have access to the following options:
- Create column intervals – Clicking on the “˄” and “˅” icons allows you to turn your Profile Builder Registration and Edit Profile forms into column-based forms.
- Remove column breakpoint – By clicking on the same icons, you can unset the column start/end.
- Enable or Disable Form Fields in Columns – Choose to enable or disable Form Fields in Columns only on specific forms.
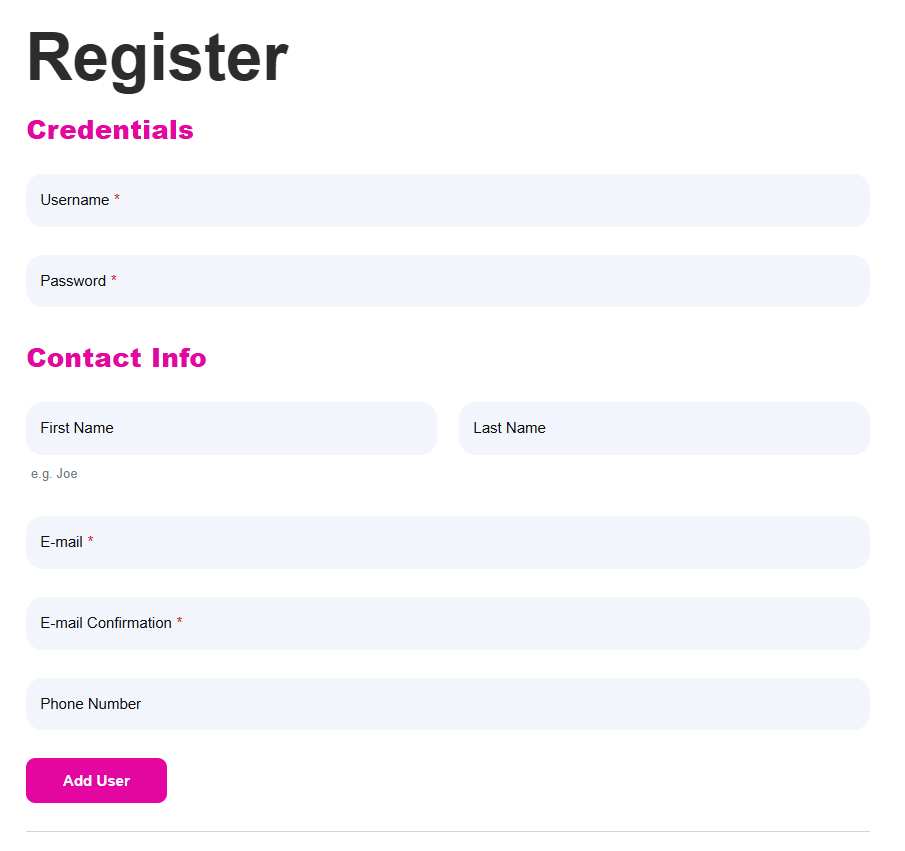
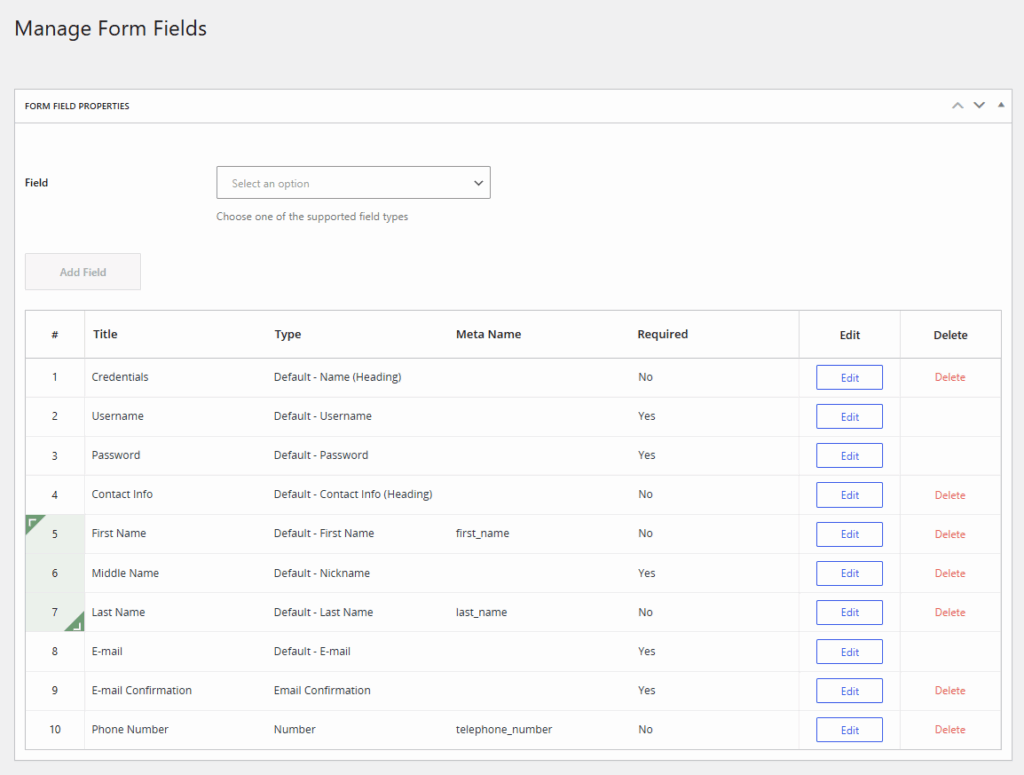
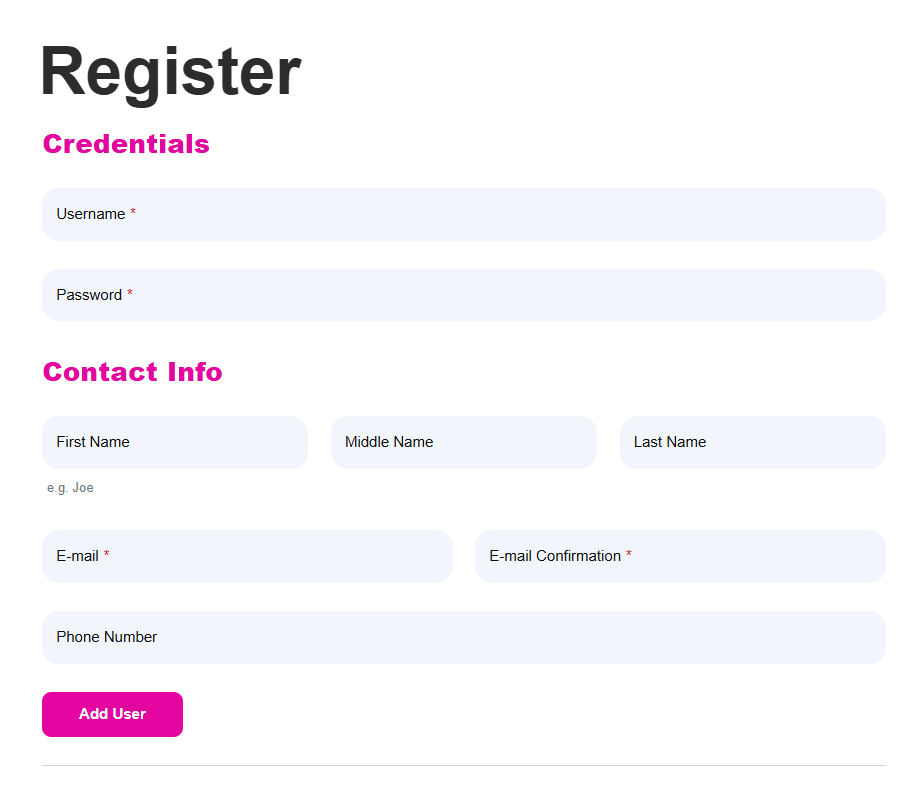
So, let’s start simple. To create a 2 column form, I will group the First Name and Last Name fields in columns by clicking on the dedicated icons.
It should look like this in the back-end:
And something like this on the front-end:
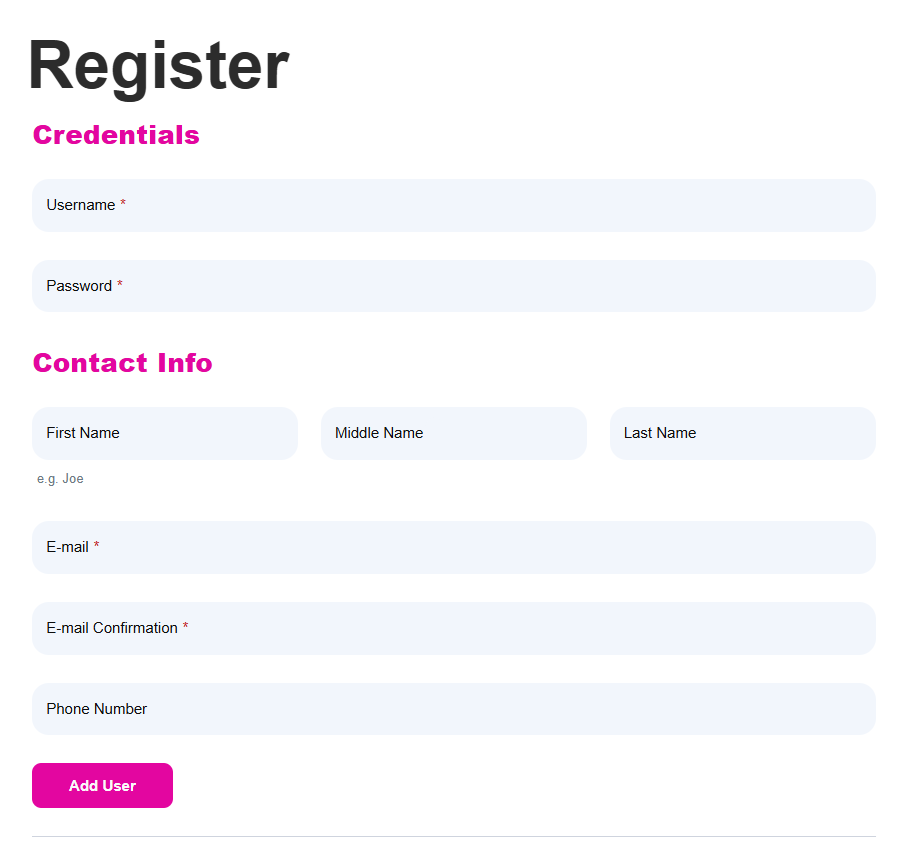
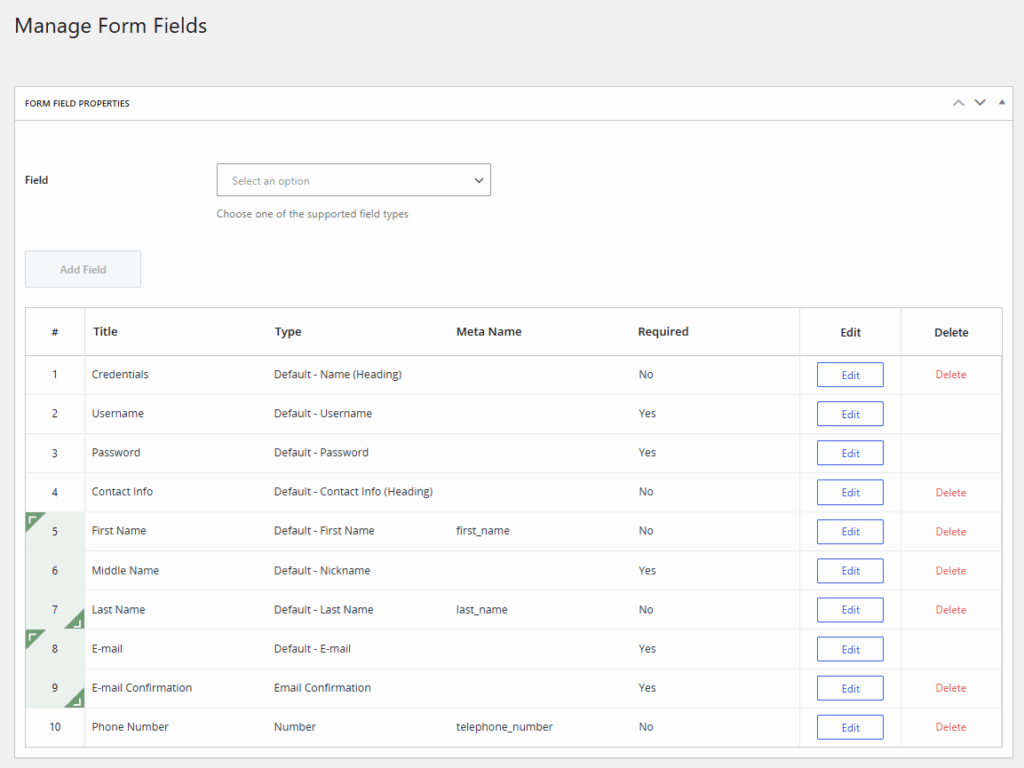
The same process goes for a 3 column form.
This is how it will show in the back-end:
And this is on the front-end:
But what if you want to have a multi column form, with both 2 and 3 columns? That’s easy.
Just group your fields however you want. Like this, for example:
And then view it on the front-end:
As you can see, you can freely mix 2 and 3 column sections in the same form. This gives you full control over how your form is organized.
Start Testing Now And See What Works Best For You
Improving your forms is one of the easiest (and most overlooked) ways to increase signups, improve engagement, or simplify the onboarding process.
So if you’ve been looking for a way to make yours more user-friendly, 2 column forms are a simple, effective upgrade.
Give it a try, and let me know in the comments how your form looks after the switch!
Profile Builder Pro
Create beautiful front-end registration and profile forms with custom fields. Setup member directories, custom redirects, cutomize user emails & more using the all in one user management plugin.
Get Profile BuilderRelated Articles

How To Create a Divi Membership Site
If you’re thinking of building a membership site in WordPress, you’ll need a solid theme and a membership plugin that pairs well with it. In this complete guide, we’ll show you how to create a Divi membership site using the popular Divi theme in combination with the Paid Member Subscriptions plugin.
Continue Reading
How to Hide Products by User Roles in WooCommerce?
Do you want to easily hide products by user roles in WooCommerce? Some WooCommerce store owners have a unique requirement where they want to hide certain products from all but a few specific groups of users. There may be many reasons for this, including selling exclusive products only to the more loyal customers, with a […]
Continue Reading
How to Create WordPress Redirects to Another Page, External URLs, or a Subdomain
There are different reasons WordPress site owners want to create WordPress redirects to another page, external URL, or a subdomain. The redirect can be based on an important user action or set up to redirect all users landing on a particular page. Whatever the type or need of your redirect, WordPress offers the flexibility to […]
Continue Reading