

Table of Contents
Are you looking to sell subscription products on your WooCommerce site?
One of the most popular ways to sell subscription products in WooCommerce is with the WooCommerce Subscriptions plugin. It lets you create WooCommerce products with recurring payments as a way to offer subscriptions to your customers.
While this is an official extension from WooCommerce, it’s quite expensive. This is especially true for small businesses that want to create their first membership site. Instead, we recommend using a WooCommerce Subscriptions alternative like Paid Member Subscriptions.
In this article, we’ll introduce a WooCommerce Subscriptions alternative – Paid Member Subscriptions – and see how it stacks up in terms of features and functionality. We’ll also explain how you can use the Paid Member Subscriptions plugin to set up a membership site.
Why Use WooCommerce Subscription Alternatives
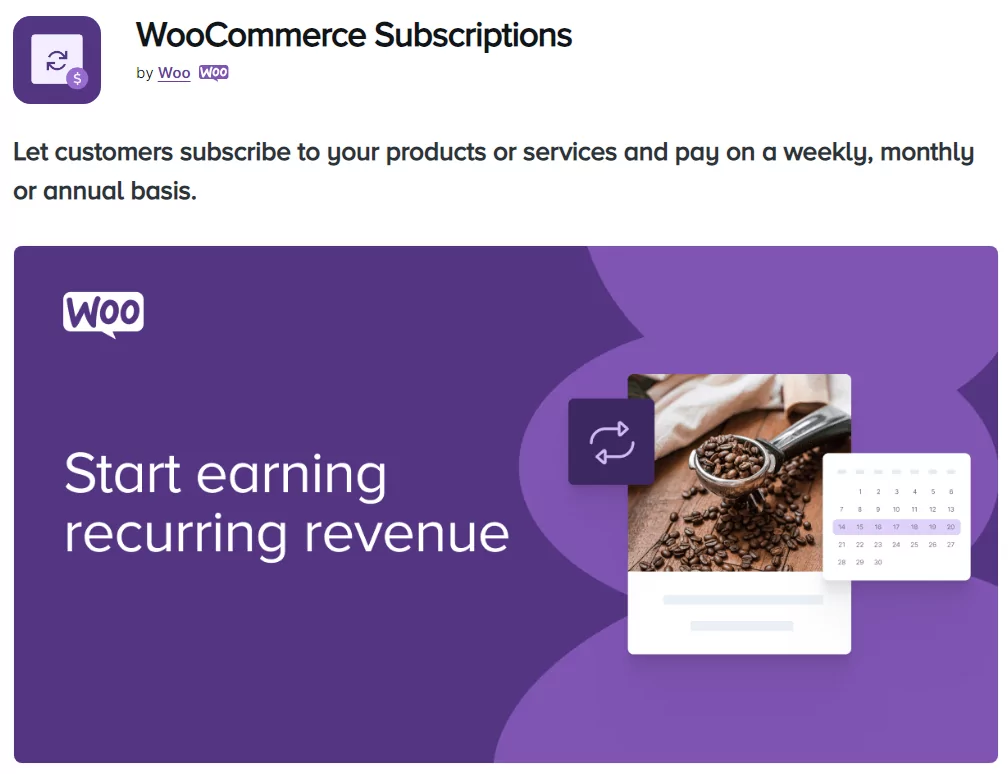
The WooCommerce Subscriptions plugin is the official WooCommerce extension that lets your customers subscribe to products with recurring payments:
The plugin lets you manually upgrade and downgrade subscription plans directly from the WordPress admin dashboard. Additionally, WooCommerce Subscriptions offers detailed reports and analytics to help you keep track of your membership site’s performance.
While it’s a great plugin that adds subscription functionality to your WooCommerce site, it’s lacking in a few key areas.
For starters, it’s not very user-friendly and isn’t recommended for non-tech-savvy users. On top of this, you have to manually create important membership pages like the subscription registration page or the members account login page yourself (either using blocks or code). Finally, the plugin comes with limited content restriction options, which are essential for any subscription or membership site.
One of the major reasons why most users look for a WooCommerce Subscription alternative is the high price point. The license for this plugin will set you back $279 per year, which is a lot considering the features it offers.
Paid Member Subscriptions: The Best WooCommerce Subscriptions Alternative
The Paid Member Subscriptions plugin is the best WooCommerce subscriptions plugin. It lets you create a full-fledged subscription site relatively quickly.
Paid Member Subscriptions Pro
The easiest way to create and sell subscriptions on your WordPress membership site.
Get Paid Member SubscriptionsCompared to WooCommerce Subscriptions, Paid Member Subscriptions is much easier to use, even if it’s your first time creating a membership site. Most of the important membership pages are automatically created for you using blocks (and the plugin also supports shortcodes). This makes the process of setting up a membership business site in WordPress and WooCommerce simple.
Paid Member Subscriptions also offers extensive and straightforward content restriction settings. Each page containing members-only content can be restricted within a few clicks (using a meta box below the page or post.) Compared to WooCommerce Subscriptions, this is a big jump as that plugin only offers limited content restriction options.
The best part about Paid Member Subscriptions is that you can choose between multiple plans or opt for the free version of the plugin (which offers limited features). This can be the perfect scalable solution for small businesses that are just starting out.
How to Set Up a Membership Site Using Paid Member Subscriptions
Here, we’ll show you how to set up a membership site in WooCommerce using a WooCommerce Subscriptions alternative.
For this, you will need a WordPress site with the WooCommerce plugin installed. You’ll also need the Paid Member Subscriptions plugin to create a subscription plan (or multiple) and protect members-only content.
Step #1: Get the Paid Member Subscriptions Plugin
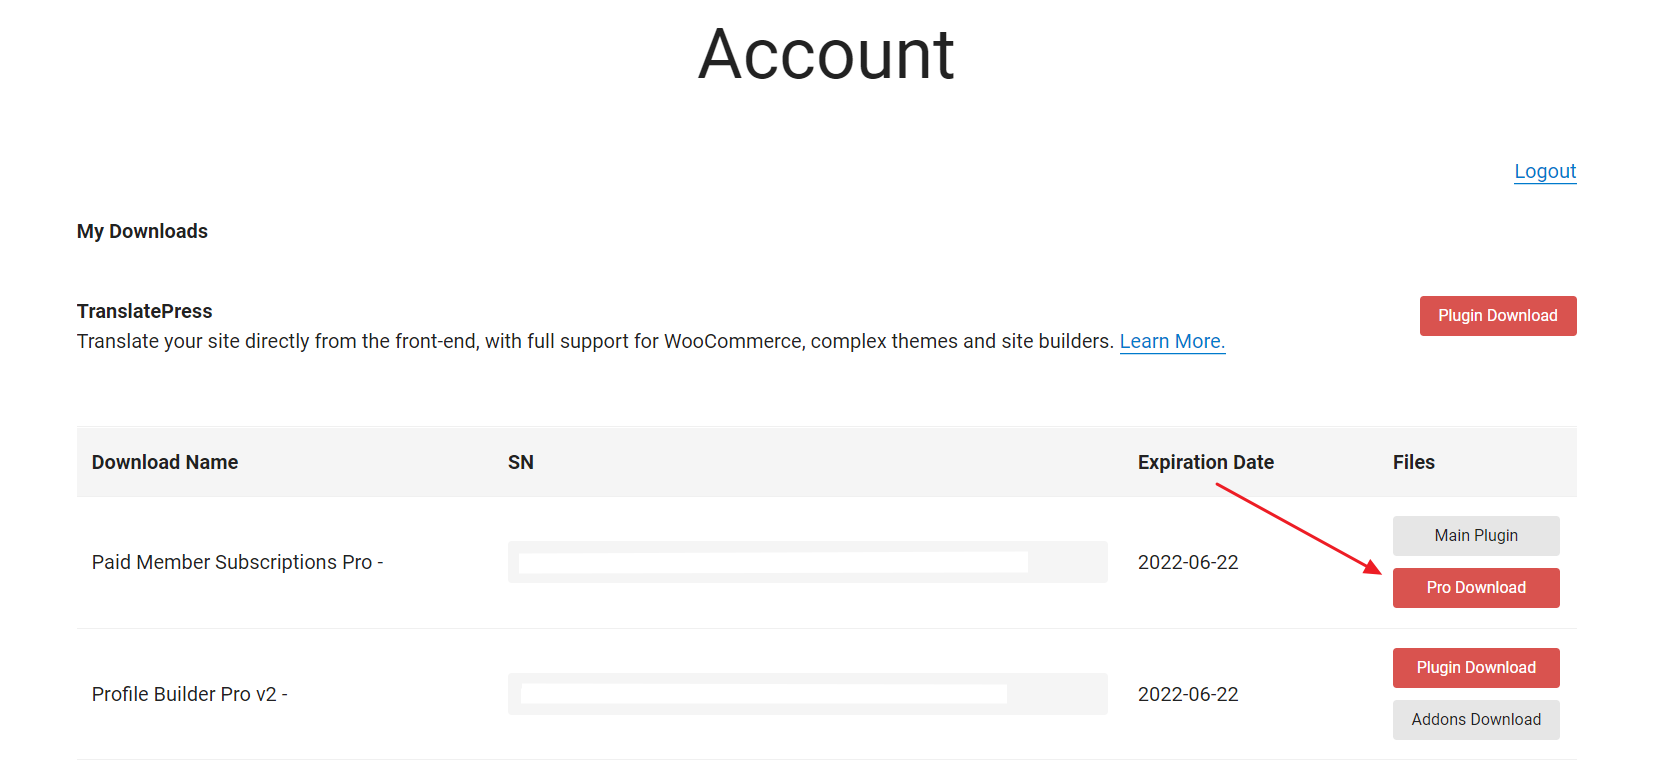
First, you’ll need to get the Paid Member Subscriptions plugin and install it on your WooCommerce site. Once you purchase the plugin, you will receive an email containing the license key and the download link for the plugin’s ZIP file.
Alternatively, you can download it directly from your account page on the Cozmoslabs website. Make sure to download both the main plugin and the pro extension, which is what gives you access to all the features we’ve talked about:
After uploading the plugin (both .zip files, one by one) to your WooCommerce site, click on the Install Now button and then Activate this plugin link to continue. With the plugin installed on your site, it’s time to activate the license key.
To do this, navigate to Paid Member Subscriptions → Register Version and paste the license key given to you at the time of purchase. Click on the Activate License button to continue.
Step #2: Create a Subscription Plan
Now that the Paid Member Subscriptions plugin is installed and active on your site, it’s time to create a subscription plan. Navigate to Paid Member Subscriptions → Subscription Plans and click on the Add New button. This will take you to the subscription plan creation page:
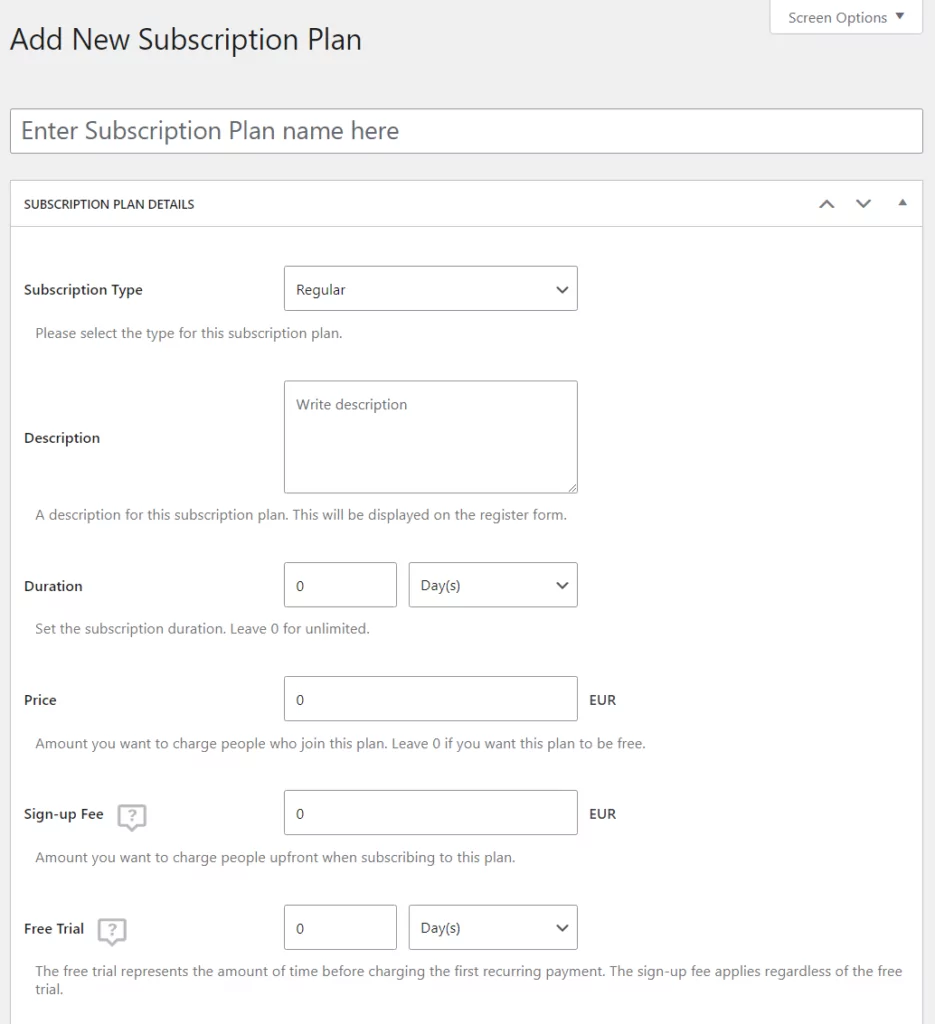
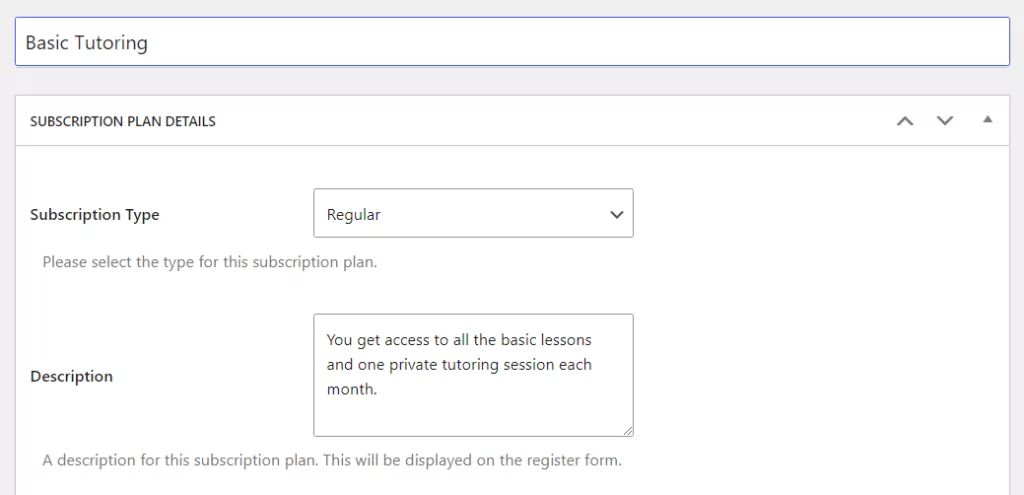
To start with, give your subscription plan a suitable name and add a description explaining what members can get if they sign up for that plan:
You can also change the Subscription Type from Regular to Group if you want to offer a subscription plan to organizations and brands that want to purchase “seats” instead of a single subscription.
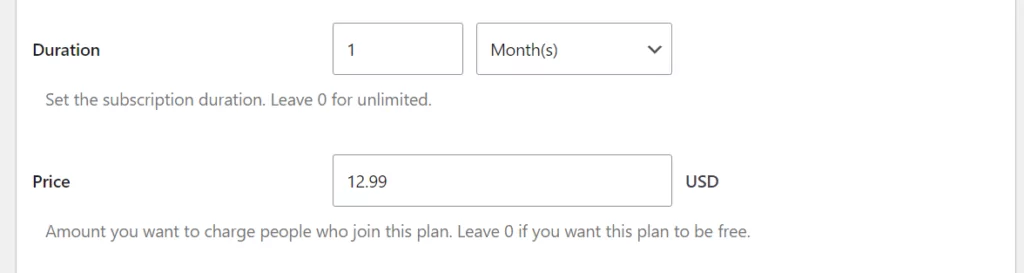
Now, set the duration period and the price of your subscription plan. For the duration period, you get to choose between days, months, weeks, and years:
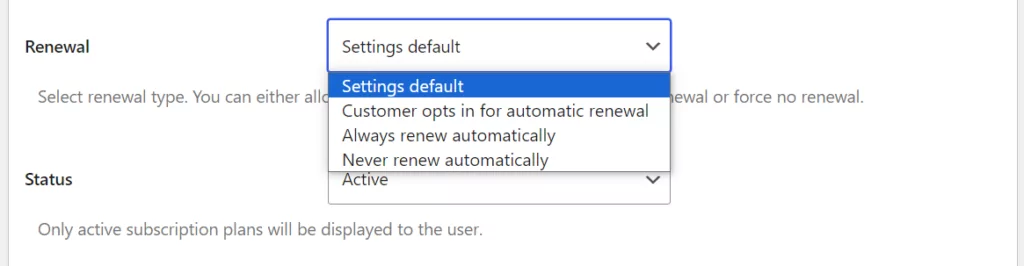
The Renewal dropdown menu enables you to specify subscription renewal options. You can let your subscribers choose to opt-in for automatic renewal, force automatic subscription renewal until the user cancels, or completely disable automatic renewal and force users to subscribe themselves manually when the subscription period ends:
Additionally, the User role dropdown menu enables you to assign a user role to customers or users when they purchase the subscription plan. When you’re ready, make sure to click on the Save Subscription button to continue.
Step #3: Create a WooCommerce Subscription Product (Optional)
On top of adding a subscription plan to your site, you can also create a WooCommerce subscription product using Paid Member Subscriptions. While this can be useful for selling subscription products on WooCommerce, it isn’t essential if you only want to offer subscription plan registration on your site.
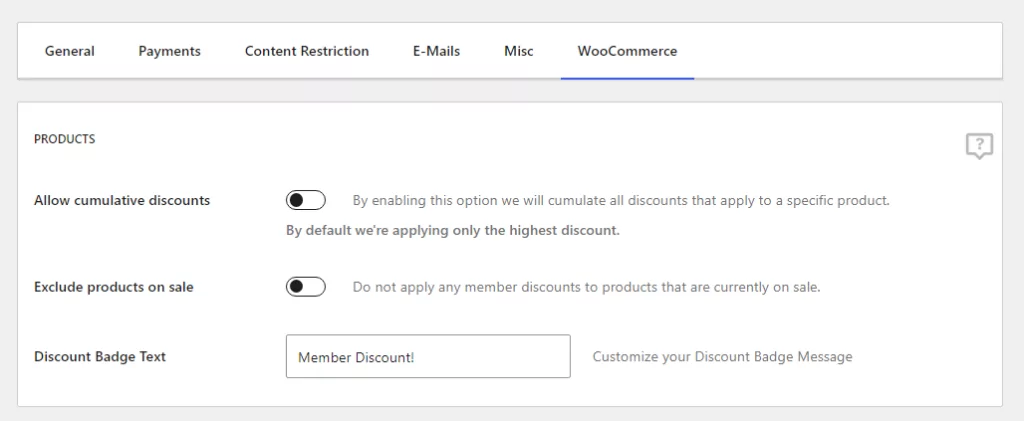
To do this, navigate to Paid Member Subscriptions → Settings and click on the WooCommerce tab in the top menu:
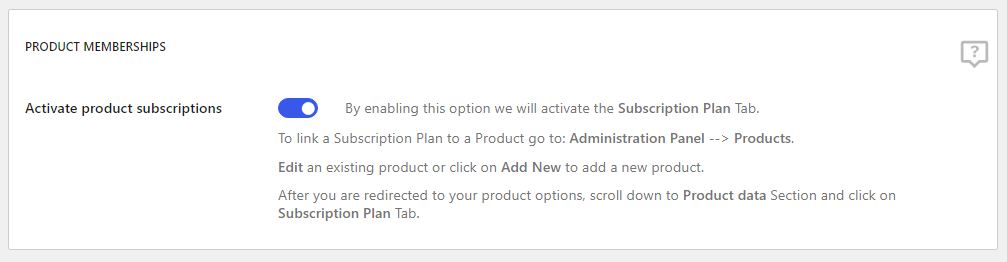
Scroll down to the Product Memberships section and check the Activate product subscriptions checkbox. This will let you link a WooCommerce subscription product with a subscription plan. Once you’re done, click on the Save Settings button to continue:
Now, navigate to Products → Add New and create your WooCommerce subscription product:
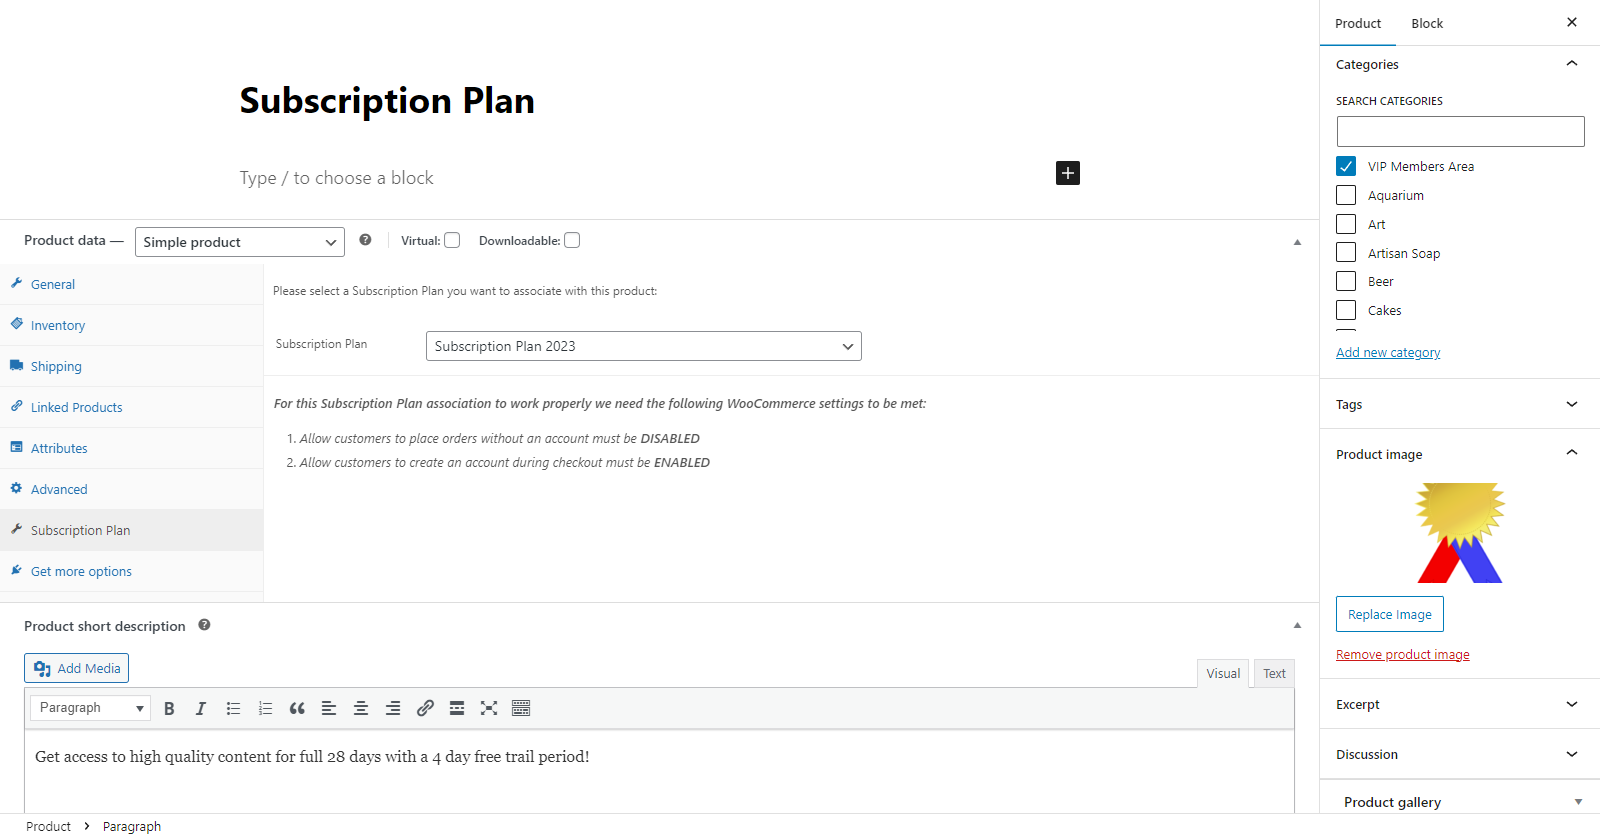
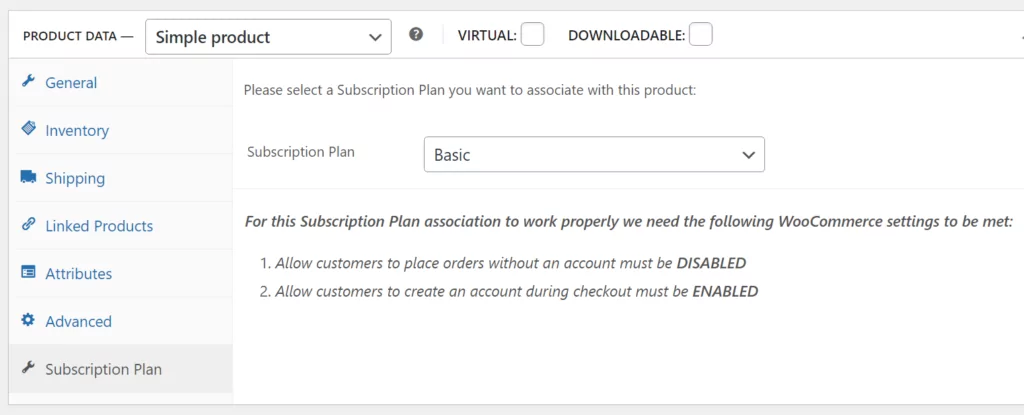
Under the Product data meta box, click on the Subscription Plan tab and select the subscription plan we created earlier using the dropdown menu. Click on the Publish button to continue:
This will allow customers to purchase the subscription plan directly from your online store.
However, for the WooCommerce subscription product to work properly, you will need to disable orders without an account. This will make it so all customers have to register before they can buy from your WooCommerce site.
To do this, navigate to WooCommerce → Settings and click on the Accounts & Privacy tab at the top:
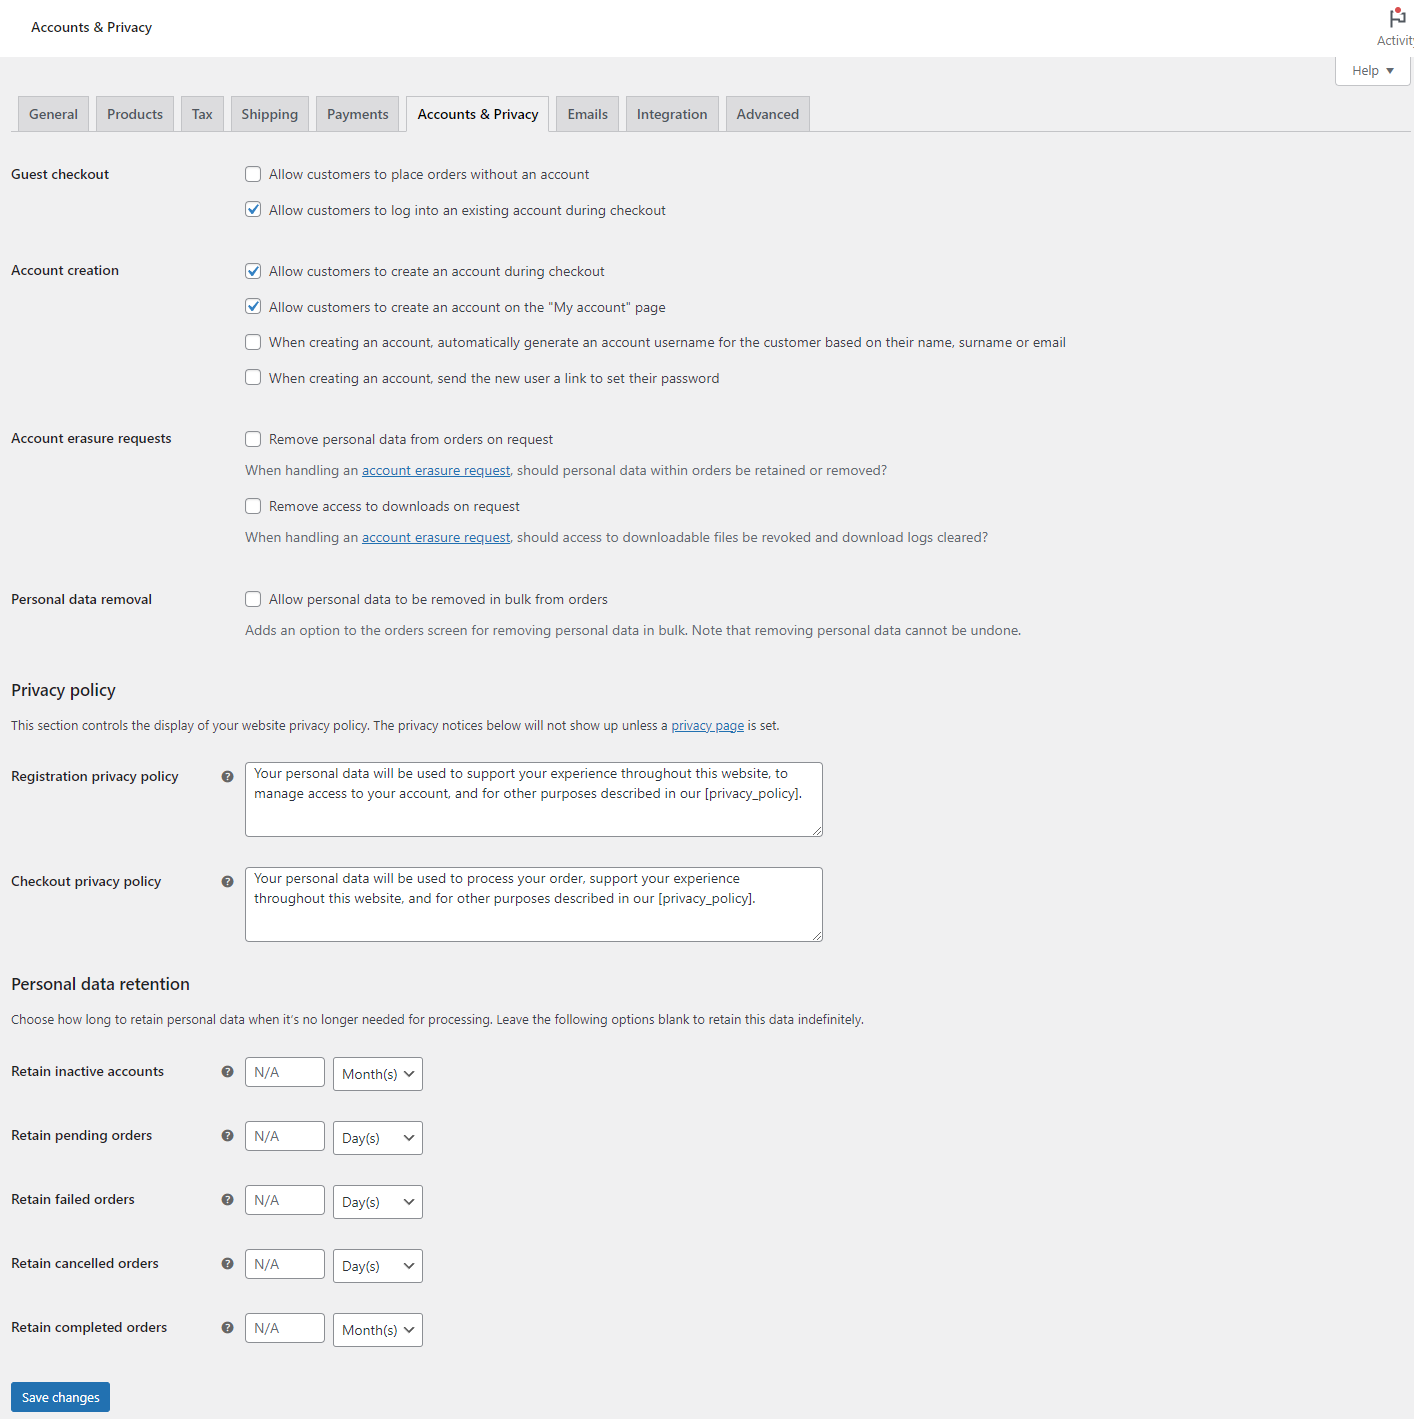
Disable the option that reads Allow customers to place orders without an account and enable the Allow customers to create an account during checkout setting. Doing this will ensure that the WooCommerce subscription product functionality works properly on your site. Click on the Save changes button to continue.
For more information on this, you can go over our guide on how to set up recurring orders in WooCommerce.
Step #4: Create Important Membership Pages
Now we can start setting up important membership pages. This is very easy to do with Paid Member Subscriptions. The plugin implements blocks you can use to set up and customize these membership pages in the WordPress block editor. If you use the Classic editor, the plugin also supports shortcodes.
Navigate to Pages → Add New and give your subscription registration page a suitable title. Click on the “+” icon to add a new Block and select the PMS Register block:
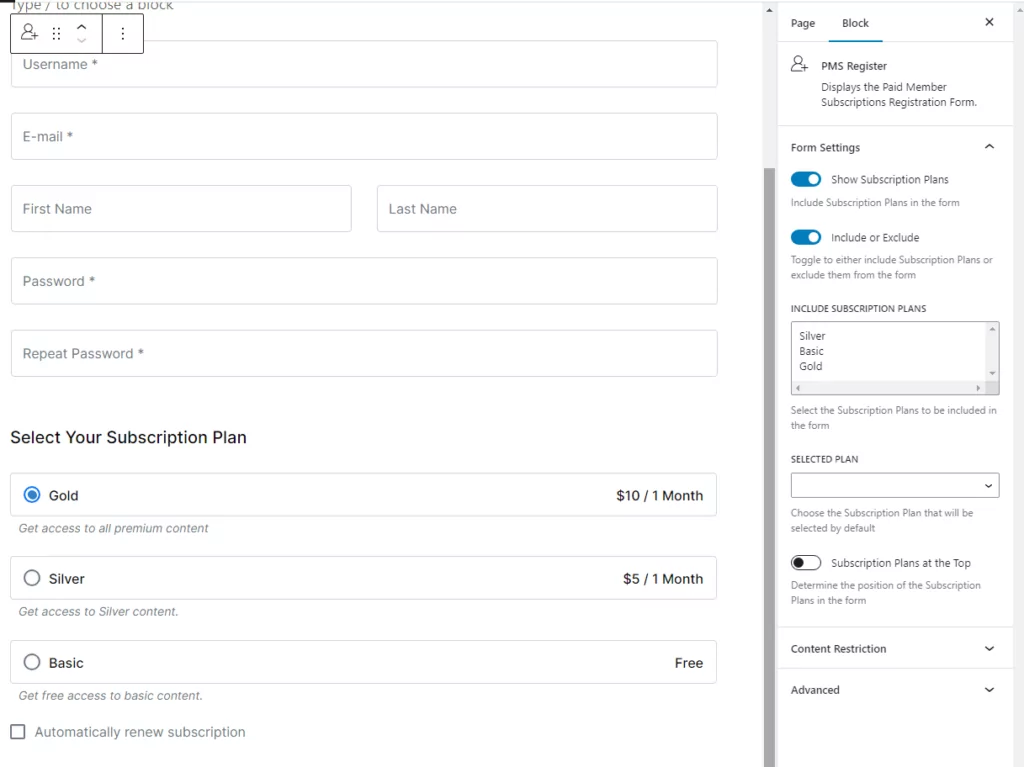
This will automatically create a new subscription registration form for you. This is great for quickly setting up professional-looking membership pages.
In addition to this, you can also choose which subscription plans will be displayed or offered on the registration form using the block settings tab on the right side of the screen. Once you’re ready, click on the Publish button to continue.
Similarly, you can also set up other membership pages, such as the My Account page or the Membership Login page, using Paid Member Subscriptions blocks. Once you have all pages set up with the corresponding blocks, navigate to Paid Member Subscriptions → Settings and scroll down to the Membership Pages section:
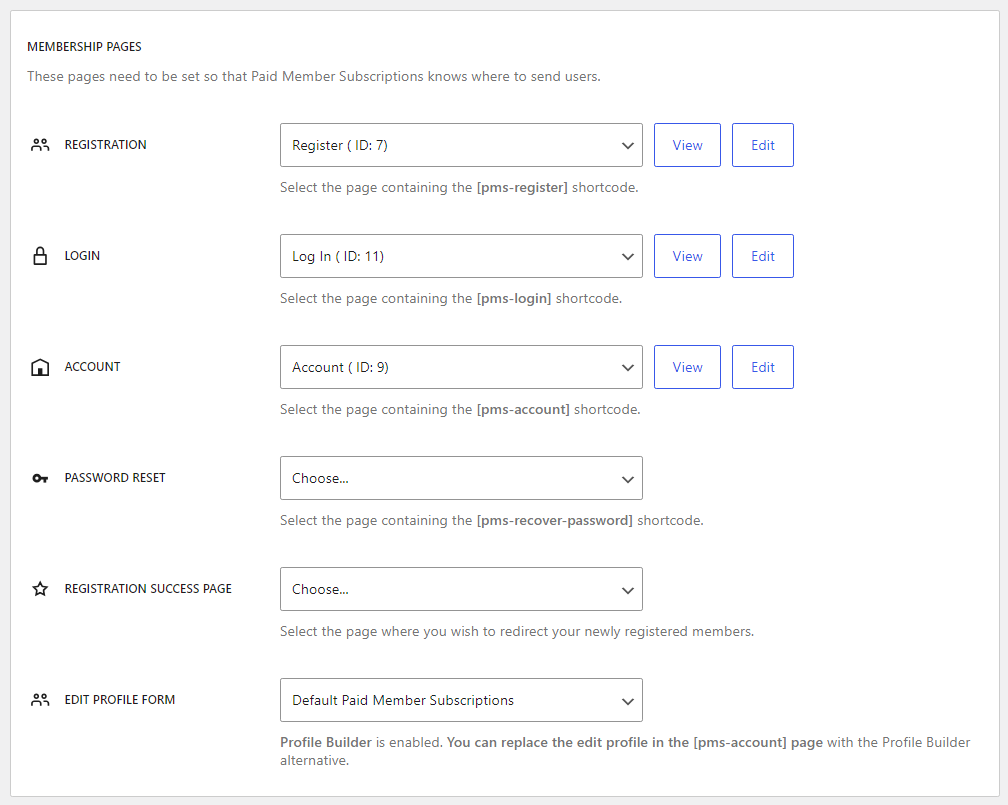
Select the pages you’ve created using the Paid Member Subscriptions blocks in the dropdown menus and click on the Save Settings button to continue.
Step #5: Protect Membership Content
Now that everything is set up for your membership site, it’s time to start protecting members-only content. Navigate to the editing screen for the post or page you want to restrict. Once you’re in the editor, look for the Content Restriction meta box at the bottom of the page:
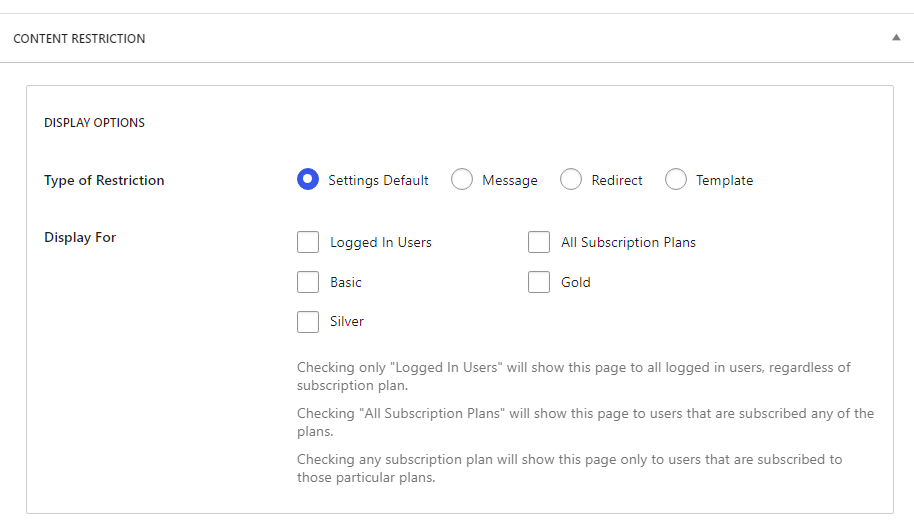
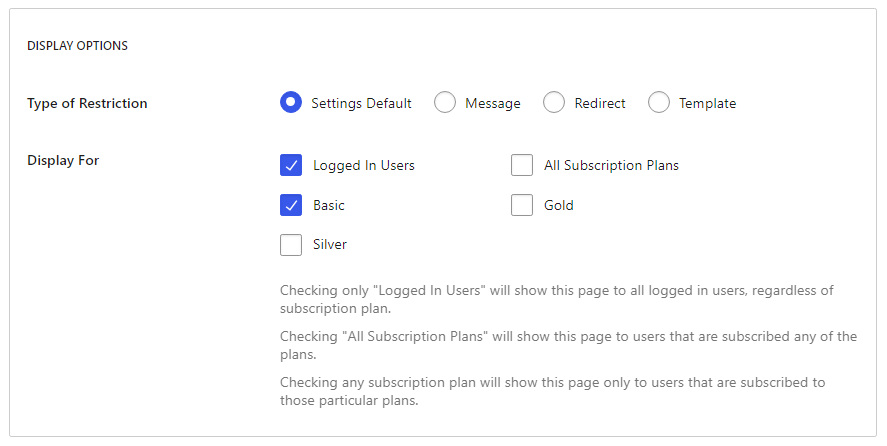
Select Logged In Users and your subscription plan from the DISPLAY OPTIONS section. This will only display the selected post or page to users who have subscribed to the corresponding plan:
You can also set up the content restriction rule so that users who have not subscribed yet will be redirected to the subscription registration page. To do this, select the Redirect option from among the Type of Restriction settings.
This automatically displays a new section in the meta box called RESTRICTION REDIRECT URL. Go to this box and toggle the Enable Custom Redirect URL setting:
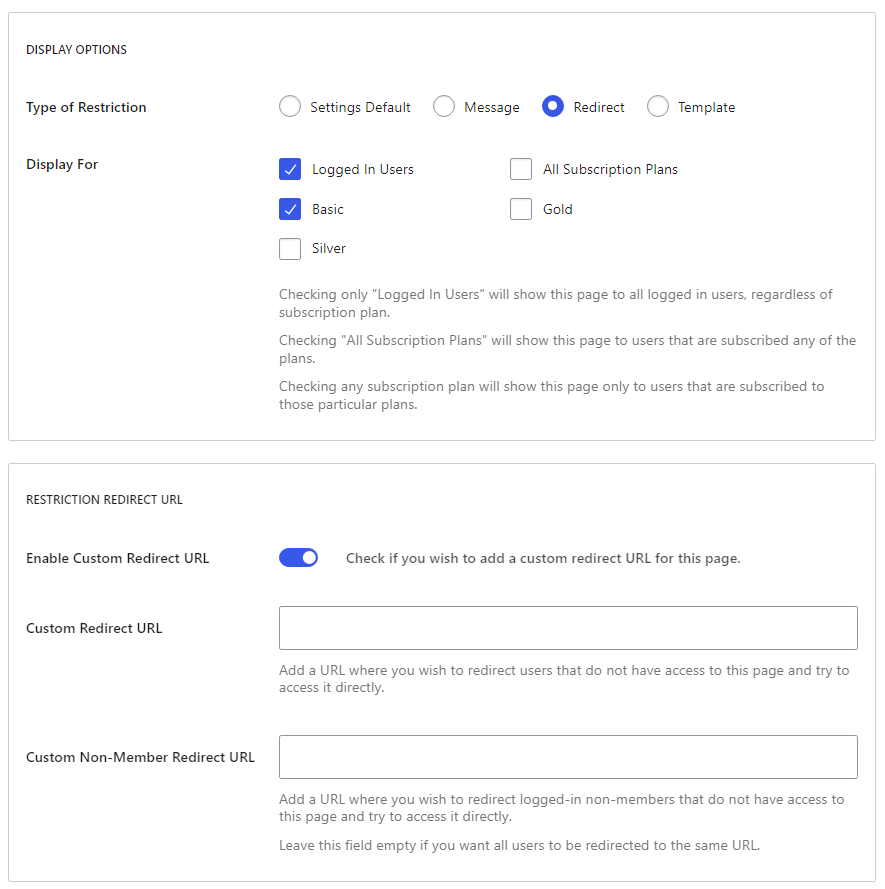
You can use the Custom Redirect URL field to enter a URL. Any users without access to the content due to their role will be redirected to that URL. The second setting, Custom Non-Redirect URL applies to logged-in members as well, but it’s not needed at this stage.
Conclusion
While WooCommerce Subscriptions is a great plugin that does the job, other alternatives like Paid Member Subscriptions offer the same features (and more) at a better price.
Paid Member Subscriptions makes it easy for anyone to create a professional, full-fledged membership site within minutes.Plus, you also get access to robust content restriction features.
You can download the plugin for free, or choose one of the premium plans for full membership features.
Paid Member Subscriptions Pro
The easiest way to create and sell subscriptions on your WordPress membership site.
Get Paid Member SubscriptionsAre you looking for a WooCommerce Subscriptions alternative plugin? What are some of the features that are most important to you? Let us know in the comments box below!
Related Articles

How to Create a Private Community With WordPress That People Actually Use
Public social platforms used to feel like the easiest way to build a community. But over time, many businesses have realized their limitations. Algorithms decide who sees your content. Discussions get buried. Notifications compete with endless distractions. And most importantly, you don’t truly own the space or the relationship with your audience. That’s why more […]
Continue Reading