
![]() The Campaign Monitor Add-On for Profile Builder is here and it will help you close the gap between you and your potential subscribers. As with the MailChimp Add-On we’ve tried to make the set-up as easy as possible, in order to save you the time and the trouble. So let’s see what needs doing.
The Campaign Monitor Add-On for Profile Builder is here and it will help you close the gap between you and your potential subscribers. As with the MailChimp Add-On we’ve tried to make the set-up as easy as possible, in order to save you the time and the trouble. So let’s see what needs doing.
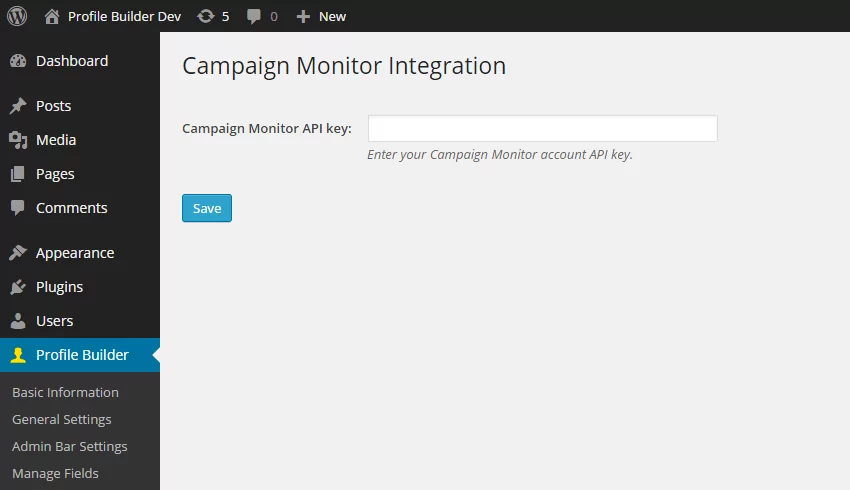
API Key
In order to connect Profile Builder with Campaign Monitor you will need to add the API key of your Campaign Monitor account into the newly created page from Profile Builder. You will find the API key in your Campaign Monitor account, in the Account Settings page.
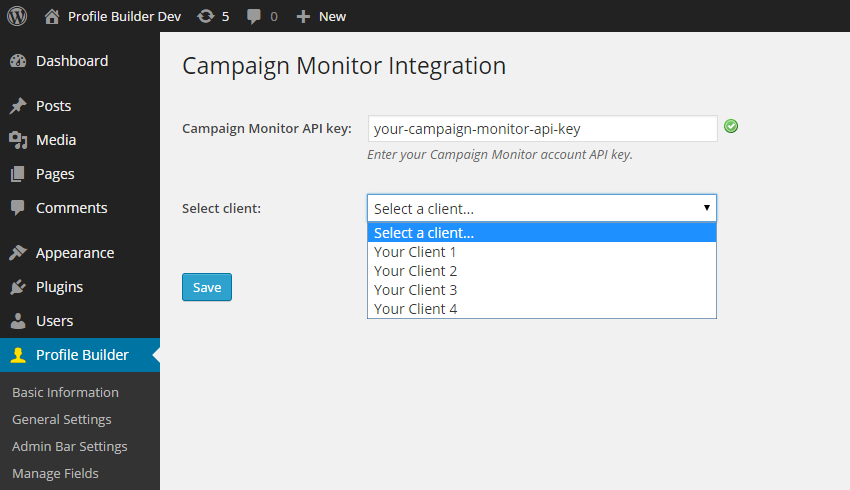
Clients
If the API key is valid a drop-down with all the clients from Campaign Monitor will appear. Select the client you wish to connect with Profile Builder and the lists associated with that client will load into the page.
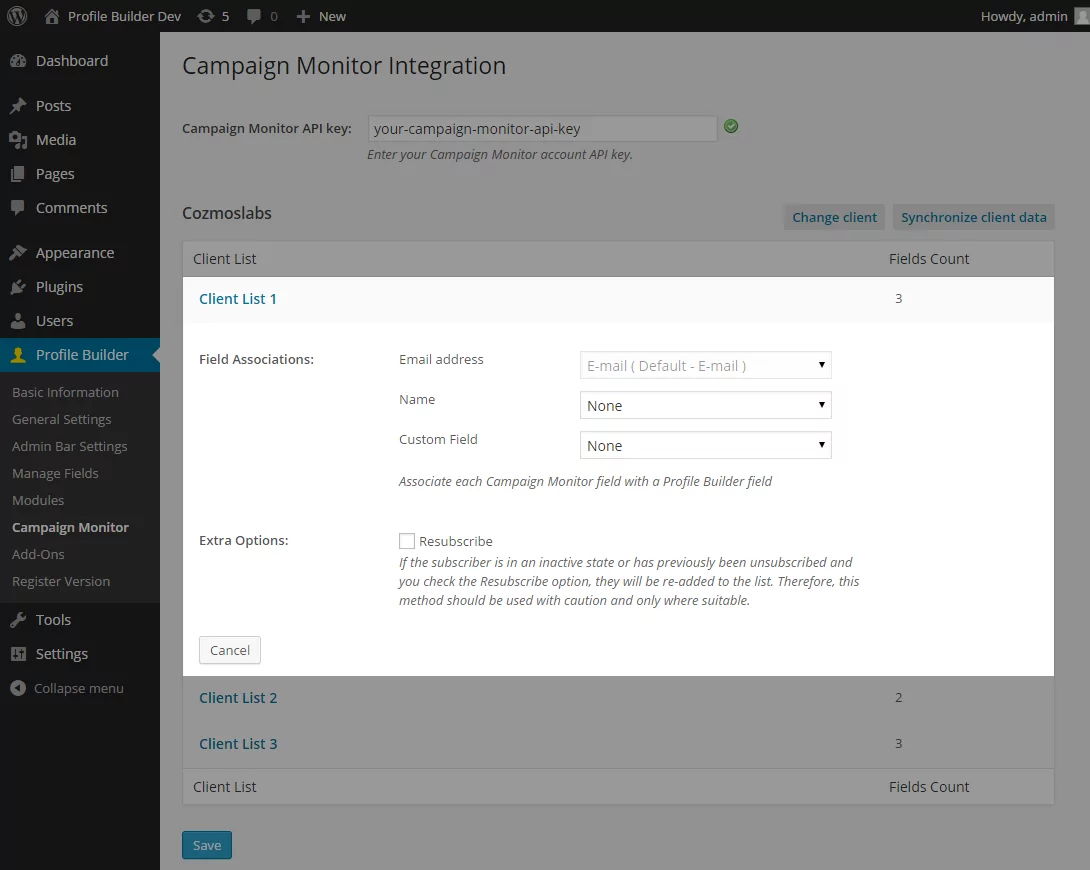
Client lists and fields
You can edit each client list. Click on the name of the list to open the Edit Panel. Here you will find the Field Associations option where you can associate the fields from Campaign Monitor with the fields from Profile Builder. By default the E-mail Address from Campaign Monitor is associated with the Default E-mail field from Profile Builder and it cannot be edited as it is a mandatory field in Campaign Monitor.
Don’t forget to hit Save after you’ve made new changes.
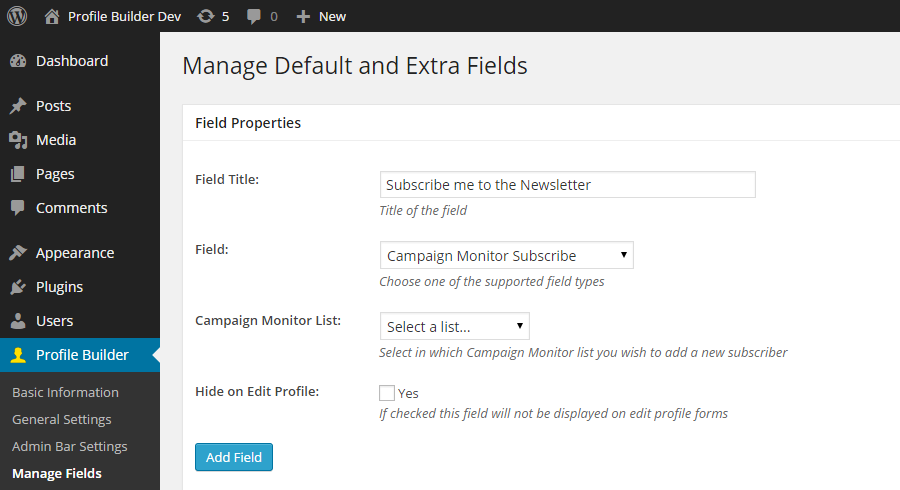
Campaign Monitor Subscribe field
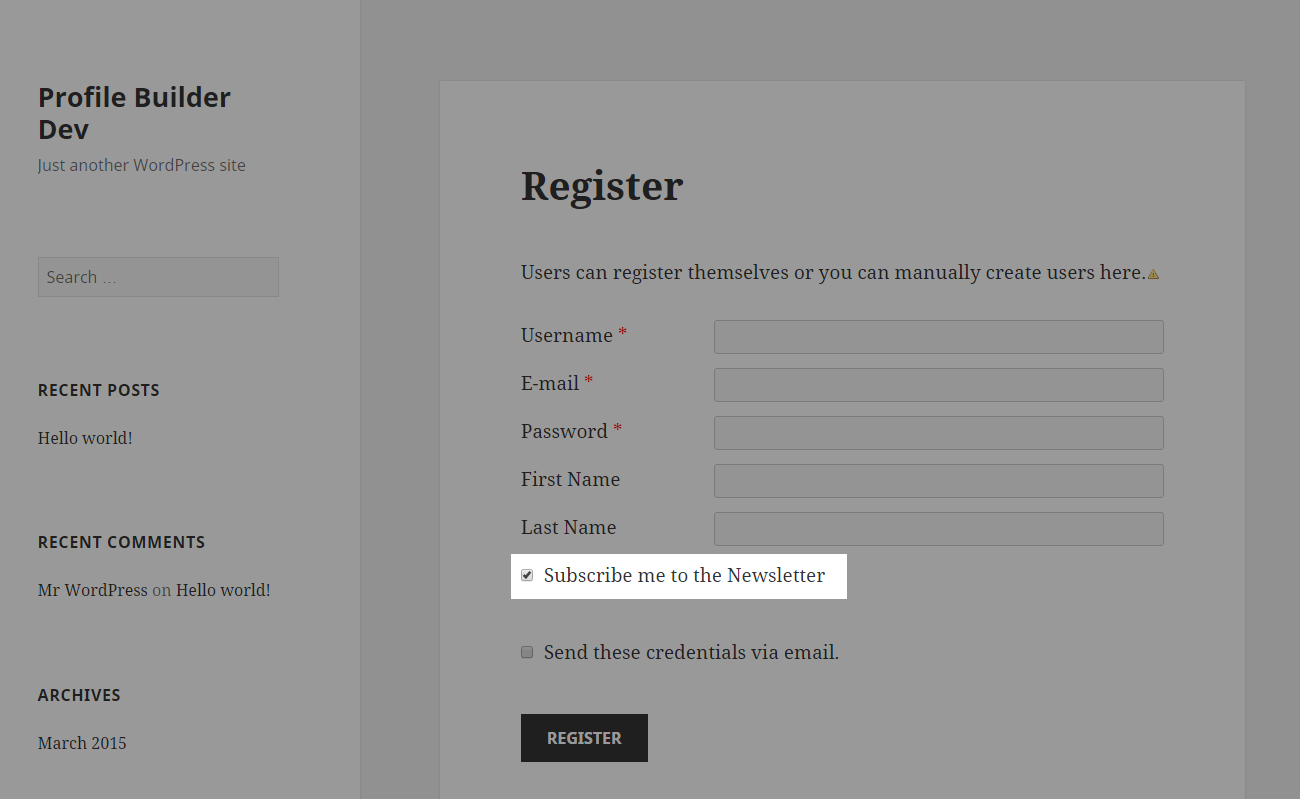
Once the add-on is active the Campaign Monitor Subscribe field will be added to the fields drop-down in Manage Fields. Here you will select the list you wish your new users to be added to. By default the field shows both on Register forms and on Edit Profile forms, but you can hide it from the later if you wish.
On your website
In the front-end part of your website the field will be displayed as a checkbox. If the users check this option, when the registration is complete the data of the fields that have been associated with the Campaign Monitor fields will be sent to Campaign Monitor and the new user will be subscribed to the list you have selected.
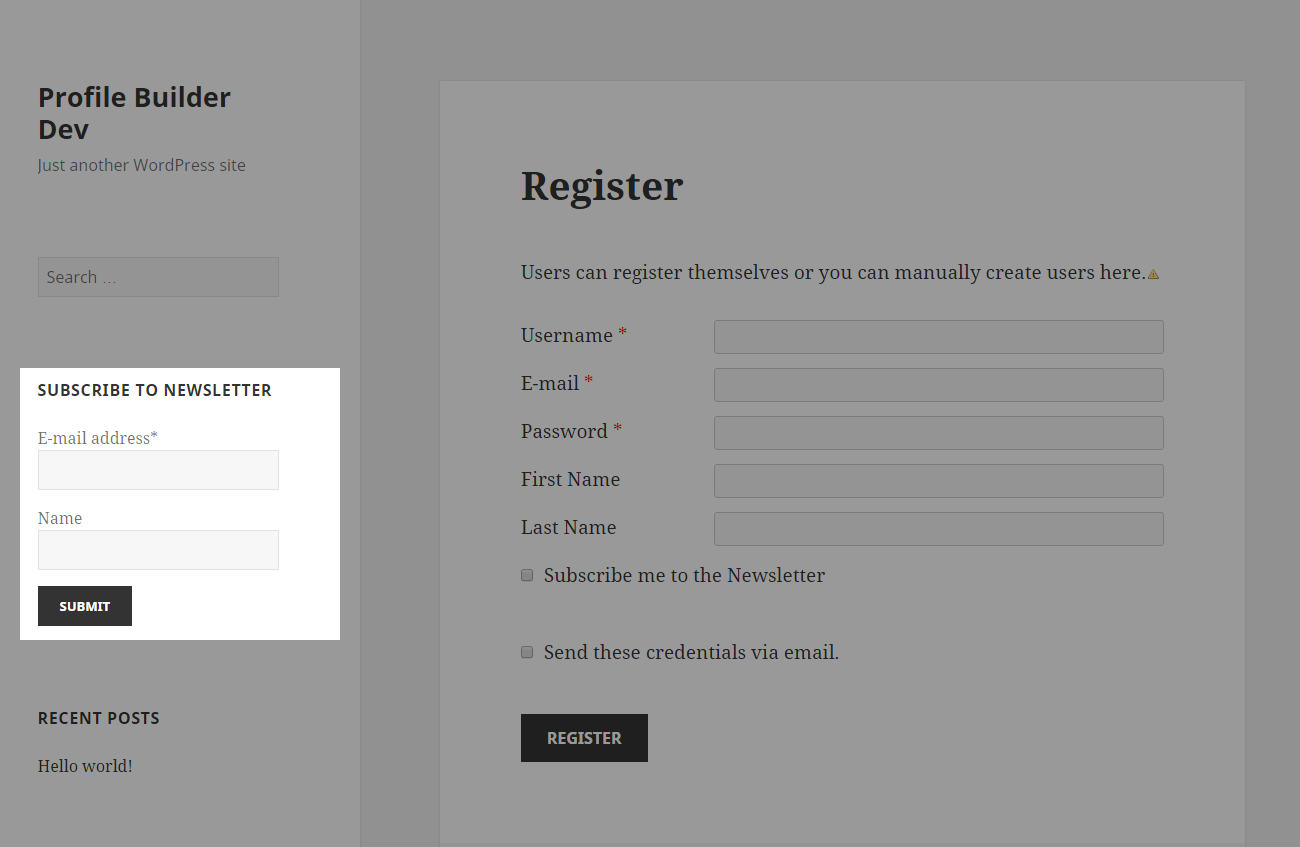
Campaign Monitor Widget
Use the built-in Campaign Monitor Widget to attract more subscribers. Here you can select the list your new subscribers will be added to and also which fields to display in the front-end form. By default you will be able to display the E-mail address and Name fields.
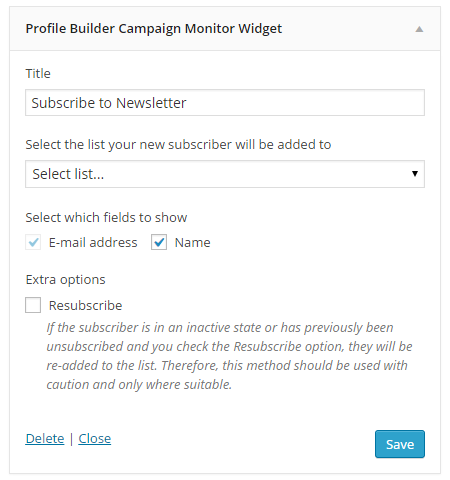
If both fields are selected the form will display as in the image below. The e-mail address field is mandatory.
If everything goes well the user will be prompted with a success message, if not an error message will be displayed with indication to what went wrong.

And finally…
You are done! Campaign Monitor is up and running and ready to be used. Get it now for a limited discounted price by following the link below.
Hello, great tutorial, thanks. I have problem.When try to install plugin get white page and must make restore backup to get page back 🙁 Do you know what can be a problem?
Thank you
This should not happen. Can you please open a support ticket detailing more about your configuration and other plugins installed? I will get back to with you with more information. You can open a ticket here: http://www.cozmoslabs.com/support/open-ticket/
Thank you
Love this plugin, I am using it very often, keep up the good work.